View contact cards
Contact cards include all the information about a client and help team members quickly get up to speed before a call, email, or deal.
Let’s talk about how to view contact cards and their tabs.
Open a contact card
To open a contact card, go to Contacts and click the contact's name.
On the left, next to their name, you will see the date added and contact source, along with a unique ID.
Below, you'll find icons for all available ways to reach your client. You can also duplicate or delete contacts by clicking the three dots and selecting an action.
Read more: Manage contacts.
Contact cards store all contact details, including email addresses, phone numbers, and social media usernames.
If a card has multiple contact methods, the first added email address and phone number become the primary ones and are used in automated flows. You can always change the primary contact manually.
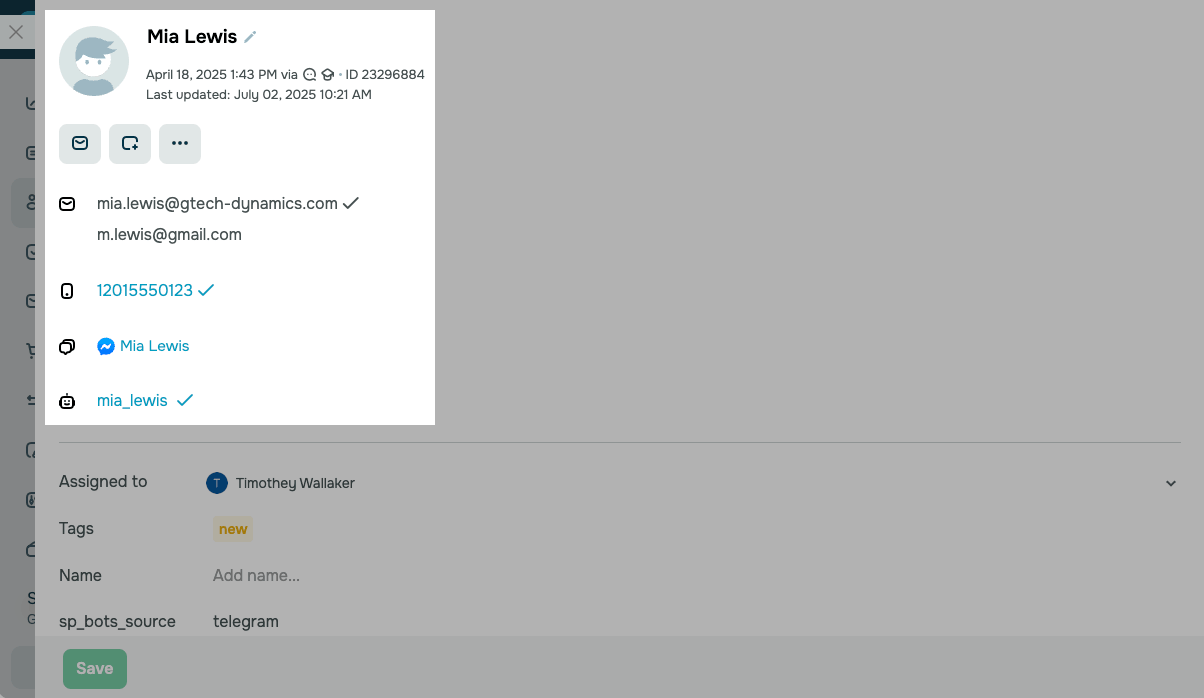
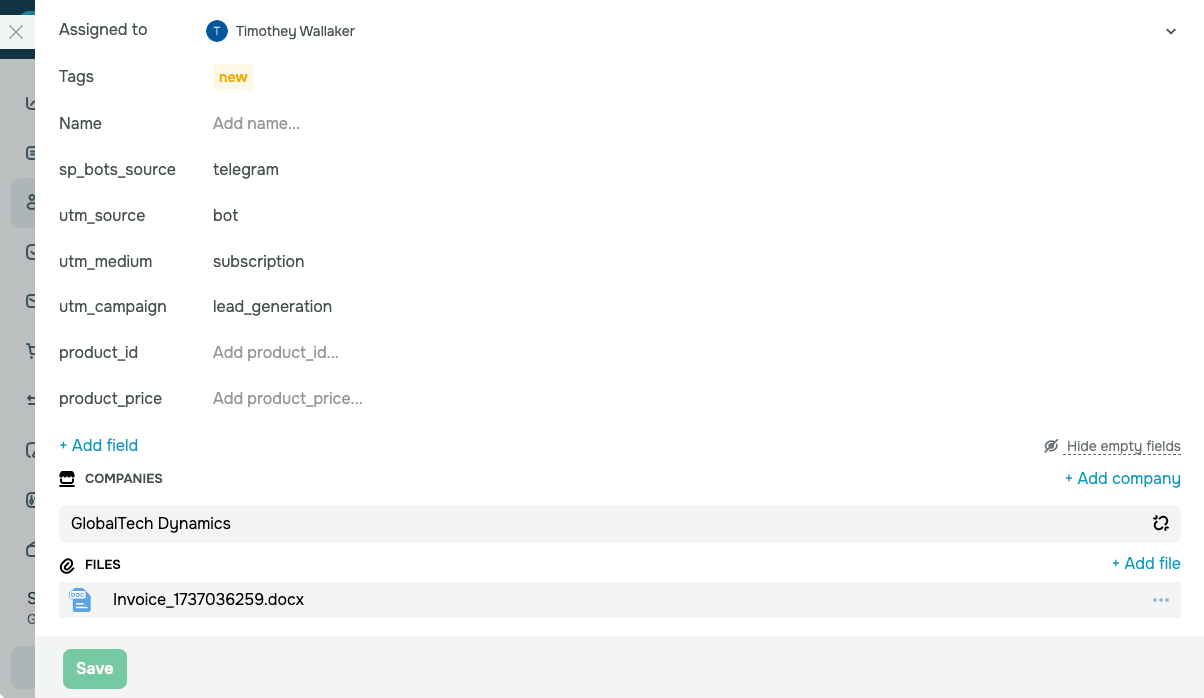
In the Assigned to field, you can see your contact's assigned team member.
Contact information also appears in attributes, which are fields and tags that you can add in the settings.
At the bottom, you will also find the linked company and uploaded files related to the contact, such as contracts or documents.
You can also view and edit your contact's details and attributes.
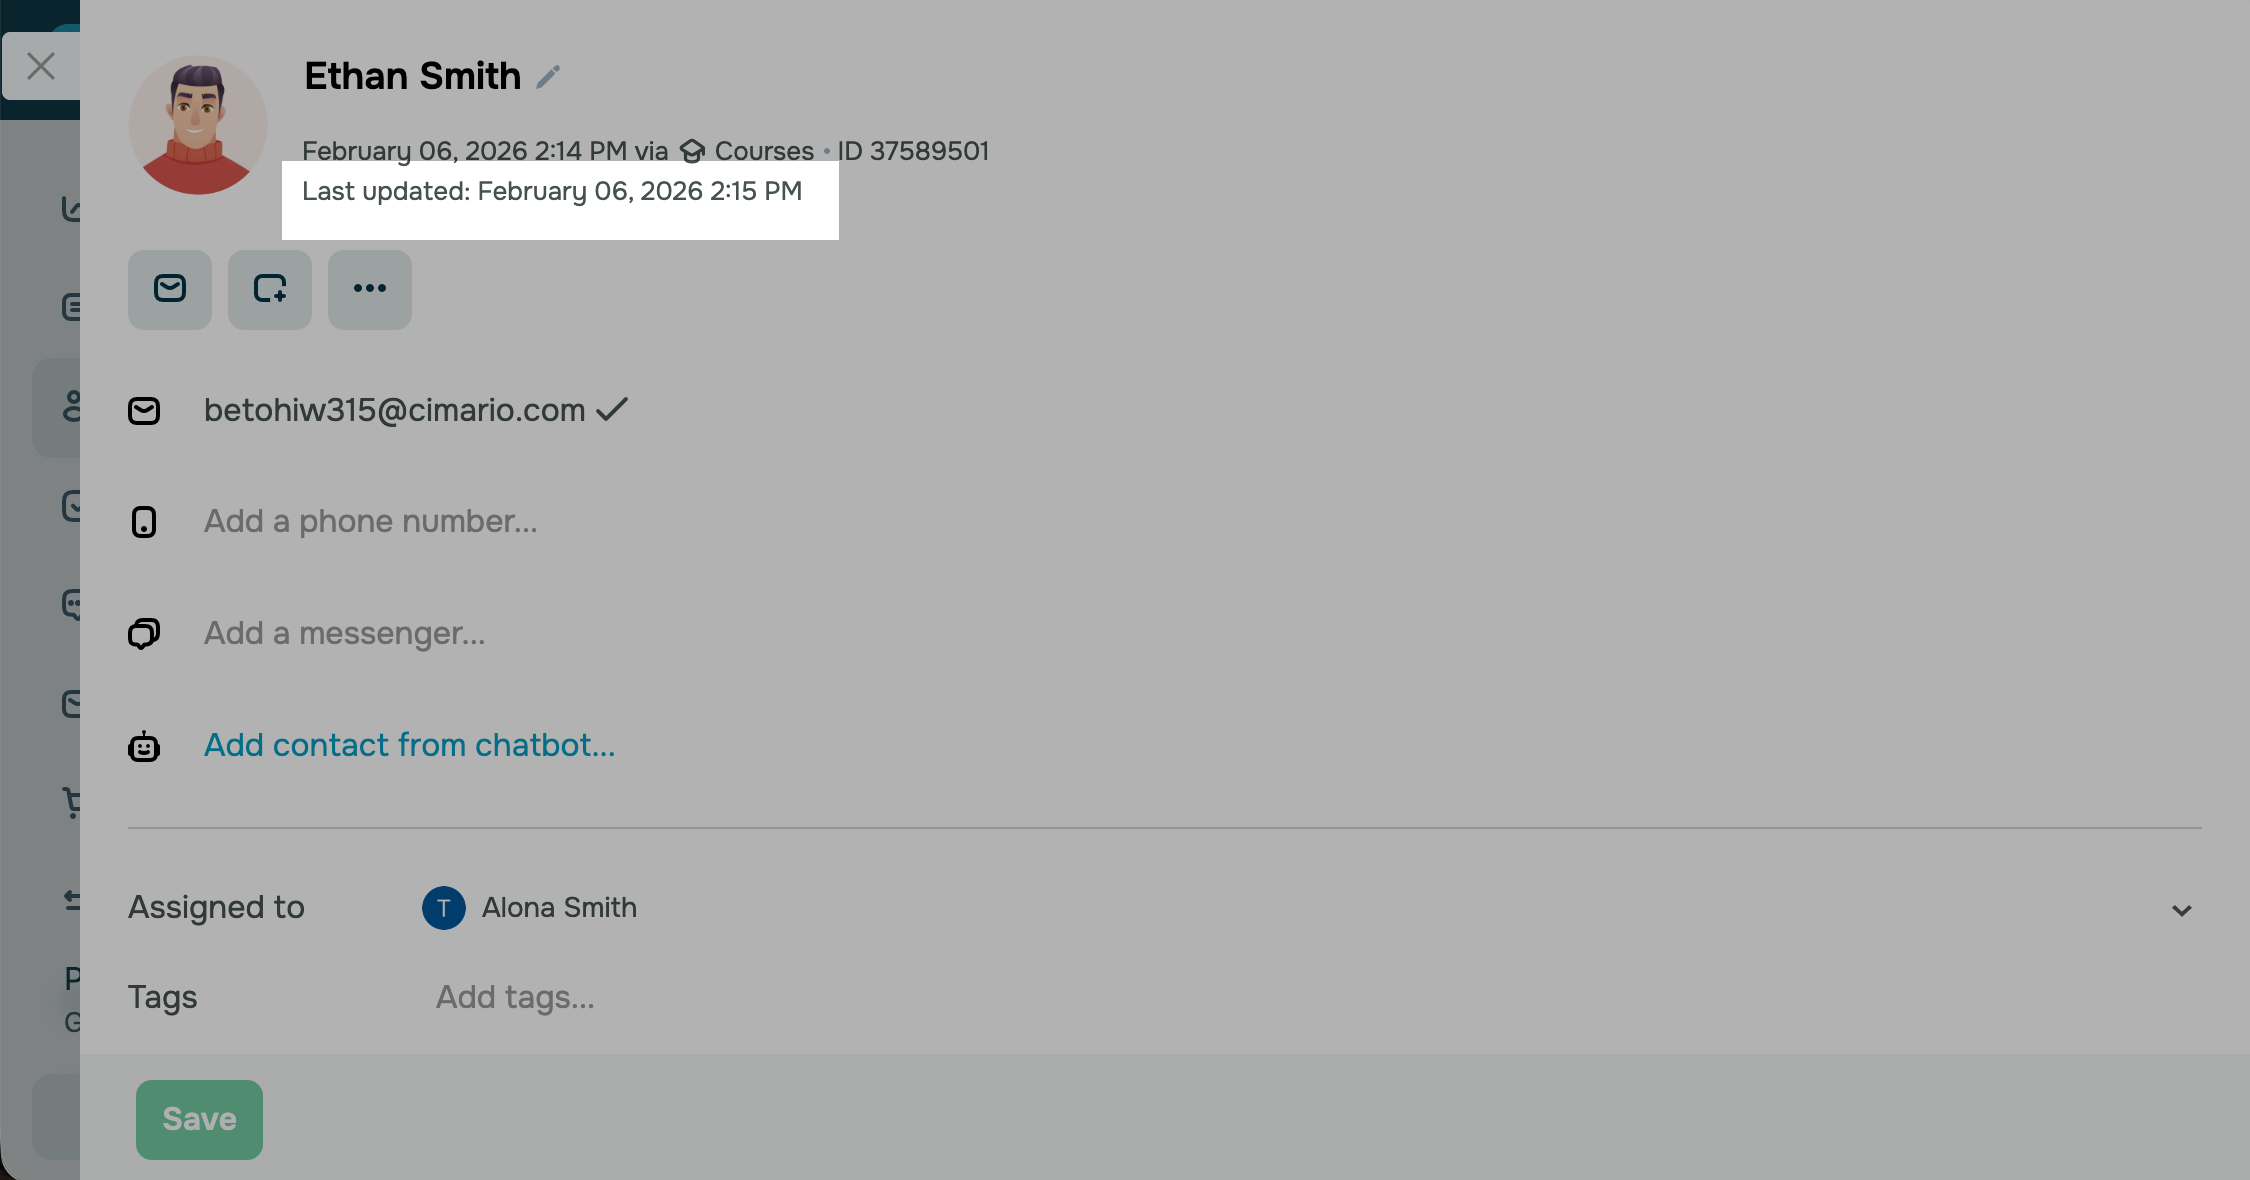
Check the last update date
The Last update section shows the date and time the contact's details last changed. Before you call or email the contact, check this row to make sure their details are up to date.
SendPulse updates this row when you:
- Change the contact's details — their name, email address, phone number, or username in a messaging app
- Change the value of a custom field
- Add or remove a contact tag
- Change the assignee
- Link or unlink a company
- Merge contacts
- Apply any of these changes to several contacts at once using bulk actions
The row doesn't change when you:
- Open the contact card
- Edit deals, tasks, comments, or files linked to the contact
- Change the contact source or pop-up settings
Keep in mind that the Last update row appears only after the first change to the contact's details.
View contact card tabs
To view a contact's details, click the three dots in the icon section and select Contact details.
On the right, you'll find tabs with information about the contact and your interactions. Switch between them to view and edit data.
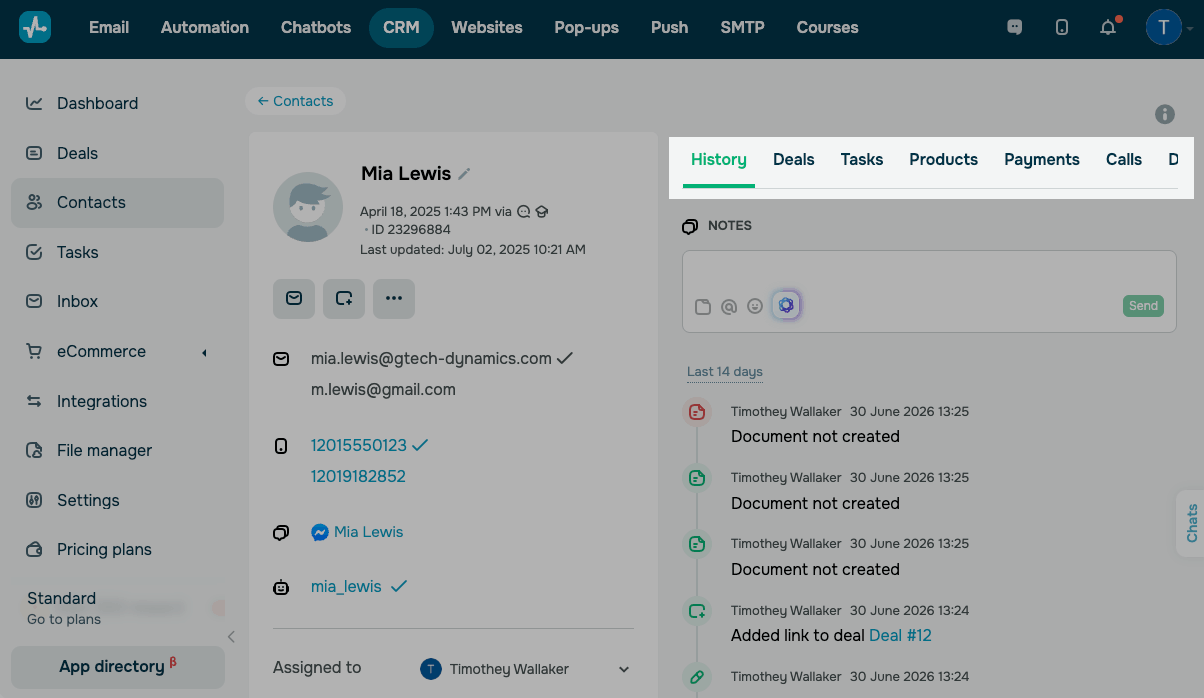
If needed, you can edit tabs in contact cards. Each tab shows a specific type of information about your contact.
History
On this tab, you can add comments, tag other team members, and attach files. Below, you will see your contact's activity history, including comments and deal activity. Filter the history to show all activity or comments only.
Read more: Work with contact history and comments.
Documents
On this tab, you can view uploaded documents, including their status and upload date. You can also email these documents, download them, or unlink them from the card.
To create a new document using the card's data, click Create document.
Read more: Create a document.
Deals
On this tab, you can view deals linked to your contact.
To add a new deal for the contact, click Add deal. Enter a deal name and amount, choose an assignee, pipeline stage, and deal type. Create new fields if needed. Click Add deal.
Read more: Manage deals.
Tasks
On this tab, you can view tasks linked to your contact.
To create a new task, click Add task. Enter a name, choose an assignee, fill in the task details, and click Add task.
Read more: Create a task, Update tasks.
The created task, including its name, task board status, due dates, and assignees, will appear on the contact card.
To edit a task or view its card, click it.
Payments
On this tab, you can view your contact’s payment information: the payment provider, amount, description, applied course promo code or CRM promo code, status, and date.
You can also generate payment links and share them with clients.
Payment statuses come directly from the selected payment system. If you need more information about a payment status, contact your payment provider's support team.
Read more: Sources of automatically added deals and contacts.
Calls
On this tab, you can view call details from your telephony integration, including the date and time, duration, call type (incoming, outgoing, missed), call recording, and the assigned team member.
Read more: Connect Binotel to your CRM system.
Courses
On this tab, you can view the courses the contact has enrolled in, their progress, and the courses they have completed.
To add the contact to your course, click Invite. In the window that appears, choose a course, pricing plan, contact email address, and invitation email language. Click Invite.
Read more: View student data.
Subscriptions
On this tab, you can view information about the contact's payment for a Subscription-type digital product: name, price, currency, duration, total payments over time, payment date, scheduled payment date, and payment status.
Read more: Сreate a subscription.
Nova Post
The Nova Post tab appears only after you integrate Nova Post with the CRM system.
On this tab, you can view the Nova Post shipments linked to the contact, including the description, status, date created, declared value, assigned team member, and waybill number.
Read more: Create and view Nova Post shipments in the CRM system.
 Last Updated: 07.07.2026




or