Integrate Nova Post with the CRM system
Integrate Nova Post with SendPulse's CRM system to sync shipment data with your deals and contacts.
For example, you can create a waybill directly from the deal card without going to your Nova Post business account.
Let's talk about how to install the Nova Post app and set up the integration.
Connect Nova Post
To start using the integration, get your personal API key from your Nova Post business account, install the app from SendPulse's app directory, and connect Nova Post to your account.
Get an API key from your Nova Post account
In your Nova Post business account, go to Settings > Security. In the My API keys section, click Create key. Accept the API license agreement and click Create. Copy the generated API key.
Install the Nova Post app
In SendPulse, go to the app directory. Find Nova Post and click Install. Grant the app access to the CRM system and click Grant consent.
To remove the Nova Post app, click the three dots next to it on the list of installed apps and select Delete.
Connect Nova Post to your SendPulse account
Go to My apps > Installed and select Nova Post. Paste your Nova Post API key in the input field and click Connect.
Configure the integration
Once connected, configure your sender details, shipping settings, and CRM pipeline mapping.
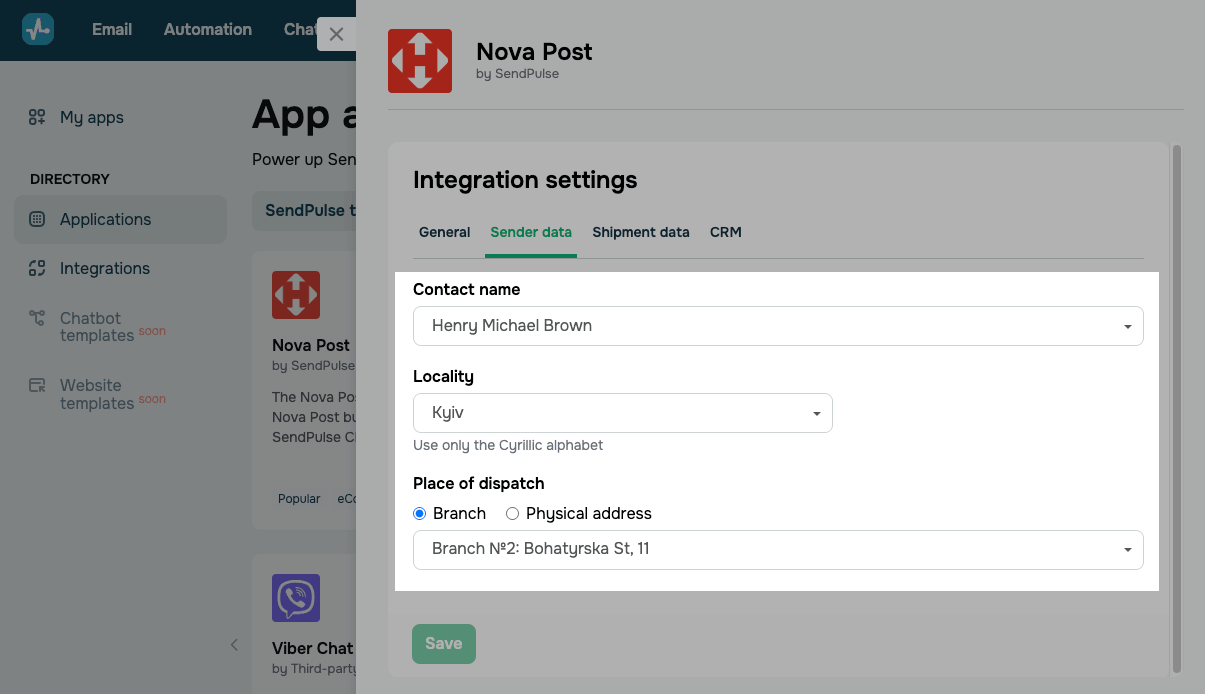
Sender data
Set the sender details that will be used when creating waybills.
You can configure the following:
| Contact name | Select a sender contact from your Nova Post business account.
Once you add the API key, the contact list will be loaded automatically. |
| Locality | Enter the name of the locality the shipment will be sent from. Locality search uses the Nova Post database. |
| Place of dispatch | Select a sender email address.
Options include: Branch — select a Nova Post branch or parcel locker in the chosen locality. Physical address — enter a street name, building number, and apartment for pickup. |
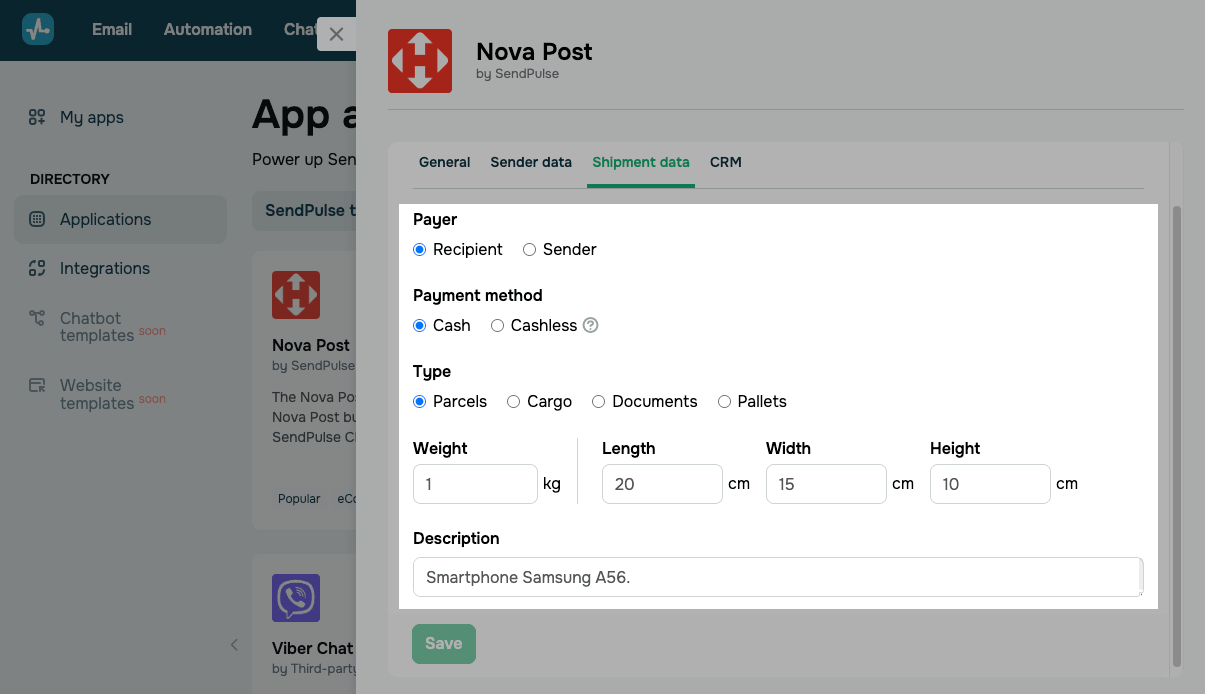
Shipment data
Configure the delivery settings used as default values when creating waybills.
You can configure the following:
| Payer | Select who will pay for delivery.
Options include: Recipient — the recipient pays for delivery. Sender — the sender pays for delivery. |
| Payment method | Select a delivery payment method.
Options include: Cash — pay for delivery in cash at the branch. Cashless — pay for delivery by bank transfer or another non-cash method. The integration only passes this parameter and does not process payments in SendPulse. |
| Type | Select a shipment type based on the package's contents and parameters.
Options include: Parcels — standard shipments of small size and weight. Cargo — oversized and heavy shipments. Documents — paperwork, certificates, letters, and postcards. Pallets — shipments secured on a pallet. |
| Weight | Enter the weight of the shipment in kilograms. |
| Dimensions | Enter the shipment dimensions to calculate volumetric weight: Length, Width, and Height in centimeters. |
| Description | Enter a brief description of shipment contents, such as the product name. |
Shipment deletion through the integration is unavailable.
CRM
In Deal stage to assign when waybills are created, select the CRM pipeline and deal stage where Nova Post waybills will be created.
Make sure that users who manage deals have access to your selected pipeline.
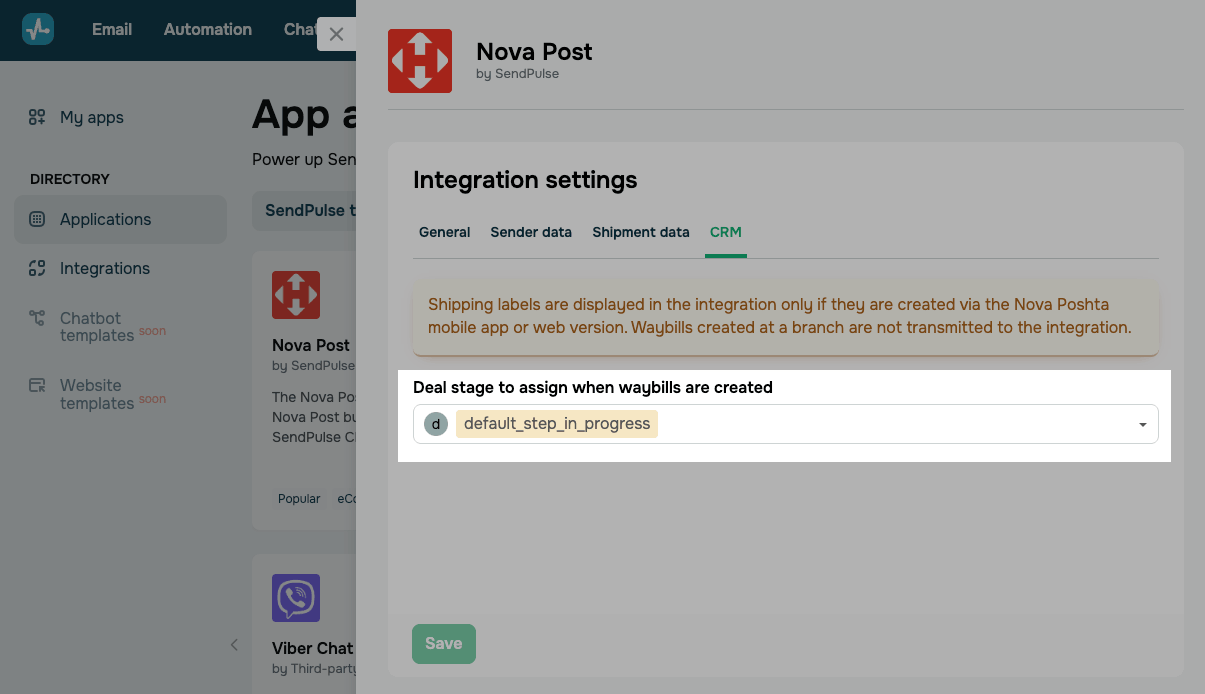
When you're done, click Save.
Now you can create or add a Nova Post shipment from the deal card in CRM.
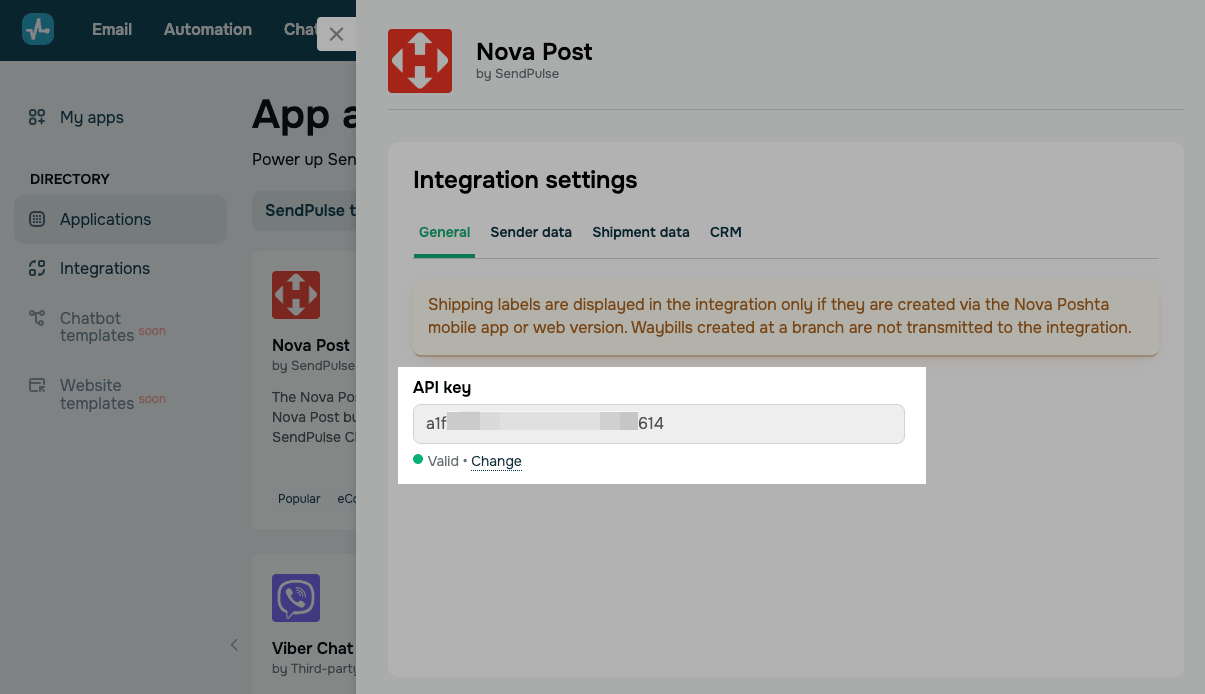
General
You can enter a different API key if needed, for example, if your current key has expired or you are connecting to another Nova Post business account.
Click Change. In the pop-up window, enter a new API key from your Nova Post business account.
Entering a new API key resets your previous integration settings. Reconfigure them before saving.
Last Updated: 24.04.2026
or