Integrate Prom with the CRM system
Use this integration to sync products, orders, and contact details between Prom and SendPulse's CRM system.
For example, every time a customer places an order on Prom, the CRM system automatically creates a deal using this customer's details and order information.
Let's talk about how to install the Prom app and configure data synchronization in SendPulse.
Get an API token from your Prom store
To integrate your Prom store to SendPulse, get a personal token in your Prom seller account.
Go to your Prom seller account > Settings > API key management. In the Create personal token section, enter a token name and select an expiration period. In the Access section, configure token access to the store sections. Click Create token.
In the Active personal access tokens section, select the token you've created and click View. In the pop-up window, copy the token.
Install the Prom app
In SendPulse, go to the App and template marketplace. Find Prom Ua and click Install. Grant the app access to the CRM system and click Grant consent.
To remove the Prom app, on the list of installed apps, click the three dots next to the app and select Delete.
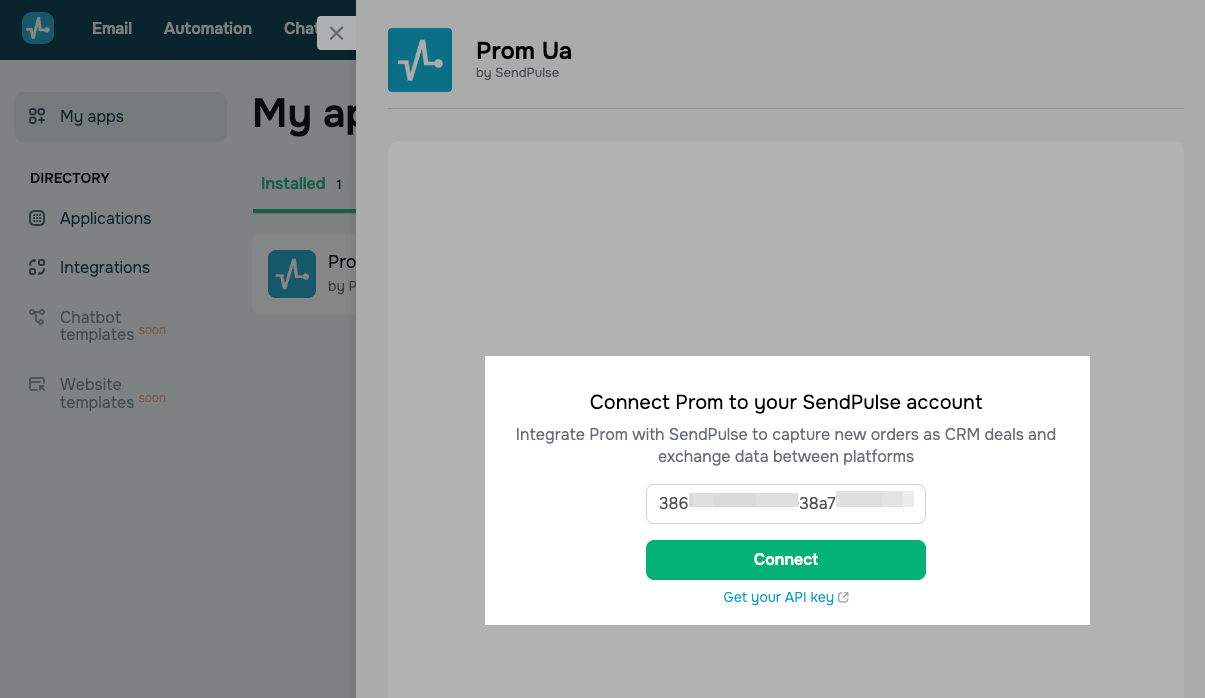
Integrate your Prom store with your SendPulse account
Go to My apps > Installed and select Prom Ua. In the input field, enter your Prom token and click Connect.
Configure export between the CRM system and Prom
Synchronize products, deals, and contacts between SendPulse's CRM system and your Prom store.
To get started, configure product category mapping. Match each Prom category with a corresponding CRM category.
Products
Map Prom and CRM categories to ensure products are assigned correctly.
On the Export settings page, go to the Products tab. In the Categories mapping section, map CRM and Prom categories. In the CRM category and Prom category fields, select the corresponding categories.
To add more category mappings, click Add category mapping.
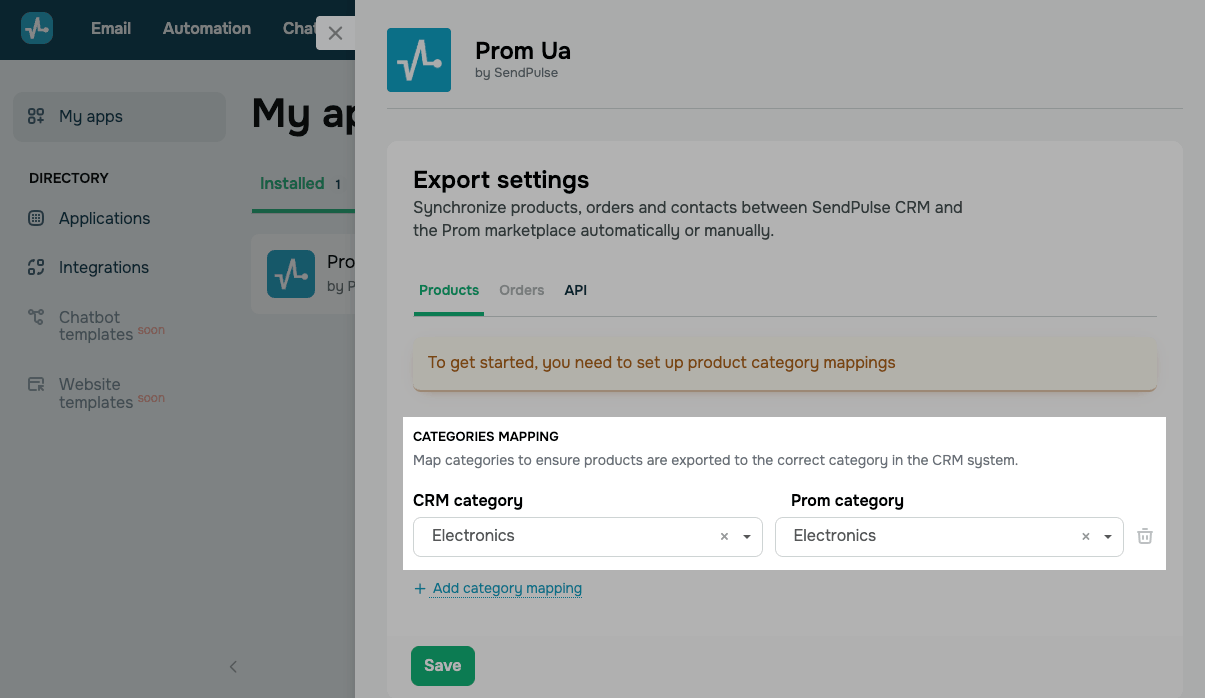
Once you're done, click Save.
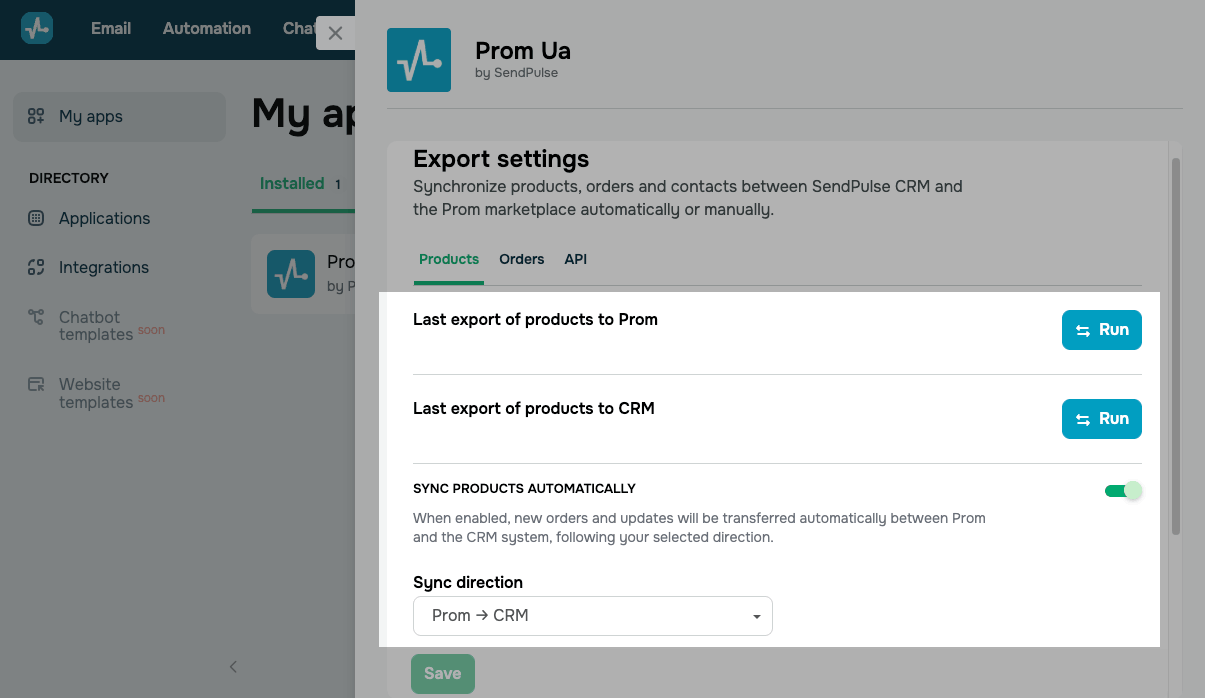
Next, you can configure the following product export options:
| Last export of products to Prom | Manually transfers new products or their updates from the CRM system to Prom through an XLSX file containing all products from the CRM system.
To synchronize products manually, click Run. |
| Last export of products to CRM | Manually transfers new products or their updates from Prom to the CRM system.
To synchronize products manually, click Run. |
| Sync products automatically | Automatically transfers new products or their updates between Prom and the CRM system every 12 hours based on the selected direction.
Turn on the toggle. In the Sync direction field, select a sync direction: Prom > CRM or CRM > Prom. |
Please note that you cannot delete products through the integration. To avoid re-synchronization, delete products manually in the CRM system and on Prom.
Once you're done, click Save.
Deals and orders
Configure deal mapping between your Prom store and the CRM system to ensure accurate data transfer.
You can configure the following deal export options:
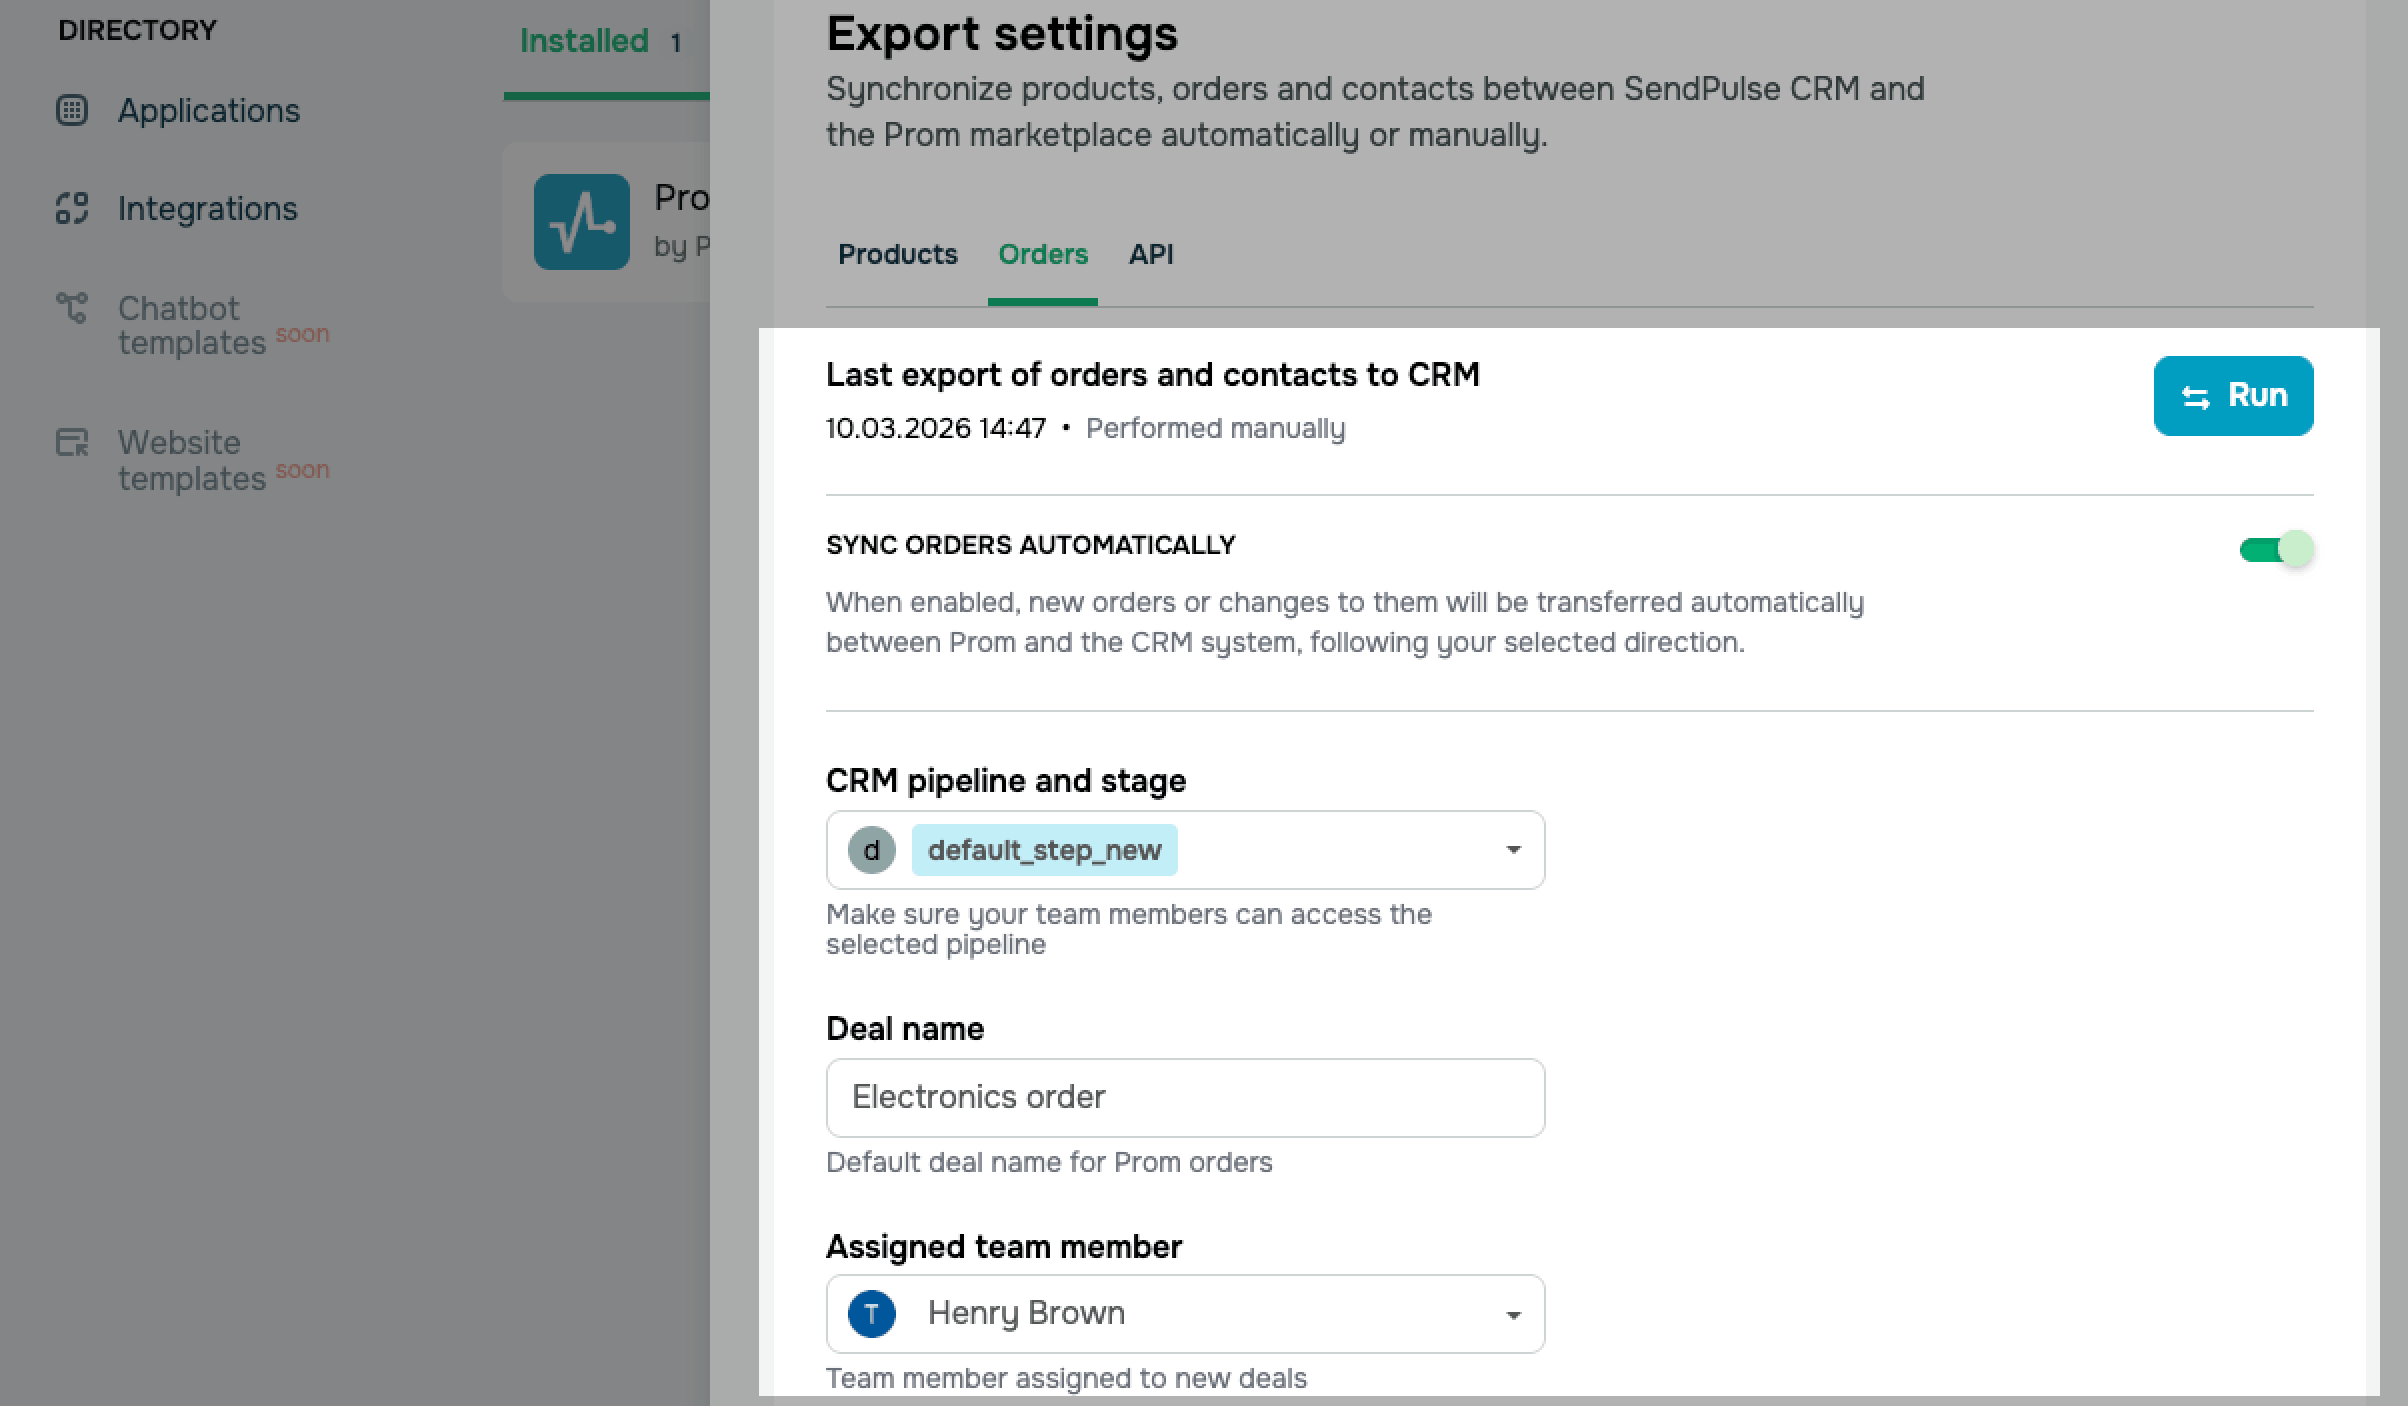
| Last export of orders and contacts to CRM | Manually transfers new orders or their updates from Prom to the CRM system.
To synchronize orders manually, click Run. |
| Sync orders automatically | Automatically transfers new orders or their updates from Prom to the CRM system every 15 minutes.
Turn on the toggle. For automatic synchronization, configure the CRM pipeline and stage, Deal name, and Assigned team member fields. |
| CRM pipeline and stage | Select a CRM system pipeline and its stage.
Make sure that the users who will manage these deals have access to your selected pipeline. |
| Deal name | Enter a deal name for orders from Prom. |
| Assigned team member | Assign a user responsible to new deals. |
| CRM deal field | Select a CRM pipeline field where Prom order values will be synced. |
| Prom order field | Select a Prom order field where CRM deal values will be synced. |
Once you're done, click Save.
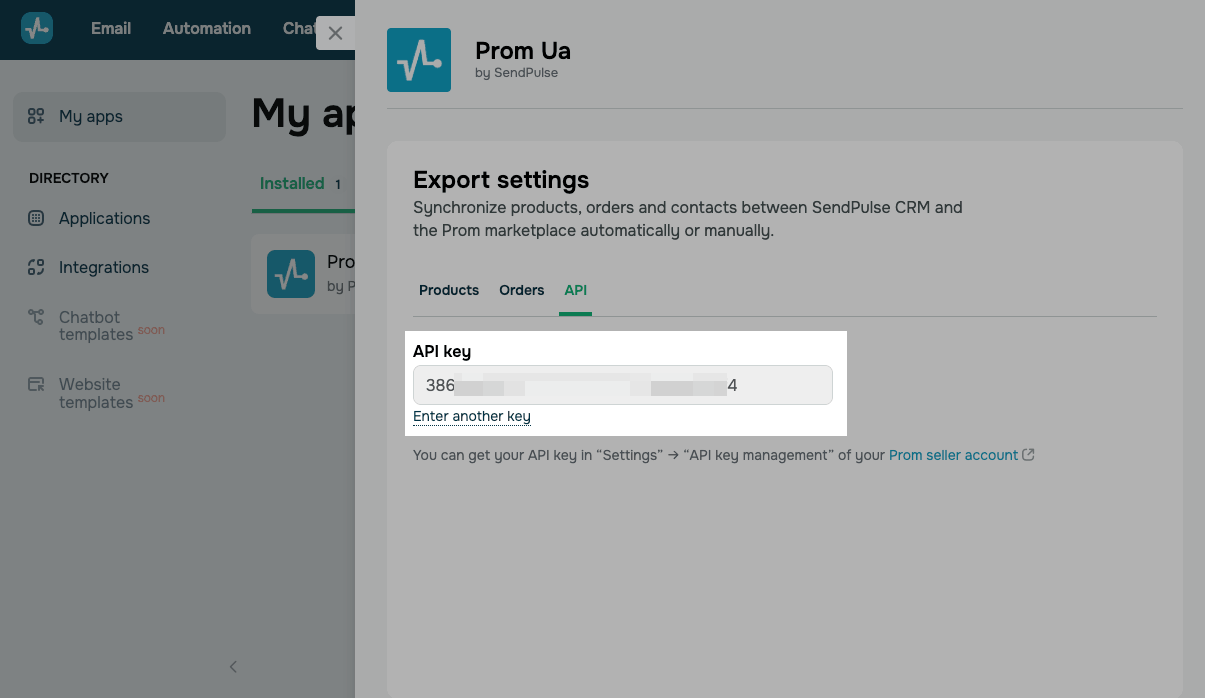
API
You can also enter a different API token if your active token expires or if you'd like to integrate the CRM system with a different Prom store.
Click Enter another key. In the pop-up window, enter the new API token from your Prom seller account.
Please note that once you enter a new token, the previous integration settings will be reset. Reconfigure them before saving.
Once you're done, click Save.
View data imported into the CRM system
In the CRM system, you can view products, orders, and contact details imported from your Prom seller account.
To view products imported into SendPulse, go to CRM > eCommerce > Products.
To view orders imported into SendPulse, go to CRM > Deals.
To view contacts imported into SendPulse, go to CRM > Contacts.
Last Updated: 19.03.2026
or