Send a "Thank you" email after registration
With SendPulse, you can create an automation triggered by an event, for example, to thank the customer for registering on your site or purchasing your product or send them about an abandoned cart message.
In this article, we will talk about how to add a new client registration event and create a flow that will be triggered by this event.
Add a new event
Go to the Automations > Events Manager and click Add new event.
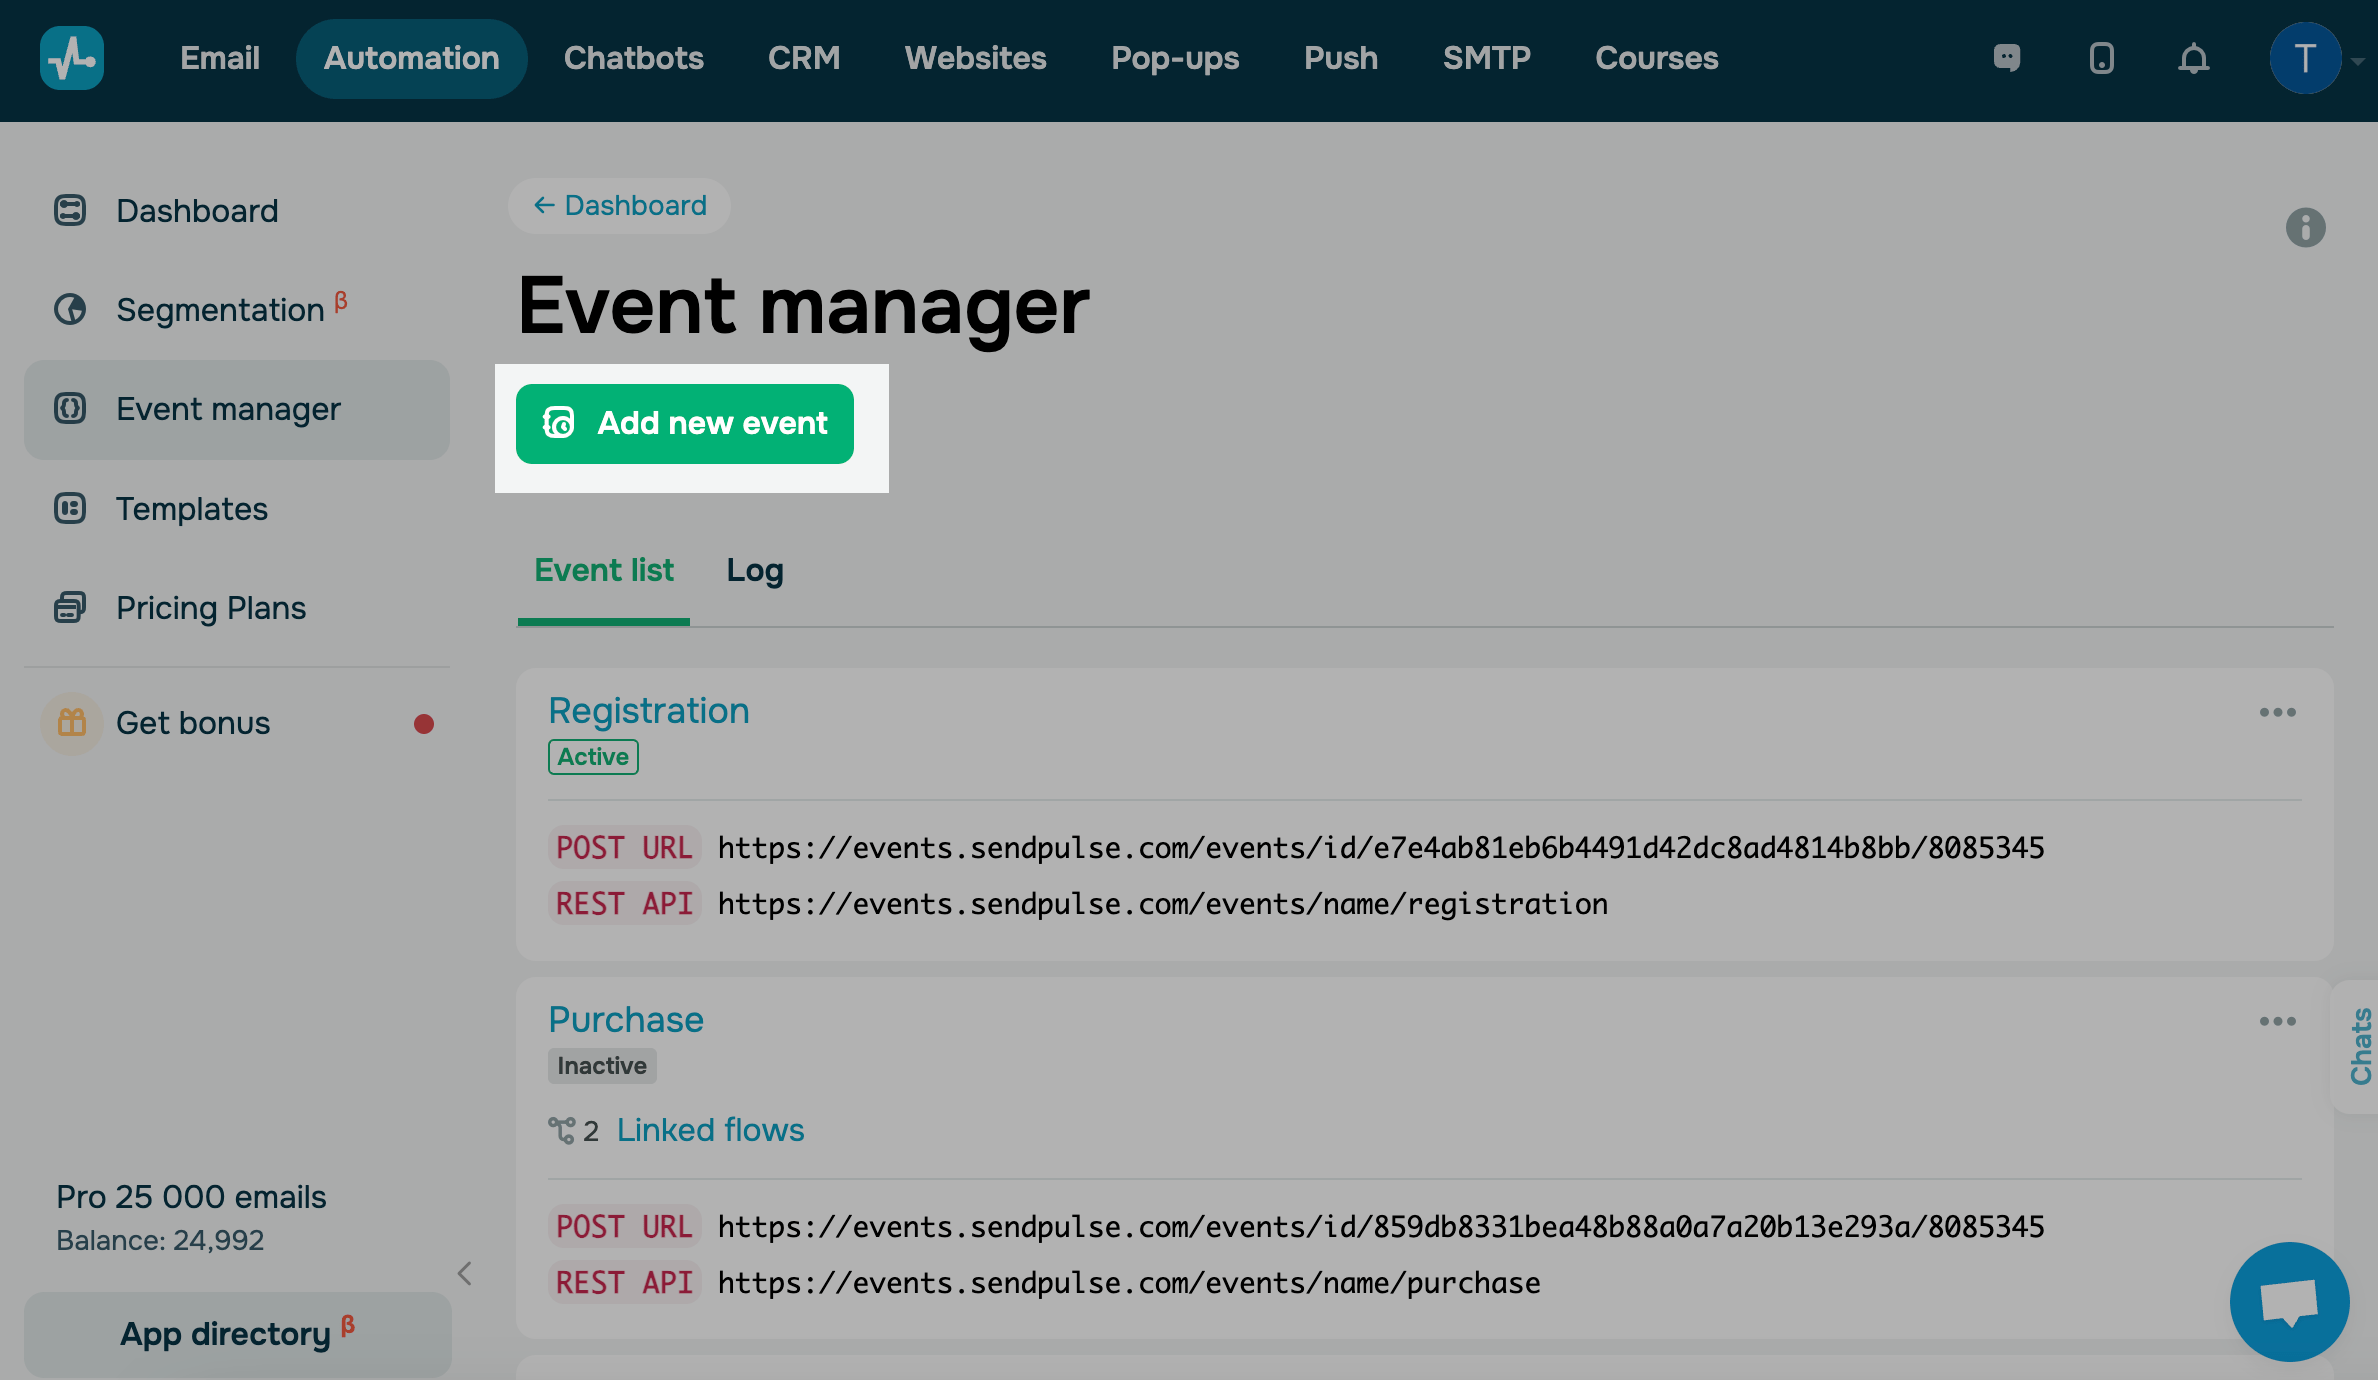
Select the Purchase event, or create a custom event.
You can delete or add variables in the settings menu and set the variable type — String, Number, Date, or Structure.

Next, the service will generate a link your system should send requests to.
Choose your request method, and copy the generated link.
Learn more: How to create events and How to send events to SendPulse.
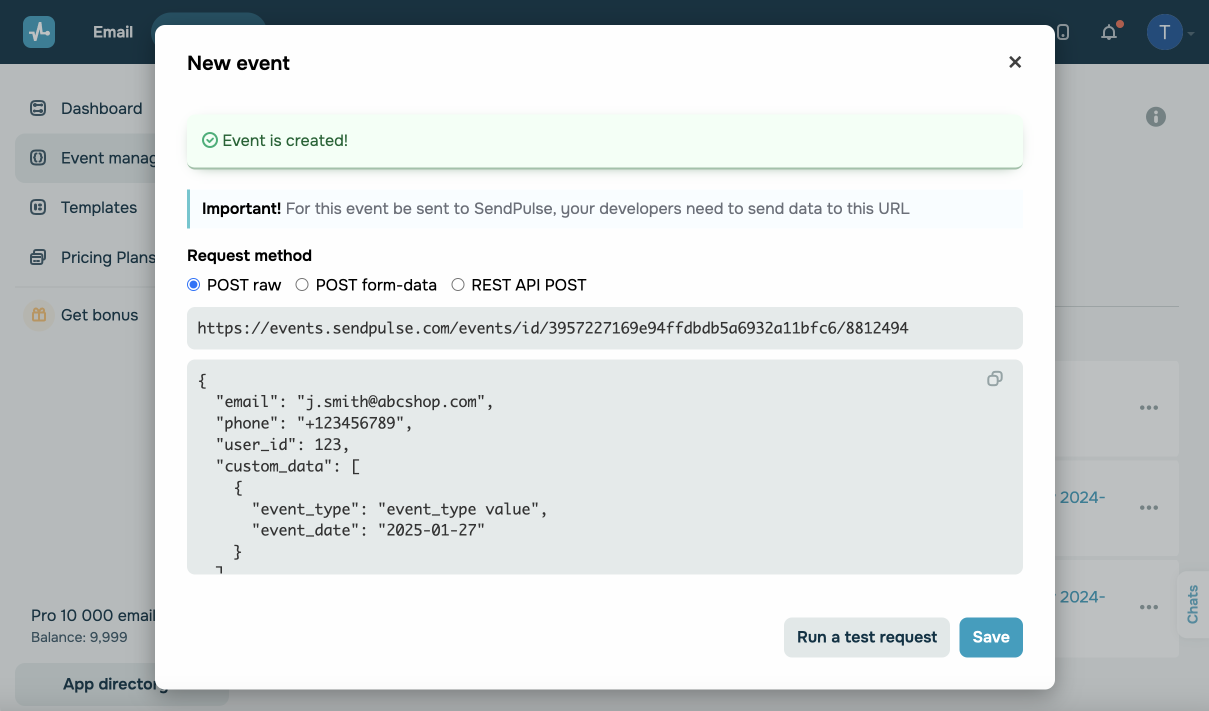
Click Save.
Create an Automation
Go to Automations, and click Create new automation.
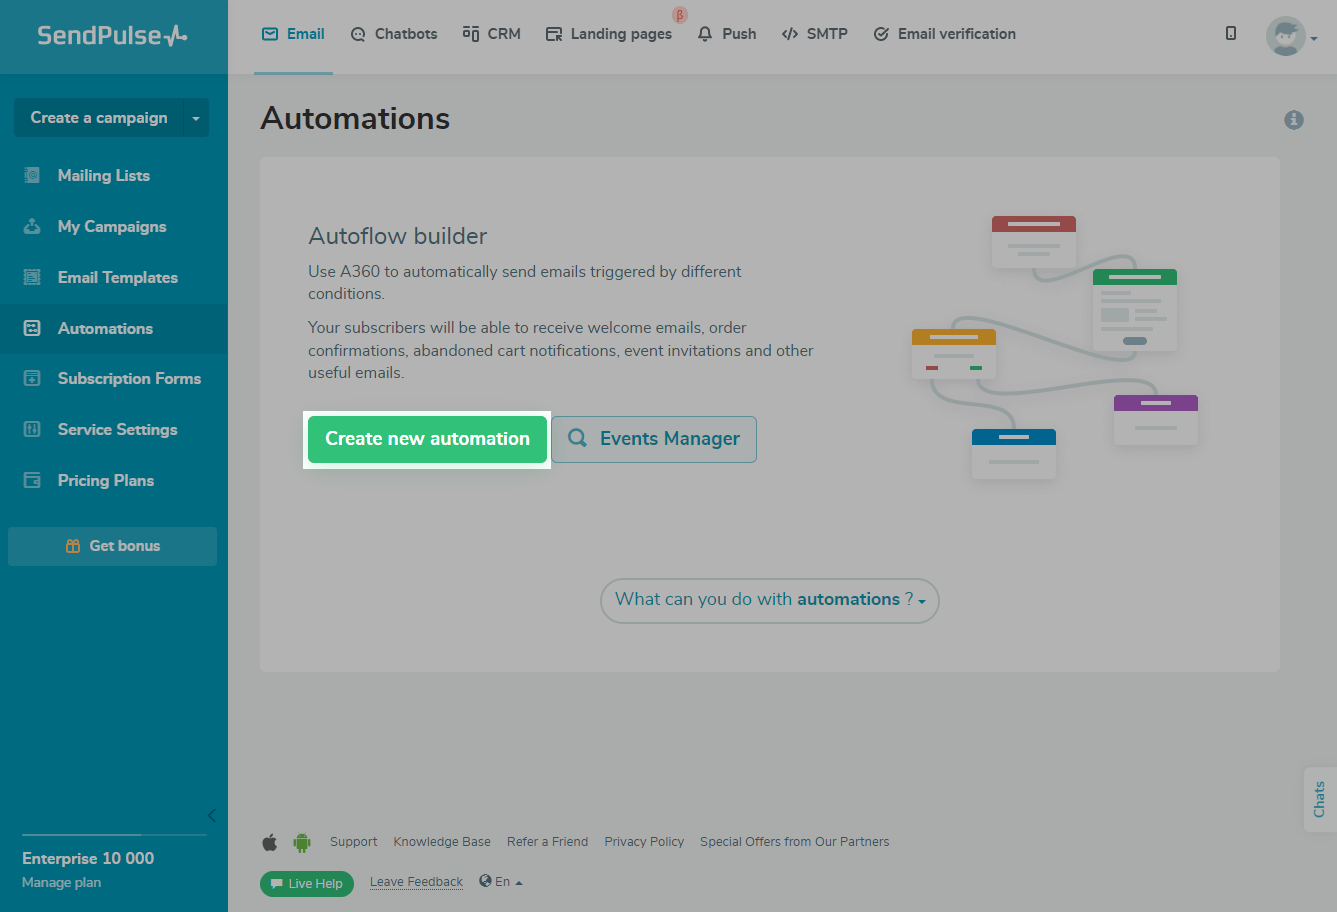
Select Automation 360.
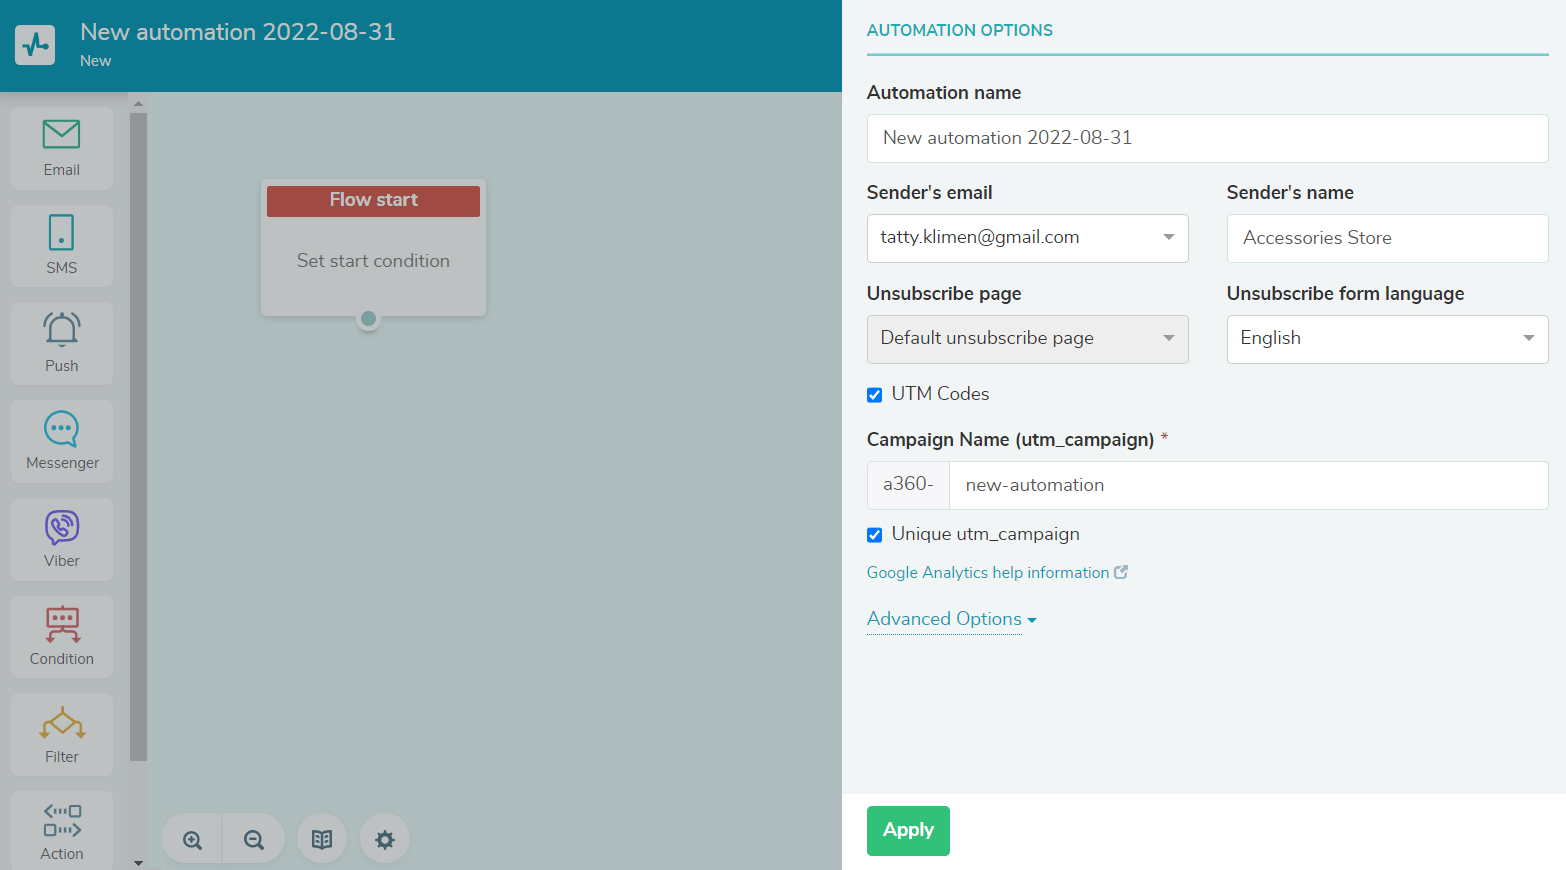
Configure automation settings
Enter your automation name, specify the sender, connect Google Analytics, and select the unsubscribe page and unsubscribe form's language.
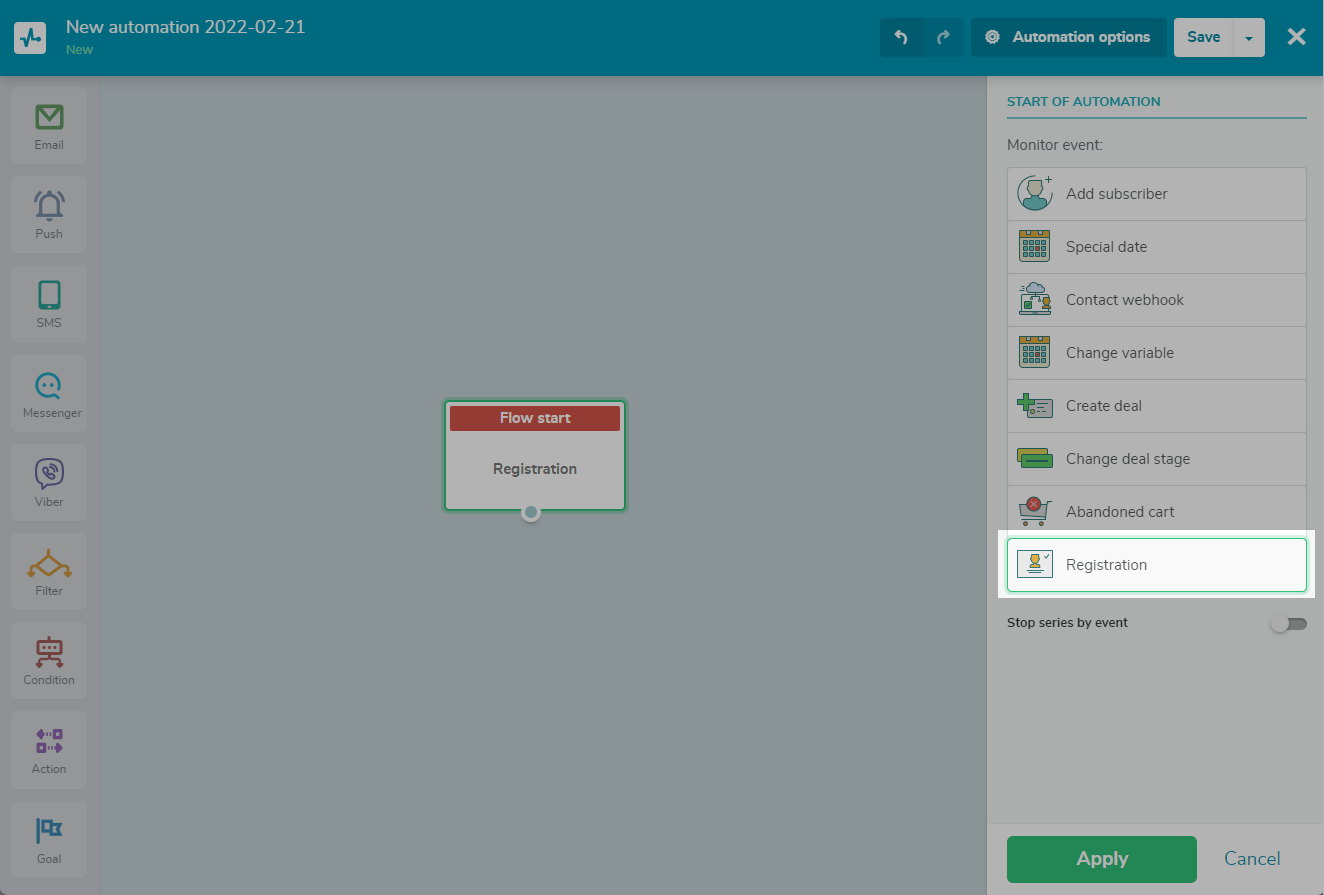
Set your series start
Specify the Registration event created as a start condition in the previous step.
Additionally, you can specify a certain mailing list to use its variables in your message.
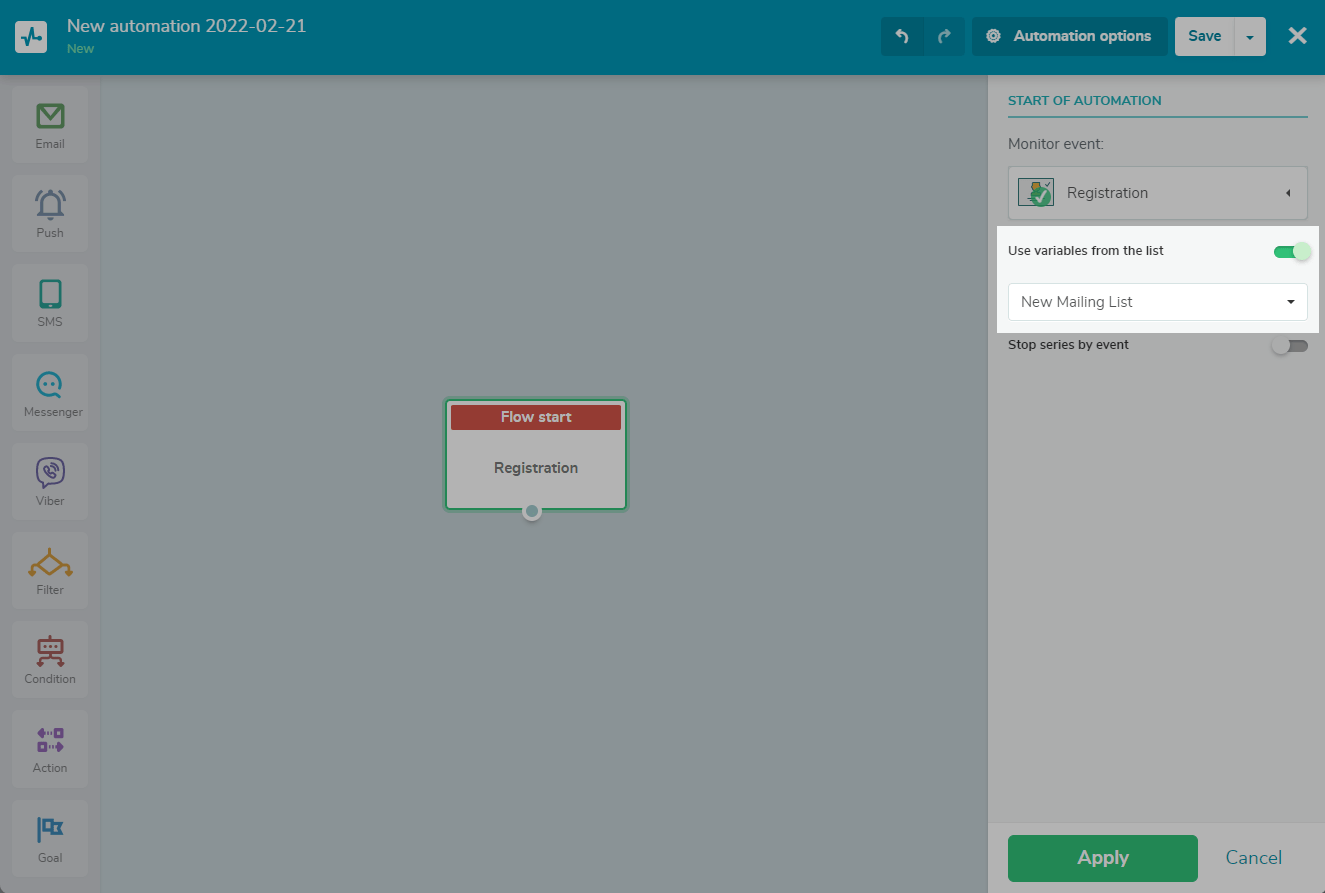
Check whether you want the series stop to be triggered by an event, and select this event. You can also count the series stop as a conversion.
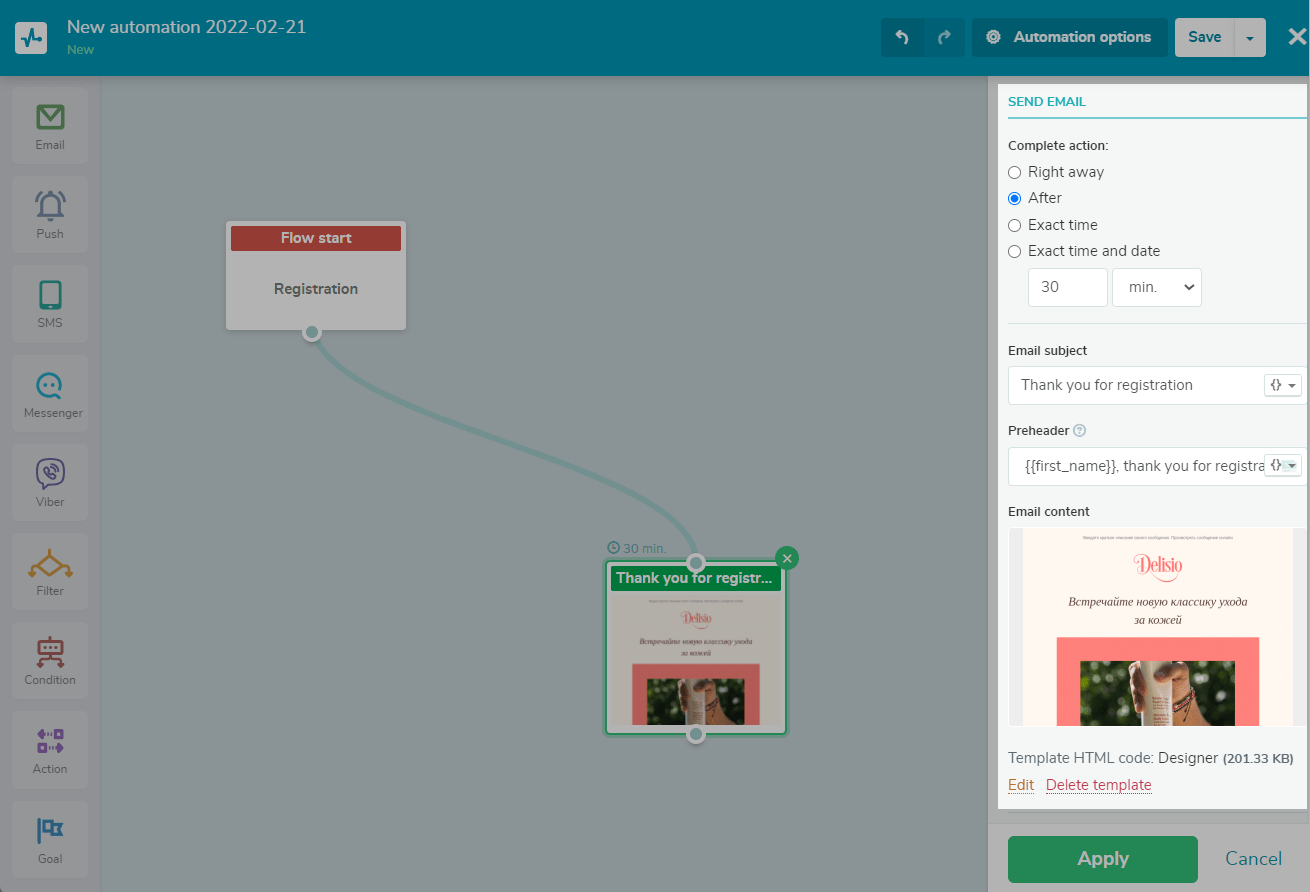
Add an element to send a message
In Automation 360, you can send a message to the user via Email, SMS, Viber, Push, and Messenger elements.
Drag the Email element into the editor field, and specify the start message’s sending time. Enter your email subject and preheader, and add your variables from the mailing list. Select a template. Additionally, you can attach files to your email.
Read more about block execution conditions in the article: Element execution time.
You can also disable the unsubscribe link.
You can disable the unsubscribe link for three Email" blocks only.
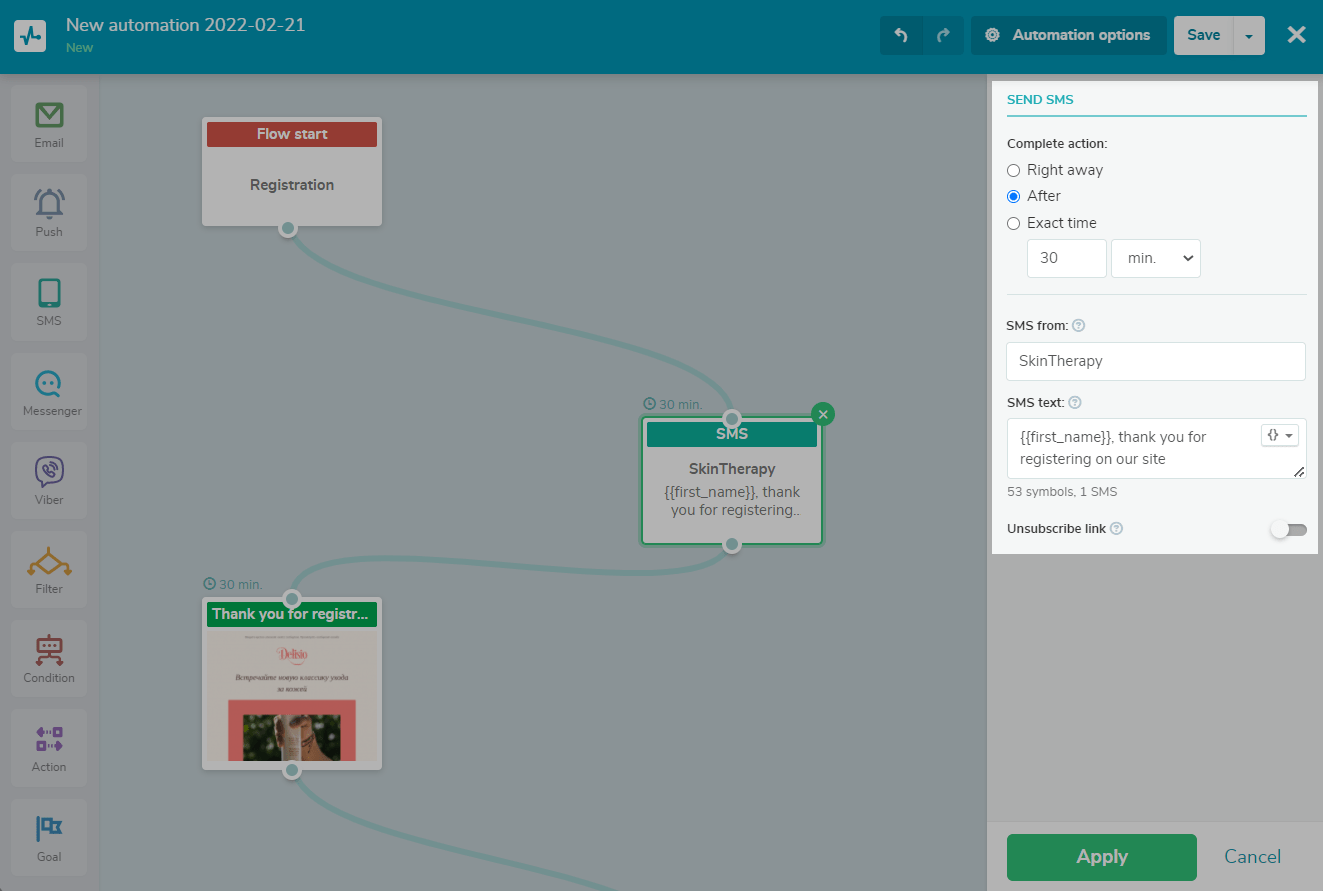
SMS
Drag the SMS element into the editor field, and specify the start message’s sending time. Enter the SMS sender's name and SMS text. You can personalize the message text and insert more variables.
You can enter up to 11 Latin characters in combination with numbers as your SMS sender name, including spaces. Entering numbers without letters is not allowed.
Additionally, you can add the unsubscribe link, which will add from 23 to 25 characters to the overall length of your message text.
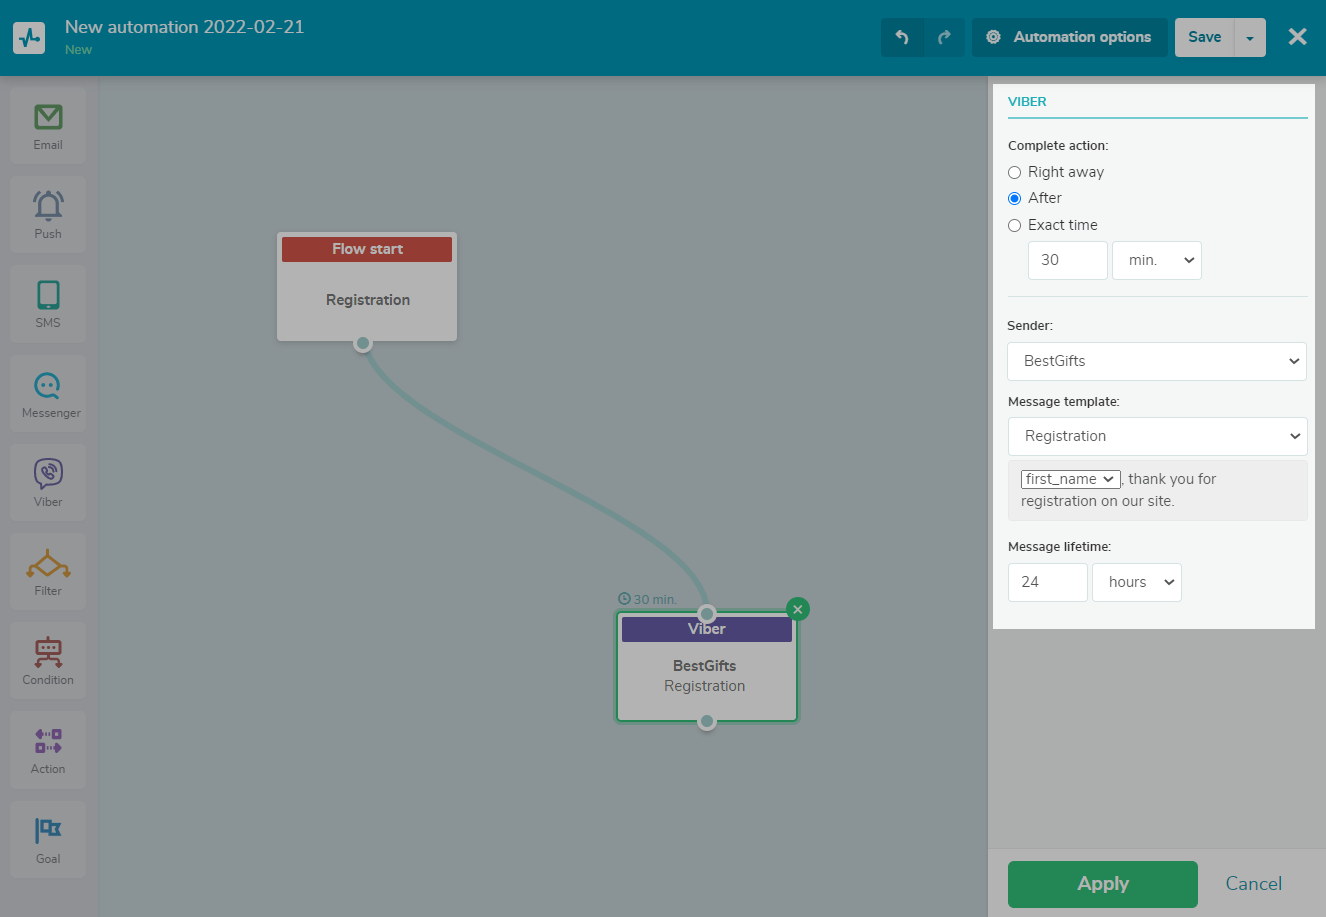
Viber
Drag the Viber element into the editor field, and specify the start message’s sending time. Select your sender and message template. Add your variables from the list, and set the message lifetime.
Please note that the contact that goes through the flow must have a phone number. Contacts that only have an email address will not receive your message.
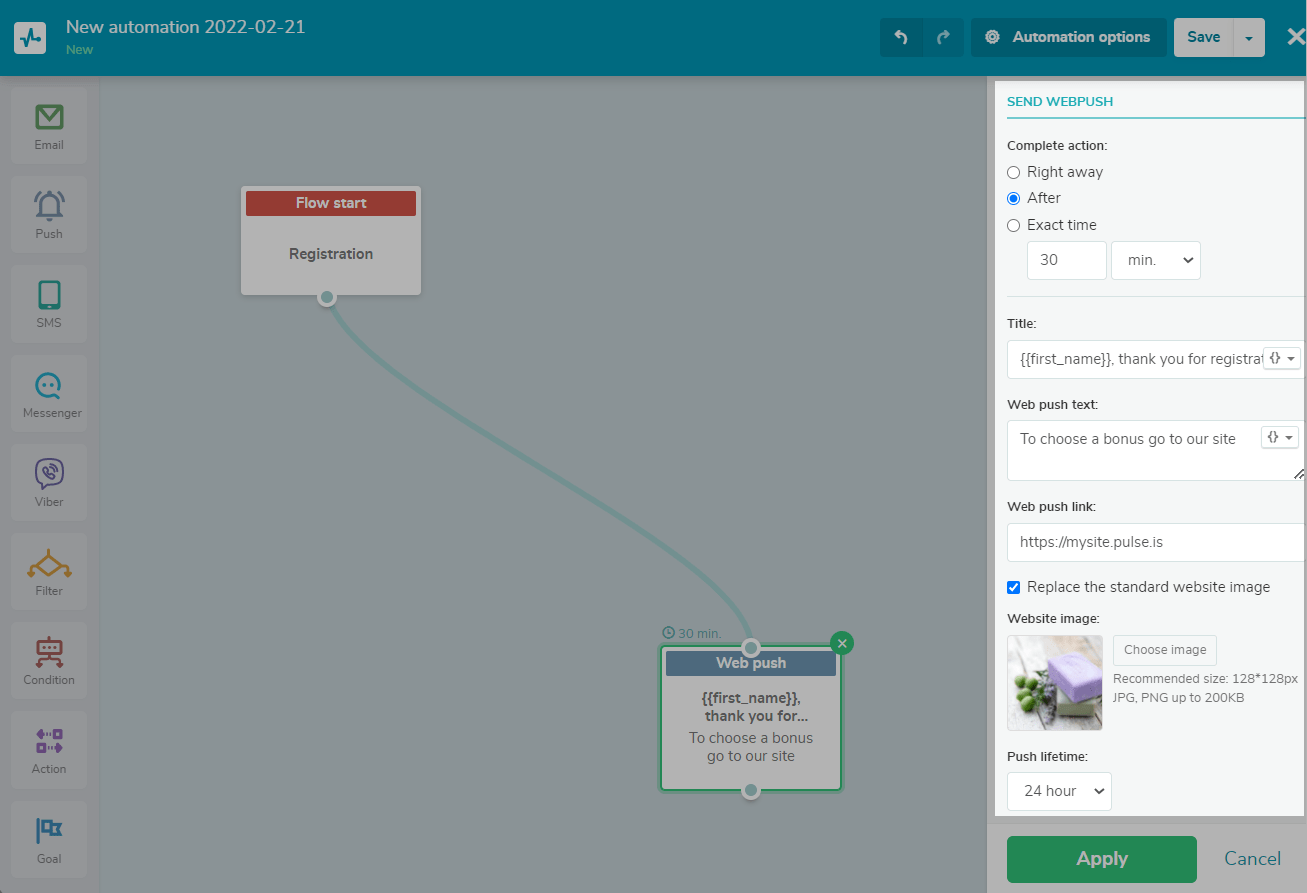
Push
Drag the Push element to the editor, and select the recipients of your push message. Enter the start notification’s sending time, title, text, and a web push link. Specify the web push lifetime.
Additionally, you can replace the standard push notification image.
Please note that to send push notifications, the subscriber of the selected site must have the same email address as your contact in the mailing list that’s going through the flow.
Read more: How to send web push notifications in Automations.
Messenger
Drag the Messenger element into the editor field, and specify the start message’s sending time. Select the chatbot with the help of which you want to send a message to subscribers.
Note: the recipient must be subscribed to the chatbot using which you will send the message and have an email or phone number included in your chatbot's Audience. Read more about how to get additional variables: Messenger in Automation 360 and How to manage subscribers and their data in your chatbot audience.
Choose an action: send a message or start a flow.
In the Message section, enter your message text. You can also add variables and emoji to the text.
In the Flow section, select a flow.

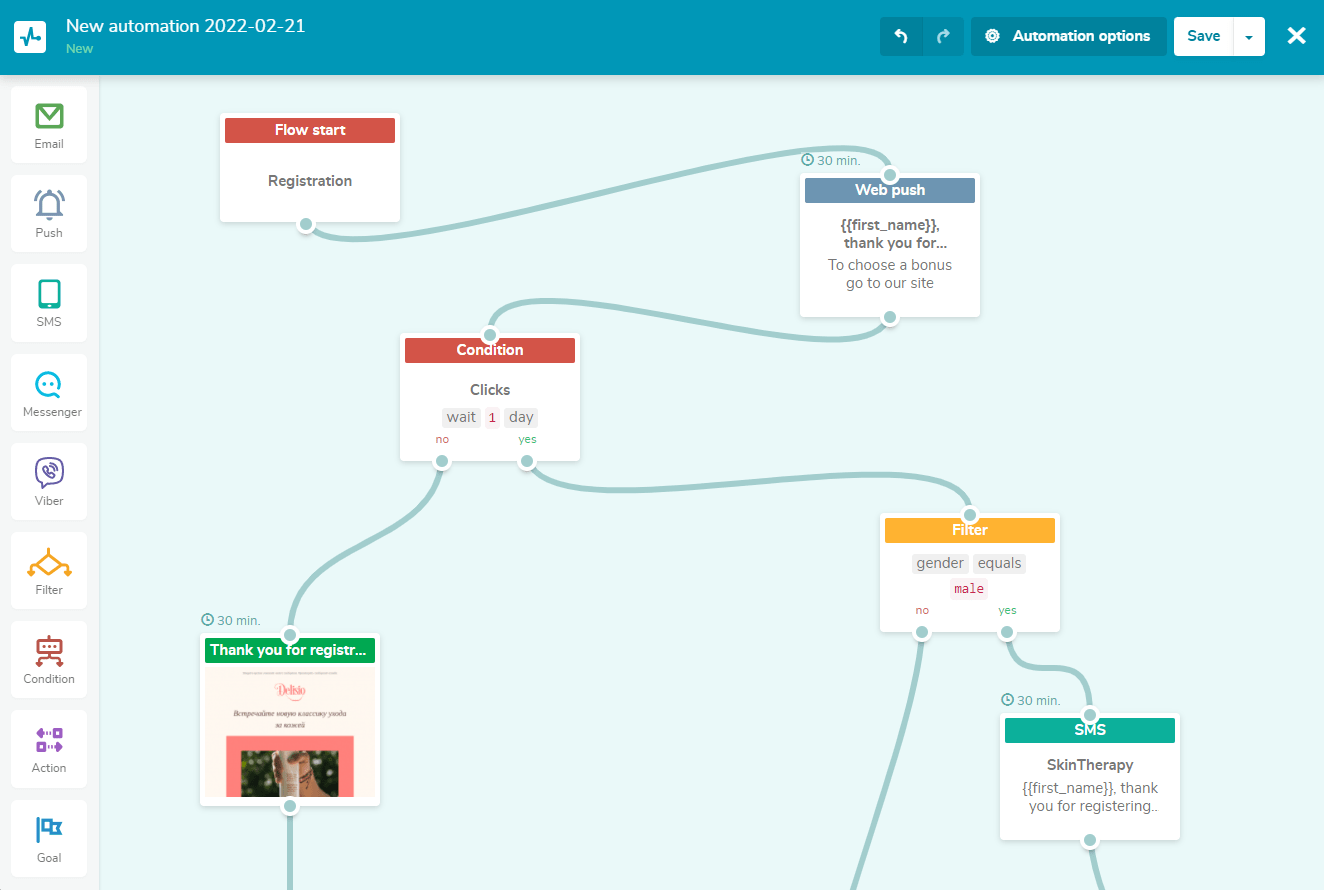
Add additional elements
Additionally, you can add other elements to diversify the functionality of the flow. For example, you can add the Condition element to track your email opens and deliverability or the Filter element to branch the flow based on the variable value.
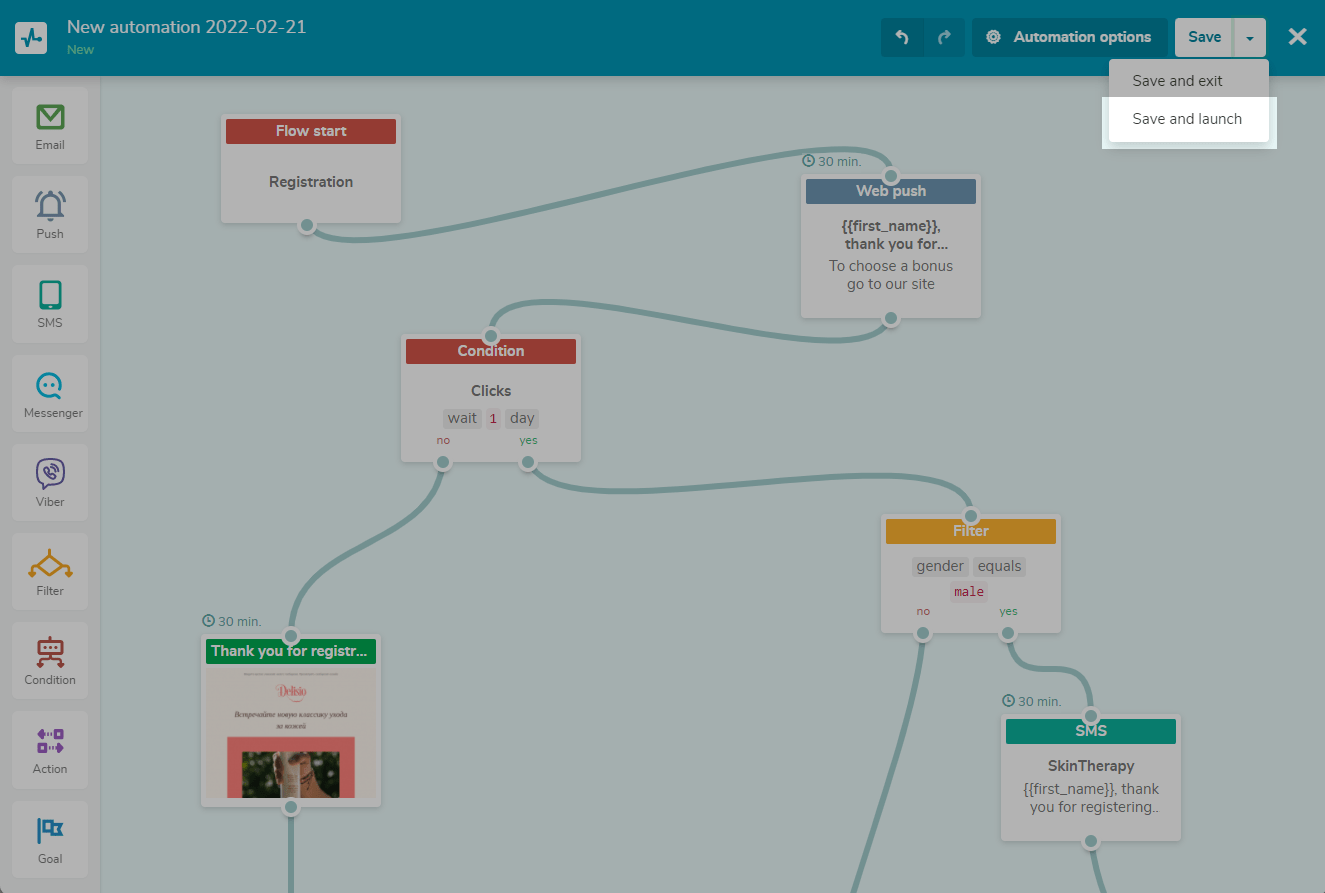
Save and launch
Once you've finished setting up your flow, save and launch it.
As soon as the registration event happens, customers will receive your email.
Last Updated: 26.12.2023
or