Create an automated flow
An automated flow is a sequence of elements that controls when, to whom, and how SendPulse sends messages and takes actions. You can use flows to automate welcome messages, post-purchase sequences, deal updates, course enrollments, and more.
With Automation, you can:
- Trigger flows based on contact activity, CRM events, course progress, website visitor behavior, and custom events from external systems.
- Send messages across email, SMS, push notifications, and messaging apps.
- Route contacts into branches based on their data or actions.
- Update contact records, manage CRM deals and tasks, and control course access.
- Use multiple communication channels in one flow to create a smooth customer journey.
Let's walk through how to create a flow and what elements are available in the builder.
Build a flow
To build an automated flow, go to Automation and click Create automation. The workspace appears with the starting element. Add elements from the sidebar, link them, and set up each one.
To generate a flow layout using a prompt, click the AI assistant icon in the lower-right corner of the builder, outline your goal, and list the elements to include.
Read also: Use the automated flow builder, Create an automated flow using AI, and Troubleshooting contact progression issues in a flow.
Starting elements
Every flow begins with a starting element, which is the event or condition that triggers it. Contacts enter the flow when the condition is met, such as when they take an action, their data changes, or a specified date arrives.
Triggers are organized by the SendPulse tool they track:
| Email service | Launches when a contact is added to a mailing list, a variable changes, a tag is assigned, or a key date arrives. |
| CRM | Launches on updates in your sales pipeline, such as when a deal is created or moves to another stage, a task is updated, or a deadline approaches. |
| Courses | Launches on course progress updates, such as when a student enrolls, completes a lesson or course, receives a certificate, or their access is about to expire. |
| Event | Launches when a signal is received from an external system, such as a purchase, form submission, or other actions. |
| Dynamic segments | Launches when a contact enters or exits a segment that updates automatically as contact data or behavior changes. |
| Pixel event | Launches when an identified contact takes a tracked action on your website, such as a page visit, a link click, or a custom pixel event. |
The starting element also helps you set re-entry rules, restrict sending to a priority time window, and manually launch your flow for an existing mailing list.
The trigger you choose also determines which variables are available in the flow. CRM triggers provide deal and contact fields. Custom events provide variables defined in their structure. Email service triggers provide subscriber data from the mailing list.

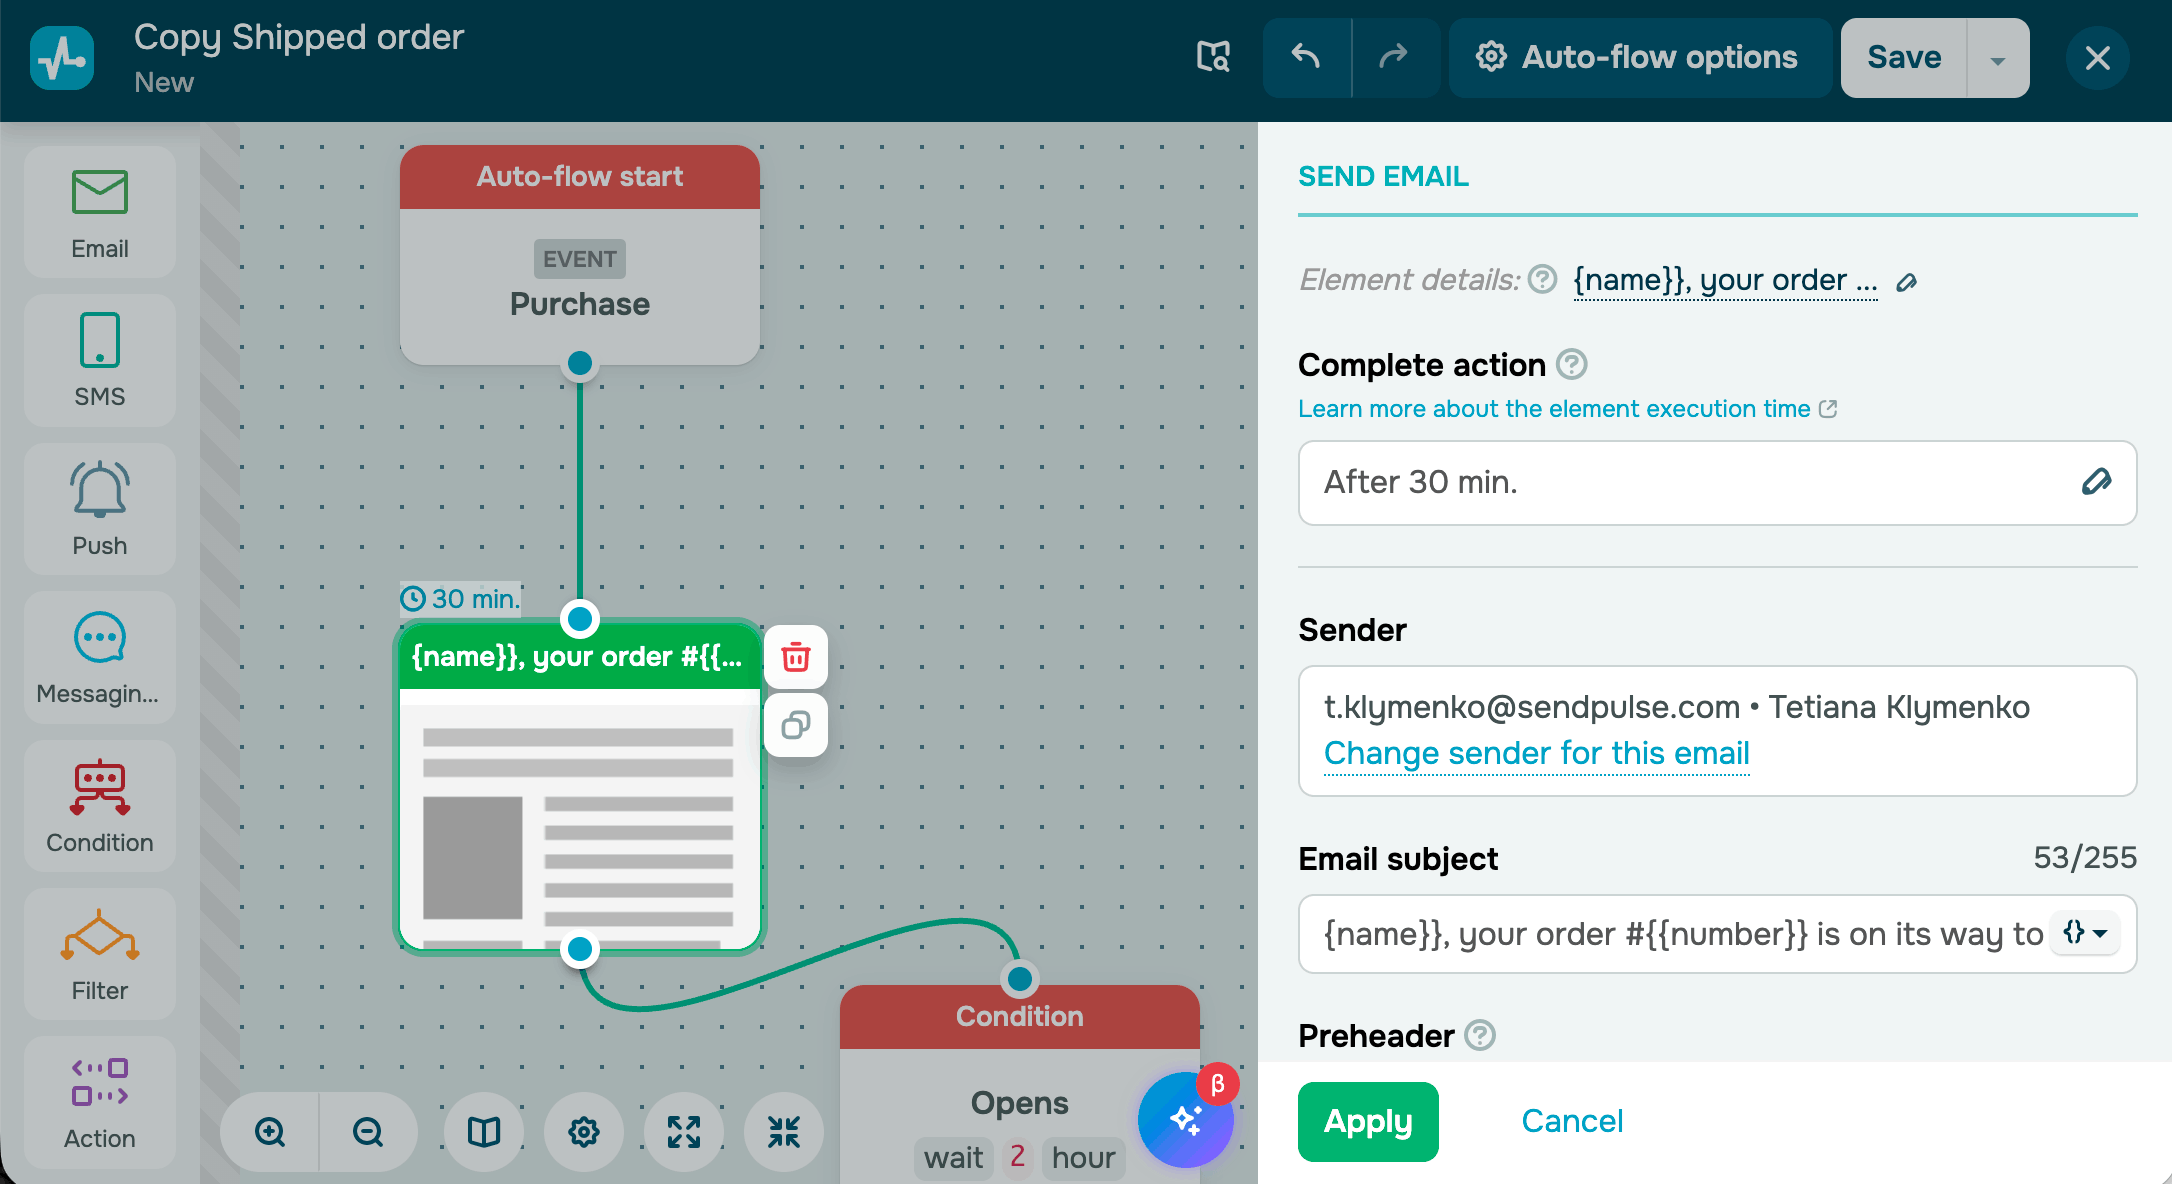
Sending elements
Use sending elements to contact users across multiple communication channels and send emails, SMS messages, and push notifications. Each element has its own template, sender settings, and delivery time.
Automation supports the following communication channels:
| Sends an email to the contact using a selected template | |
| SMS | Sends a text message to the contact's phone number |
| Push | Sends a web push notification to a subscriber's browser |
| Messaging app | Sends a message or runs a chatbot flow on social media. |
| Viber | Sends a Viber service message using an approved template |
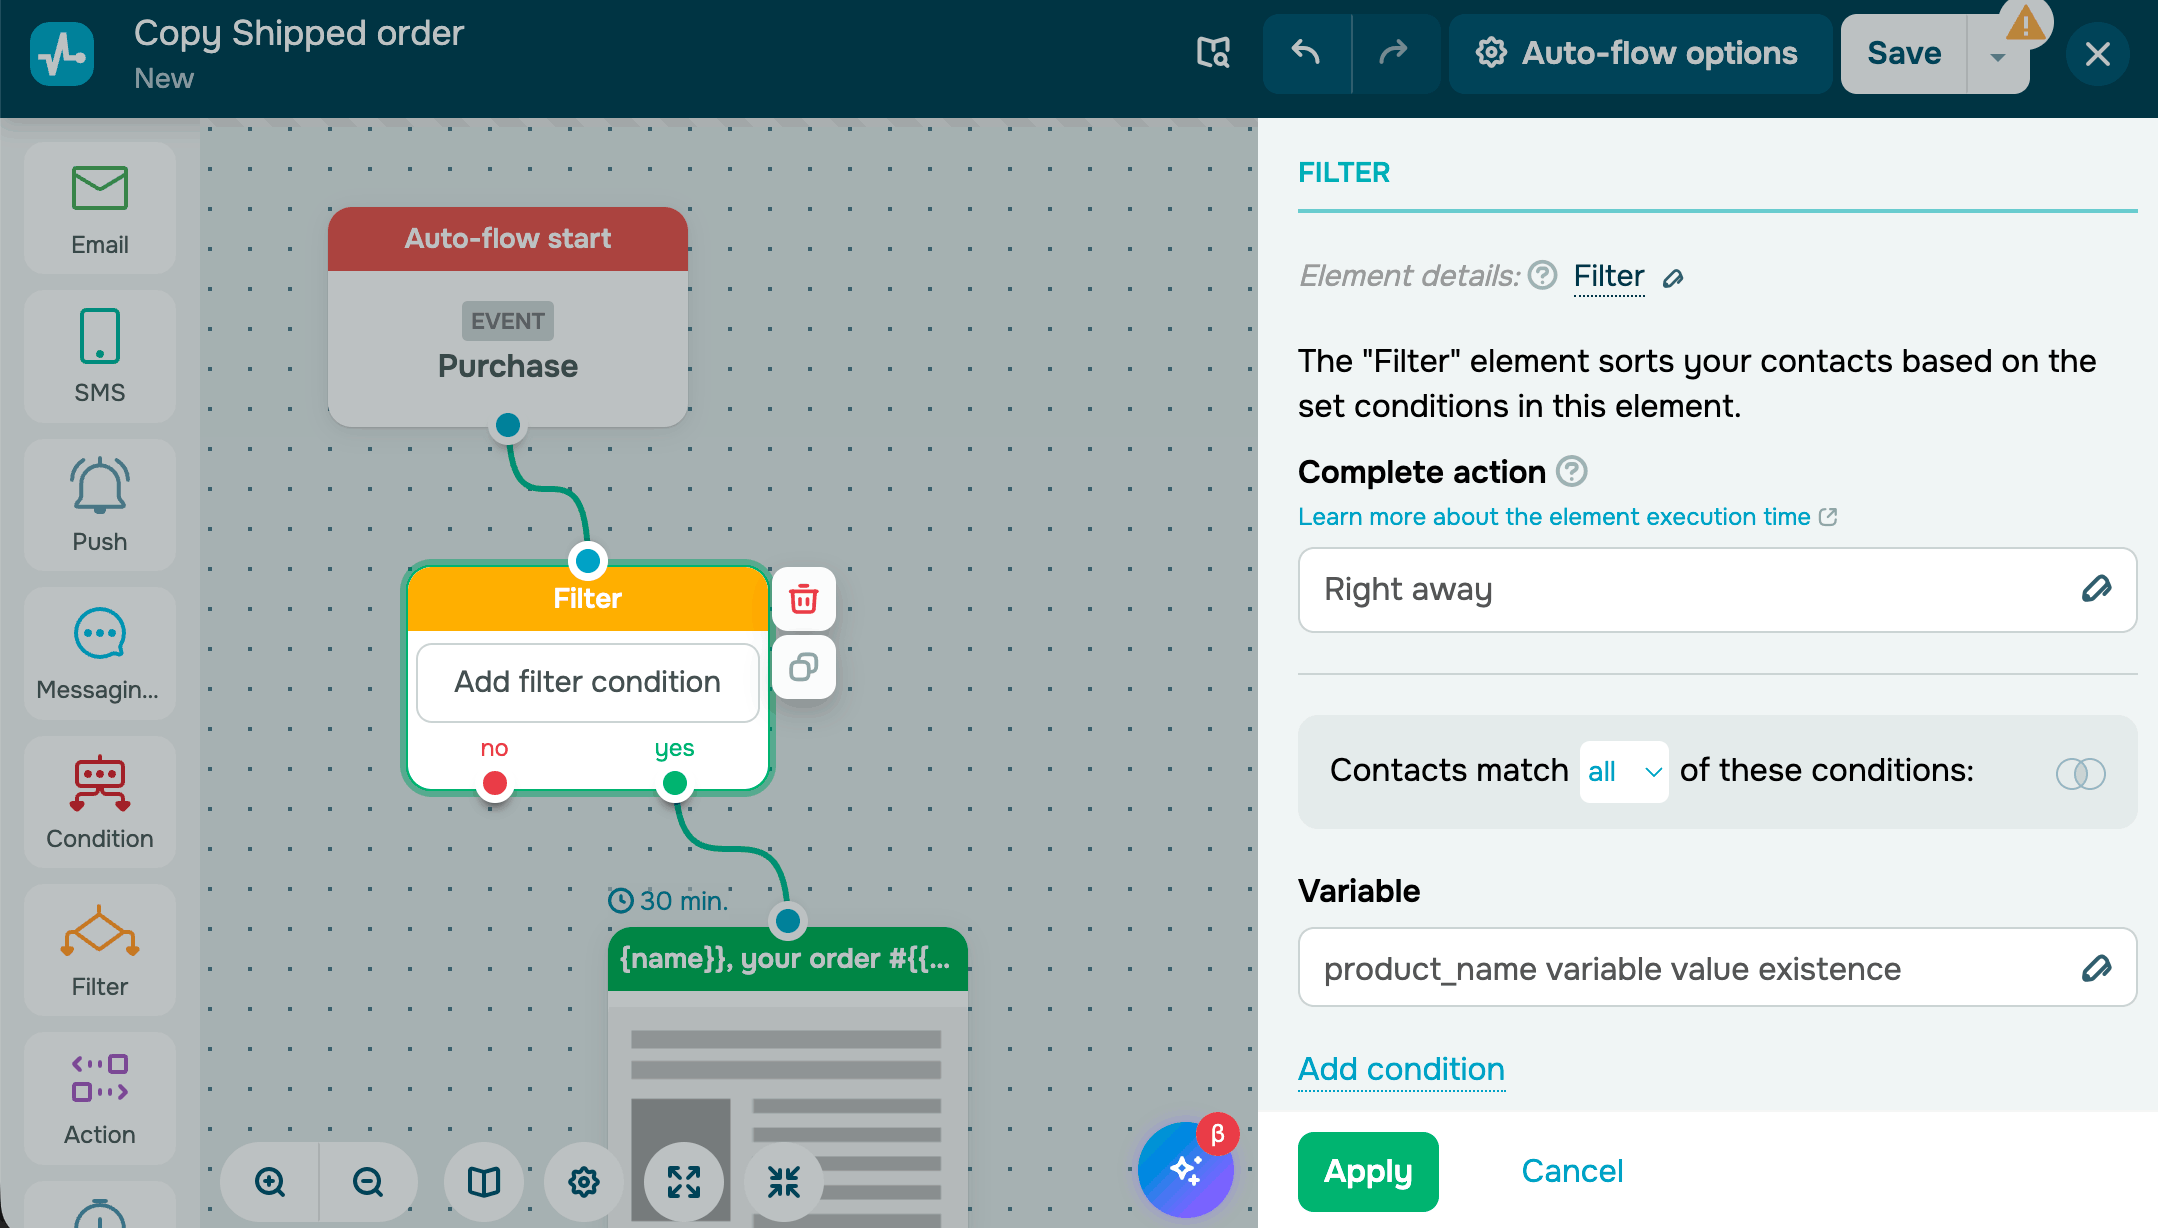
Filter
The Filter element routes contacts to Yes or No based on their data, such as variable values, tags, days of the week, or other criteria.
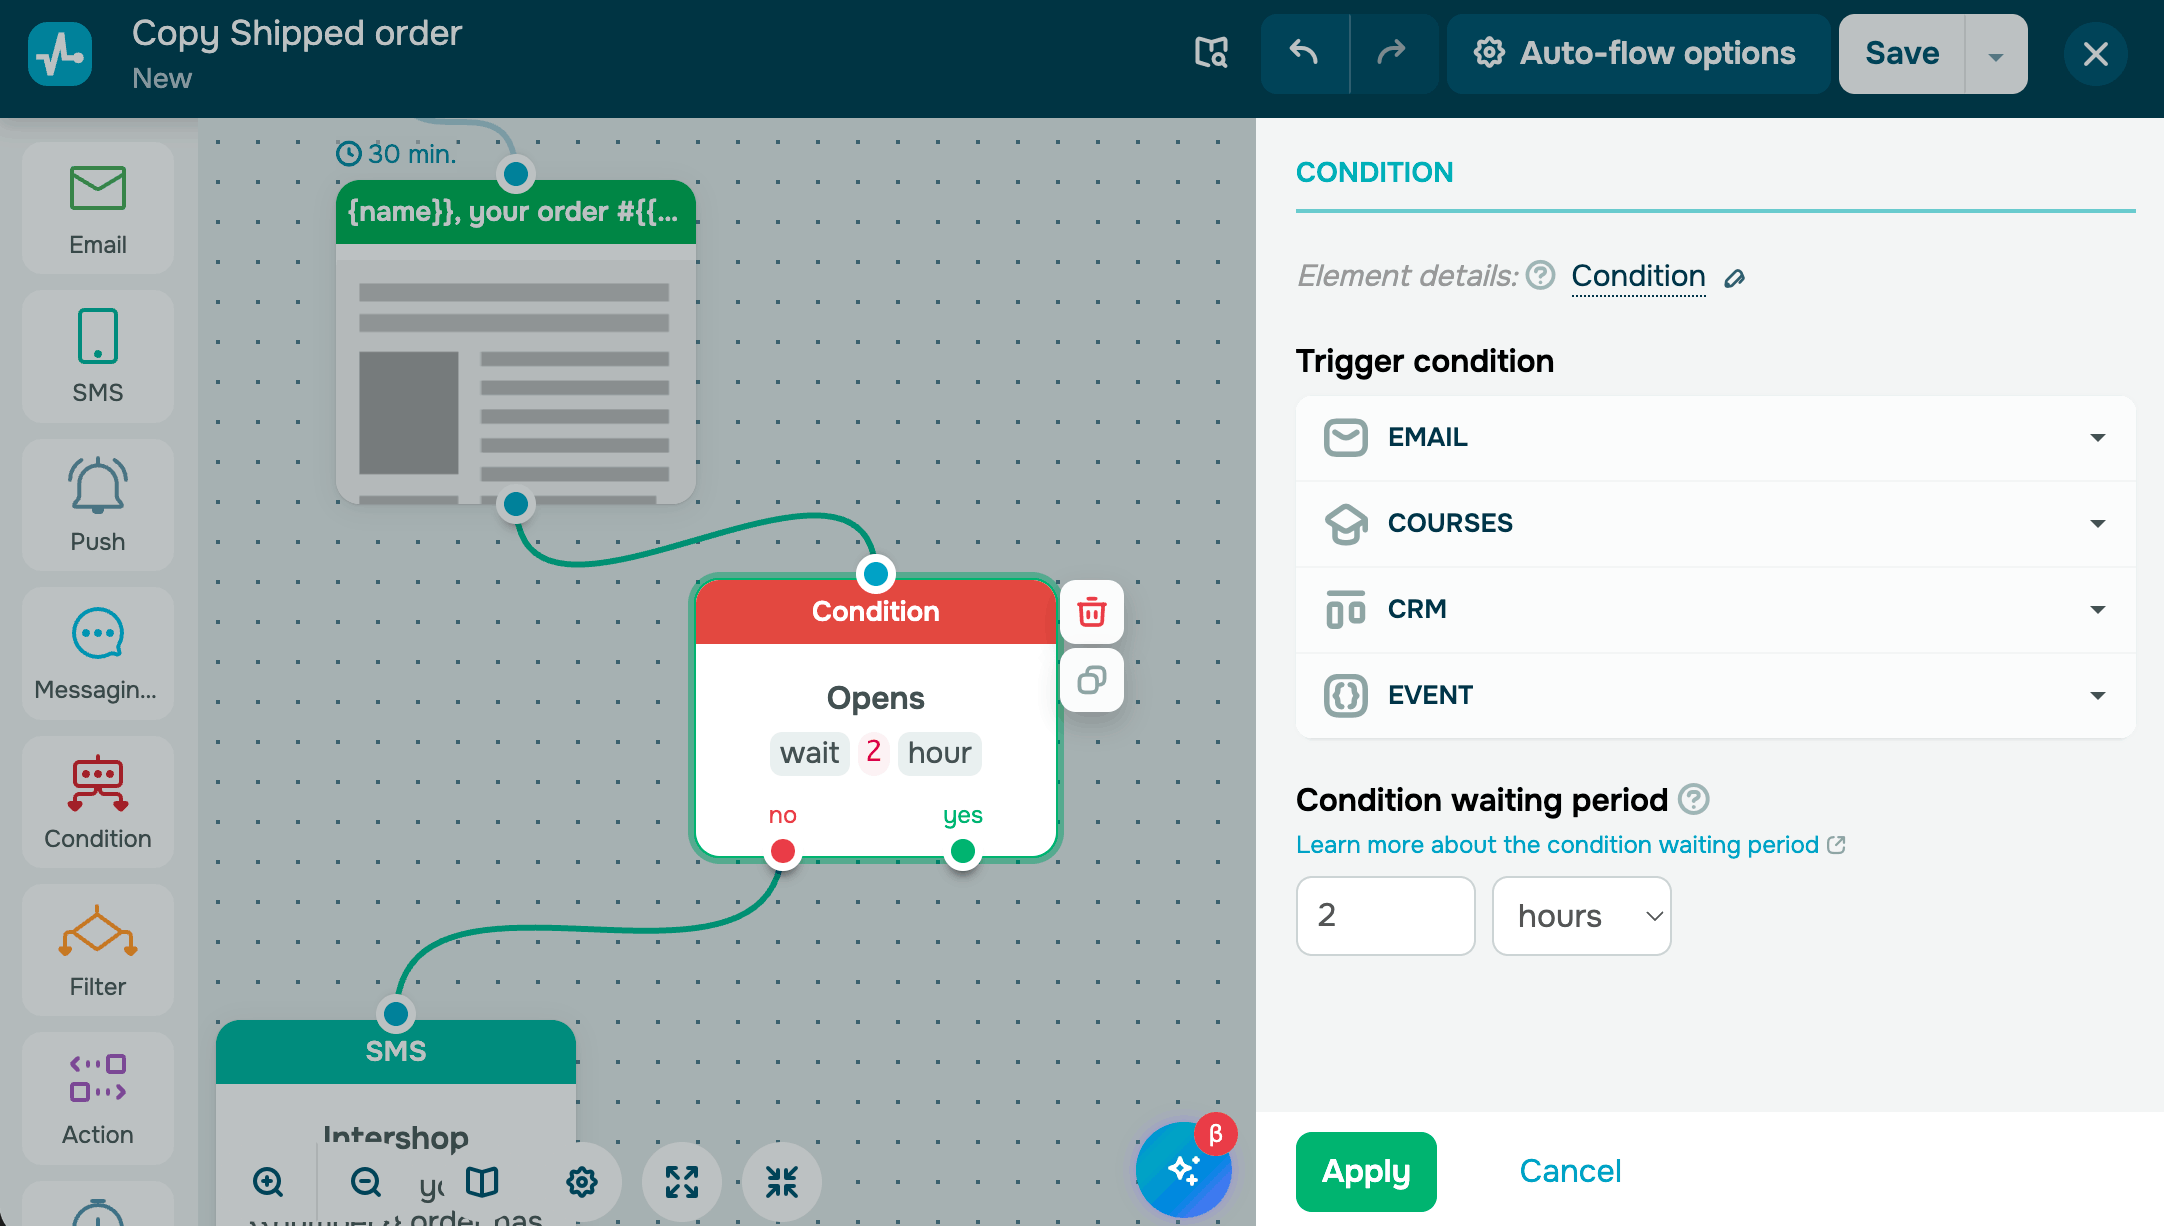
Condition
Use the Condition element when your next step depends on what a contact does after the previous step. Set a time window. The flow waits and then splits into two branches: contacts who acted and contacts who did not.
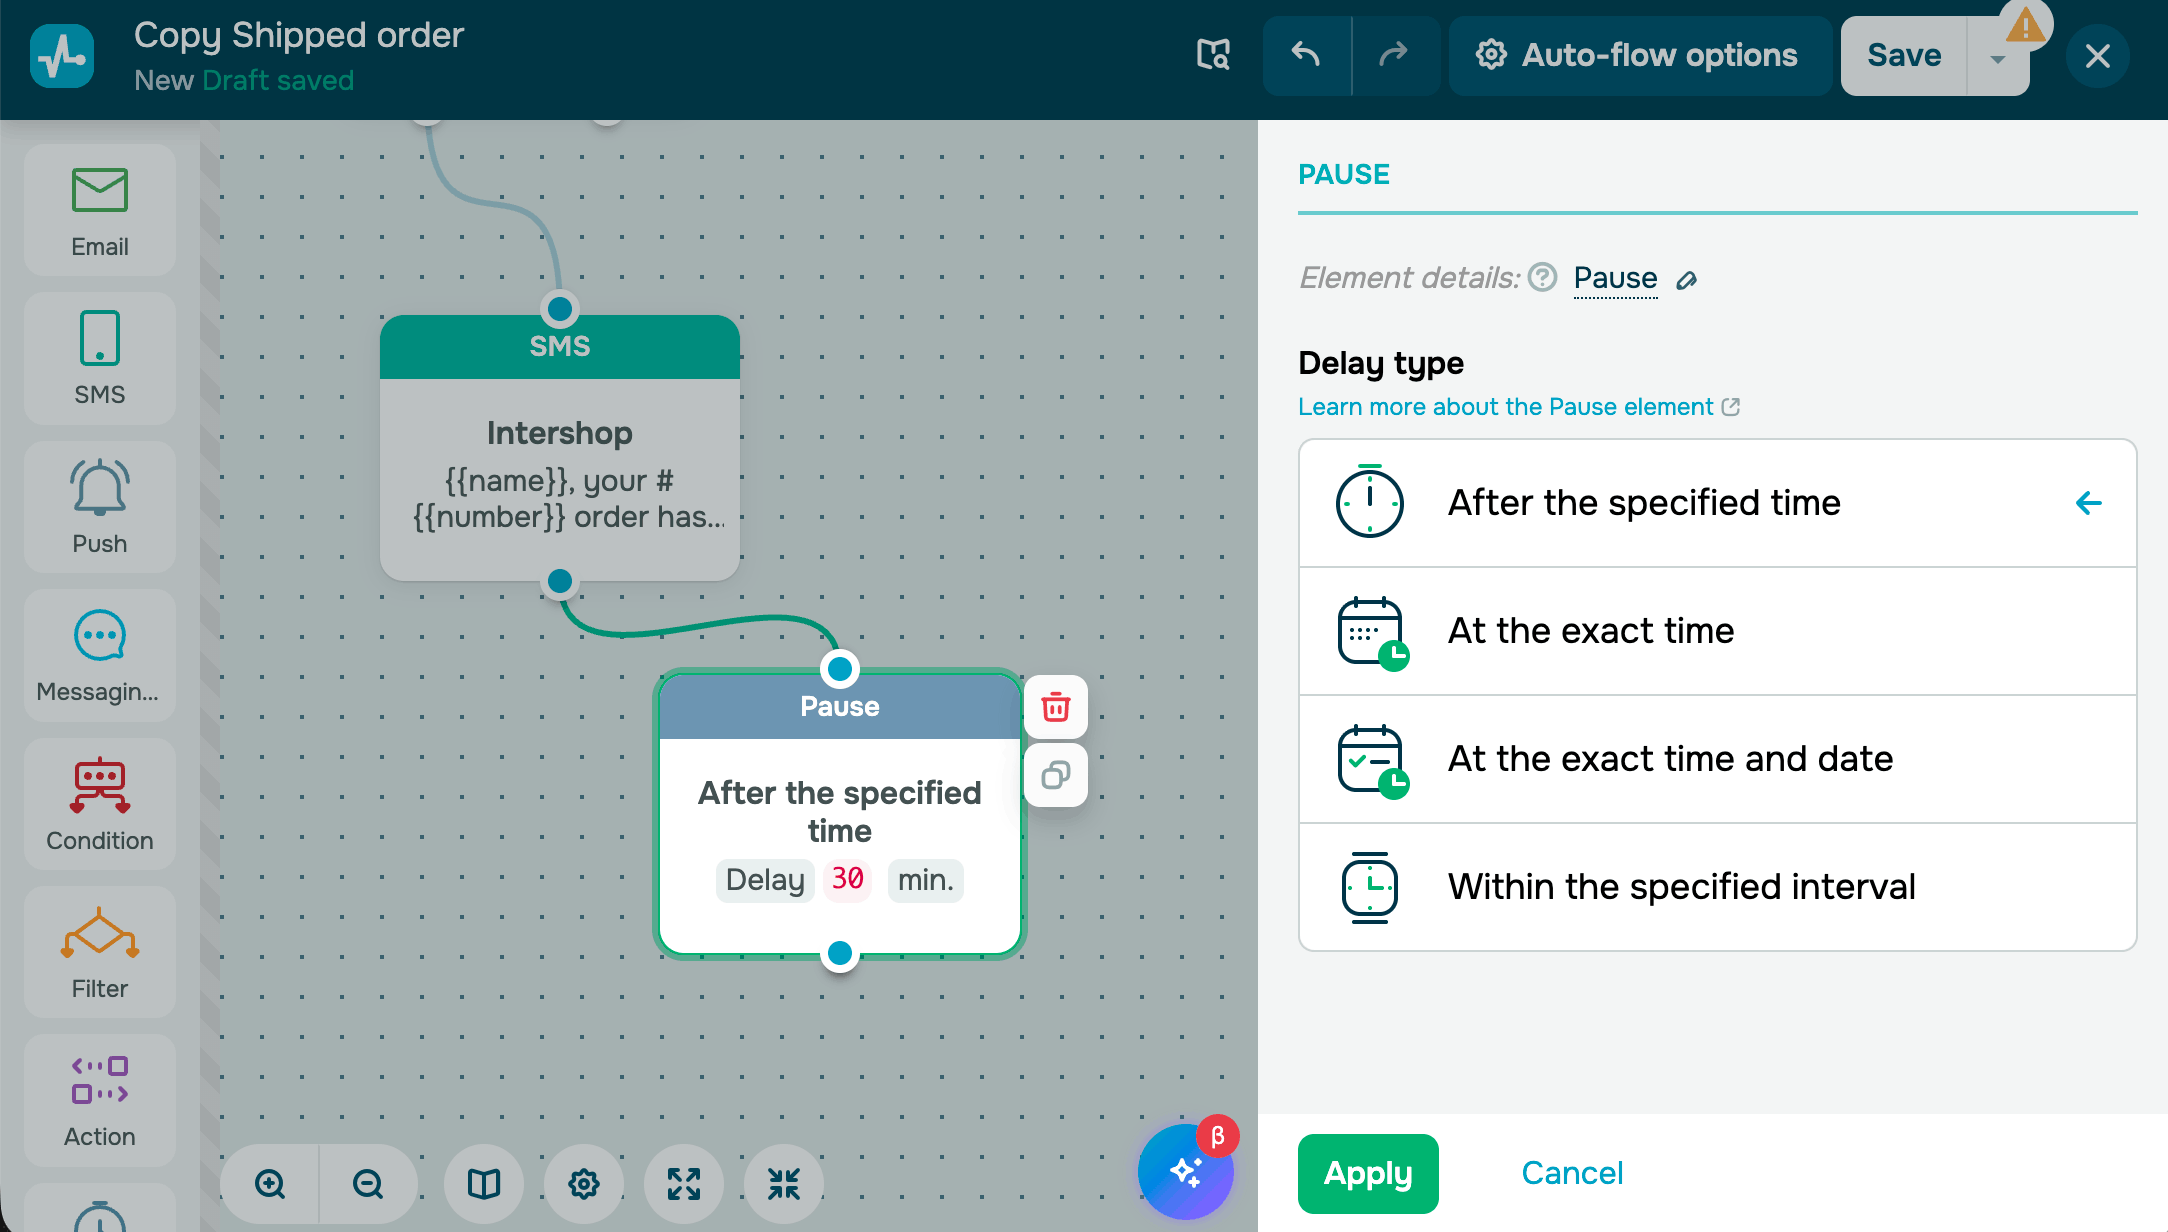
Pause
The Pause element holds a contact in the flow for a set amount of time before moving them to the next element. Use it to control the timing between messages or to delay an action until later.
Action
The Action element performs tasks in your connected tools. It can create records, update data, move contacts, or send webhooks. Use it anywhere in the flow when you need to update your system.
Actions are grouped by the SendPulse tool where they apply changes.
| Email service | Manages subscriber status and mailing list membership. |
| CRM | Manages deals, tasks, and contacts in your sales pipeline. |
| Courses | Enrolls students, manages access rights, resets progress, and sends course invitations. |
| Other | Sends data to external systems. |

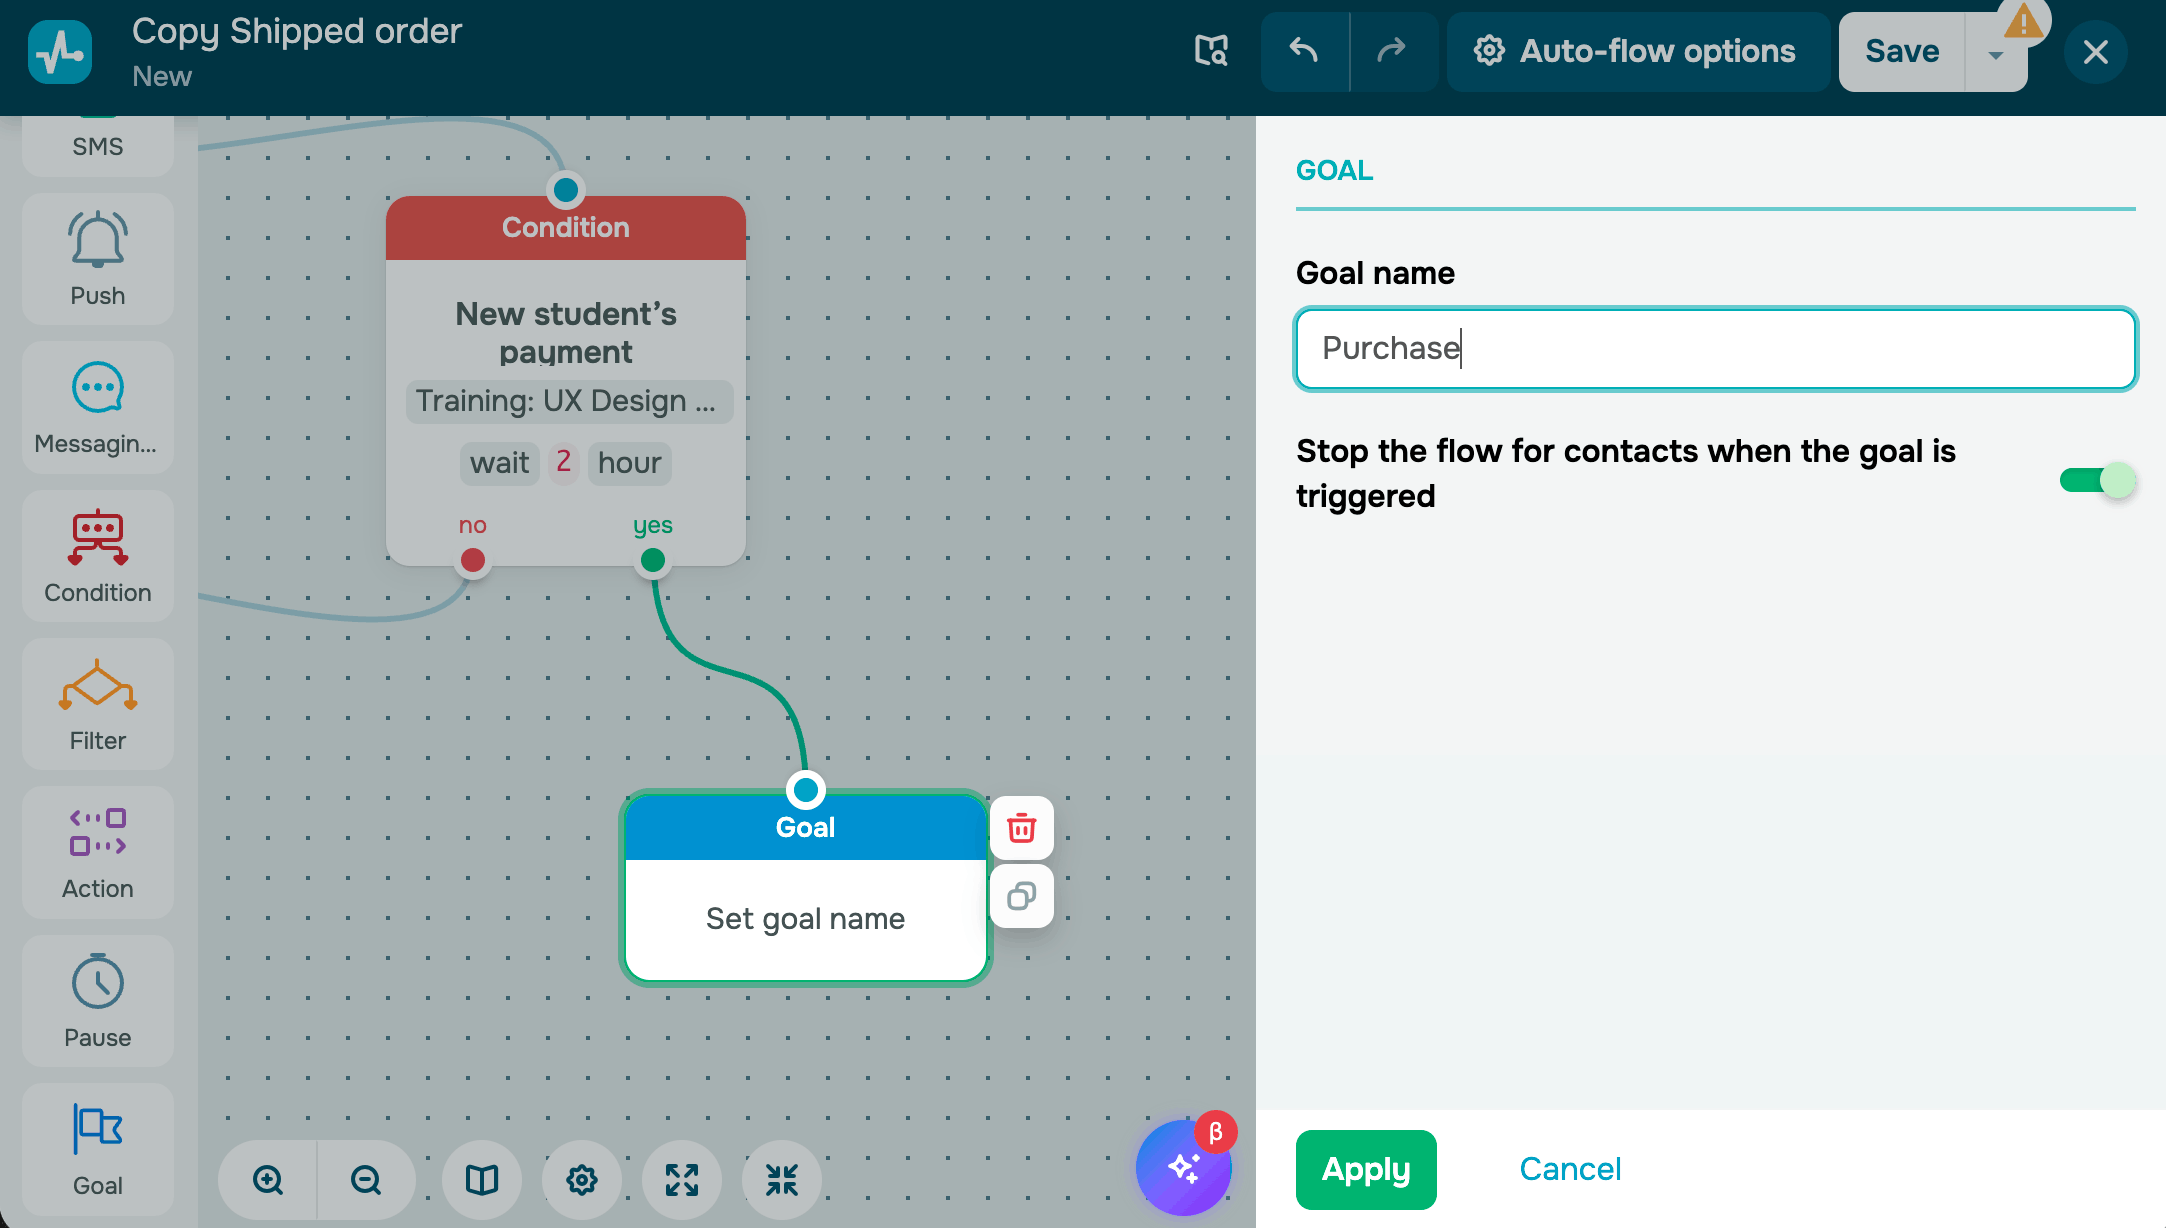
Goal
The Goal element defines a target outcome in the flow. When a contact reaches a Goal, it counts as a conversion.
Use it to track completed actions, such as purchases, registrations, or course completions. Contacts who reach the Goal element are removed from your active flow.
Once your flow is ready, activate it from the settings. You can track its performance in statistics. Each element shows how many contacts passed through, are waiting, or have been converted.
Last Updated: 09.09.2024
or