Automate your LinkedIn communication
With automated flows, your LinkedIn chatbot can reply to incoming messages based on keywords.
Here's how that works in practice: your chatbot can send your price list whenever a connection asks about your rates, log a lead's inquiry after business hours, or route a complex question to your team member.
Let’s talk about how to create a trigger and build an automated flow for your LinkedIn chatbot.
Create a trigger
Once you create a LinkedIn chatbot, you can build flows that run based on keywords in incoming messages. Each flow starts with a trigger, which is the event that tells your chatbot when to run it.
To view and manage triggers, go to the Chatbots section and select your LinkedIn chatbot. Open the Bot structure tab and choose a trigger:
| Standard reply | Runs the flow when a subscriber's message doesn't contain any of your keywords. This flow is set up by default.
You can add a message to let subscribers know that you will contact them during business hours. |
| Trigger | Runs the flow when an incoming message contains your keyword. For LinkedIn chatbots, use the Keyword trigger type.
Read more: Manage chatbot flow triggers. |
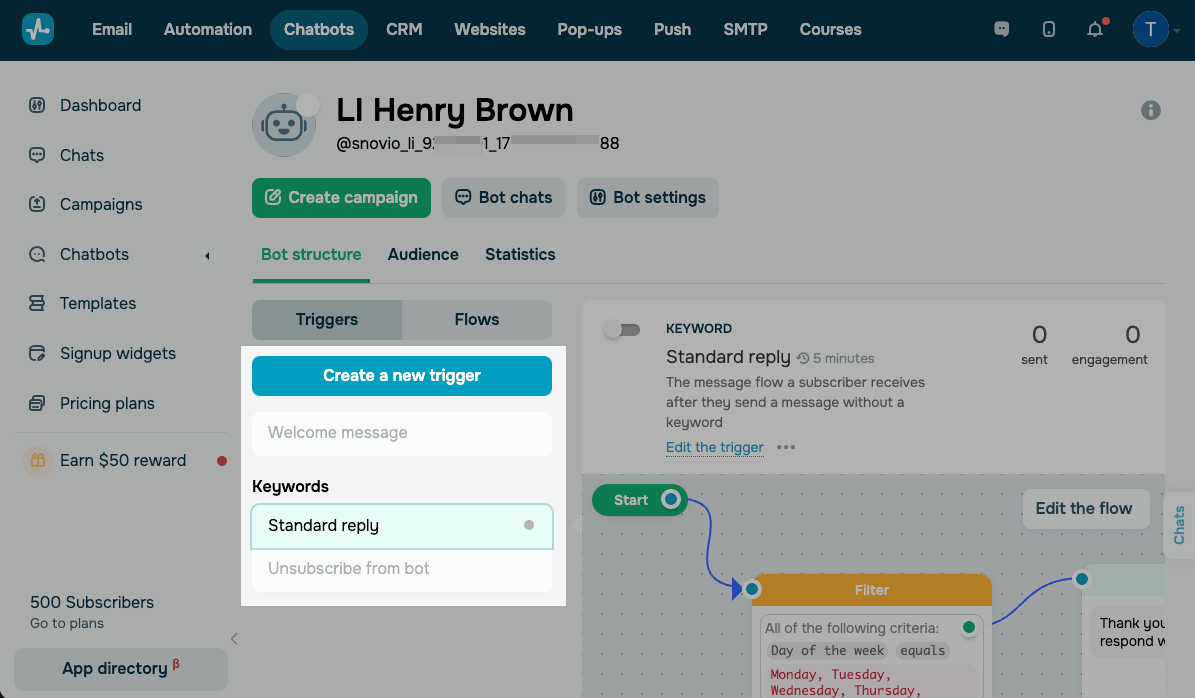
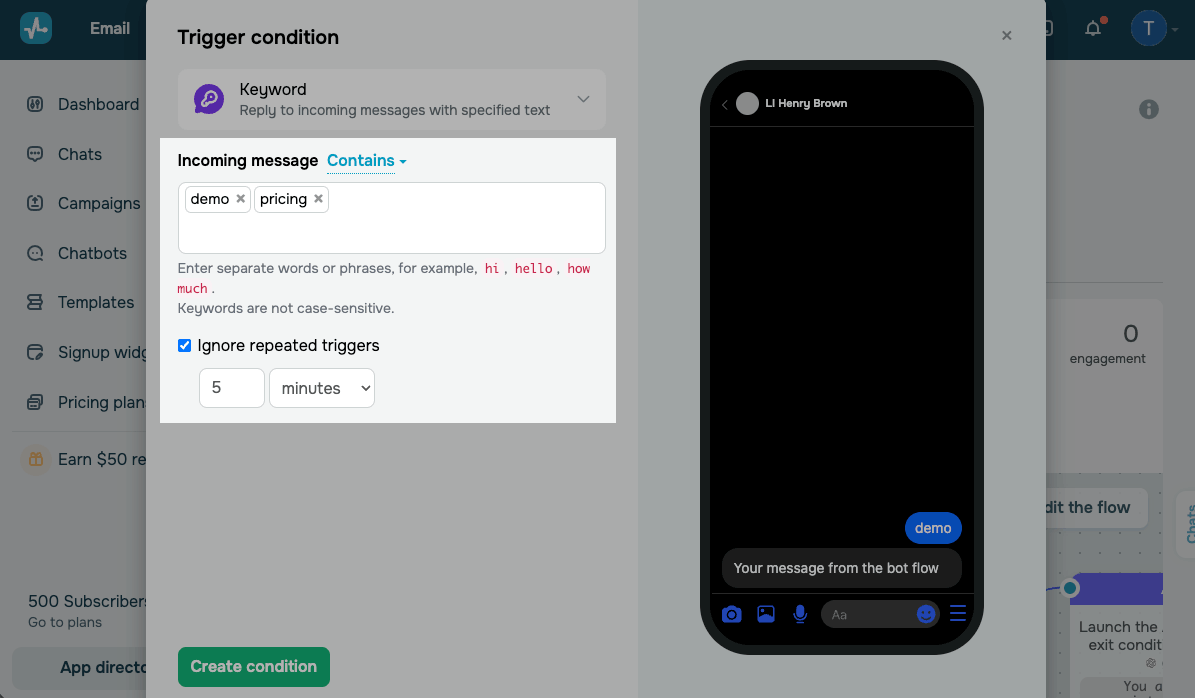
To add your own trigger, click Create a new trigger. Select a Keyword trigger condition. Enter separate words or phrases. Keywords are not case-sensitive.
To stop your flow from running repeatedly, keep the Ignore repeated triggers checkbox selected and set an interval. Click Create condition.
Suppose you create a trigger with demo and pricing as keywords to reply to leads outside of working hours. When someone messages you on Saturday, your flow will send a link to your booking page and log their inquiry. On Monday, your team will pick up the conversation with full context.
Your chatbot replies within a few minutes. Outside business hours, that's still fast enough — the lead gets an answer instead of waiting until Monday.
Build your flow
Plan your chatbot's architecture and setup first. A well-designed chatbot helps subscribers get answers to their questions and shares the information they need. Define your chatbot's tasks, split them into dedicated flows, and map out how elements should connect.
Once you create a trigger, link a flow to it. Select your trigger and click Create a flow.
To reuse a flow you've already built, click Bind existing.
Every messaging channel has its own limitations, so plan your flow accordingly. LinkedIn doesn't support buttons in messages, so build your flows around keywords, text, and links. Your chatbot also takes a few minutes to reply, so avoid flows that heavily depend on instant responses.
Learn more about chatbot types and development strategies on our blog and YouTube channel. To build your flow, use the elements covered in the next section, select a ready-made flow template, copy a flow from another chatbot, or generate a flow using AI.
Let's talk about chatbot builder elements. They're all optional, so you can stop even after the first message if you don't need anything else.
Start
Use Start to select the element that runs your flow. To begin your flow with an element, connect it to Start.
To change the starting element, connect another element to Start instead of the current one.
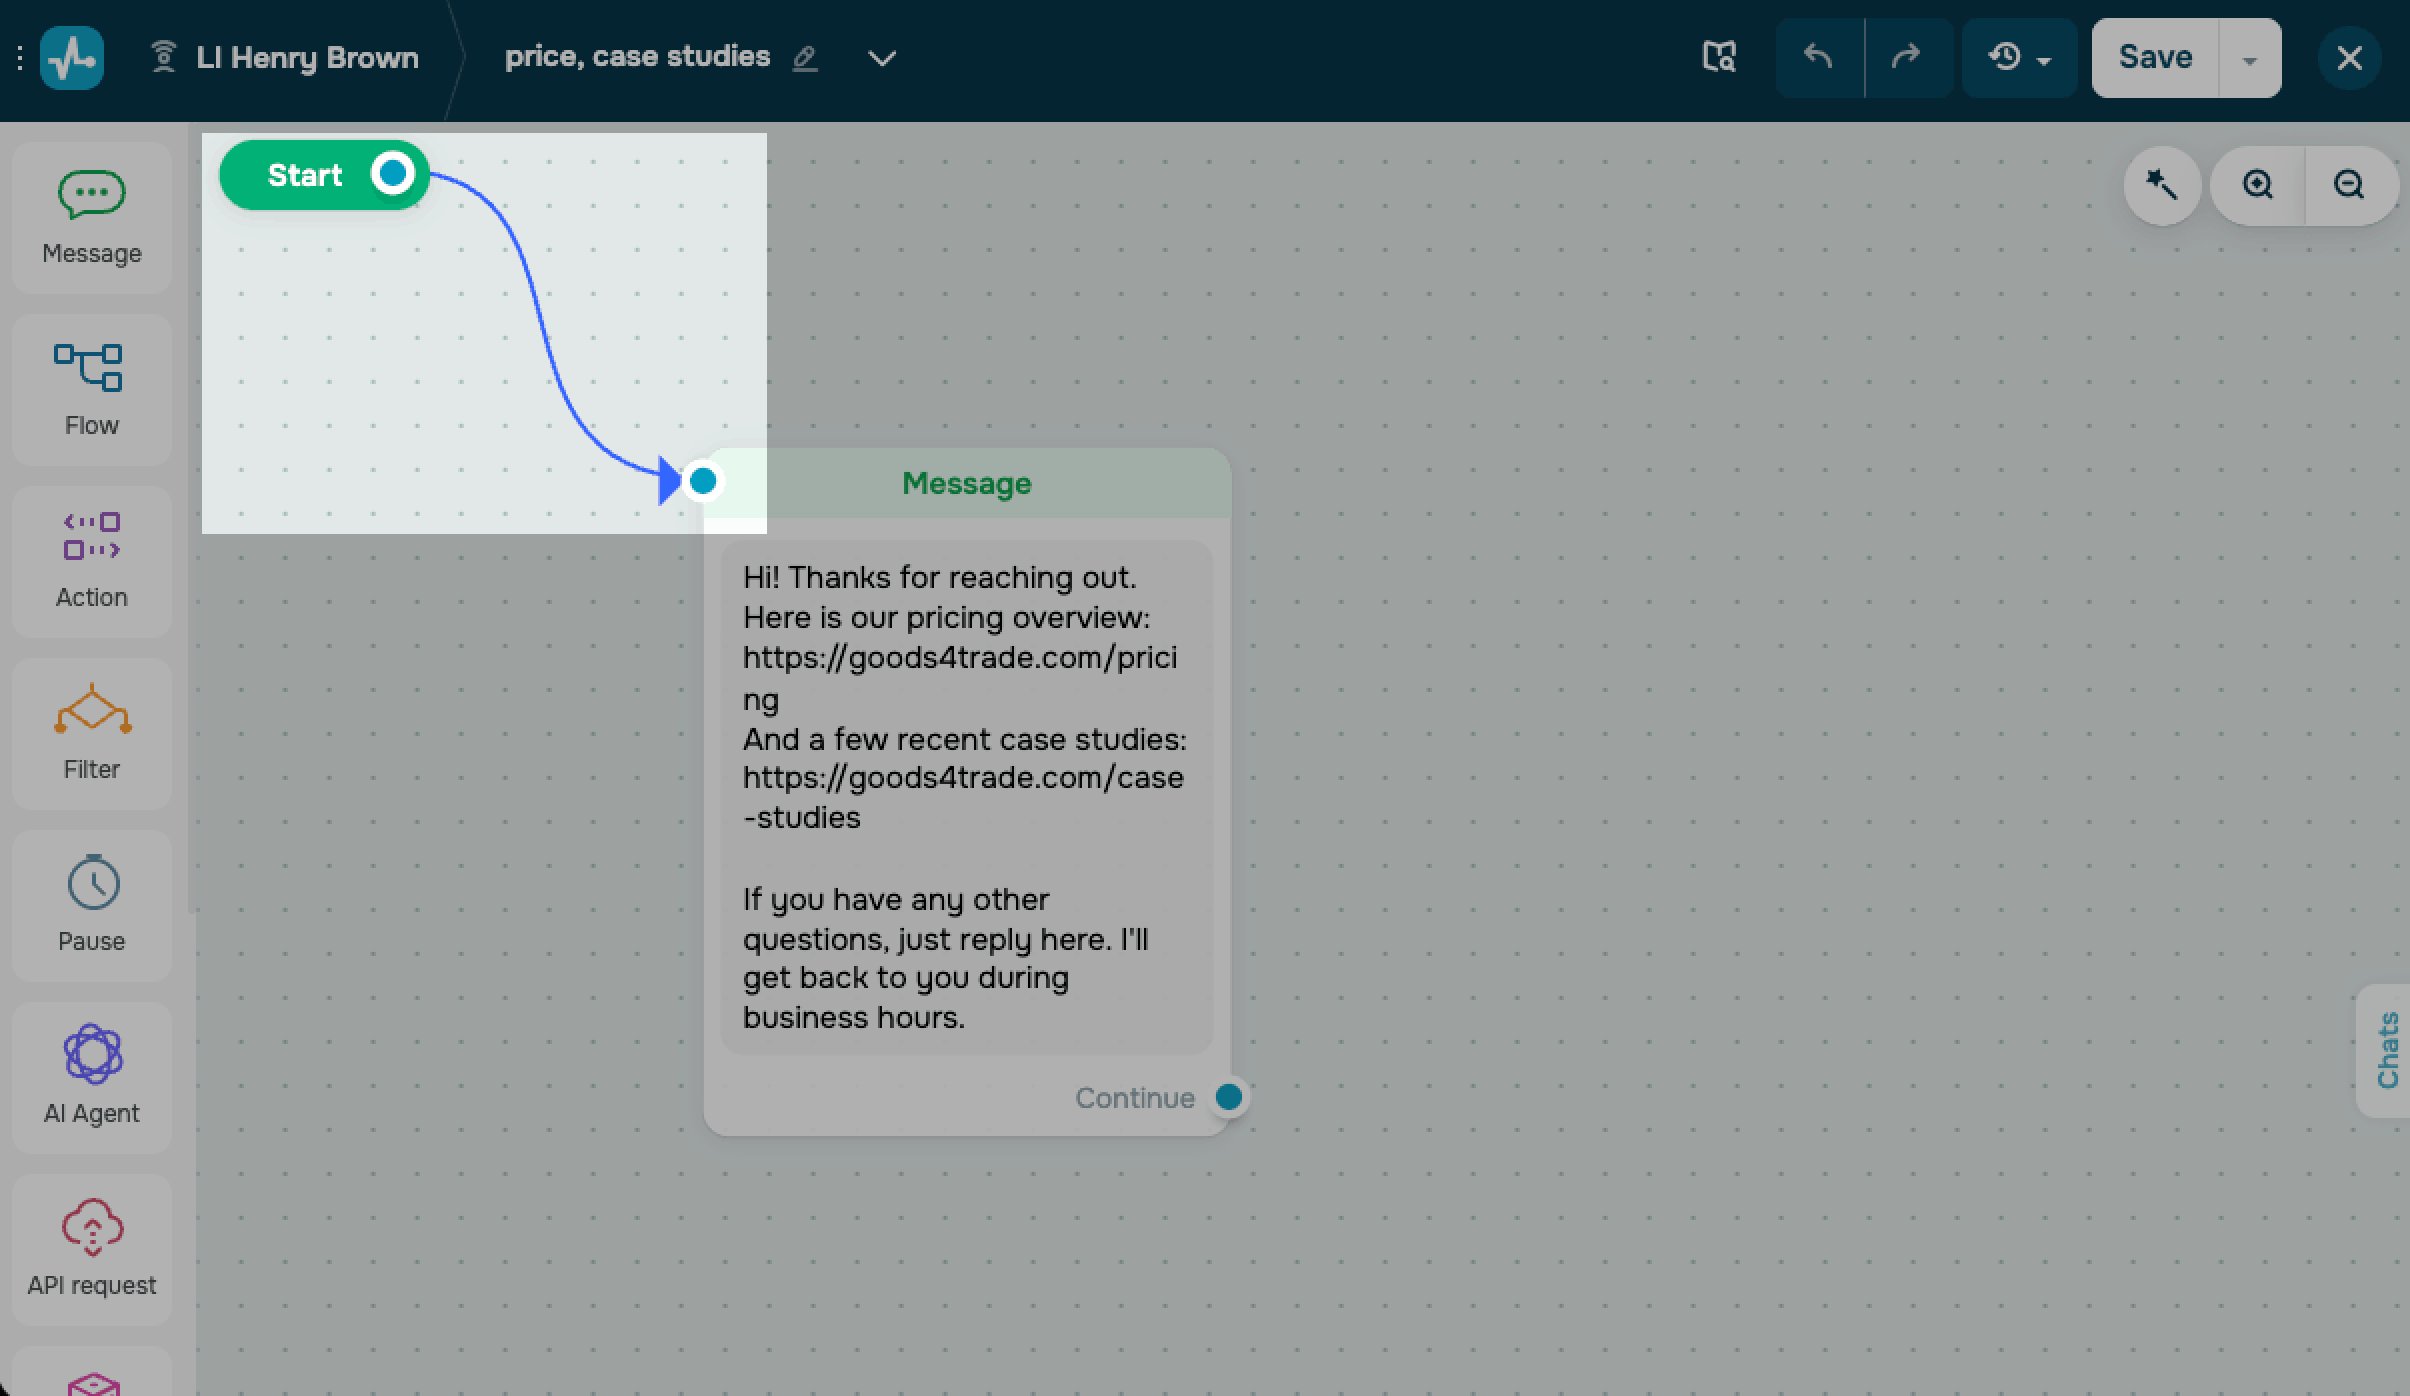
To see which trigger starts your flow, click Start.
The Message element
Use the Message element to reply to subscribers.
In LinkedIn flows, the Message element supports Text content only. Add your message, then include links to your website, calendar, or files directly in the text.
In the input field, enter up to 2,000 characters of your message text. You can add variables and emojis to personalize your message and format your text to highlight key points.
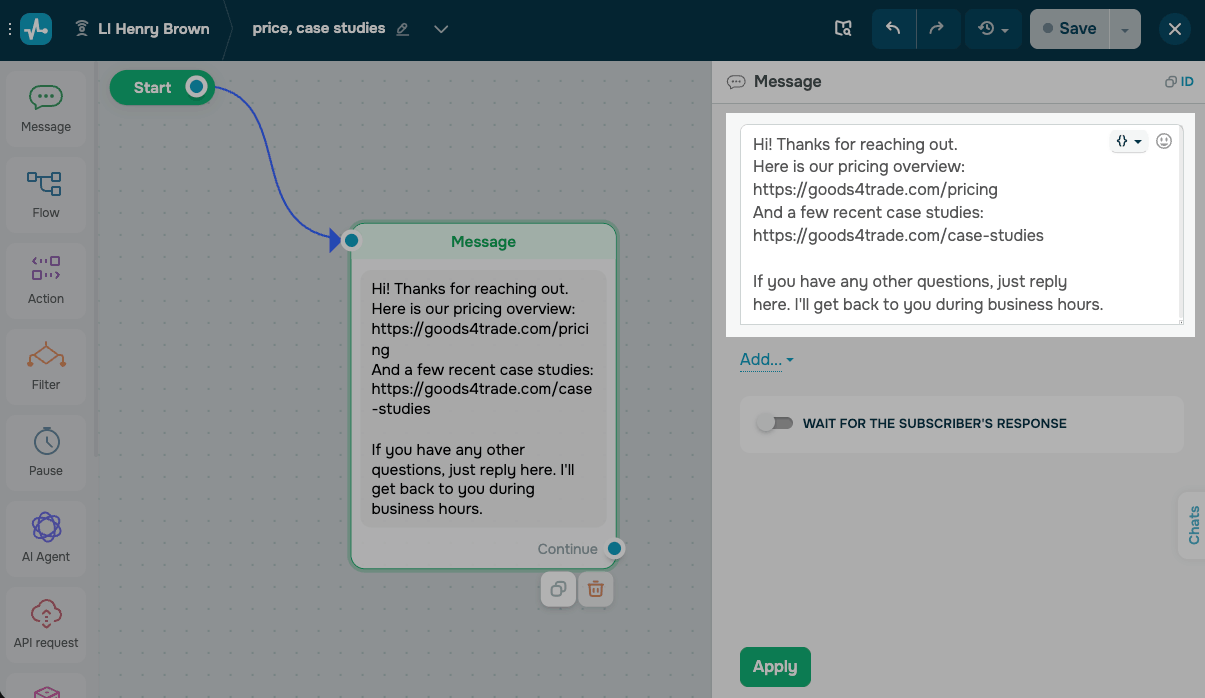
To capture and save subscriber replies to variables, turn on the Wait for the subscriber's response toggle. Choose a validation type, type in a message users will receive if they enter invalid data, and select the variable to which you want to save the data.
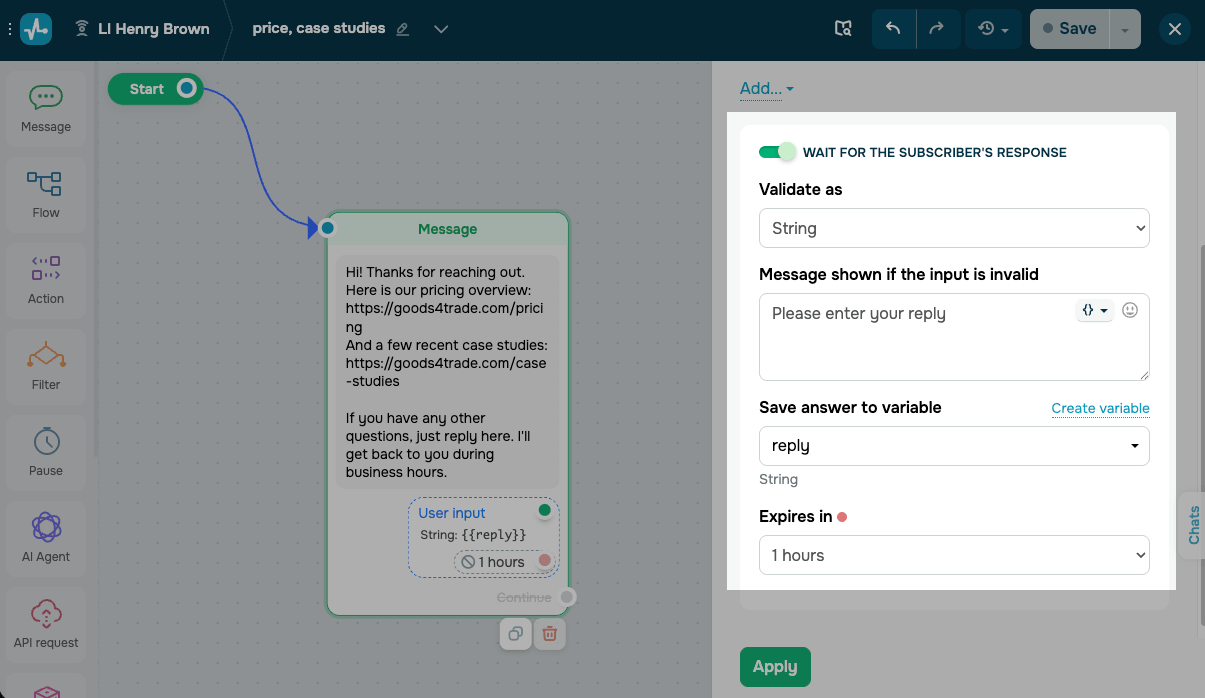
Expanding your flow
After a Message element, connect the next element using the Wait for the subscriber's response toggle, or keep the flow moving without waiting for a reply.
If you don't wait for a response, we recommend adding a Pause to check if the subscriber interacts with your flow and follow up after a set delay.
You can’t use the Continue and User input connectors on the same element.
The User input connector supports an unlimited number of elements. The Continue connector supports up to 100.
Connecting elements
To connect elements, drag a line from one element's blue dot to another.
To remove a connection, double-click the line, then click the button that appears. Make sure every element in your flow connects to at least one other element.
SendPulse highlights elements with empty fields in red. For example, a Message element added without any text shows up this way.
You can't save a flow that has empty required fields.
The Flow element
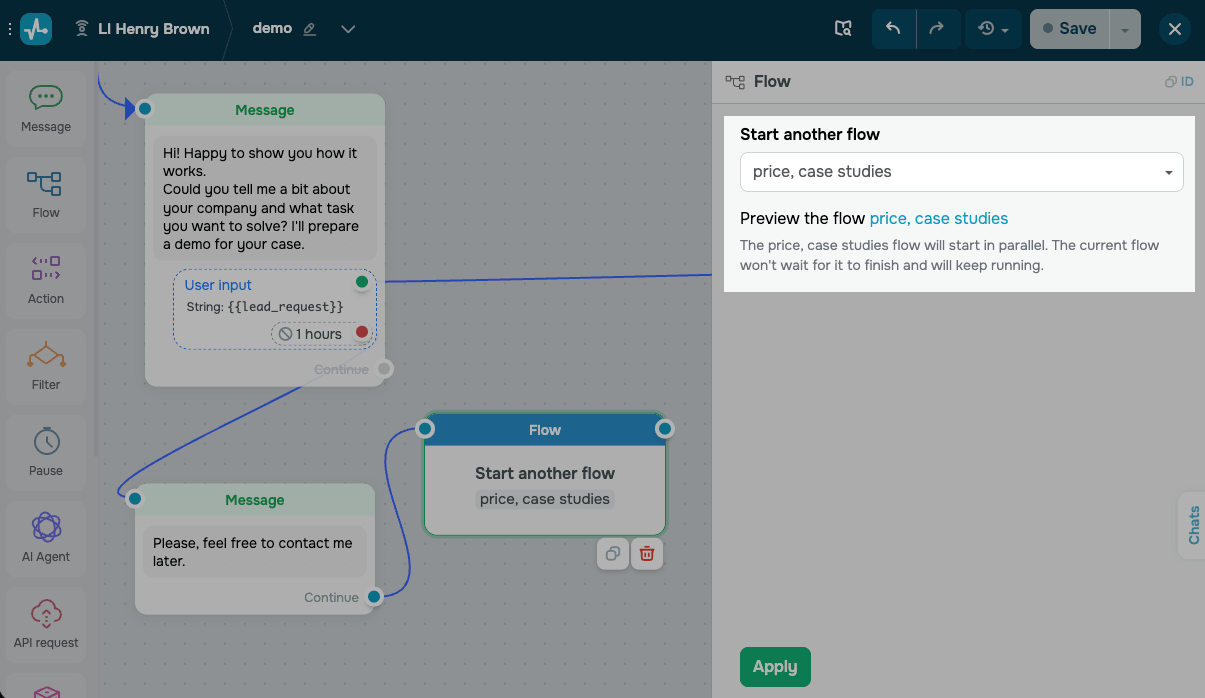
Use the Flow element to run another flow for your subscriber. In the Start another flow drop-down list, select an existing flow. You can pick any flow, even if you’ve created it for a different purpose. Your selected flow starts independently, and your current flow keeps running without waiting for it to finish.
The Action element
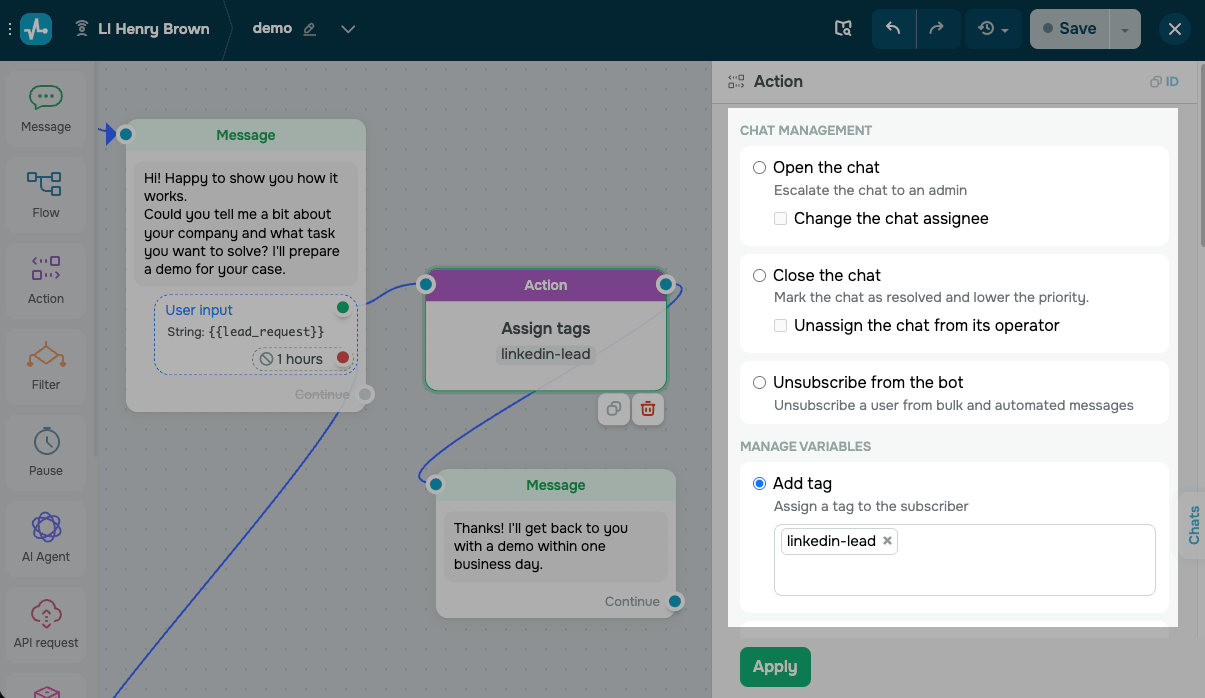
Use the Action element to manage conversation and subscriber data. You can start or end your chat, assign a tag, set a variable, add a note, or create a deal in the CRM system.
The Filter element
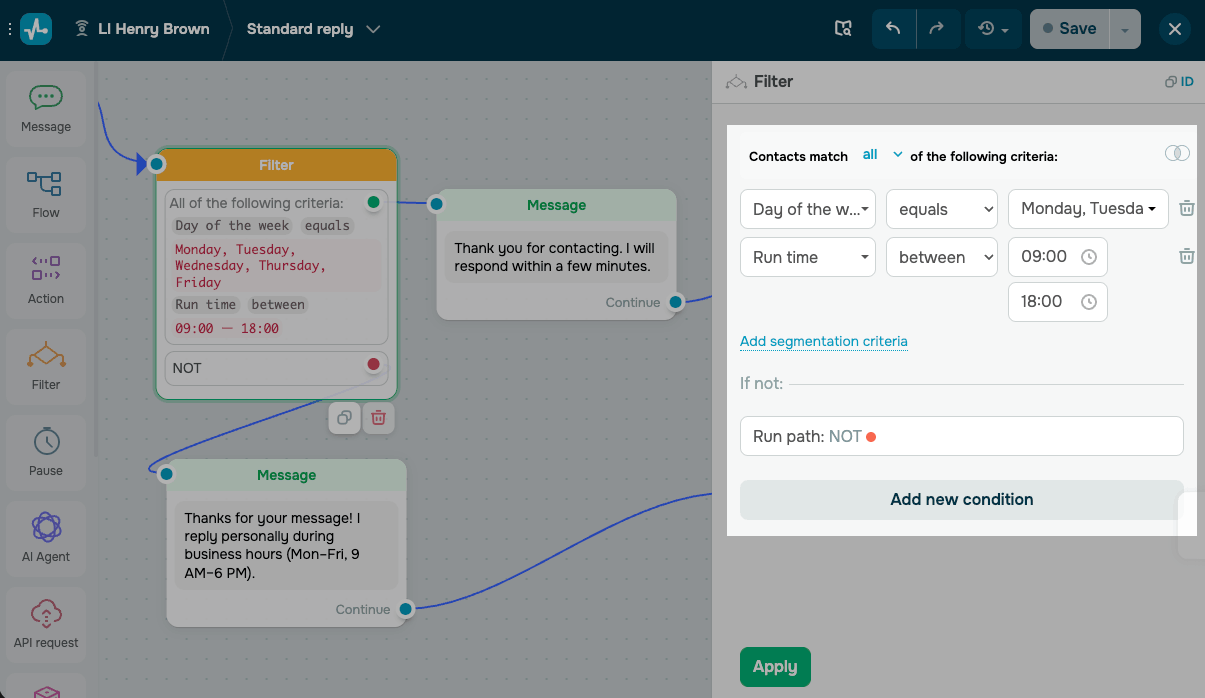
Use the Filter element to branch your flow based on subscriber data, tags, variables, or previous interactions.
Drag the Filter element from the left sidebar to the workspace, then place it after the element that will branch your flow. Then, choose a filter condition. You can combine conditions using the any or all operators or use independent conditions.
The API Request element
Use the API Request element to send requests to third-party servers to create objects or retrieve data. Get information and use it in your chatbot messages.
You can save the received data points to a variable or add them to a message as JSONPath.
Drag the API Request element from the left sidebar to the workspace, then connect it to the element after which you want to retrieve data. Choose a request type and enter the URL to send the request.
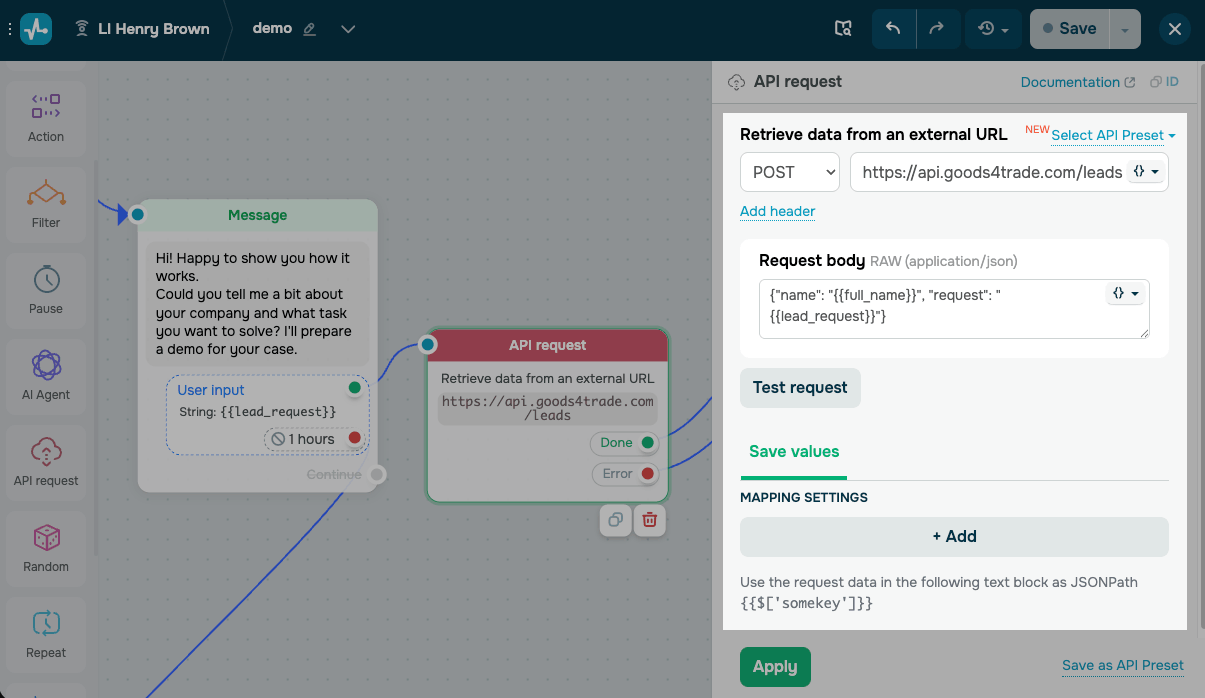
After testing the request and receiving a successful response, configure the mapping settings.
The Pause element
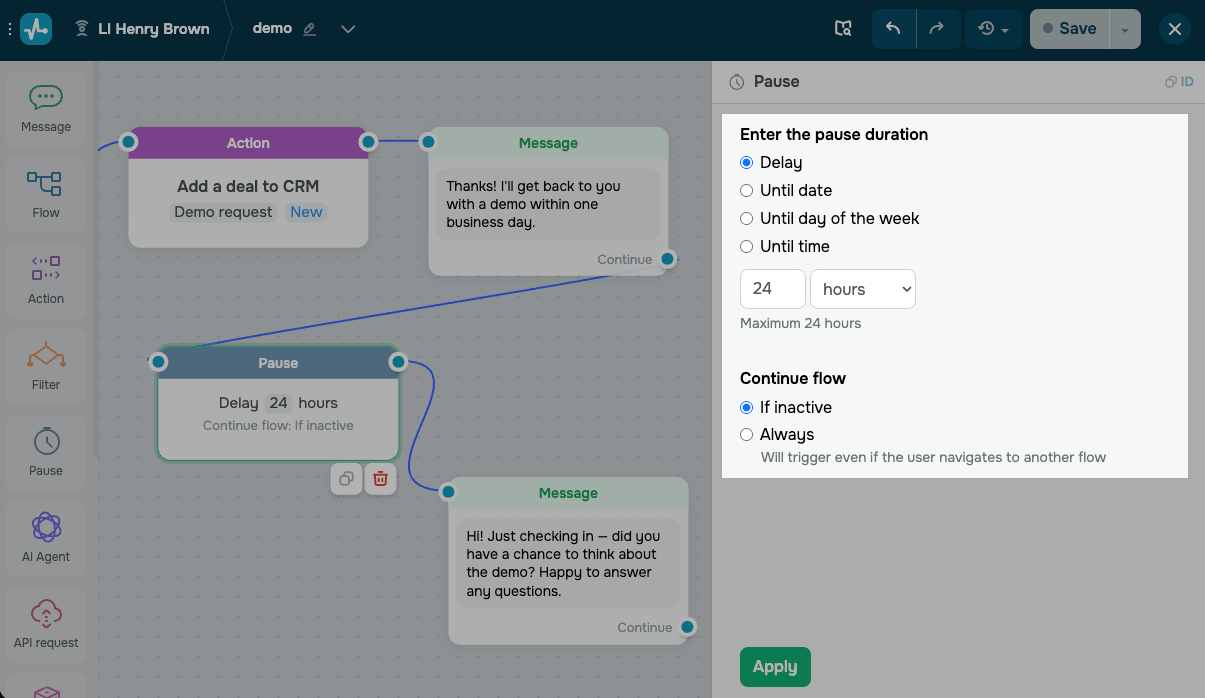
Use the Pause element to delay the next automated message sent to the subscriber. You can set the pause in seconds, minutes, or hours.
For example, add a pause before sending a follow-up message if the subscriber hasn't replied.
Select the Pause element from the left sidebar and configure it in the settings that appear.
The AI Agent element
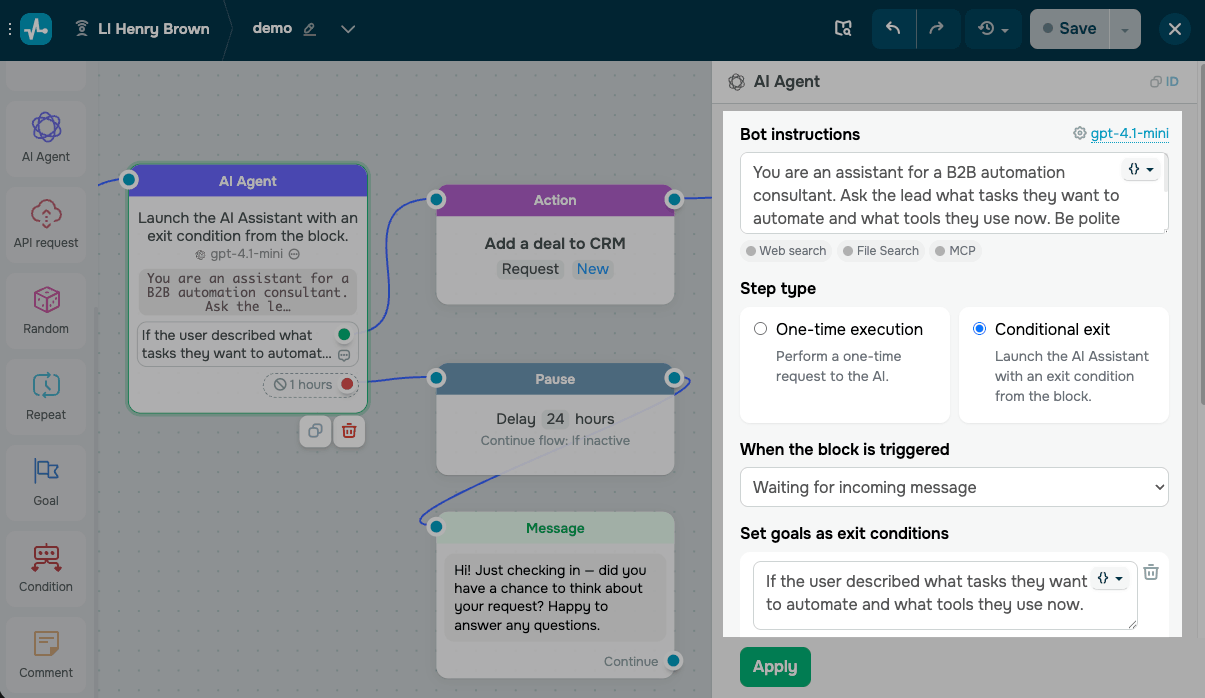
Use the AI agent element to add AI into your chatbot flows. It analyzes client needs and conversation tone, processes users' replies, and branches your flow based on goal progress.
Select the AI agent element from the left sidebar and configure it in the settings that appear.
The Random element
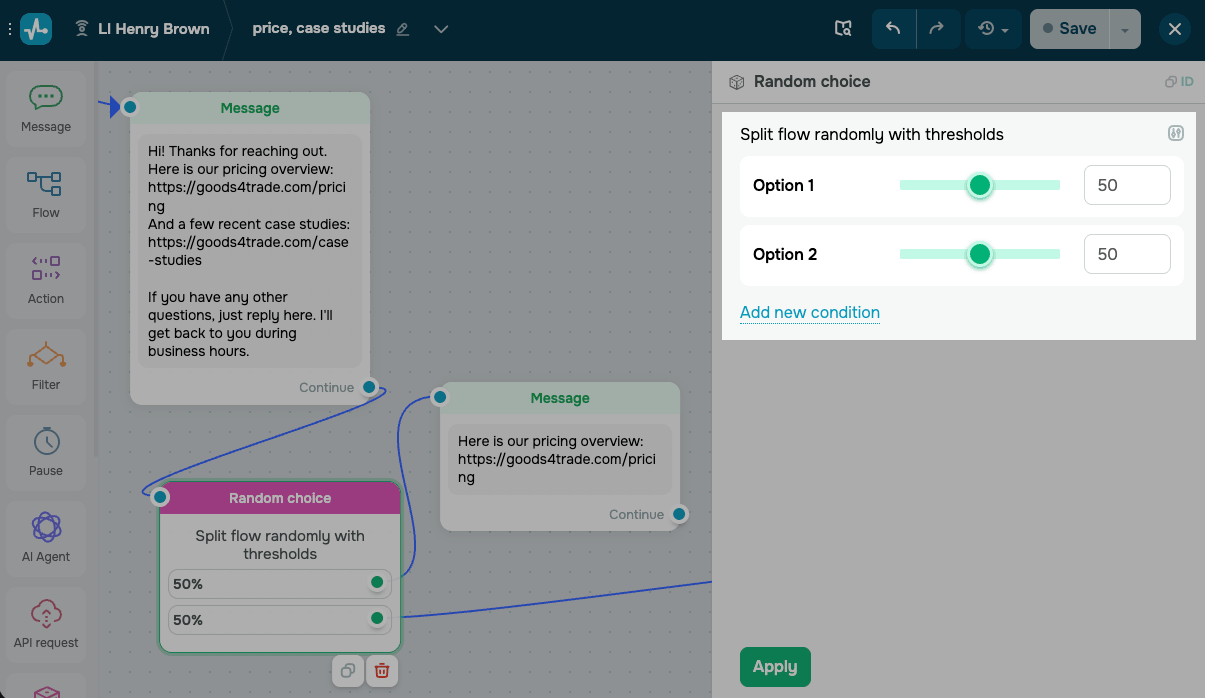
Use the Random element to split subscribers across flow branches at random, for example, to A/B test your reply options. You can customize the recipient group size for each option, send random information, and test different chatbot scenarios.
Drag the Random element from the left sidebar to the workspace, then connect it to the element that will branch your flow.
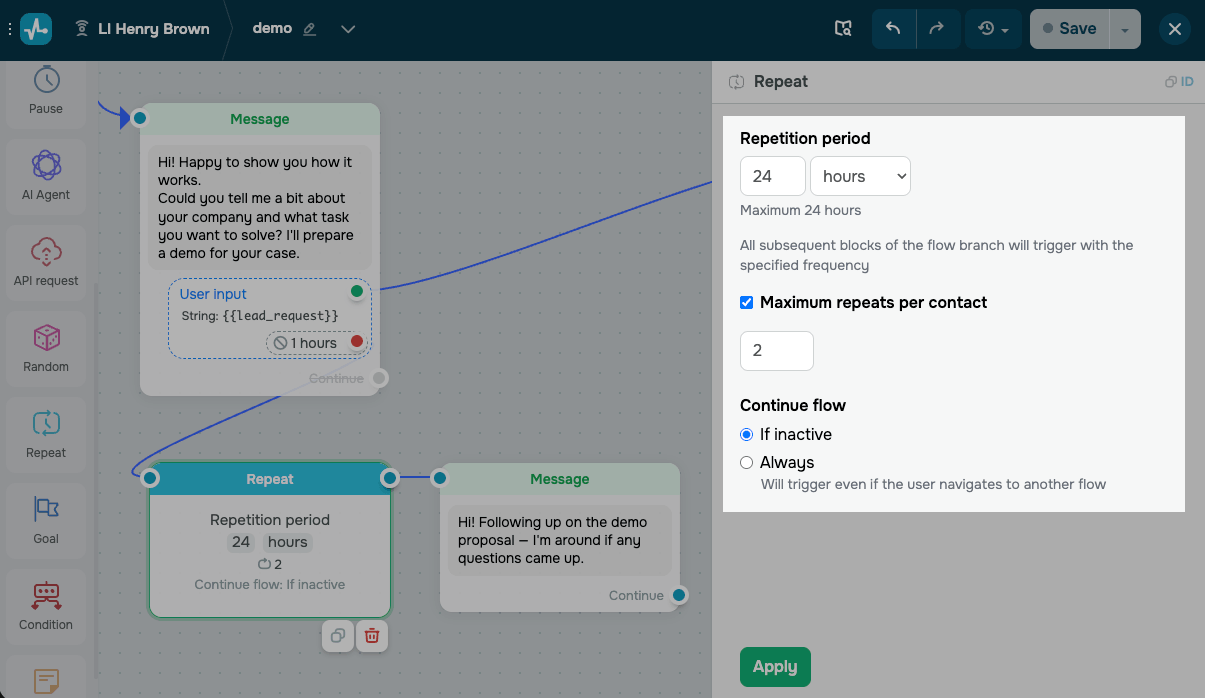
The Repeat element
Use the Repeat element to trigger actions at regular time intervals, such as automated reminders, notifications, or other updates.
Select the Repeat element from the left sidebar and configure it in the settings that appear.
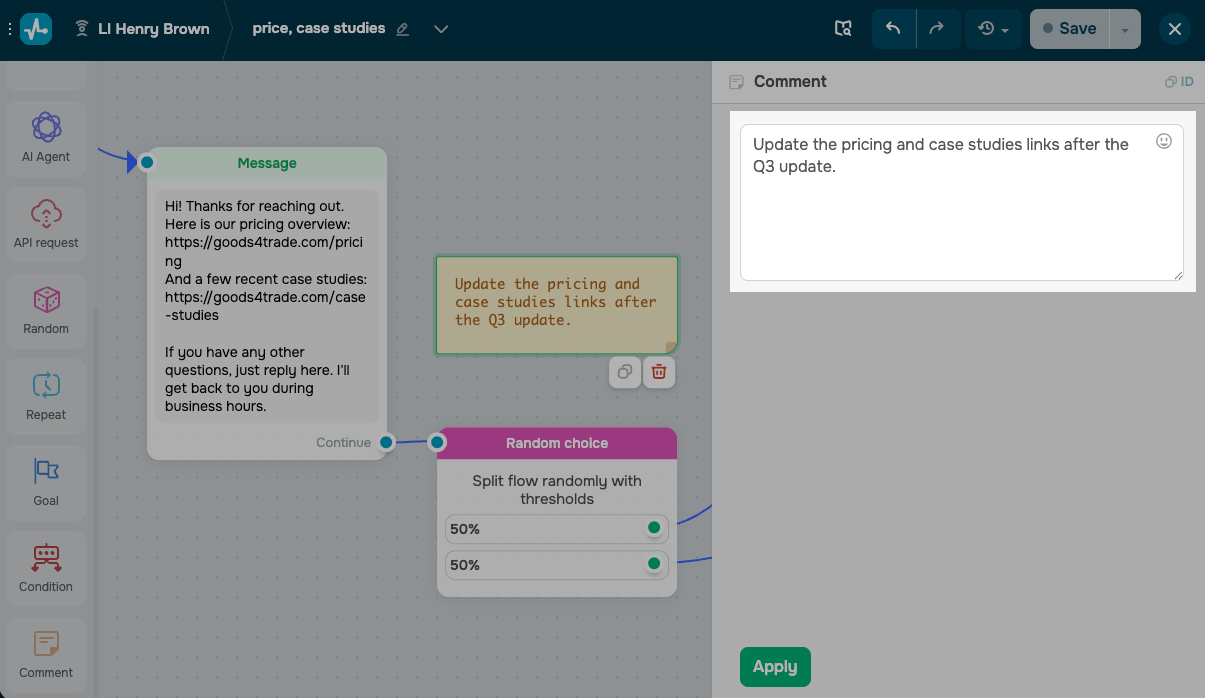
The Comment element
Use the Comment element to add internal notes about your flow’s performance for yourself or your team. This element is only visible to you and your team members.
Drag the Comment element from the sidebar, then enter your comment in the settings that appear on the right. You can add up to 512 characters of text, links, and emoji.
Save and test your flow
Once you’ve added and linked all the elements, save your flow before exiting. Click Save and exit.
Make sure your flow includes at least one Message or Action element.
To test the flow, send a message with your keyword to your connected LinkedIn account from a different account. The reply appears in the LinkedIn conversation and in your chats within a few minutes. It may take up to 5 minutes to receive the message and up to 4 minutes to send the reply.
Track the number of messages sent and the engagement rate for each trigger in the Bot structure tab.
Read more: Create a chatbot structure and Tips on chatbot flow design.
 Last Updated: 20.08.2026




or