Use SendPulse nodes in n8n
With official SendPulse nodes, you can integrate the platform with any other tools n8n supports and automate business processes without writing code.
For example, you can sync CRM data, send emails, manage chatbot subscribers, and retrieve Automation data right in the n8n visual editor.
With SendPulse nodes, you can:
- create contacts and deals in the CRM system when a trigger runs in n8n to sync data from forms, payment tools, and other connected tools;
- send transactional emails and create email campaigns based on events from other tools;
- run chatbot flows and send messages to subscribers on Facebook Messenger, WhatsApp, Instagram, TikTok, Telegram, Viber, and live chat;
- retrieve SendPulse data points, including mailing lists, campaigns, and Automation flows, and use them in your flow’s next steps.
Let’s talk about how to create a flow in n8n, install SendPulse nodes, connect your account, and configure flow elements.
Create a flow in n8n
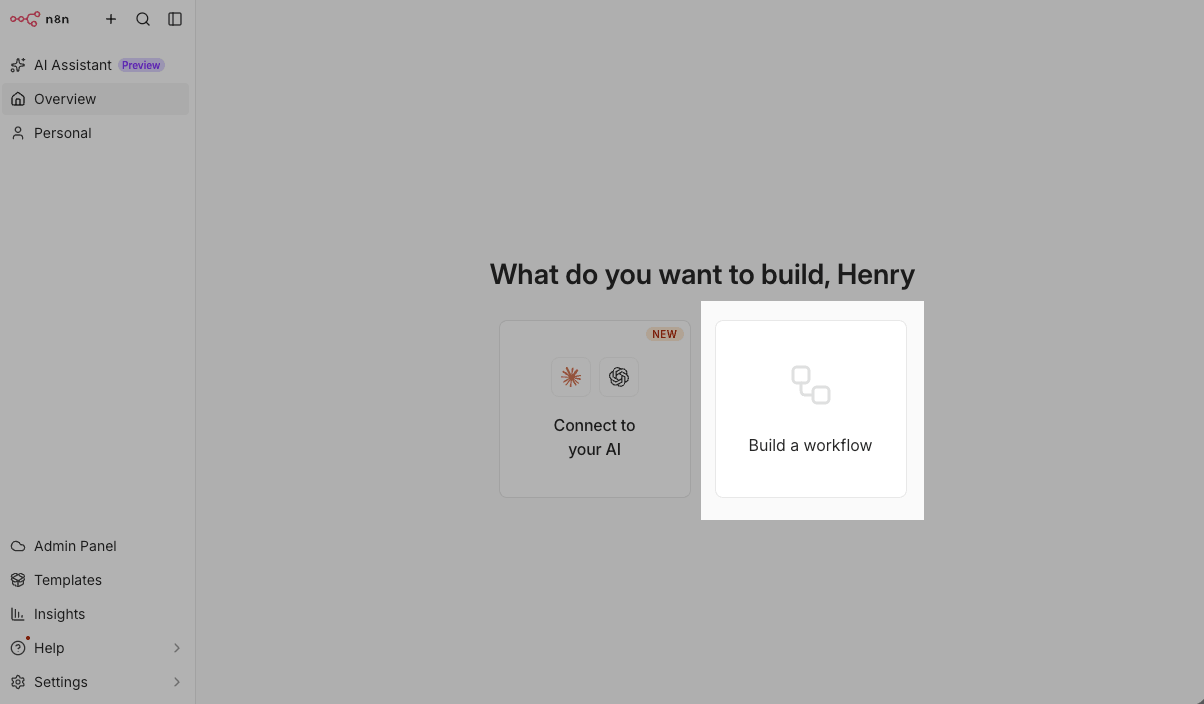
Log in to your n8n account. On the main page, click Build a workflow.
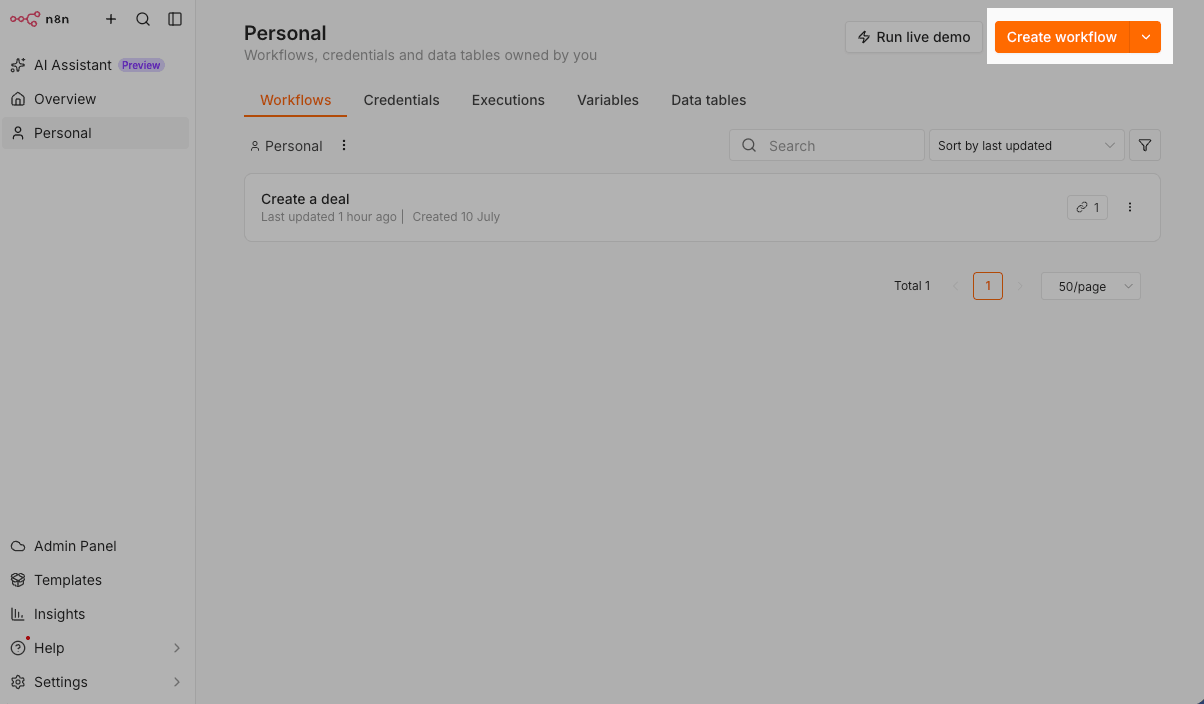
If you have already created flows, go to the Personal section and click Create workflow.
Install SendPulse nodes
n8n installs all SendPulse nodes as one package. After installation, each SendPulse tool is available as an individual node.
You can add only the nodes you need or combine elements from multiple nodes to build a multichannel flow.
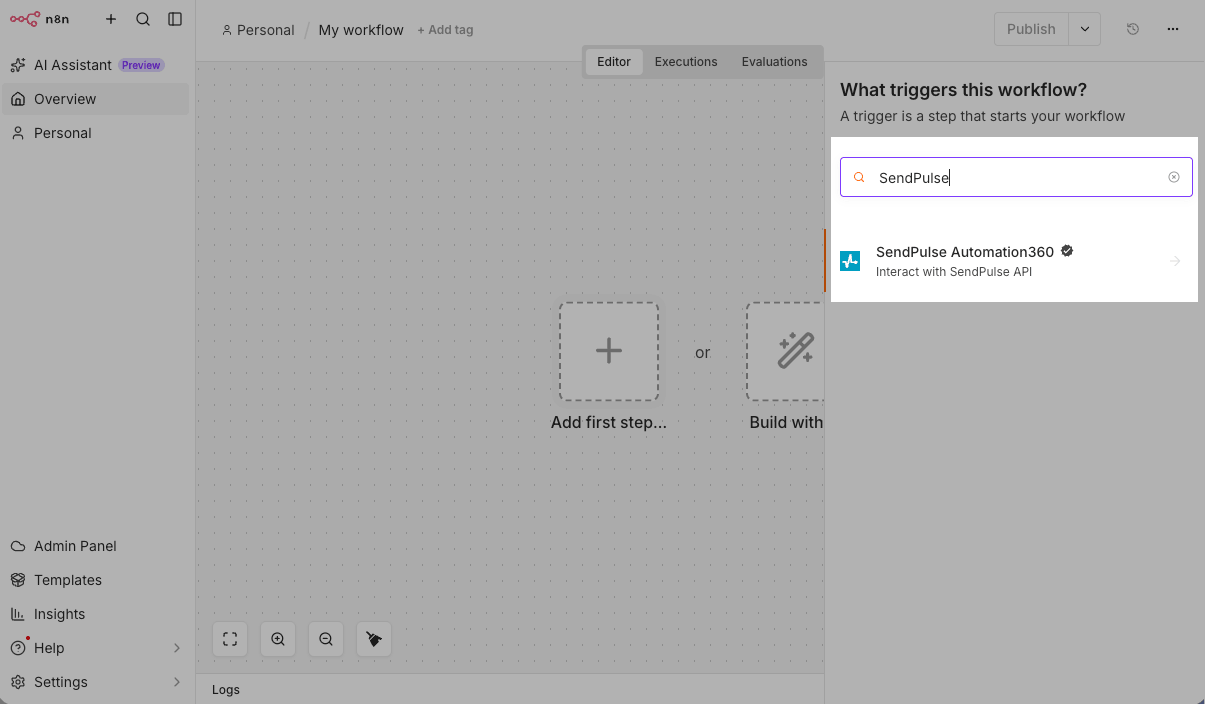
To install the nodes, click Add first step in your flow workspace, then enter SendPulse in the node search bar.
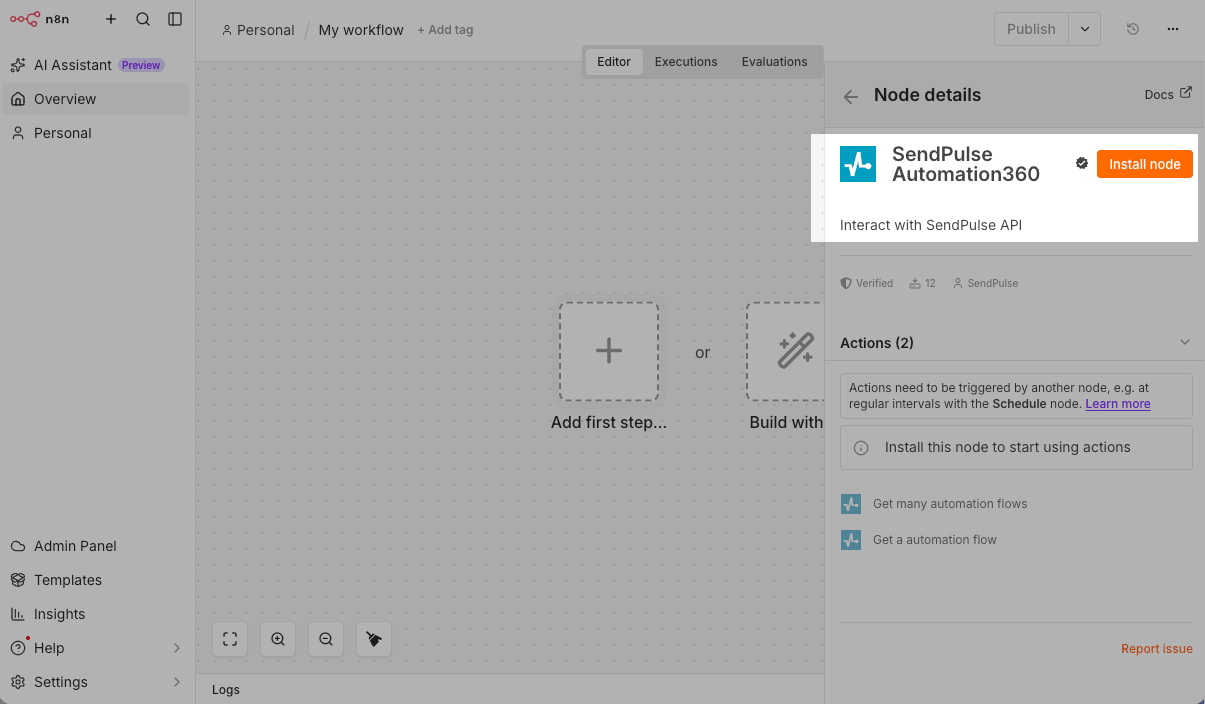
Select the SendPulse node from the search results. In the Node details pane, view the available actions and click Install node.
After installing the package, enter SendPulse in the search bar again, and all available SendPulse nodes will appear on the list. Select the nodes you need and add their elements to your flow.
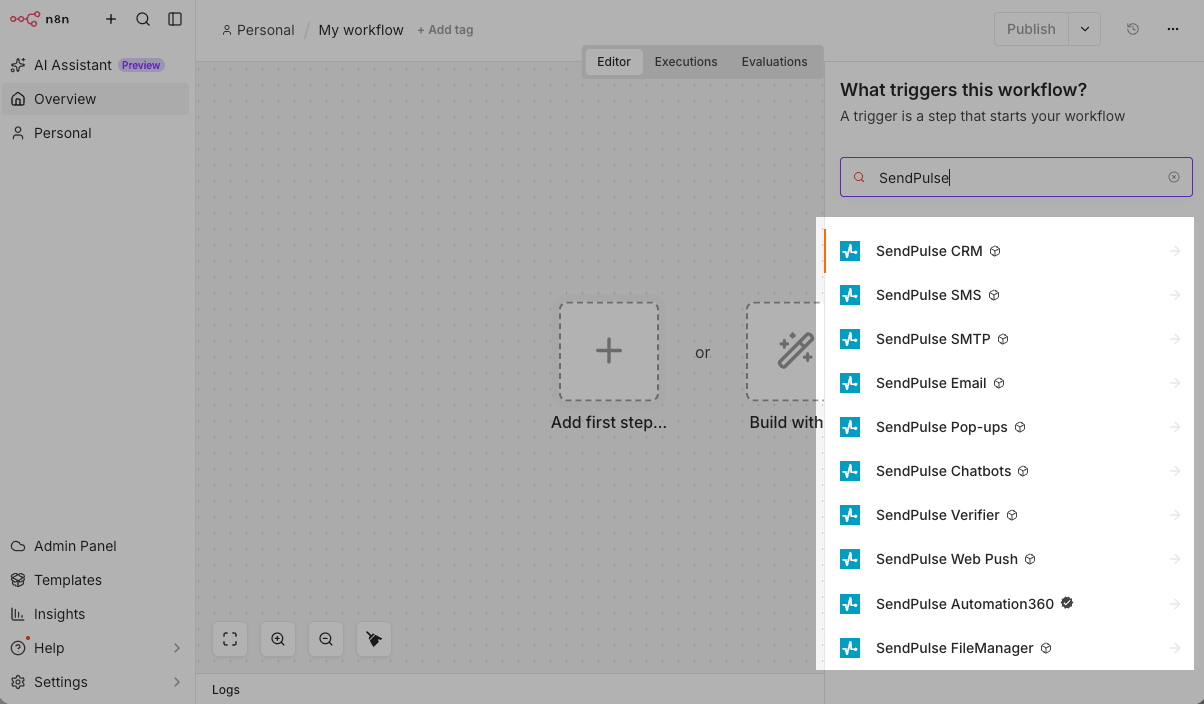
View SendPulse nodes
You can use the following SendPulse nodes and their element actions:
| SendPulse Email | Allows you to manage mailing lists and email campaigns.
Available actions: Get many mailing lists — retrieve a list of mailing lists; Get a mailing list — retrieve mailing list information; Create a mailing list — create a mailing list; Add emails to list — add email addresses to a mailing list; Get a list of all email campaigns — retrieve a list of email campaigns; Get a campaign info — retrieve campaign information; Create email campaign — create an email campaign. |
| SendPulse SMTP | Allows you to send transactional emails and view your sent emails.
Available actions: Get all SMTP emails — retrieve a list of emails sent through SMTP; Get SMTP email info — retrieve email information; Send an email via SMTP — send an email. |
| SendPulse CRM | Allows you to manage contacts, deals, and pipelines.
Available actions: Get many contacts — retrieve a list of contacts; Get a contact — retrieve contact information; Get a contact by external ID — retrieve contact information by external ID; Create a contact — create a contact; Get many deals — retrieve a list of deals; Get a deal — retrieve deal information; Create a deal — create a deal; Get many pipelines — retrieve a list of pipelines; Get a pipeline — retrieve pipeline information; Create a pipeline — create a pipeline. |
| SendPulse Chatbots | Allows you to manage your Facebook Messenger, WhatsApp, Instagram, TikTok, Telegram, Viber, and live chat chatbots.
Available actions: Get many bots — retrieve a list of chatbots; Get many dialogs — retrieve a list of conversations; Get a contact — retrieve contact data; Send a message to a contact — send a message to a contact; Run a flow — start a flow. |
| SendPulse Automation | Allows you to retrieve Automation flow data.
Available actions: Get many automation flows — retrieve a list of flows; Get an automation flow — retrieve flow information. |
| SendPulse SMS | Allows you to add contacts and create SMS campaigns.
Available actions: Add phone numbers to mailing list — add phone numbers to a mailing list; Create SMS campaign for mailing list — create an SMS campaign for a mailing list. |
| SendPulse Web Push | Allows you to retrieve website data and create web push campaigns.
Available actions: Get many websites — retrieve a list of websites; Get a website — retrieve website information; Create web push campaign — create a web push campaign. |
| SendPulse Pop-ups | Allows you to retrieve project and pop-up data.
Available actions: Get many projects — retrieve a list of projects; Get many popups — retrieve a list of pop-ups in a project. |
| SendPulse Verifier | Allows you to verify email addresses in your mailing lists.
Available actions: Verify a mailing list — verify a mailing list; Get verified mailing lists — retrieve a list of verified mailing lists; Get mailing list verification results — retrieve mailing list verification results. |
| SendPulse FileManager | Allows you to upload files, such as images, for emails and chatbot messages.
Available actions: Upload a file — upload a file. |
Connect your SendPulse account
To let nodes take actions in your SendPulse account, connect it using your Client ID and Secret.
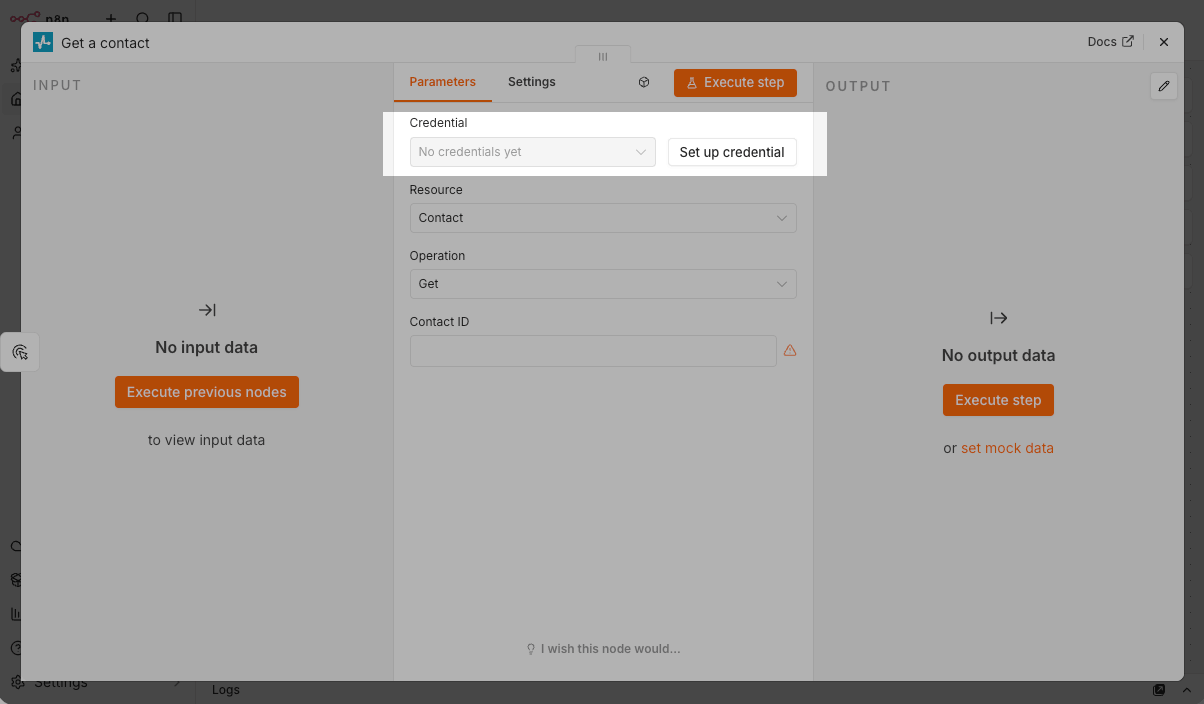
Go to the element you added and click Set up credential in the Credential field.
If you have already added credentials, select them from the list, or click Create new credential.
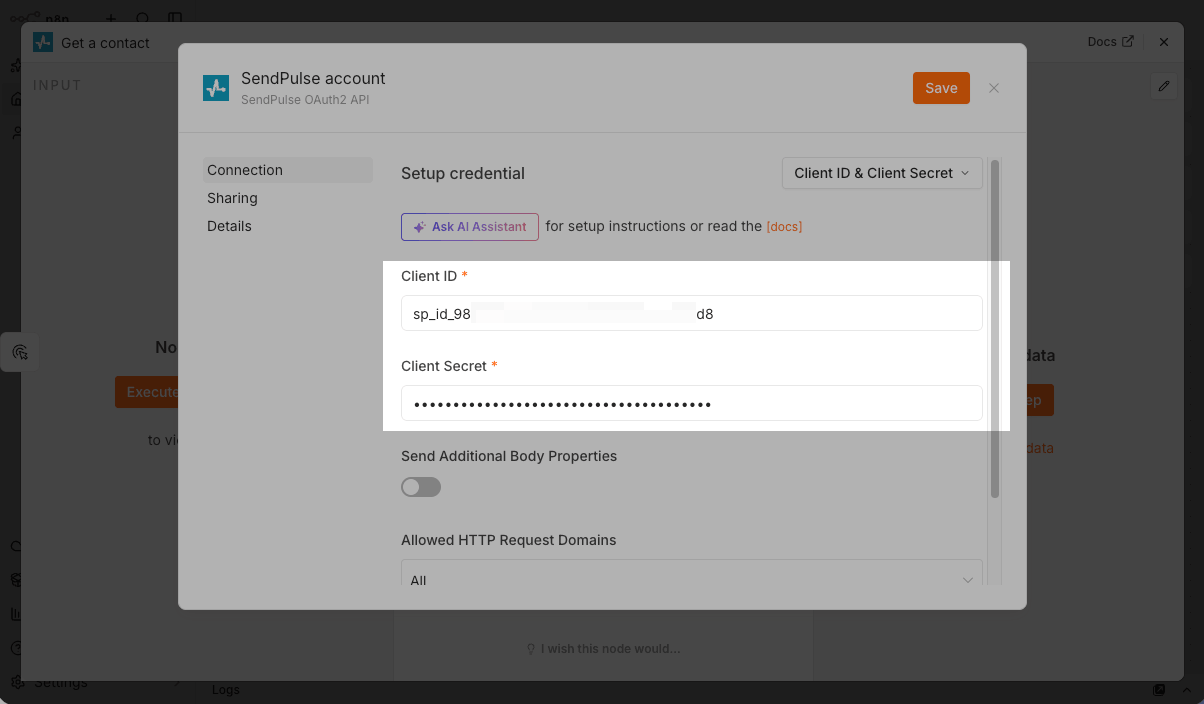
In the SendPulse OAuth2 API connection window, select the Client ID & Client Secret authorization method.
In your SendPulse account, go to Account settings > API and open the Client credentials tab in the API access section. Copy the Client ID and Secret field values.
You can only copy your Secret value right after you generate your keys.
Paste the copied values into the Client ID and Client Secret fields in n8n, then click Save.
Configure flow elements
Once your account is connected, set up each flow element by choosing its action and the data it should use.
Let's go over an example of retrieving CRM contact data.
Select the SendPulse CRM node, then add the Get a contact element to your flow. n8n automatically fills in the Resource and Operation fields based on your selected action.
Fill in the required fields. In our example, we enter a contact ID from a CRM contact card in the Contact ID field.
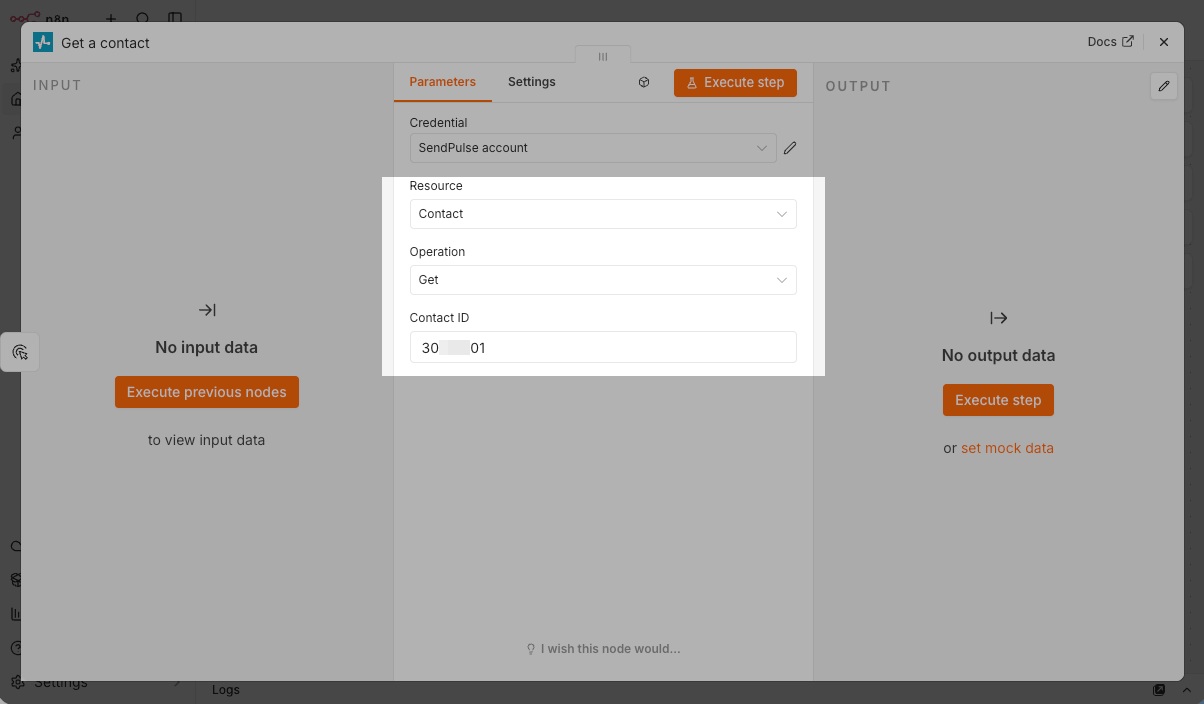
To use variables from previous flow elements in field values, click Execute previous nodes in the Input section, then drag your variable to the field.
To test your setup, click Execute step. If the request is successful, the retrieved data will appear in the Output section, and you can use it in your next flow elements.
If SendPulse nodes don't include the operation you need, send a request through the HTTP Request element using any method from the SendPulse Service REST API.
Read more: Integrate SendPulse tools with n8n.
Start your flow
SendPulse nodes don't have their own triggers. If you add a SendPulse element as your first step, n8n automatically adds the When clicking 'Execute workflow' manual trigger.
To replace it, open the trigger, click Explore other ways to trigger your workflow, and select another option, such as On a schedule to run your flow regularly or On webhook call to start your flow after an event in another tool.
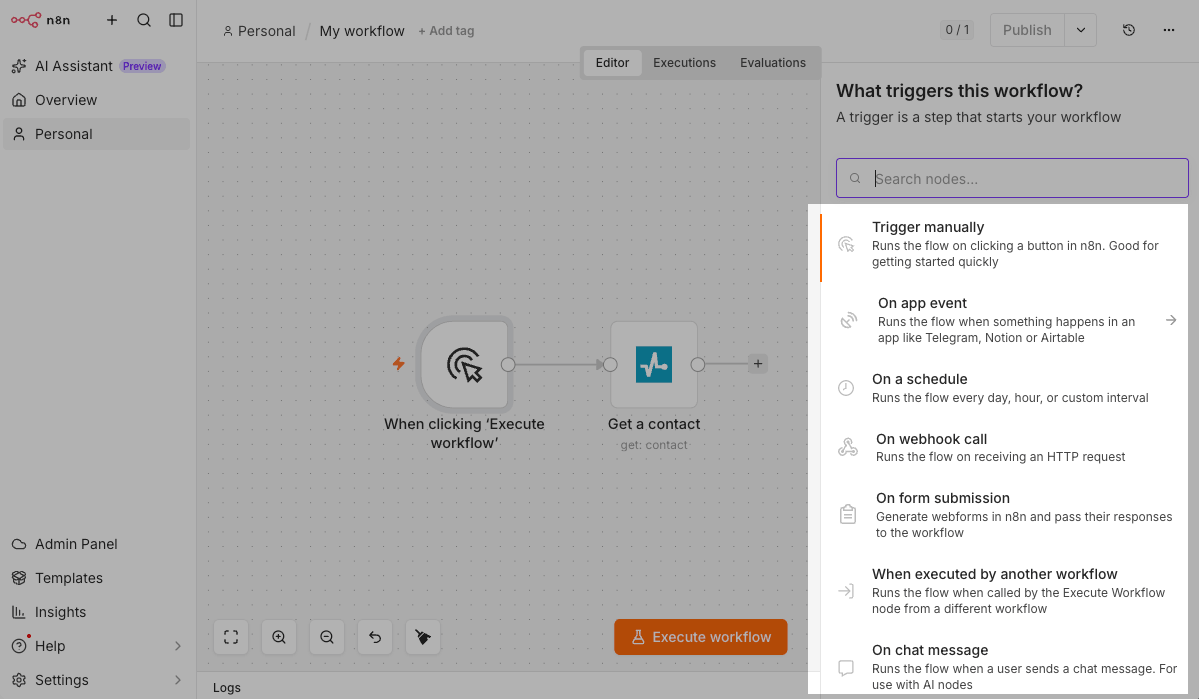
To start an n8n flow based on SendPulse events, use the On webhook call trigger and SendPulse webhooks, such as global chatbot webhooks, automated flow webhooks, email webhooks, and successful payment webhooks.
To test your entire flow, click Execute workflow at the bottom of the workspace. To activate your flow, click Publish.
SendPulse nodes will now take actions in your account every time your n8n flow trigger runs.
CRM deal flow example
Let's go over an example of a flow that retrieves CRM data and creates a deal in a selected pipeline.
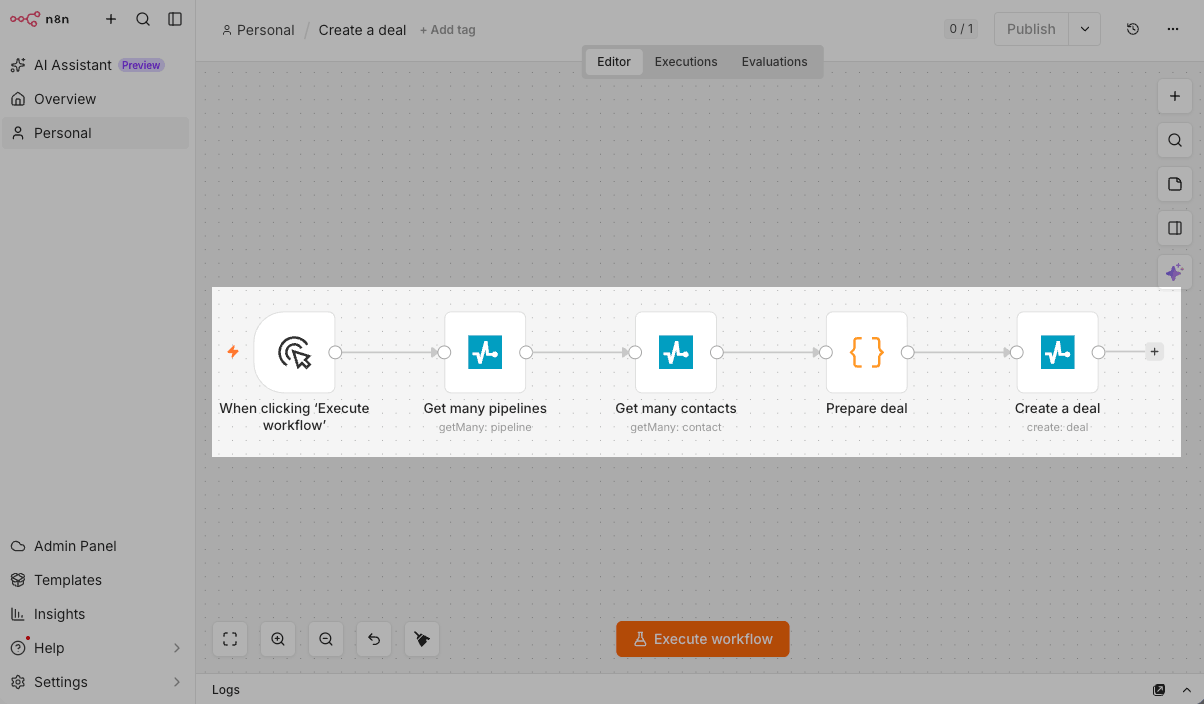
Add the Trigger manually trigger. From the SendPulse CRM node, add the Get many pipelines and Get many contacts elements.
Once these elements run, pipeline data with stages and contact data will appear in the Input section of your next flow elements.
Add a data processing element, such as Code, and generate values for your deal, such as a pipeline ID, stage ID, and deal name.
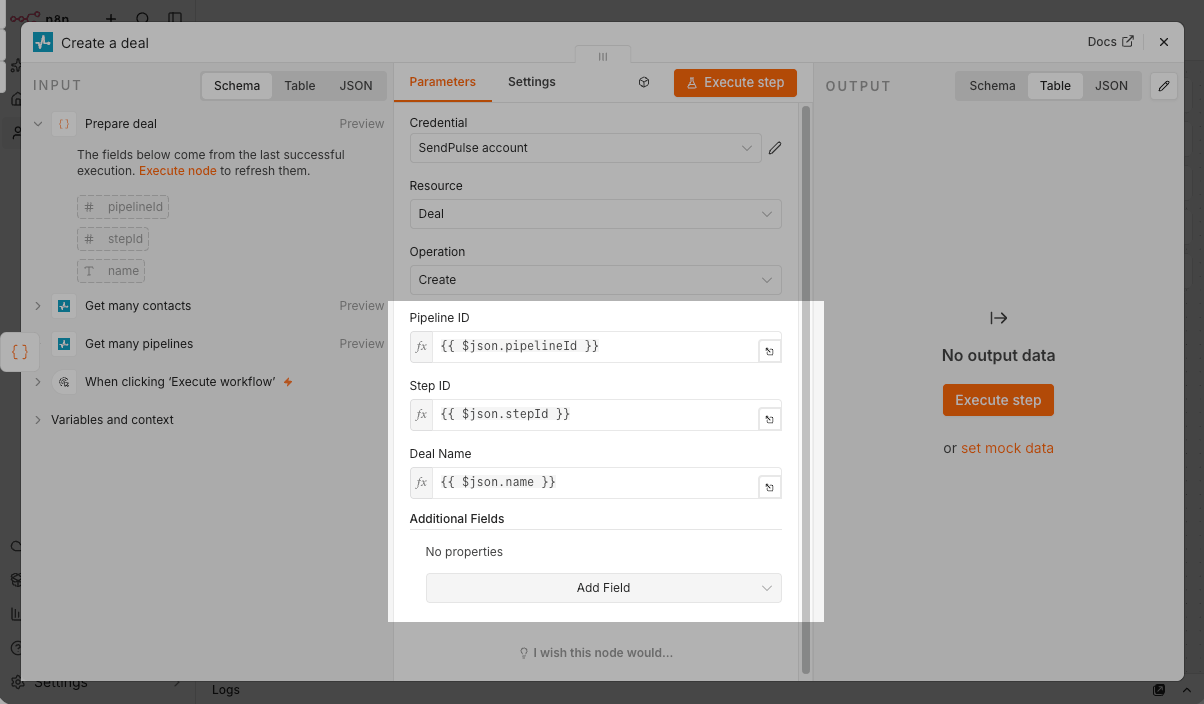
From the SendPulse CRM node, add the Create a deal element. Fill in the Pipeline ID, Step ID, and Deal Name fields with values from previous elements using expressions, such as {{ $json.pipelineId }}.
To attach a contact to your deal or add a deal price and currency right away, expand Additional Fields, then add the fields you need.
To run your flow, click Execute workflow.
Your new deal will appear in the CRM system at the first stage of the selected pipeline, and the deal history will show that it was created through API.
To run Automation flows using data from n8n, set up events and event-triggered flows.
 Last Updated: 22.07.2026




or