Stop a flow using an event
When you create an automation, you can add a flow stop event to stop sending subsequent messages at any time.
For example, when a customer returns to their abandoned cart and pays for their order, you no longer need to send them uncompleted checkout reminders.
Let’s talk about how to set up flow stop events.
Add a flow stop event
A flow stop event is a custom or pixel event that ends a flow for a contact once triggered.
Open your flow or create a new one. Go to the starting element where you specified your trigger, then turn on the Stop the flow by event toggle.
The toggle appears if you have at least one custom or pixel event in your account. To stop a flow, your event must pass a variable with the contact's email address or phone number.
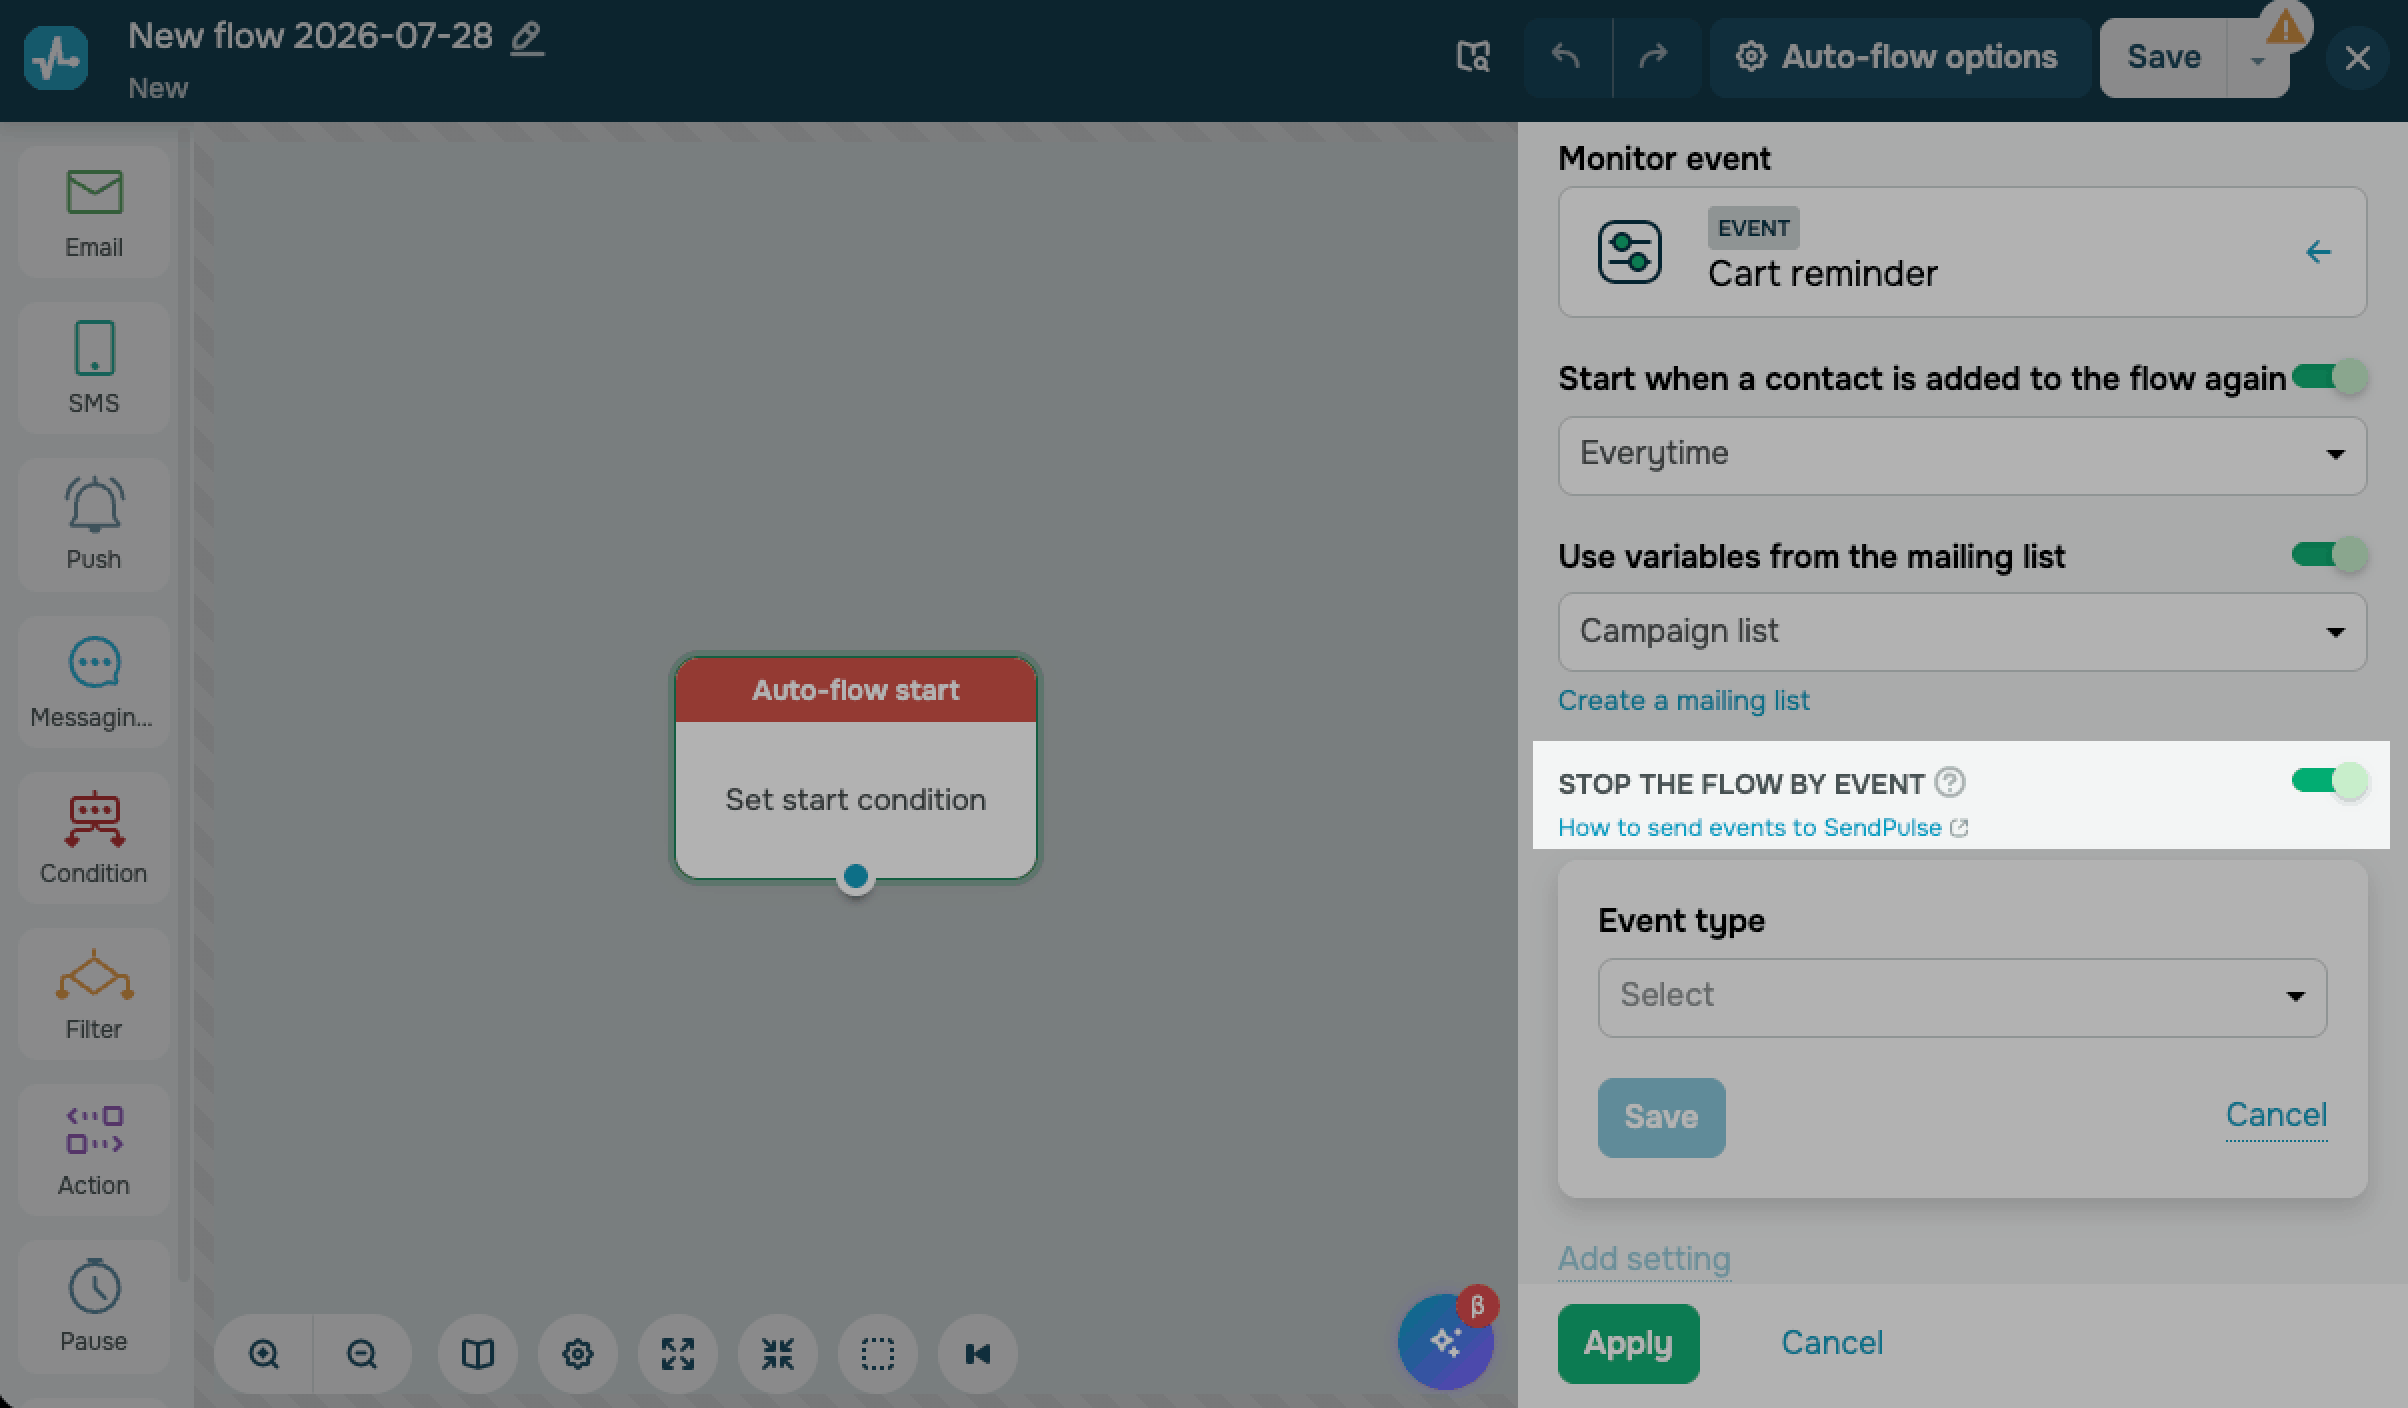
In the Event type field, choose a stop event type.
You can use an event as a starting trigger or as a stop event. The event you selected as your starting trigger appears inactive in the stop event list.
Custom event
To stop a flow using a custom event, create an event and set up event sending to SendPulse beforehand.
Select the Custom event type and choose an event from the list.
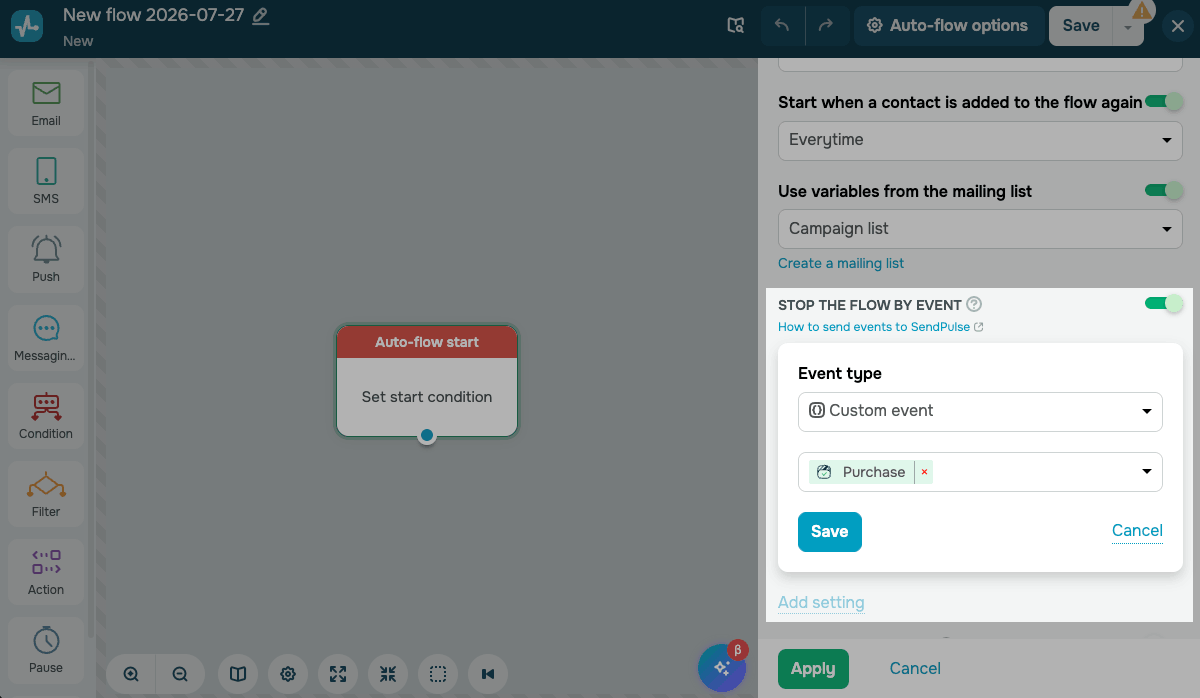
Click Save.
Pixel event
To stop a flow using a pixel event, install a pixel on your website, then create condition-based or code-based events beforehand.
Select the Pixel event type. In the Website field, choose the website where your pixel is installed. In the Event field, add one or more events from this website.
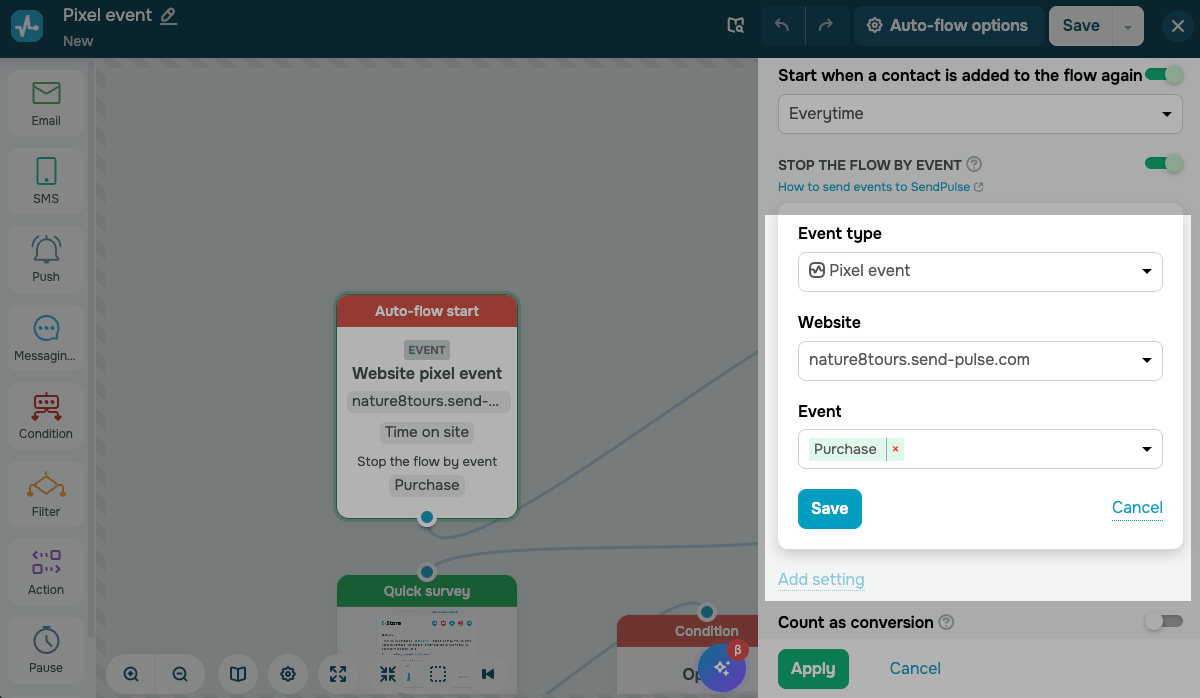
Click Save.
You can also track the same pixel event in the Condition element.
Complete the setup
Once you save a flow stop event, the setting collapses into a card.
To edit an event, click the edit icon on the card. To delete an event, click the delete icon.
To add another flow stop event, click Add setting.
Each flow supports up to 5 stop events of different types. However, you can choose the same custom event only once. You can add the same pixel event to multiple settings, so the system records flow stop statistics in each of them.
The flow will stop if at least one of your selected events is triggered.
If necessary, turn on the Count as conversion toggle to include flow stops in your conversion tracking. The toggle applies to all stop events in the flow.
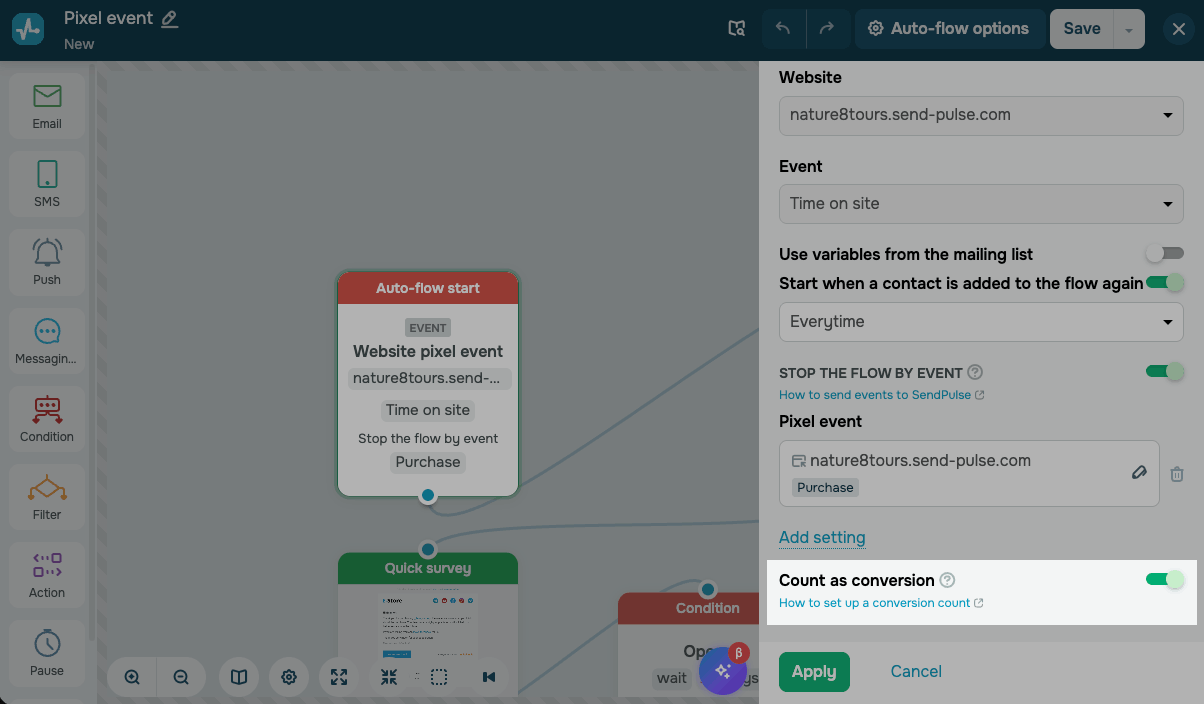
Click Apply, and save your flow.
Stop event behavior and statistics
Once the system receives an event, it checks the flow queue. If the contact is waiting for the next element to run, the system removes them from all queues and records them in the stop event statistics.
The flow stops regardless of the element the contact is in, and the system records the stop the first time the event is triggered. If multiple flows use the same stop event, all flows with this contact in their queue will stop.
Pixel events stop your flow only if the system matches the visitor to your contact.
If the visitor opens your website in a different browser or incognito mode, clears their cache, or switches devices, the flow will not stop. If you remove or disable the pixel event, or delete the website, your flow won't stop either. The system marks these events with the "Event deleted" and "Event stopped" labels.
Once you launch your flow, you can view its stop events, including stops counted as conversions, on the flow statistics page.
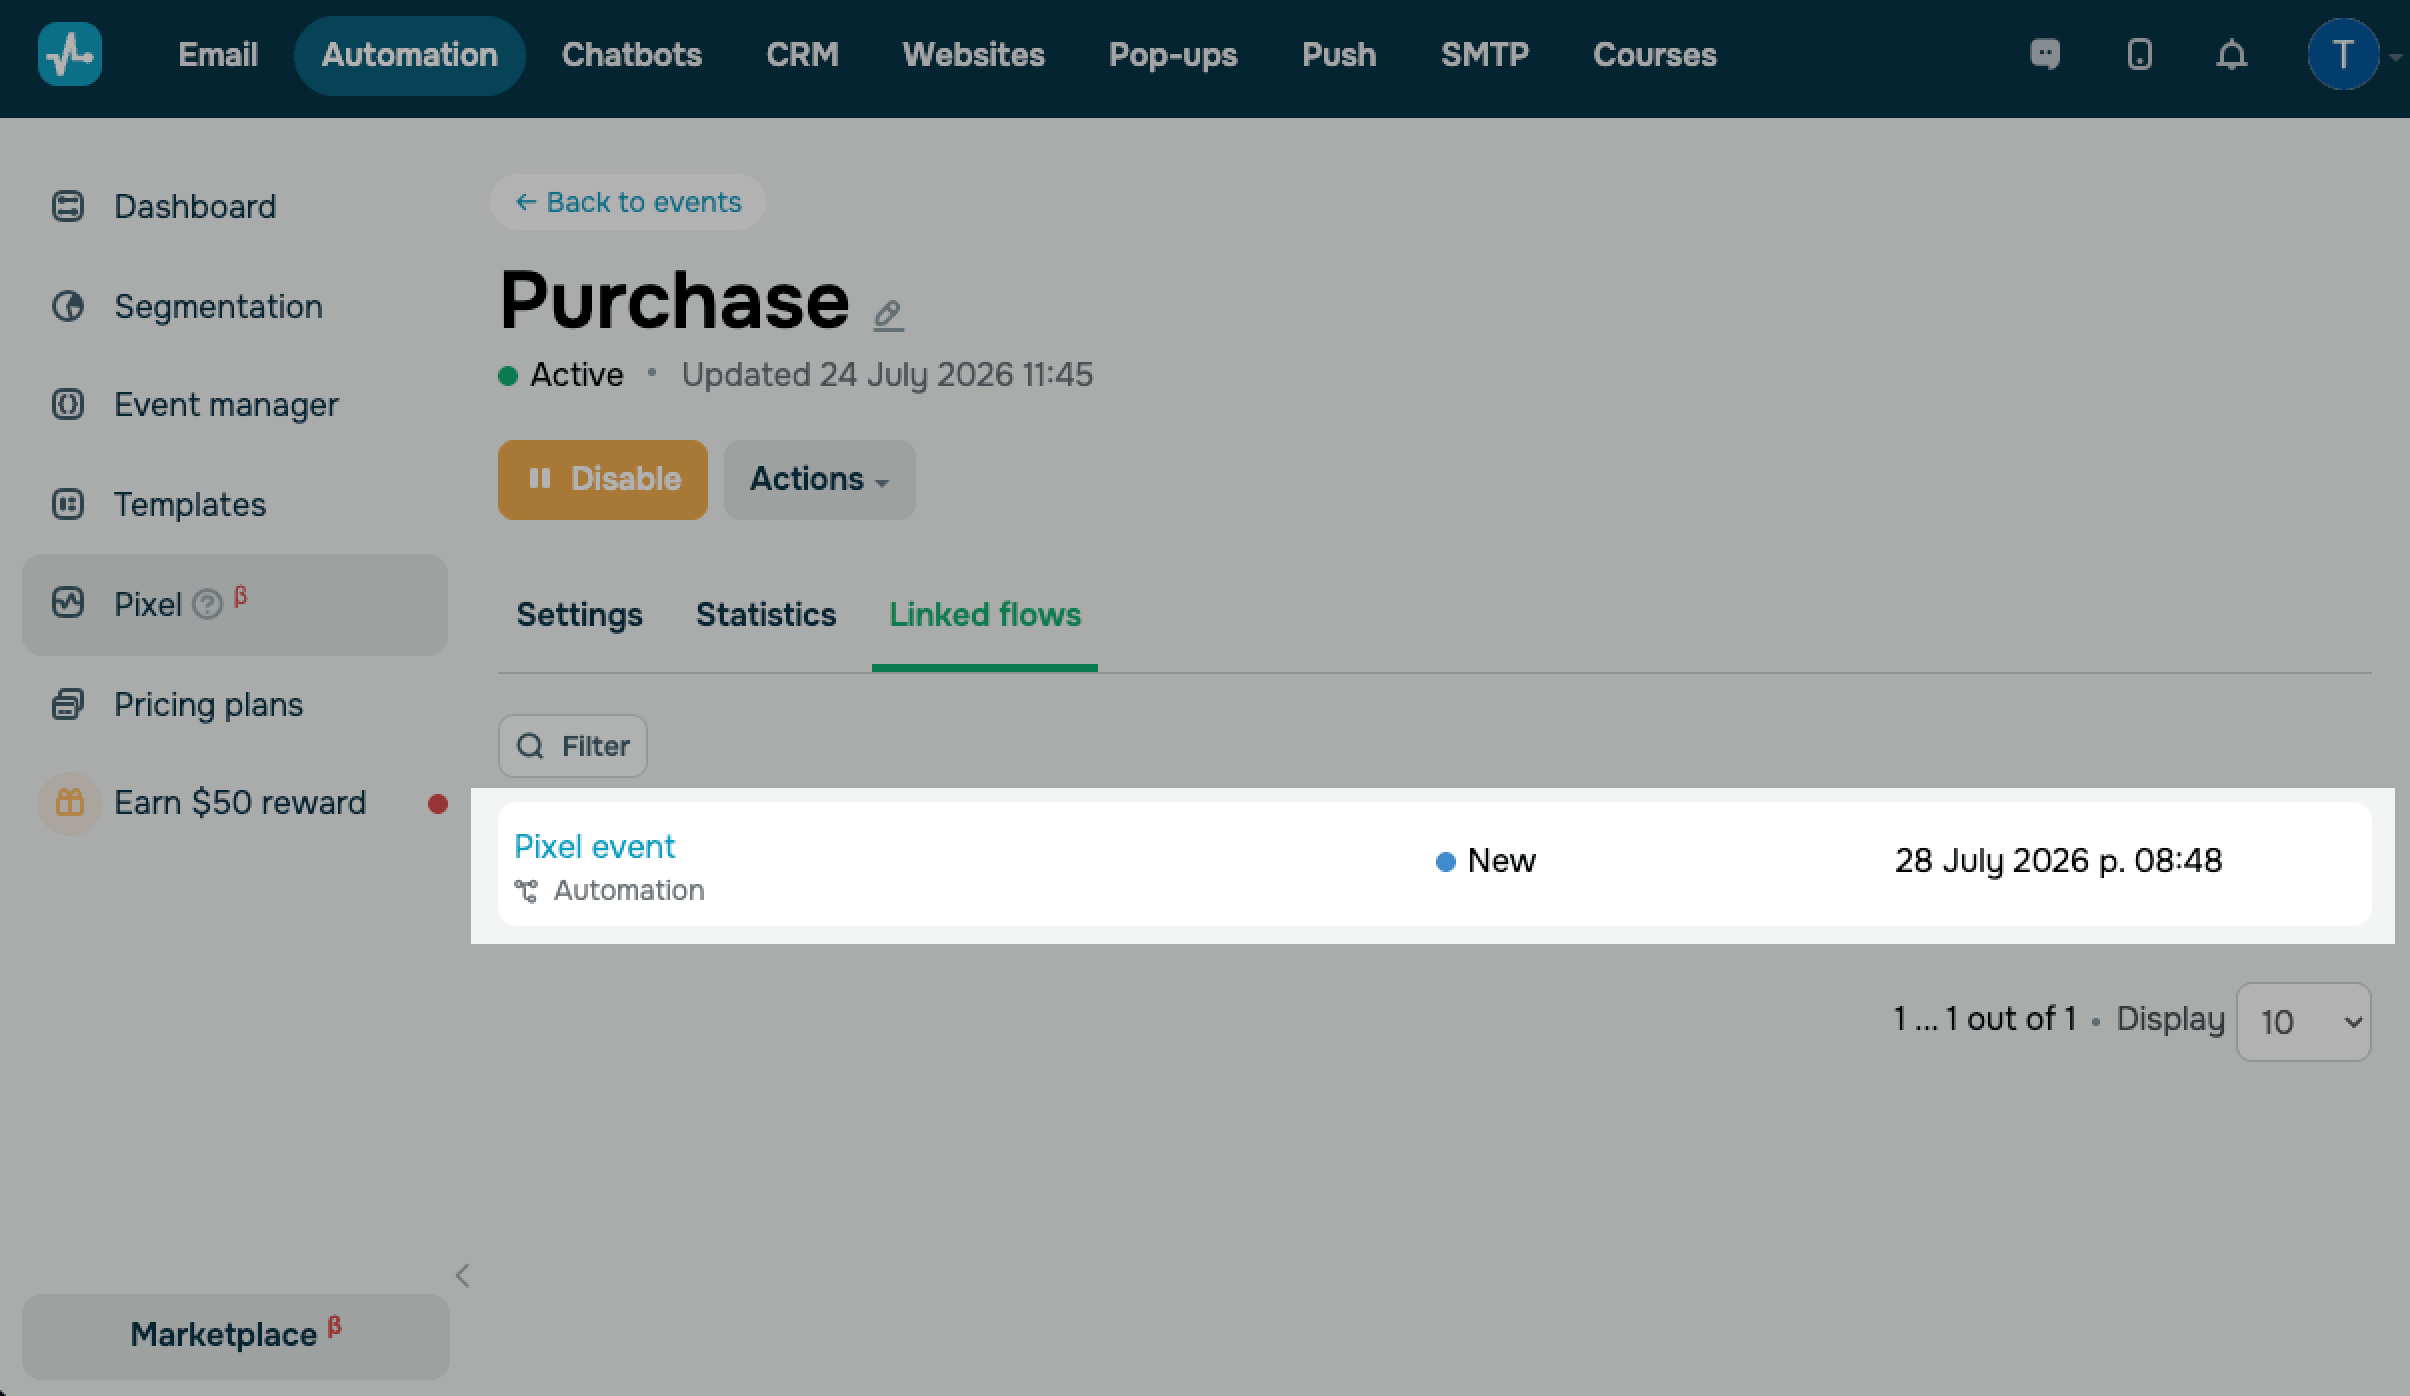
To view flows that use a pixel event as a stop trigger, go to the Pixel section. Choose a website and open the event. The Linked flows tab displays all linked flows in one list, regardless of whether they use the event as a start trigger, stop event, or Condition element.
 Last Updated: 27.12.2023




or