SendPulse pixel basics
A pixel is a code snippet you add to your website to track visitor actions. It records events in real time and sends the collected data points to SendPulse, where you can use them in email campaigns, automated flows, and chatbots.
In this article, we will talk about how the SendPulse pixel works and how to add it to your website.
Basics
An event is a tracked user action on your website, such as clicking a link with a UTM tag or scrolling a page.
After you install the pixel on your website, it:
- records the events you define in your settings;
- identifies a visitor (if identification data points are available);
- sends information about new actions to your SendPulse account.
The pixel can link website actions to a specific contact in your SendPulse audience if a user visits your website:
- through a link in an email campaign;
- through a link in an automated flow, provided the Prevent link expirations toggle is turned on;
- through a chatbot link;
- through submitted forms on your website.
In these cases, the system automatically adds identification parameters to the link. These parameters help determine which contact visited your website.
If an identified visitor completes a tracked event, SendPulse automatically records this action.
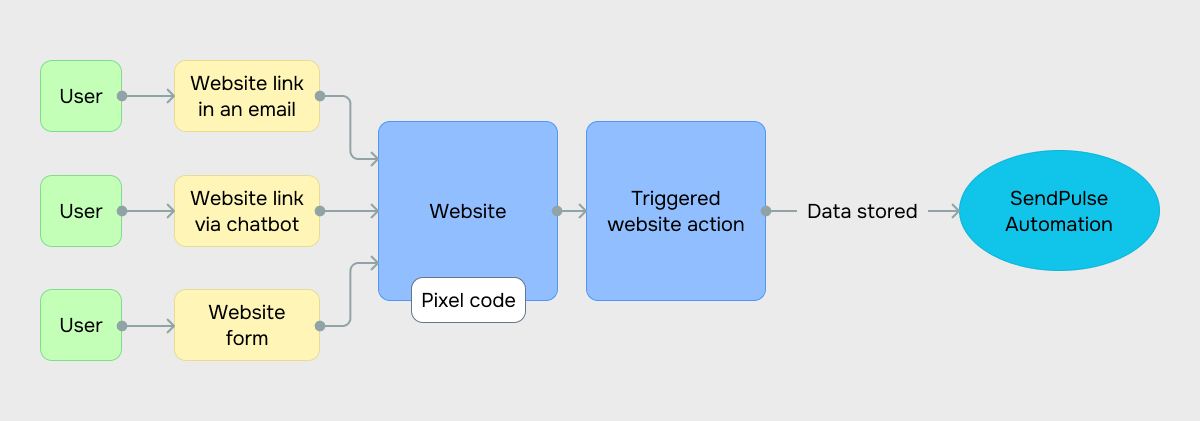
You can then use the data collected by the SendPulse pixel to run chatbot flows and automated flows.
Free plans include 1,000 event-triggered launches. As for paid plans, this number depends on the SendPulse tool and your pricing plan.
Adding a website
To start tracking events, go to Automation > Pixel. Click Add website and add your website.
You can add a SendPulse-powered website or a third-party website. For SendPulse-powered websites, the code applies automatically. For third-party websites, you’ll need to install the generated code manually.
Read more: Install a pixel on your website.
Adding events to track
Go to your website and select the Events tab. Click Add event. If you’ve added a third-party website, you can access the Events tab in the settings window.
Select an event trigger type and configure it as needed:
| Automated, condition-based | The event is triggered automatically when the selected conditions are met, such as click-through, page view, and similar.
Read more: Set up automated trigger conditions for an event. |
| Manual, code-based | The event is sent manually using JavaScript code.
Read more: Set up an event trigger using code. |
You can only select one trigger type for one event.
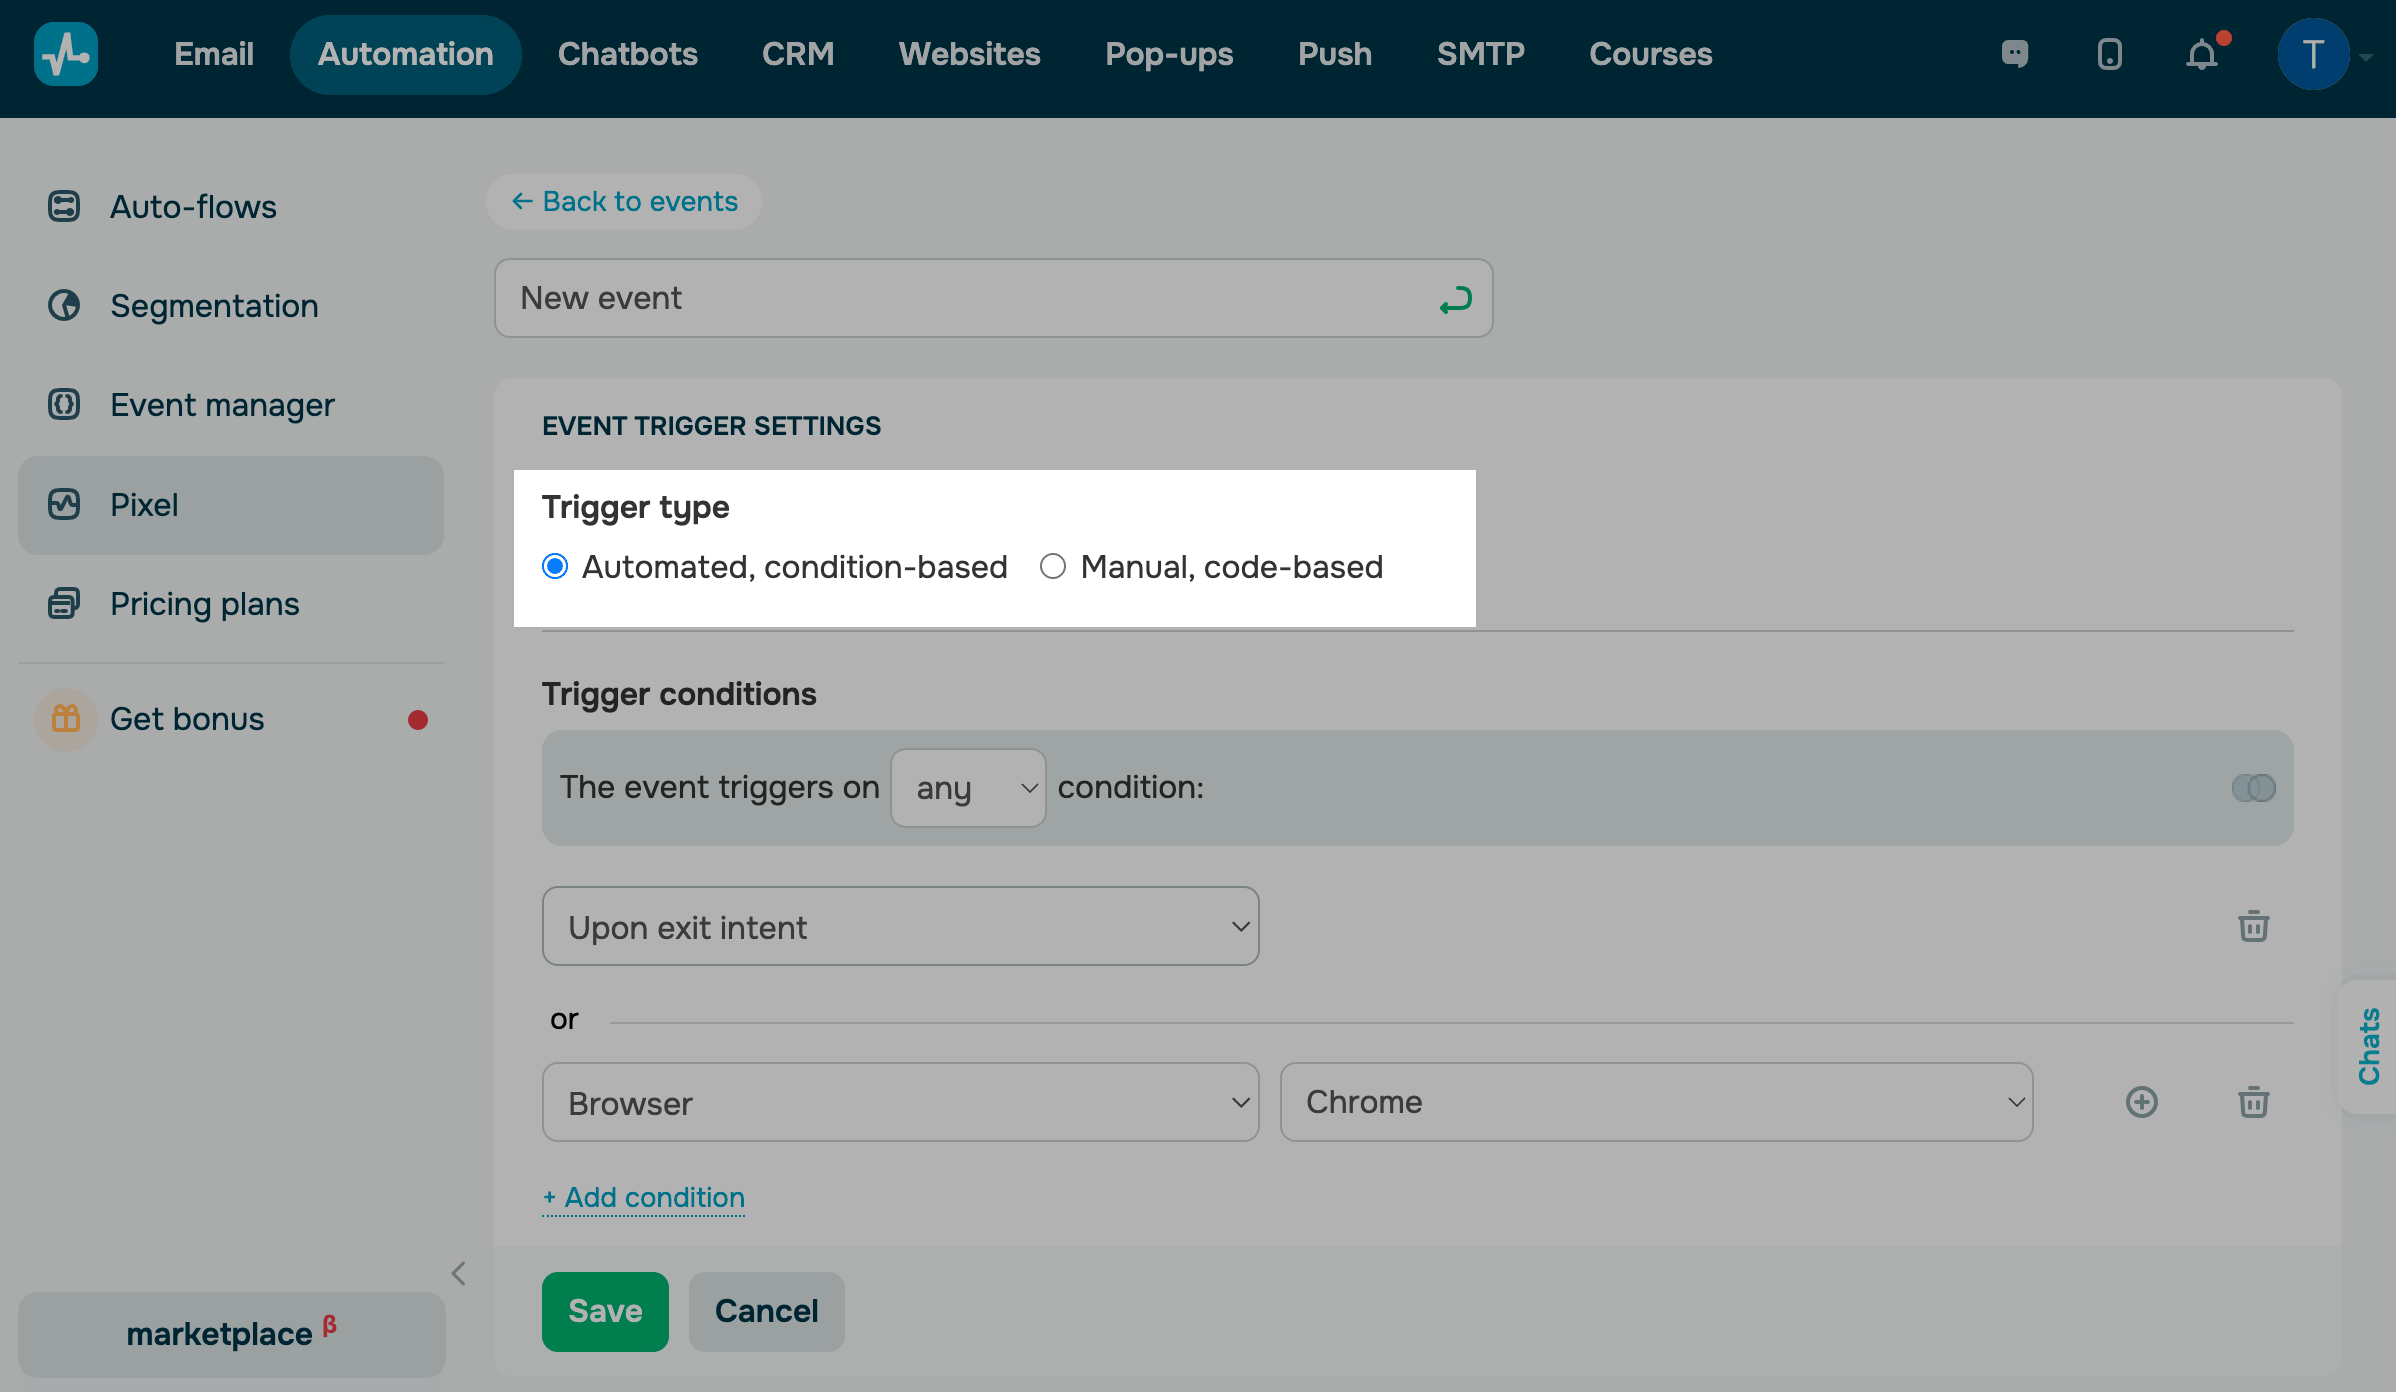
Once you set up the event, click Save.
You can view pixel statistics.
Using the pixel in SendPulse tools
You can add the pixel to your website, track events, and use the collected data to automate workflows.
The pixel is supported by the following SendPulse tools:
| Websites | Add the pixel to your SendPulse-powered website and enable event tracking. |
| Track click-throughs in emails using the pixel.
In your event settings, set the Automated condition-based trigger type and select Visitor data > Traffic source > Email. You can then build flows based on these data points in Automation. |
|
| Automation | Create flows that run automatically when a pixel event occurs. To do this, create a flow, select the Pixel event trigger, and configure the flow. |
| Chatbots | Create chatbot flows that run automatically when a pixel event occurs. Add the Pixel event trigger and build your flow based on it. |
Last Updated: 25.02.2026
or