Distribute chats between agents
Chat distribution decides which agent gets the next chat assigned to a group. It relies on two things: who is online right now, and how many active chats each agent already has.
A chat limit is the maximum number of active chats an agent can receive through auto-assignment.
When an agent reaches their limit, new chats are assigned to other available agents in the group. If everyone in the group is at their limit, the chats wait in the queue.
Let’s talk about how auto-assignment works and how to set a chat limit for each agent.
How auto-assignment works
Auto-assignment starts when you assign a chat to a group. You can do this by selecting the group in the chat's assignee drop-down list or adding the Open the chat action to your flow. The chat goes to an agent in that group who is online and has not reached their chat limit. If everyone in the group is at their limit, the chats wait in the Awaiting assignment queue.
An agent's limit in each group is compared with their total number of active chats, not just the chats from that group. Suppose Maria is a member of two groups and has a limit of 10 chats. She has 6 ongoing chats from one group and 4 from the other, which is 10 in total. A new chat will not reach her in either group until she ends one of her current chats.
When an agent ends a chat, the system can assign them the next one. In the Close the chat action, you can also select the Unassign the chat from its agent checkbox to remove the completed chat from the agent's list. When an agent changes their status to Away, auto-assignment stops for them.
Set an agent's chat limit
To set a limit, go to Chats > Teamwork, click the three dots icon next to an agent, and select Settings.
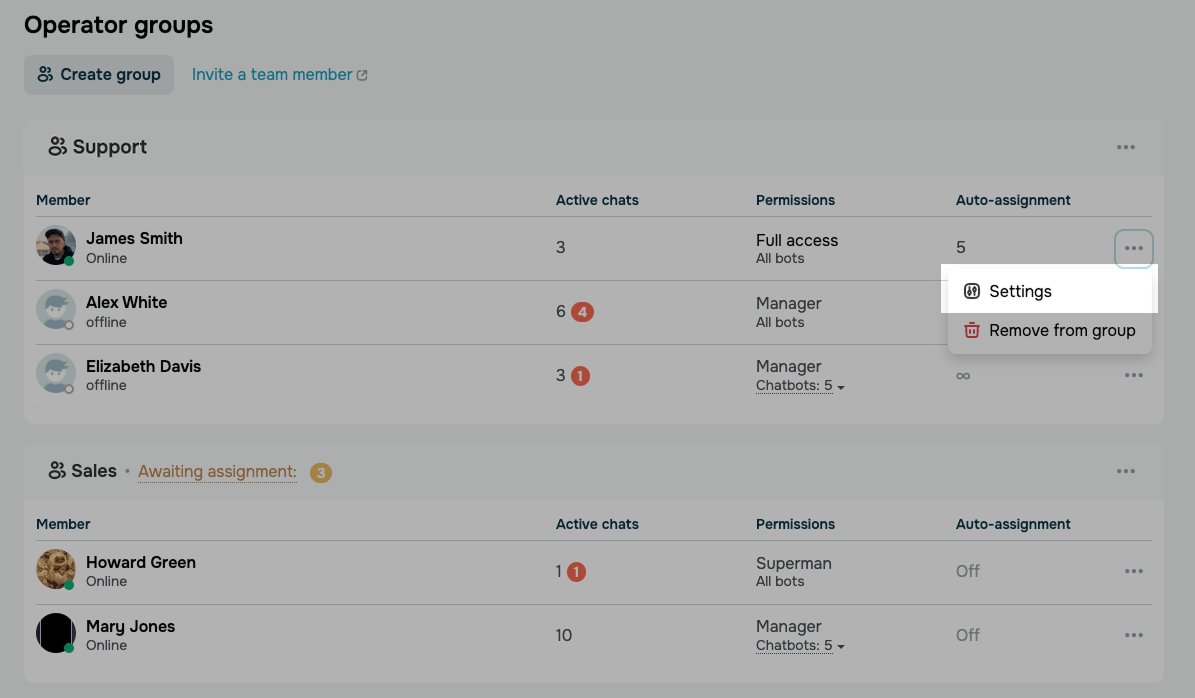
Scroll down to the Group member section and turn on the Auto-assignment of dialogues toggle for an agent in a specific group. Choose an option and click Save:
| Unlimited | The agent receives chats with no limit. |
| Limit the number of open chats | The agent receives chats until they reach the limit, for example, 10. New chats wait in the queue or go to other members. |
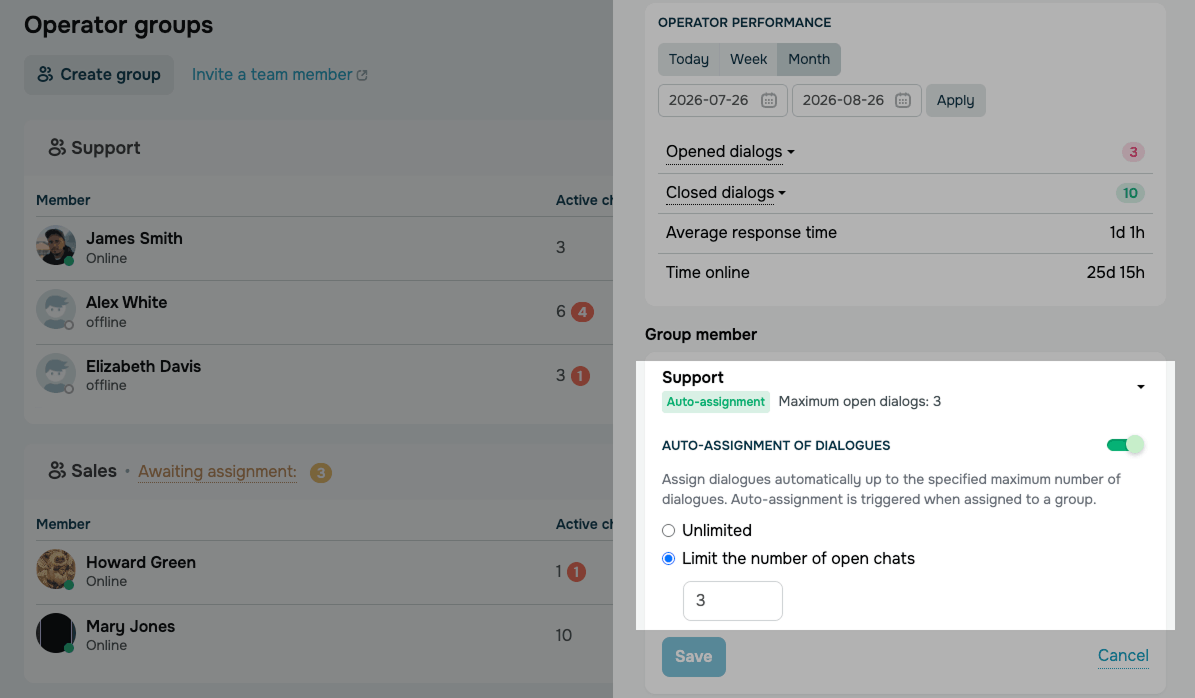
To exclude an agent from auto-assignment, for example, a team lead who only monitors chats, turn off the Auto-assignment of dialogues toggle for them. You can still assign chats to them manually.
We recommend setting lower limits for new team members and raising them as agents gain experience.
View the chat queue
You may encounter the Awaiting assignment queue during peak hours, when incoming chats exceed your team's capacity, or when available agents have switched to Away or reached their chat limits.
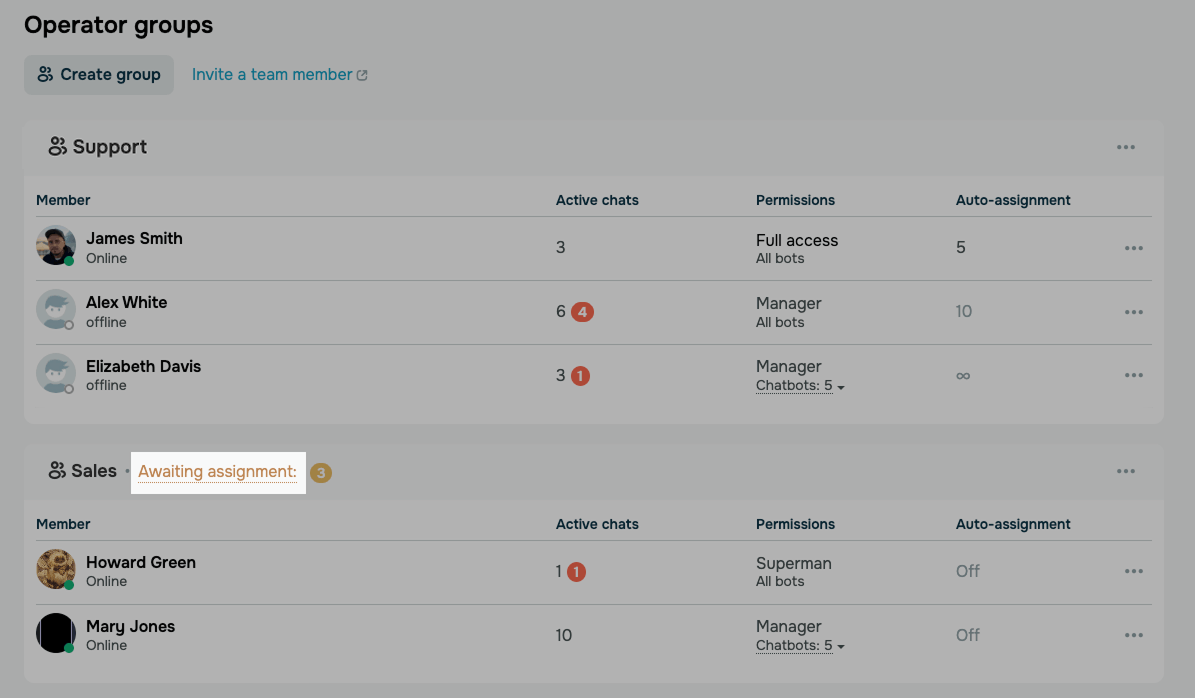
To view the queue, go to Chats > Teamwork and in the grop section click the Awaiting assignment counter.
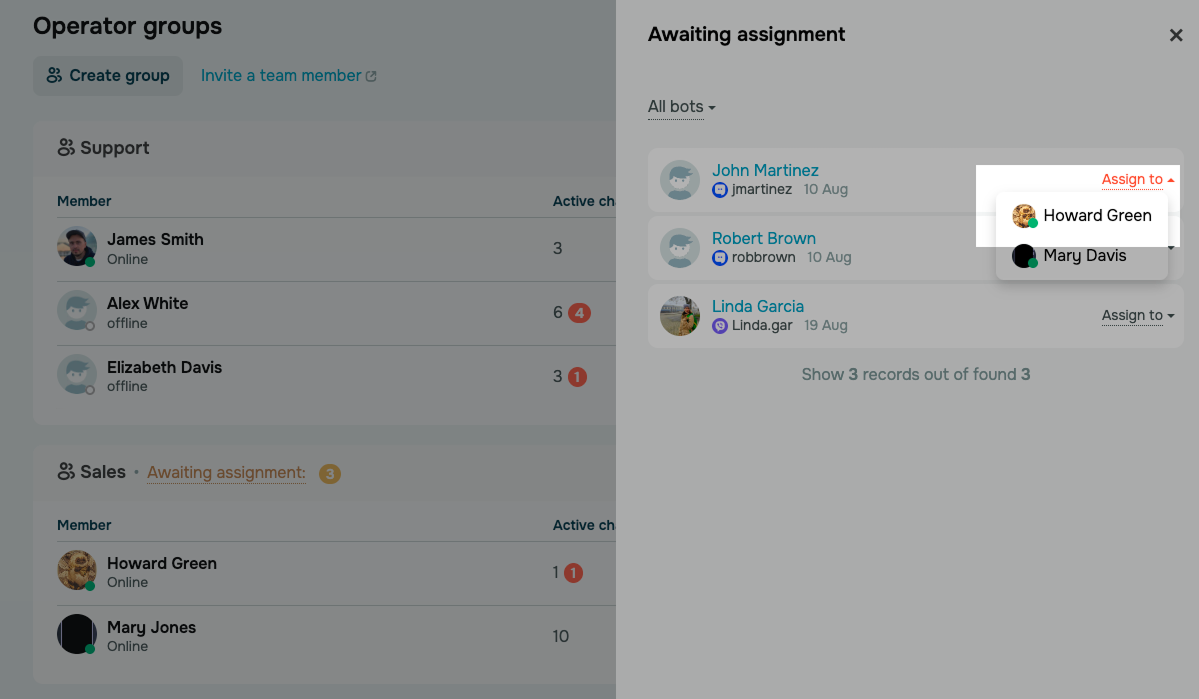
The queue shows pending chats and the chatbots they belong to. To view assignments from a specific bot, select it from the All bots drop-down list.
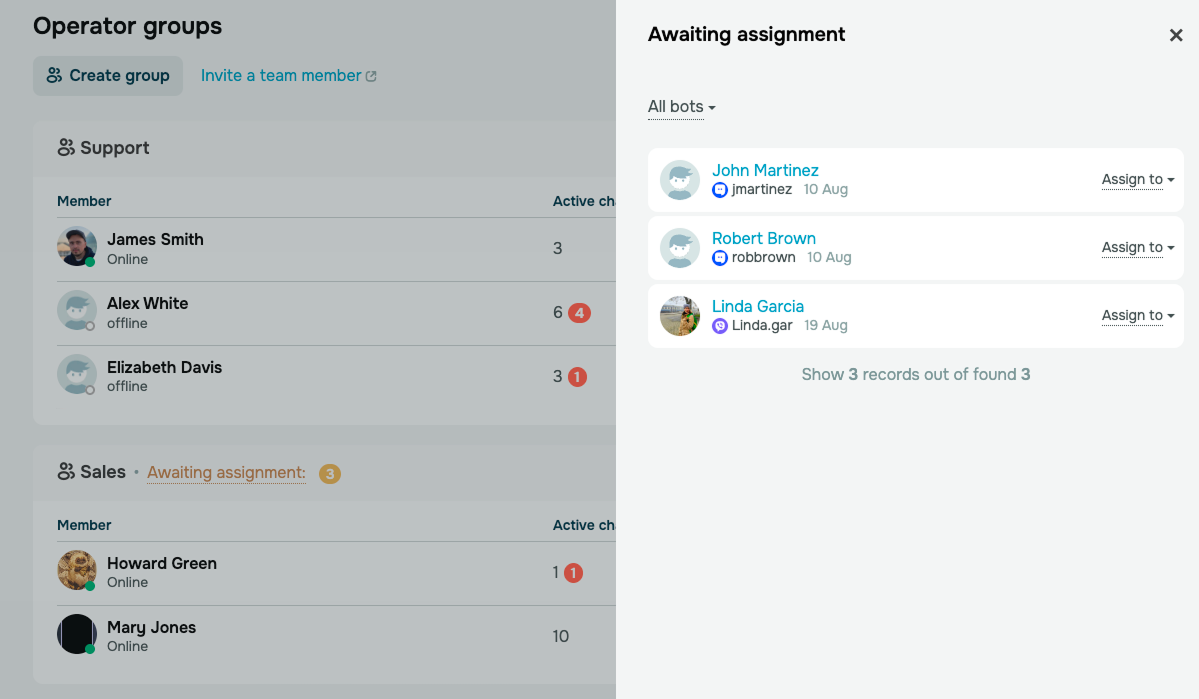
To assign a chat manually, click Assign to next to the chat and select a team member. This works even if the agent has already reached their limit. An agent can take a chat themselves, or a manager can assign it to another agent.
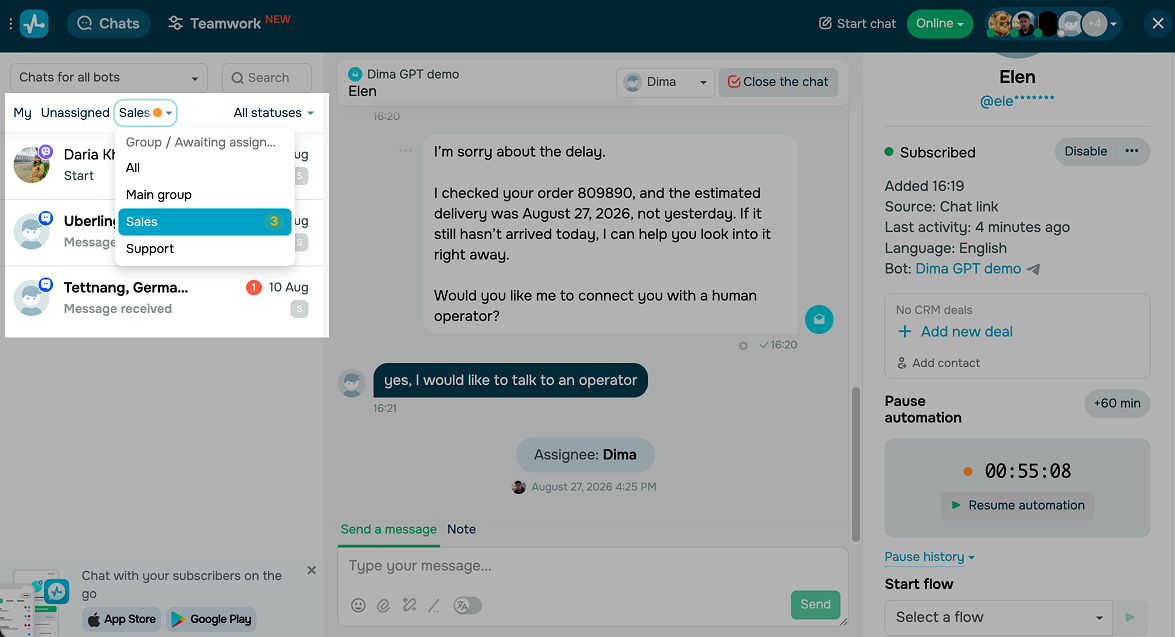
You can also view an agent group's queued conversations in the Chats section. To do this, click All in the chat list and select a group.
View assigned chats and change assignee
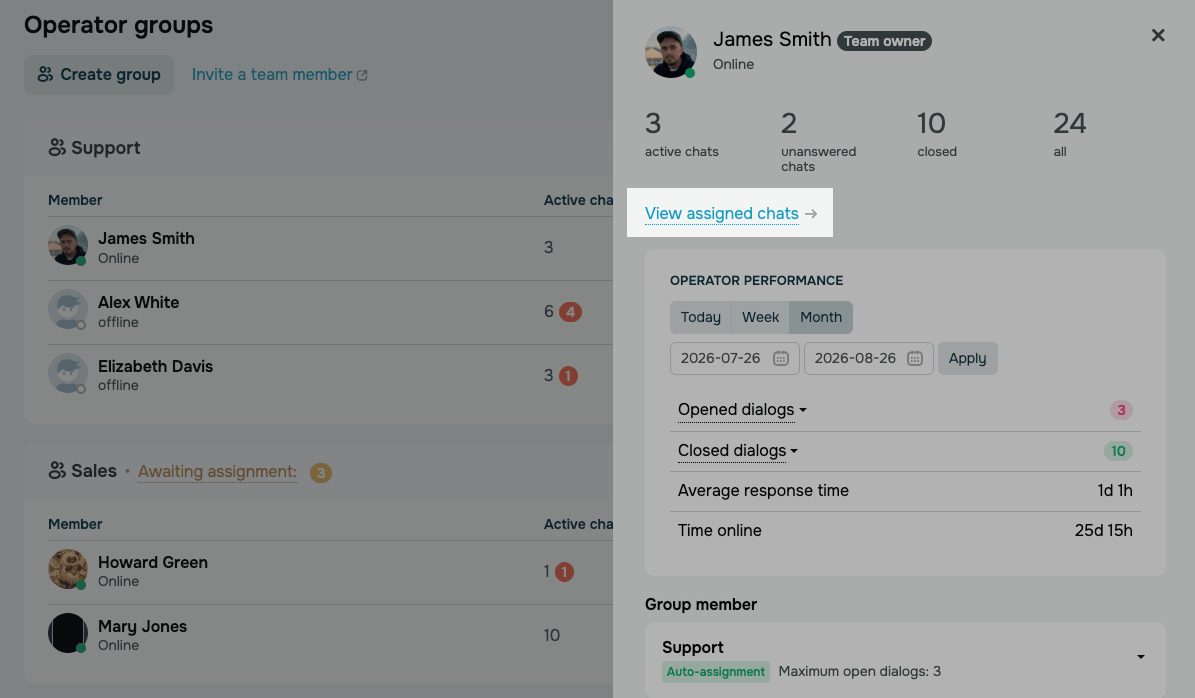
You can also view all assigned chats to an agent in the agent profile. Go to Chats > Teamwork and click on the agent, and then click View assigned chats.
You can only view chats if your user role gives you access to chatbot conversations.
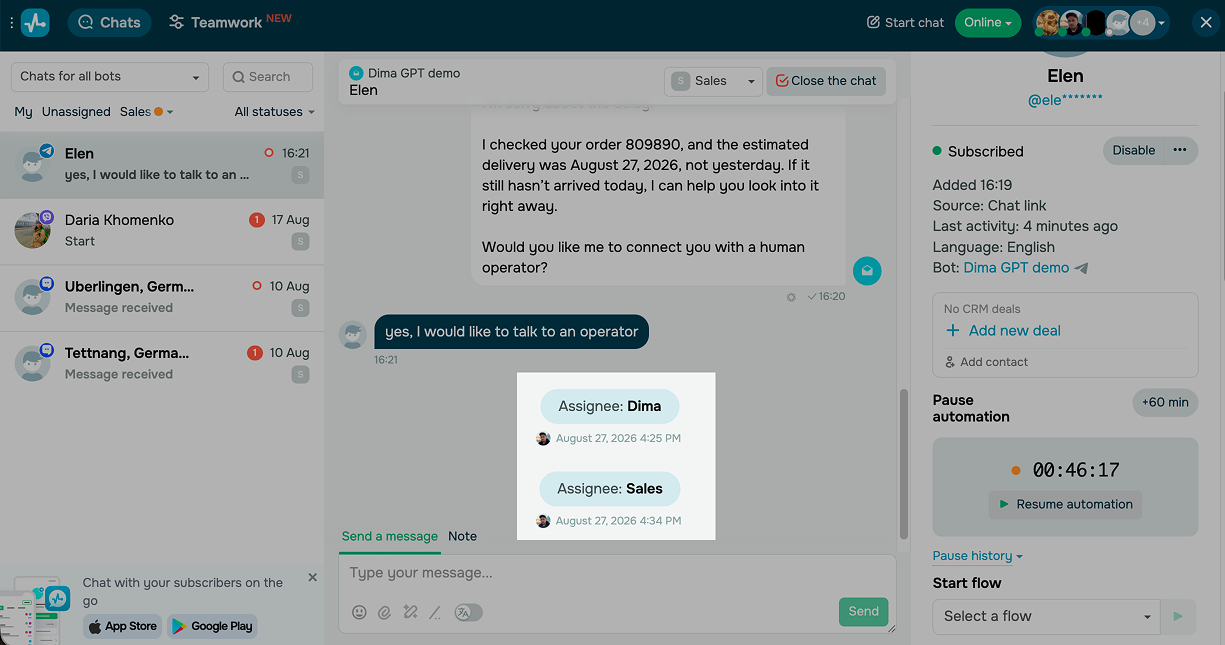
The conversation opens with the My chats tab selected. At the top, you can see who the chat is currently assigned to. To reassign the chat, select another team member or group from the drop-down list.
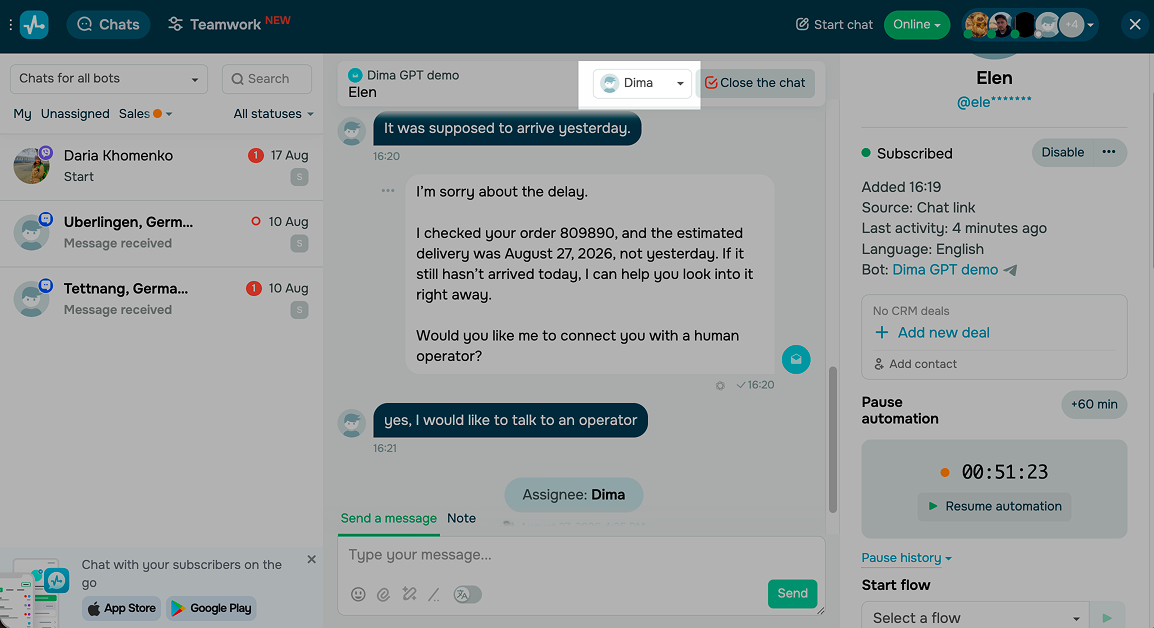
To view previous assignments, scroll to the Assignee: Name event. The chat history records each assignment, including assignment to a group and automatic assignment to an agent.
 Last Updated: 08.10.2026





or