Create and manage an agent group
A group is a team of agents who handle the same types of customer chats. Chats assigned to a group can be automatically distributed among its available agents based on their workload and availability.
You can create groups based on your team structure or responsibilities, such as sales, support, tier 1 and tier 2 support, projects, or brands. An agent can belong to multiple groups, with a different chat limit set for each group.
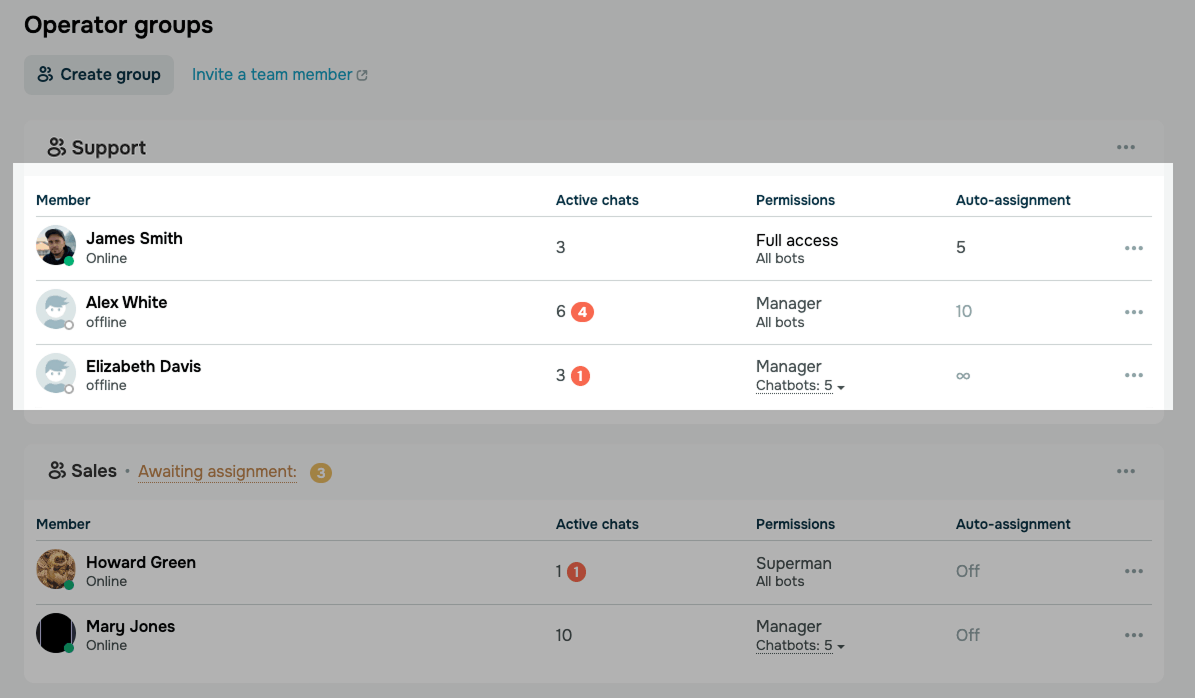
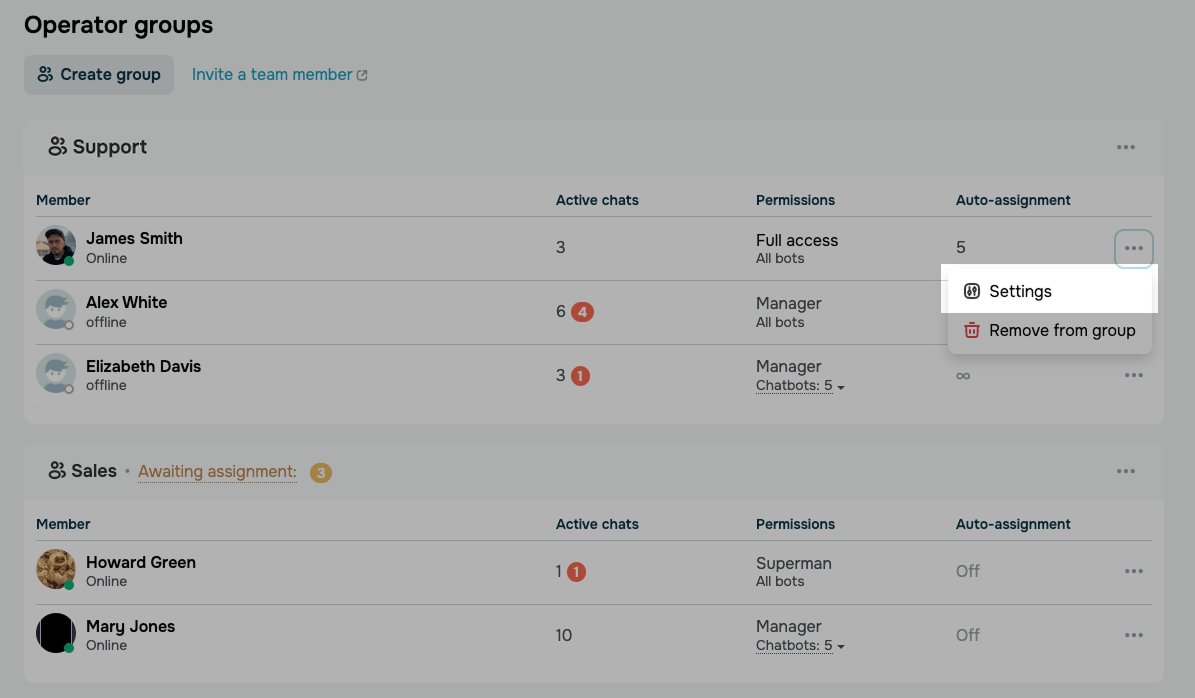
Group cards on the Teamwork tab show you a quick overview of your team, including who belongs to each group, how many chats each agent is handling, and their auto-assignment settings. Use these cards to spot an overloaded agent or a member without a chat limit.
Let's talk about how to create a group, view your groups, and manage their members.
Before you start, invite users to your account and share access to your chatbots. You can only add users who have accepted your invitation.
Read more: Manage an agent's chat access.
Create a group
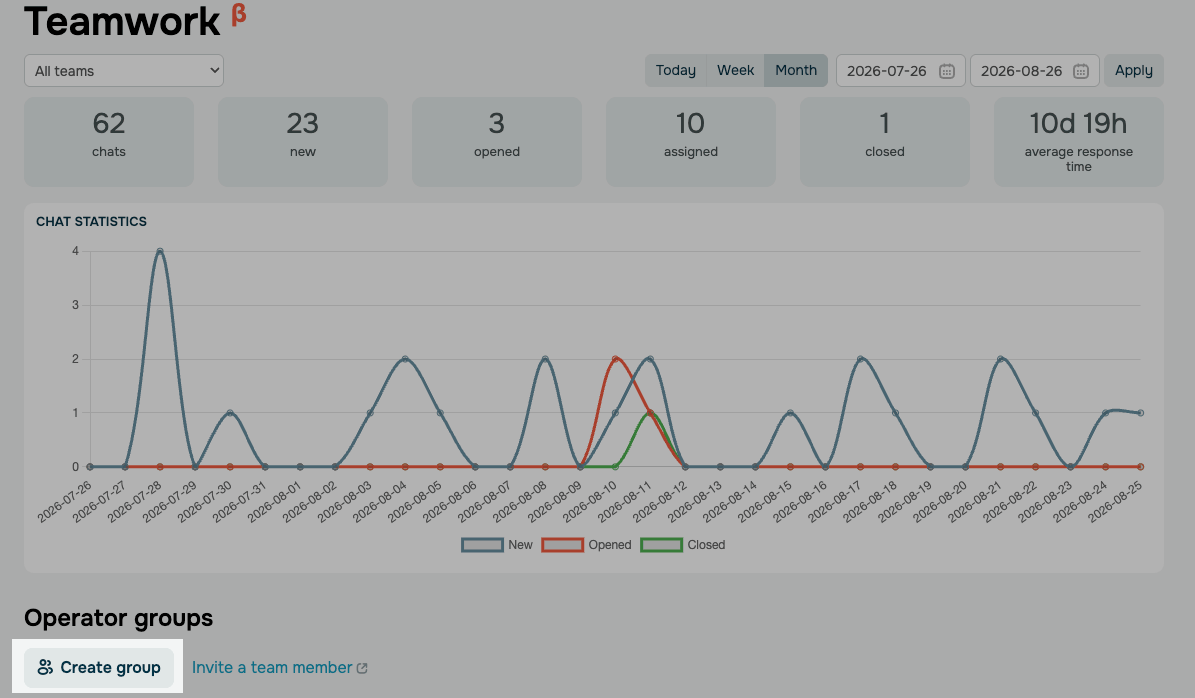
To create a group, go to the Chats section, open the Teamwork tab, and click Create group.
In the Group field, enter a group name, for example, Support. In the Add member field, select the agents you want to add, and click Save.
You can also add members in group actions later.
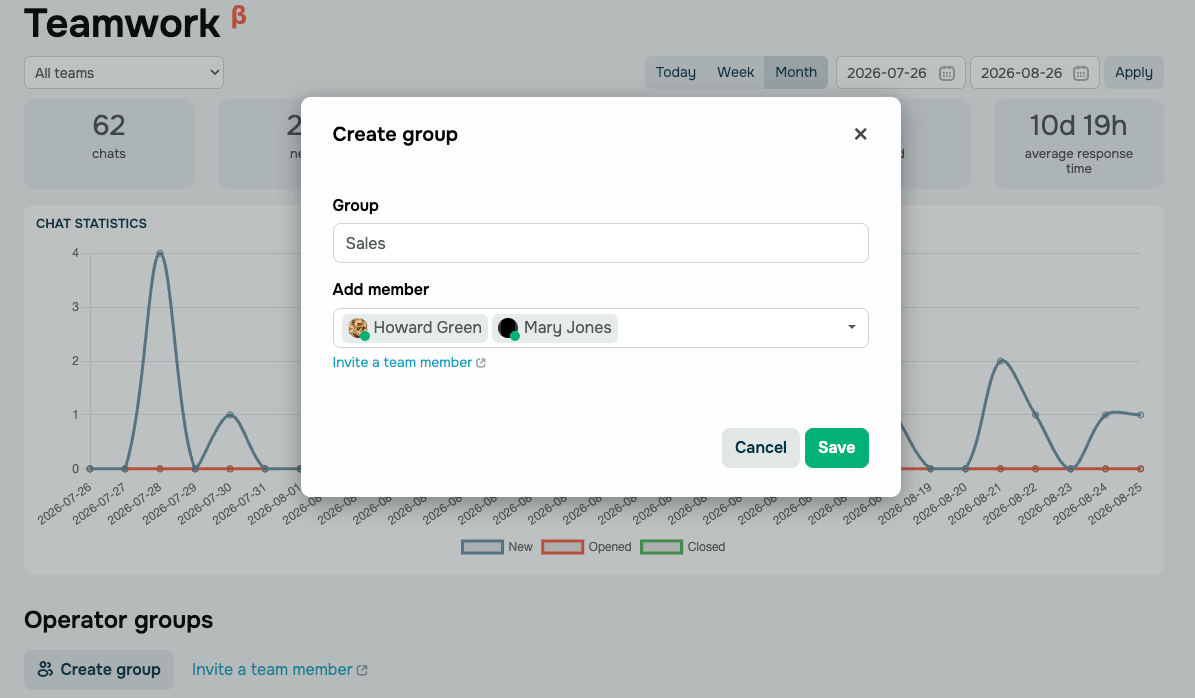
To add an agent who is not on the list yet, click Invite a team member and send them an invitation.
Track groups and members
Once you save your group, it appears on the Teamwork tab. To view your groups, go to Chats > Teamwork. Each group card shows a table of members with the following information:
| Member | The agent's name and status, such as Online or the time when they were last online. |
| Active chats |
The number of active chats assigned to the agent and the unread message counter. Read also: Switch your availability status. |
| Permissions |
The agent's role in your account and the chatbots they can access. Read also: Distribute standard user roles' access rights: Chatbots. |
| Auto-assignment | The agent's chat limit in this group. |
Manage a group
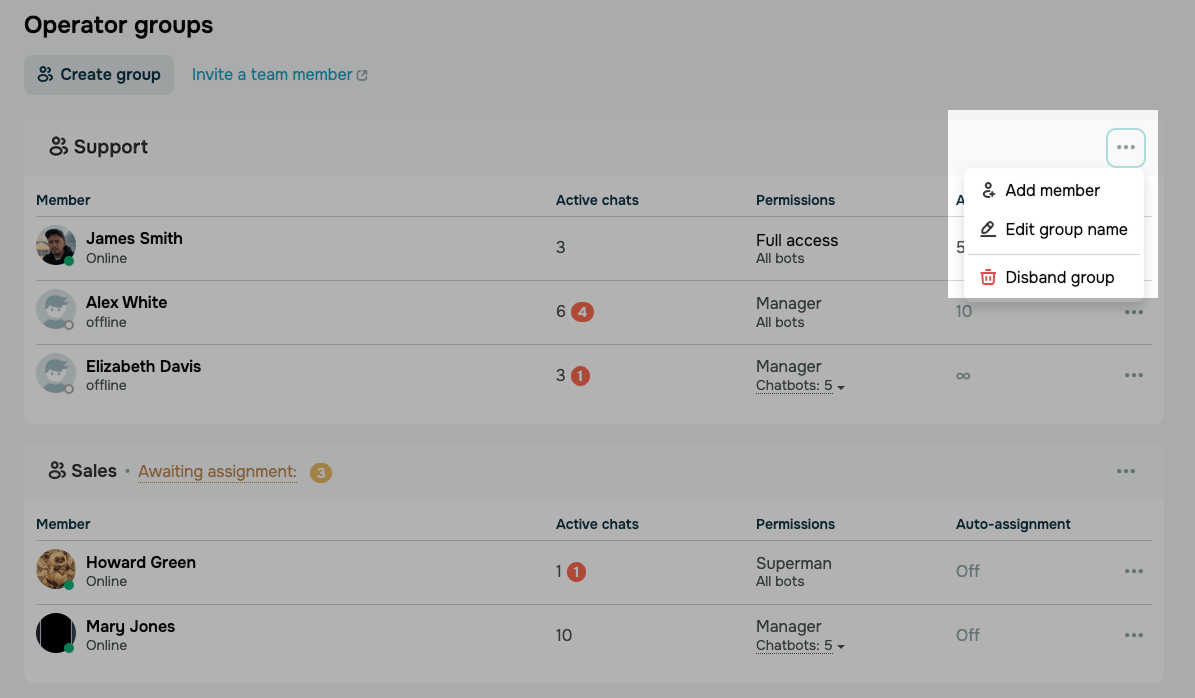
To manage a group, click the three dots icon next to its name and select an action:
| Add member | Adds agents to the group. Select the users you want to add. The list shows only those who have accepted an invitation to join your account. To invite a new person, click Invite a team member. |
| Edit group name | Renames the group. |
| Disband group | Deletes the group. Its members stay in your account and in their other groups. |
Manage group members
An agent can belong to multiple groups at once, for example, a team lead covering both sales and support. You set an individual chat limit for the agent in each group.
To manage a member, click the three dots icon next to them and select an action:
| Settings |
Opens the agent's profile, where you can view their performance and set an auto-assignment limit. Read more: Set agent chat limit and Track agent performance. |
| Remove from group | Removes the agent from this group. The agent stays in your account and in their other groups. |
Please note that agents outside of groups appear in the Ungrouped list: the system does not auto-assign chats to them and does not include them in statistics.
 Last Updated: 28.08.2026





or