Manage an agent's chat access
Chat access is controlled by the Chatbots permissions in a user role. To give an agent chat access, invite them to your account, assign a user role with Chatbots access, and select the chatbots they can use.
You can also restrict agents’ access to other chatbot features, such as flows, campaigns, settings, and pricing plans. This way, agents only get the tools they need. Say, if an agent only handles support, you can give them access to conversations from selected chatbots and nothing else — no flows, no campaigns, no settings.
Chat access is set separately from access to other SendPulse services. If a support agent also needs to look up a customer's deal, you can open the CRM section for them while keeping their chatbot permissions limited to conversations.
It works the other way round too. If your account already has a marketer who works with email campaigns, you can close their access to chats so that they don't affect the work in them and don't appear in chat distribution.
Let’s talk about how to manage and update your agents’ chat access settings.
Invite an agent with chat access
Before you invite agents, check the standard user roles with predefined access rights. You can use one of these roles or create a custom role based on your team members' responsibilities.
Permissions come with the role you select and can't be changed in the invitation form. To use a different set of permissions, select another role or change the user's role later.
To add an agent, go to Account settings > Team and click Invite a new user. Enter the agent's email address, set an email language, and choose a role with chatbot access.
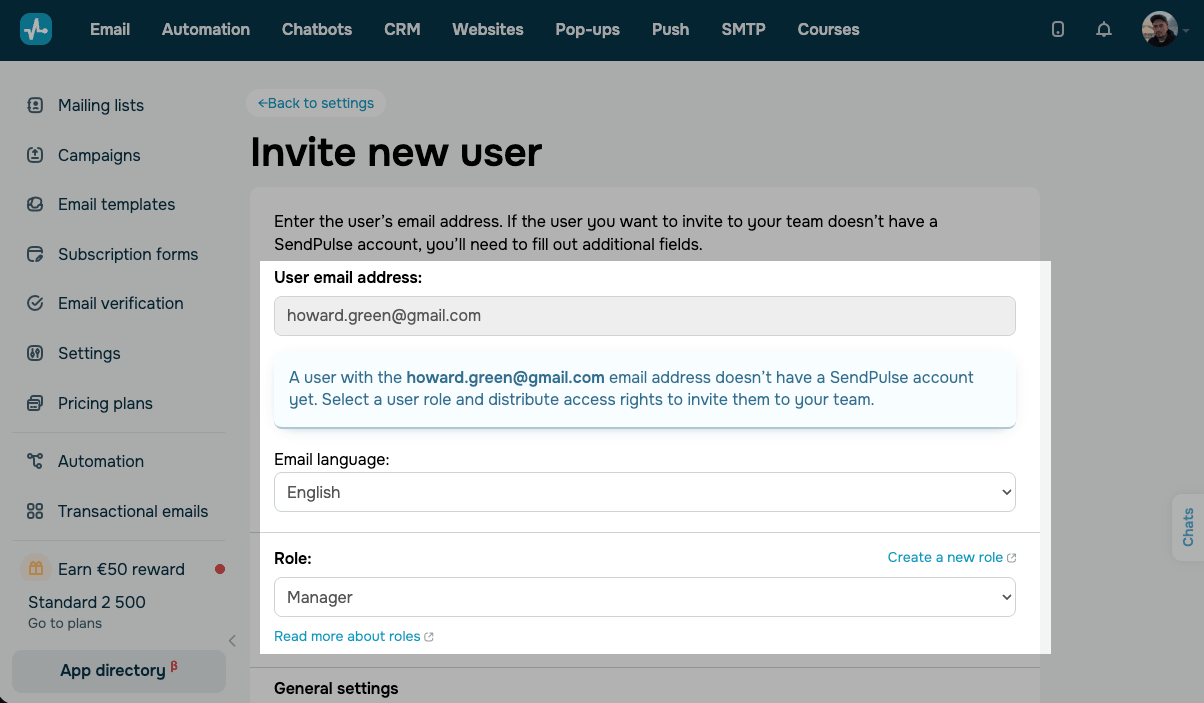
Select the chatbots
Scroll down to the Chatbots section and select chatbots available to an agent.
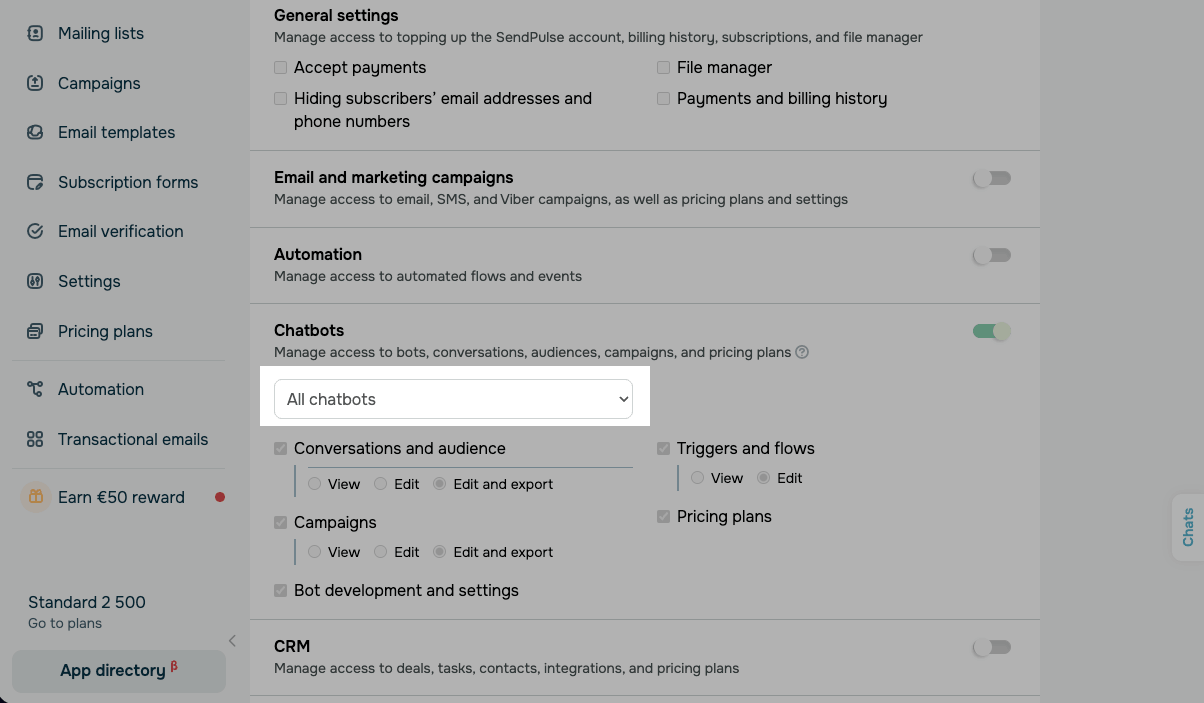
Send the invitation
Once you finish, click Send an invitation. The agent will join your team as soon as they accept it.
After they do, add the agent to a group. SendPulse will start assigning chats to them automatically and tracking their statistics.
Choose which conversations an agent sees
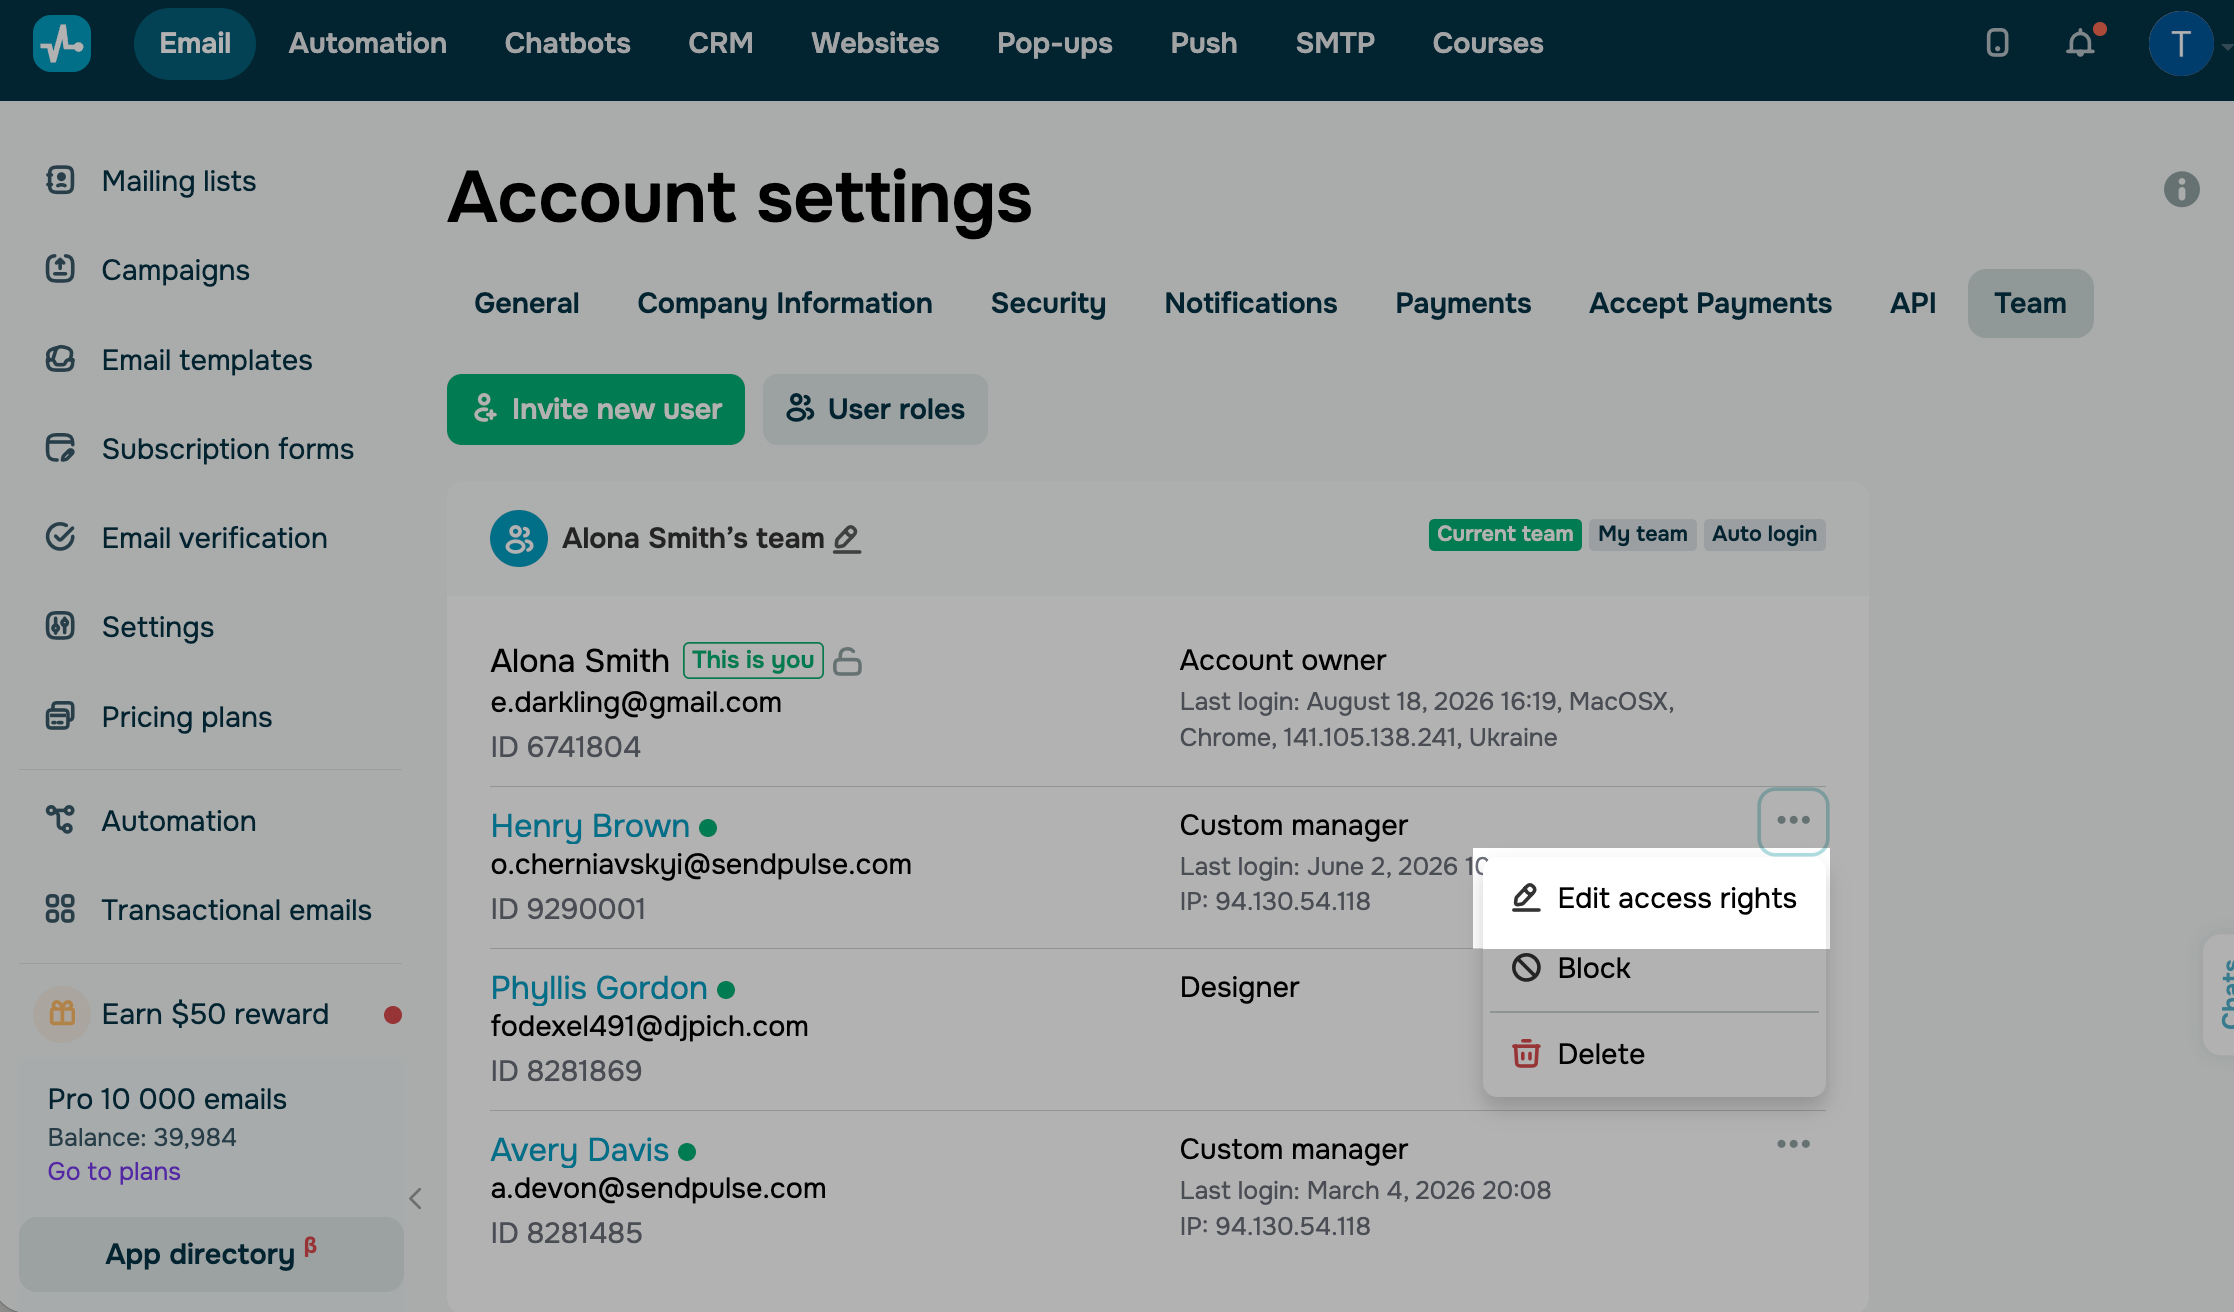
Once the agent accepts the invitation, choose which conversations they see. Go to Account settings > Team, click the three dots icon next to the agent, and select Edit access rights.
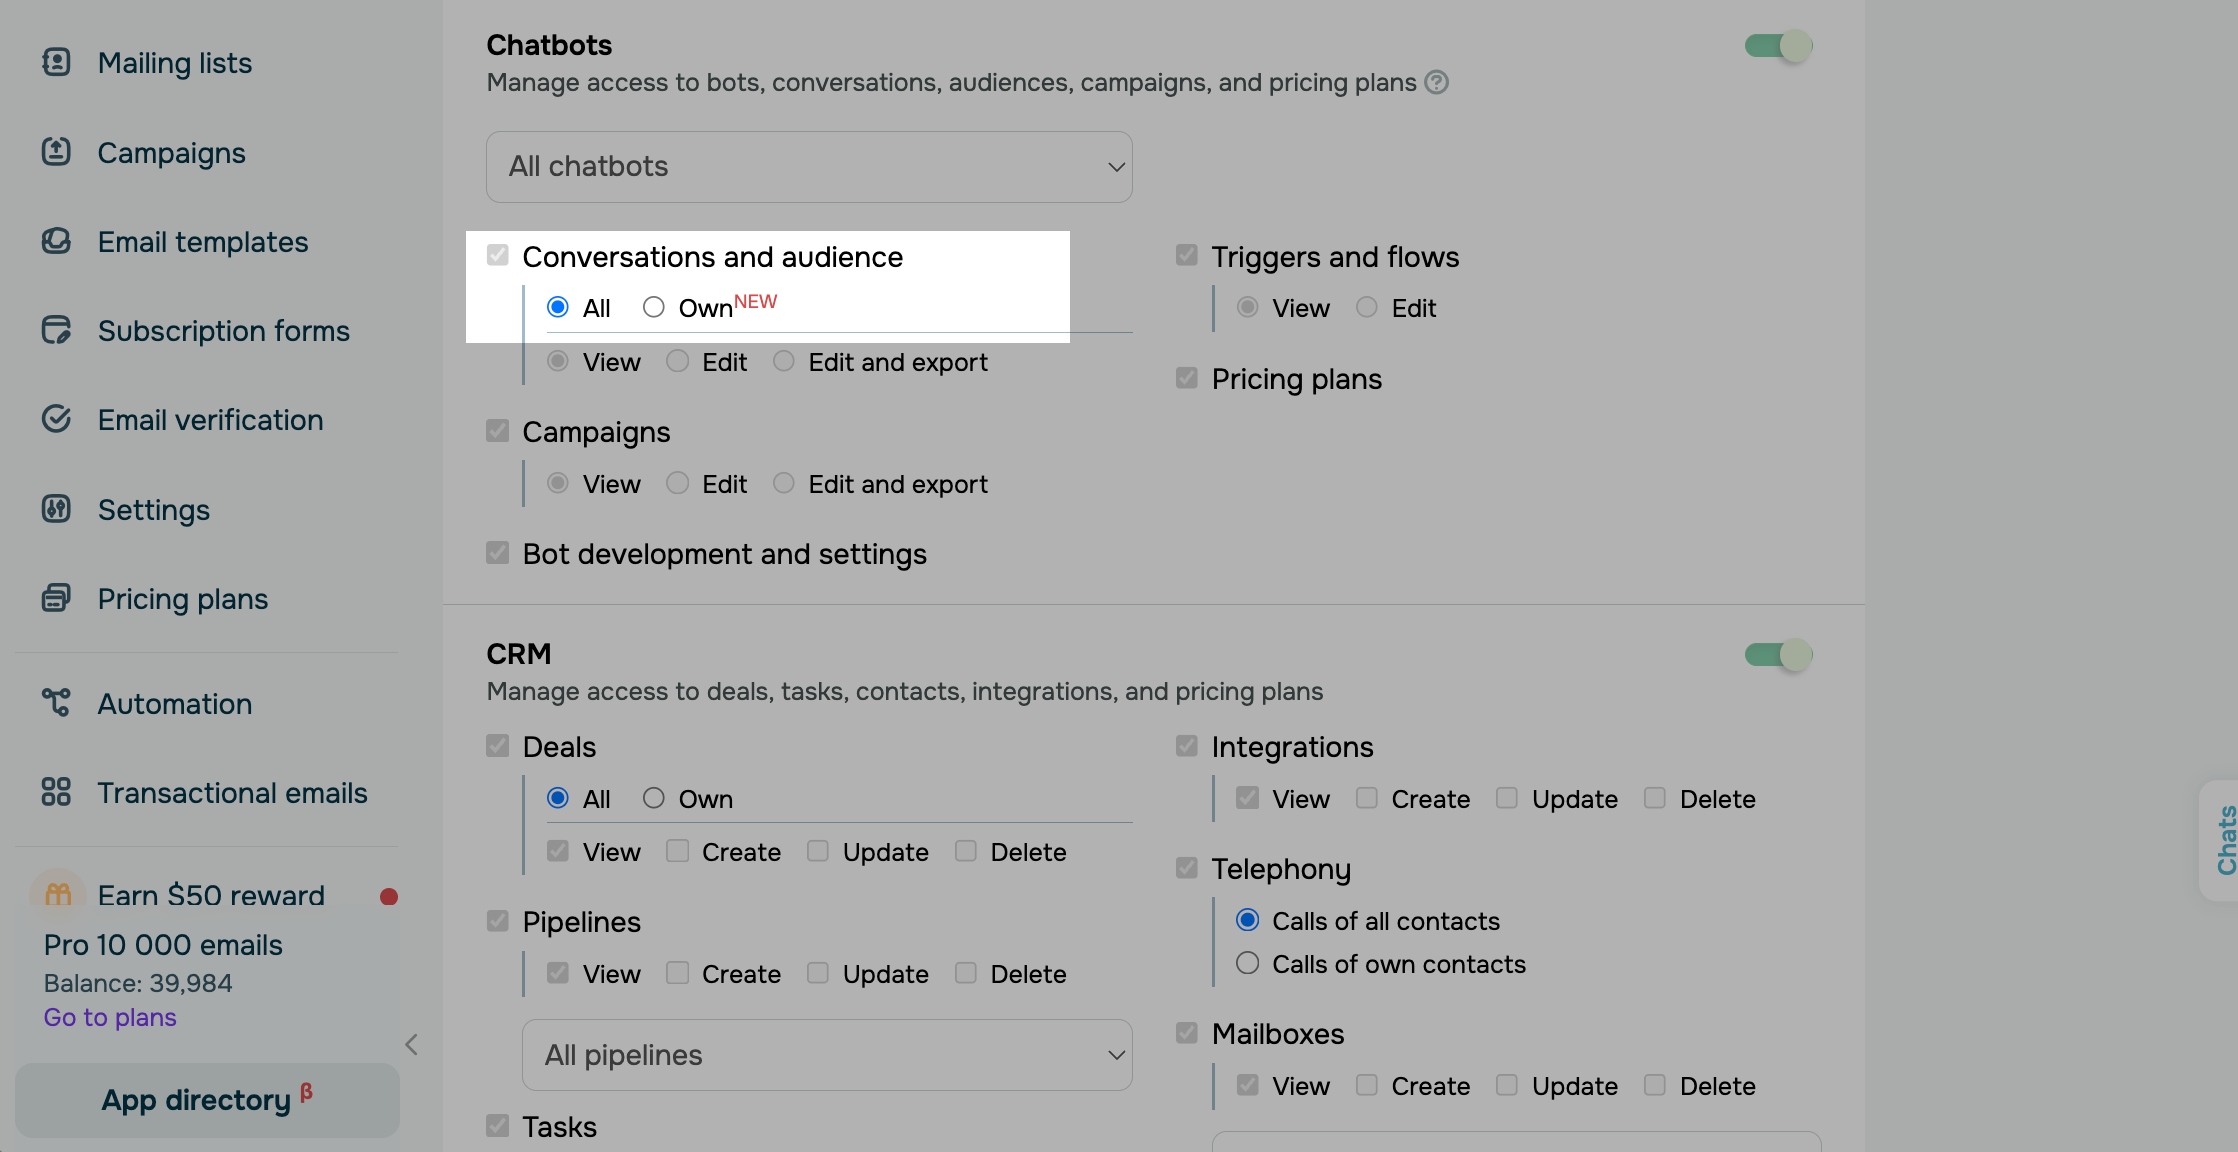
Scroll down to the Chatbots section. In the Conversations and audience section, select one of the options:
| All | The agent sees all conversations and contacts of the selected chatbots. |
| Own | The agent sees only the conversations and contacts assigned to them. |
Use the wider option for agents who pick up chats from the queue or cover for each other, and the narrower one when agents should work only with their own customers — for example, outsourced agents or several sales reps sharing one chatbot.
 Last Updated: 28.08.2026





or