Use the "Manage subscription" and "Re-confirm subscription" variables
The subscriber data that you collect in your mailing list becomes outdated over time. You can send subscribers a second request to confirm their subscription in accordance with the GDPR or change the information already available in your saved variables.
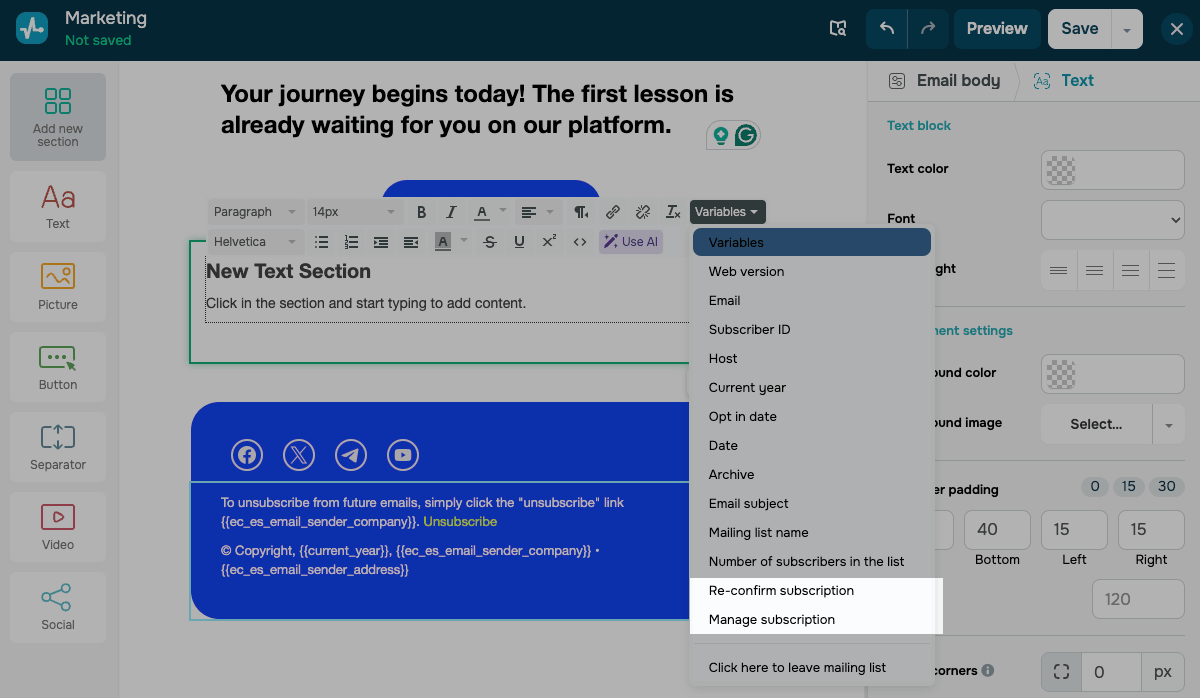
Add a variable to a template
Select the template you want and go to editing mode. Drag the text block into the template, open the edit panel, and select the Re-confirm subscription or Manage subscription variable options.
Manage subscription allows subscribers to change their personal information stored in your mailing list. Your subscriber will only be able to change fields that you have created, filled with values, and made available for editing by a subscriber in your mailing list. Also using this link, your subscribers can request the deletion of their personal data.

Re-confirm subscription lets you get additional consent to continue to send emails.
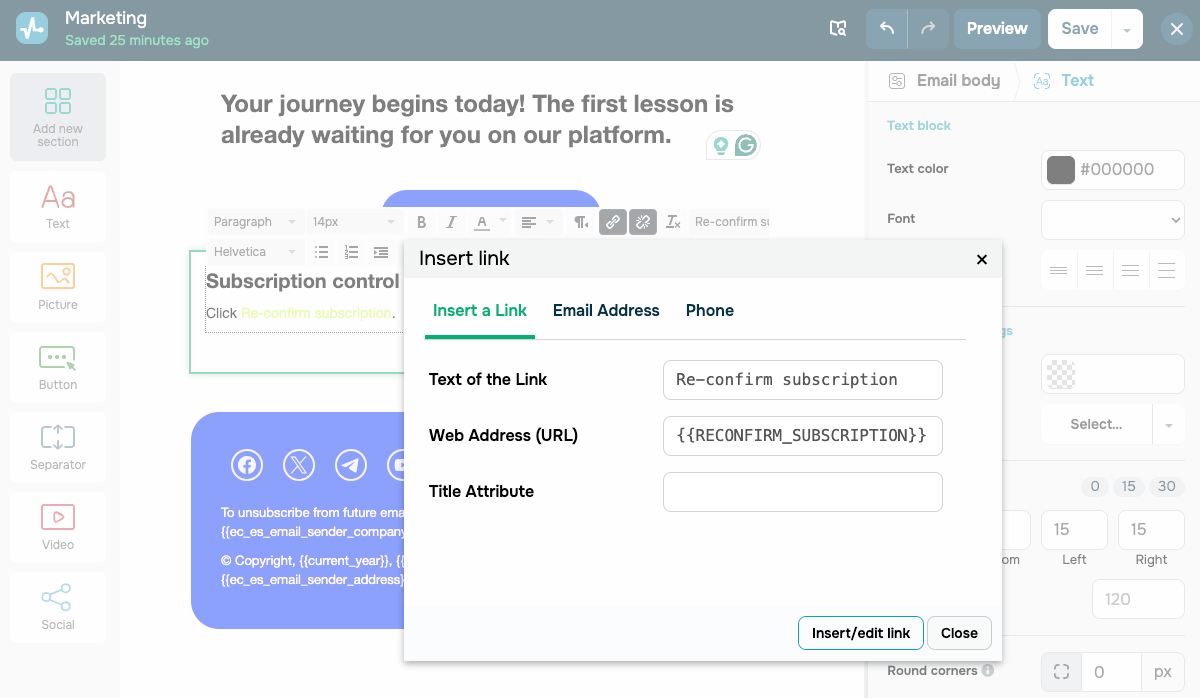
A hyperlink to the corresponding variables {{MANAGE_SUBSCRIPTION}}, {{RECONFIRM_SUBSCRIPTION}} will be inserted into your template. You can edit the displayed text via the link edit option or in the source code mode <>.
You can use the these variables in your email campaigns and automation templates.
Managing and re-confirming a subscription in an automation is only available for flows that start with an Add subscriber trigger.
Also, if users have canceled their subscription or deleted data in the Manage subscription form, then the contact status in the mailing list will change to User requested to delete personal data, but the automation flow will not be stopped for them.
From the subscriber's side
Manage subscription
In the form that opens, following the link in the received email, the subscriber can change their data or send a request to delete personal data.
To change the data, subscribers can enter new values in the corresponding fields. Then they need to agree to the processing of personal data and the terms of the privacy policy and click Update profile.

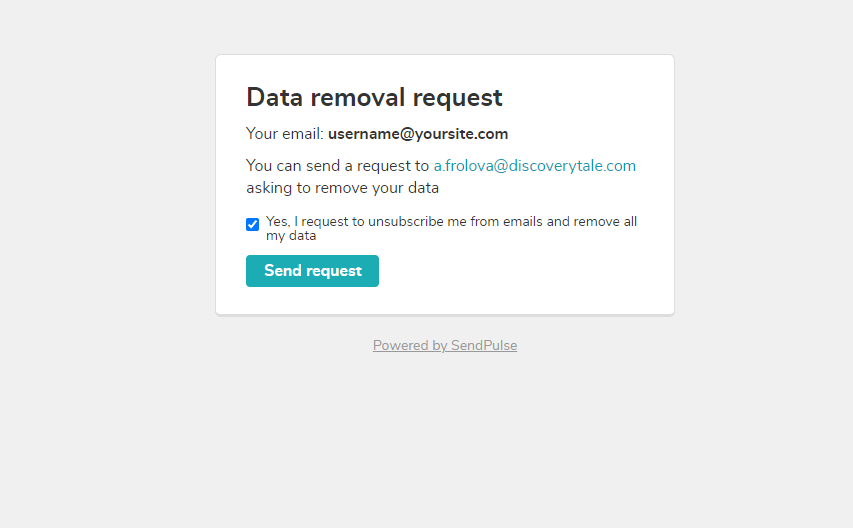
If the subscriber wishes to unsubscribe or delete data, they can click on the "Unsubscribe" or "Request removal of your data" link, respectively.
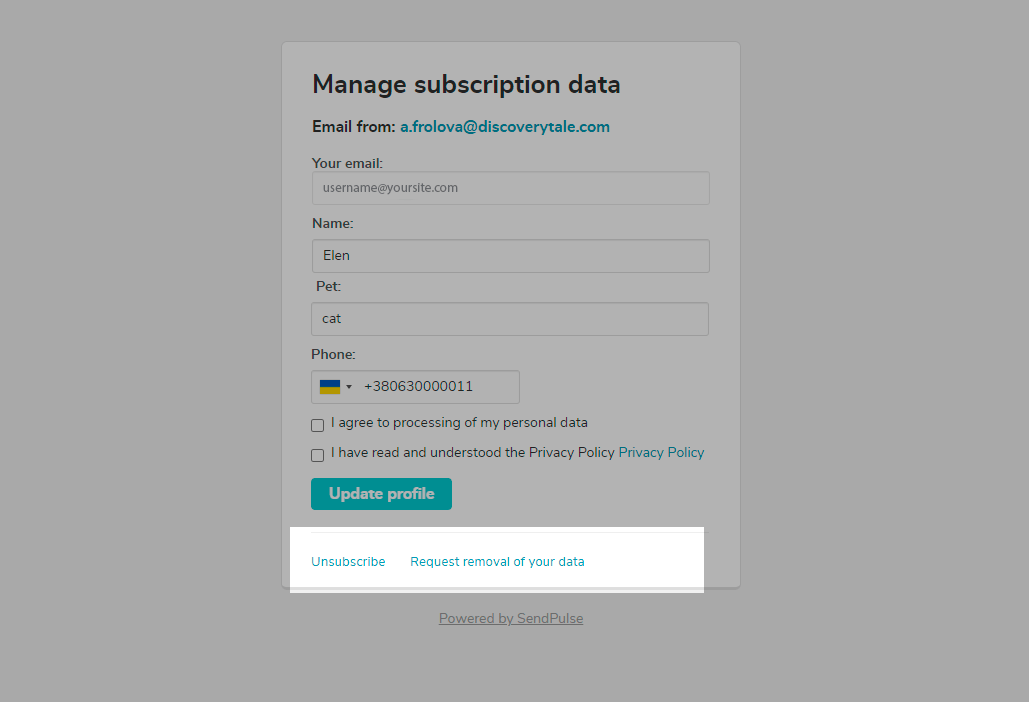
In the window that opens after clicking on the link, subscribers need to confirm the action.
Re-confirm subscription
If you are sending a request to re-confirm your subscription to your emails, the subscriber must mark two checkboxes.

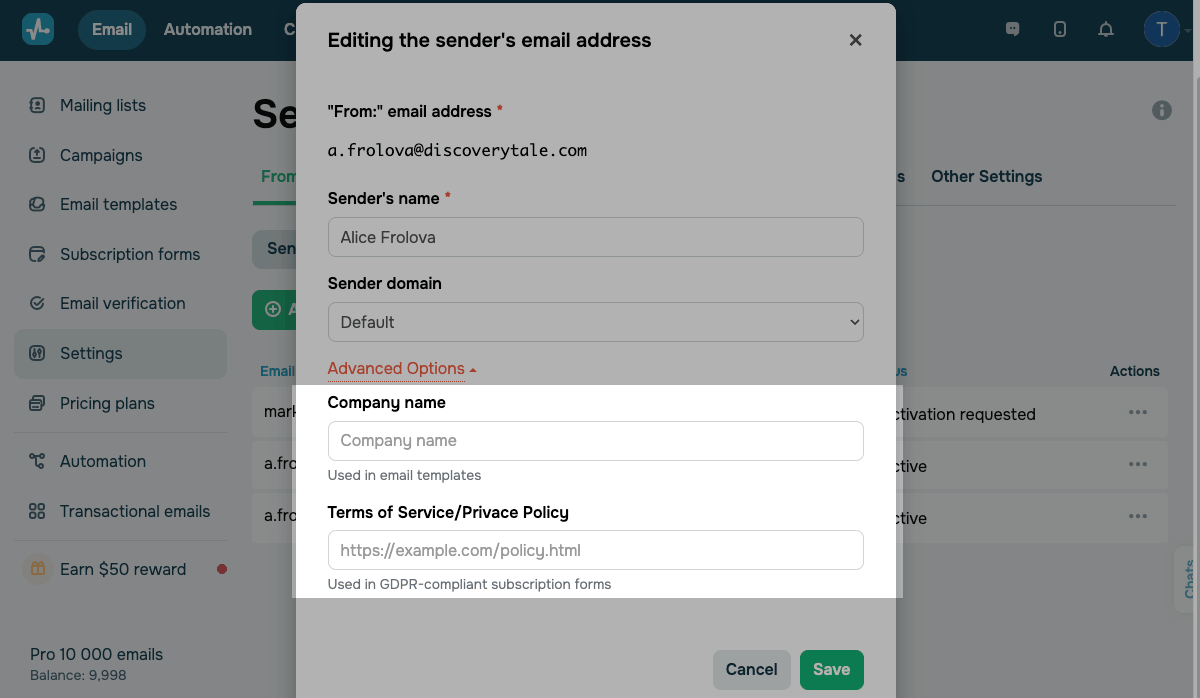
You can change the link to the privacy policy and the company name in the sender address settings.
How information on your mailing lists will change
If the subscriber has changed their data, it will automatically be changed on the mailing list that you used to send your emails.
If the user has requested the deletion of their data, their contact status will change to User requested to delete personal data.
Please note that data is not automatically deleted. You can filter contacts in your mailing list by this status and delete the data. Also note that it will not be possible to send emails to an address with this status.
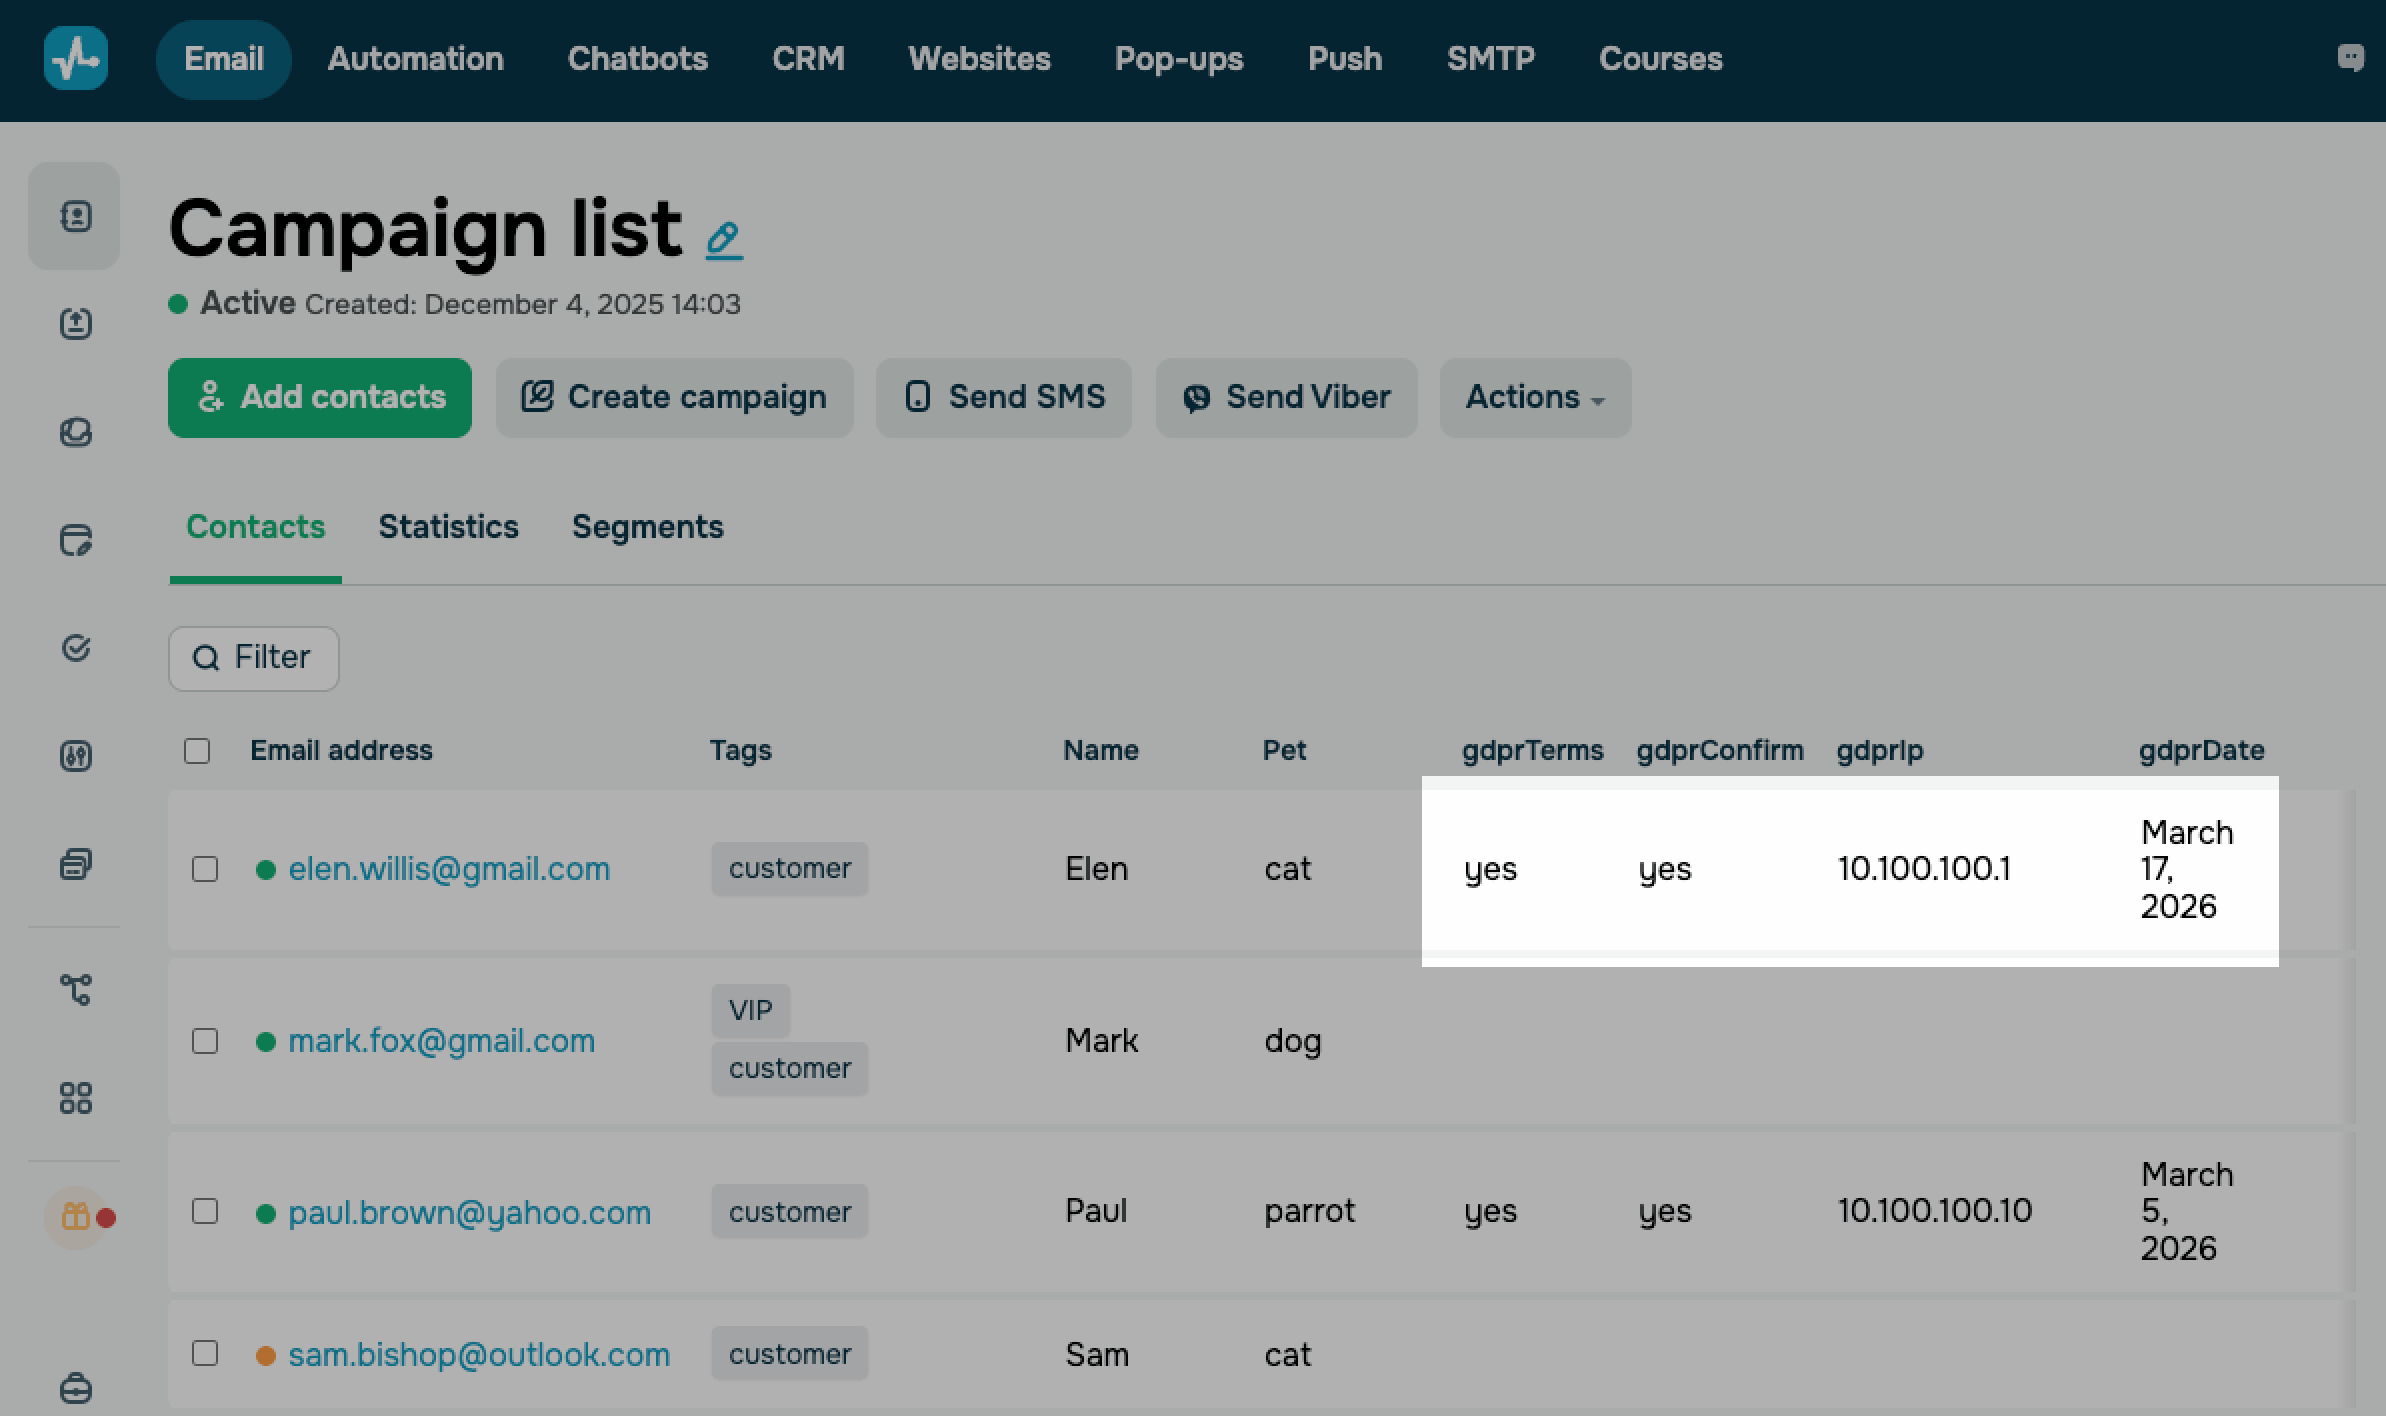
The subscriber who reconfirmed the subscription will receive values in additional variables: gdprTerms, gdprConfirms, gdrpIp and gdprDate. You can use it when creating segmented campaigns.
Last Updated: 05.12.2023
or