Segmentation in email marketing is the process of splitting your contact list into smaller groups based on shared data, like behavior, preferences, demographic details, and more.
Segmentation helps you deliver personalized messages tailored to every subscriber instead of blasting generic emails to your entire mailing list. These campaigns usually perform better, boosting open and click-through rates.
Now, let’s walk through how to create segments based on user behavior and preferences in SendPulse and make your email campaigns more relevant.
How to segment your audience based on user behavior
In SendPulse, behavioral segmentation relies on open and click rates and subscriber ratings from the past three months. This makes it easier to pinpoint active, inactive, or reengaged subscribers and tailor campaigns to high-potential groups.
To create a segment, go to the “Mailing List” section and select a subscriber list you’ve already sent campaigns to. Then navigate to the “Segments” tab and click “Add segment.”
In the pop-up window, select your segment type, set up filtering conditions, and enter their values.
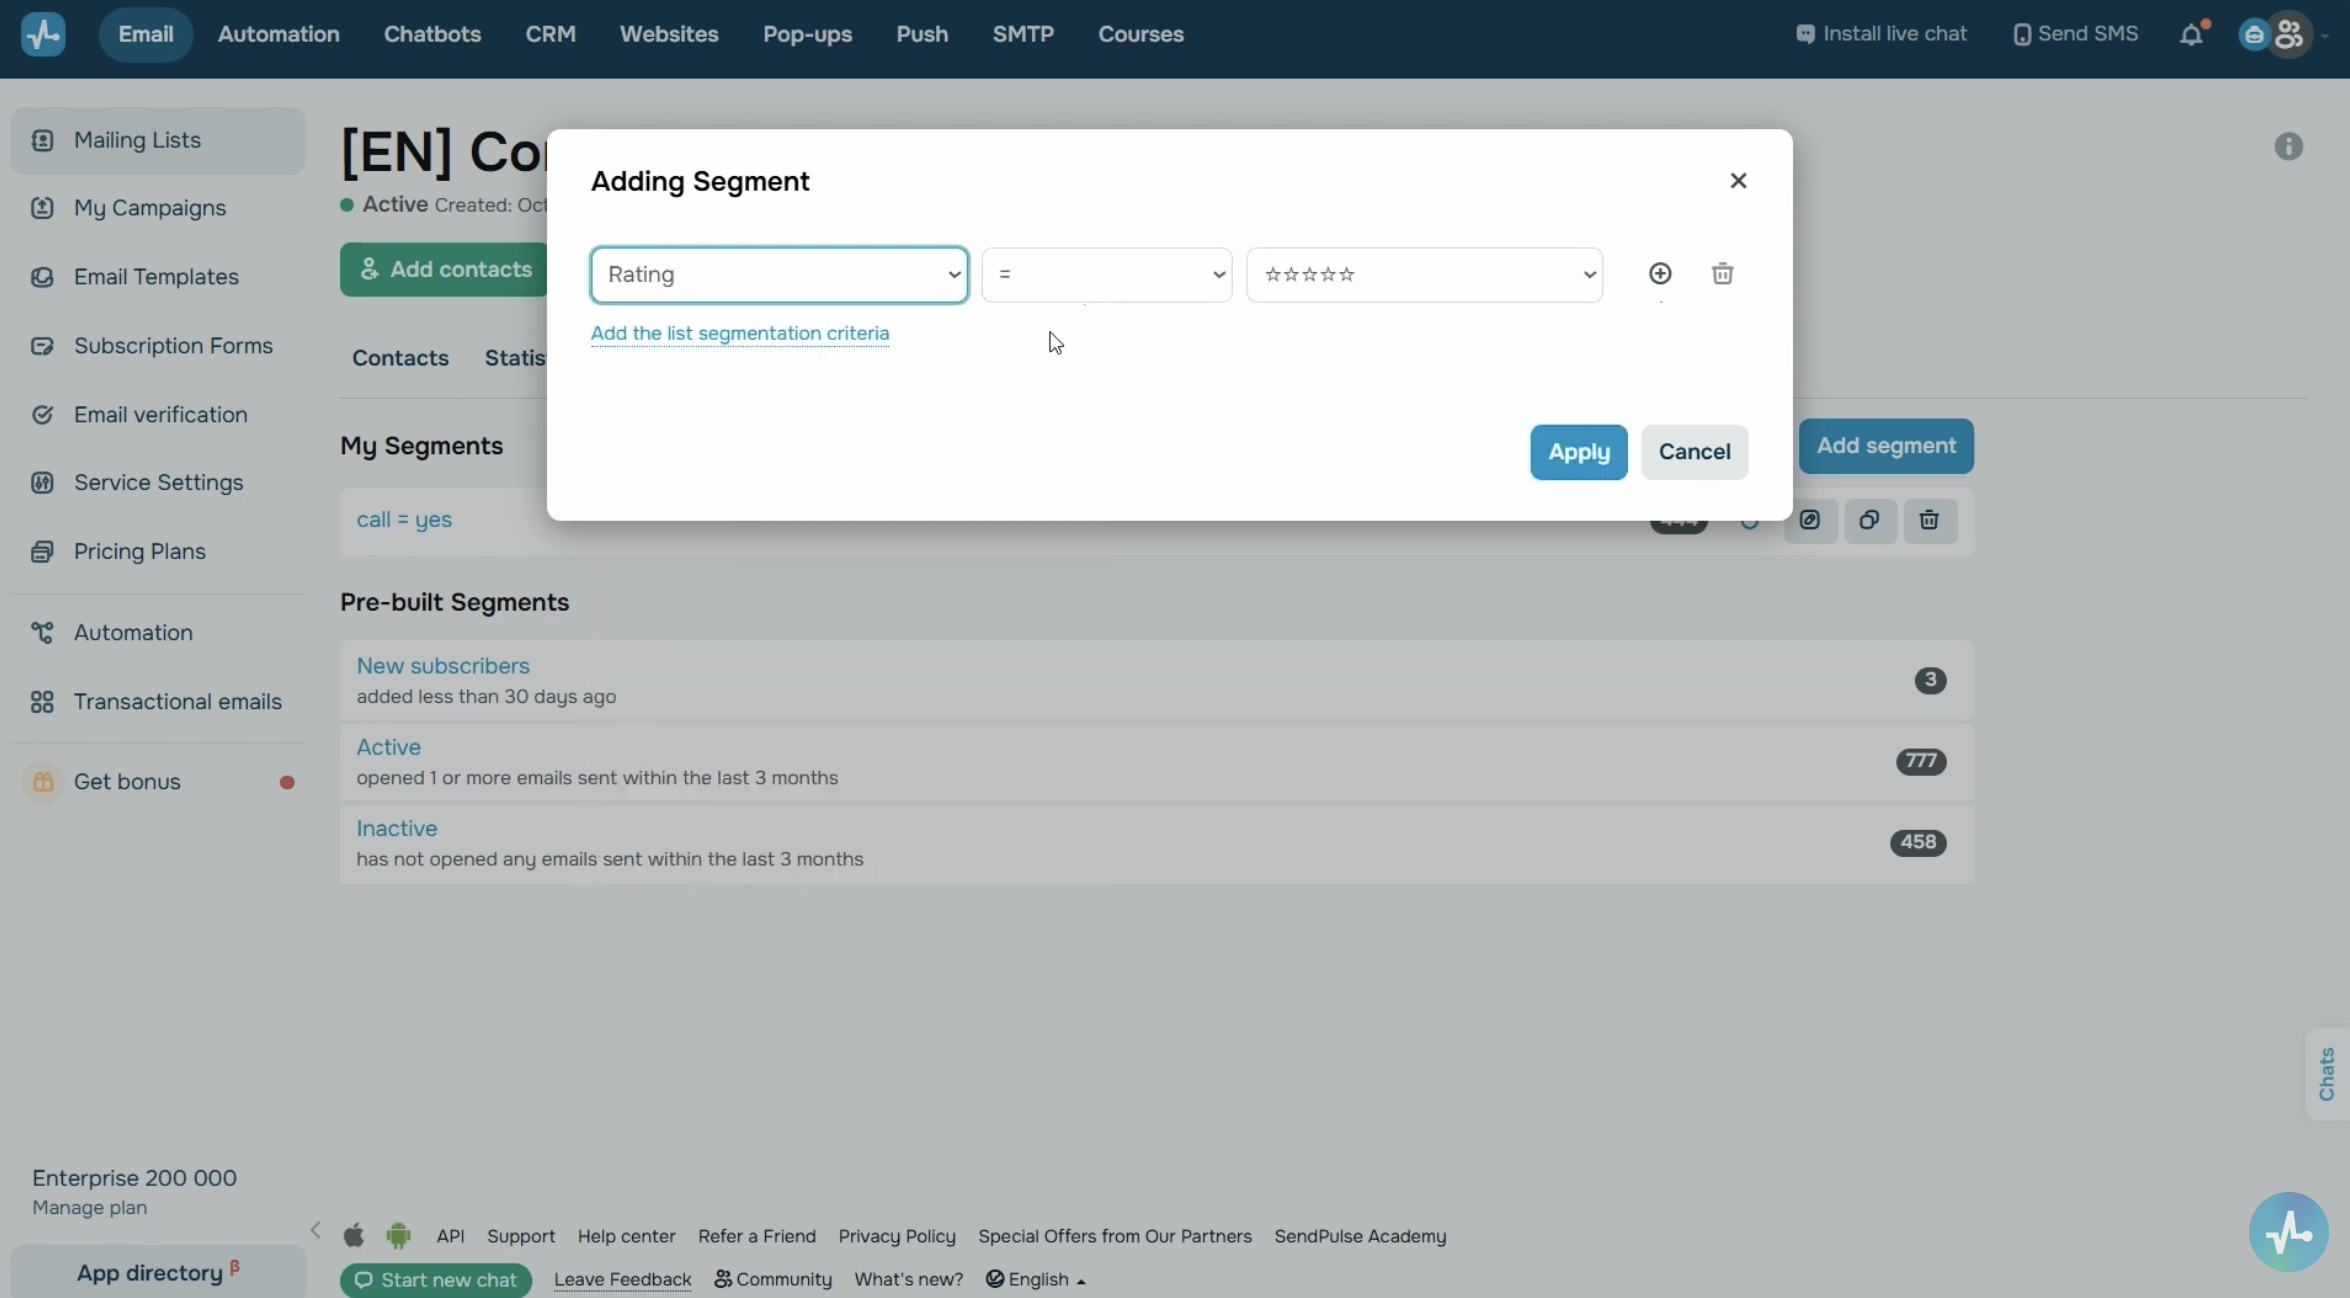 Segments tab of a mailing list and the Add segment pop-up window with the segment type, condition, and value fields.
For behavioral segmentation, you can use the following criteria:
- Email actions, such as who received, opened, or clicked through your emails.
- Subscriber rating, from zero to five stars, where higher ratings mean more opens in the last 60 days.
- Interaction statistics, including the number of deliveries, opens, and clicks, with corresponding dates.
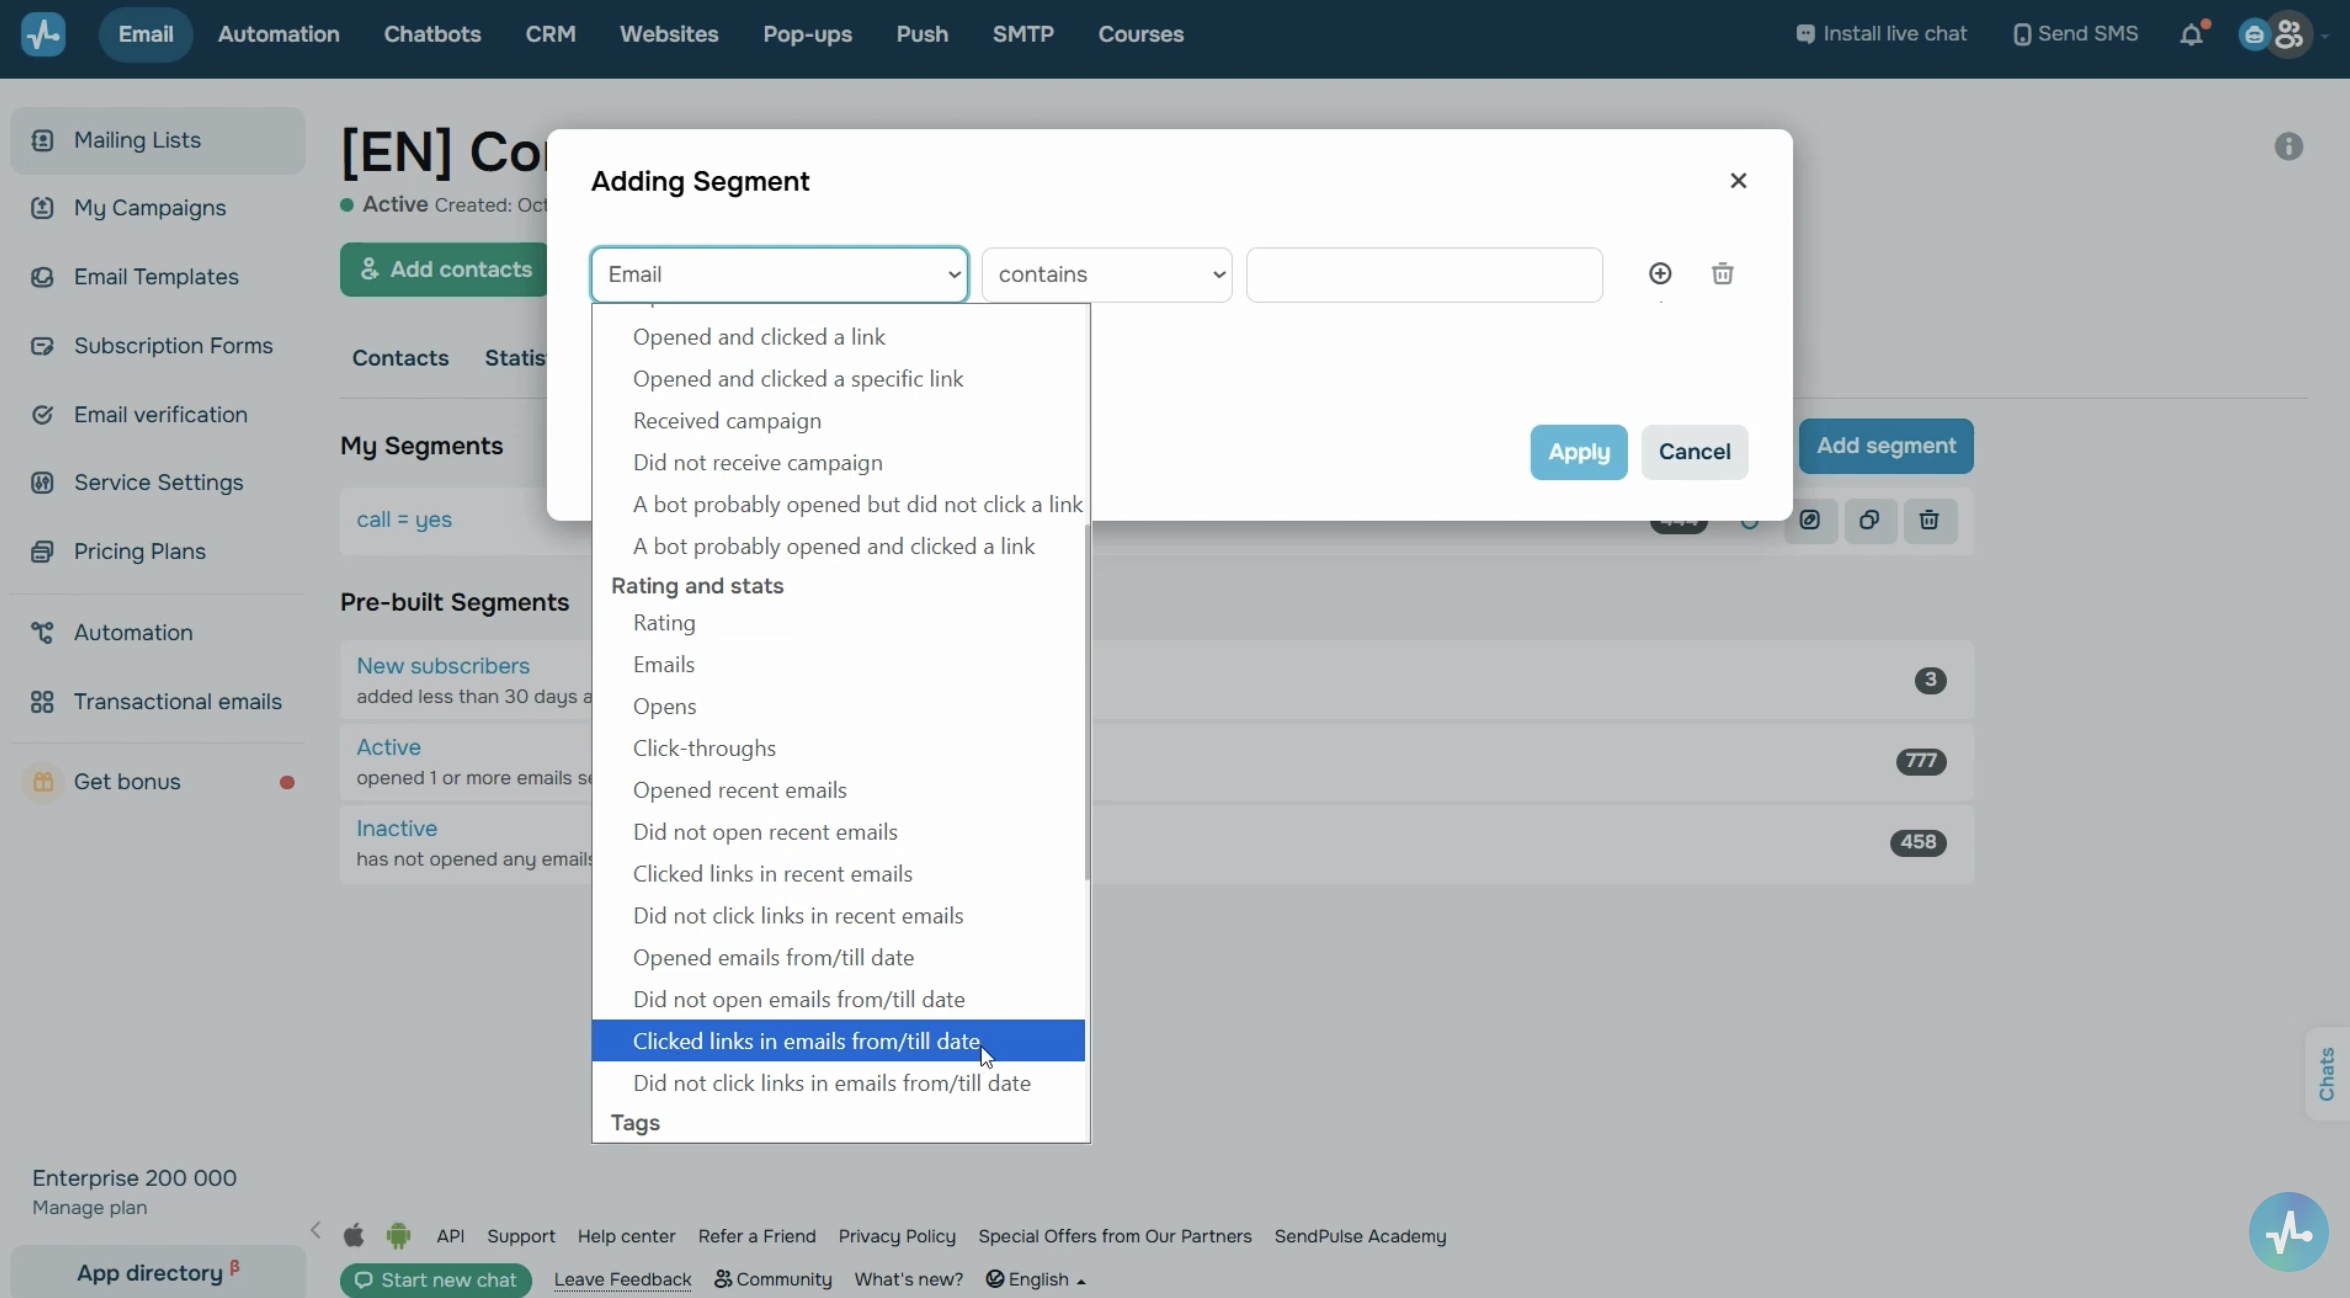 Segment type drop-down list with Email actions, Subscriber rating, and Interaction statistics options selected in turn.
While setting up a segment, you can combine conditions using “and” and “or” operators for conditions of the same type and “all” and “any” operators for different condition types. This allows you to build more targeted segments.
Select “and” and “all” operators when all conditions must be met. And use “or” and “any” if meeting just one condition is enough.
Suppose you need to target active subscribers with upsell campaigns. You can create a segment where recent campaign opens are higher than three, and the subscriber rating equals four.
To re-engage inactive subscribers, try setting conditions like “Did not open recent emails” more than five times and “Did not open emails before a selected date.”
Re-engaged subscribers are those who start interacting with your emails again. For instance, they open an email and click a link after the reactivation date, despite being inactive for the previous 90 days.
To keep their interest alive, it is a good idea to send premium content or discount offers to this segment.
If some subscribers never engage with your emails, it’s best to remove them from your list. This will help you save resources, protect your sender reputation, and keep your mailing list healthy.
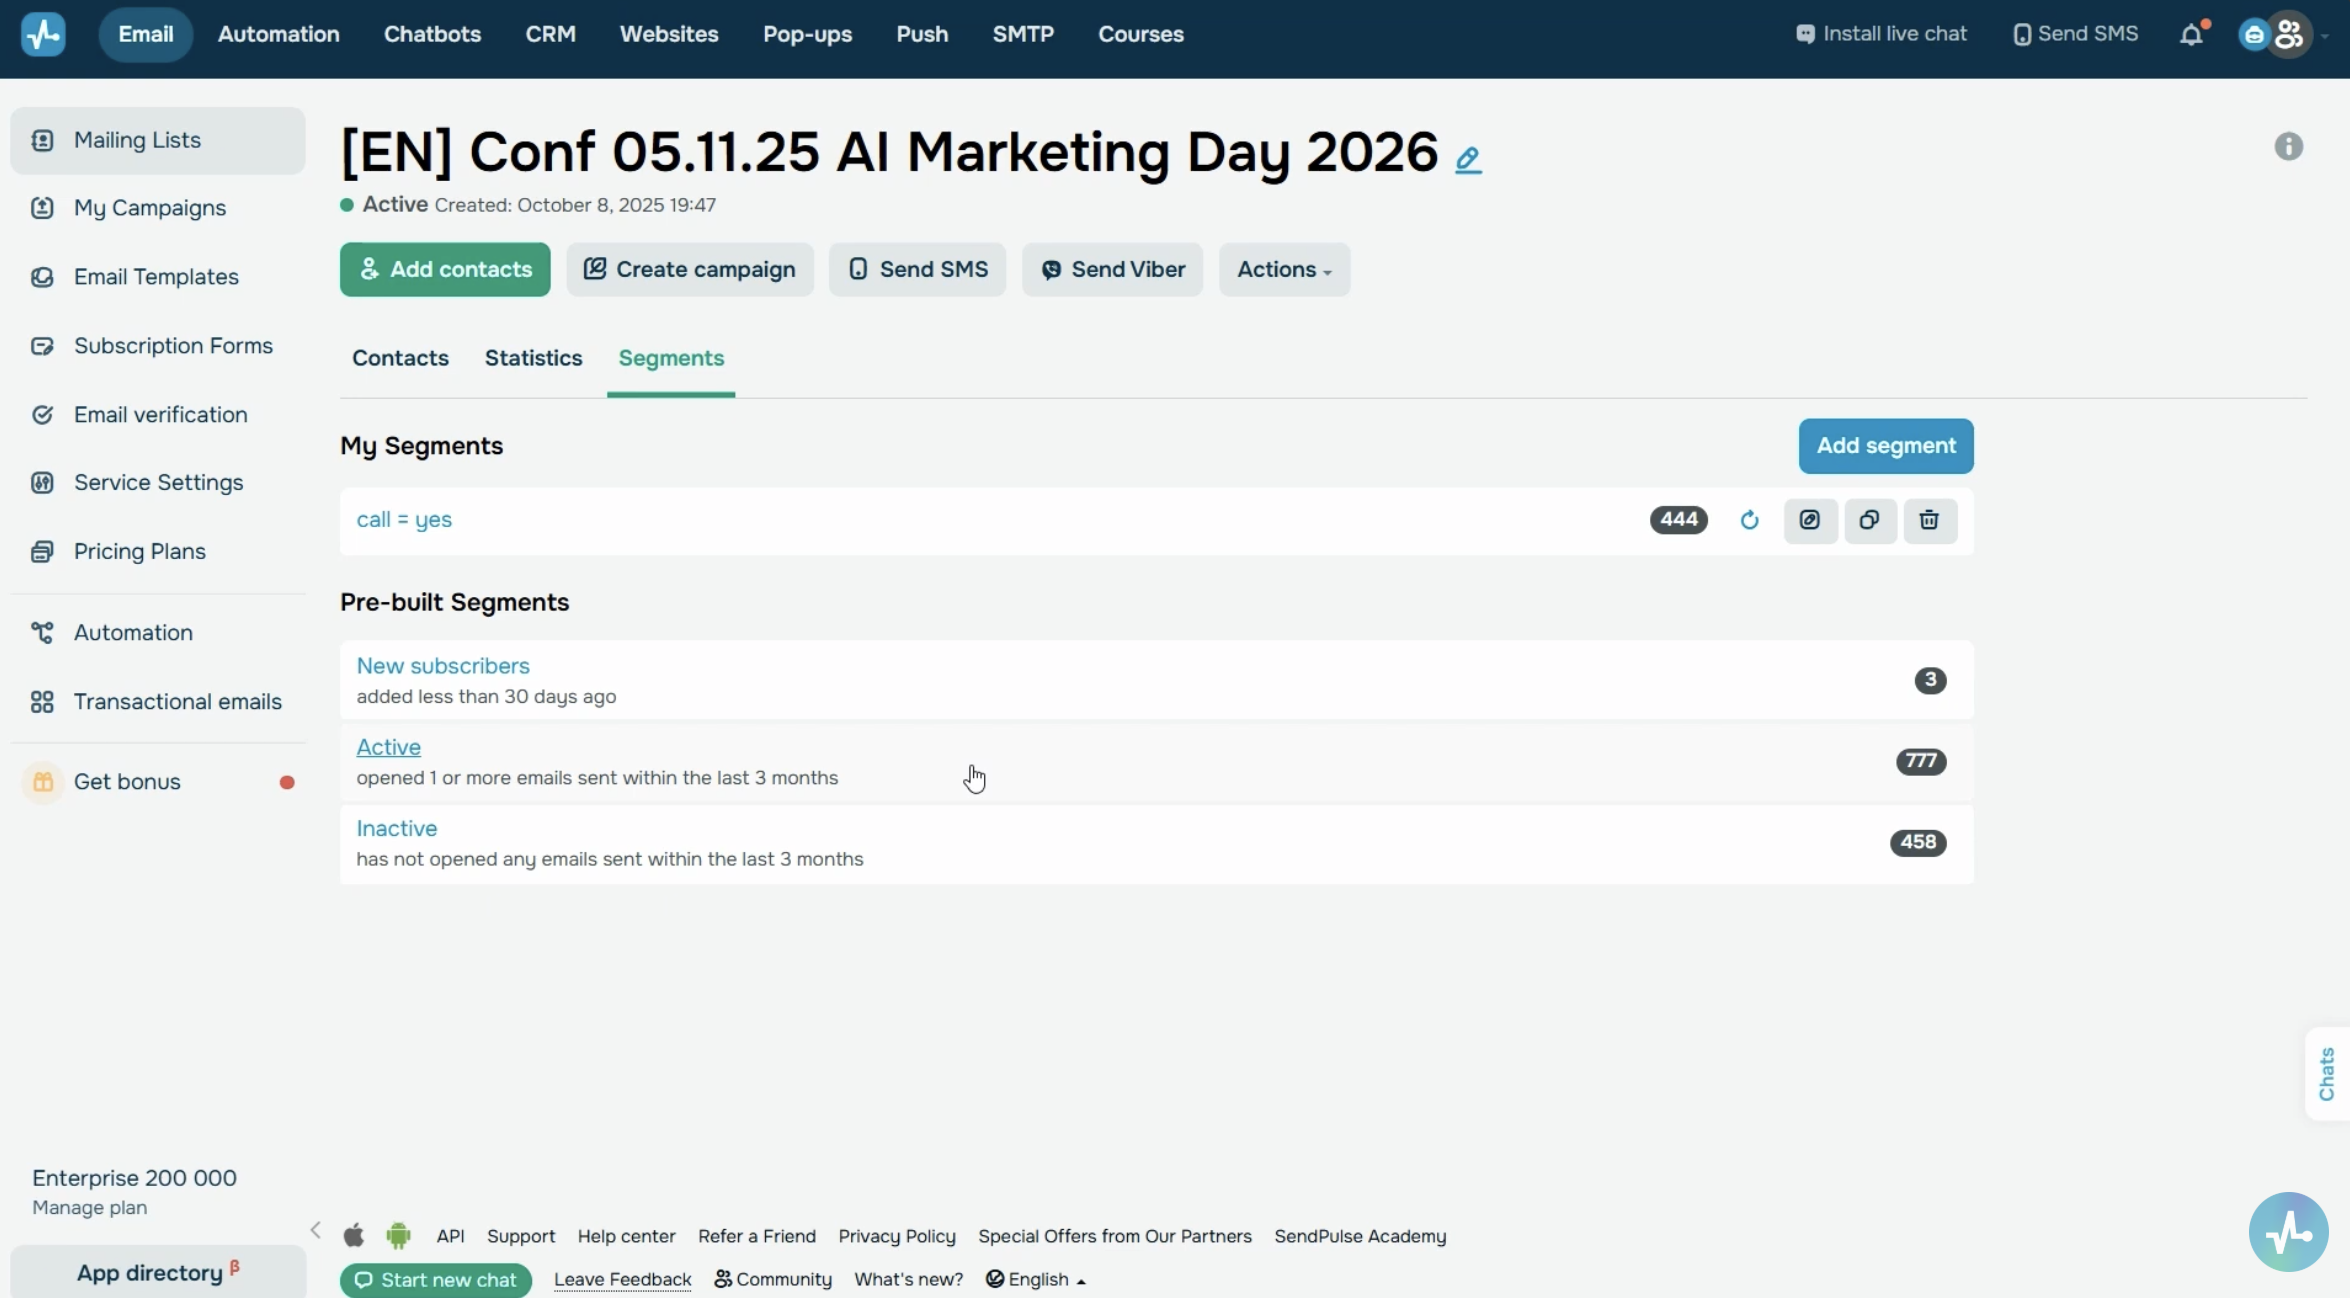 The list of ready-made segments available on a paid plan: New subscribers, Active subscribers, and Inactive subscriber
With a paid plan, you also get access to ready-made segments, including the following:
- New subscribers. These are the contacts added to your list within the last 30 days;
- Active subscribers. These users have opened at least one email in the past three months;
- Inactive subscribers. These contacts haven’t opened any emails during the past three months.
How to segment your subscribers by preferences
In SendPulse, you can segment subscribers by preferences using tags and variables.
Tags
A tag is a label that you add to contacts to organize them into groups.
 Creating a tag for contacts in the mailing list and assigning it to a group of selected contacts
For instance, you can tag subscribers who clicked a link in your promotional email as “Interested in discounts” and continue sending them personalized deals later on.
To give you another idea, you can create a segment of loyal customers with a four-star rating or higher and assign them the “VIP” tag.
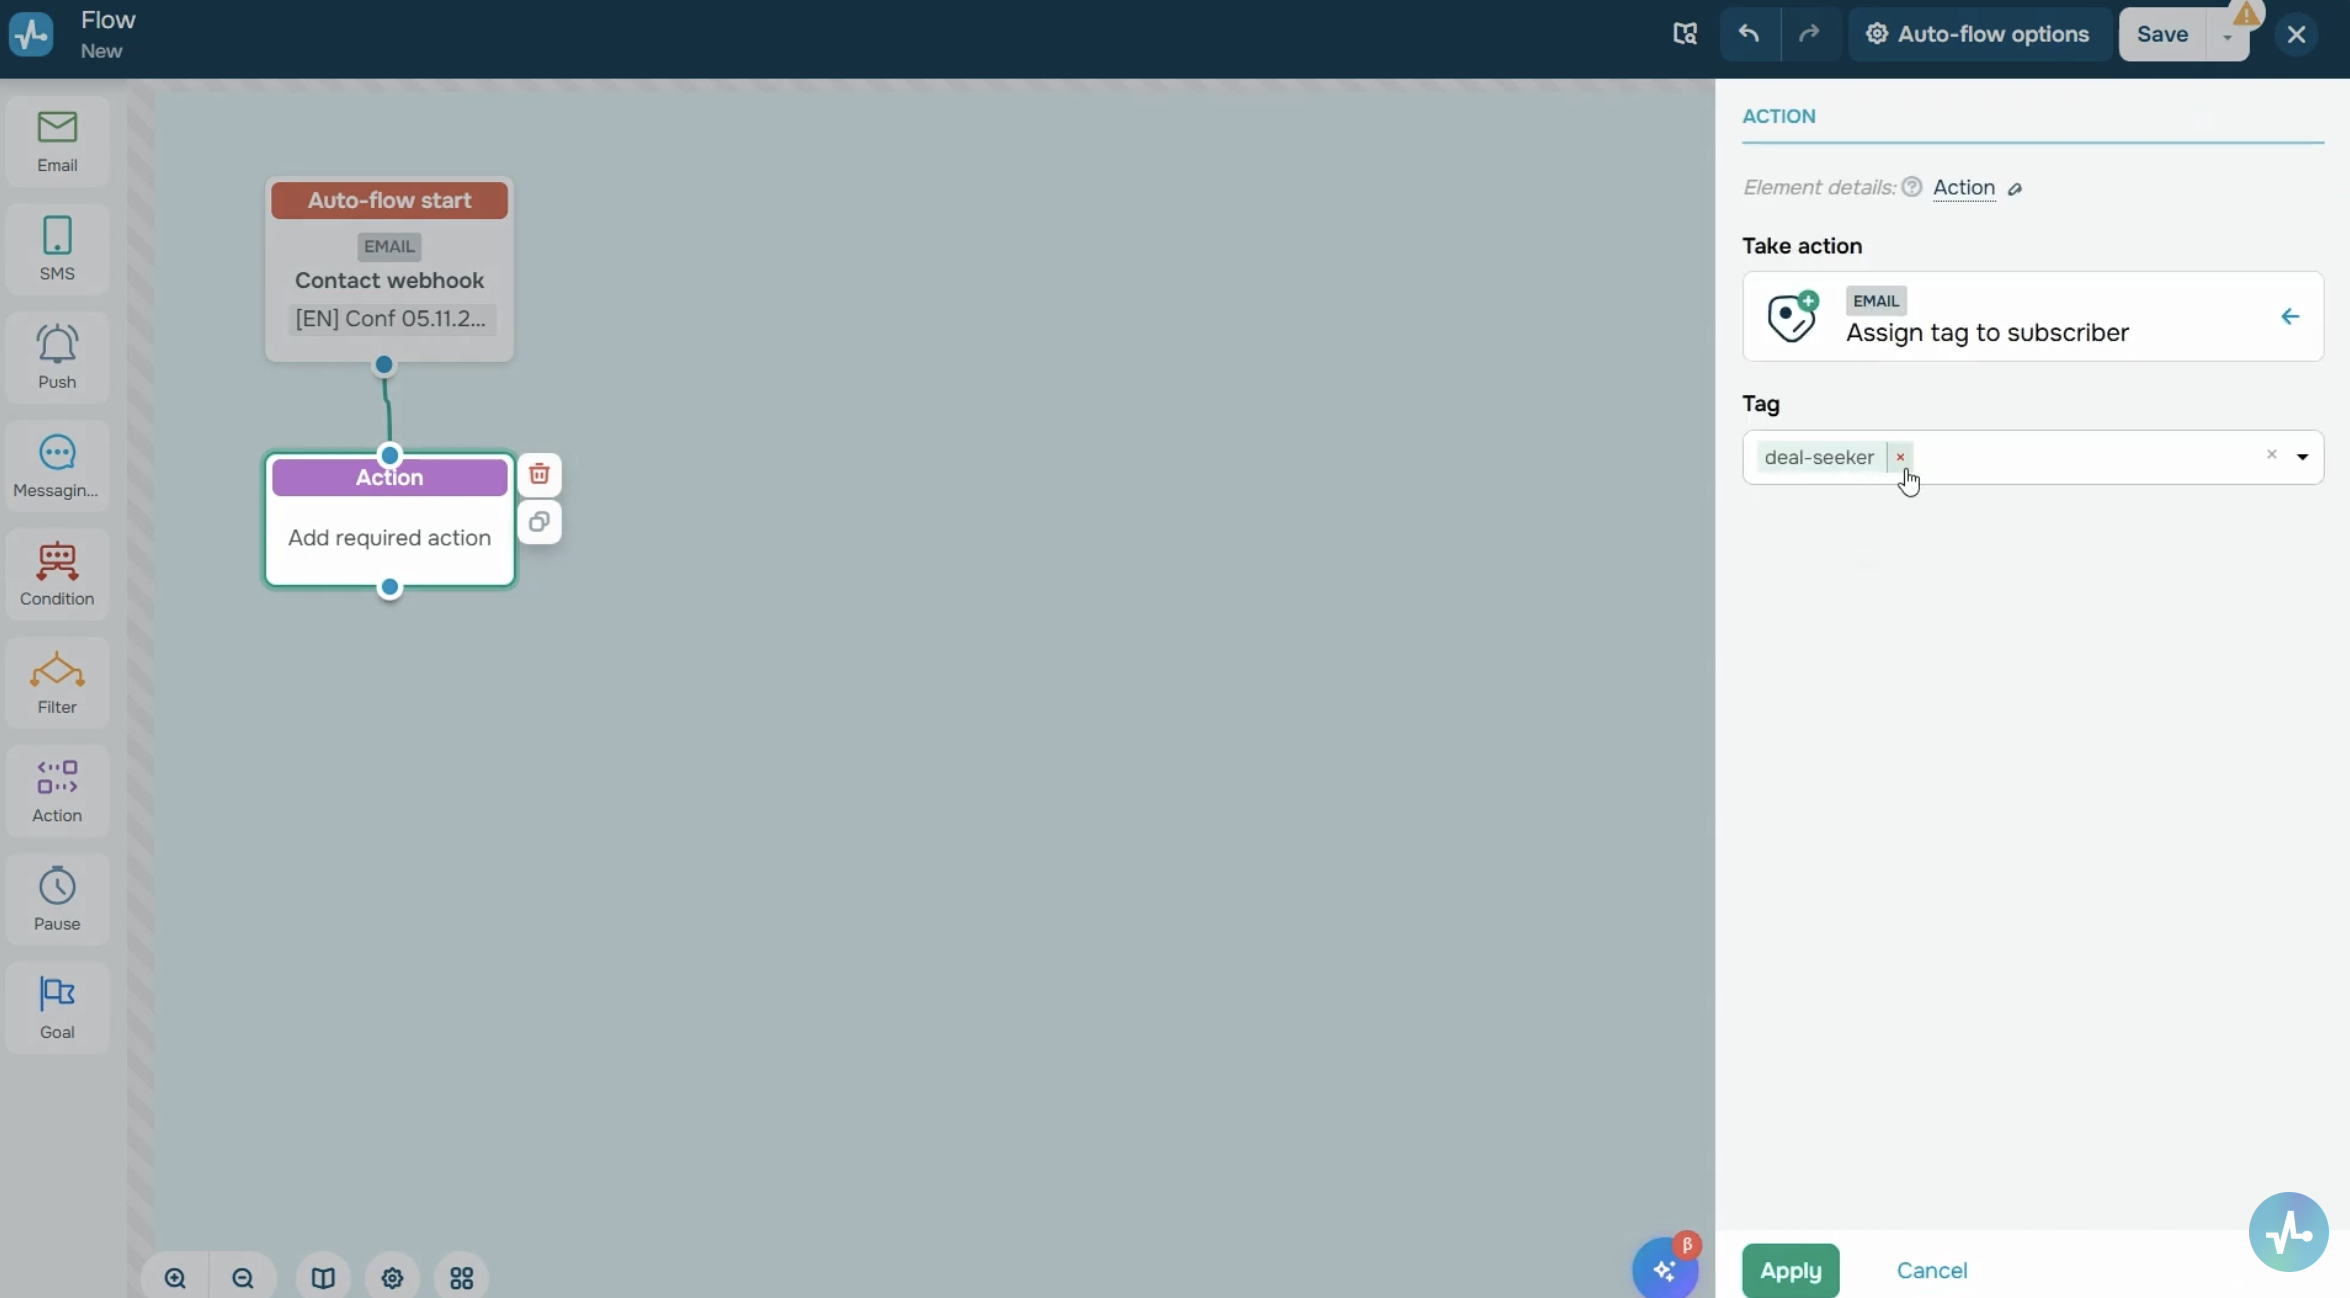
You can assign them manually in the email marketing service or automatically using Automation.
Variables
Variables in SendPulse mailing lists help you store subscribers’ personal information.
In addition to system variables like email address or phone number, you can create custom fields, let’s say, to log subscribers’ city, job title, date of birth, selected product color, and more. Variable values are collected automatically through signup forms on your website, or you can add them to your mailing list manually.
You can use variables even with the free pricing plan. Unlike tags, you can add them to your email subject line and content to enhance campaign personalization. Learn more about variables by following the link in the description below.
After you add tags and variables, they become available in the segmentation condition list. When filtering by tags, you can select contacts with a specific tag or contacts that have any tags. When filtering by variables, you can use exact or partial value matches and check if a variable contains a value.
You can combine tag and variable conditions using “and,” “or,” “all,” and “any,” just like with behavioral criteria.
After adding all the criteria, click “Apply,” and the system will find contacts that match your conditions. You can edit your segment, delete it, or send a campaign to selected contacts. With a paid pricing plan, you can name and save your segment. It will appear in your segment list for this mailing list so that you can use it to create new campaigns later.
Dynamic segments in SendPulse
Along with standard mailing list segments, SendPulse helps you build dynamic segments for hyper-personalized customer communication.
Unlike static segmentation, dynamic segments track events in real time across SendPulse tools, including email marketing service, Automation, CRM system, as well as chatbot and online course builders.
You set the conditions once, and the system takes care of the rest. It automatically adds contacts to the segment or removes them when they no longer meet the conditions.
This helps you ensure every subscriber receives the right message at the right moment. Let’s take a look at how to create and set up a dynamic segment.
In your SendPulse account, go to “Automation” → “Segmentation” and click “Add segment.” Name your segment so you can easily find it later.
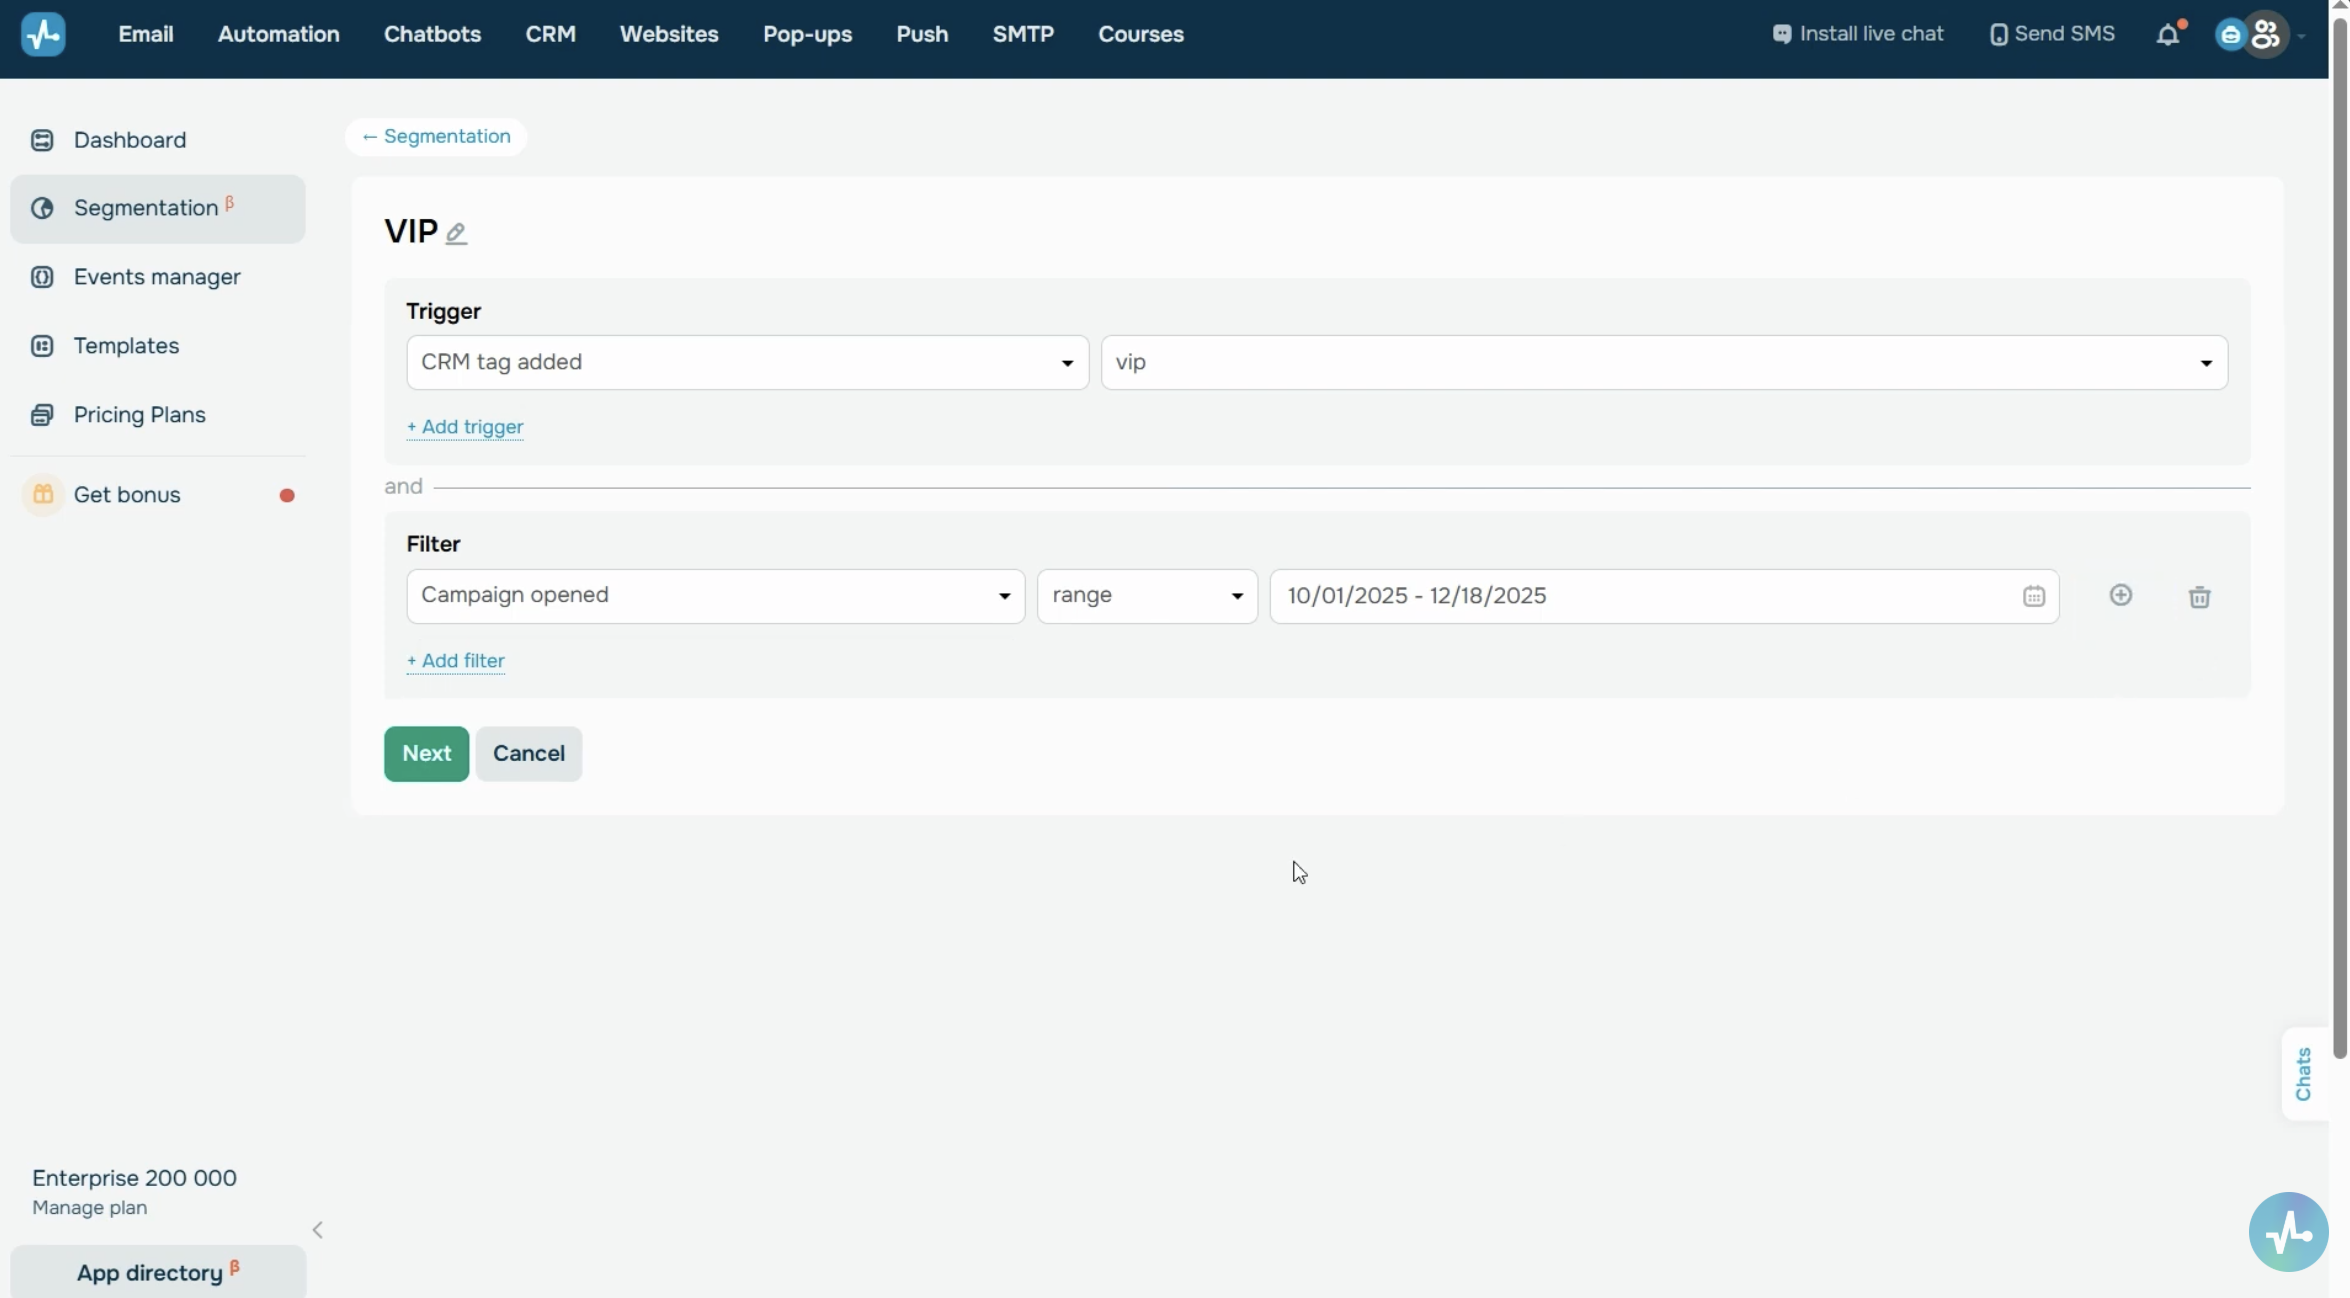 The dynamic segment builder with a trigger and a filter configured for the “VIP clients” example segment.
From there, select a trigger, which is the event that will automatically add a contact to your segment. Your triggers can include a variable update, adding a contact to your mailing list, receiving a specific email campaign, assigning a CRM tag, and more. You can combine multiple triggers from different SendPulse tools. When one of them is triggered, the contact will be added to your segment.
While triggers track future events, filters analyze your contact’s existing information. In the “Filter” element, select a filtering parameter from the drop-down menu and set the value or condition you need. To illustrate, you can check whether a contact is assigned to a specific mailing list, has or doesn’t have a tag, has opened your emails, and more.
If you add multiple filter conditions, you can combine them using the “any” or “all” operators so that contacts enter the segment when at least one condition is met or when all conditions are met.
As an illustration, let’s create the “VIP clients” segment. It will include contacts who have the “VIP” tag in the CRM system and who have opened your emails within a selected timeframe.
This will help you send exclusive offers only to engaged customers. If a customer doesn’t open your emails or loses the “VIP” tag, the system will automatically remove them from the segment.
Once everything is set up, you can use dynamic segments as triggers in Automation or apply them to email campaigns by selecting a relevant segment as your audience.
Wrapping up
Audience segmentation helps you send the right message to the right person when it matters most, boost open and click-through rates, and enhance your overall campaign performance. With SendPulse, you can build targeted segments for personalized campaigns using behavioral data, tags, and variables, or let dynamic segmentation handle the routine for you.