If your website supports multiple languages, you can add a SendPulse-powered live chat in each to interact with customers in their preferred languages. This can help you foster loyalty and drive conversions, as customers who get personalized assistance are more likely to make a purchase or take another suggested action.
In this article, we’ll show you how to create a live chat for every language version of your website. In just a few clicks, you’ll ensure smooth and consistent communication with your visitors.
First, let’s create a live chat widget and place it on your website.
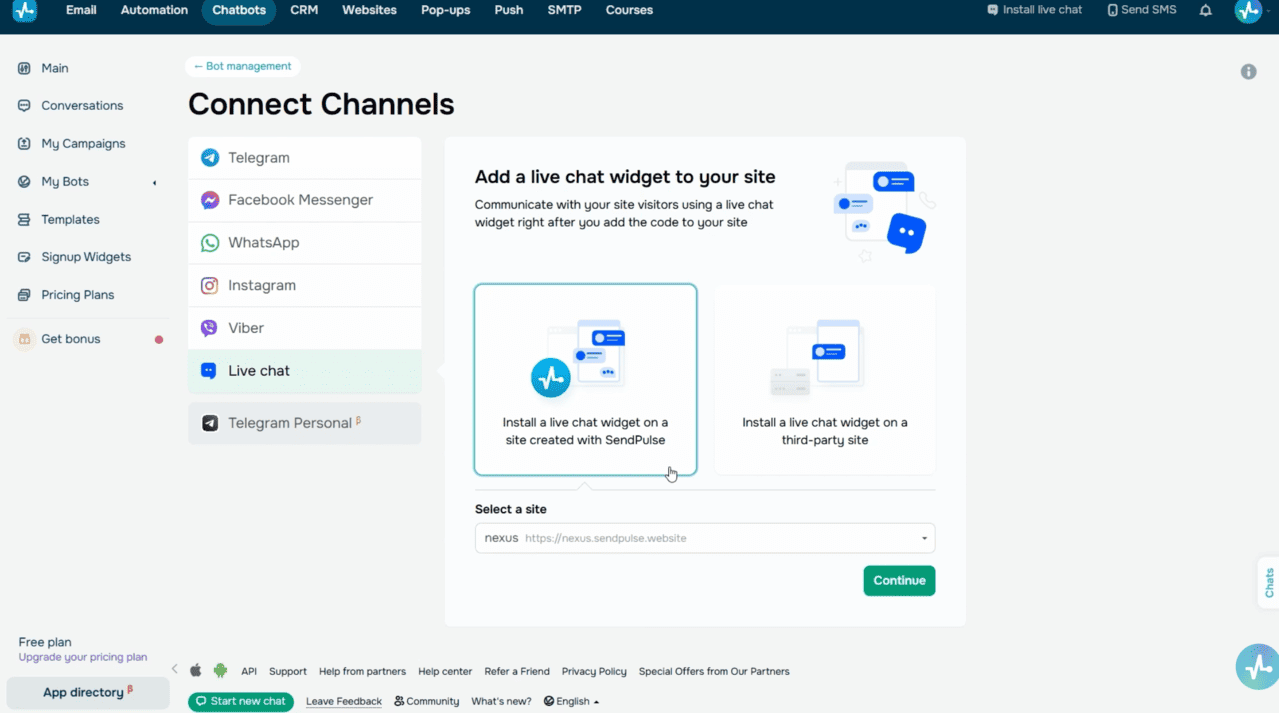
To do this, go to the “Chatbots” section in your SendPulse account. Click “Manage bots” and select “Connect” next to “Live chat.”
Choose a website you want to add your widget to. Select your SendPulse-powered website or paste the link to a website built using third-party tools.
Your next step is to customize your live chat layout.
Select a widget alignment (right or left), choose a color scheme that matches your brand style, and add a live chat title.
To see what your widget will look like, go to live chat settings on the right. If everything looks good, click “Next.”
If you’re adding your live chat to a SendPulse-powered website, it will appear automatically on all website pages.
For external websites, you’ll need an installation code.
To get this code, go to “Bot Settings” > “Website integration.” Copy your code and paste it into your website’s link before the closing tag on every page where you want the live chat to appear.
 Live chat setup
Add live chat flows in different languages
Now let’s set up an automated live chat flow that greets users in their preferred languages.
To do this, select a live chat in your SendPulse account and go to the “Bot structure” tab.
It’s best to start your flow with a “Welcome message” trigger. It launches your flow when a user sends their first message to your live chat. It’s an excellent opportunity to outline your chatbot’s purpose and features, explain how it can assist users, and let them know when your team member will follow up.
To go to the chatbot builder and start creating your flow, click “Edit flow.”
Make sure to add a “Filter” as your first flow element. This element branches your flow scenario and routes users into the right language-specific path.
To add a filter to your flow start, unlink the “Start” and “Message” elements. Then, drag the “Filter” element into your workspace and link it to the “Start” element.
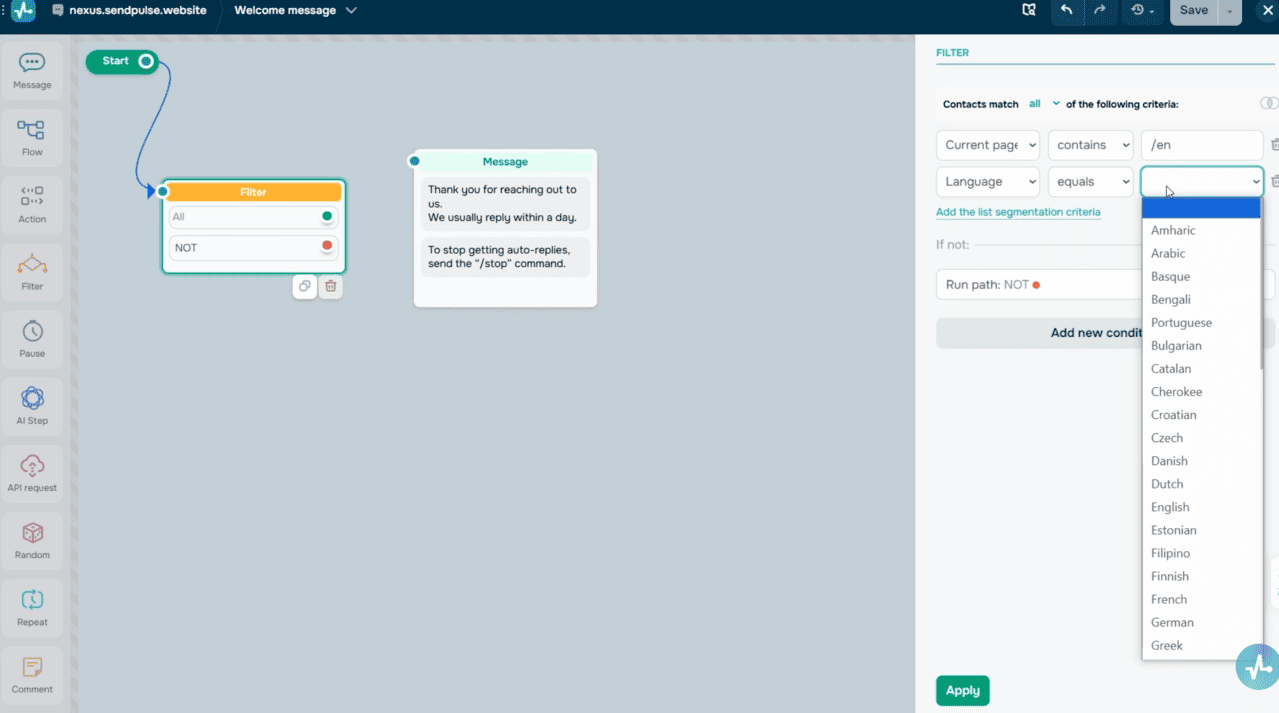
Click the “Filter” element to set one or more conditions that will help recognize users’ preferred languages. Here are a few setup examples you can use.
Use the “Language” condition to check users’ browser languages. Select the “equals” operator and set a language. For example, “Language equals English.”
The “Country” condition helps you recognize website visitors’ countries based on their IP addresses or phone numbers. Use the “equals” operator once again and select a country from the list. For example, “Country equals United Kingdom.”
Choose the “Current page URL” option to verify users’ active webpages when they send a live chat message. To set this one up, you’ll need to select an operator and then enter a link or its part to filter the data.
You can also combine multiple conditions using the “all” or “any” operators. To give you an idea, you can use “Current page URL contains /en” OR “Language equals English.” In this case, users matching at least one condition will follow the English-language path in your flow.
Once you set up the “Filter” element, add a message for every language branch and link flow elements based on your scenario.
 Filter element with Language, Country, and Current page URL
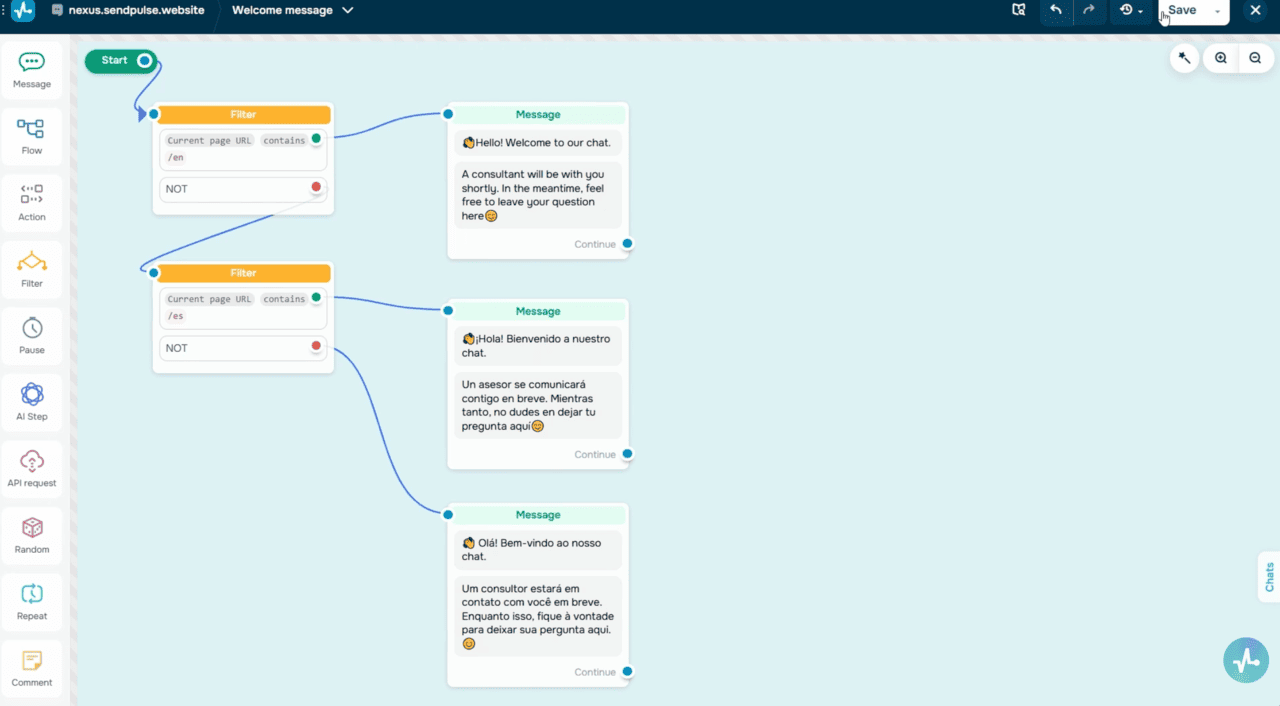
Let’s create a multilingual flow using link markers for different language versions, including /en for English, /es for Spanish, and /pt for Portuguese.
Add “Filter” as your first flow element. Select the “Current page URL contains /en” condition, which identifies if a user is on the English-language page.
The “Filter” element can branch in two directions, each marked with specific dots — “green” if the condition is met, and “red” if it isn’t.
Link the “green” branch to your “Message” element, containing your welcome text in English.
You can duplicate and edit this element if you’d like. Next, add a second filter condition and use “URL equals /es” to detect the Spanish-language page. Link the “red” branch of the first filter to the second filter.
Link the second filter’s “green” branch to the “Message” element with your text in Spanish.
Finally, link the “red” branch of the second filter, when the “URL equals neither /en nor /es,” to your third “Message” element with your text in Portuguese. Save your flow.
 Completed multilingual flow
This way, you will create a branching flow logic where your chatbot tracks filter conditions and sends its first message in users’ preferred languages. From there, you can expand your language branches with follow-up questions, buttons, extra flows, or even AI agents.
Test live chats across all website versions
Now, you need to ensure your live chat runs flawlessly on every version of your website.
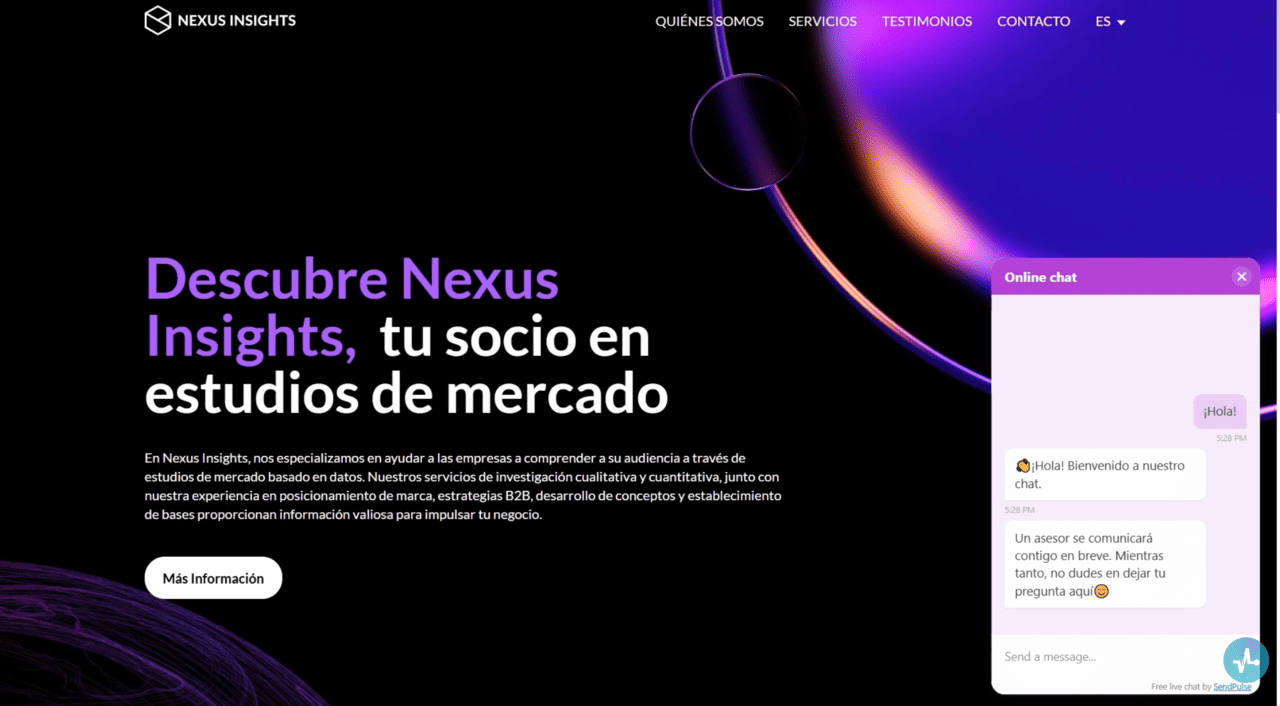
To test your live chat, go to your English-language page, select the live chat widget, and send a brief message, like “Hi.” Your chatbot should respond in English based on your predefined flow. Repeat this for every language on your website.
Testing ensures that every visitor gets a message in their preferred language right from the first interaction with your live chat.
 Testing live chat across language versions
Manage live chat conversations
You can view your live chat conversation history in the “Bot chats” tab and the “Conversations” tab. Click a chat to view user details, including status, last activity, and recently visited page.
If you learn a user’s name during your conversation, you can update it in their contact card under the profile picture.
You can also add or edit a CRM deal, send a reply, leave a note, stop an automated campaign, launch your chatbot flow, or add a tag.
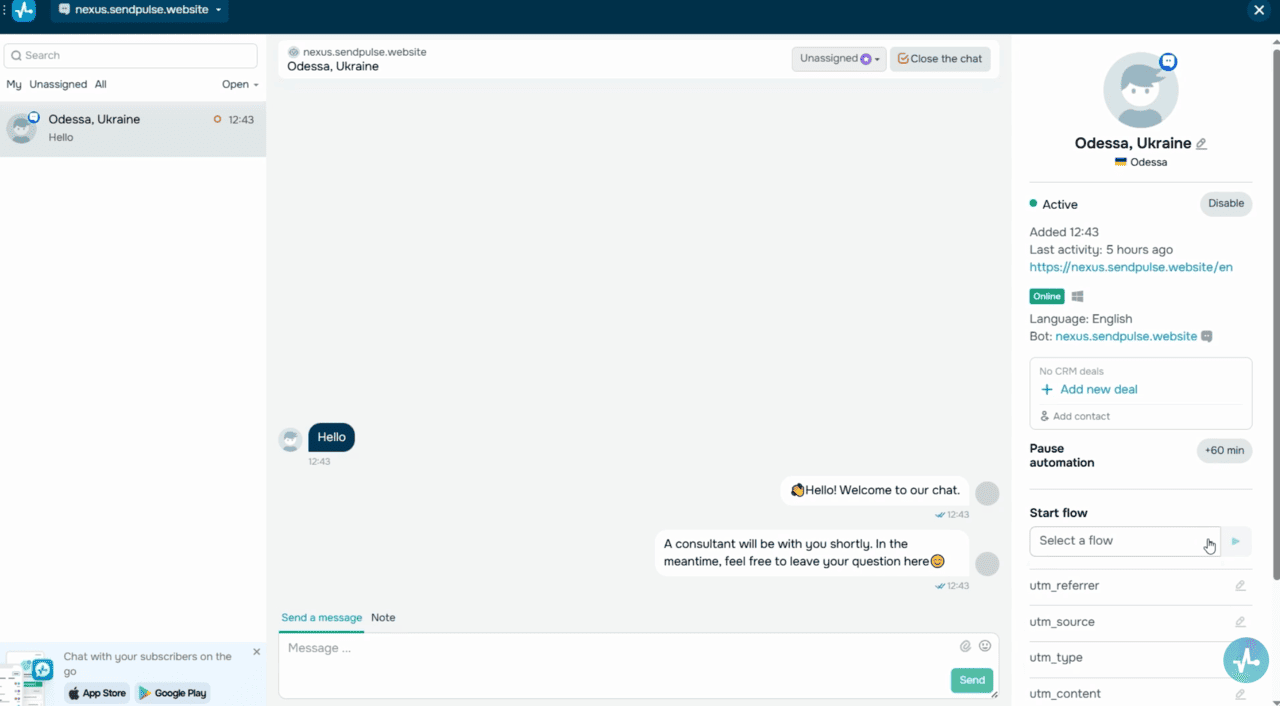 Conversations tab — chat history, user details
Let’s wrap it up
Now you know how to create a SendPulse-powered live chat for your multilingual website in just a few simple steps. With a well-crafted flow, your live chat will automatically detect every visitor’s language and start a conversation accordingly. This will allow your team member or AI agent to seamlessly take over the conversation at the most convenient moment.
This level of personalization makes communication easier and creates a more engaging and seamless website experience.
Thanks for reading, and best of luck setting up your multilingual live chat with SendPulse!