Once a customer pays for a product or service on your website, it’s crucial to send them a confirmation email with order details. Automated post-purchase messages help you build trust, save time, and deliver all the information customers need with minimal effort. In this video, we’ll show you how to send automated confirmation emails when customers make payments on your SendPulse-powered website.
Connect payment systems
To accept payments through your website, you need a paid SendPulse subscription. If you already use a paid pricing plan, simply add your payment method. Go to “Account settings,” select “Accept Payments,” and add one or more payment methods. To learn more about how to integrate with payment systems, follow the link to our step-by-step guides in the description.
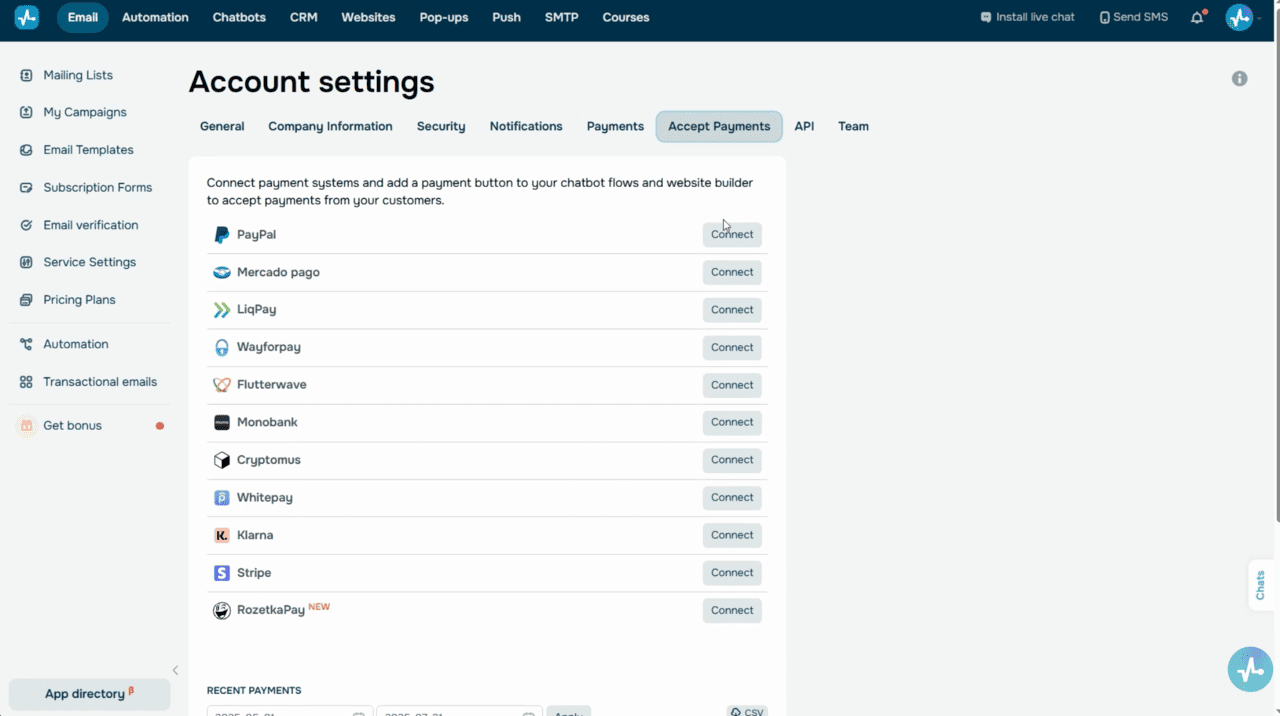 Accept Payments tab in account settings with the list of payment methods.
Once you add payment methods, you’ll be able to accept online payments right on your website. All transactions will automatically appear in the “Accept Payments” section of your account.
Create a pipeline and deal stages
To manage your payments, go to the CRM system. There, you’ll find a default pipeline template. Use it to define deal stages based on your sales process. To give you an idea, you can include stages like “New order,” “Payment failed,” or “Payment successful.” You can also add extra stages to track your deals more accurately.
Next, go to your pipeline settings. Under the “General” tab, type in a pipeline name and select its icon colors. Assign a team member to your automatically added deals and choose a deal currency.
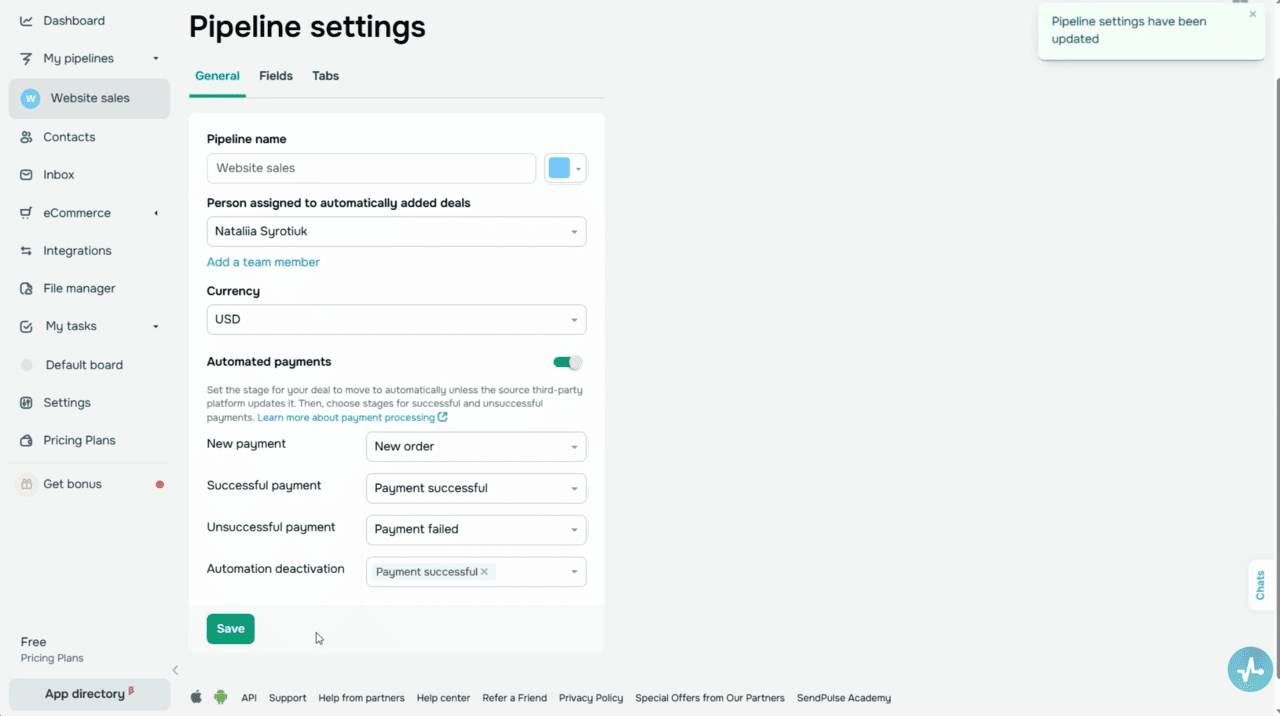 Pipeline settings
Then, turn on the “Automated payments” toggle and select the stages your deals should move to based on payment status. For instance, a new payment made on your website goes to “New order,” a completed payment lands in “Payment successful,” and a failed one moves to “Payment failed.” This CRM setup can help you organize deals accurately and track payments in real time. You can also create a stage to stop automated payment processing.
In the “Fields” tab of your pipeline settings, you can add custom deal fields, like “Shipping address,” “City,” or any other information you need. This helps save all order-related details right to your deal cards.
You can also create custom fields for CRM contact cards in “Contacts” > “Settings.” For instance, you can add a “Delivery method” or “Date of birth,” and SendPulse will automatically save customer data from your payment form to these fields.
All fields you add are saved to the CRM system as custom variables. You’ll be able to personalize your payment confirmation emails and other messages using these variables. We’ll get into it in a moment.
Along with custom variables, email templates also support standard CRM variables, including:
- {{firstName}} — customer name;
- {{name_deal}} — deal name;
- {{price_deal}} — deal price.
To learn more about system and custom variables, as well as contact attribute management, follow the link below.
Create a mailing list
Suppose you plan to run marketing email campaigns for customers who place orders on your website. It’s a good idea to create a dedicated mailing list in SendPulse’s email service before you do this.
To do this, go to the “Mailing Lists” tab and create a new list. Let’s call it “Website Clients.”
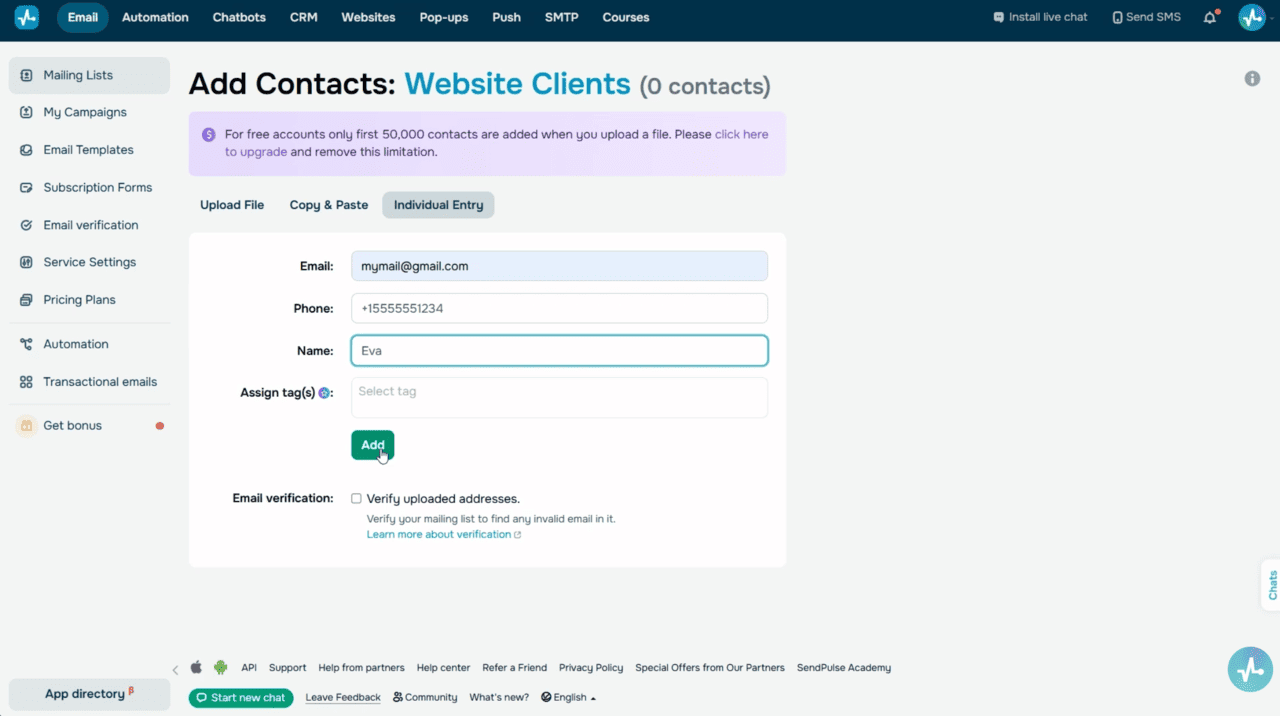 The creation of the new mailing list “Website Clients” and adding contacts.
Next, add contacts manually or upload a file with your clients’ email addresses.
Once you create this list, add variables for any data you plan to collect through your website’s payment form. Click “Create variable,” name it, and select its data type.
To find more information on how to manage custom variables, follow the link below.
When creating your payment form, you can set it to automatically add contacts to this mailing list. You can then use them to run reengagement campaigns and drive repeat purchases.
Now let’s set up payment processing on your website. In SendPulse’s website builder, select your webpage and place the “Payment” widget. You can customize it in the widget settings on the right.
Type in a payment form title and your product or service name. These details will appear on the payment method page and order receipts.
Select a payment method and click the pencil icon to set a product price and currency. If you’ve added multiple merchants to this method, select one from the list. If you’d like to include several payment options you’ve already integrated, add them using the “Add payment method” button. Name the deal that will be created after every successful payment. For instance, you can use your service name.
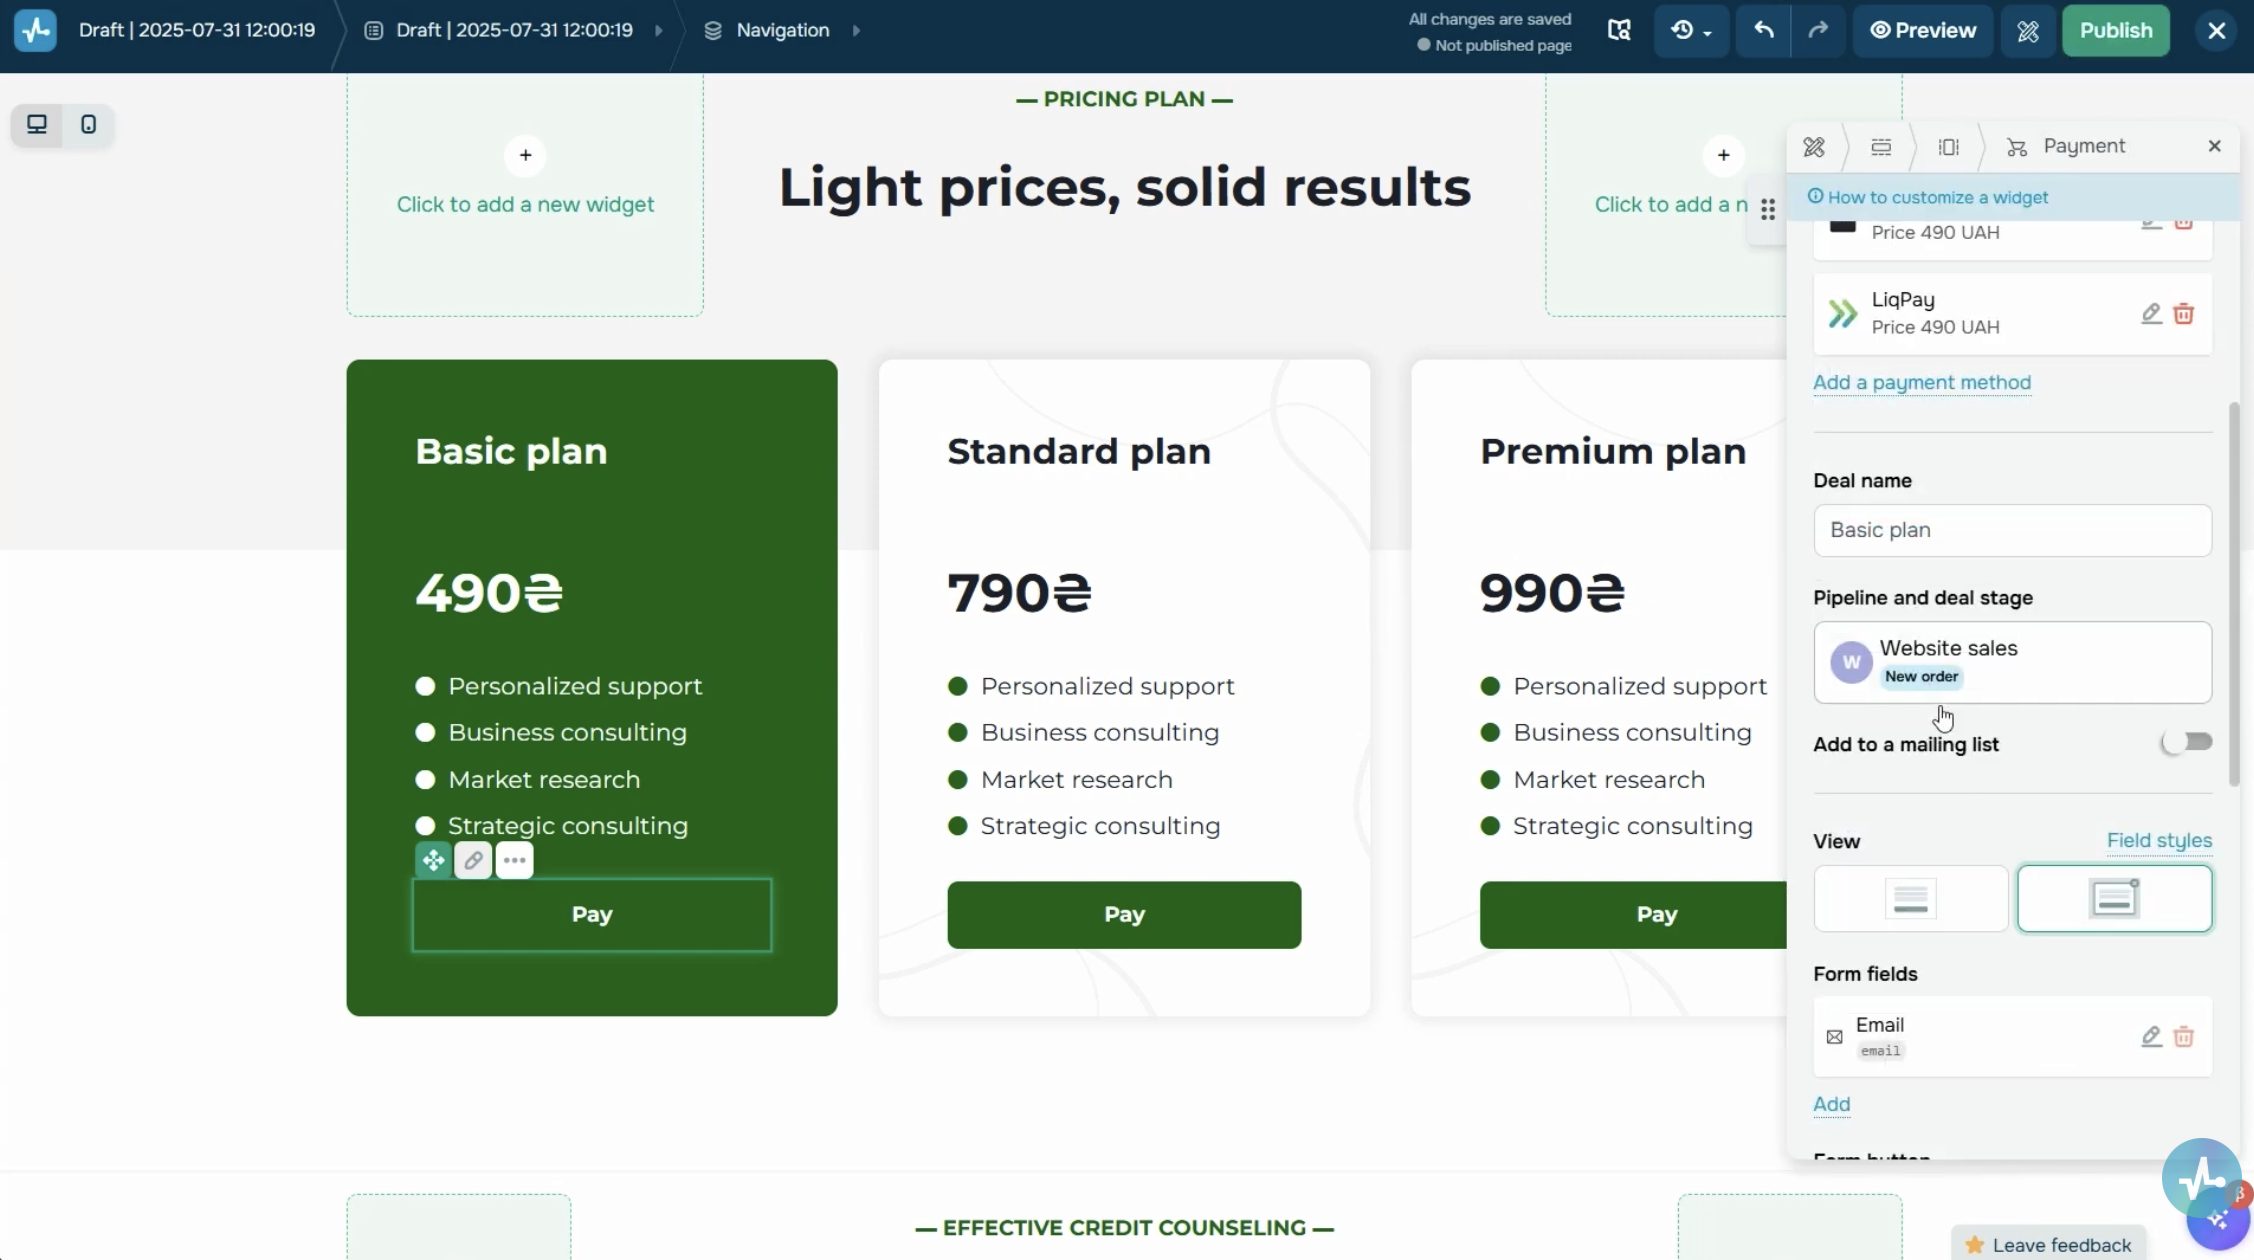 The Payment widget in the website builder with the field settings panel.
Scroll down, then select your CRM pipeline and a stage for new deals. To give you an idea, all new deals can start at the “New order” stage.
Then, turn on the “Add to a mailing list” toggle and select the mailing list you’ve created earlier.
This list will only include contacts who complete their payments. Users who fill out your form but don’t end up paying won’t be added to it.
By default, your payment form includes an email address field. It’s required and can’t be removed. However, you can add custom fields to collect other valuable user information. To do this, click “Add,” select the pencil icon next to a new field, and adjust its settings.
You can edit your field name, link it to a mailing list or CRM variable, add an infotip, and make fields required.
Keep in mind that the “Email” and “Phone” fields are automatically saved to system variables, so you don’t need to create them manually.
Set up your automated flow
Once you add your website’s payment form and link it to the CRM system, it’s time to set up your payment confirmation flow.
Go to “Automation” and click “Create flow.” Start by configuring the basic settings. Name your flow, enter a sender email address and name, and then choose the unsubscribe page your contacts will see. You’ll also need to select the language for your unsubscribe form.
Next, you’ll see a list of available triggers on the right sidebar. Go to “CRM” and select “Deal stage update.” In the trigger settings, choose your CRM pipeline and set which stage change should trigger your flow. In this case, use a condition where the deal moves from “All” to “Payment successful” (or any other status you’ve set for completed payments in your pipeline settings).
Once your deal reaches the “Payment successful” stage, the flow will run automatically. With that out of the way, it’s time to create the email your customers will receive when their deal stages are updated.
Create your confirmation email
In the flow builder, drag the “Email” element into the workspace, link it to the start element, and set a sending time. You can send your confirmation email immediately after payment or add a delay.
Next, add a subject line and preheader and tailor them to enhance the user experience. You can use custom fields or system variables like “firstName, your order has been successfully paid” or “Payment confirmation for order # deal_id.”
Now let’s move on to creating your email content. Click “Select template.”
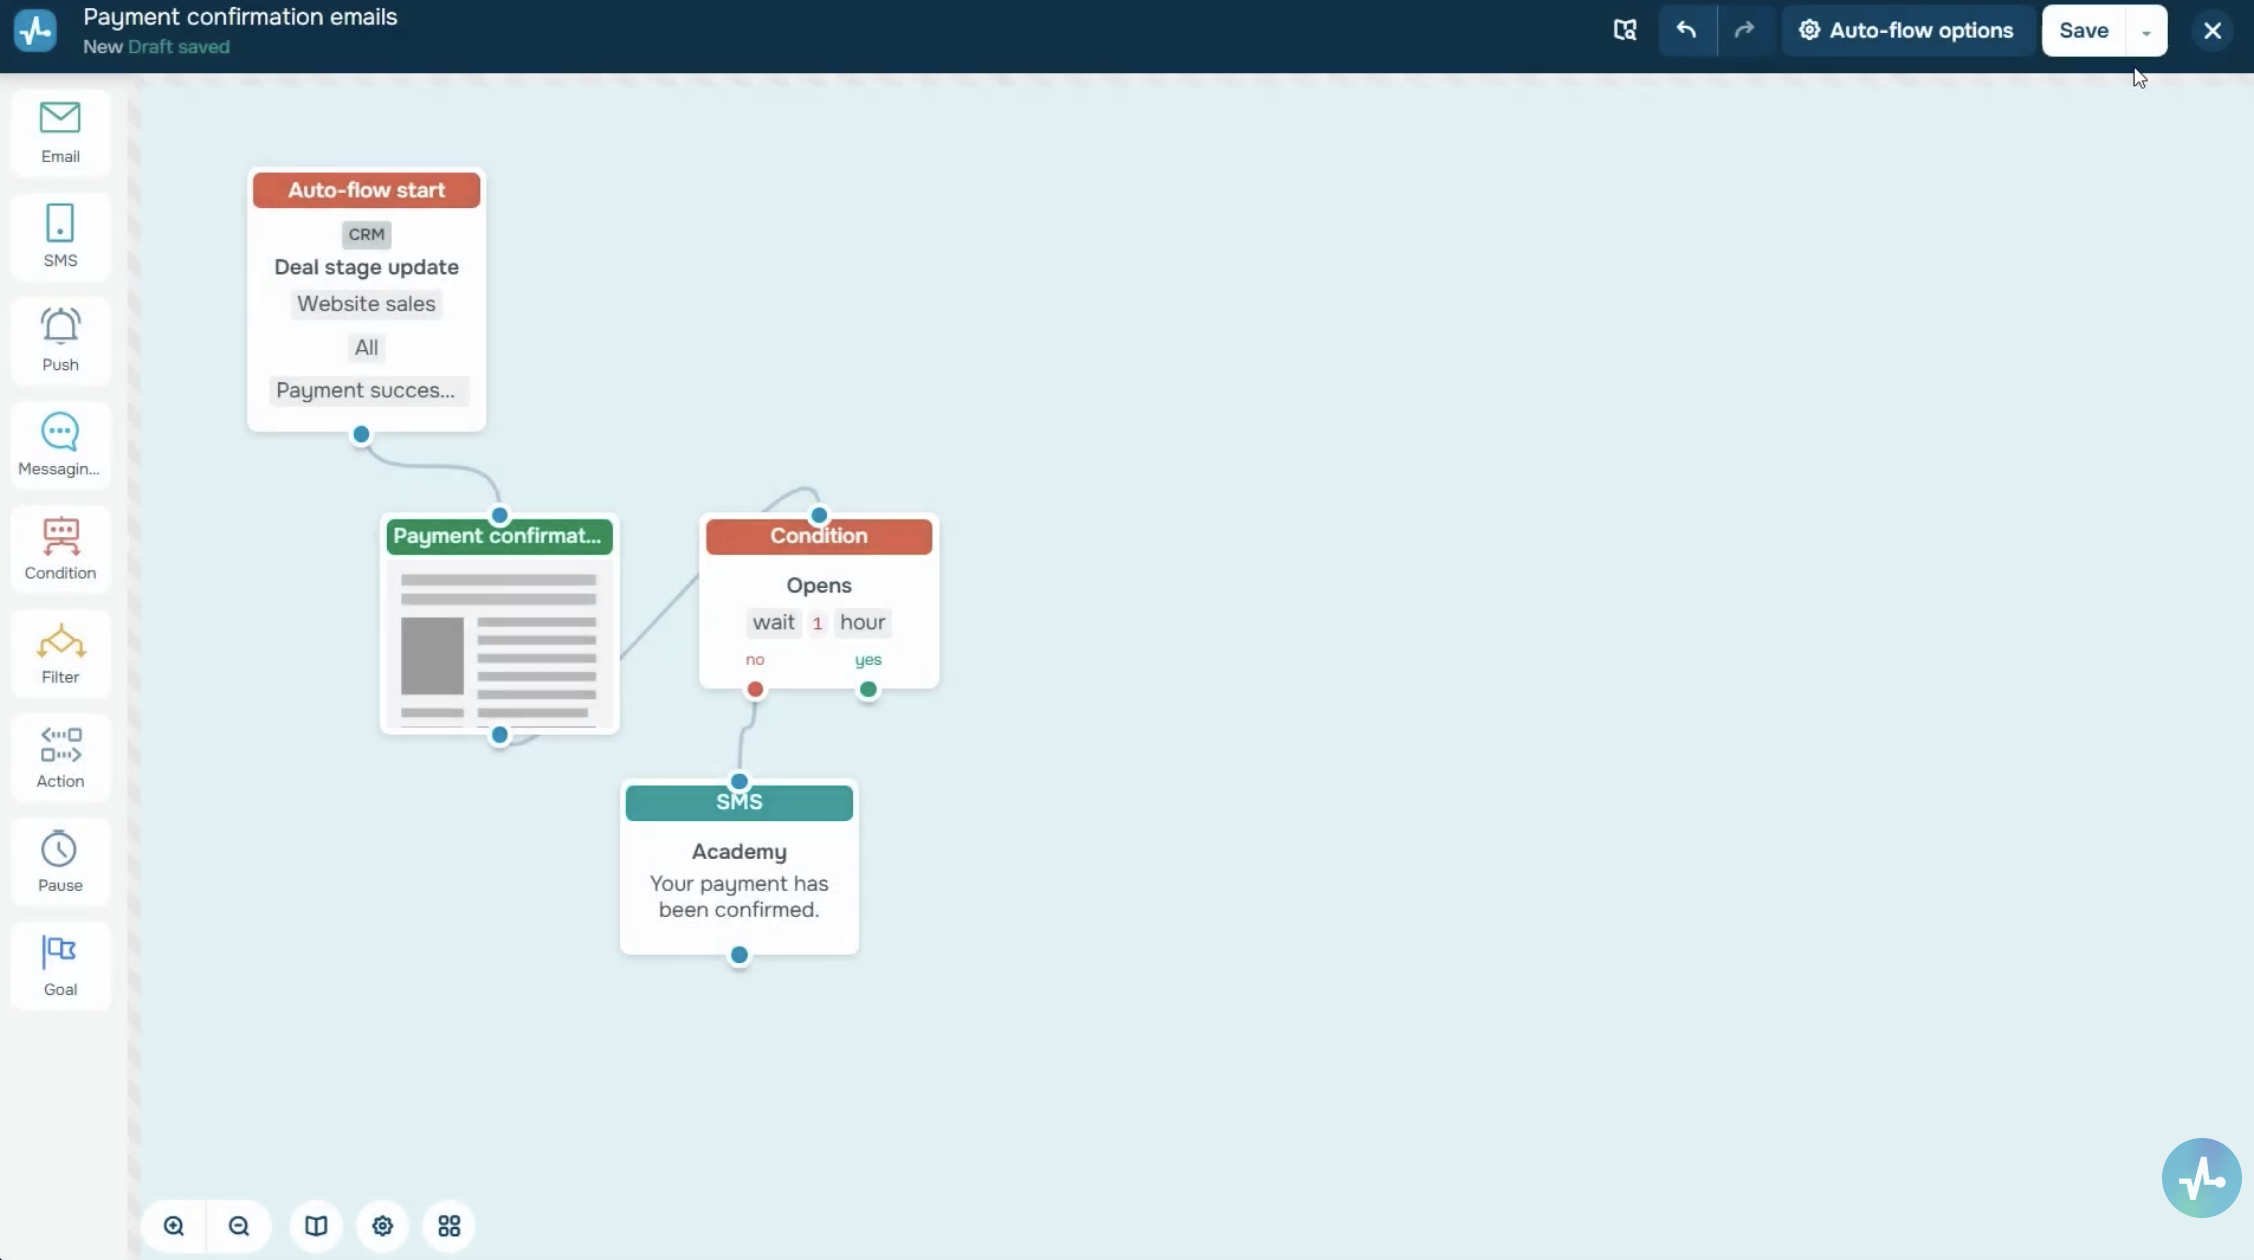 Flow with the “Deal stage update” trigger and the connected Email element.
Pick a saved template or SendPulse’s ready-made option. Templates like “Order Received” or “Order Confirmed” already include a layout with order details.
Once you have chosen your template, click “Edit” to go to the email builder. You can customize your message copy and layout, and most importantly, add variables to include tailored order details for every client.
To add a variable, hover over where you want it in your message and click the “Variables” button. Select a variable from the drop-down list. You can retrieve both contact and deal data from the CRM system. Specifically, your email can include system variables like:
- {{deal_id}} — deal ID;
- {{name_deal}} — deal name (this can be your product or service name);
- {{price_deal}} and {{currency_deal}} — payment amount and currency.
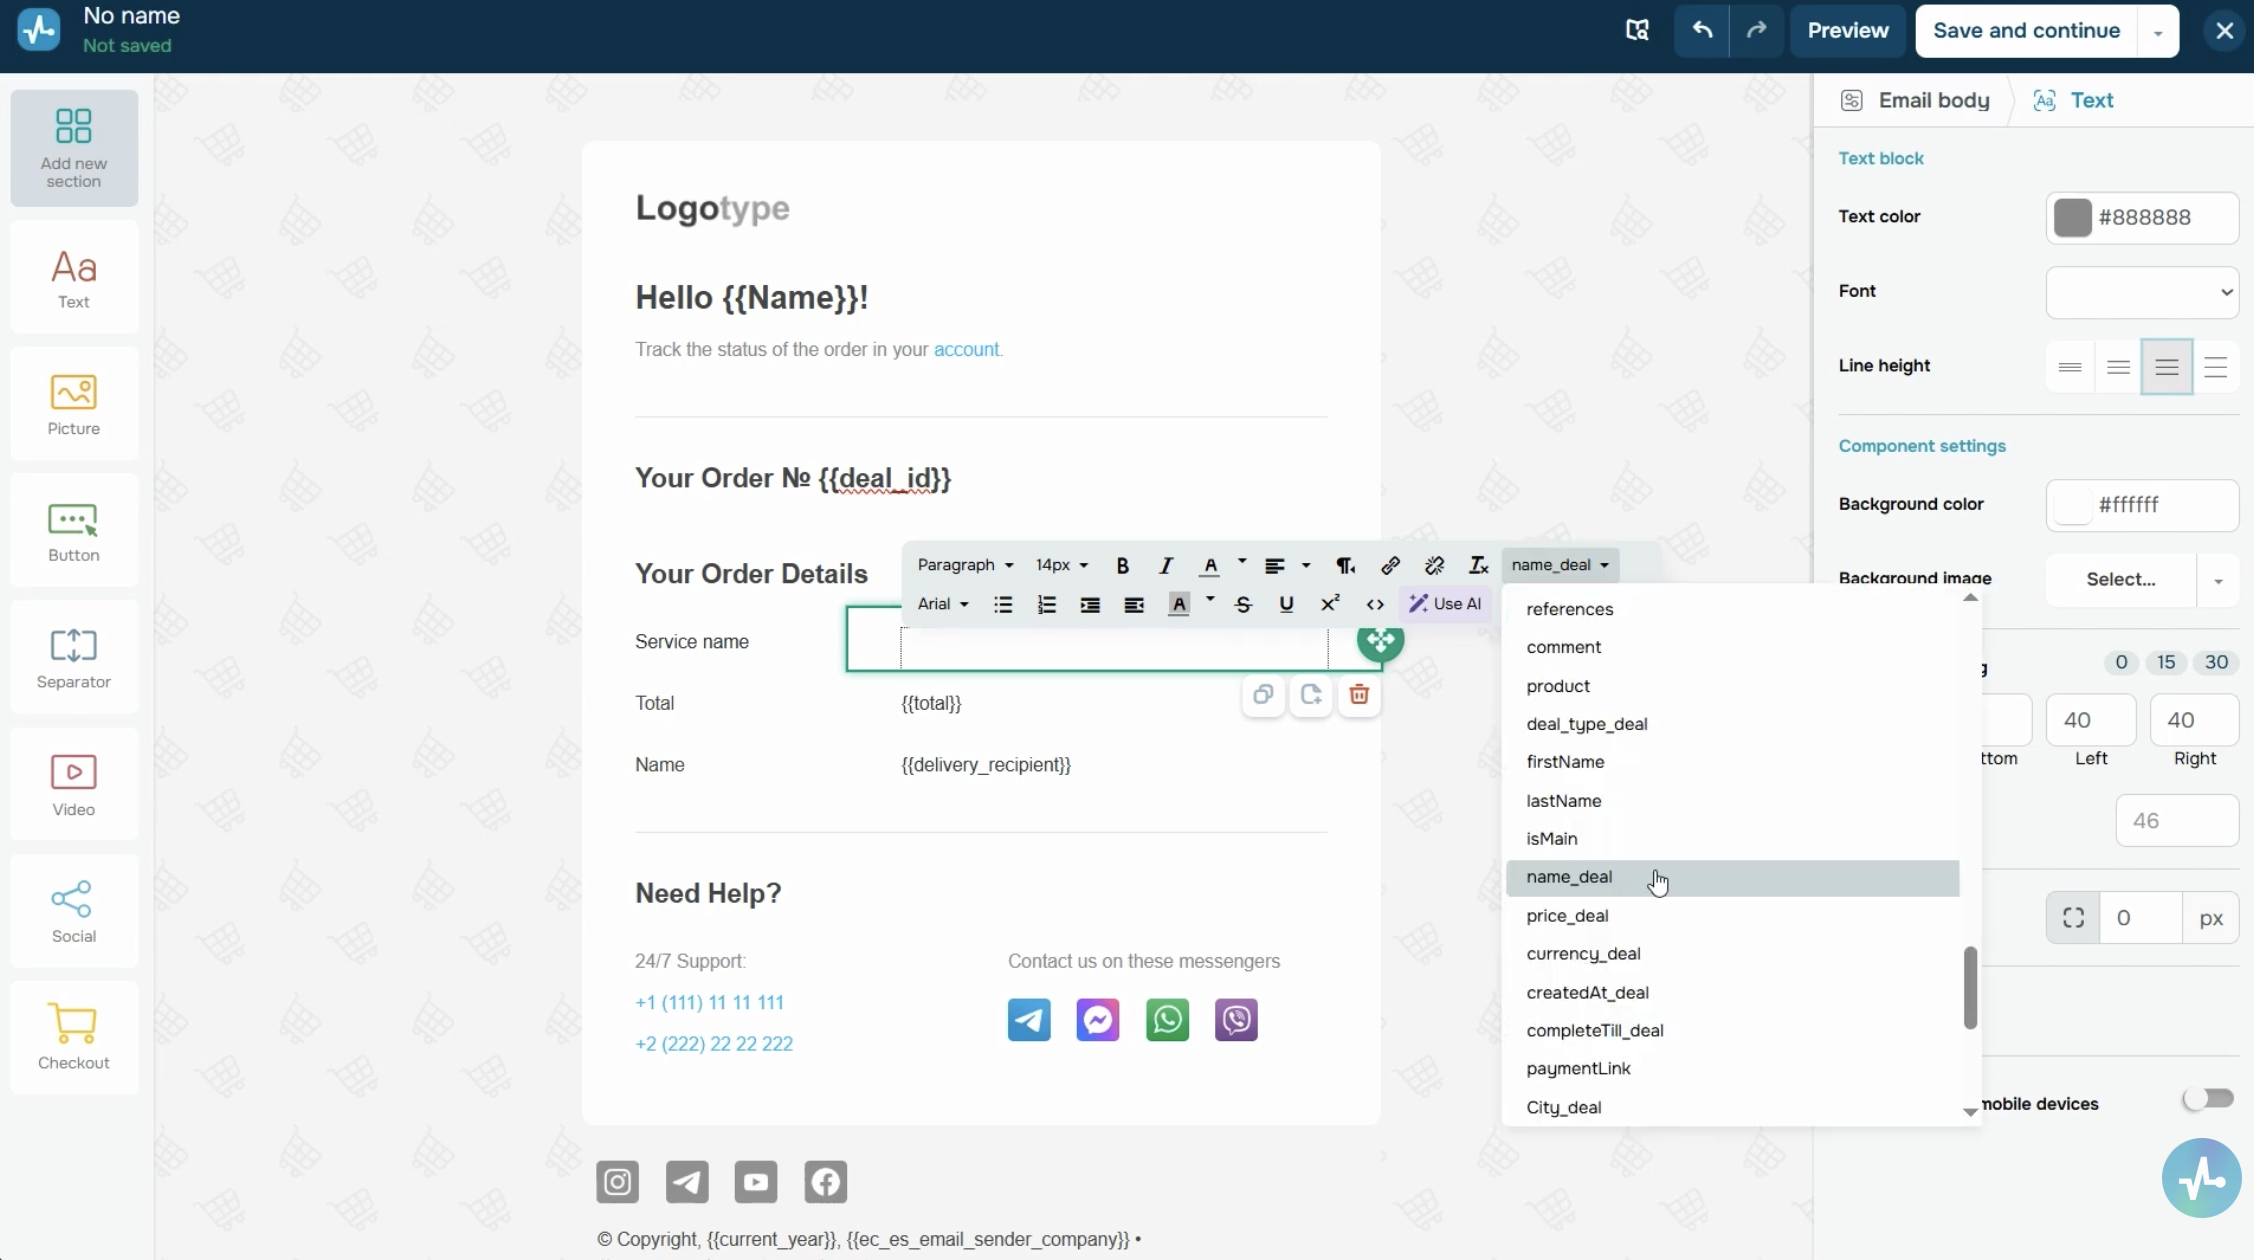 Email builder with the variables drop-down list and inserted deal variables.
You can also use any custom variables you’ve added as fields for deals or contacts, including city, payment date, or payment method.
Please keep in mind that to use values from custom deal fields in your emails, you need to add the “_ (an underscore) deal” suffix to your variable name. For instance, if you create a custom field called “City” in your deal, your email variable will be {{City_deal}}.
Once you’re done customizing your email content, click “Save and continue” to return to your flow.
You can add other elements to your flow if you’d like. To give you an idea, add a “Condition” after the “Email” element to check if a customer has opened your email within a specified timeframe. If not, use the “SMS” element to send an extra message confirming their order.
Once your flow is all set, click “Save and launch” to start it.
From now on, whenever a customer pays for their order on your website, SendPulse will automatically create a CRM deal with a payment status and send a personalized confirmation email with order details.
Let’s wrap it up
Automated post-payment emails help you respond to customers instantly, build trust, and foster loyalty. Set up your confirmation flow once, and let SendPulse handle the rest. No follow-up needed, no time wasted. Every customer will receive a timely, personalized message, allowing you to stay focused on growing your business.