Сreate and assign contact tags
Assign tags to organize your work with contacts. You will be able to filter and segment contacts according to certain criteria to find the contacts you need faster and individual work with each group. For example, you can add a tag based on customer preferences or change the status of working with a customer.
You can also create contact segments, filter contacts inside the mailing list, and send personalized campaigns by selecting the desired audience segment by tag. Let's take a closer look at how to work with tags.
Tags basics
A tag is a specific label for contacts that helps you organize your audience and separate groups of contacts for personalized communication.
Tags work globally across your entire account. When you assign a tag to a contact in one mailing list, that contact is tagged simultaneously in all other mailing lists.
When you edit a tag in the tag settings, this tag is updated for all of your contacts in all of your mailing lists.
Create a tag
You can create a tag via the global tag settings. To do this, go to the Mailing lists tab and click Tags.
Click Create tag and give the tag a name — up to 256 characters. You can choose the color of the tag and add emoji.
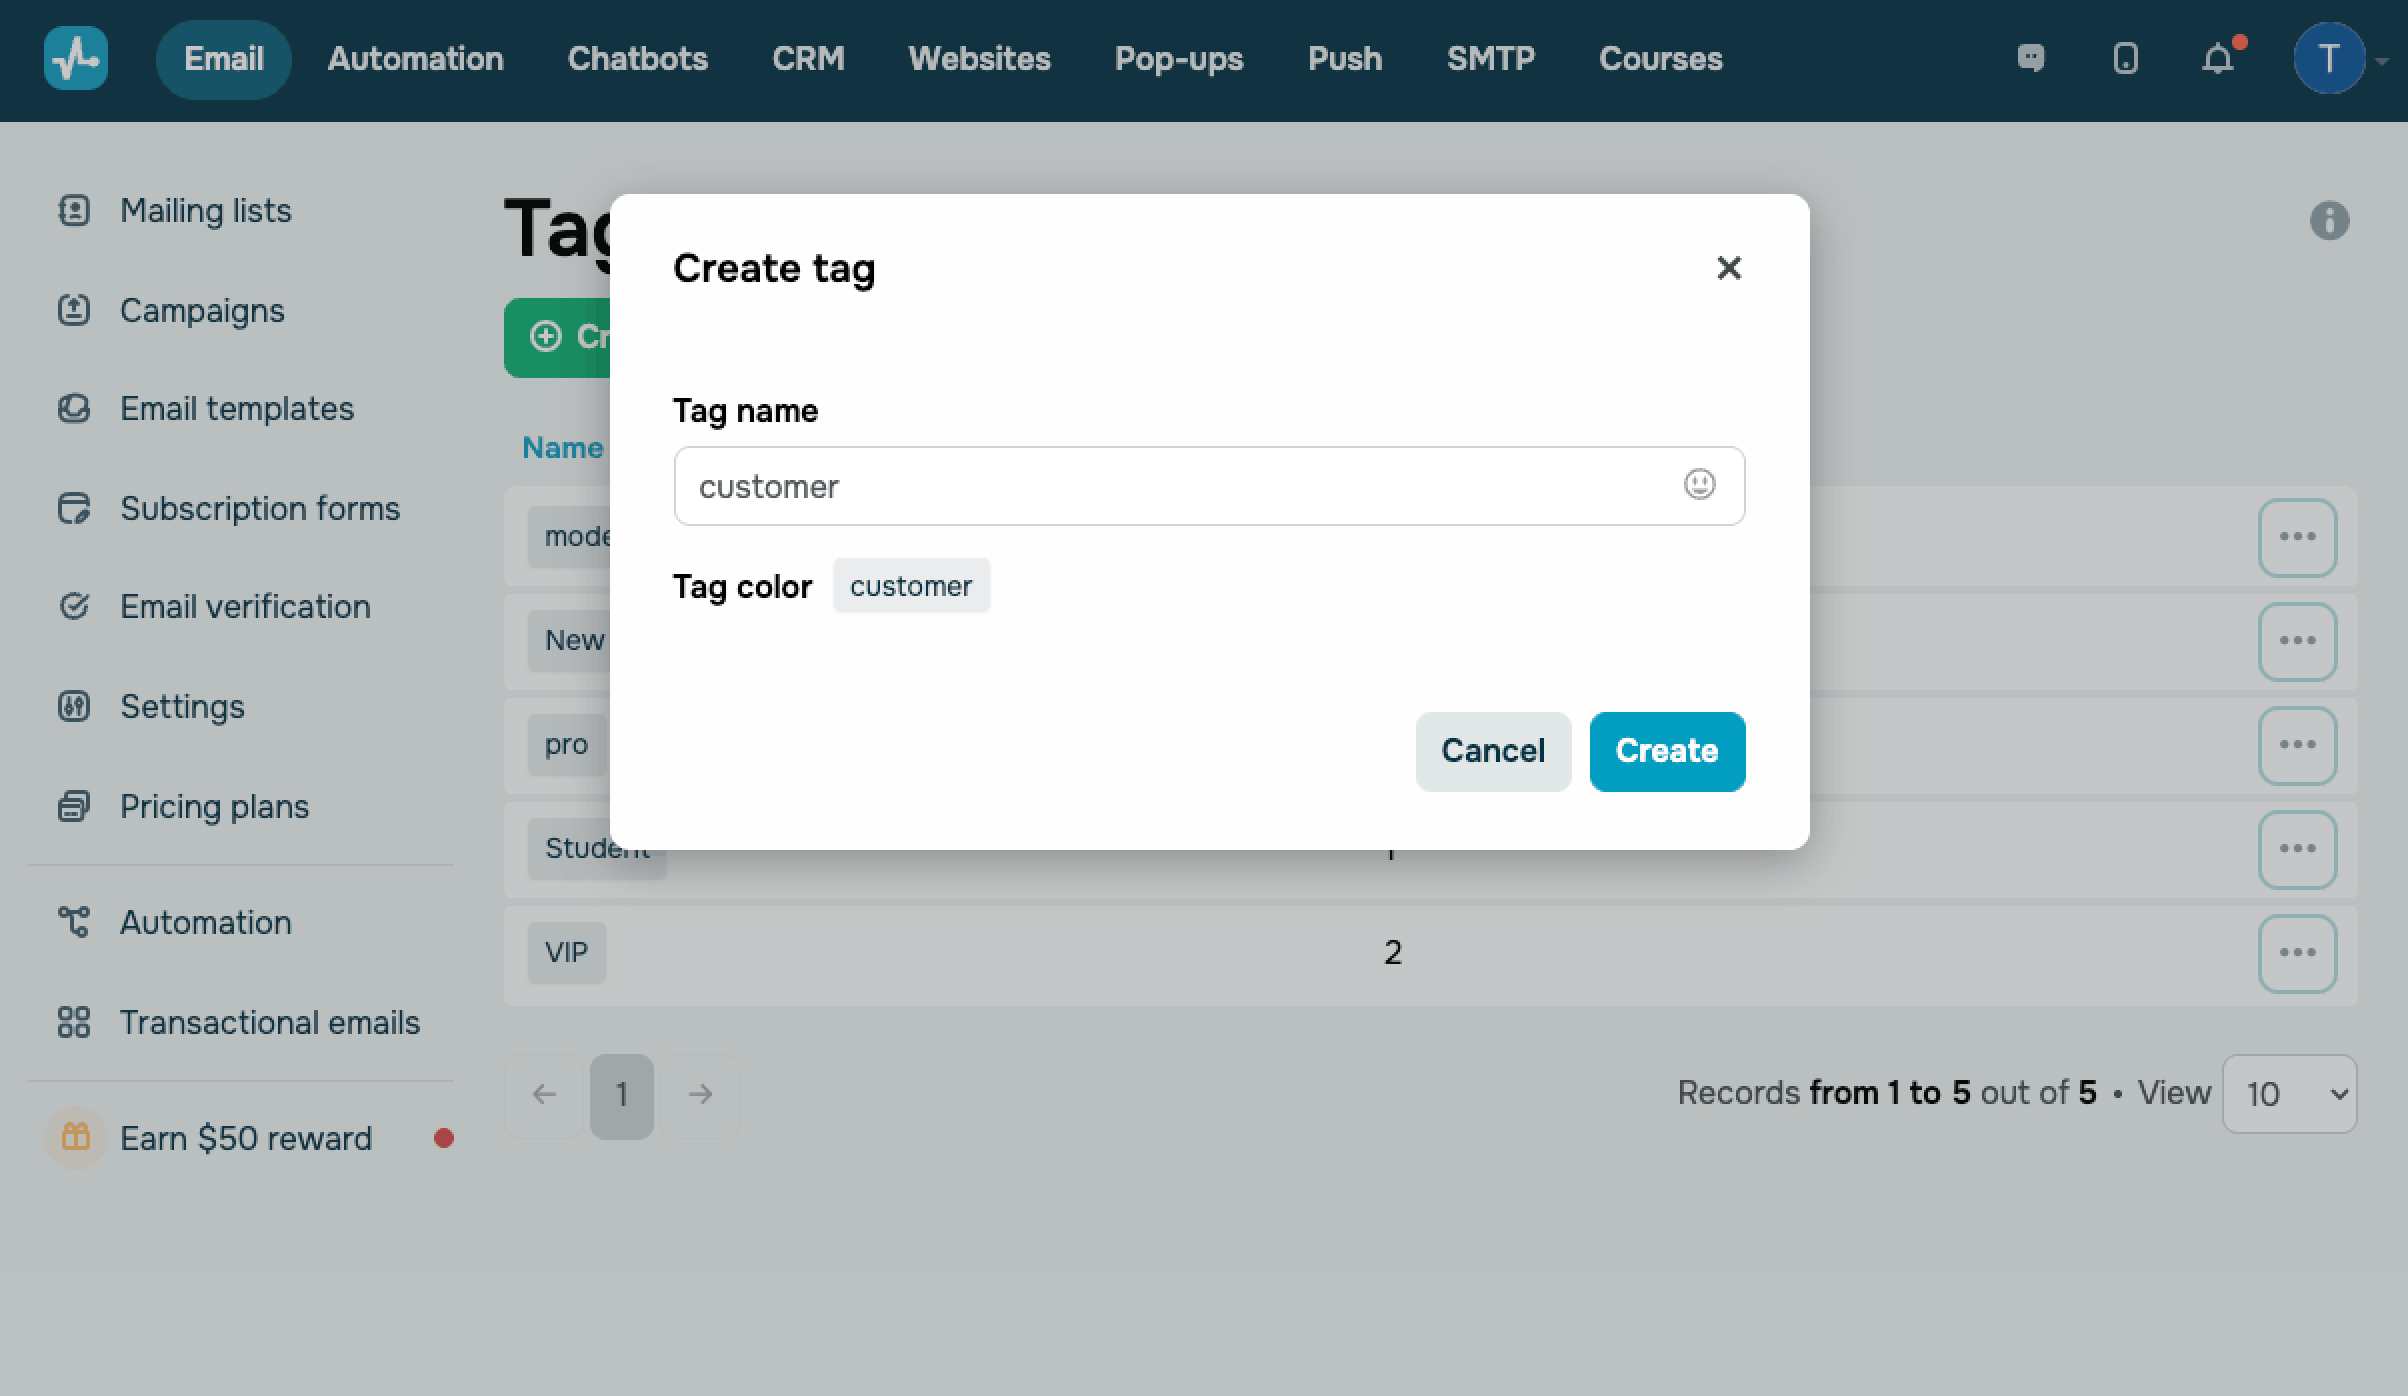
Click Create. Now you can assign the created tag to the selected contact or contact group.
You can also set tags for a contact in a mailing list. When using this method, you will not be able to choose a color or add emoji right away — for this, you need to go to the tag settings mentioned above.
Assign a tag
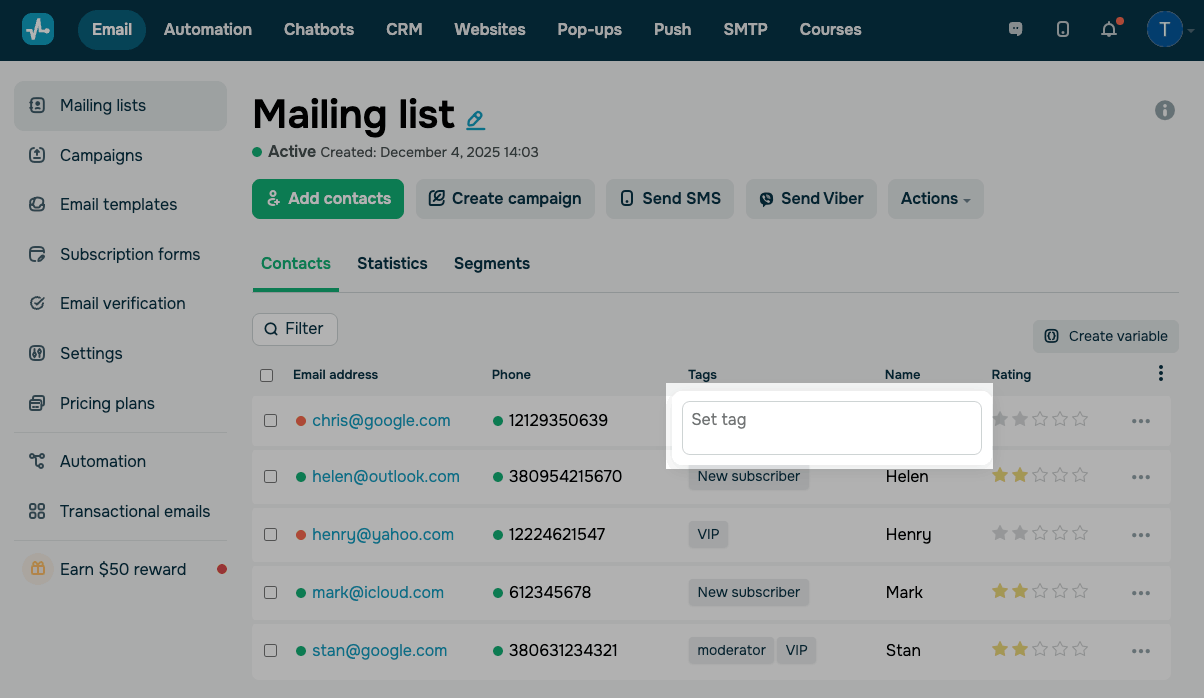
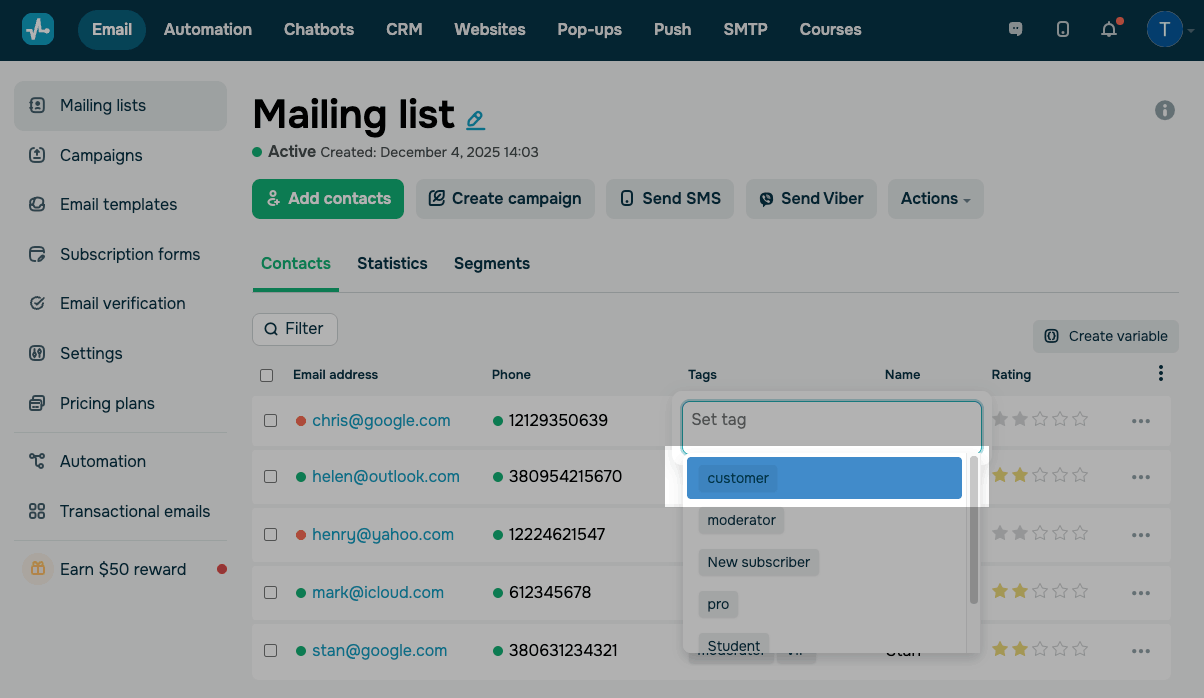
Assign an existing tag to an individual contact
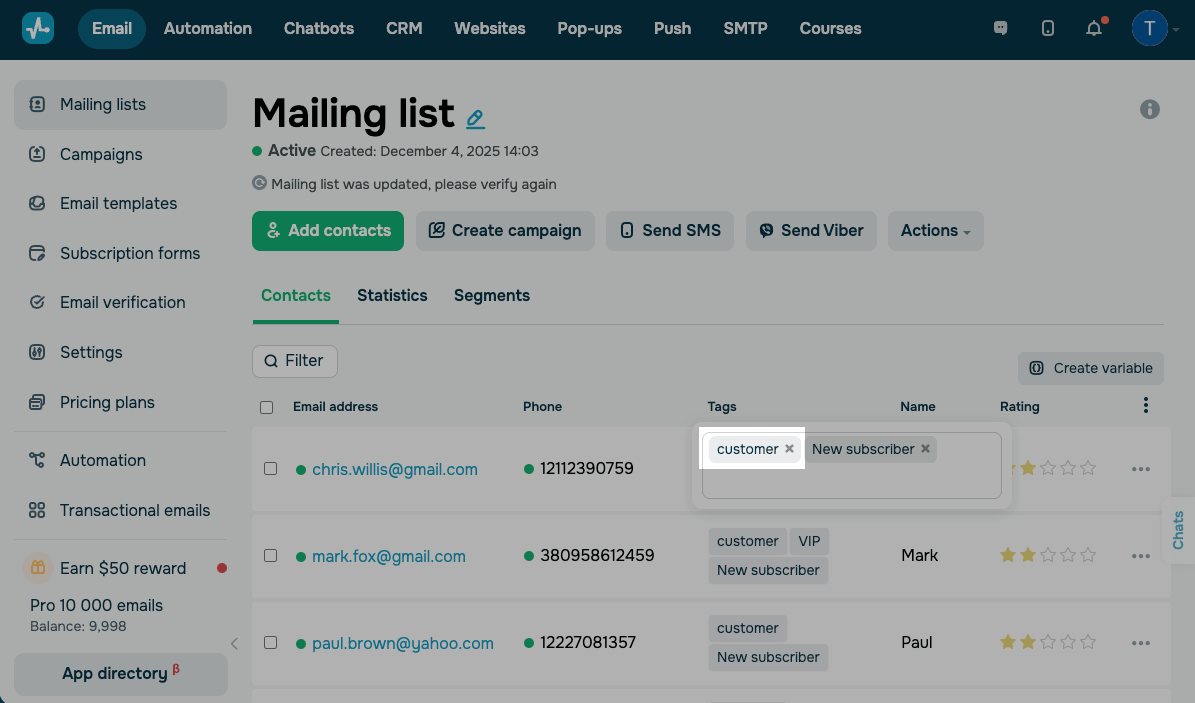
Select a contact, in the Tags column, click on the field and select the desired tag from the list of tags.
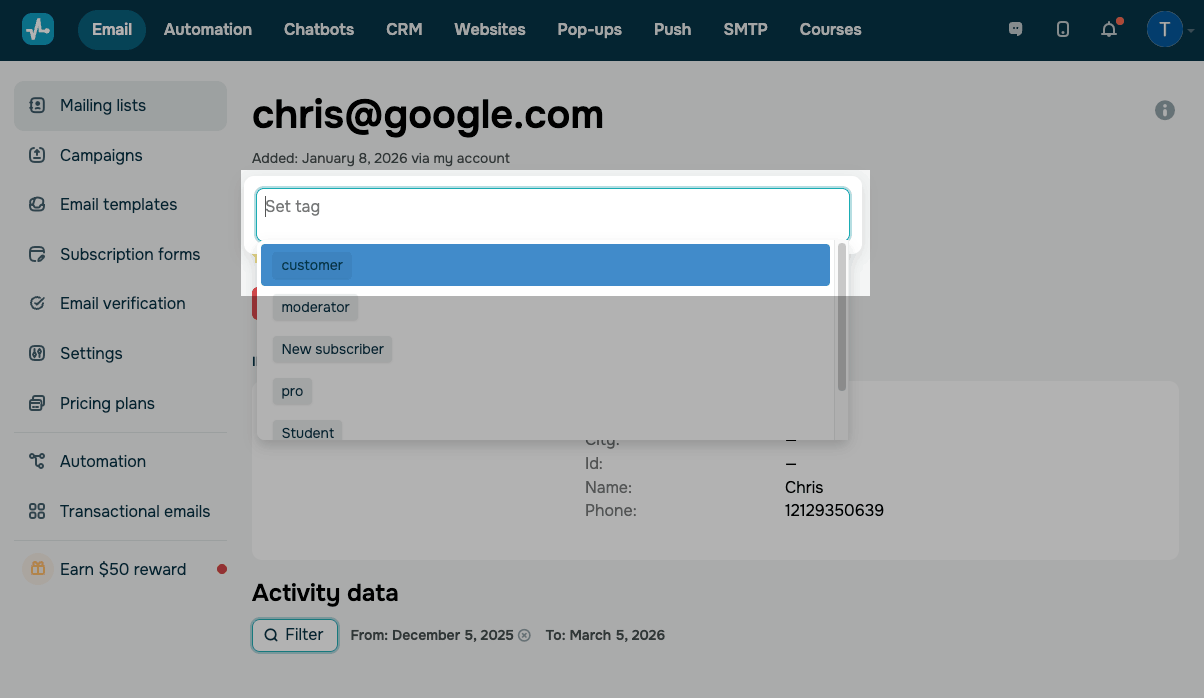
You can also click on an email address to go to the subscriber’s contact details and create a new tag or assign an existing tag.
You can add up to 100 tags per contact.
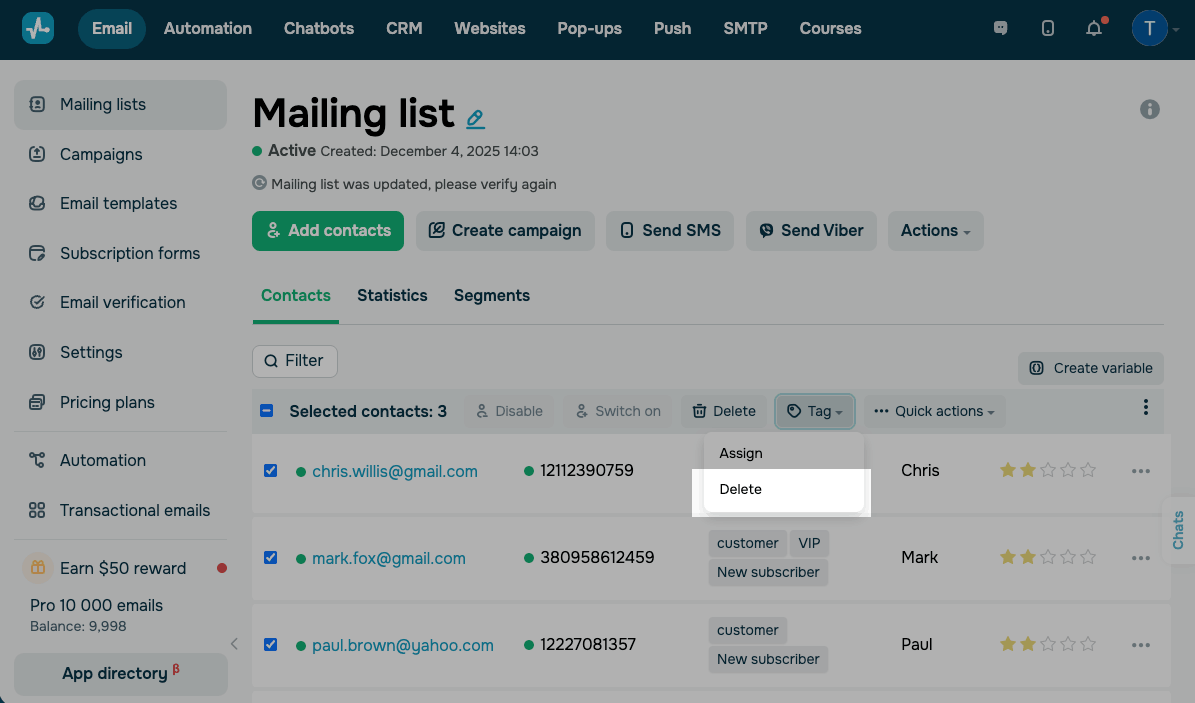
Assign an existing tag to a contact group
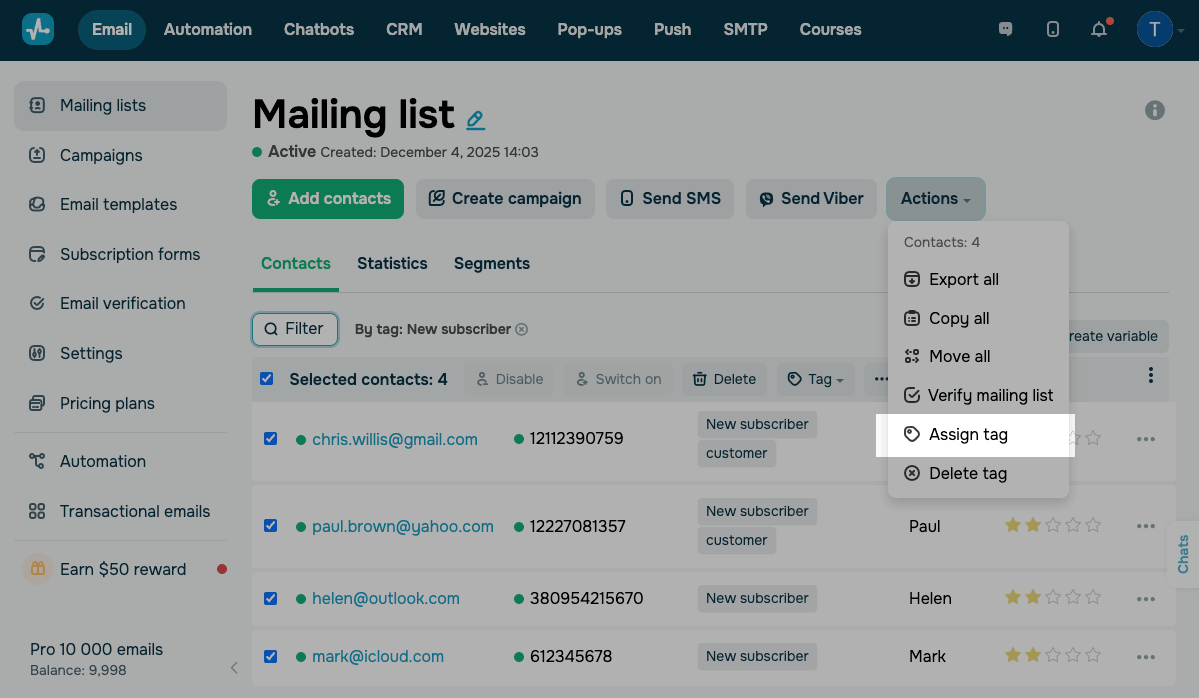
Highlight all contacts in a particular mailing list segment and click Tag to assign one tag to all of the selected contacts.

To select a group of contacts by various criteria, click Filter and select a filter condition: by subscription date or the date you added a contact manually, address status, address verification status, id and email address of the searched for contact, phone availability, or assigned tags.
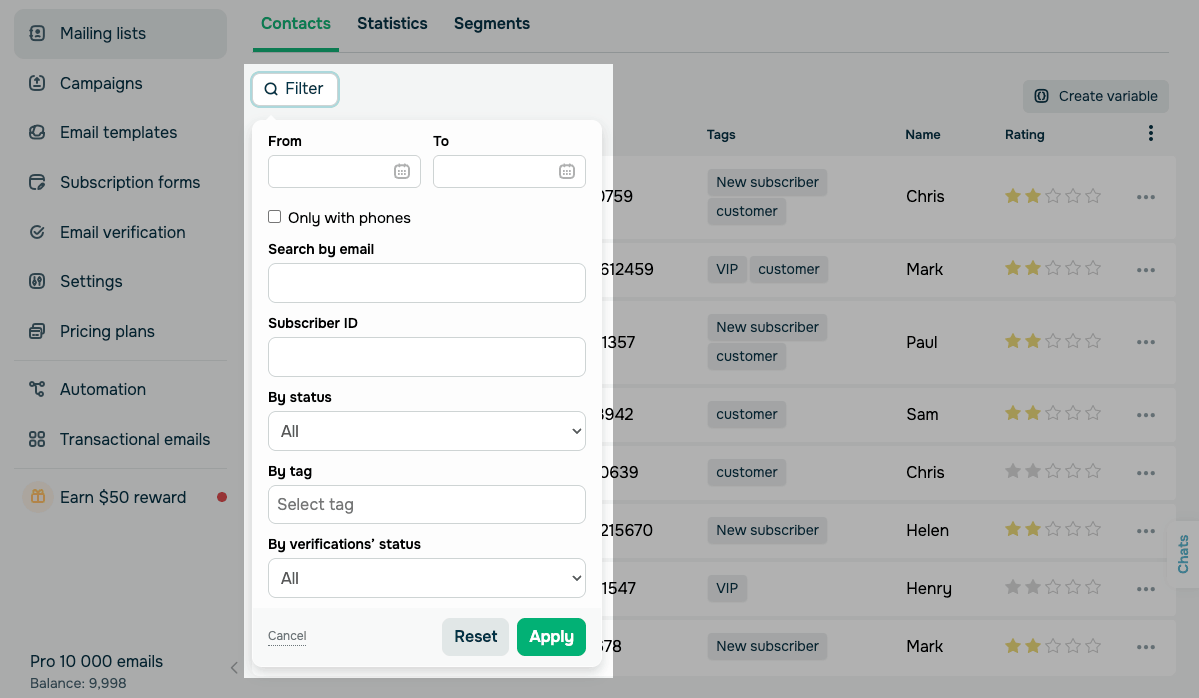
Every contact that matches the filter conditions will be displayed.
Then click Actions, select Assign tag, and select the tag you want to assign.
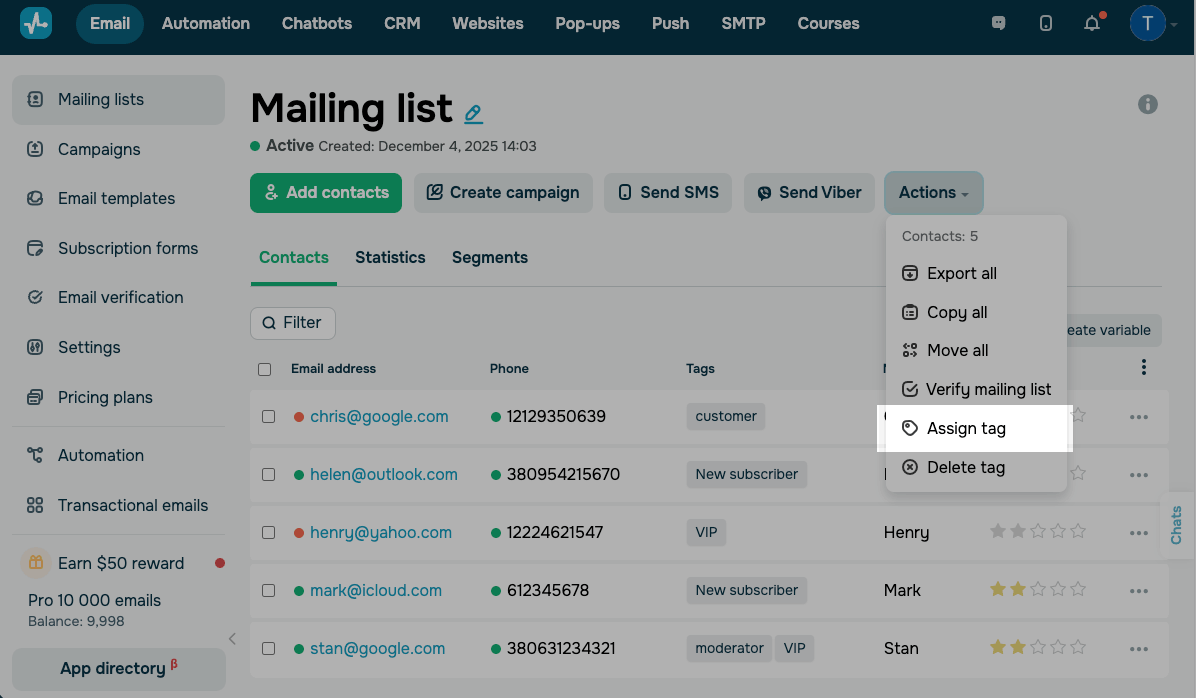
Assign a tag to an entire mailing list
Go to the mailing list, click Action, select Assign tag, and select the tag that you want to assign to every contact on the mailing list.
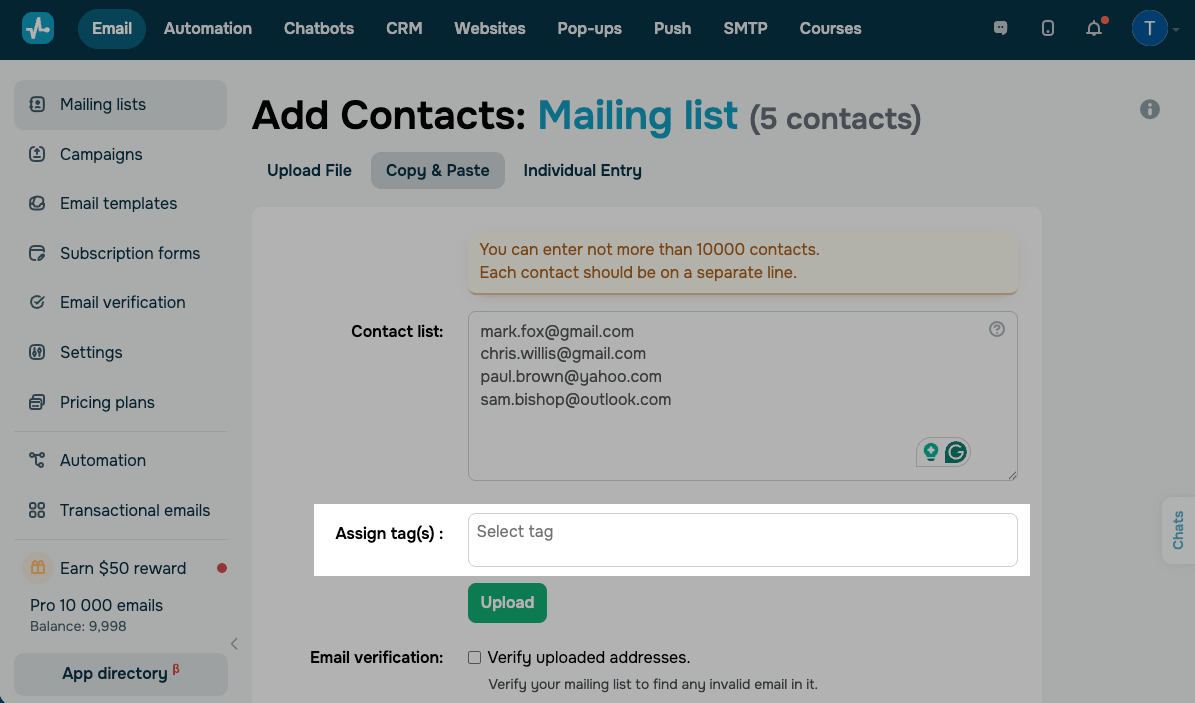
Create and assign a tag when adding contacts
When uploading a file with contacts or entering them manually, you can add a tag to all of the new contacts from your previously created tags or create a new one.
Unassign a tag
Unassign a tag from a contact
To remove a tag from a specific contact, in the Tags column, hover over the tag and click on the X.
Unassign tags in bulk
Select your contacts, click Tag, and select the tag you want to remove from the selected contacts.
Unassign a tag from all contacts in your account
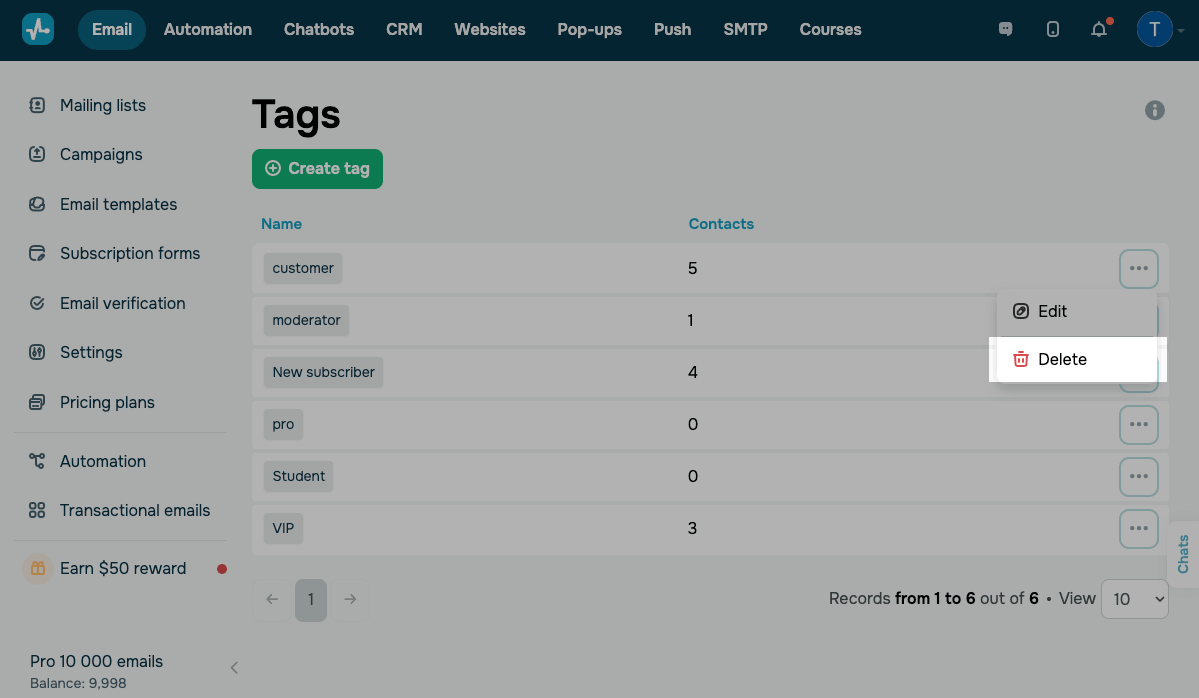
Go to the section Mailing lists > Tags, and opposite the created tag in the drop-down menu, select Delete.
Last Updated: 07.02.2024
or