Manage contacts in your unsubscribed list
The unsubscribed list helps you manage contacts who no longer receive your email campaigns.
For example, if a customer asks to be unsubscribed through support instead of using the unsubscribe link, you can manually add their email address to the unsubscribed list.
Let's talk about how to add contacts to the unsubscribed list, export them, and delete them.
Manage a specific contact
You can add specific contacts to the unsubscribed list.
Go to Manage inactive contacts. Click Unsubscribe contact. In the pop-up window, select the One subscriber tab. In Email address, enter your contact's email address. Optionally, in Unsubscribe reasons, add a note. To confirm, click Add.
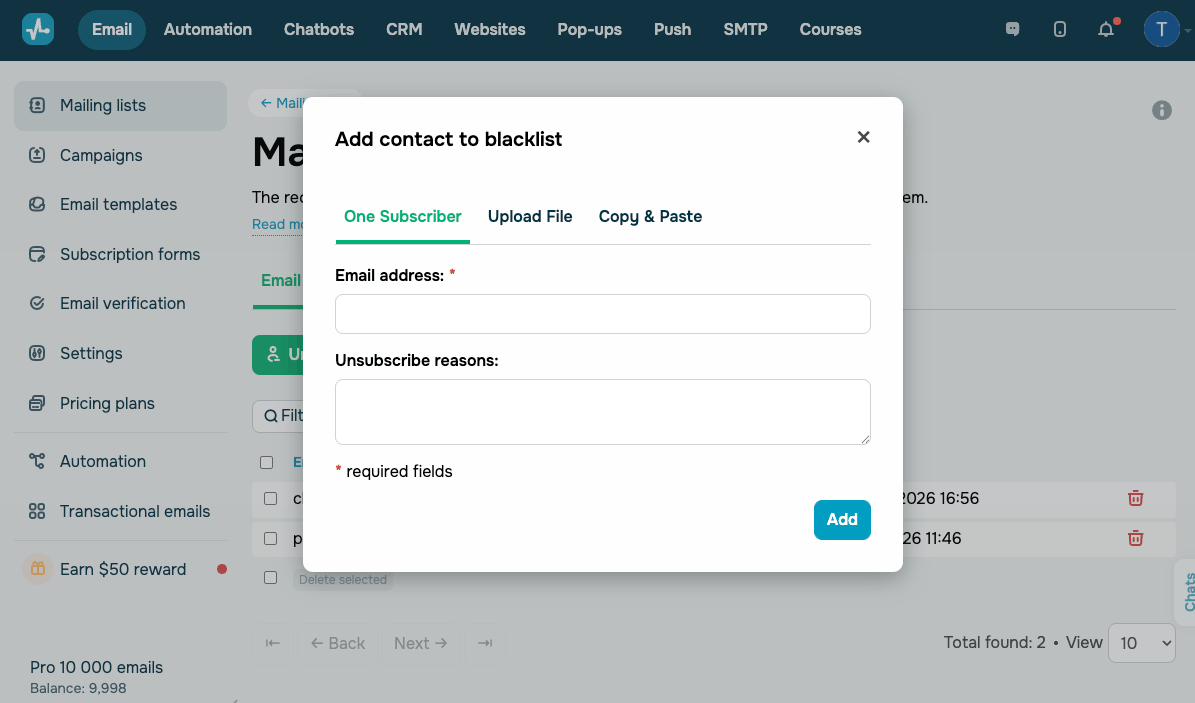
The contact will be added to your unsubscribed list and excluded from further campaigns.
To delete a specific contact from the unsubscribed list, click the Delete icon next to their email address.
Once removed, this contact can receive campaigns again if they are included in an active mailing list.
Manage multiple contacts
You can add multiple contacts to the unsubscribed list.
Click Unsubscribe contact and choose one of the available methods:
| Upload File | Upload a file with email addresses. Supported formats: CSV, TXT, XLS, XLSX. |
| Copy & Paste | Enter or paste up to 10,000 email addresses into the text field, one email address per line. |

To delete multiple contacts, select the checkboxes next to them, then click Delete selected.
Export the unsubscribed list
You can export the unsubscribed list.
Click Export contacts. Select a file format, such as CSV, XLS, or XLSX. Click Export.
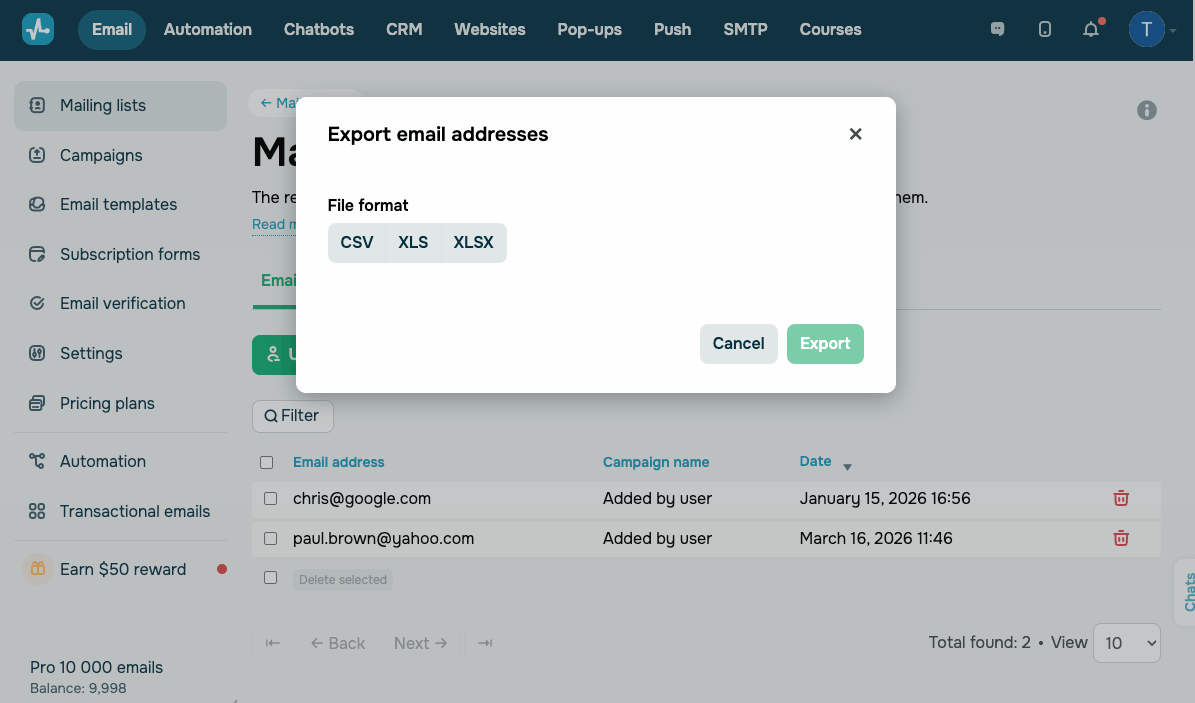
The downloaded file will contain the following columns: Email address, Campaign name, Category, Comment, Unsubscribe reasons, and Date.
Last Updated: 20.03.2026
or