Messenger element in Automation
You can implement multiple communication channels in Automation 360 autoflows and add sending messages from Instagram, WhatsApp, Facebook Messenger, or Telegram chatbots to your flows.
Please note that you can send a message to your customers on Facebook, WhatsApp, and Instagram only within 24 hours from the moment when the last message was sent or since the last user interaction with the chatbot.
Who can receive your chatbot messages?
The user must be subscribed to any chatbots used in your flow. Whether they also need an email address or a phone number depends on how your flow identifies them.
A flow triggered by a chatbot event can identify subscribers using the chatbots_subscriber_id and chatbots_channel variables instead of an email address or a phone number. This means the element can send a message to subscribers who have not provided their contact details. Your chatbot passes these variables automatically when the flow starts using the Start an automation by event action.
Flows started by a CRM trigger identify contacts, deals, and tasks by email address, phone number, or linked chatbot subscriber.
If a chatbot subscriber is linked to the CRM contact, your flow sends the chatbots_subscriber_id and bot_id variables for any CRM trigger. The element can then send a message to this subscriber even without an email address or phone number.
If there's no linked subscriber, the element looks for a chatbot subscriber with the same email address or phone number as the contact and sends the message to them.
A linked subscriber always takes priority. If the contact's email address or phone number matches a different subscriber, the message goes to the linked one. If the contact has multiple linked subscribers, the message goes to the primary one.
Contacts with multiple email addresses or phone numbers get one message, since the flow uses only their primary email address and phone number. Deals with multiple linked contacts send a message to each contact.
You can get additional contact information using the following methods:
- a subscription widget and customized transfer of additional variables from your site;
- the User input function - you can request information from a user and save it to a variable;
- the API Request element - send a request to your database and write responses to the selected line of customer data into a variable;
- the API Set variable method;
- manually adding the Audience list of a particular chatbot.
Read more about how to create variables and update values: How to manage subscribers and their data in your chatbot audience.
Add an element
Drag the Messenger element into your flow, connect it to the element, after which you need to send a message from your chatbot and or launch a chatbot flow.
You can also rename your element to distinguish it from others. Click Element name and enter up to 253 characters in the field. Once you save the settings, the new name will appear in a pop-up window when hovering over the element in the builder.
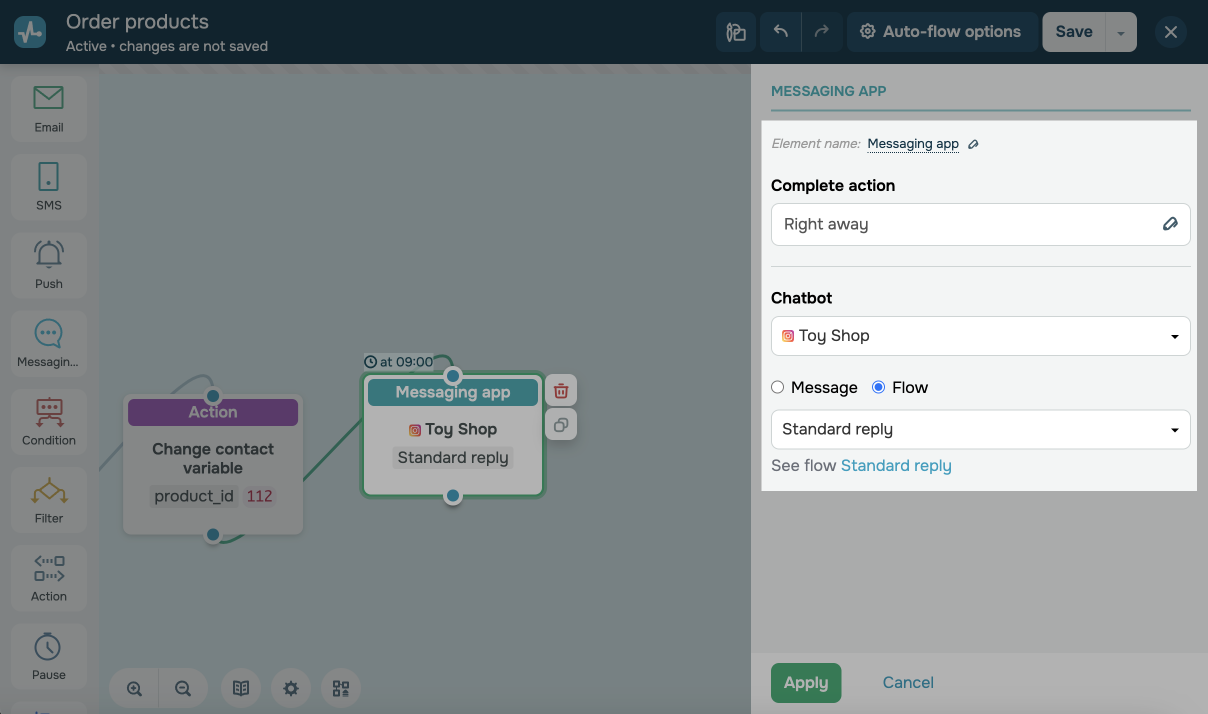
Specify your sending time
Specify when you want to send your message. You can select the Right away option to send the message immediately, choose the After option to delay the sendout, or select Exact time or Exact time and date to set the time yourself.
Read more about block execution conditions in the article: Element execution time.
Select a bot
Select the bot you want to run.
You can also add multiple Messenger elements and launch multiple chatbots at once if your subscribers are subscribed to your bots on multiple social networks.
Add contents
Choose an action (send a message, launch a flow, or send a template).
Send a message
In the Text section, enter the text of the message that will be sent to the selected chatbots. You can add variables and emoji to the text.
Launch a flow
In the Flow section, select which flow you want to start for the contact. If necessary, you can view the flow script.
Send a template
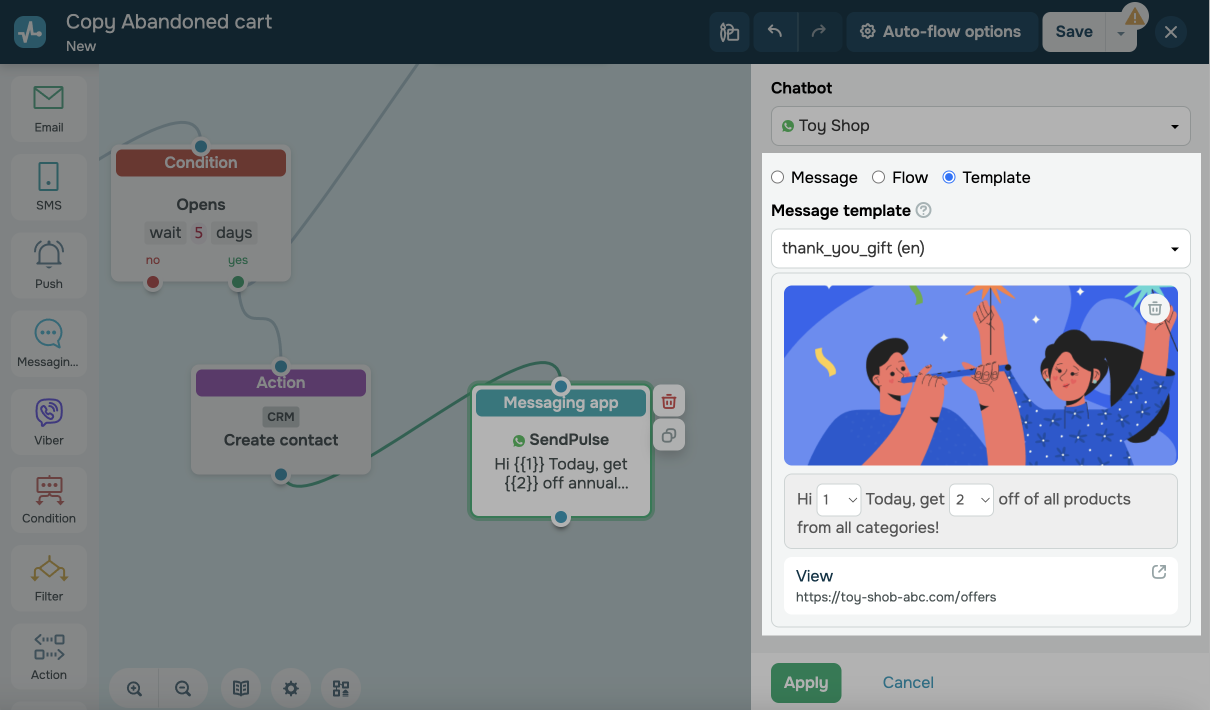
The feature is available only for WhatsApp chatbots: you can select an approved message template in the Template subsection.
A template message is sent regardless of the 24-hour window. If your template contains an image, a video, or a document, add the file in the element. You can insert variables only into the text part of the template. Variables are not substituted in a button link.
Read more: How to use WhatsApp templates in the Messenger element.
You can continue building the flow script by adding the Action element to set up an action using subscriber data and other blocks by sending a message using the Email, SMS, Viber, and Push elements.
Check out more examples of creating autoflows using the Messenger element: How to create an automation triggered by an event, How to send a message triggered by a CRM event, How to send a "Thank You" email after registration, How to send an abandoned cart message, How to create an automation that starts on a special date.
 Last Updated: 09.09.2024




or