Create a chat widget for a website
With SendPulse, you can create and add a signup widget to your website. This way, site visitors will be able to subscribe to your chatbots.
You can also pass custom variables and UTM tags when subscribing via a widget. Read more: How to pass custom variables when subscribing to a chatbot.
Create a subscription widget
Go to Chatbots in the Signup widgets tab and click Add widget.
Please note that you can only create a signup widget after creating at least one chatbot.
Choose a form type
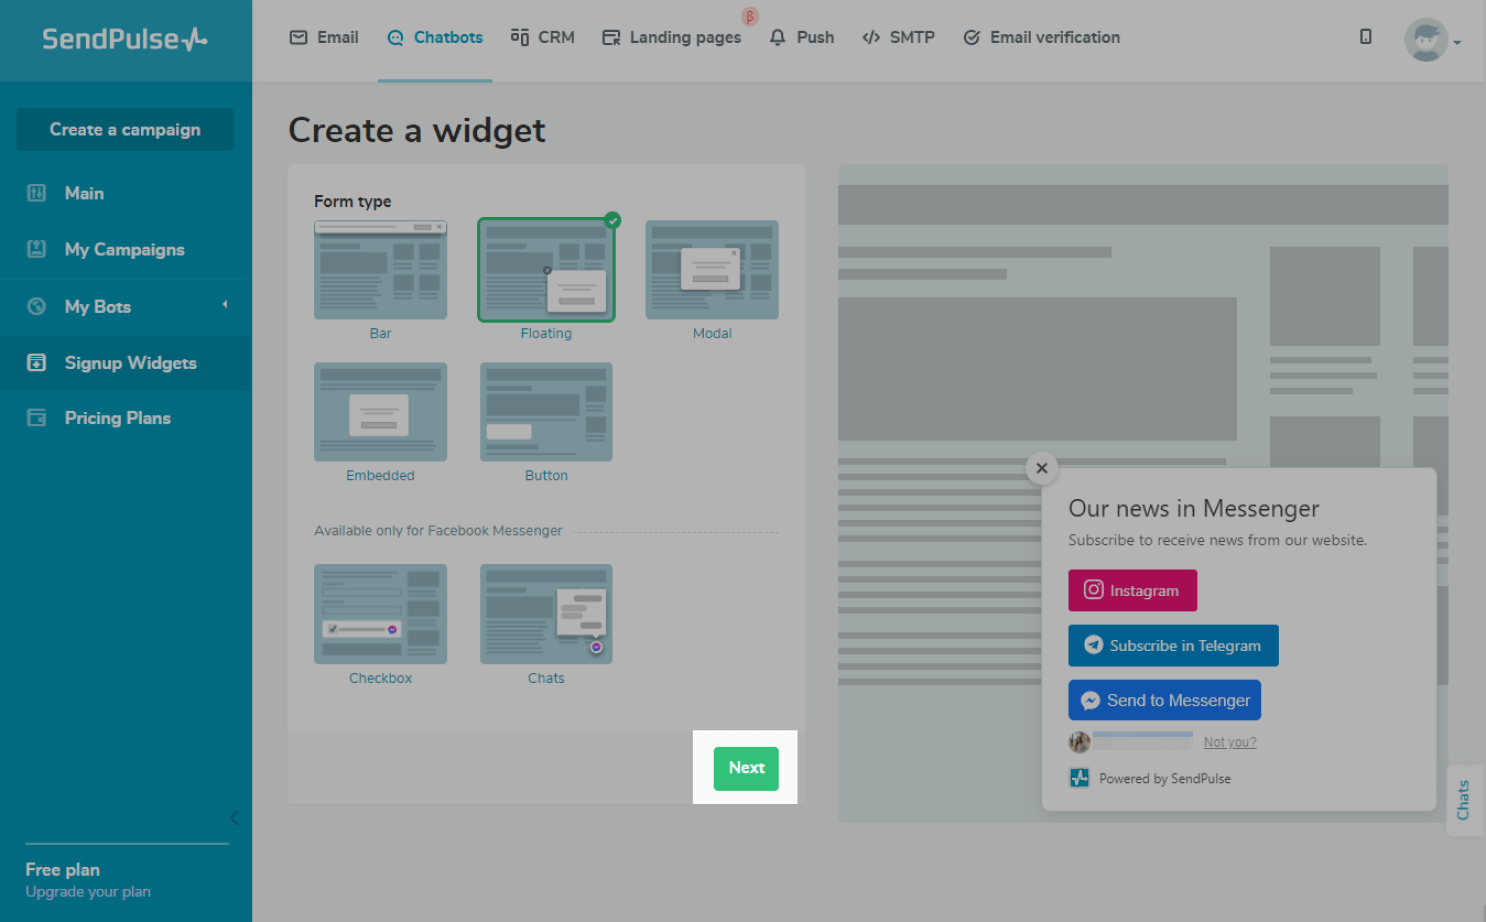
Select the form type: Bar, Floating, Modal, Embedded, Button, Chats, or Checkbox. The right side of the screen shows what the selected type looks like
Please note that the Chats and Checkbox widgets are only available for Facebook Messenger.
Click Next.
Select subscription channels
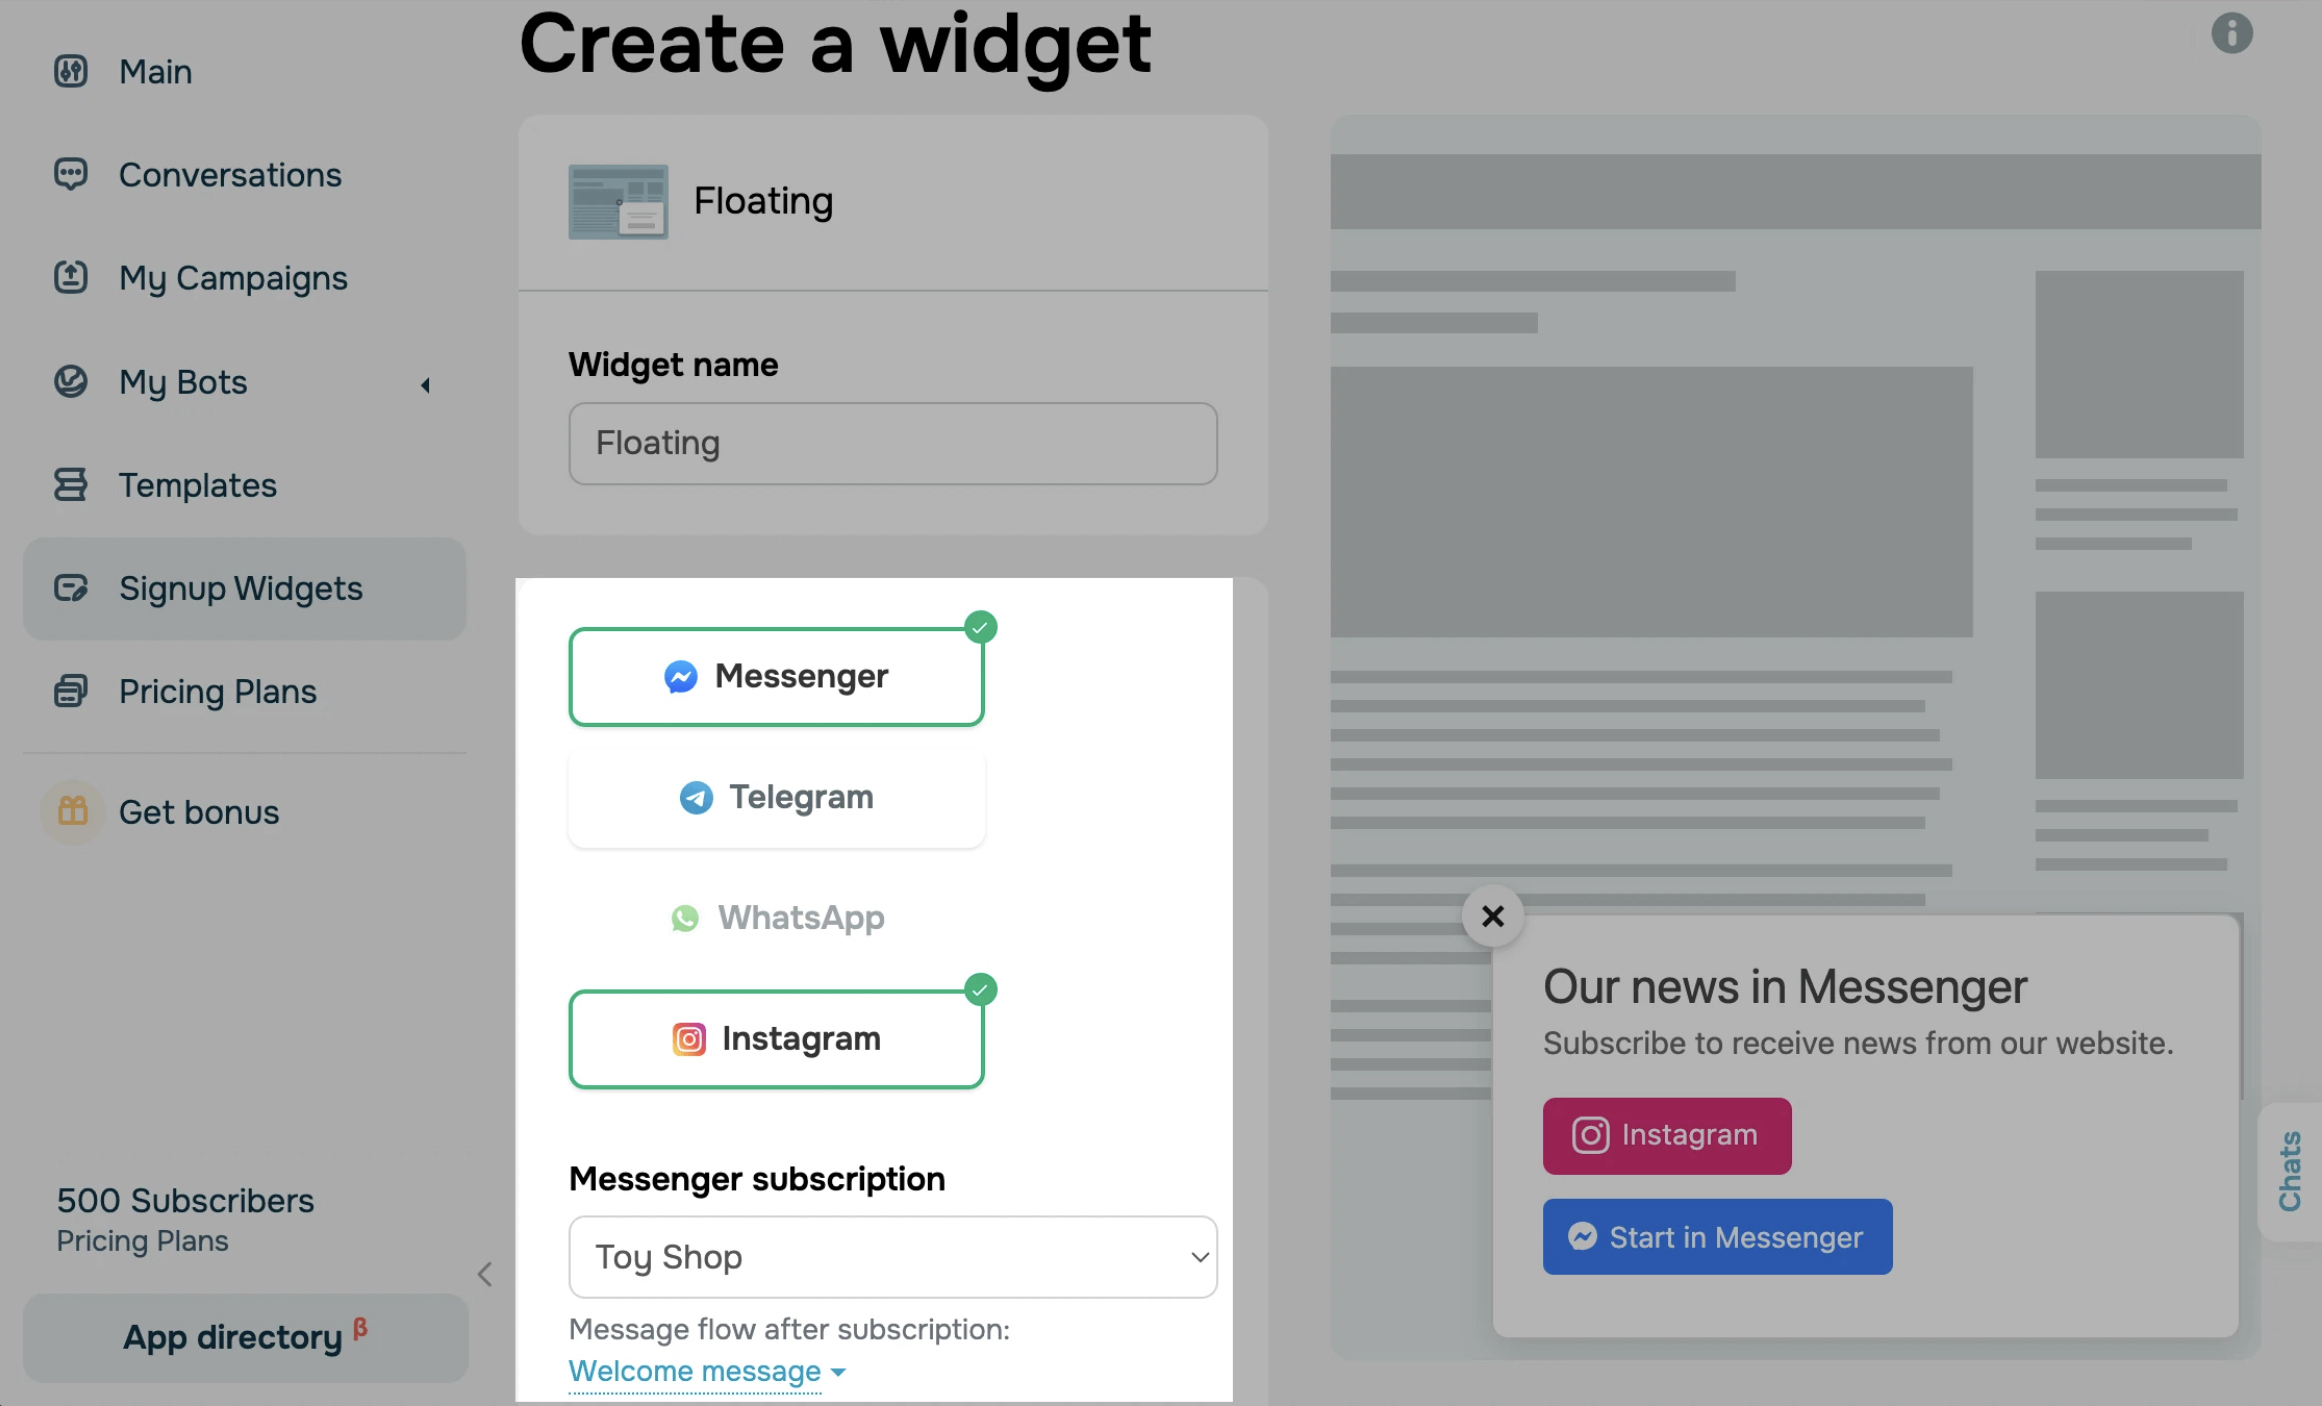
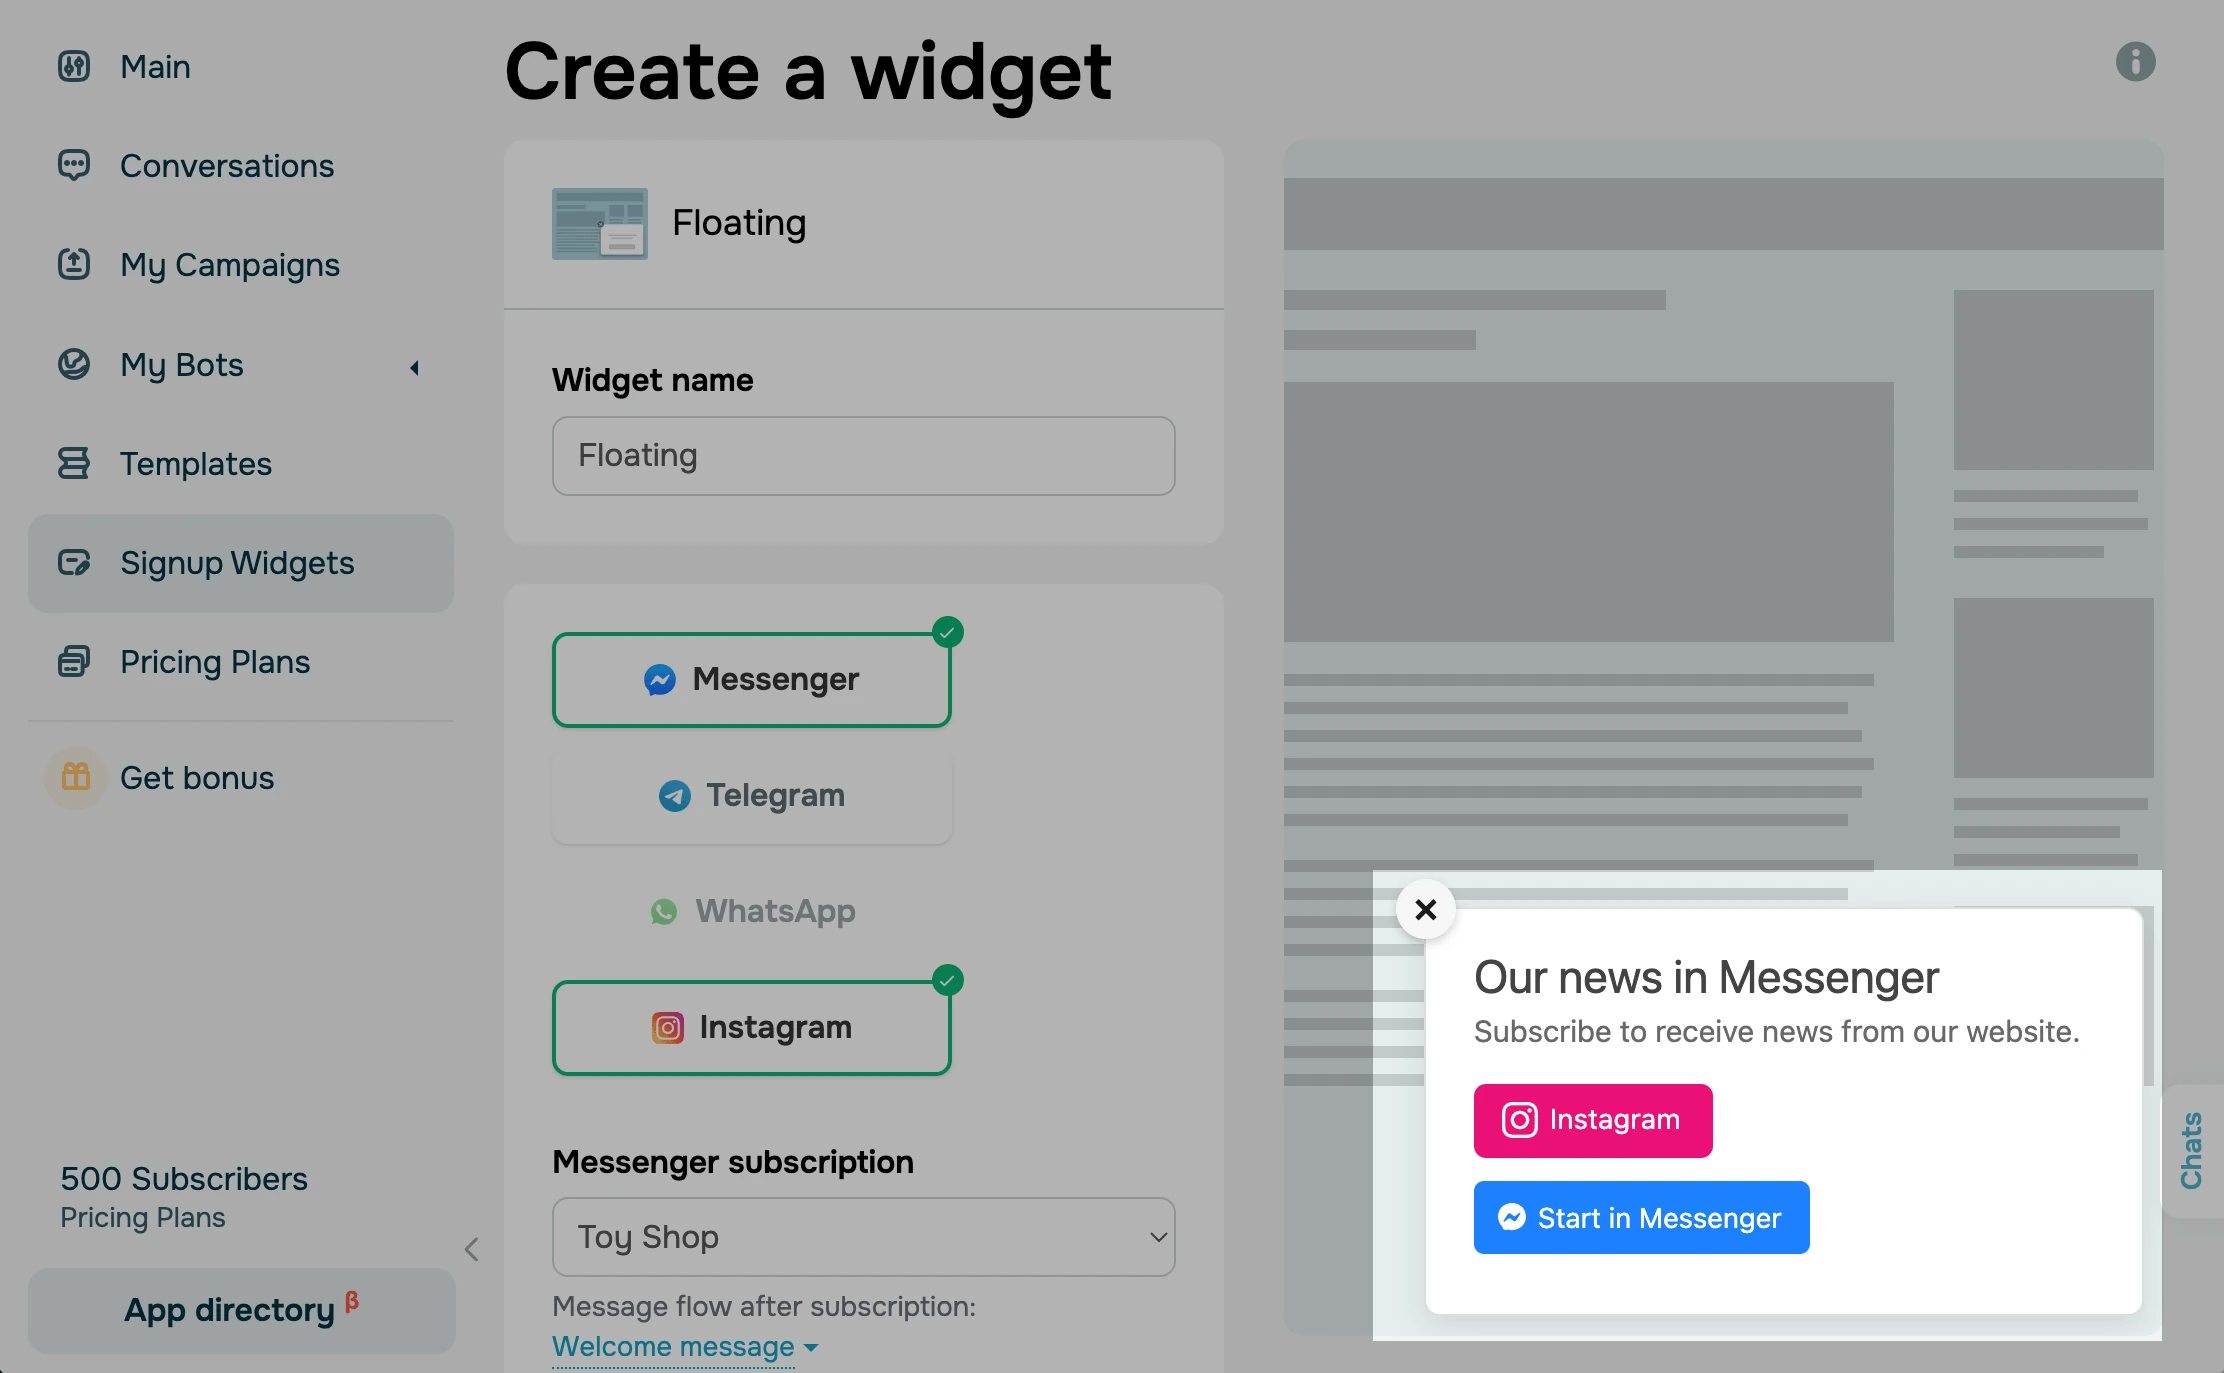
With SendPulse, you can create a signup widget for Facebook, Telegram, WhatsApp and Instagram, or individual platforms. To do so, enable the required subscription and select a chatbot from the drop-down list. Below the chatbot selection field, you can specify the flow that will be launched after someone subscribes.
Please note that the subscriber will be redirected to your Instagram page and not to private messages when clicking on the Instagram button.
Customize your widget appearance
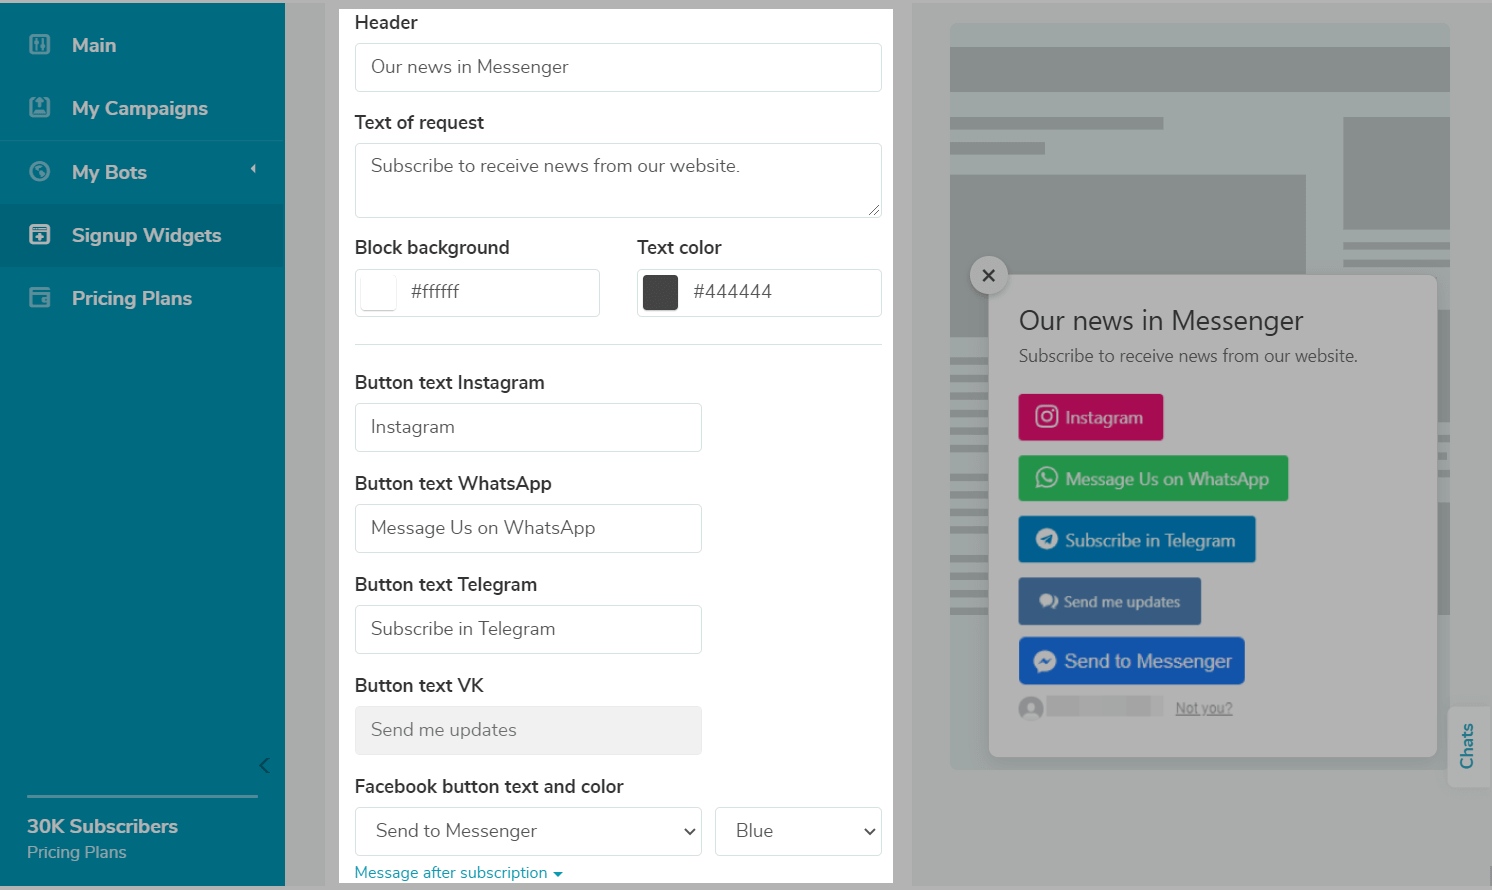
Widget setup parameters depend on the type of form you use. Forms such as Bar, Floating, and Modal allow you to specify text for the form header and request, background and text and color, button text and color, etc.
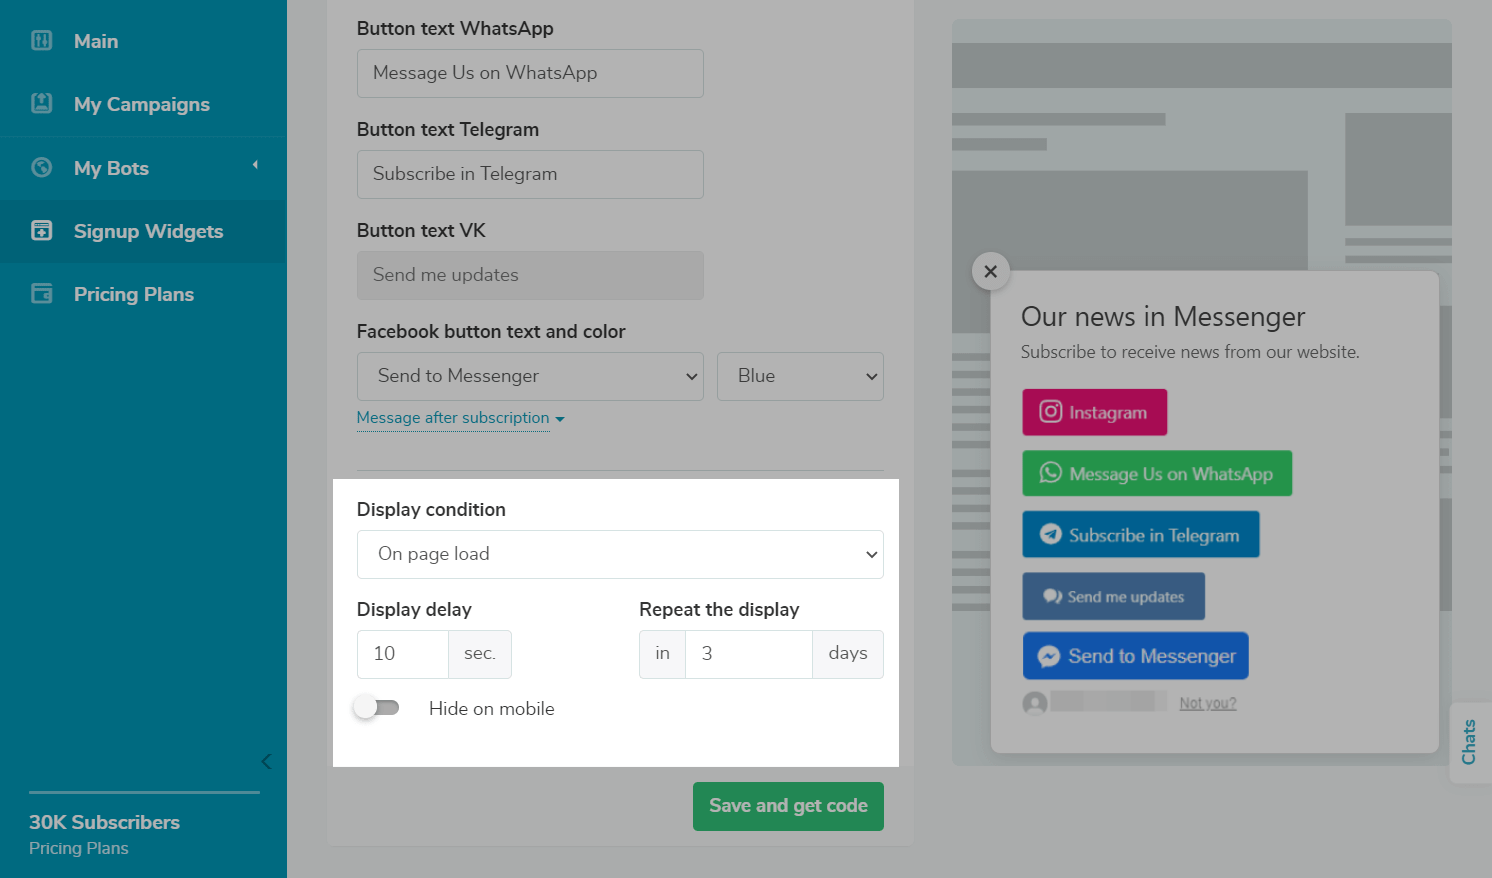
You can also specify the display conditions for these form types. Specify the display and re-display delays of the widget. To hide the widget on mobile devices, activate the Hide on mobile option.
For the Button type, you can specify the text, color and size of the button.
For Facebook buttons, you can select the text on the button from the options in the dropdown list, and also set the message for after someone subscribes.
For the Chats type, you can specify the header, theme color of the chat and add the site address.
Preview
You will see all widget changes in real-time in the preview window to the right of the settings menu.
Save the widget and add the code to your site
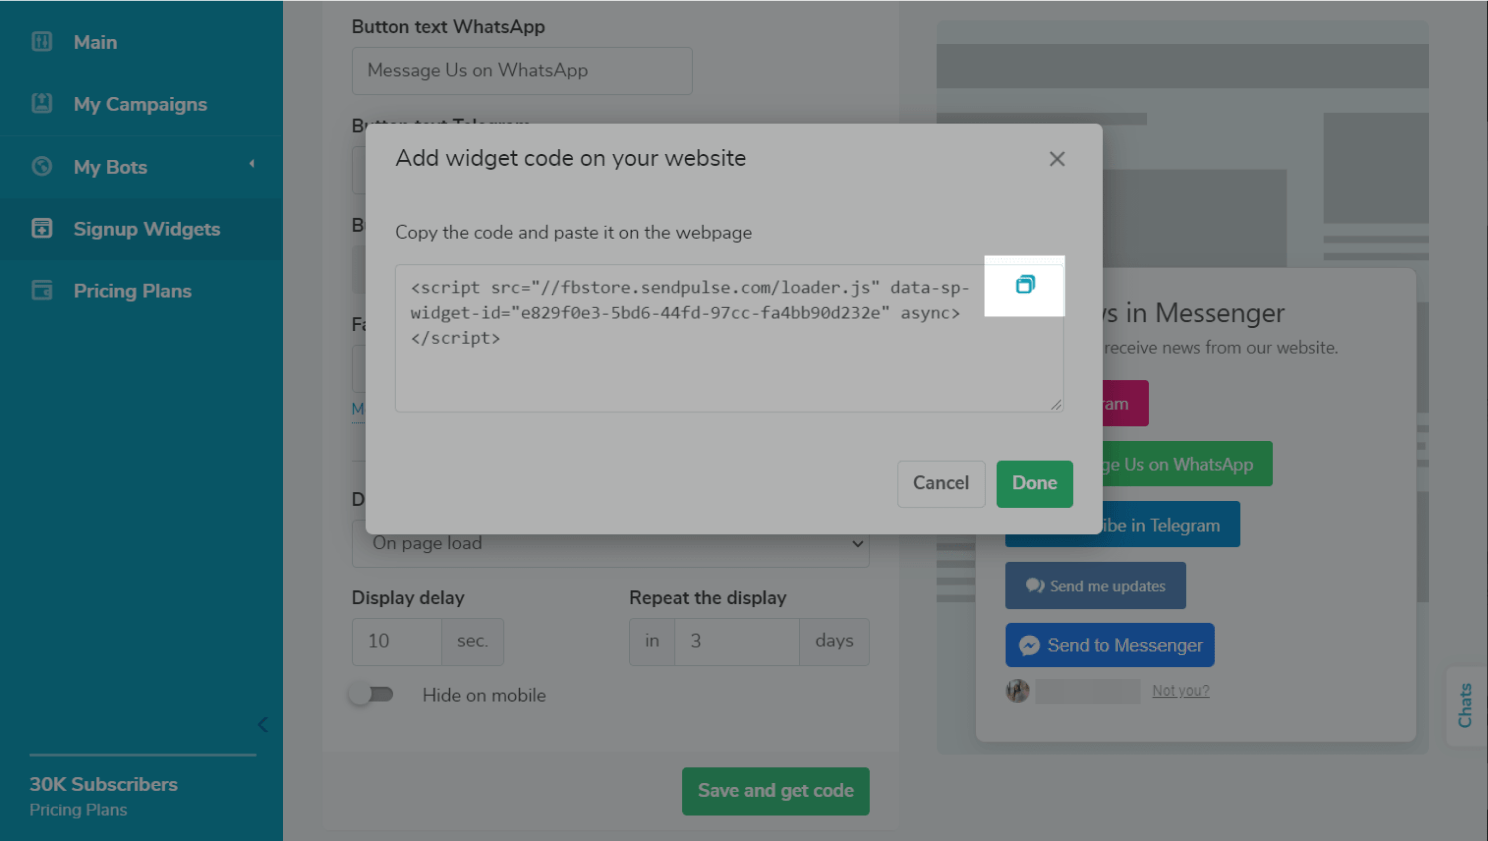
When everything is set up, click Save and get code. A window with code will open — click on the (Copy to clipboard) icon.
Add the code to the desired place on your site.
The way you add the code may differ depending on the hosting service you use. Usually, you need to open the page block settings, where you need to insert the widget, add the HTML block, and paste the widget code into the code window. Then, save the settings and publish the web page.
Last Updated: 22.06.2024
or