Send email to my address in the Action element
The Send email to my address action sends an automated notification to your own email address when a contact reaches this point in the flow. Use it to get notifications about new leads, purchases, or any other event that requires a manual follow-up.
Let's talk about how to configure the Send email to my address action.
SendPulse identifies contacts using the email or phone variable.
Add the Action element
Drag the Action element to the workspace. In the settings that appear, go to the Other category and select Send email to my address.
You can also rename the element to distinguish it from others in your flow. Click Element name and enter up to 253 characters. Once you save the settings, the new name will appear when you hover over the element in the builder.
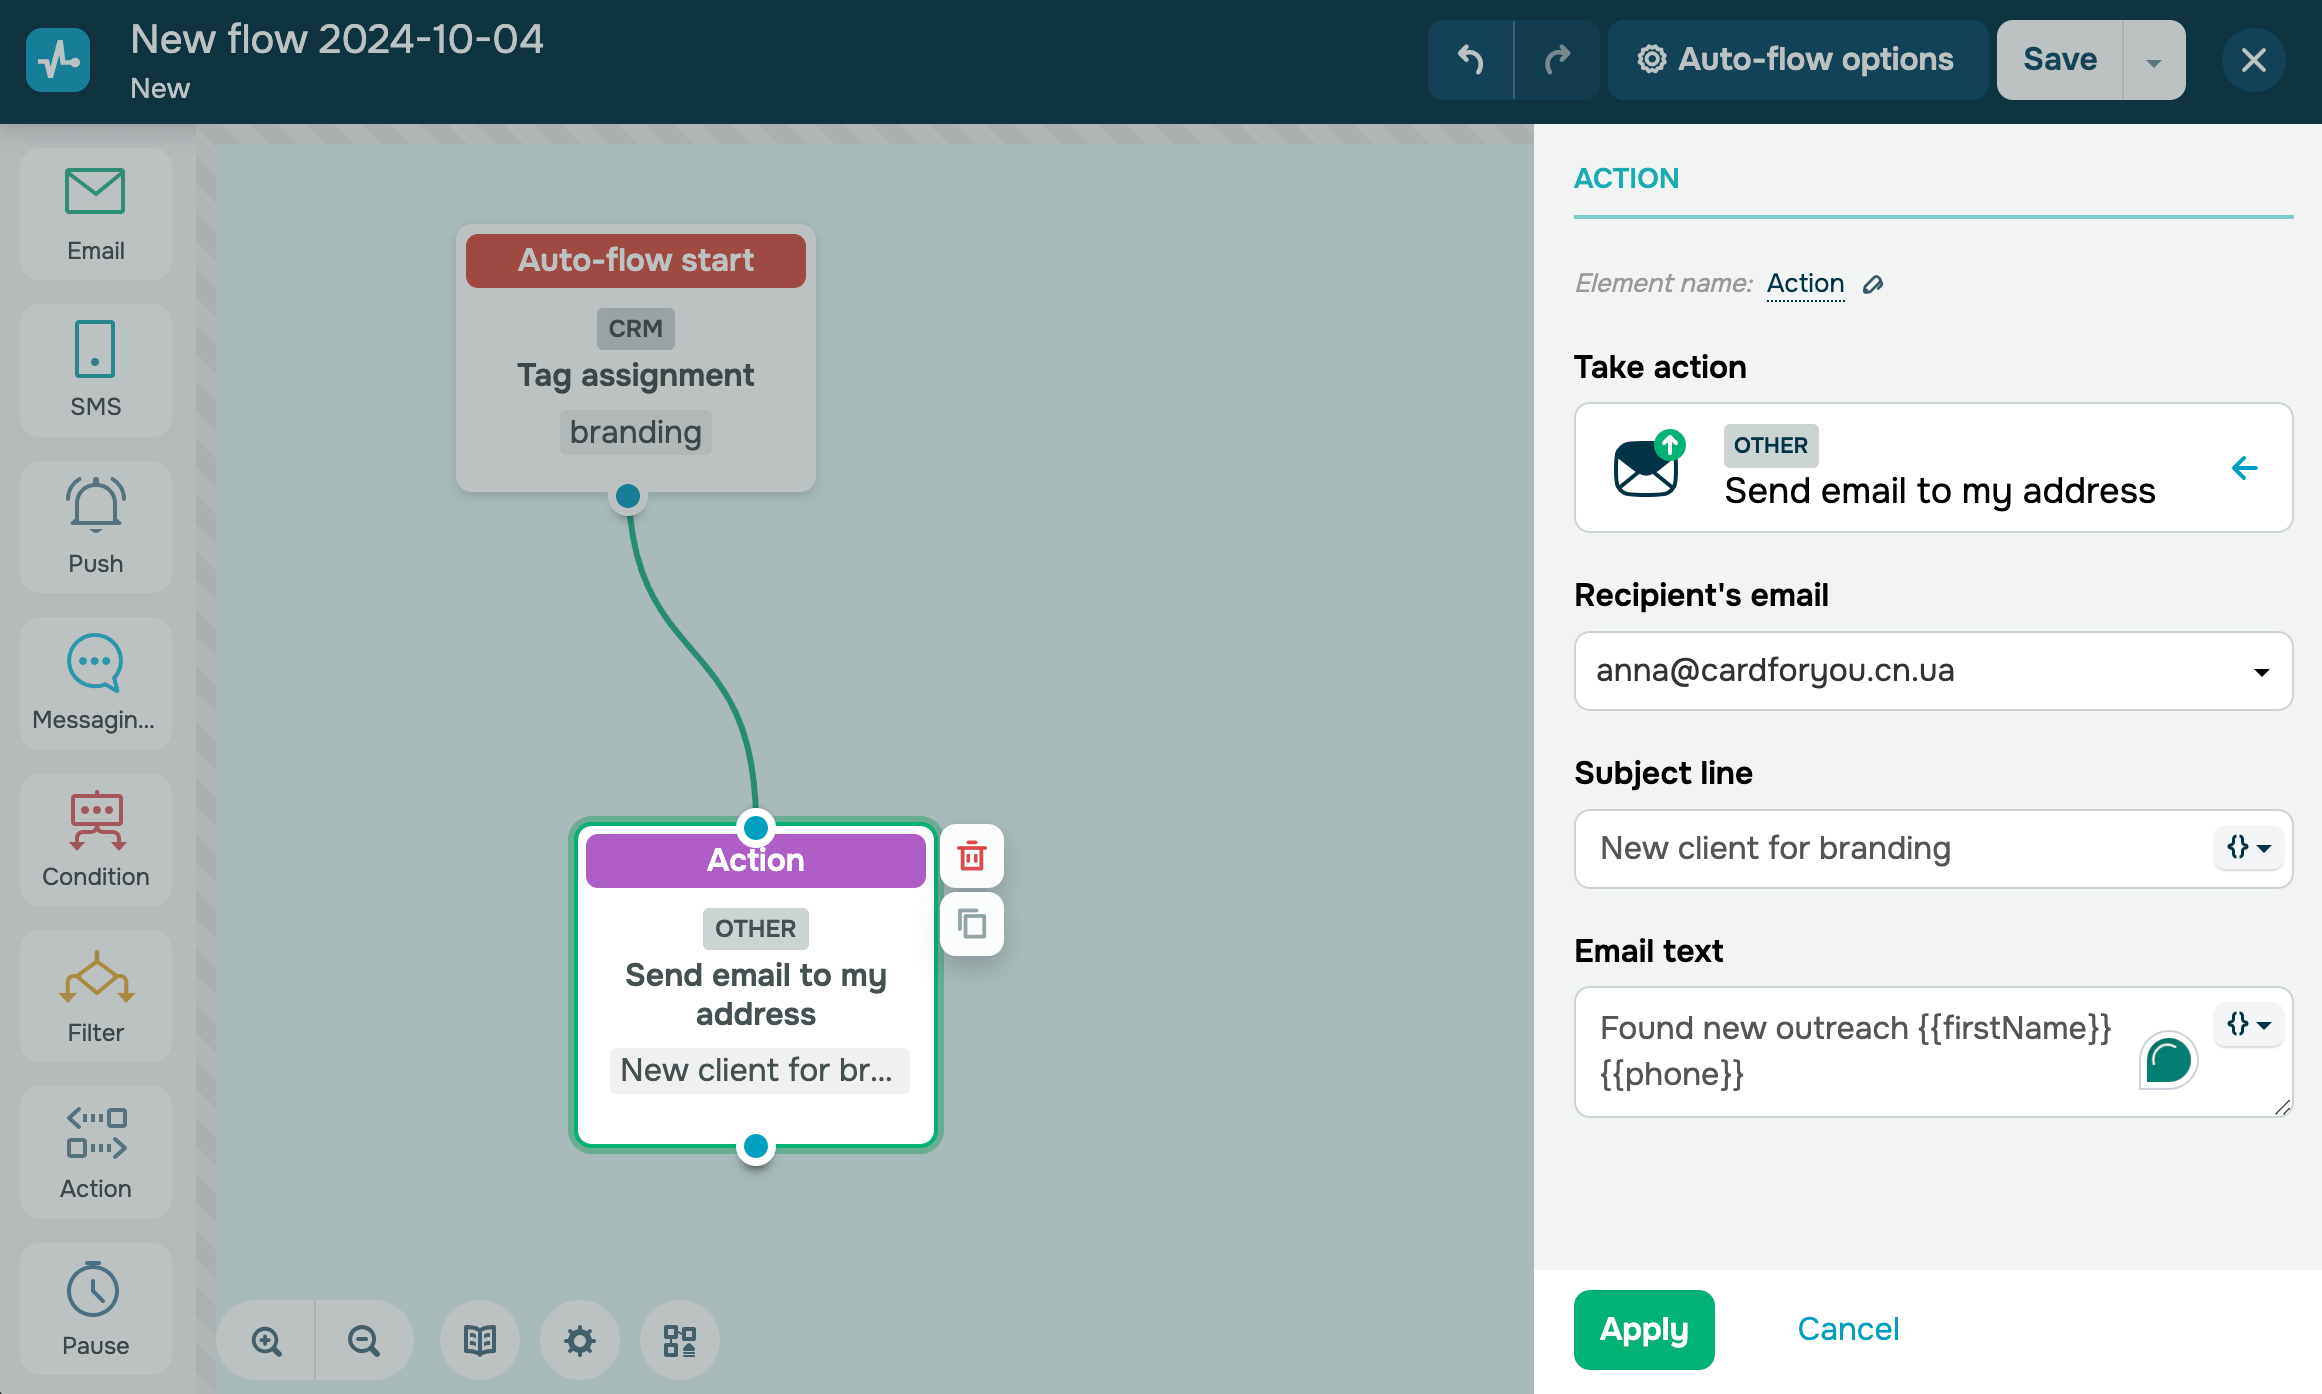
Configure the email
Fill in the following fields:
| Recipient's email | Select a sender email address from the ones added in your account settings. |
| Subject line | Enter plain text or click the variable icon to insert a contact variable. |
| Email text | Enter text or use variables to include contact data, such as {{firstName}} or {{phone}}. You can format your email with HTML tags. |
To insert a variable into Subject line or Email text, click the variable icon next to a field and select the variable from the drop-down list.
Add a product list to the email
If your flow is triggered by a custom event that passes a data array, such as a list of items in a shopping cart, you can include this data in the email body.
In the Email text field, click the variable icon and select your array from the drop-down list. A loop structure with the array's variables will be inserted automatically. You can leave it as is or adjust the layout.
Here's an example where products is the array name:
|[ for item in products ]|
{{img_url}}
{{link}}
{{name}}
{{old_price}}
{{price}}
{{amount}}
{{color}}
{{size}}
{{code}}
|[ endfor ]|
You can add multiple arrays to the same email and combine them with other contact variables outside the loop.
Read also: How to send data arrays with Automation 360.
Last Updated: 03.04.2026
or