Create an Instagram chatbot
An Instagram chatbot replies to direct messages, comments, and Story mentions on your professional account and hands conversations off to your team. Online stores, local businesses, creators, and agencies that manage client profiles can use it to handle messages faster.
Let's talk about how to choose an account connection type, add your Instagram account, subscribe to your chatbot as its owner, and build your first flow.
Benefits and use cases
With an Instagram chatbot, you can:
- reply to direct messages 24/7 based on keywords;
- run a flow when a user comments on your post or live stream, or mentions you in a Story;
- collect contact details in the chat and save every inquiry as a deal in the CRM system;
- check whether a user follows your profile before you send a reward;
- hand a conversation off to a team member when a subscriber asks a complex question;
- send campaigns to subscribers who interacted with your chatbot in the last 24 hours.
Here's how businesses can use an Instagram chatbot:
- A fitness coach can get leads from post comments. When users comment
guideunder a post, the chatbot replies in the comments. It also sends each user a direct message with a link to a workout guide. To do this, create a Comment on your post trigger withguideas the comment and select the Public reply checkbox. Then, build a flow where the Message element sends the link in a button. - A beauty brand can grow its audience with a follower-only discount. When a user sends the keyword
discount, the chatbot checks whether they follow the brand's profile and sends a promo code only to followers. To do this, create a keyword trigger and build a flow with the Filter element and its Follows you page condition. Then, add a Message element with the promo code for followers and another one that asks other users to follow the brand's profile first. - A coffee shop can thank customers who tag it in their Stories. When a customer mentions the coffee shop's profile, the chatbot sends a thank-you message with a discount code for the next visit. To do this, turn on the Story mention trigger and build its flow with the Message element that sends your text and the code.
Basics
Your chatbot uses Meta to access Instagram. Once you grant SendPulse access to your Instagram account, the chatbot replies to users as your account.
Instagram only lets businesses message users who contact them first, for example, with a direct message, a comment, or a Story mention.
After a user's last message, your chatbot can reply within the standard messaging window, which lasts 24 hours. Your team members can reply manually in Chats for up to seven days.
The first message that your chatbot sends after a comment or a Story mention can include text and one button or quick replies. The flow continues when the user replies or clicks the button.
Connect your Instagram account
Before you start, switch your account to a business or creator account in the Instagram app. The chatbot works only with a professional account.
To connect your account, go to Chatbots > Add bot > Instagram. Then, choose one of the following connection types:
| Business Login |
Connects your chatbot through the Meta business portfolio that owns your Instagram account. You log in with Instagram. Best for most businesses. We recommend this type by default. You need a business portfolio that owns your Instagram account and Full access to it. |
| Instagram Login |
Connects your chatbot directly through your Instagram account, without a business portfolio or a Facebook Page. Best to use when Business Login is unavailable, or the connection fails. Ad account integrations and the Conversions API aren't available, and new features might reach this type later. You need only your professional Instagram account. |
| Facebook Login |
Connects your chatbot through the Facebook Page linked to your Instagram business account. You log in with Facebook. Best to use for businesses that already manage their Instagram account through a Facebook Page. This is a legacy connection type. You need a Facebook Page linked to your Instagram account and full control of this Page. This type supports business accounts only. |
Each connection type starts from its own button.
Business Login
Before you start, add your Instagram account to your Meta business portfolio. The account you log in with needs Full access to this portfolio.
To connect through Business Login, click Continue with Meta for Business.
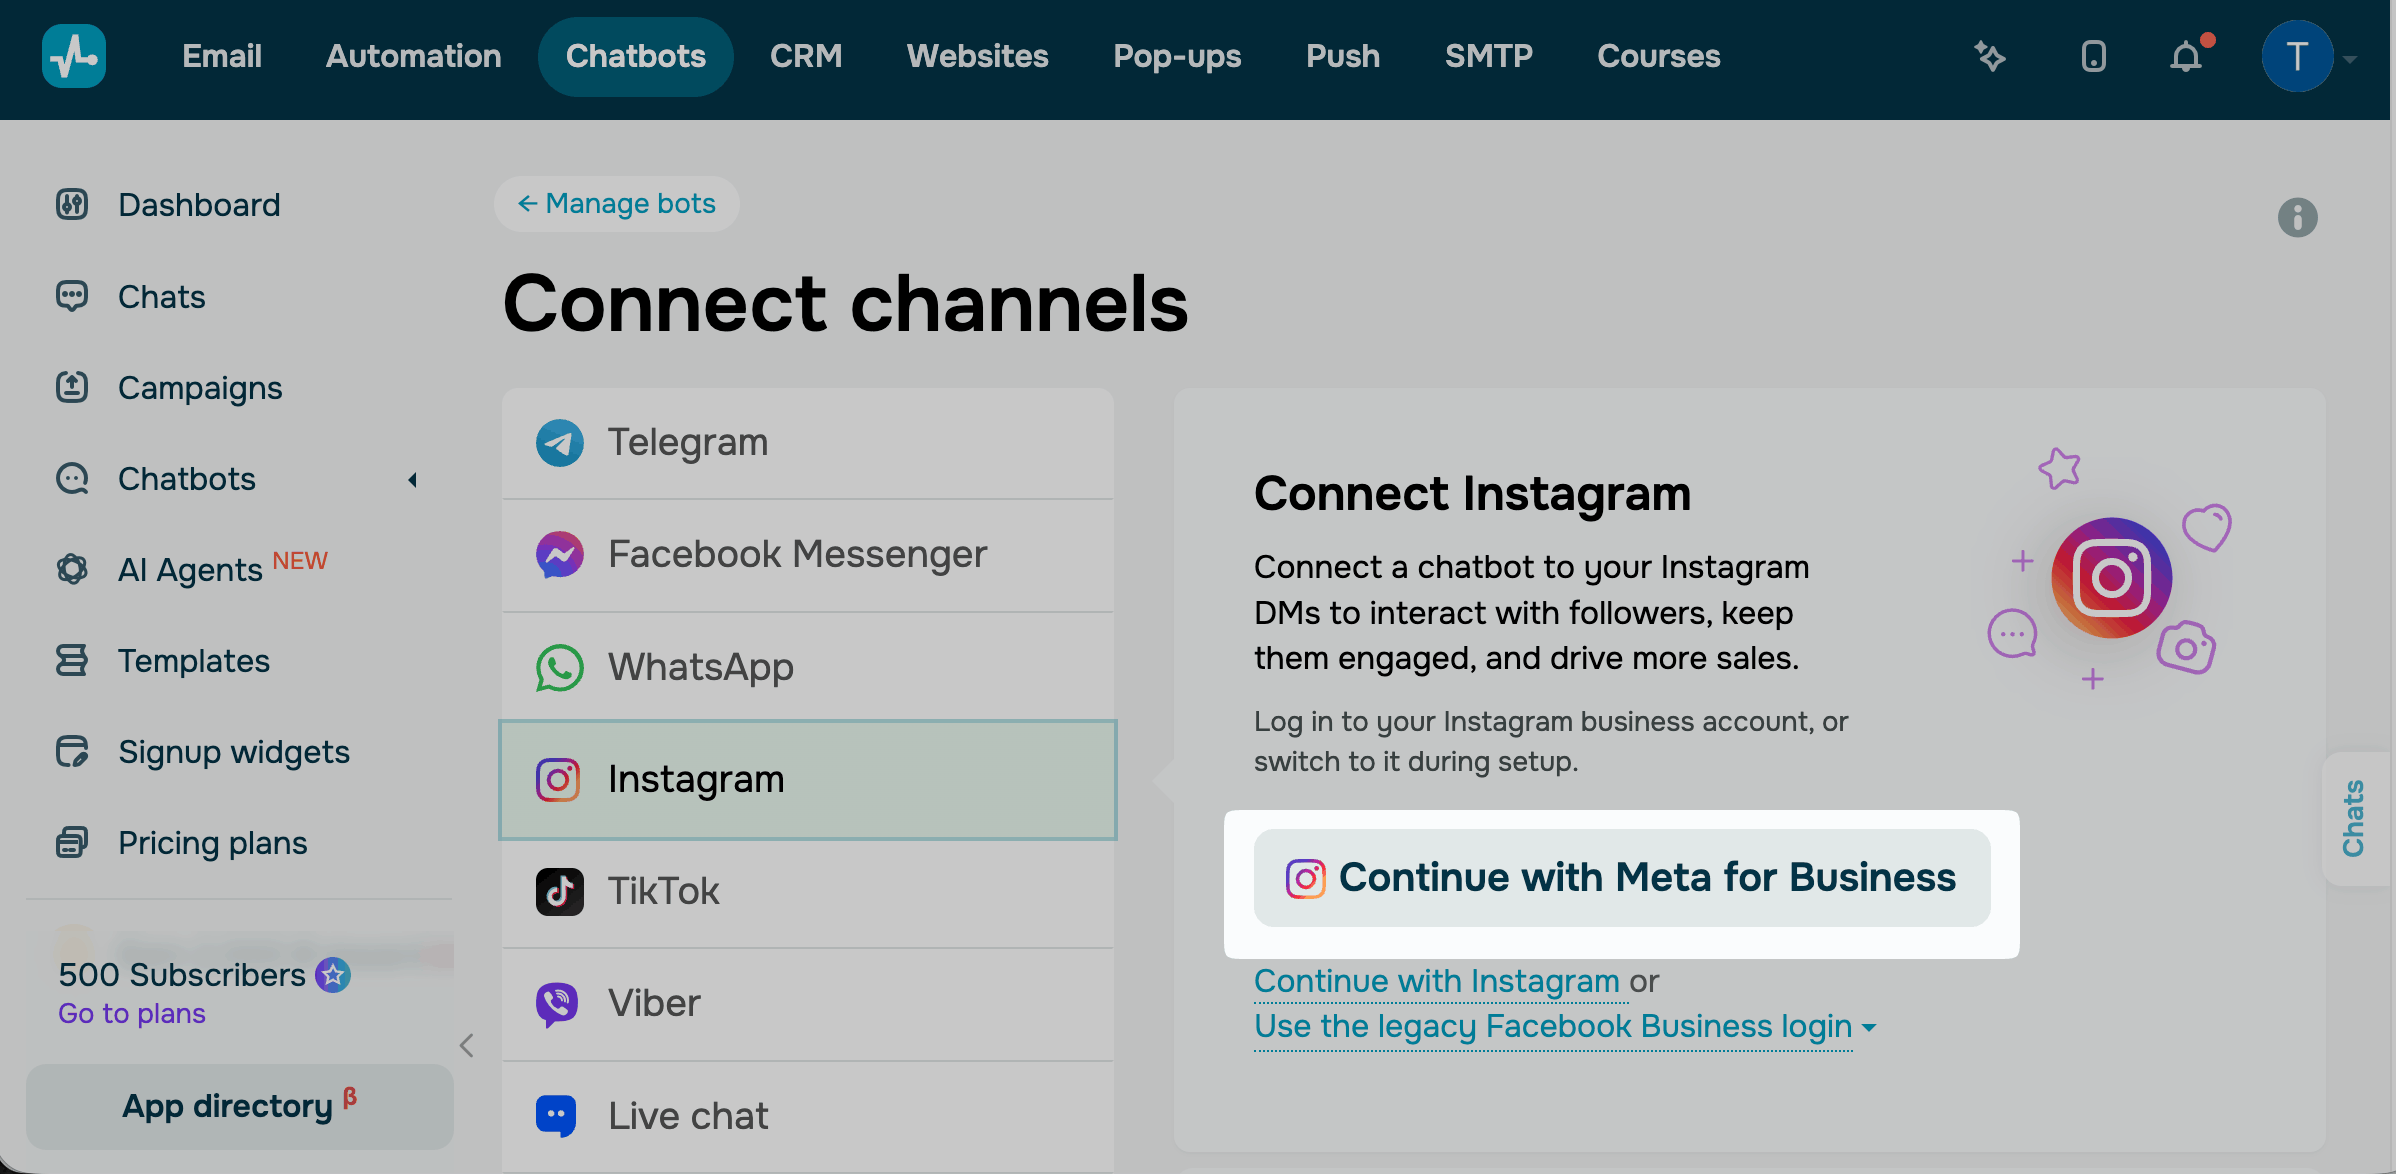
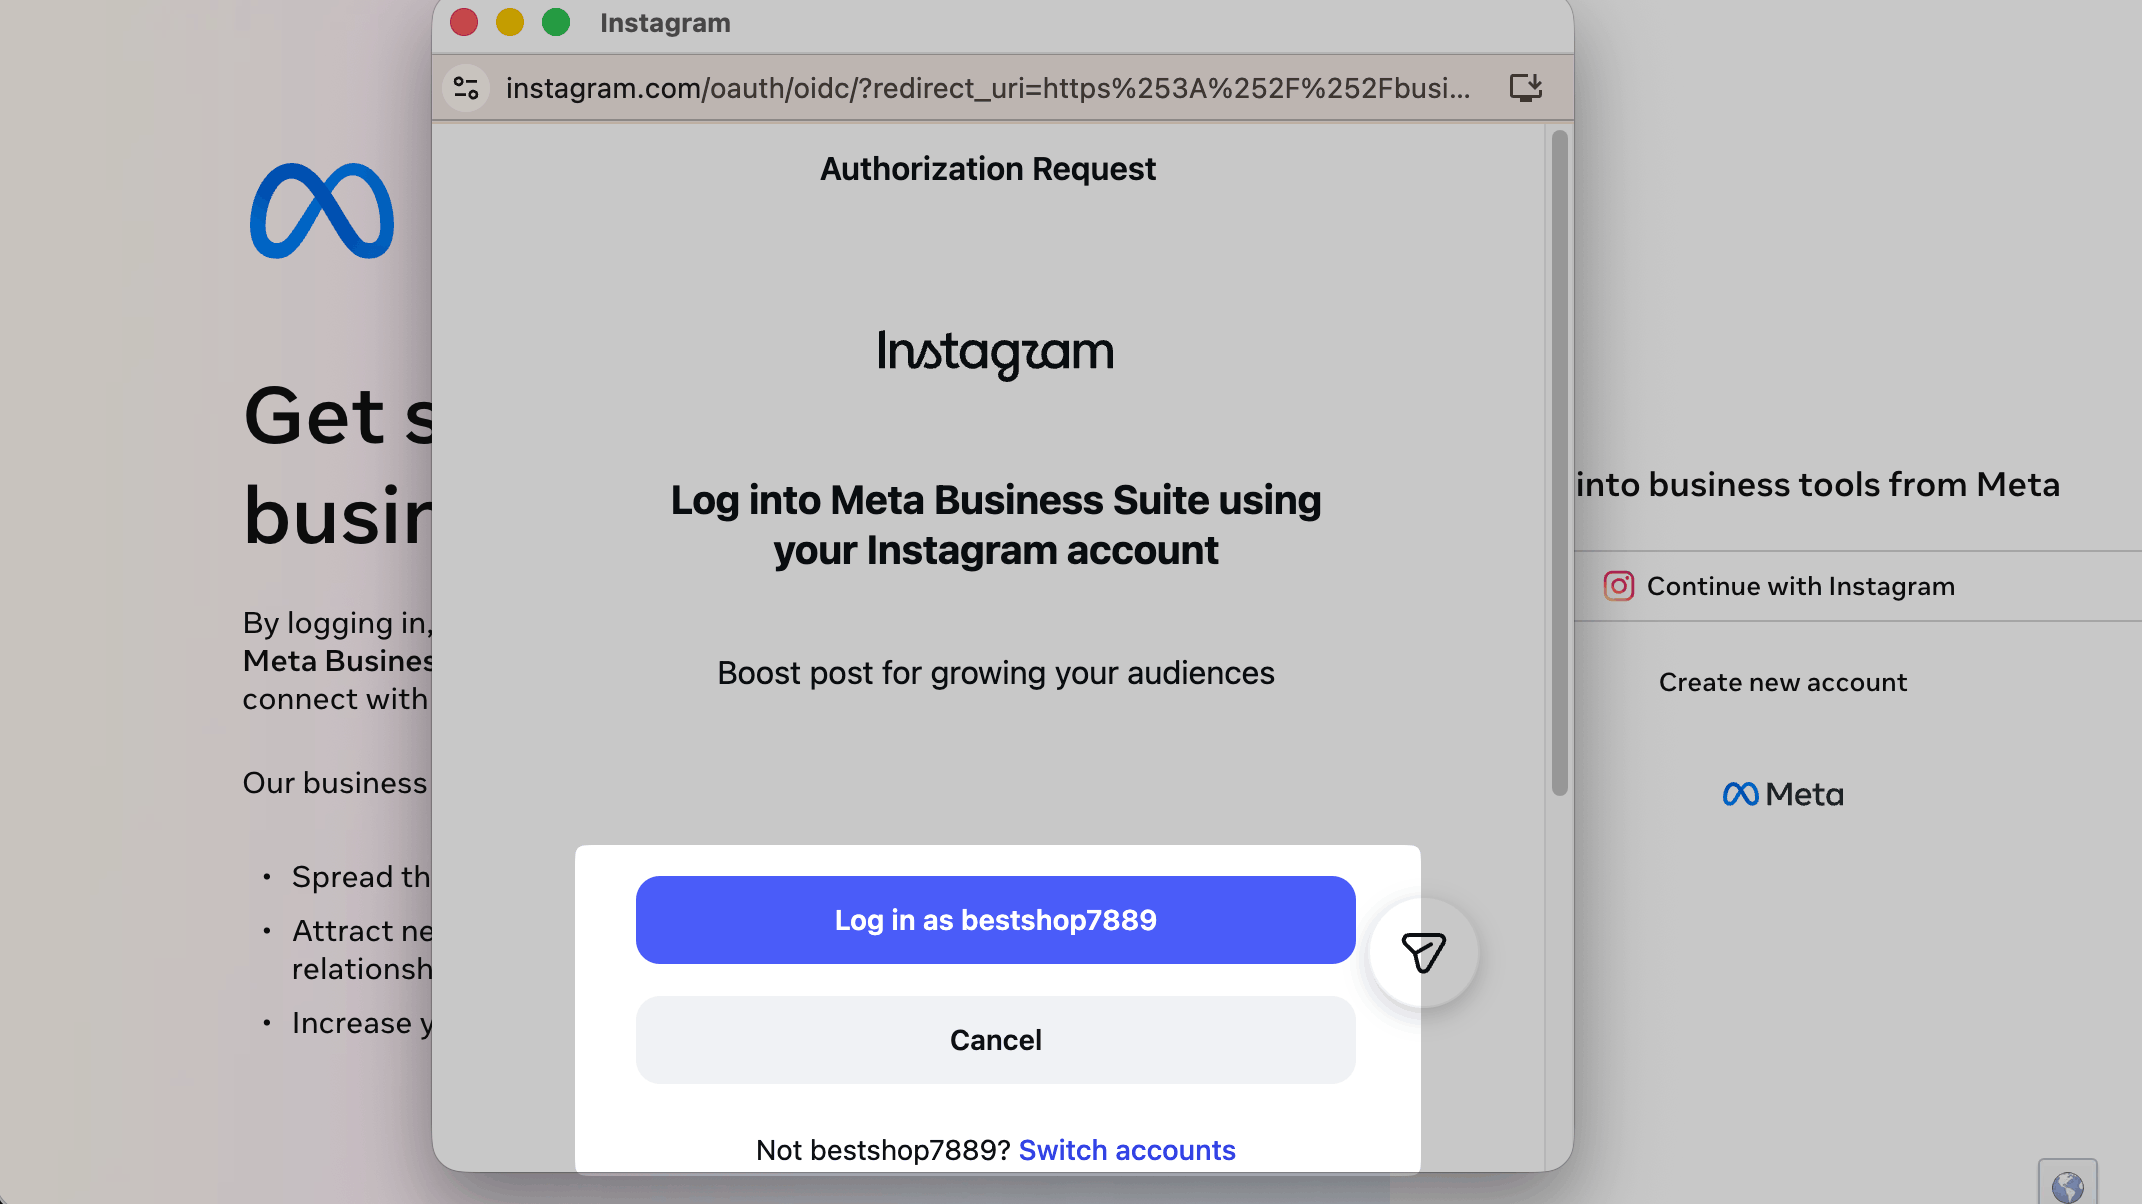
You will be redirected to the Log into business tools from Meta page. Click Continue with Instagram.
In the Authorization Request window, make sure the login button shows the right username, then click it. To log in to another account, click Switch accounts.
Next, select the following business assets to share with SendPulse:
| Business Portfolio | Select the business portfolio that owns your Instagram account. |
| Instagram Accounts | Select the Instagram account you want to connect your chatbot to. |
| Ad Accounts |
Select the ad account you want to connect your chatbot to. This field is optional. If your portfolio has no ad accounts, leave it empty. |
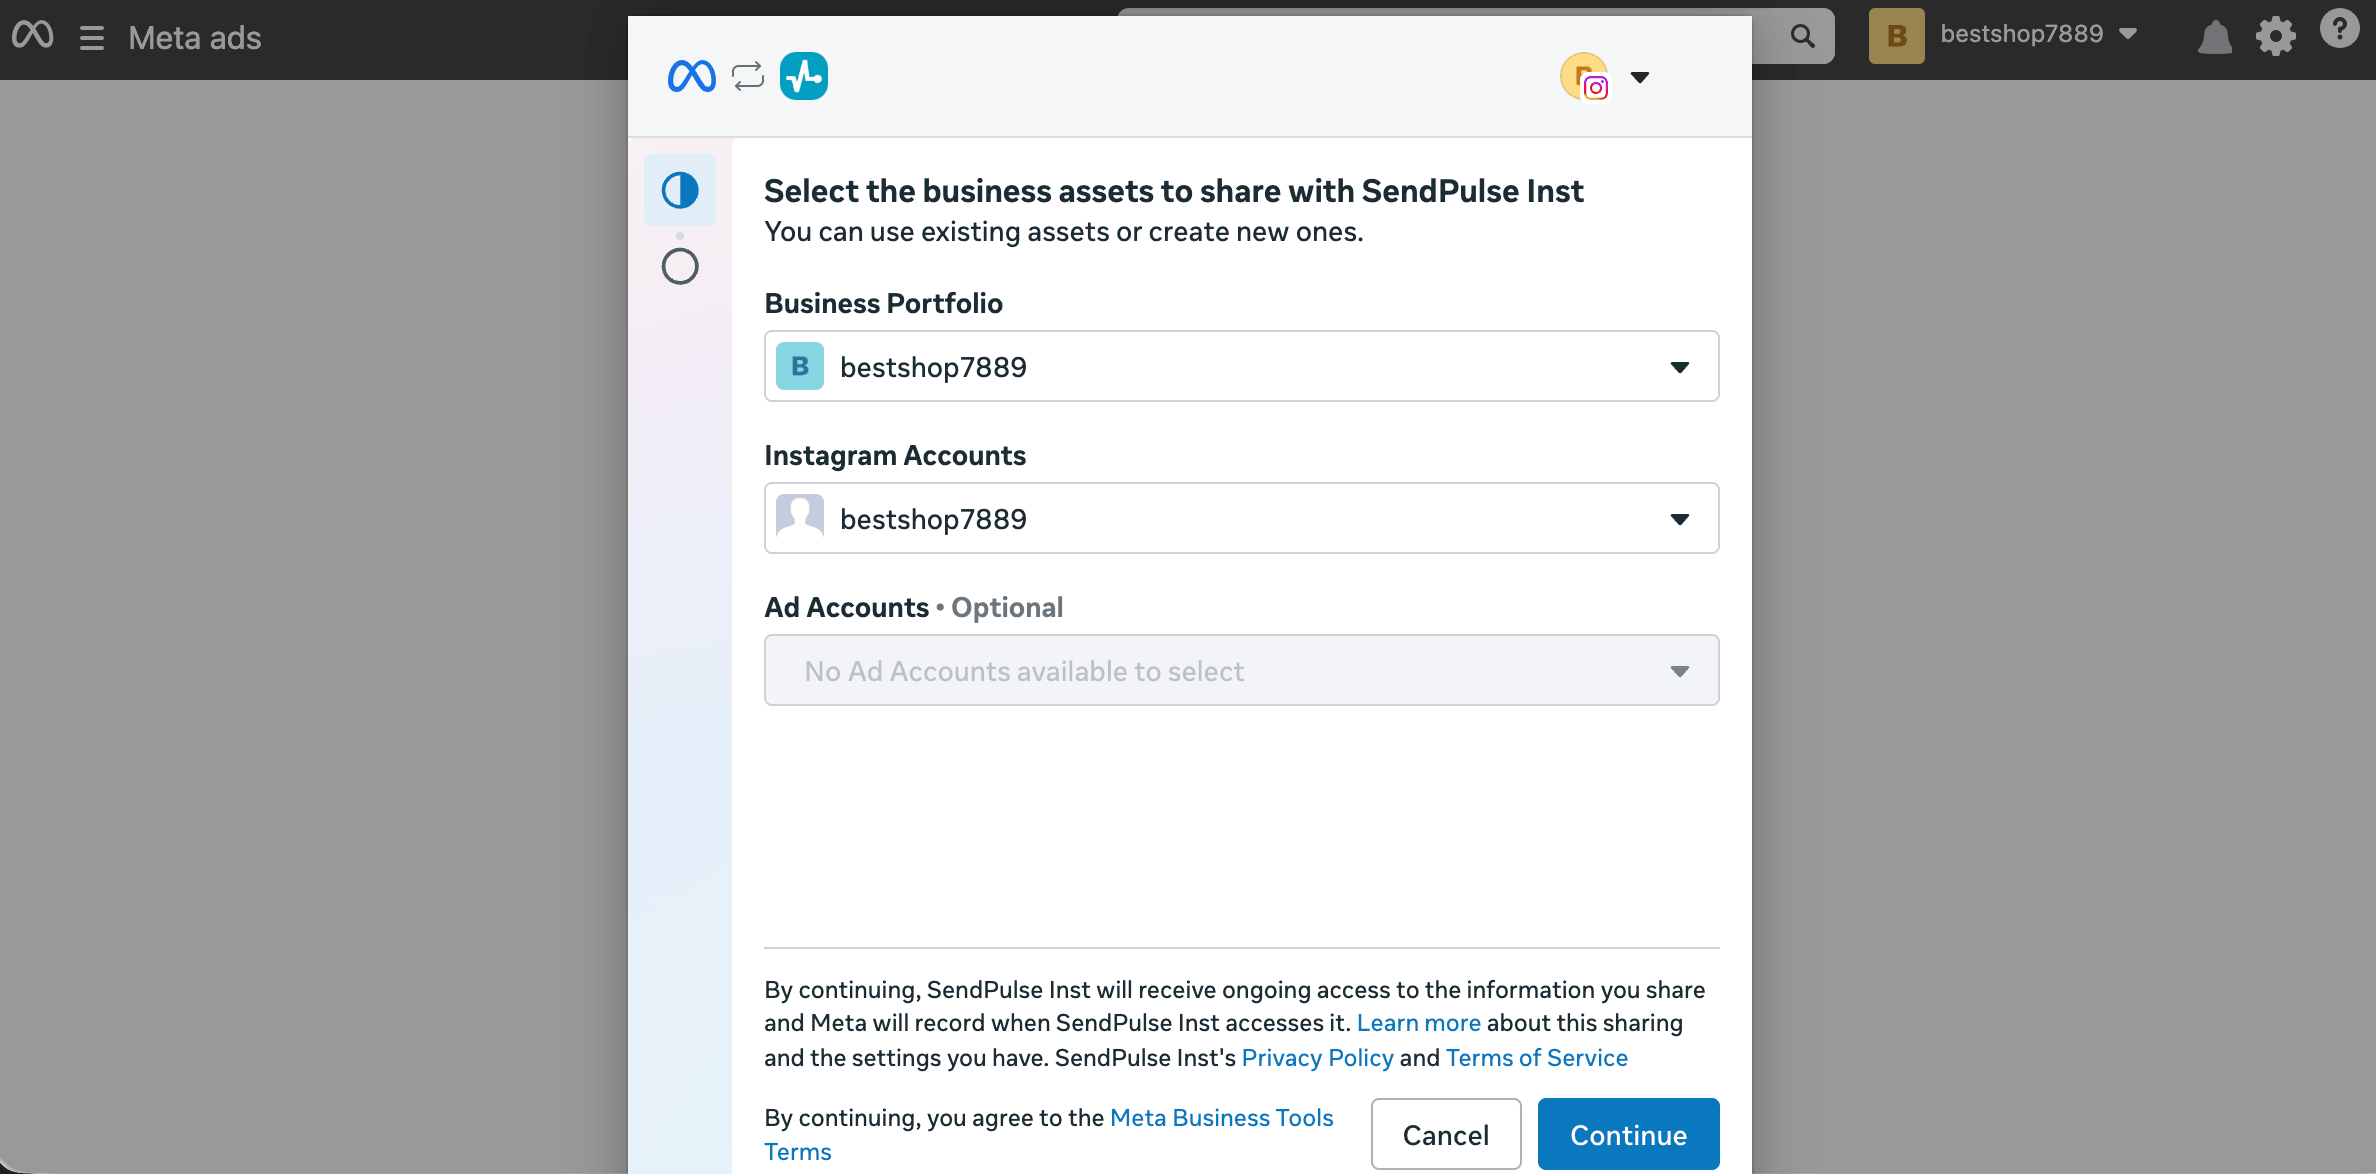
Once you select the assets, click Continue.
You’ll see what SendPulse will be able to access, such as your business portfolio and your Instagram account. Make sure the list includes Manage and access messages for the Instagram account. Your chatbot needs this permission to receive and send messages.
To proceed, click Save.
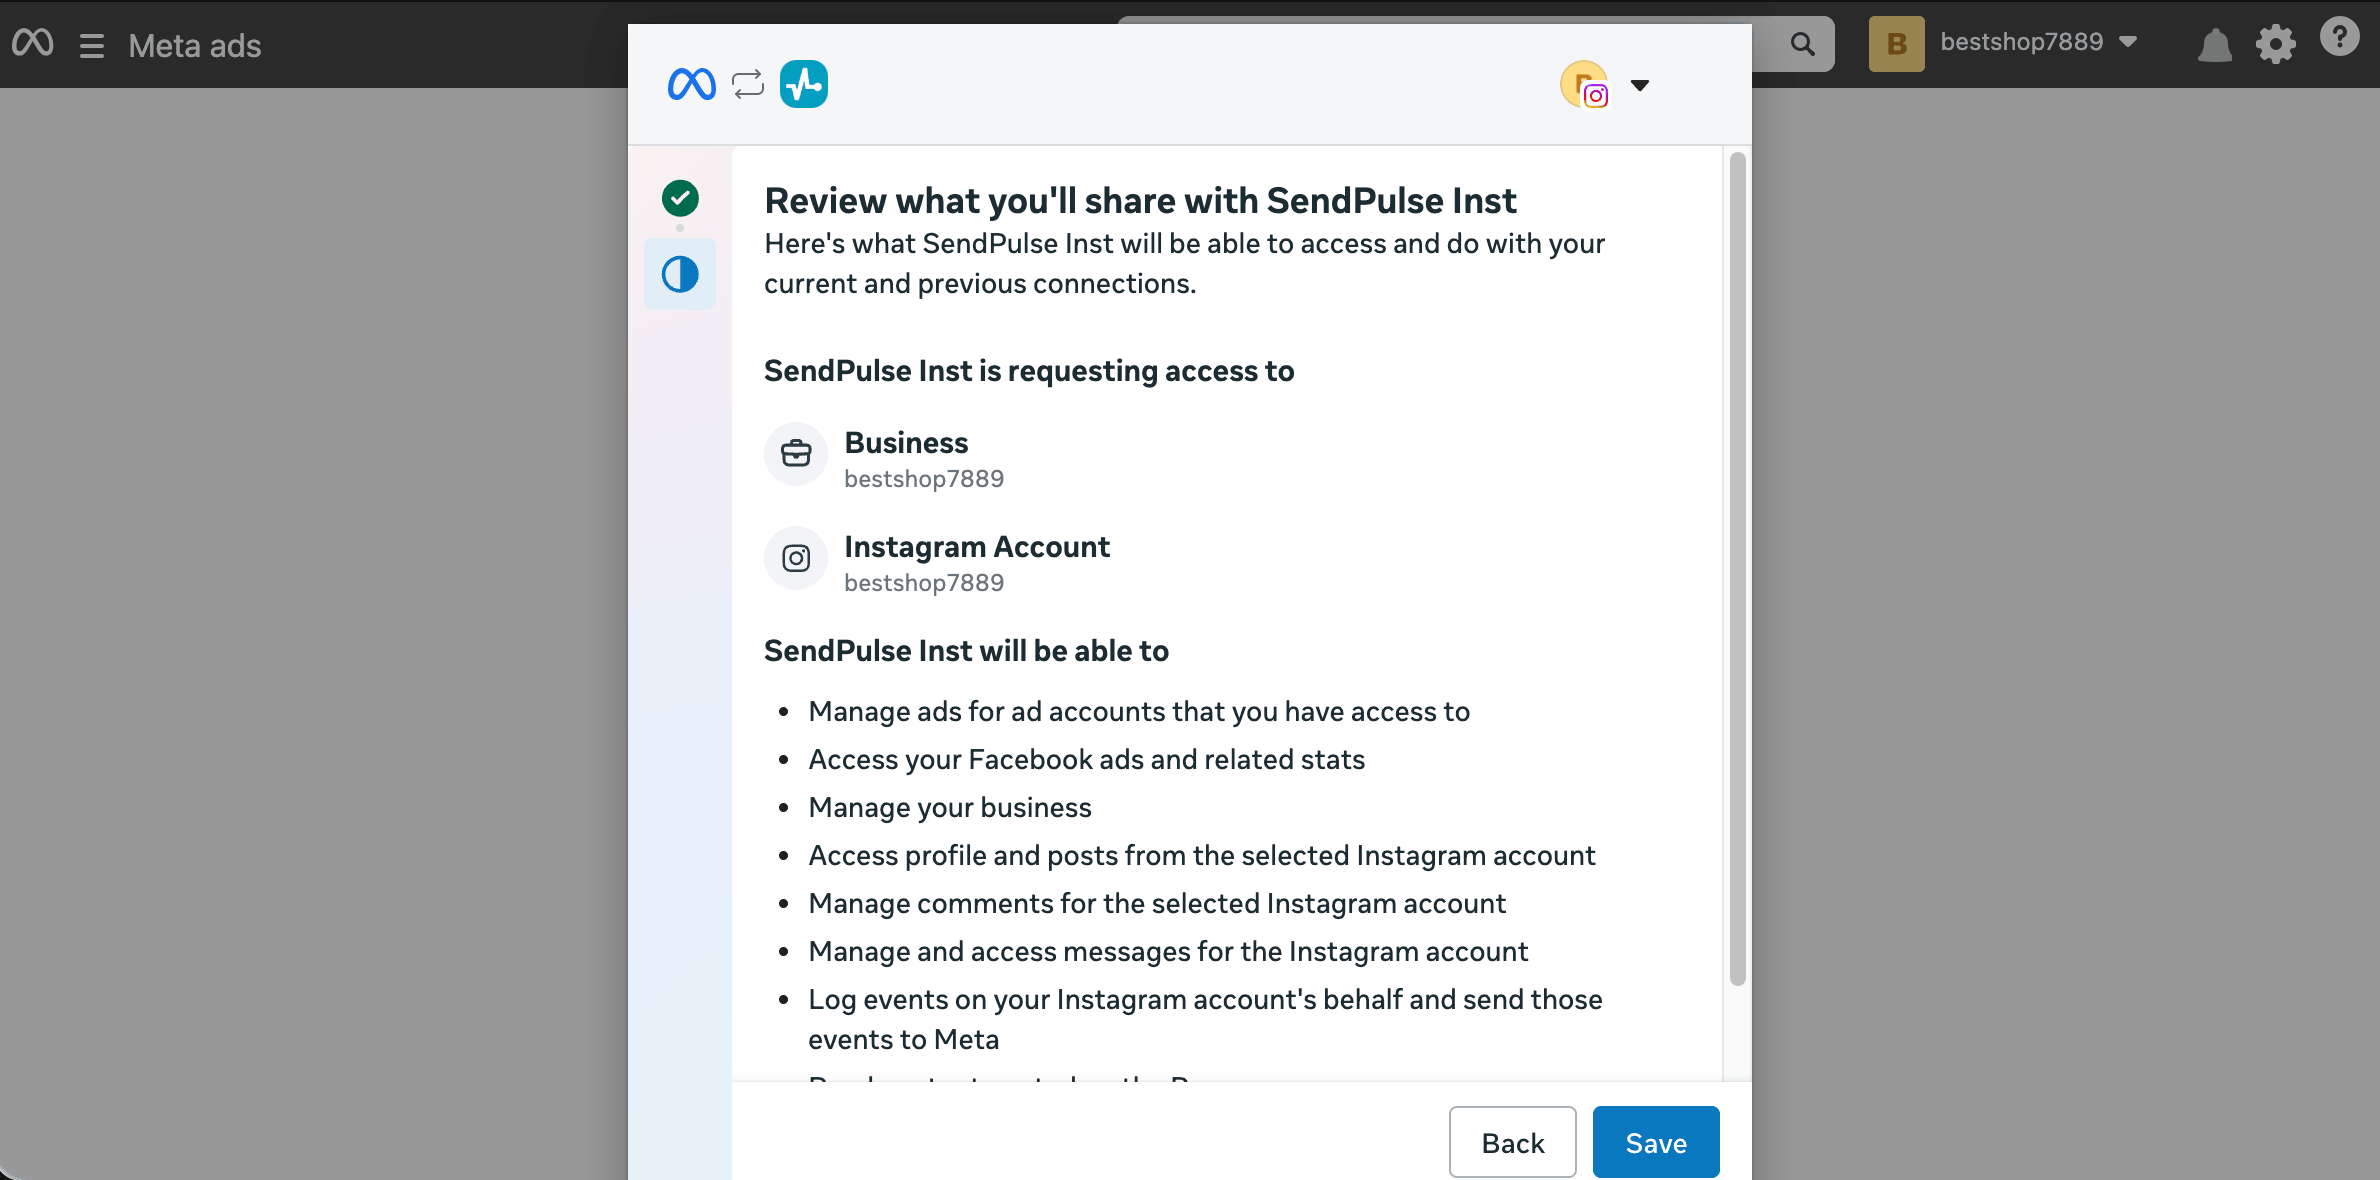
After that, SendPulse creates your chatbot. Next, subscribe to your chatbot as its owner.
If the connection fails, make sure your Instagram account belongs to the selected portfolio and that you have Full access to it. If the issue persists, see the troubleshooting checklist or try other connection types.
Instagram Login
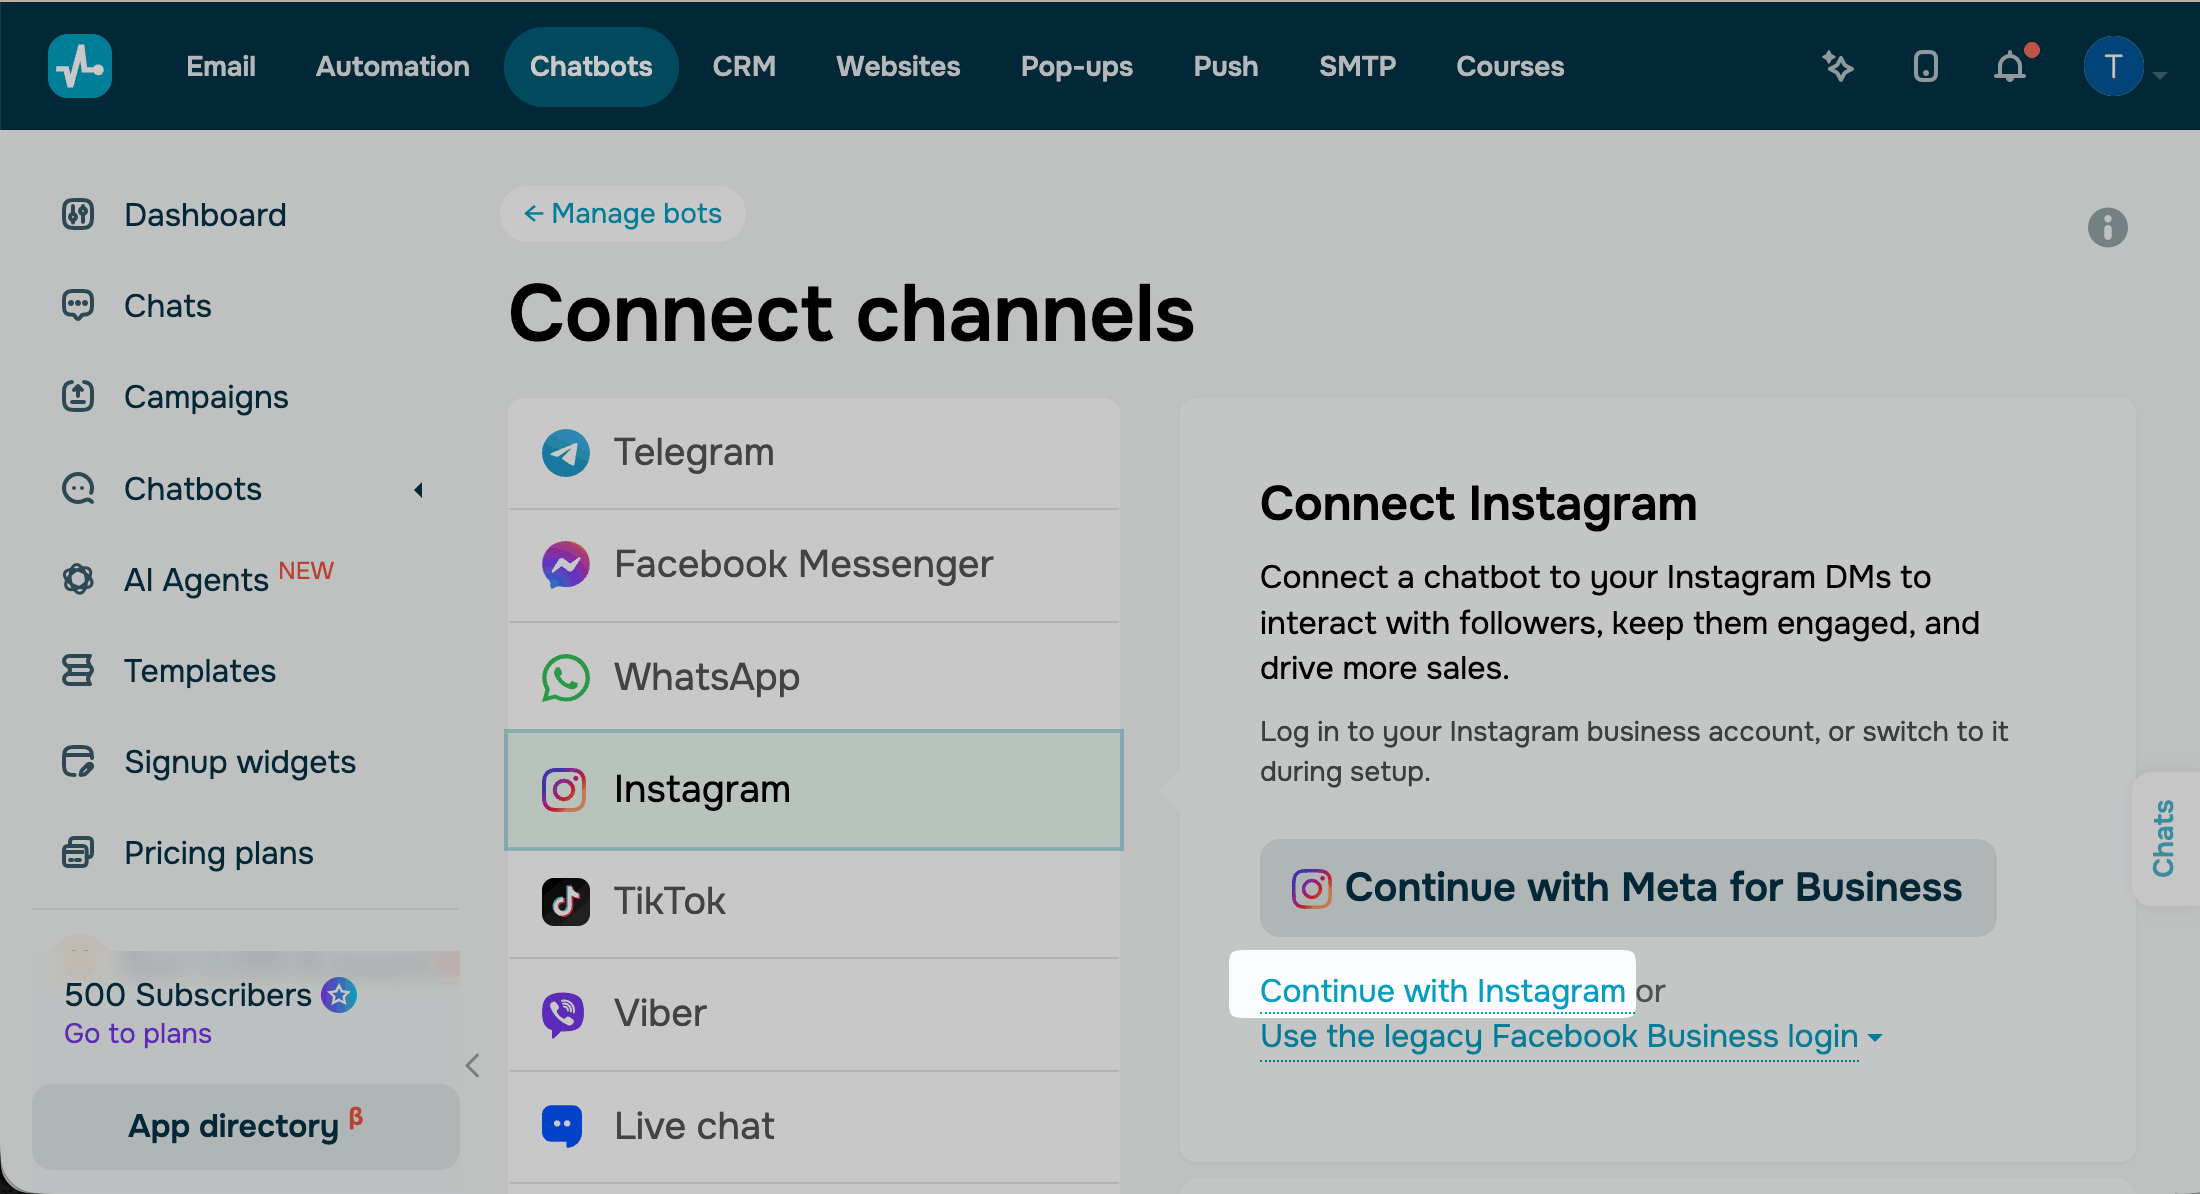
To connect through Instagram Login, click Continue with Instagram in the Connect Instagram section.
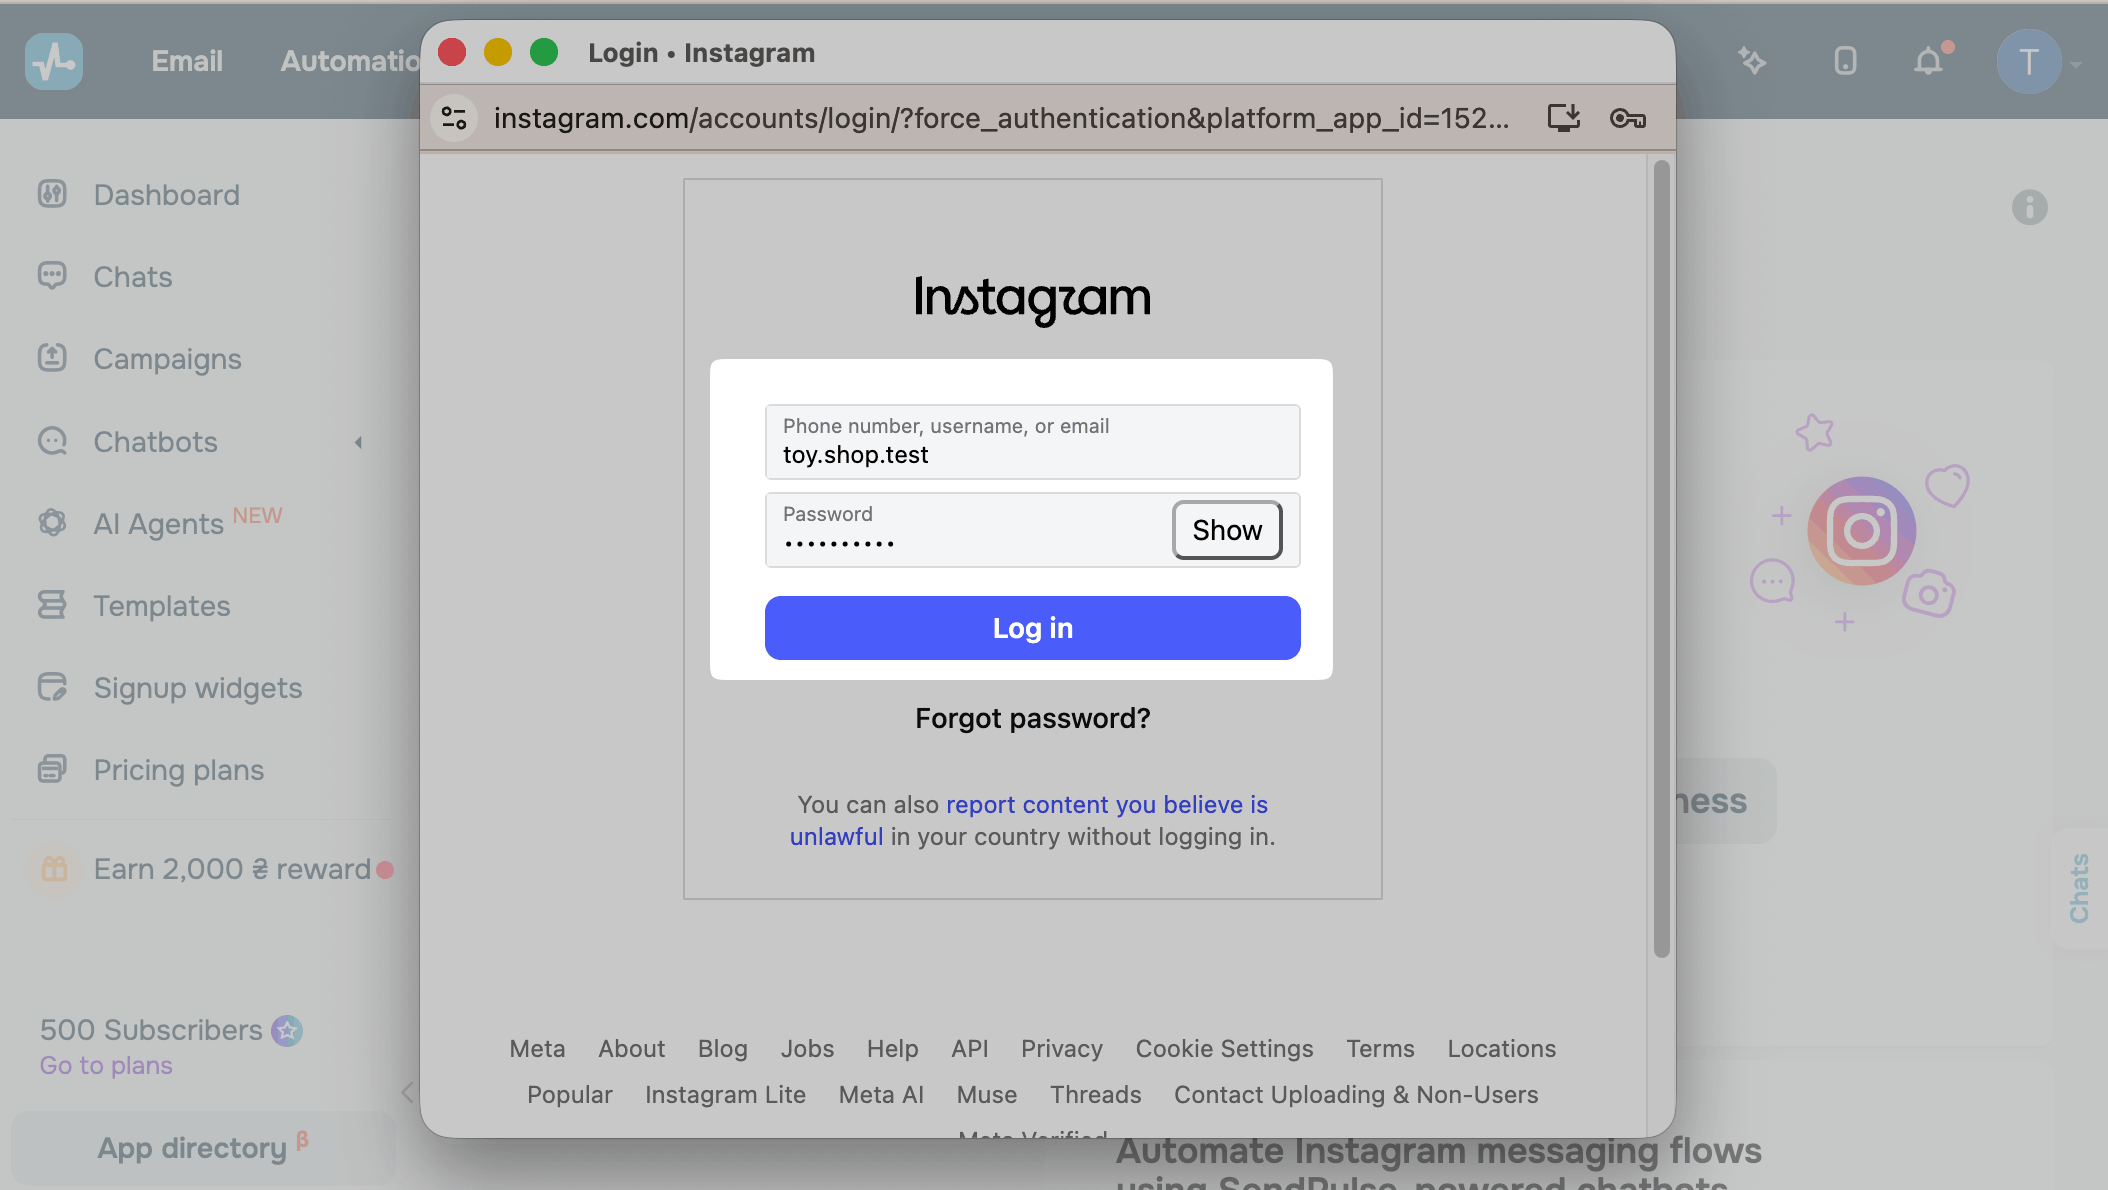
In the login window, enter the username and password of the Instagram account you want to connect. If you're already logged in to Instagram in this browser, Instagram skips this step.
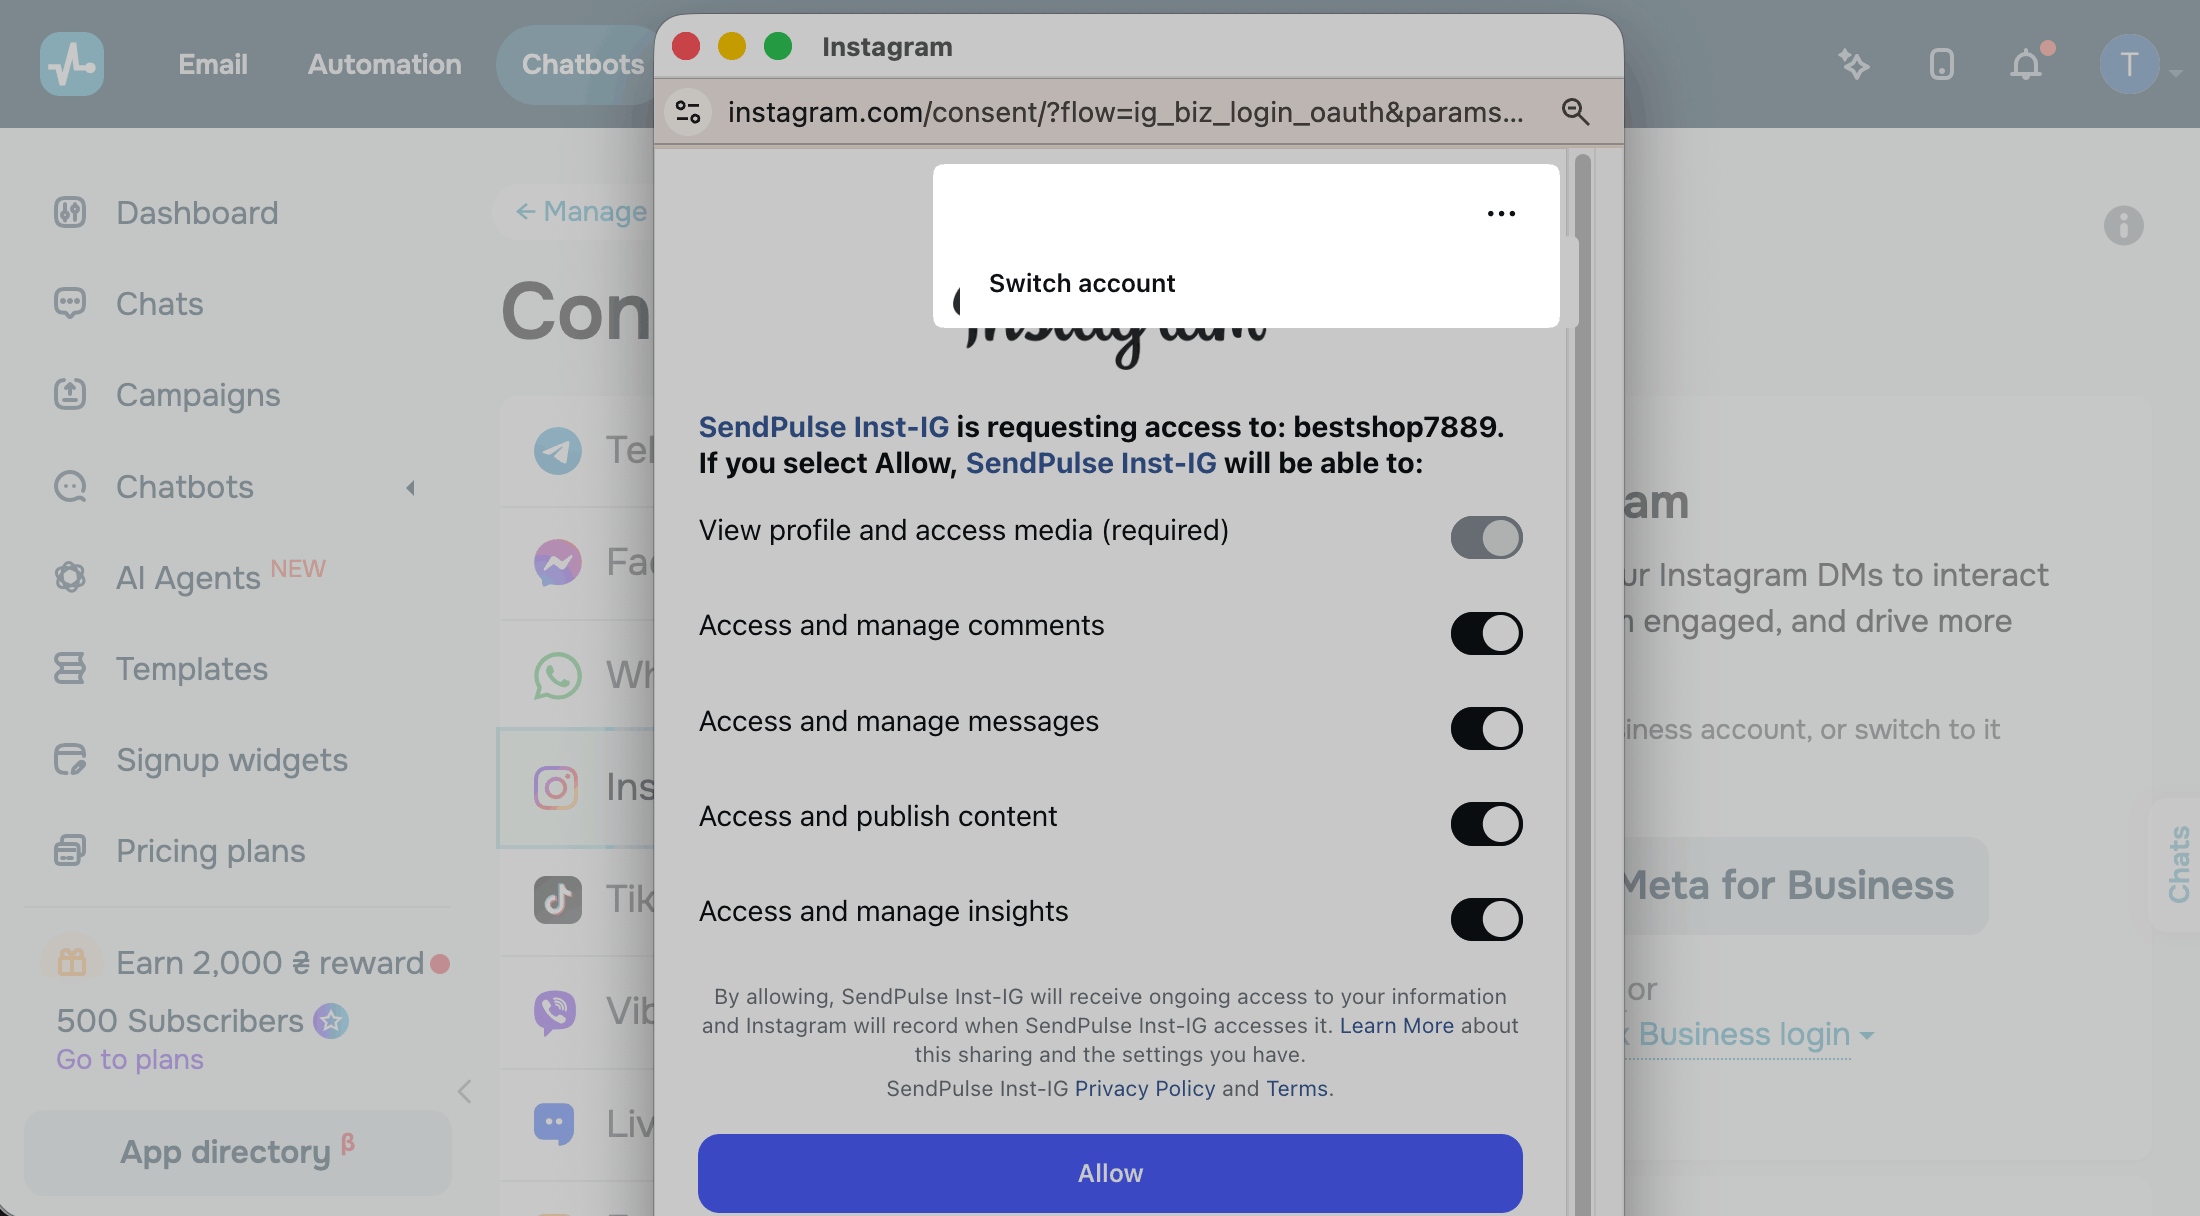
If Instagram skips the login step, the next permissions window shows the account you’re logged in to. To connect another account, click the three dots in the window header and switch accounts.
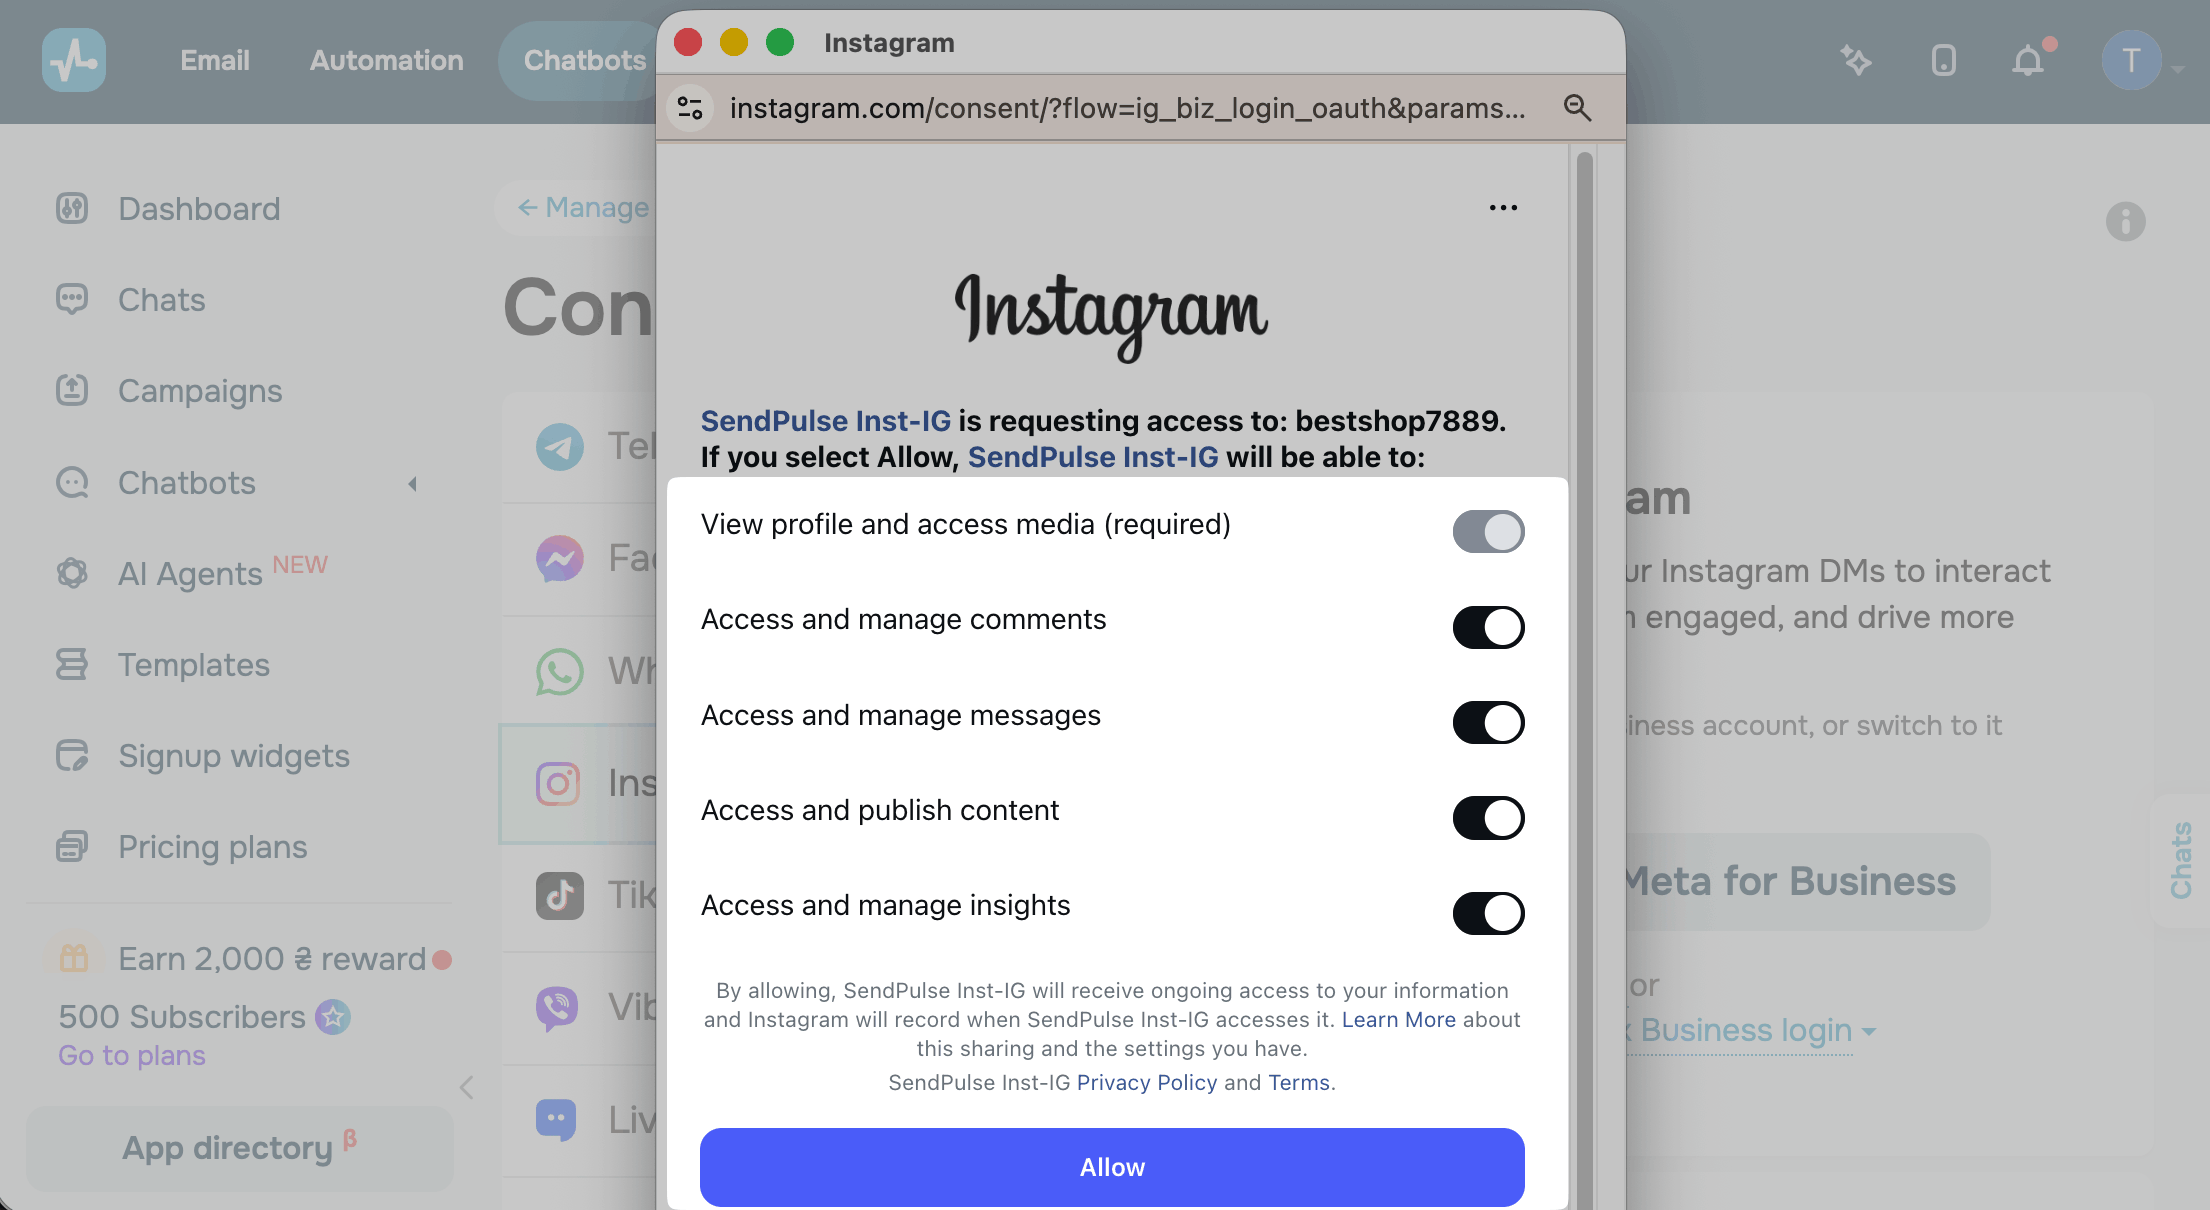
Next, Instagram shows what SendPulse Inst-IG needs to access, such as your profile and media, comments, messages, content, and insights. Keep all toggles on. If any of them is off, your chatbot may stop working and show a permission error. For example, without Access and manage messages, it can’t receive or send direct messages.
To proceed, click Allow.
After that, SendPulse creates your chatbot. Next, subscribe to your chatbot as its owner.
If you can't log in to Instagram in this window, see the troubleshooting checklist or try other connection types.
Facebook Login
Before you start, link your Instagram business account to your Facebook Page. Your personal Facebook account needs full control of this Page.
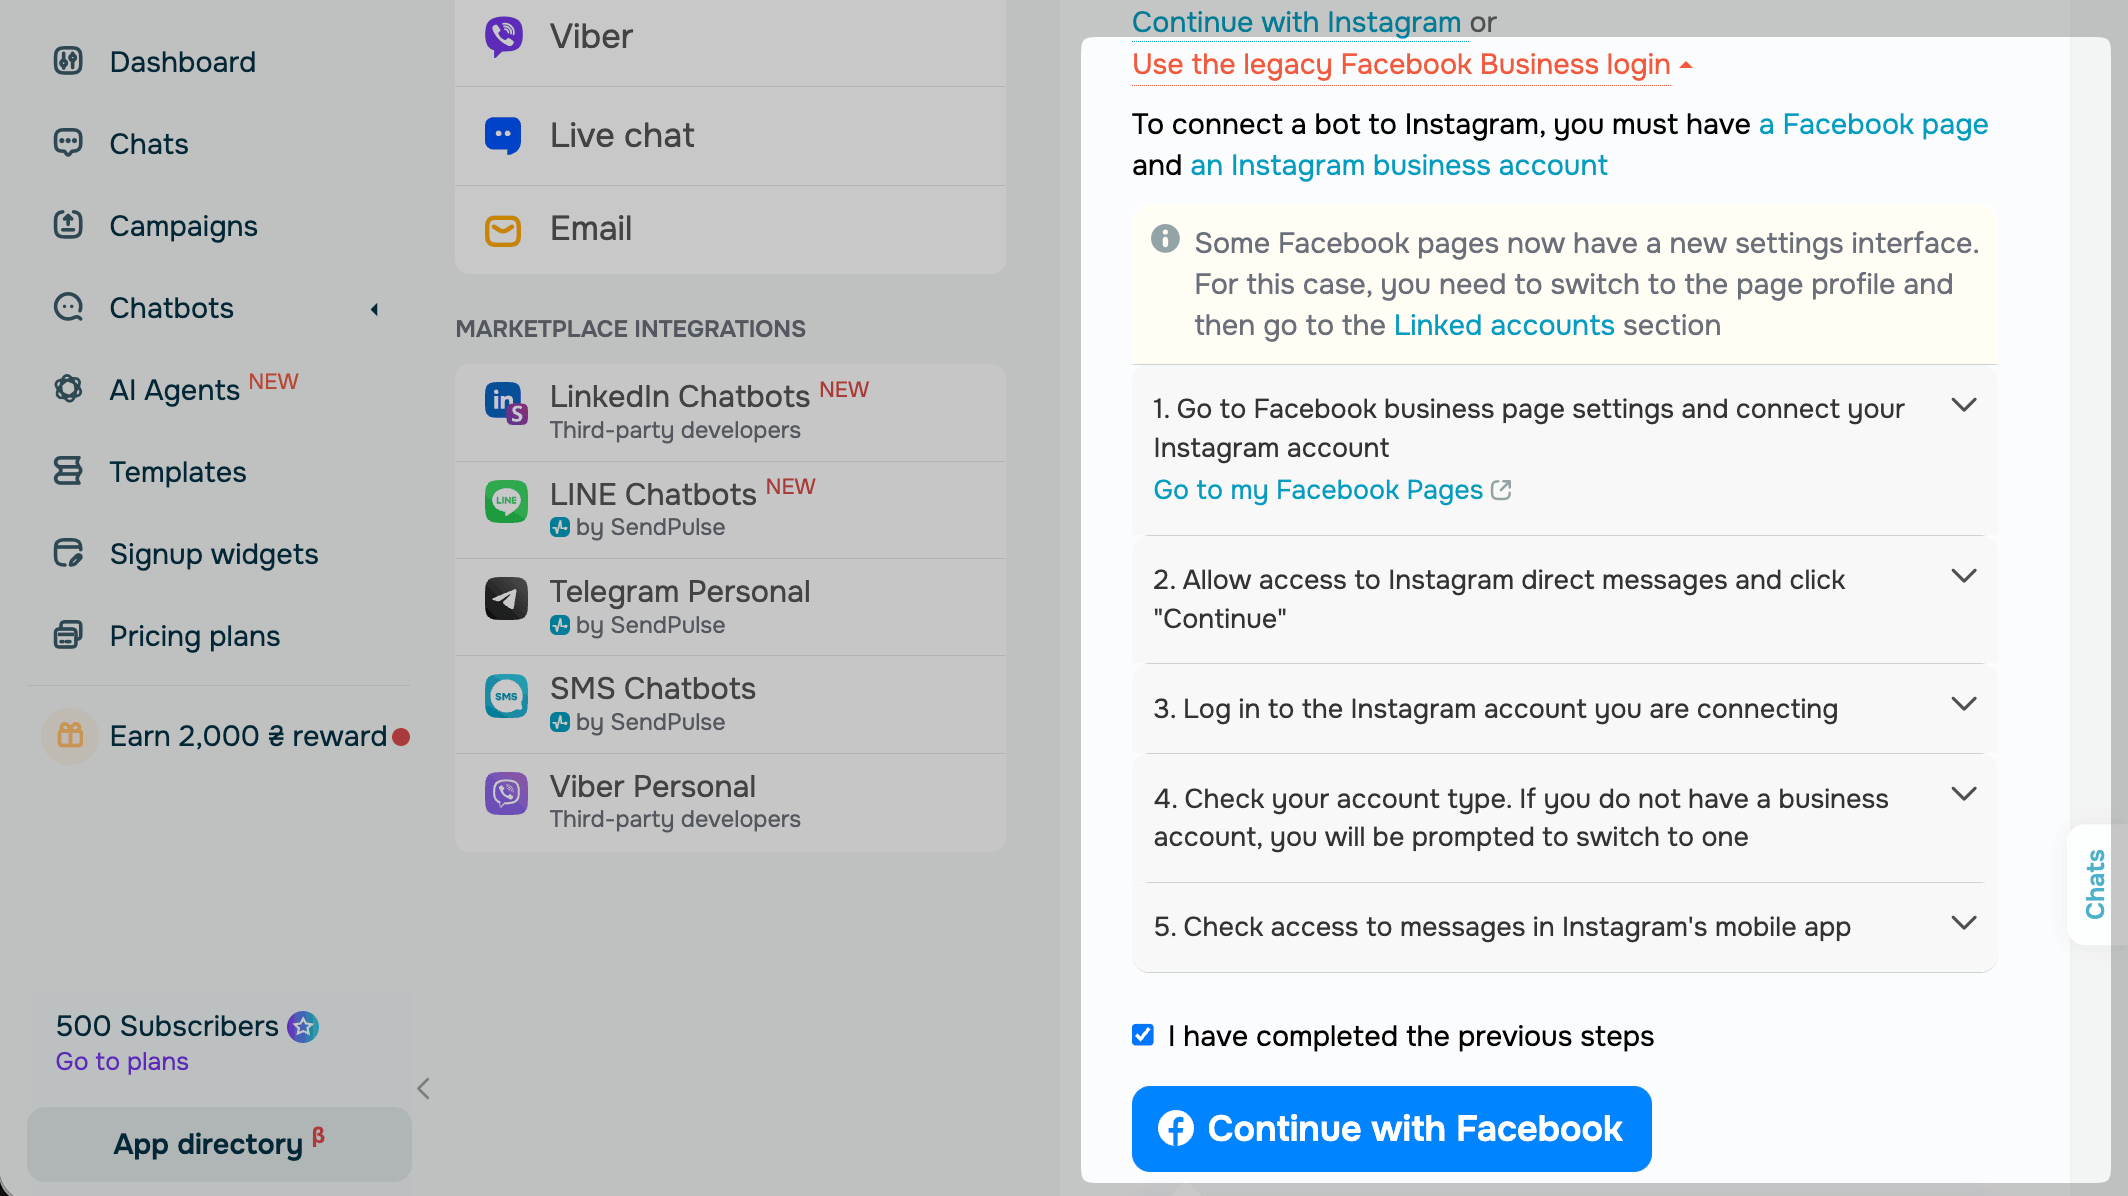
To connect through Facebook Login, click Use the legacy Facebook Business login in the Connect Instagram section. A checklist with the requirements for this connection type appears. To see how to complete a step, expand it.
When everything is set up, select the I have completed the previous steps checkbox and click Continue with Facebook.
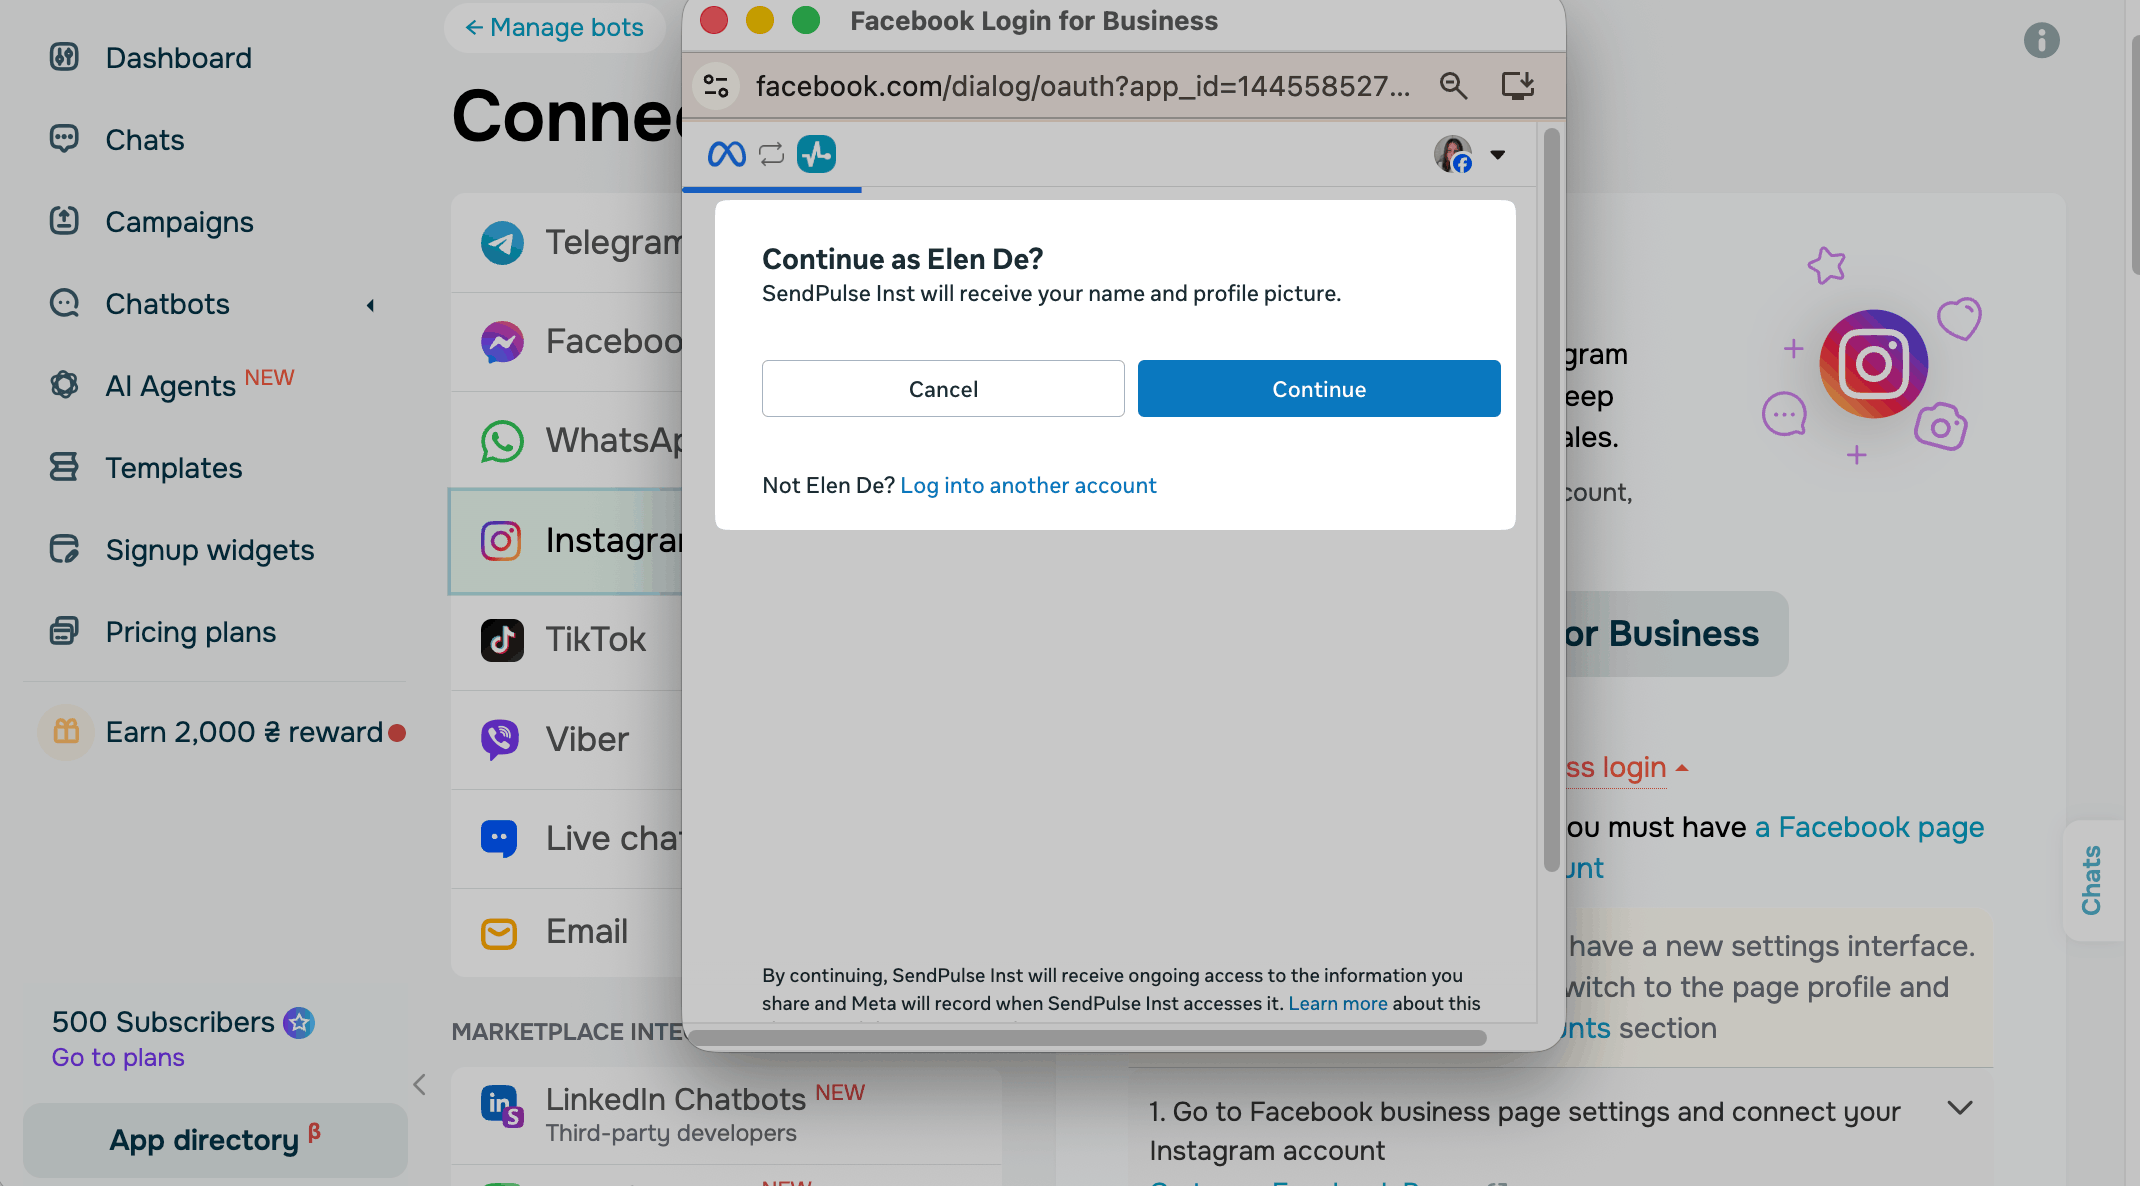
In the Facebook Login for Business window, Meta asks whether to continue with the Facebook account you're logged in to. At this step, SendPulse receives your name and profile picture.
If this account has full control of your Page, click Continue. To use another Facebook account, click Log into another account.
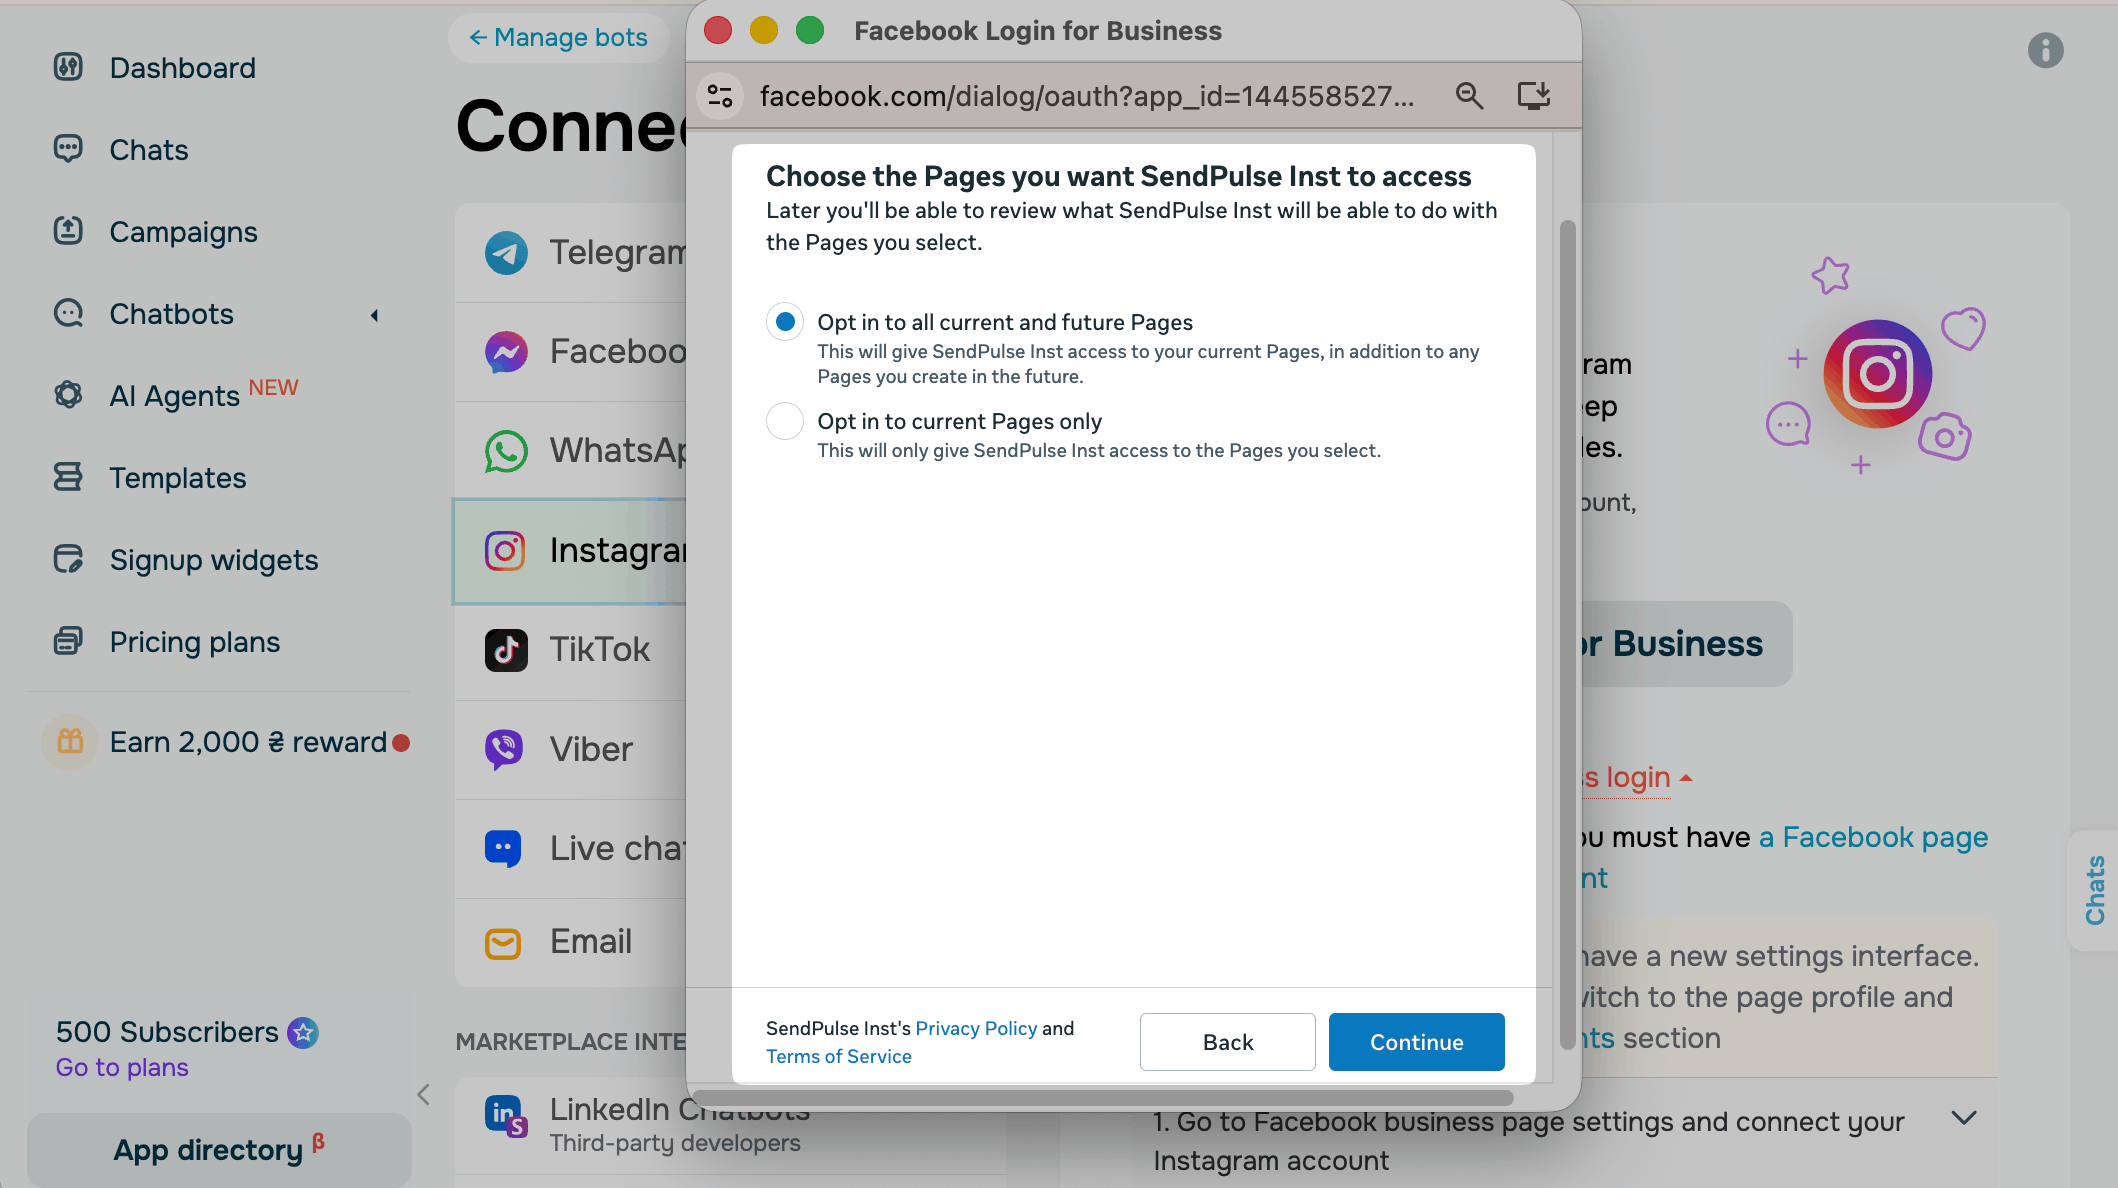
Next, Meta asks which assets SendPulse can access, starting with your Pages. The window offers two options:
| Opt in to all current and future Pages | Gives SendPulse access to all Pages you manage now and any Pages you add later. |
| Opt in to current Pages only | Gives SendPulse access only to the Pages you select. Select it if you manage multiple Pages and want to share only some of them. |
Once you select an option, click Continue.
Meta then shows the same two options for your business portfolios and your Instagram accounts. Select an option and click Continue.
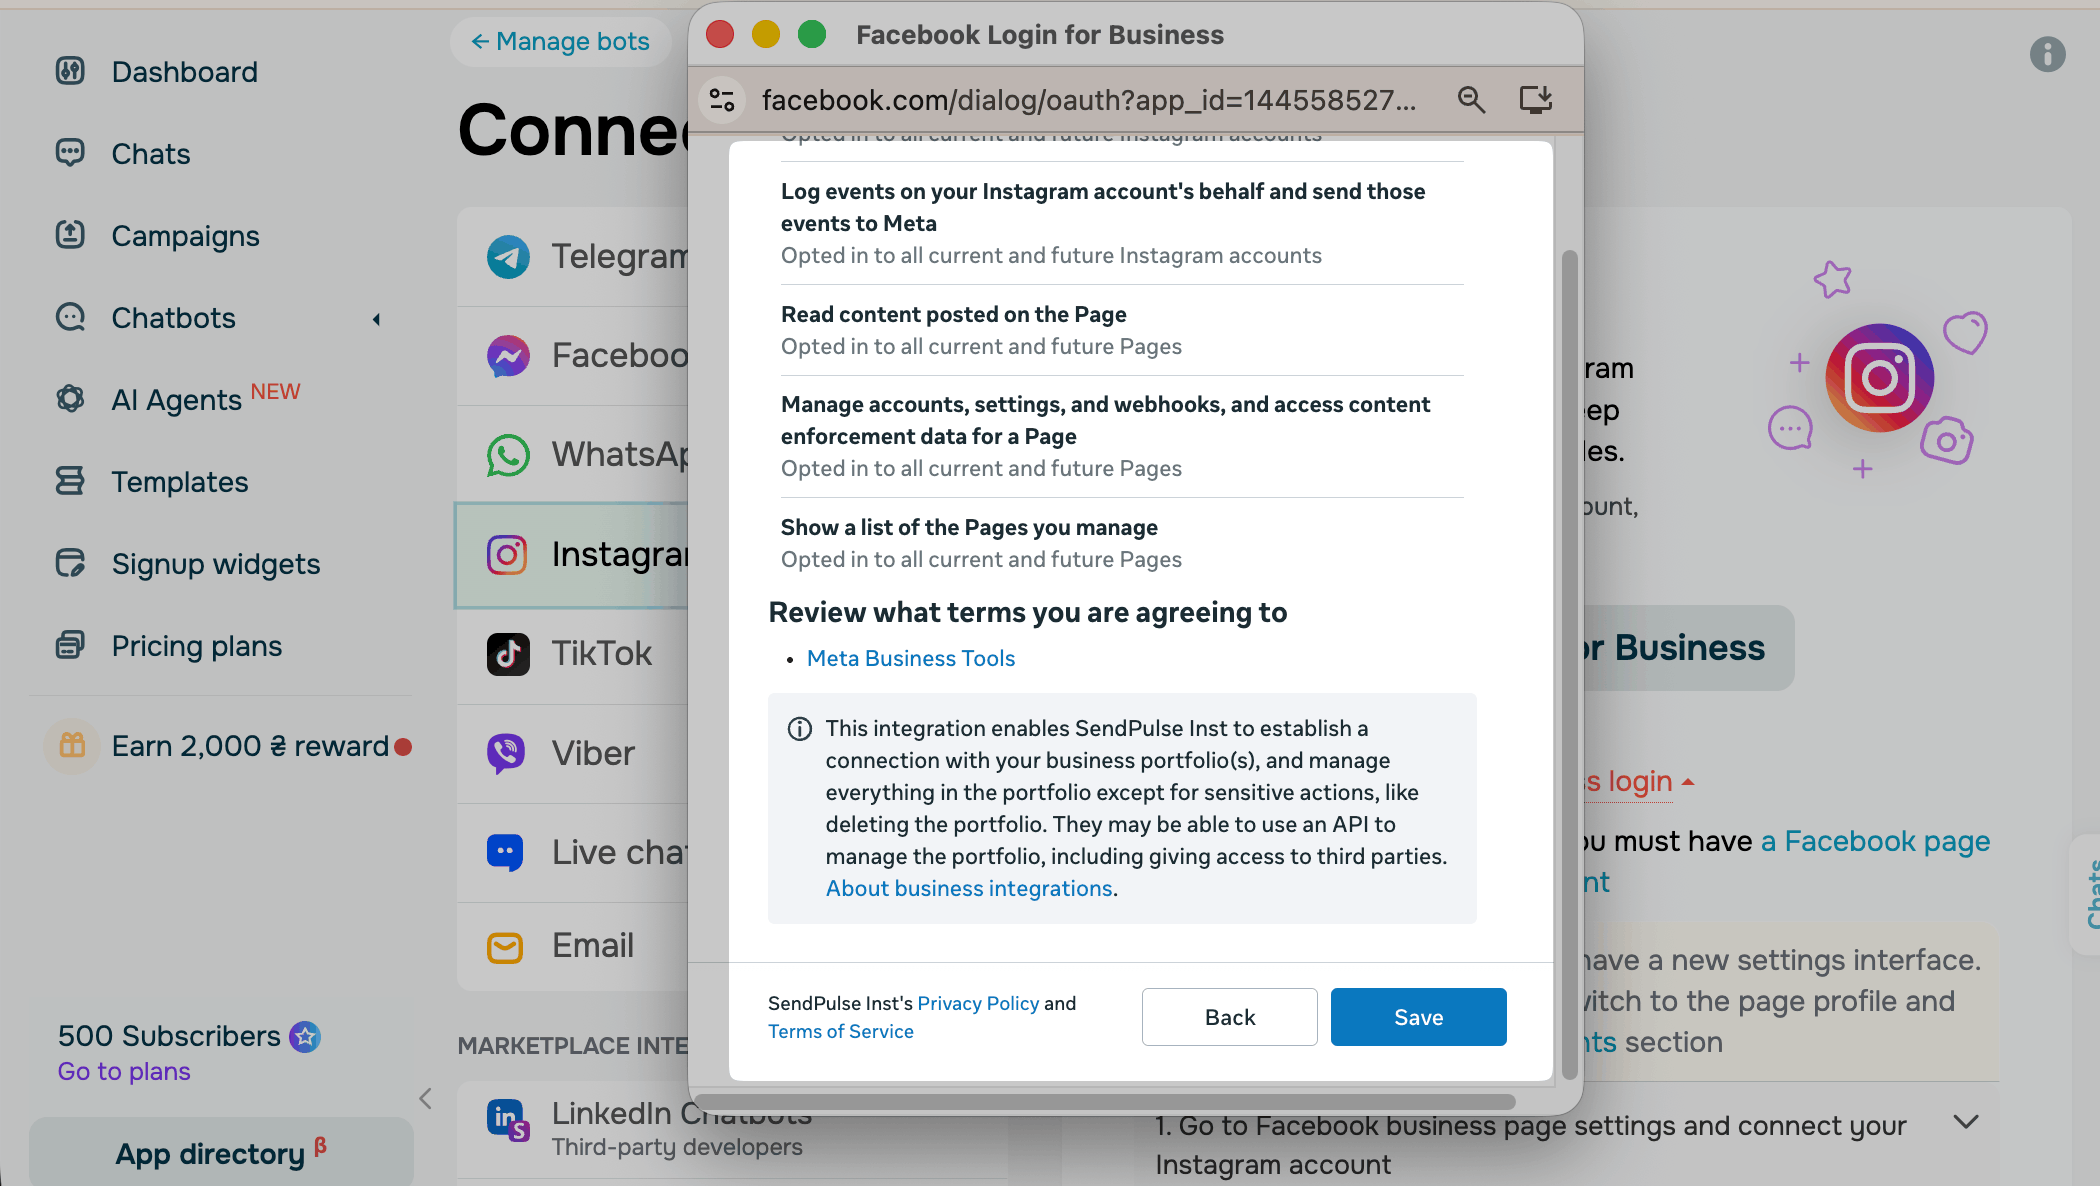
The last window lists what SendPulse will be able to do with the selected assets. For example, it can read content on your Page, manage Page settings and webhooks, and log events for your Instagram account.
Your chatbot needs these permissions to receive and reply to messages. Meta also notes that this integration can manage your business portfolio, except for sensitive actions, such as deleting it.
To proceed, click Save.
Meta shows that your Facebook account is connected to SendPulse Inst. Click Got it. You can manage this connection later in Business Integrations in your Facebook settings.
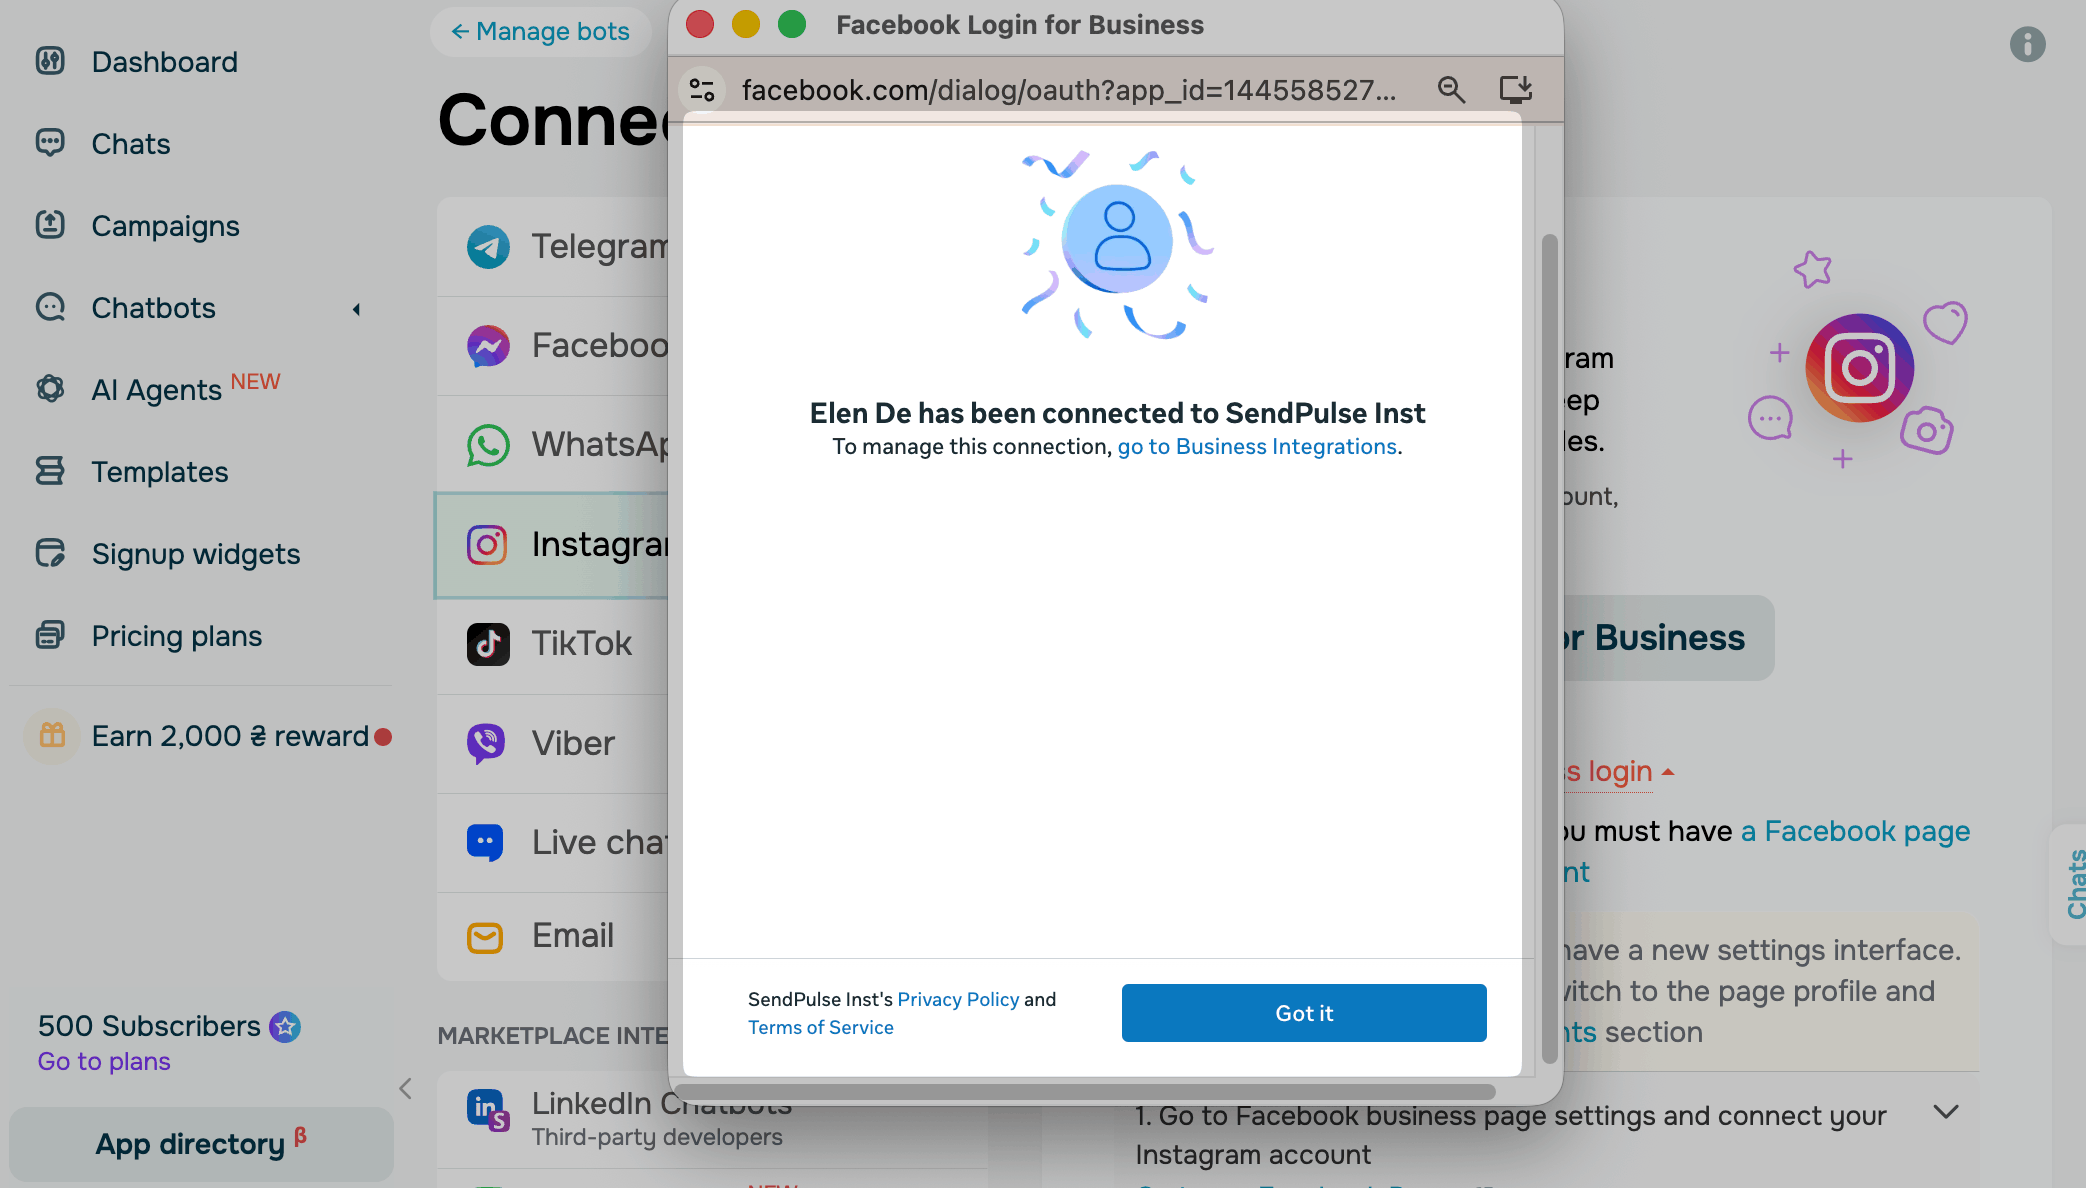
Once you click Got it, SendPulse creates your chatbot. Next, subscribe to your chatbot as its owner.
If the connection fails, make sure that your Instagram business account is linked to your Page and that you have full control of this Page. If the issue persists, see the troubleshooting checklist or try Business Login.
Subscribe to your Instagram chatbot
Once you connect your Instagram account, your chatbot appears in the Chatbots section of your SendPulse account. You can manage its connection in Manage bots.
To subscribe to your chatbot as its owner and test your flows, you need a second, personal Instagram account.
Log in to the personal Instagram account you want to make the owner. Then, scan the QR code that SendPulse shows for your chatbot or follow the link to your professional account.
In your Instagram account, click Message and send the code shown in SendPulse. The code changes every time you reload the page, so send the latest one.
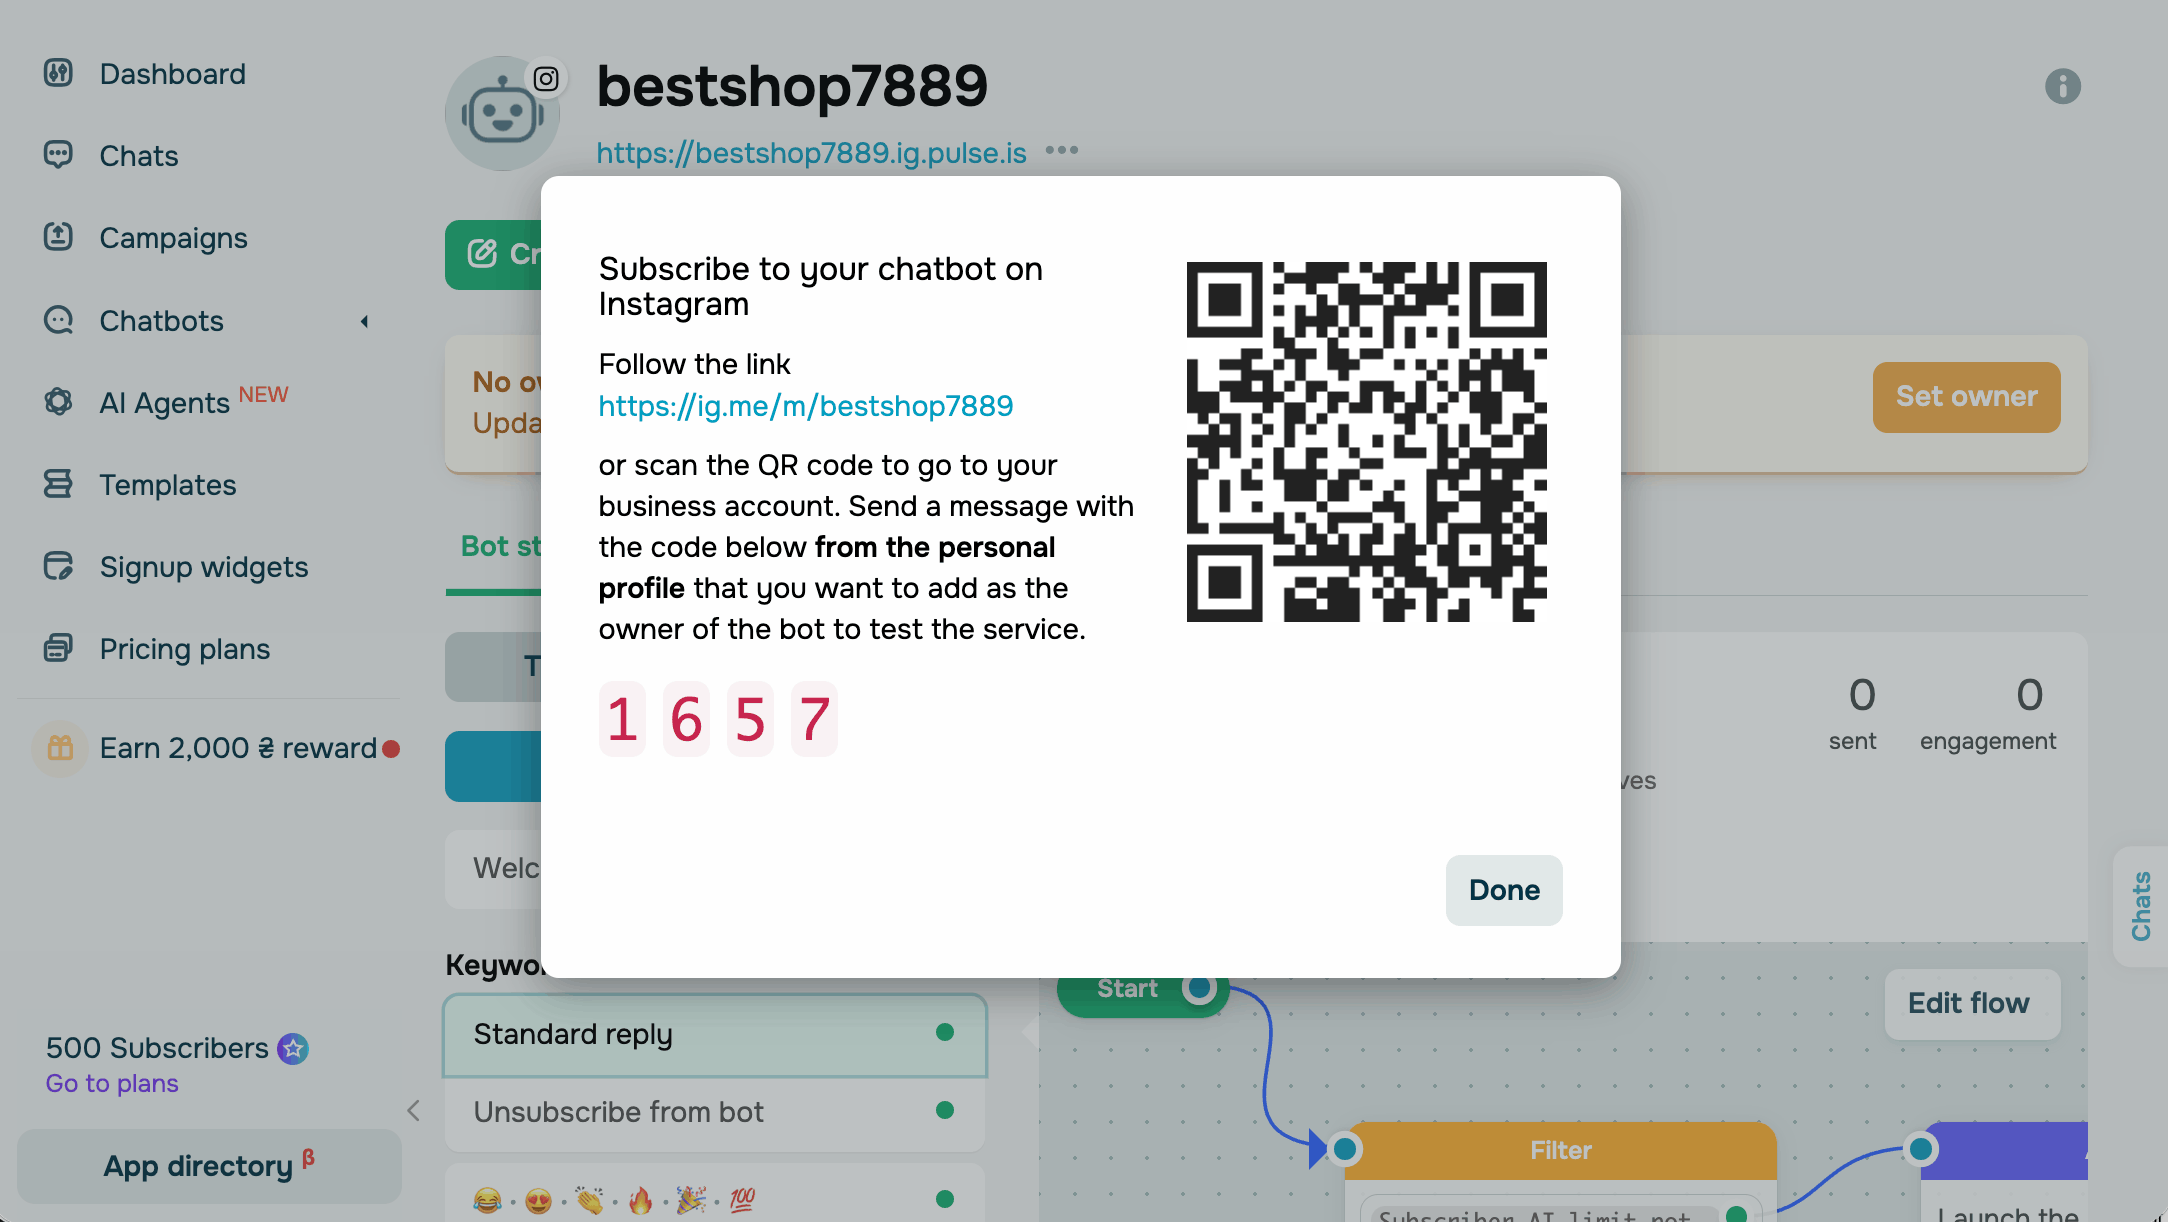
If everything is set up correctly, your chatbot will send you the Welcome message flow. The Owner label will appear next to your contact in the chatbot audience.
If the chatbot doesn't reply, make sure that the Allow access to messages toggle is turned on in the Instagram app. If the issue persists, see Troubleshooting Instagram and Facebook chatbot messaging issues.
Build your chatbot flows
Start with the default flows. Subscribers receive the Welcome message flow when they first message you and the Standard reply flow when their message doesn't match any of your keywords.
Then, create triggers for the events you want to automate and create flows using the builder elements. You can also generate a flow with AI or start from a template.
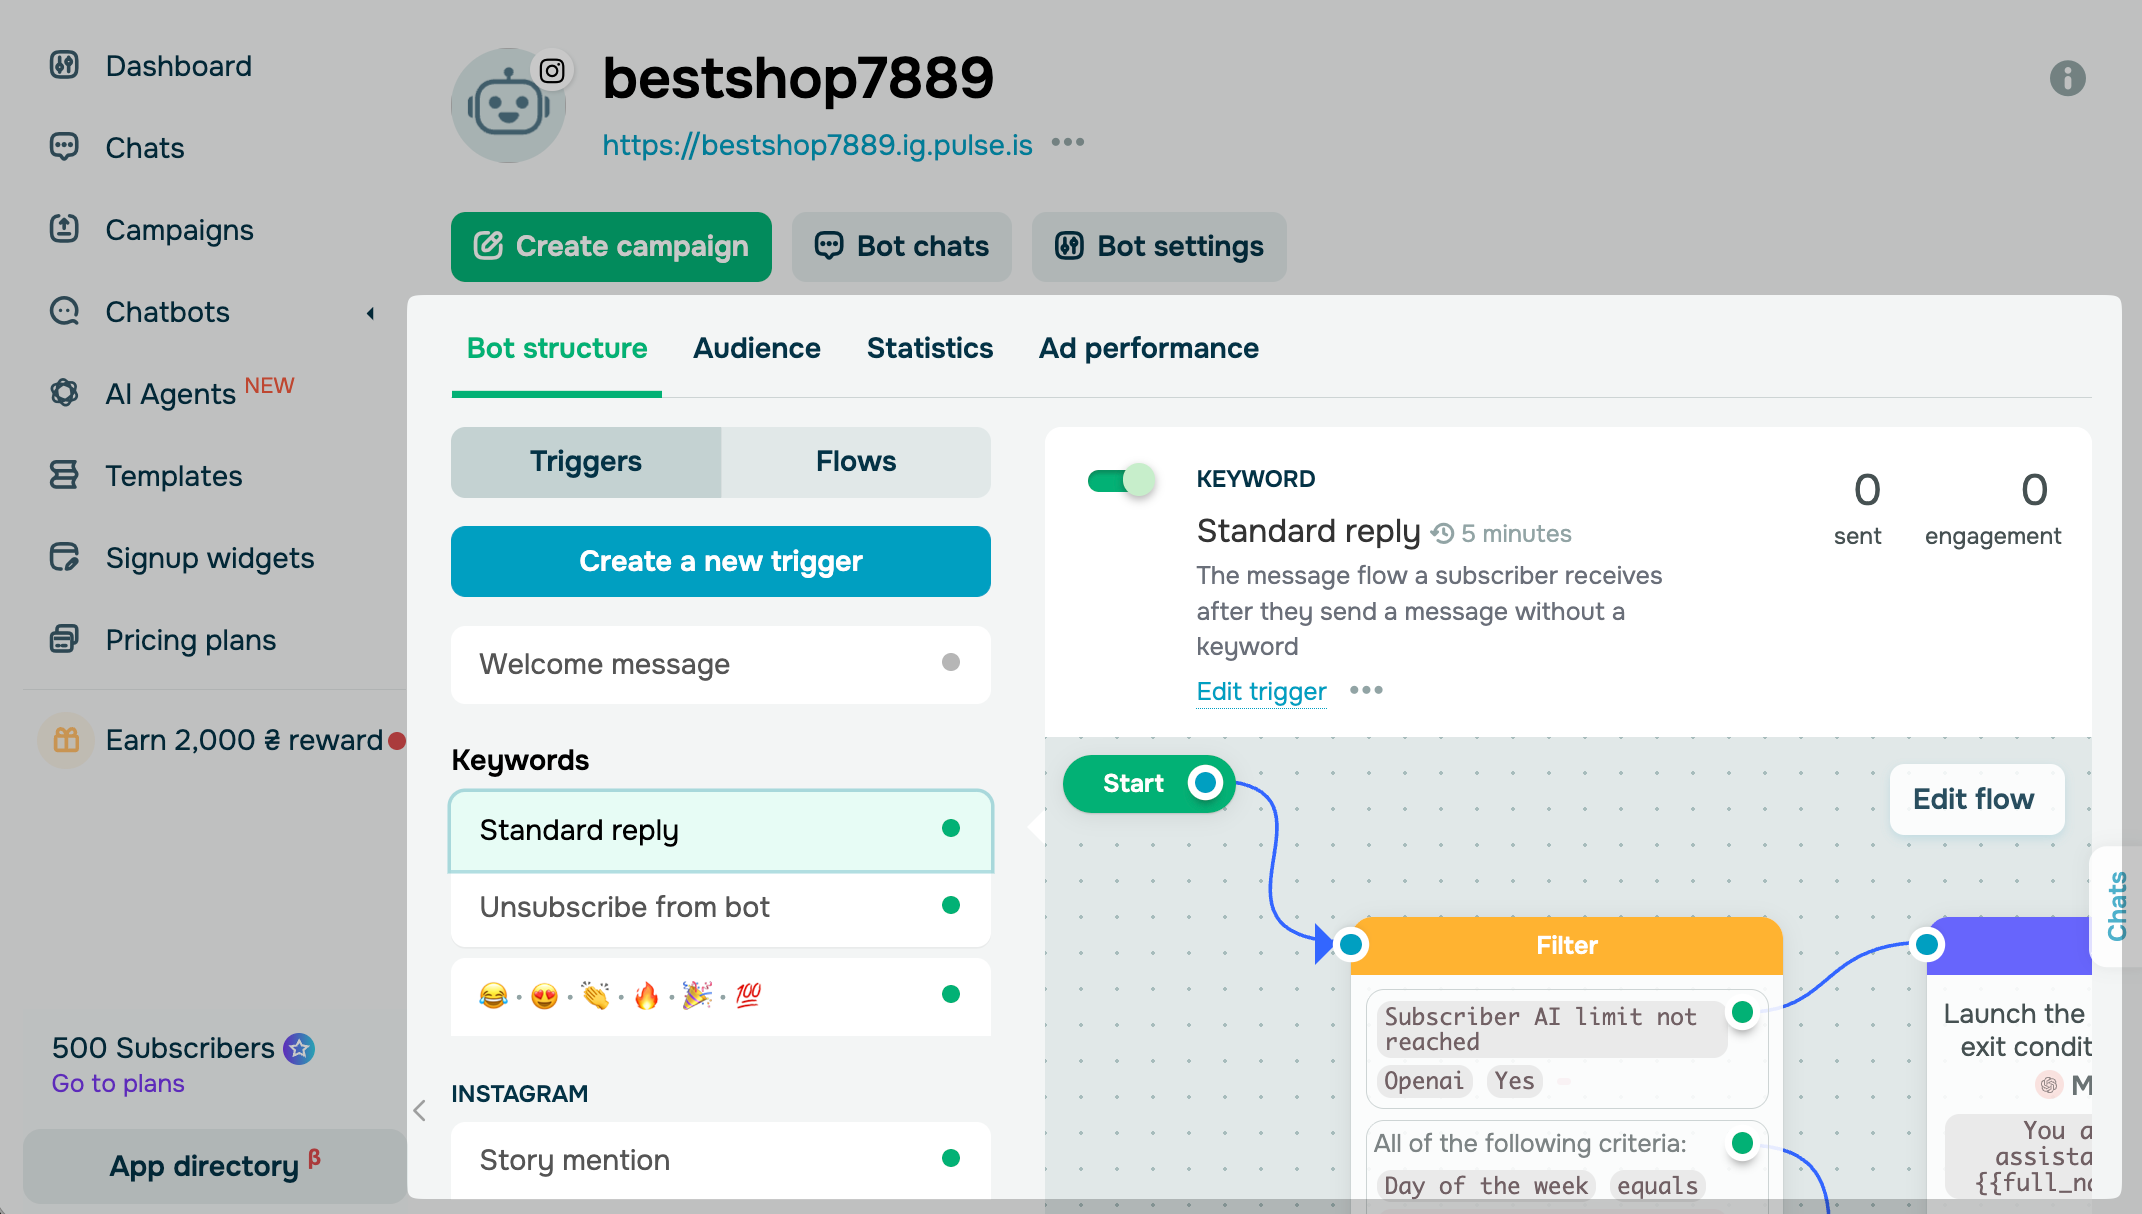
To give users more ways to start a conversation, add a greeting menu and a persistent menu, or run ads that start a chat with your chatbot.
To answer free-form questions, add the AI Agent element, which is available with the Pro plan and above.
Once your flows are running, reply to subscribers in Chats, send campaigns, and track your chatbot's performance in statistics.
Read more: Create a flow for an Instagram chatbot, Create a chatbot structure, Tips on chatbot flow design, and other articles in the Instagram chatbot section.
 Last Updated: 17.11.2026

or