Website pixel event trigger
The Website pixel event trigger helps you automatically run chatbot flows when visitors take specific actions on your website. For instance, you can configure your flow to send messages to subscribers who view a product, add it to their cart, or submit a form.
Let’s talk about how to use this trigger in a chatbot to run your flow automatically.
To use website events as flow triggers, create a pixel for your website and add events to track.
Go to Automation > Pixel. Choose your website, and in the settings, add a condition-based event or a code-based event.
Create a trigger
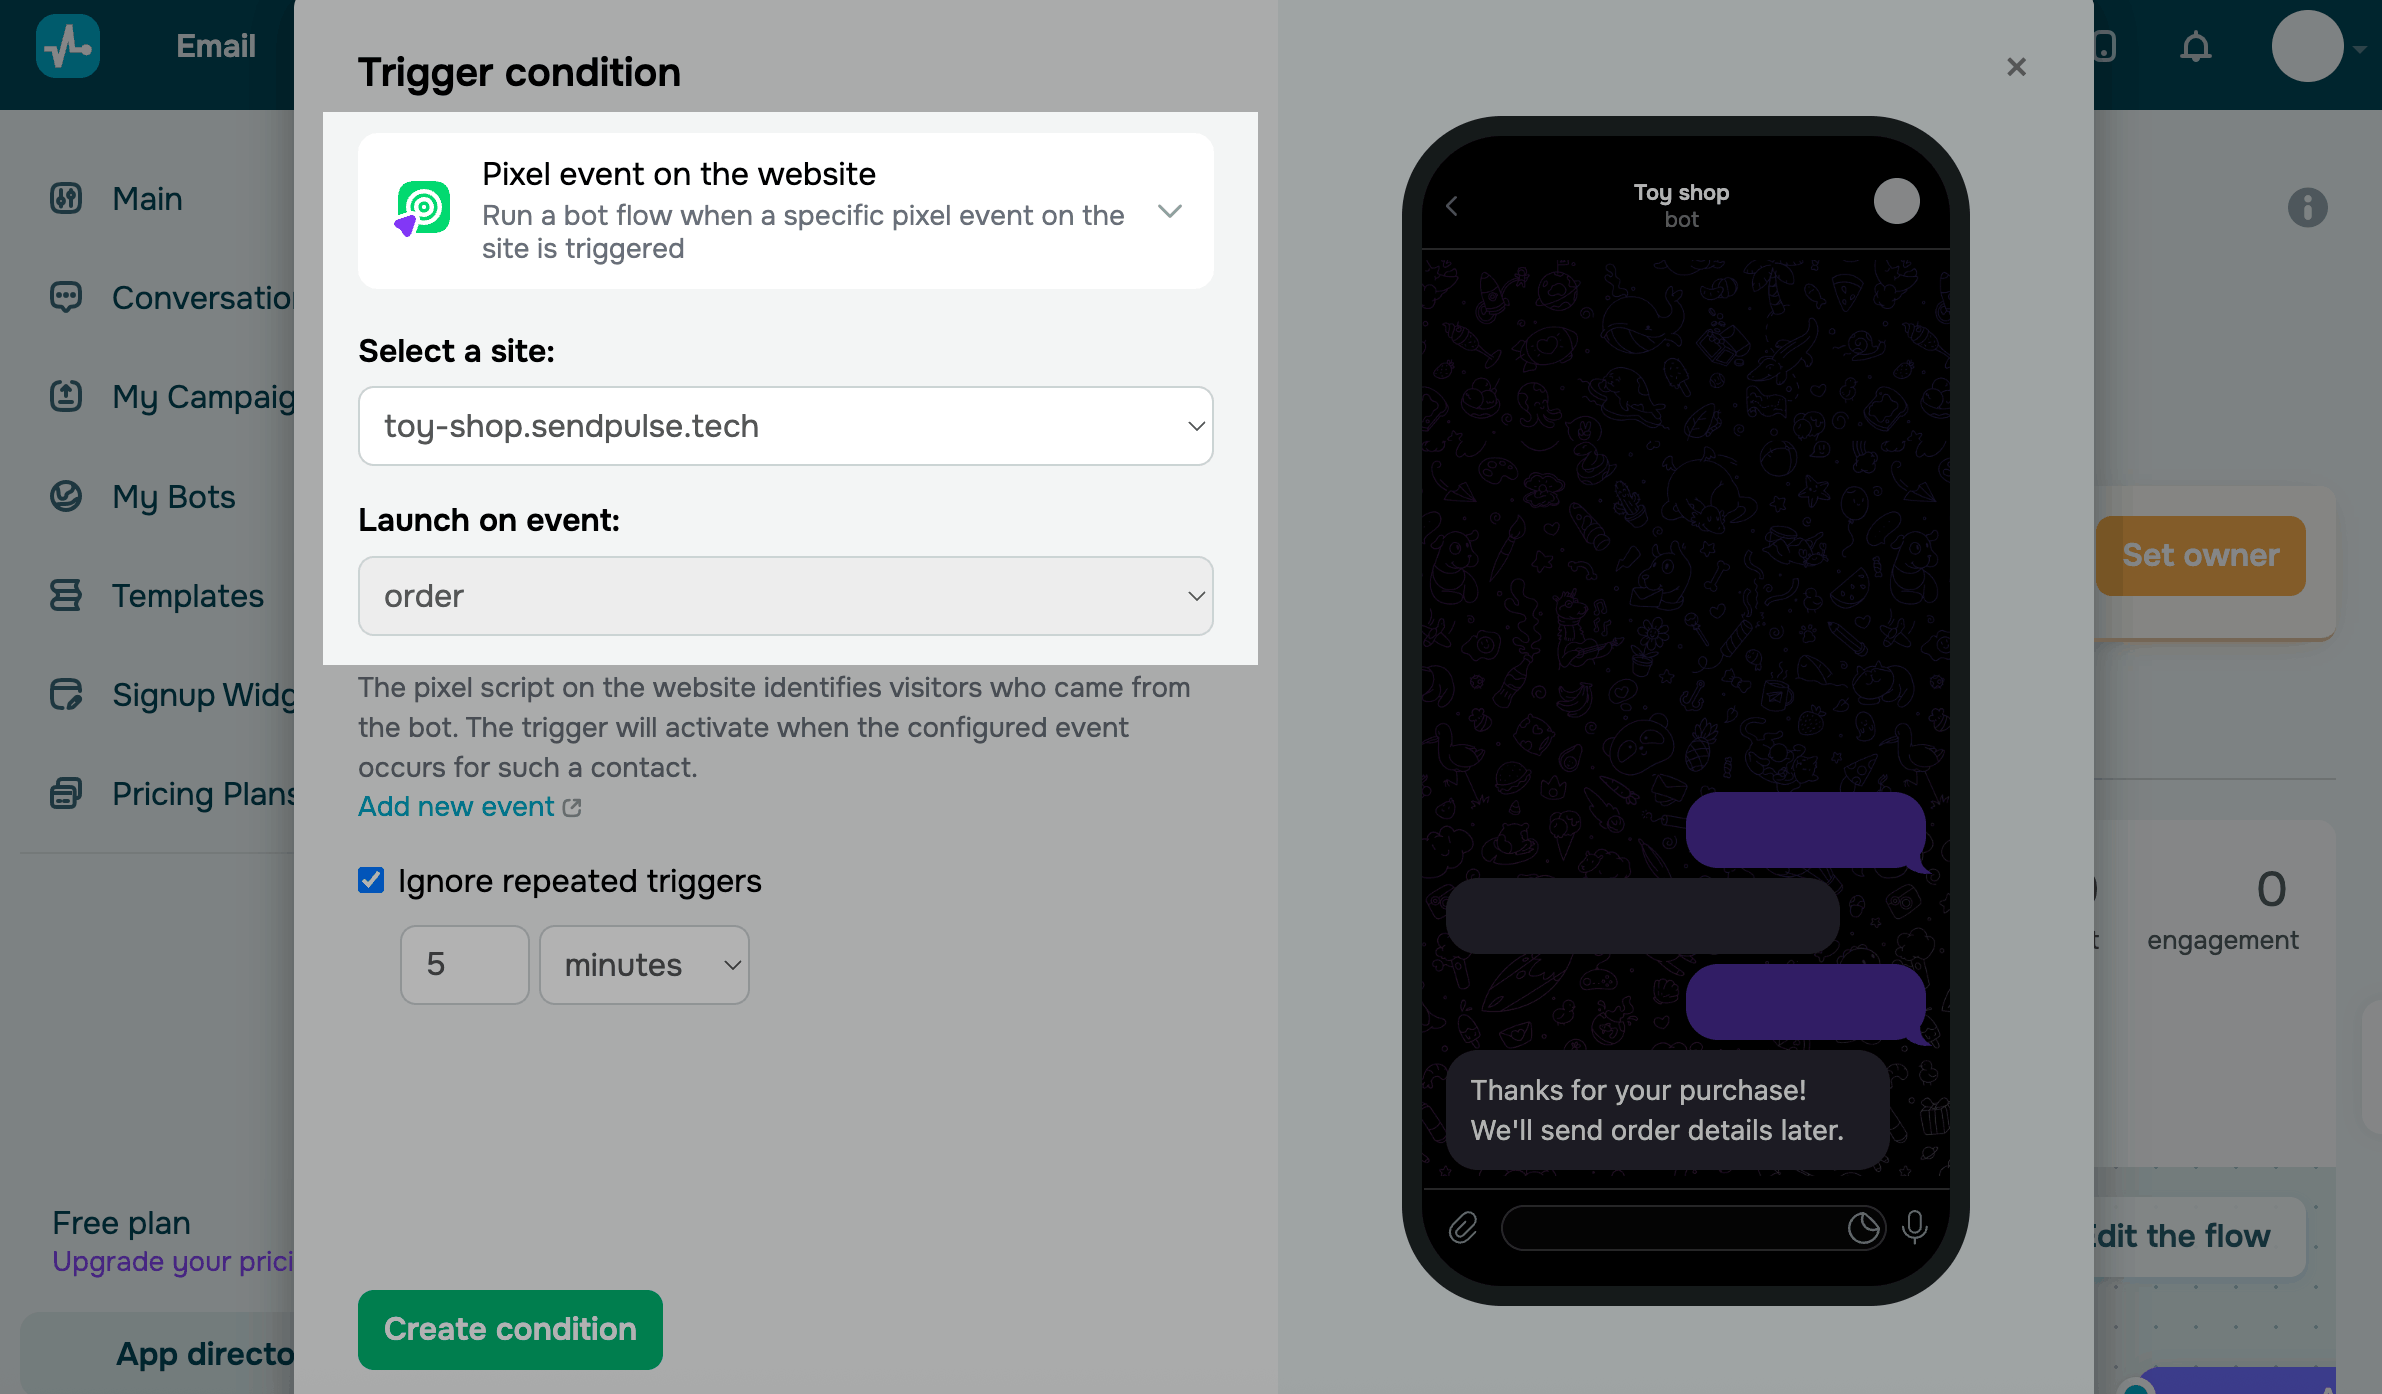
Set up a trigger to wait for a pixel event and run a flow in response.
Go to the Chatbots section, choose a chatbot, and click Create a new trigger. In the trigger settings, select Website pixel event. Then, choose your website and event from the lists.
Set up your flow
By default, this flow starts with the Message element and includes a comment explaining how to use dynamic data from the pixel.
The system sends your flow only to chatbot subscribers whom it can identify from their website activity.
In your message, you can use system pixel variables:
{{$['page']['domain']}} |
Website page domain |
{{$['page']['url']}} |
Page link |
{{$['page']['time_on_page']}} |
Time spent on your page |
{{$['page']['max_scroll']}} |
Maximum scroll depth |
{{$['page']['button_clicks']}} |
Clicks on buttons |
Variables use the data captured when the pixel event occurs.
You can edit the flow and add elements to customize it as needed.
Example. You can create a pixel event to track visits to specific pages. Let’s say a user visits site.com/checkout and does not visit site.com/success_order. In this case, you can send a message offering help that looks something like this: Hi there! If you’re browsing on {{$['page']['domain']}} but haven’t found the right fit yet, feel free to reach out in the chat. We are here to help.
You can also add the Pause element and then send a reminder message.
Last Updated: 03.03.2026
or