Import products to the CRM system
Use import to fill your product catalog from a CSV file. You upload one file instead of creating each product card by hand. Import adds new products and updates existing ones. Physical and digital products are imported separately, so upload one type at a time.
An electronics store moving to SendPulse, for example, can export 1,800 products from a spreadsheet and upload a single file that already includes prices, SKUs, categories, and image links. Import also works if you need to update the pricing or stock in an existing catalog from a new supplier file.
Let’s talk about how to set up your file, map its columns and values to CRM data, and run the import.
Set up your file
Most import errors come from the file itself, before you ever upload it. Follow the steps outlined below to make sure the import doesn't skip products.
Organize your file
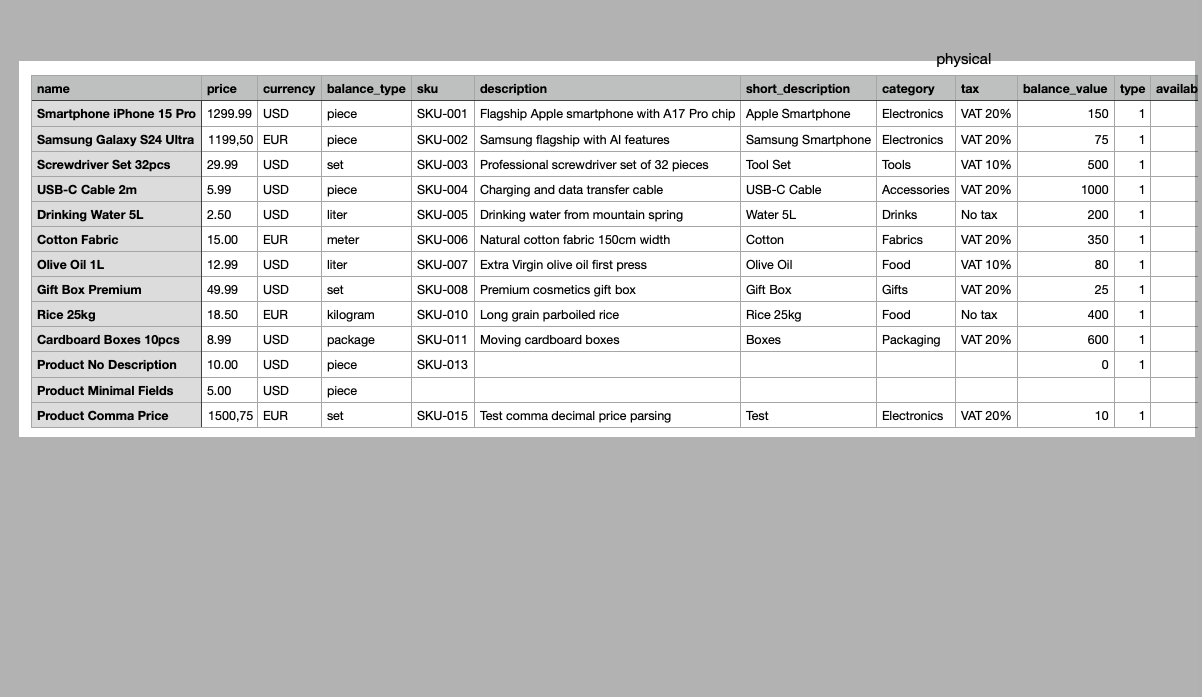
Import reads a CSV file, so export your catalog to CSV first. Your file needs to be organized as follows:
- one row of column headers at the top;
- one row per product;
- one column per product field.
Each row describes one product. A row with a name, price, currency, and category creates one product with these values.
To map your product fields automatically, name your columns exactly as your CRM fields are named. You'll just need to confirm the result.
Check the file requirements
Import supports CSV files sized at up to 50 MB, with up to 10,000 products. Separate the values in your file with a comma or a semicolon. You’ll need to specify which character you used during the upload.
To add images, add a column with links to your product images and map it to the Images field. To add multiple images to one product, list the links in one cell separated by the | character. Supported formats: JPG, JPEG, PNG, WEBP, and GIF.
During the import, SendPulse downloads the images from your links, saves them to the file manager in products inside your root folder, then links them to the matching products.
Image errors don't stop the import. If the link is broken, the format isn't supported, or you've run out of storage, SendPulse creates a product without an image and states the reason in the error report.
Your pricing plan limits the number of products in your catalog. If your file exceeds the remaining limit, SendPulse imports what fits and stops there. If you've already hit the limit, the import won't start.
Include the required fields
Each product type has its own required fields. Map them all, and the import will start. If any are missing, the CRM system shows the Required fields haven't been mapped dialog with the list of unmapped fields.
Add the following required fields to your file:
| Name | Product name. |
| Price | Product price. |
| Currency | The currency your price is set in. |
| Categories | Product category.
Map the values from your file to your CRM categories on the data mapping page. |
| Balance type | The unit of measurement for stock, such as piece, set, or liter. On the data mapping page, map your file's values to your CRM units.
Required for physical products. |
| Stock | The number of products available.
Required for physical products. |
| Product URL | The link your customer receives after paying for the product.
Required for digital products. |
All other fields are optional, including SKU, descriptions, tax, images, SEO fields, visibility, and attributes.
To learn what each product field stores, see Add a physical product and Add a digital product.
In the Availability and Visible fields, enter 1 to enable the option or 0 to disable it.
If you add an SKU to your file, the import can use it to identify products that are already in your catalog.
Upload your file and choose a product type
To import products into the CRM system, specify which products you are uploading and how to read your file.
Go to CRM > eCommerce > Products, then click Import. The Product import page opens with the Import parameters section.
In the Product type field, choose Physical or Digital. Your product type determines which fields are required and which values you will map later.
In the File upload section, drag your file into the upload area, or click the area and select a file on your device.
Once your file is uploaded, in the Separator field, choose the character that separates the values in your file: Comma or Semicolon. SendPulse uses this character to split your rows into columns.
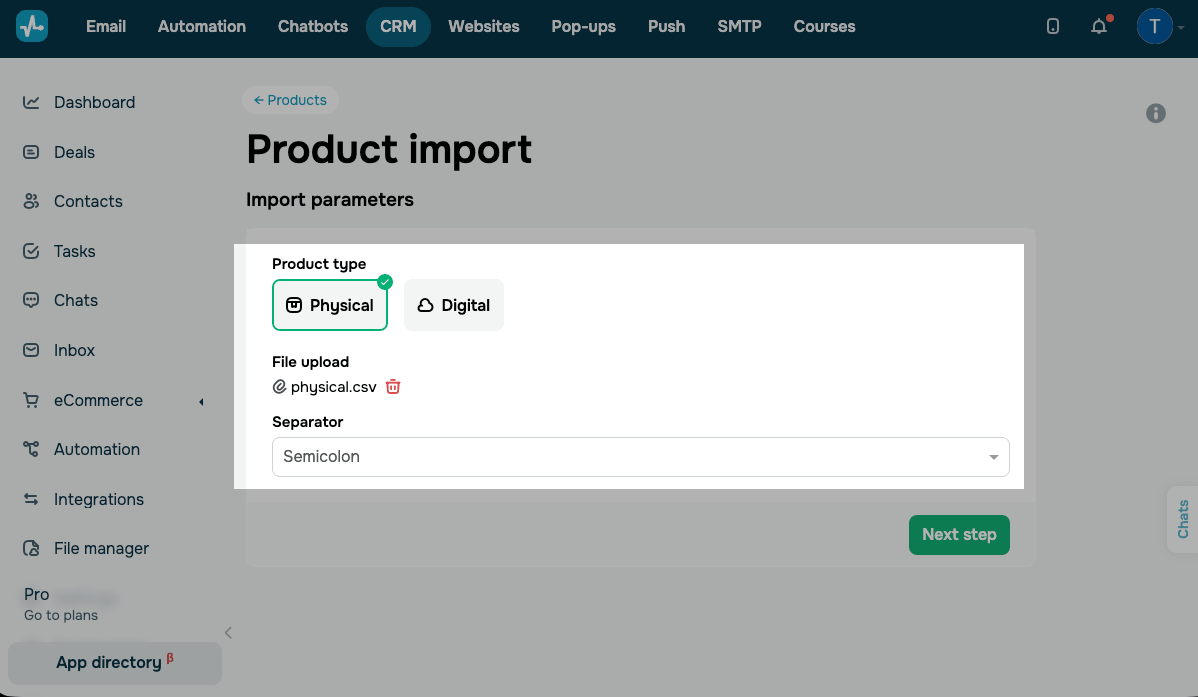
Click Next step.
Map file columns to product fields
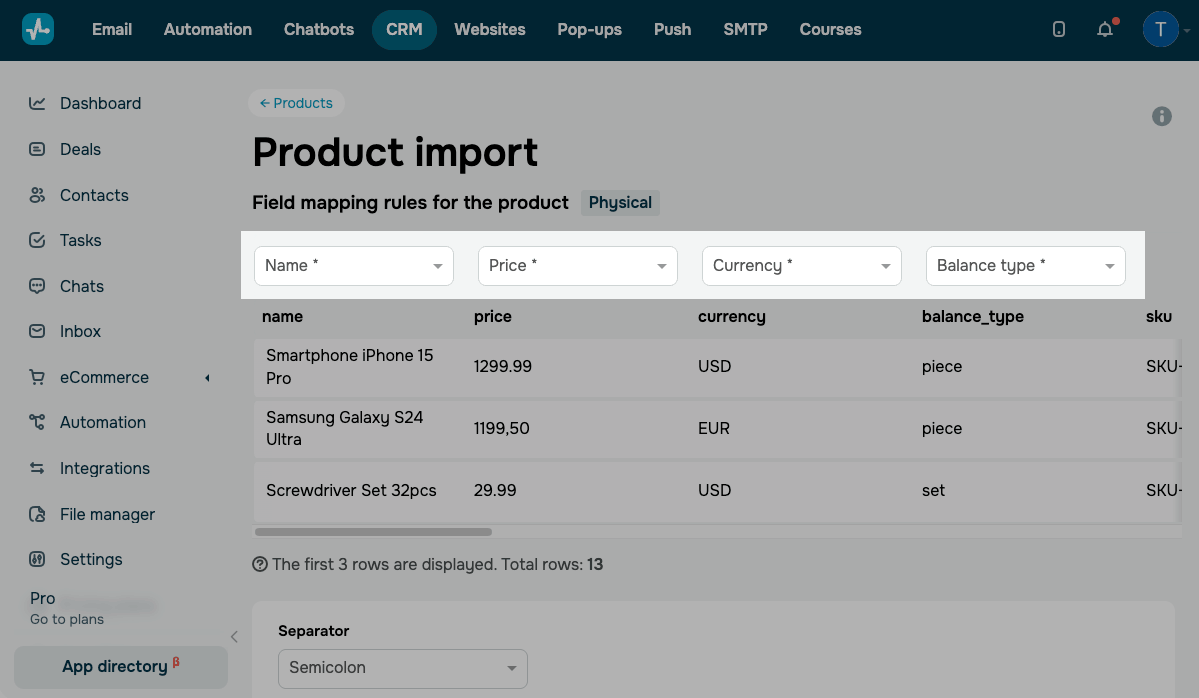
On the Field mapping rules for the product page, choose a product field for every column in your file.
Each file column has a drop-down list with a product field above it. If your column names match the field names in the CRM system, SendPulse maps them automatically. Review the mapping and correct anything that points to the wrong field.
Fields with an asterisk are required for matching. Unmapped columns stay Disabled, and their data points aren’t imported.
The table shows the first rows of your file and its total number of rows. Use them to check whether your file is organized correctly and whether your information lands in the right fields.
If your entire file appears as one column, change the value in the Separator field under the table.
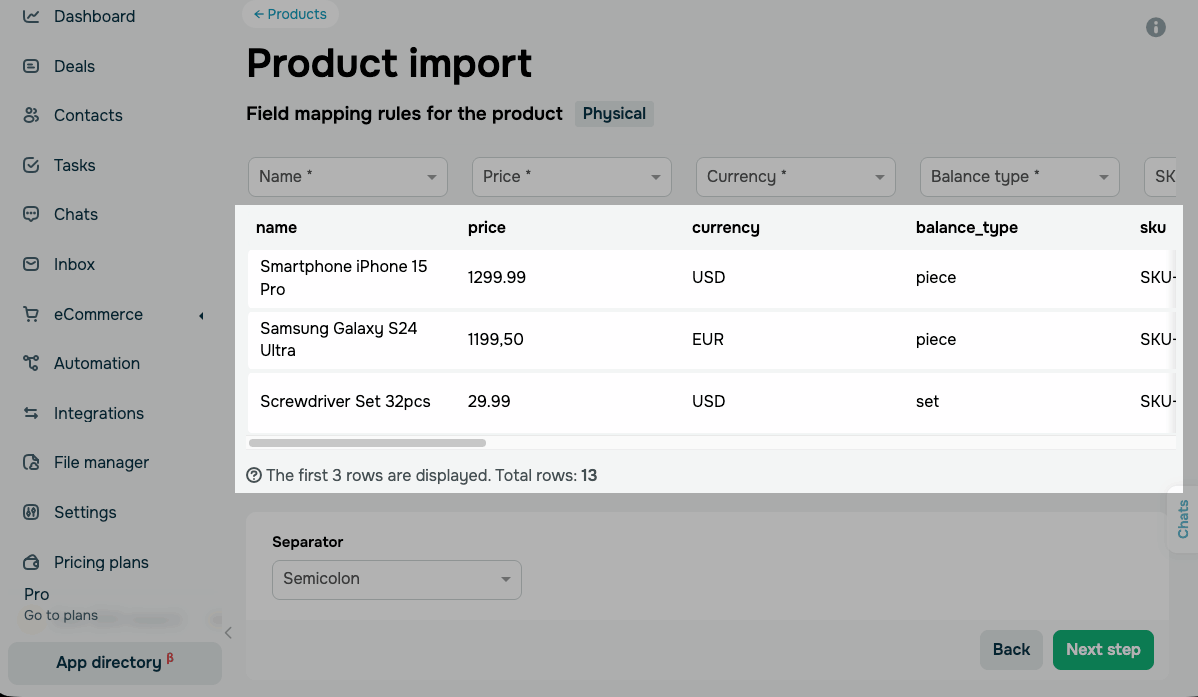
Once you've mapped your product fields, click Next step.
Map file values to CRM values
On the Data mapping rules for the product page, you map the values themselves.
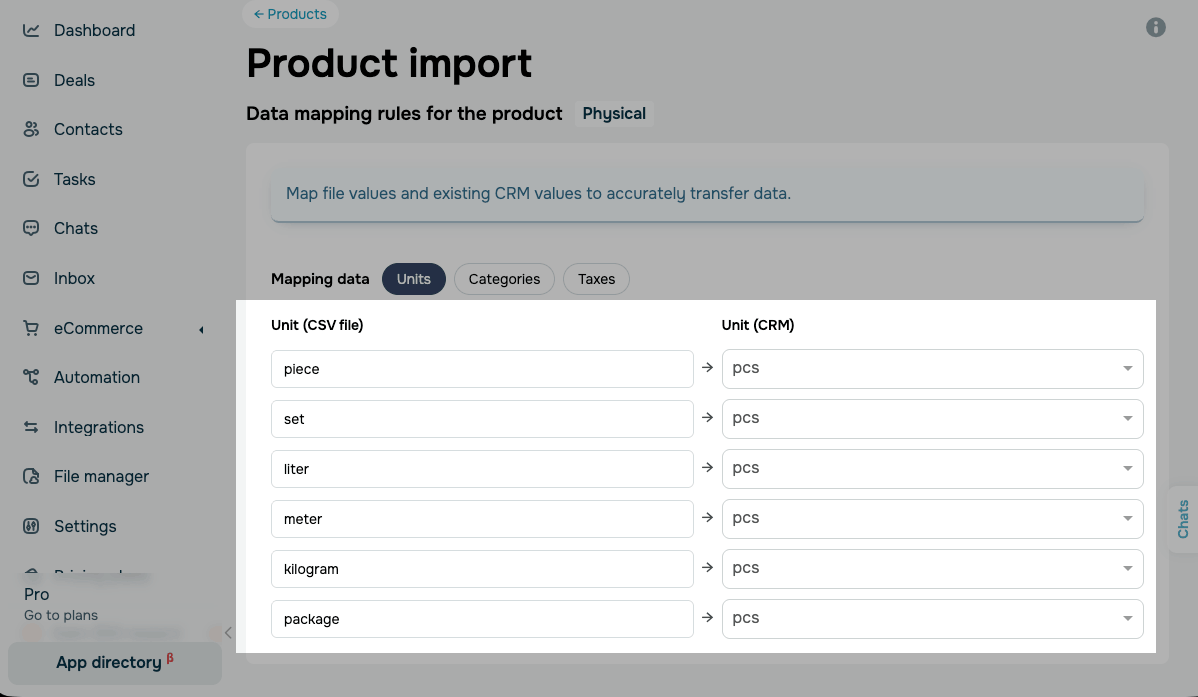
Categories, units, and taxes may already exist in your CRM, so you need to map each value from your file to the matching item there. For example, a piece in your file may map to pcs in your catalog.
In the Mapping data section, the values are grouped into tabs. The available tabs depend on the product type you selected and the columns you mapped.
On the Units tab, map each value from your file to a CRM unit of measurement. For instance, you can map piece to pcs. This tab appears for physical products only, as digital products aren't stocked.
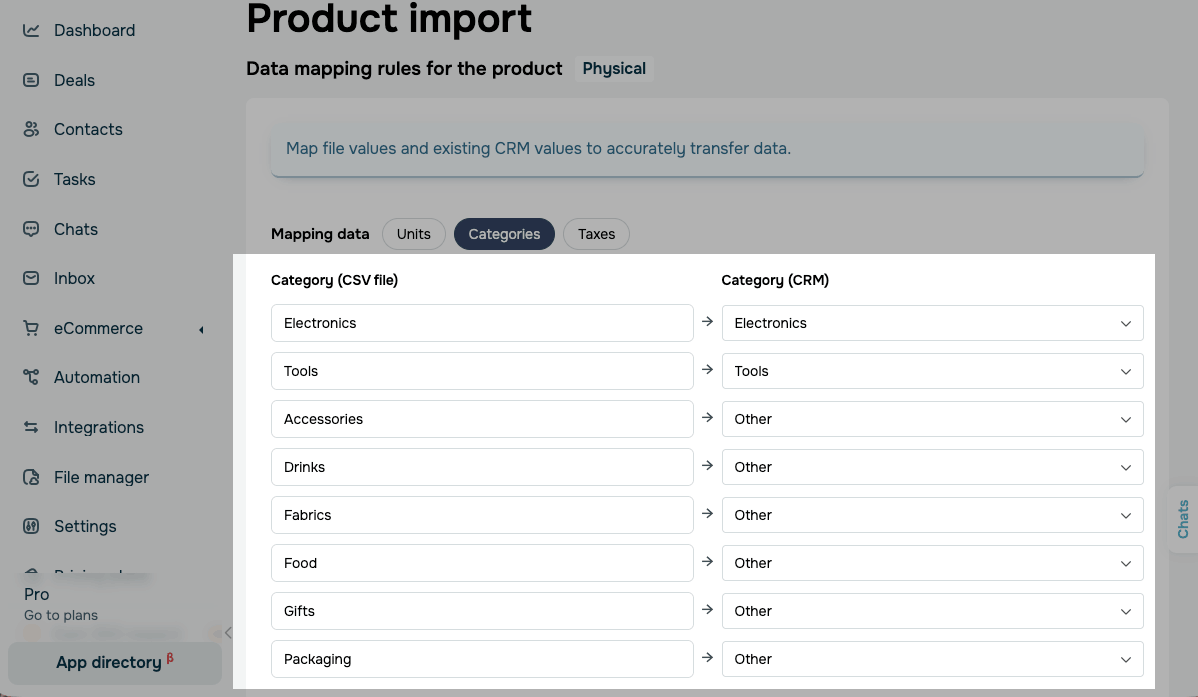
On the Categories tab, map a CRM system category to a value from your file. This tab appears for every import because a category is required for both product types.
By default, each list shows the first category from your catalog. If you leave a value unchanged, it's imported with the default category. Review every row before you continue.
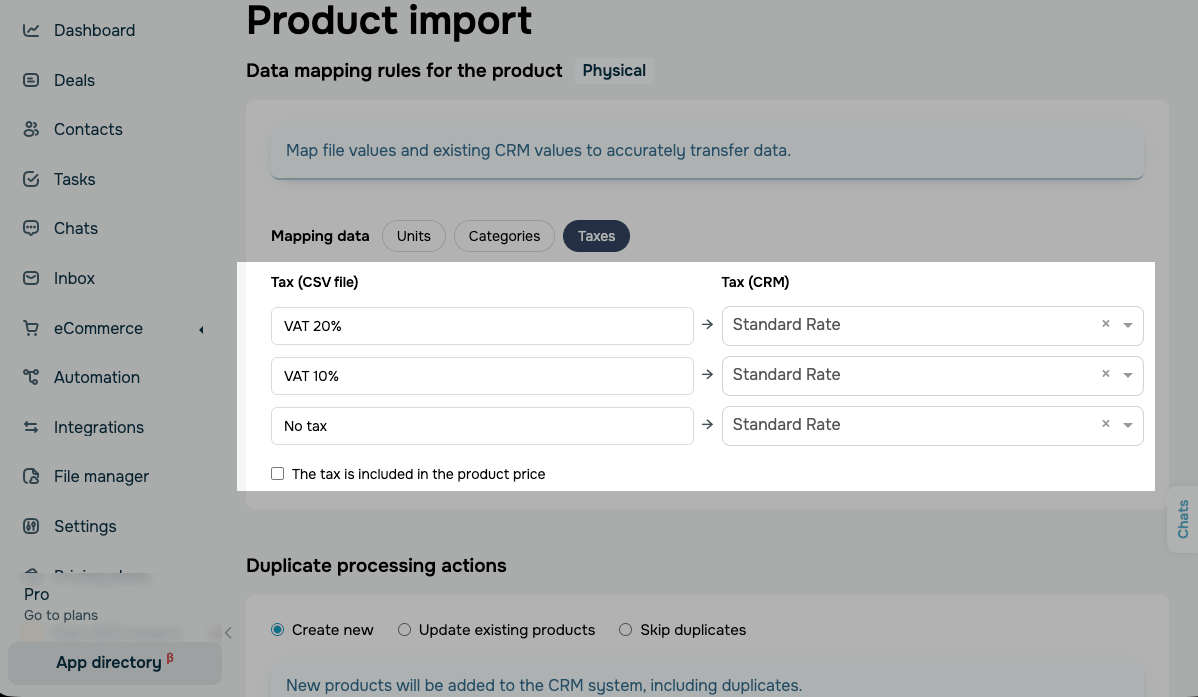
On the Taxes tab, choose a tax for every value from your file. This tab appears only if you've mapped a column to the Tax field.
If the prices in your file already include tax, select the The tax is included in the product price checkbox. This setting applies to all products in your file.
Handle duplicates and run the import
A duplicate is a product from your file that already exists in your catalog.
In the Duplicate processing actions section, decide how the import should handle duplicates:
| Create new | Adds all products from your file to your catalog, including duplicates. |
| Update existing products | Replaces the existing product data with the data from your file. Products that aren't duplicates are added as new ones. |
| Skip duplicates | Adds only the products that aren't duplicates. Duplicates from your file are ignored. |
If you've selected Update existing products or Skip duplicates, then in the Consider products duplicates if they match section, choose what identifies a product duplicate: Name, SKU, or both. If you select both, a product is considered a duplicate when its name and SKU both match.
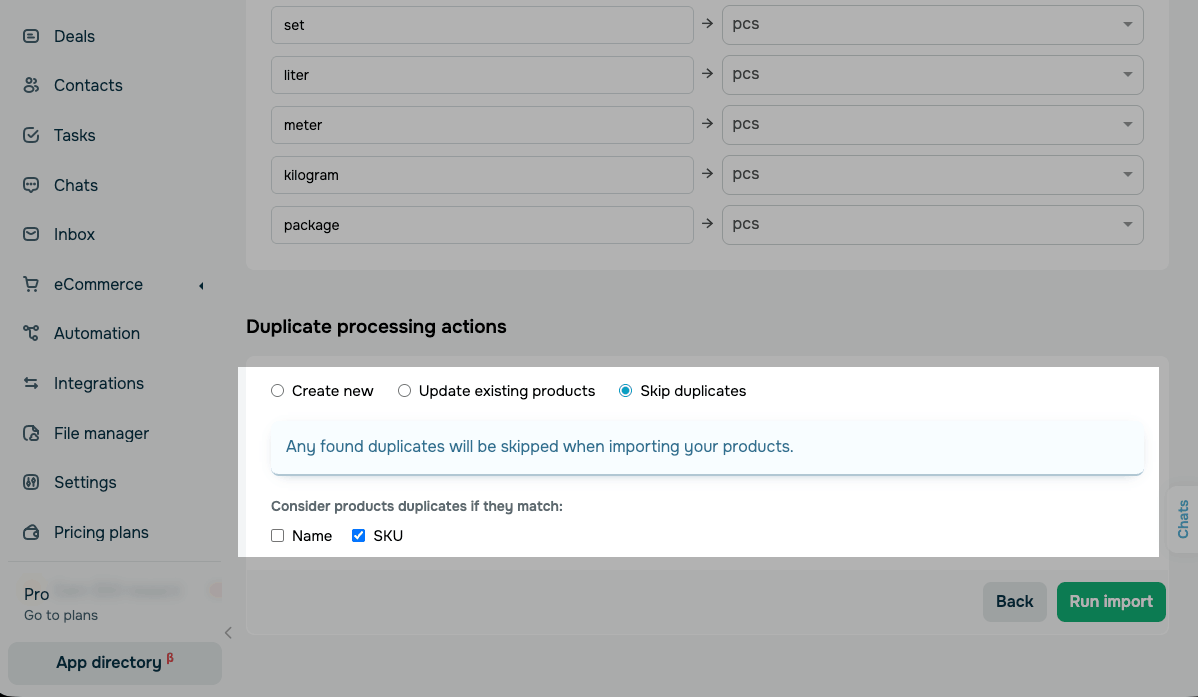
Once you've mapped your fields and values and chosen a duplicate processing action, click Run import.
View import results
When you run the import, you will see the Importing your products message with counters that update during the upload:
| Total file rows | How many rows were read from your file. |
| Products added | How many products have been added to your catalog. |
| Errors found | How many rows weren't imported. |
| Duplicates found | How many products from your file are already in your catalog. |
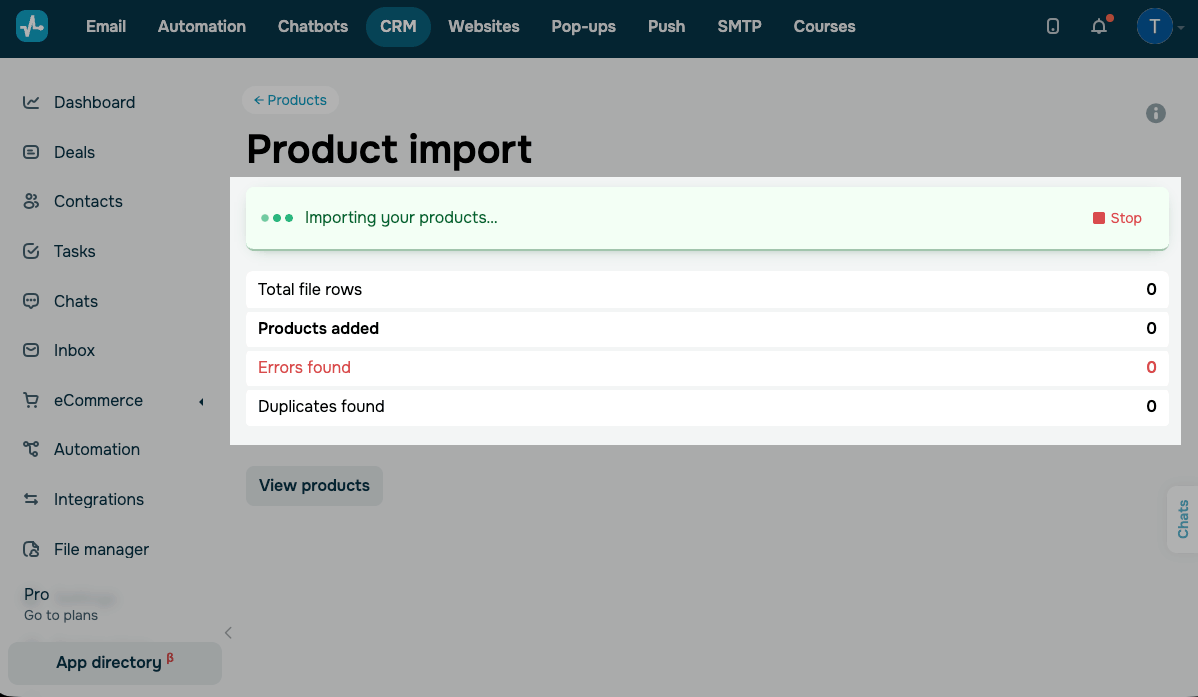
Import runs in the background, so you can close the page and come back later.
To stop the import, click Stop.
Once the import is complete, you will see the Products have been imported message.
Click View products to open your catalog.
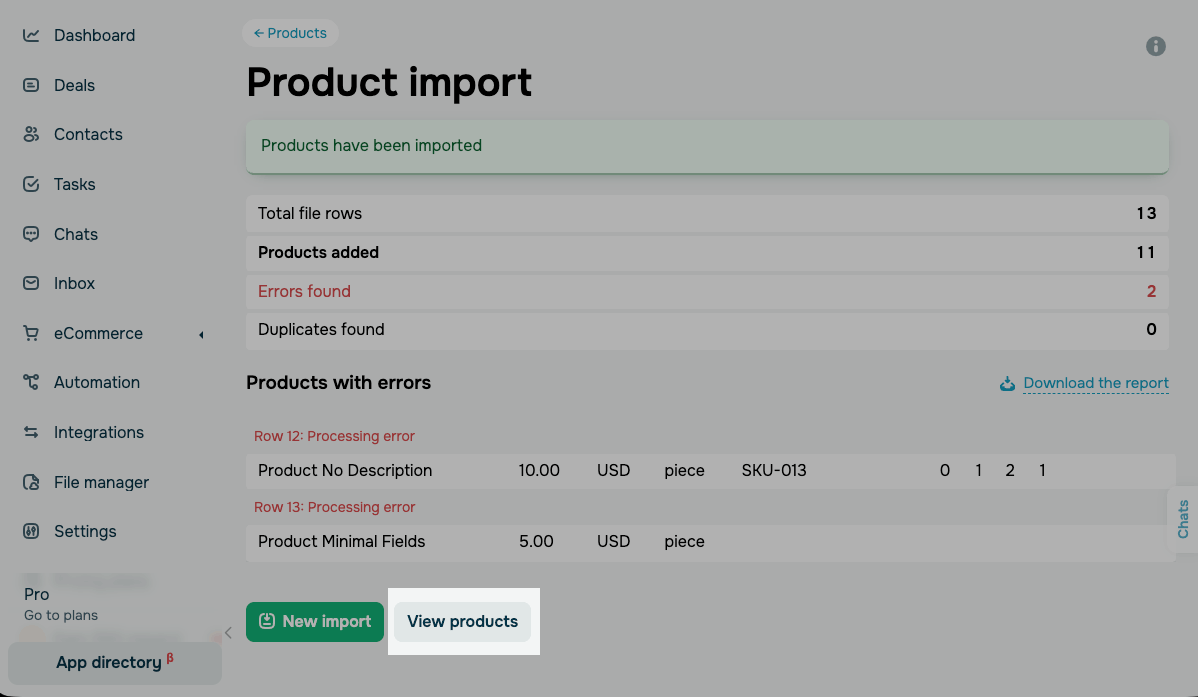
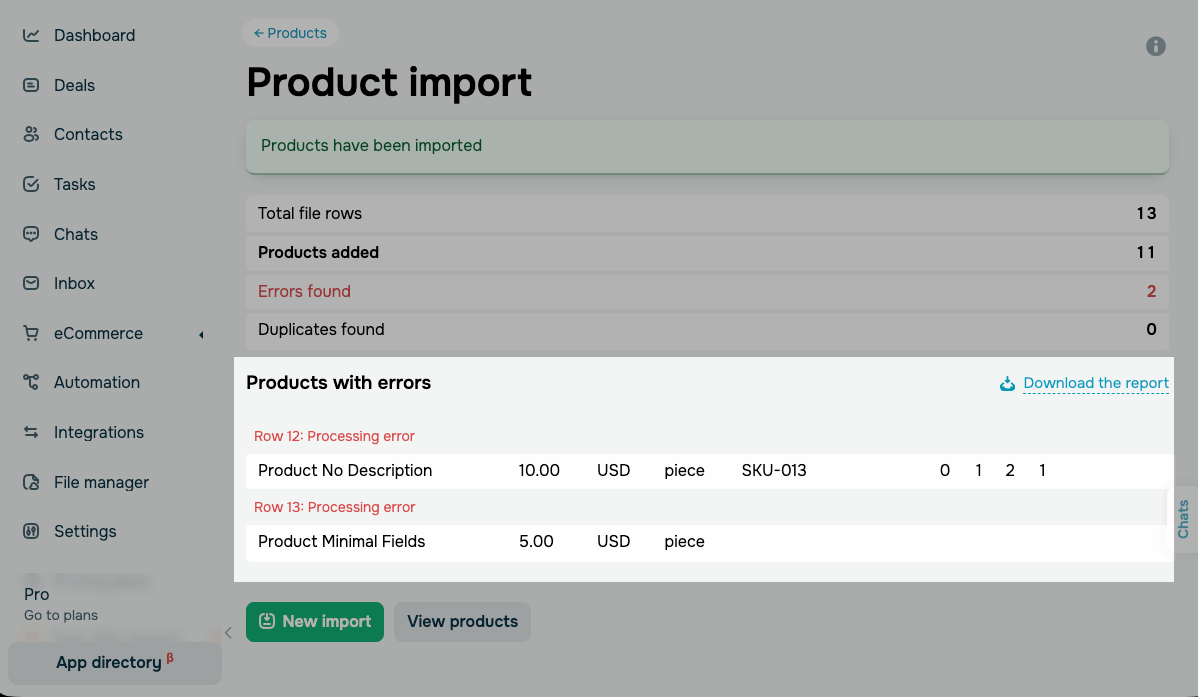
If the Errors found counter is above zero, the Products with errors section appears under it. It lists the rows that weren't imported, along with a row number and a reason. To save this list as a CSV file, click Download the report.
Row numbers in the report match those in your file, header row included. To retry, update these rows in your file, then click New import and upload it again.
Your imported products appear in CRM > eCommerce > Products, in the categories you've mapped.
Troubleshoot import issues
If the import didn't go as expected, one of these is the likely cause:
| The import doesn't move to the next step | The CRM system shows the Required fields haven't been mapped dialog listing the fields.
Click Back to mapping and map the columns it names. |
| Your entire file is read as one column | The Separator field doesn't match the separator used in your file. Change it on the import parameters page or below the table on the field mapping page. |
| Some rows weren't imported | A required field is empty in the row, so SendPulse can't save the product.
To find the affected rows, open the Products with errors section on the results page or download the report. Fill in the missing values in your file and upload it again. |
| Your products landed in the wrong categories | In the Categories tab, some rows kept the default category instead of the one you needed.
Move the products in your catalog manually or repeat the import with the correct mapping. |
| Some data points weren’t imported | Disabled columns aren't imported. Map these columns to the product fields you need and run the import again. |
| Your product was created without an image | The image link is unavailable, the file format isn't supported, or your account is out of storage. The error report shows which of these applies. Fix the cause, then add the image to the product card manually. |
| Your catalog was imported partially | You've hit the product limit on your plan. The import stops once the limit is reached. |
| Your existing product data points weren’t updated | Check which duplicate processing action you've selected. Only Update existing products overwrites existing data. Create new adds duplicates as new records, and Skip duplicates ignores them. |
Start selling imported products
To start selling your products on your website, add them to the Product or Product catalog widget.
To start selling your products in a chatbot, add them to the CRM product element.
You can also generate a payment link.
 Last Updated: 06.09.2026





or