View the request log and retry webhook requests
The request log shows every request SendPulse sent to a webhook in the last 30 days, with the status your server returned. Use it to check that events reach your server and find out why a request failed.
For example, if an online store's accounting system stops receiving paid deals, the store can find the failed requests in the log. After fixing the error, the store can retry them, and the deals reach the accounting system.
Let's talk about how to open the request log, read request statuses, view request details, and retry a request.
Open the request log
Each webhook has its own request log. If you don't have a webhook yet, create one as described in Set up webhooks to receive event notifications.
To open the log, go to Account settings > Webhooks. Click the three dots on the webhook card, and select Log.
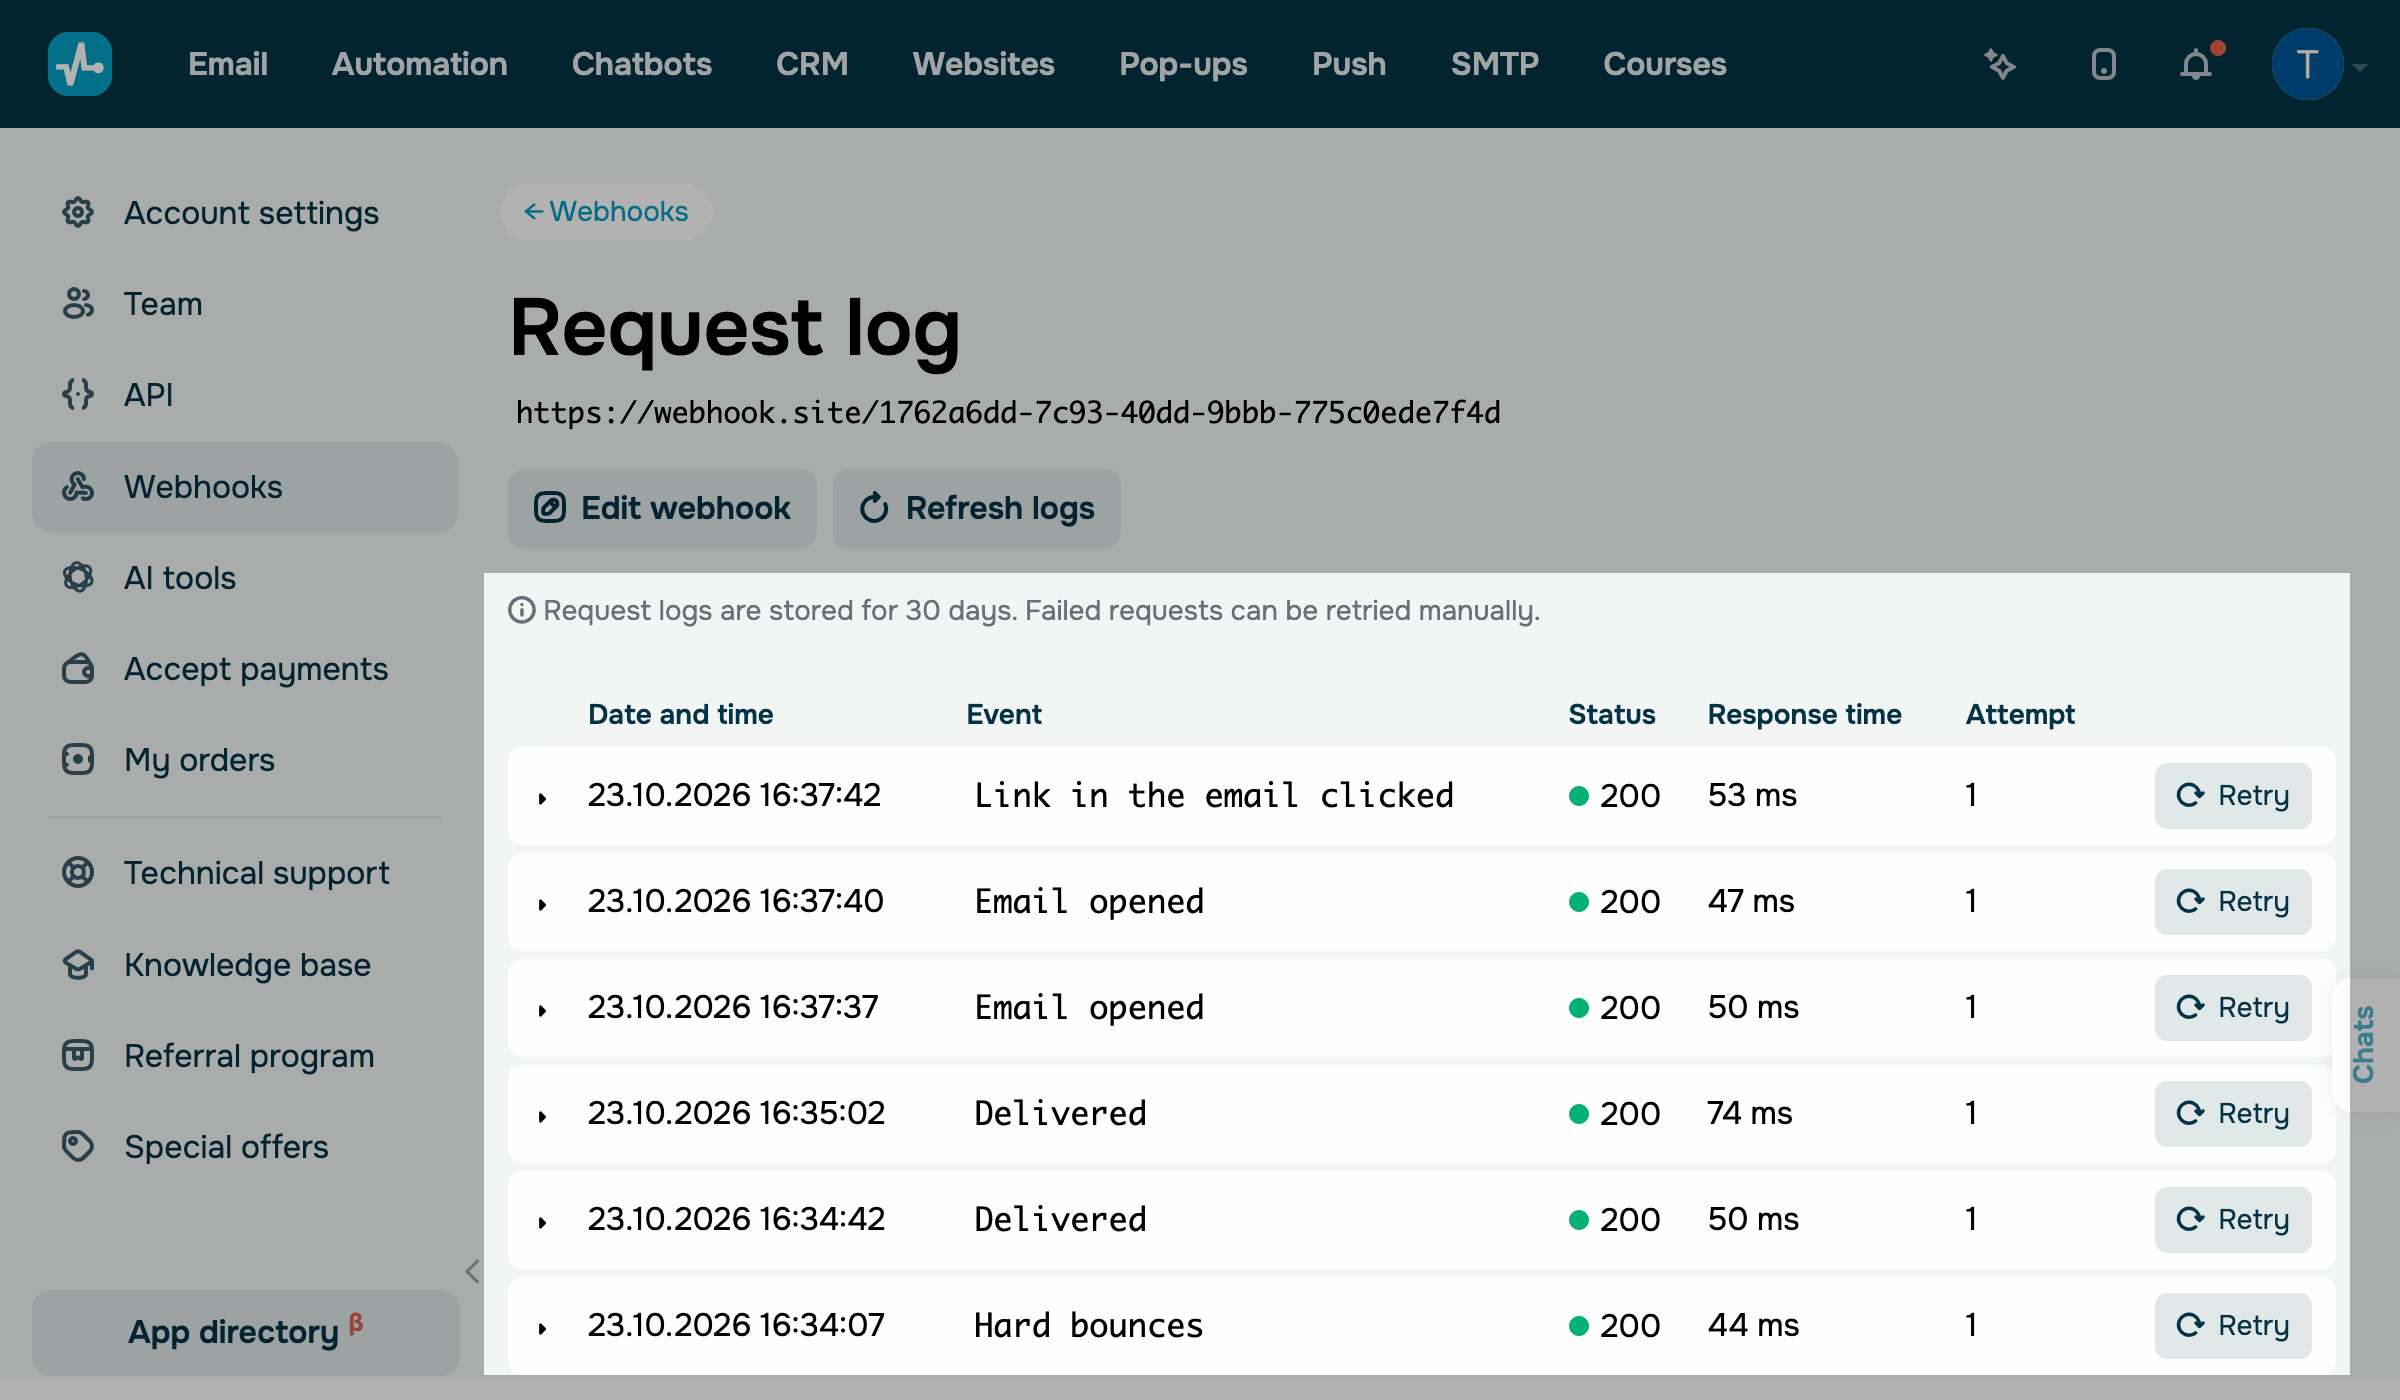
The Request log page shows the webhook URL, the Edit webhook button that opens the webhook settings, and the Refresh logs button that loads new records.
SendPulse stores log records for 30 days. The page shows 20 records at a time. To load earlier records, click Show more.
Test requests don't appear in the log.
Read the log
Each record in the log is one delivery attempt of one event.
Log columns
Each record shows the following information:
| Date and time | Shows when SendPulse sent the request, in your account's time zone. |
| Event | Shows the event name that triggered the request. For example, Deal created or Email opened. |
| Status | Shows the result of the request, such as the HTTP status code your server returned, or Timeout. |
| Response time |
Shows how long your server took to respond, in milliseconds. For Timeout, the column shows a dash. |
| Attempt |
Shows the number of the delivery attempt for this event, such as
|
Request statuses
The color of the dot next to the status shows the result, as follows:
200 (green) |
Your server accepted the request. SendPulse doesn't send it again. |
4xx (orange) |
Your server received the request and rejected it. The most common codes are the following:
|
5xx (red) |
Your server received the request but failed while processing it. |
Timeout (red) |
Your server didn't respond in time. |
If your server doesn't return a success code or doesn't respond in time, SendPulse retries the request automatically after 1 minute, then after 5 minutes, and then after 30 minutes, up to 4 attempts in all.
Each attempt is a dedicated record with the same request body and signature, and its number appears in the Attempt column.
Automated retries don't depend on your pricing plan.
View request details
To see what SendPulse sent and what your server returned, click the record.
The record expands and shows the following information:
| Request body | The JSON body of the request. |
| Response body | The unchanged response from your server, such as an HTML error page. |
| Request headers | The headers of the request: Content-Type, User-Agent, X-Event-Type, X-Signature, and your additional headers with masked values. |
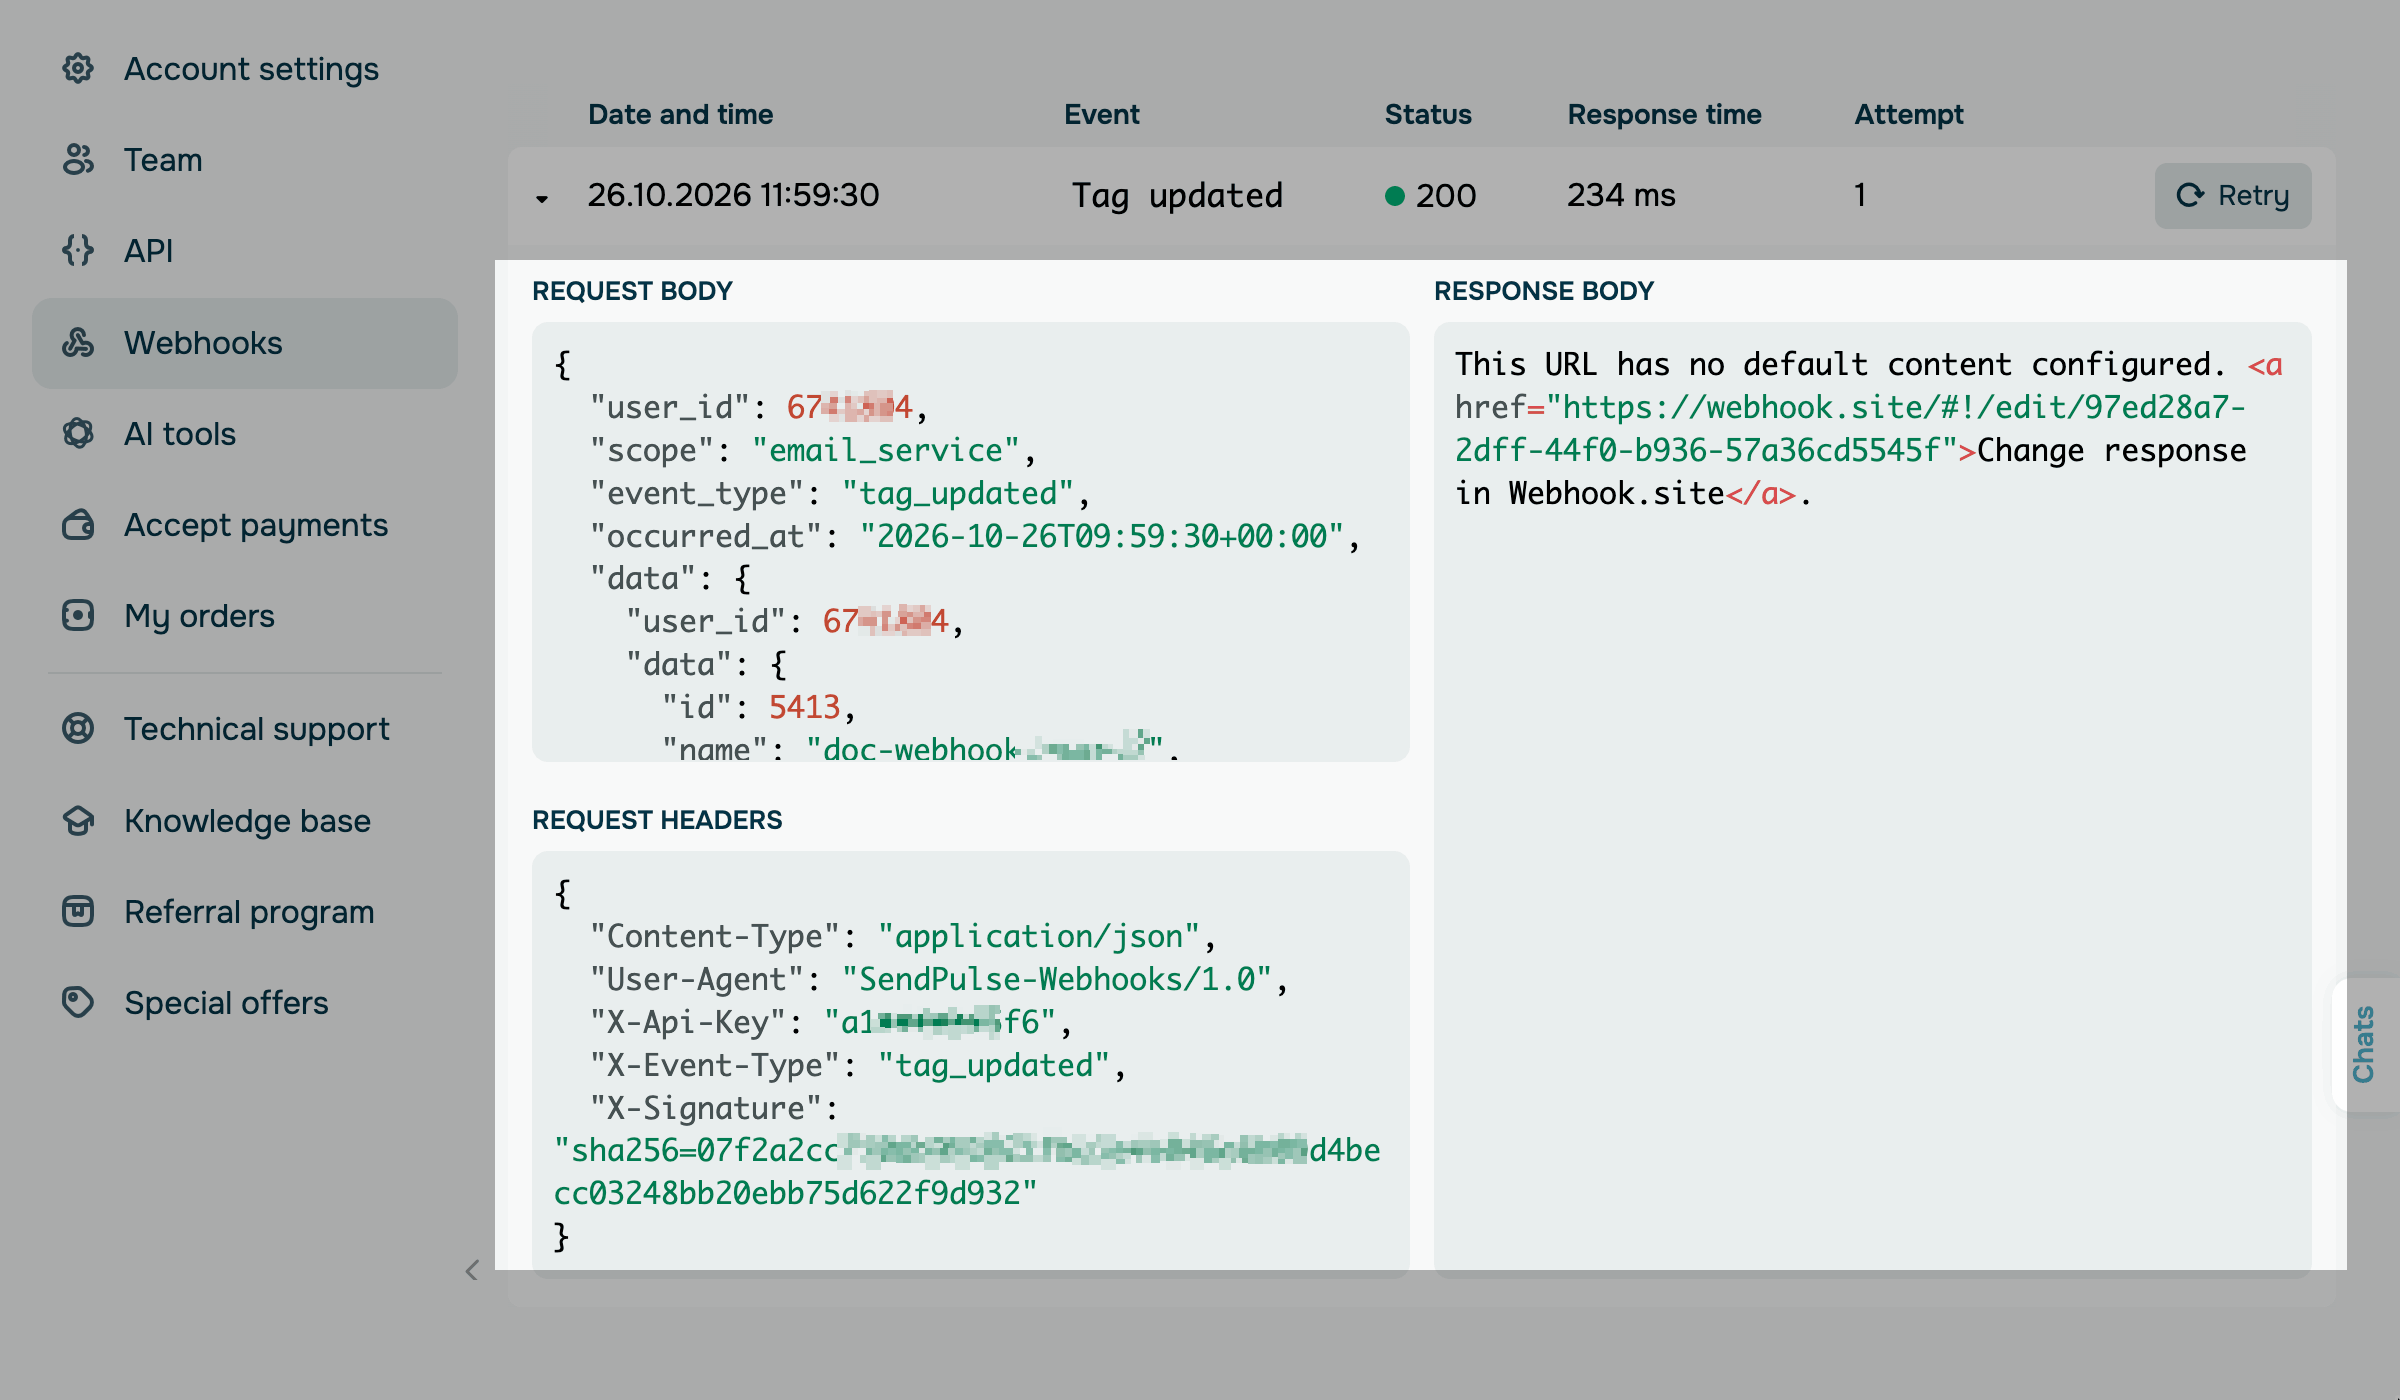
SendPulse sends each event as a dedicated request with a JSON object in the body. Every event request contains the following general fields:
user_id |
The ID of your SendPulse account. |
scope |
The SendPulse tool that sent the event. |
event_type |
The event code, for example, delivered or crm.deal.create. SendPulse also sends it in the X-Event-Type header. |
occurred_at |
The date and time of the event in the ISO 8601 format, in UTC. |
data |
The event data. The set of fields depends on the event. To see it, trigger the event and open the request body in the log. |
For the email service and SMTP events of the previous webhooks, such as Delivered or New subscriber, the body also contains the "0" element with the data in the previous format.
For new integrations, use the event_type and data fields.
Retry a request
To send a request again, for example, after you've fixed an error on your server, click Retry in its row.
SendPulse shows the Delivery retry queued message and sends the request with the same body and the webhook's current additional headers.
The new delivery appears as a dedicated record with attempt 1 after you click Refresh logs. You can retry any request, including successful ones.
Now you can see whether each event reached your server and resend the requests that failed.
To change the webhook URL, headers, or events, click Edit webhook.
To keep using webhooks, learn how to set up webhooks and choose events to receive, and how to verify the request signature.
To give team members access to webhooks, create a custom user role.
If the log shows errors, see Troubleshoot webhook issues.
 Last Updated: 03.11.2026



or