Overview of receiving course payments
With course pricing plans, you can receive payments via students’ accounts, update payment statuses manually, or add a payment widget to your website.
In this article, we will talk about how to create pricing plans, receive payments on your site, and enable users to quickly sign up for your course.
How to enable course payments
Course payments rely on pricing plans — they allow students to decide on their preferred price and access to content or instructor feedback.
Every course must have at least one active pricing plan. By default, all courses have a free plan.
Multiple plans help you test which option works best and adjust your pricing based on demand. In SendPulse, you can edit, add, disable, and remove plans as needed.
To add a pricing plan, go to your course settings and open the Pricing plans tab.
Read more: How to create a pricing plan and How to manage course pricing plans.
Payment methods for your course
Students can pay using the following methods:
Students will get access to your course content once they successfully complete their payment using the selected option.
| Via the Pricing plans widget on your academy website | Go to the course page builder and place the Pricing plan widget on it.
Select a course and pricing plan, set up payment methods, and add extra fields to collect student data. |
| Via the Courses element in a pop-up |
Go to the pop-up builder and add the Courses element. Select a course and pricing plan, set up payment methods, and add a promo code if applicable. |
| Via a payment link in the CRM system |
Go to the CRM section and open your deal or contact. In the Payments tab, click Create payment. Select Course payment as the payment type, enter a description, add contact details, choose a payment system, and set a payment amount. |
| Via student accounts |
This option is enabled automatically and requires no extra setup. If a student has enrolled in a course but hasn’t paid yet, they’ll see the Pay button instead of Start learning. |
| Via course lesson | Go to the course builder and add the Plan or Button element to your lesson to sell additional content on your course. |
| Via renewal offers | Go to Course settings > Tariff renewal and set up a plan renewal offer. When a student's access expires, they can choose an offer from the course card in their account. |
You can also set up alternative ways to update payment statuses if you receive payments through other methods.
Students will get access to your course content once their payment status is updated.
| Manually in the Audience tab | If a student pays outside SendPulse (for example, in cash or through bank transfer), you can manually mark their payment as completed in their profile.
Go to your course and open the Audience tab. Find the student, click the three dots next to their name, and select Confirm payment. |
| Automatically | If a specific event occurs or a condition is met, you can automatically update your student’s payment status.
Create a flow in the Automation section and add the Action: Mark as paid element. You can also create a flow in the chatbot section and receive payment via messenger. Add the Payment element, then the Enroll in the course element, and activate Mark as paid. |
How students can pay online
When a user clicks the button, a modal window with a form will open. The personal information they specify will be saved to their CRM contact card and student’s card in Courses that will be created after they click the button.
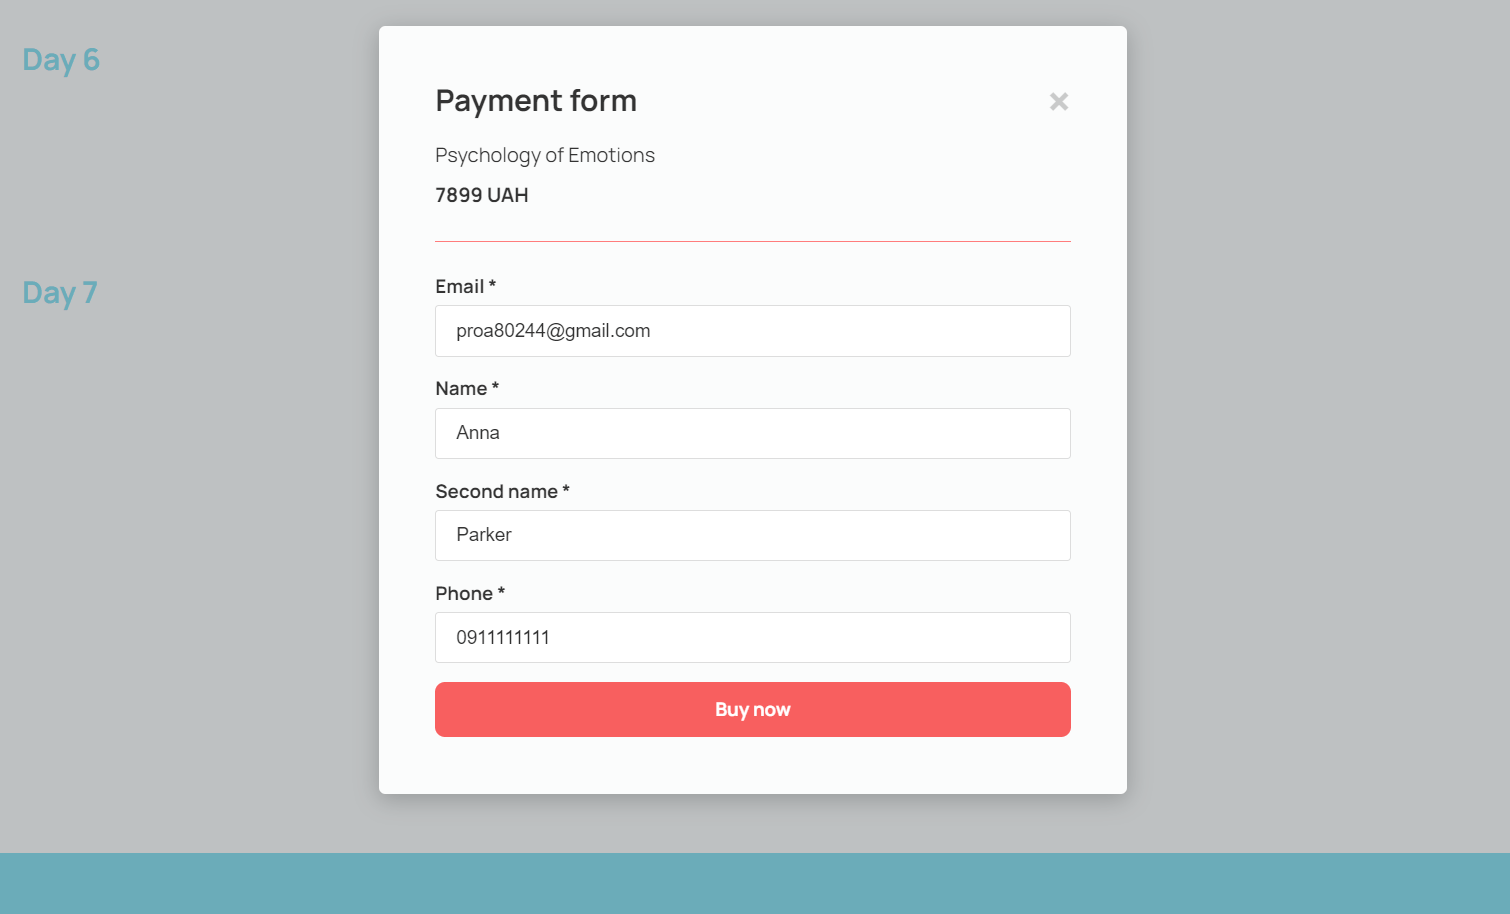
When the user fills out all the required fields and clicks the button at the bottom of your form, they will be redirected to your payment page, where they can enter their card details and pay for your course.
When users successfully pay for your course, they receive the login and password to their student account to the email address they specified in your form.
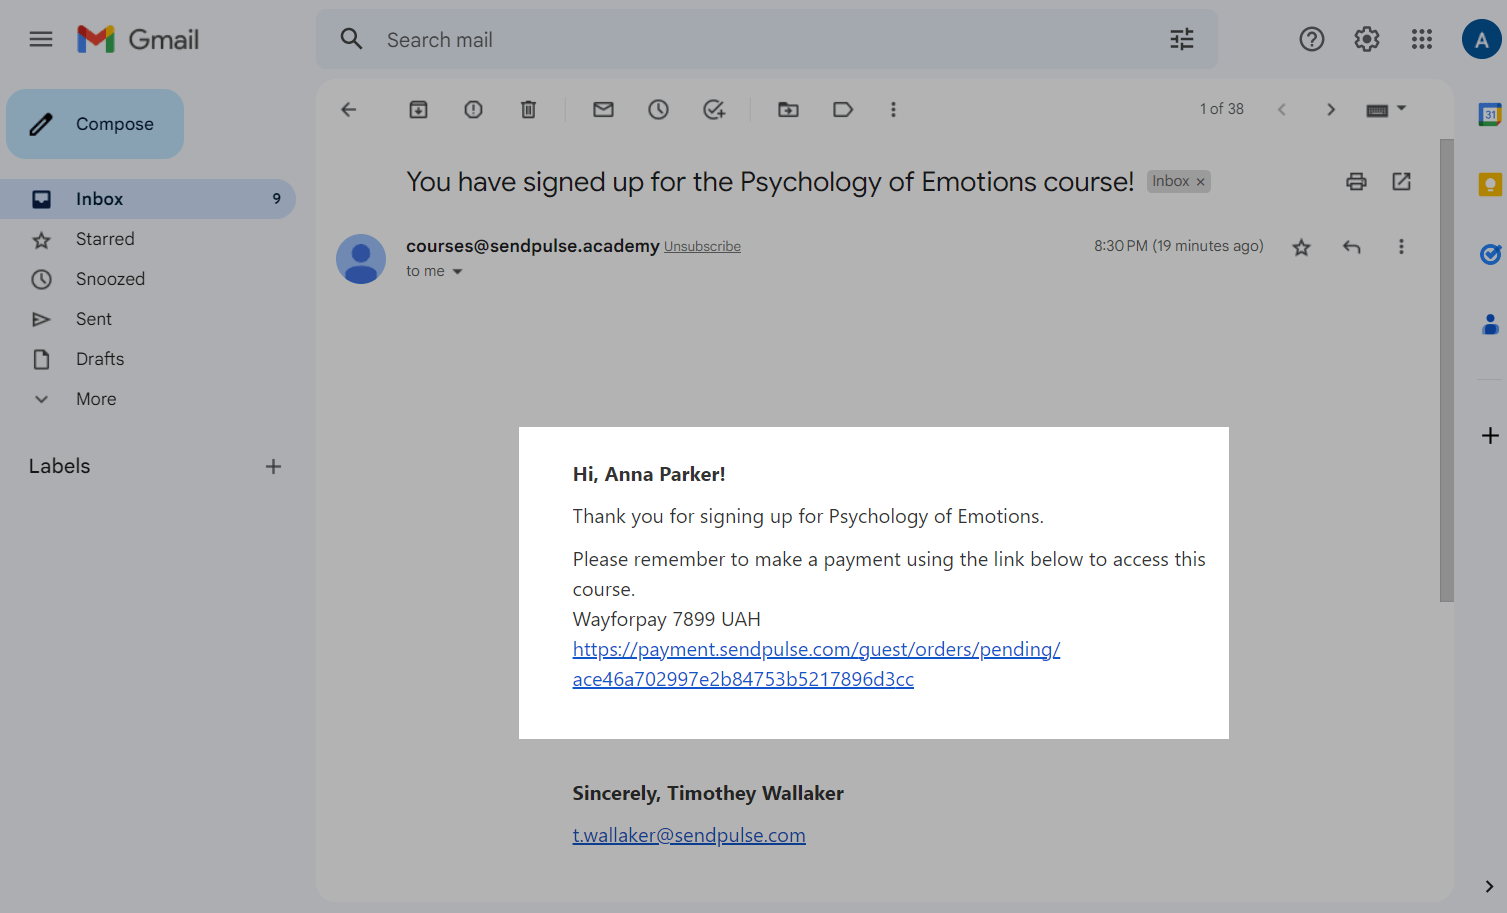
If the user filled in your form fields, clicked the button, and did not pay for your course, they will receive an email notification with a link to the payment page.
Once a student successfully pays for your course, they will get access to it for the time specified in the settings. If they repurchase your course, their access to it will be renewed.
How to view a payment status
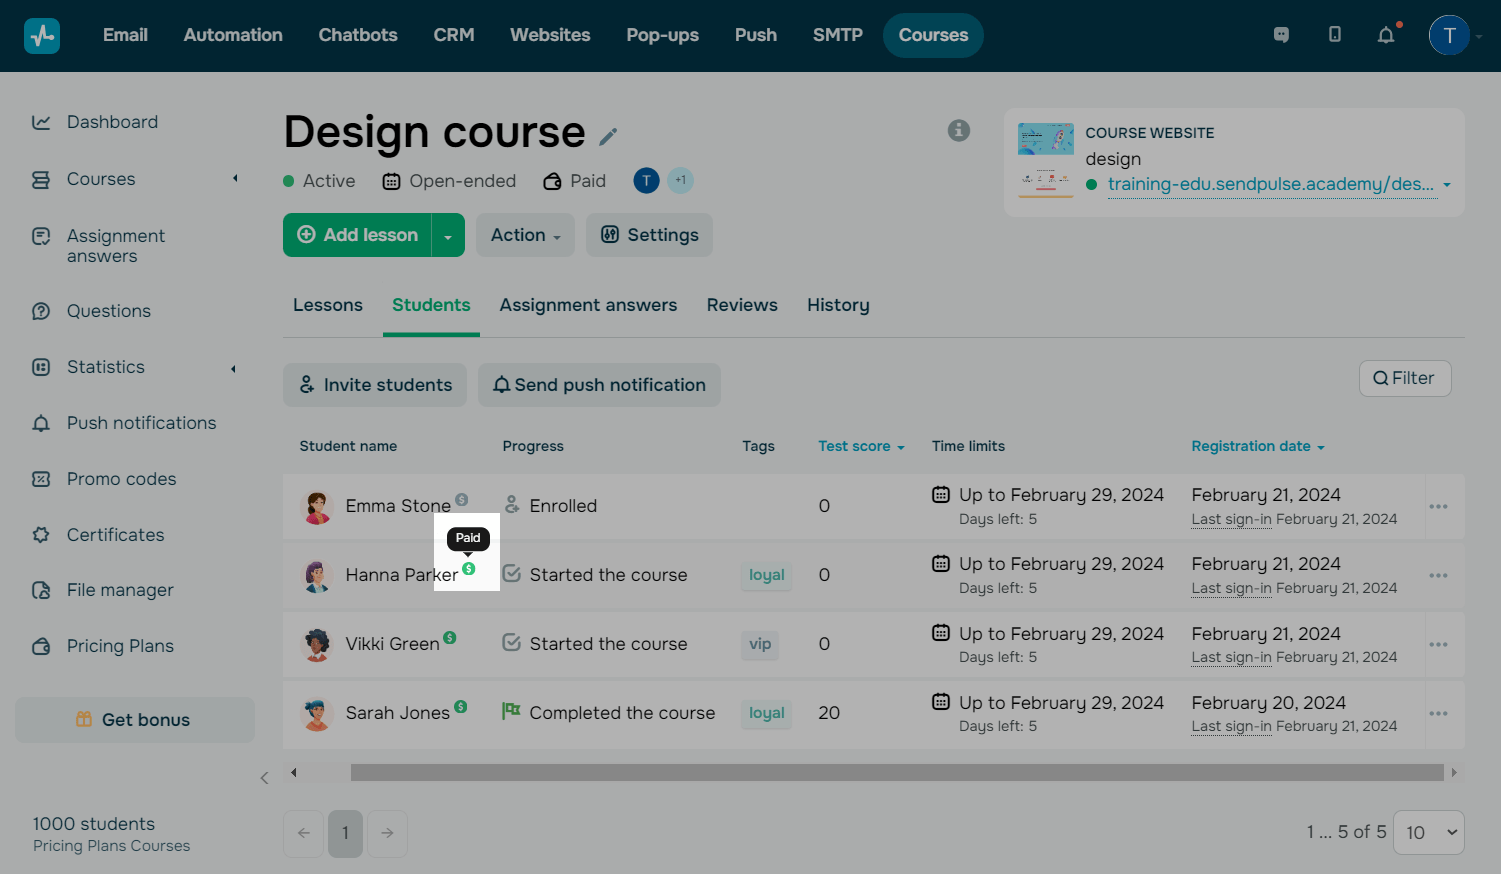
Instructors can monitor students’ payment statuses (Paid or Not paid) and pricing plan. To do this, hover over the dollar sign next to a student's name.
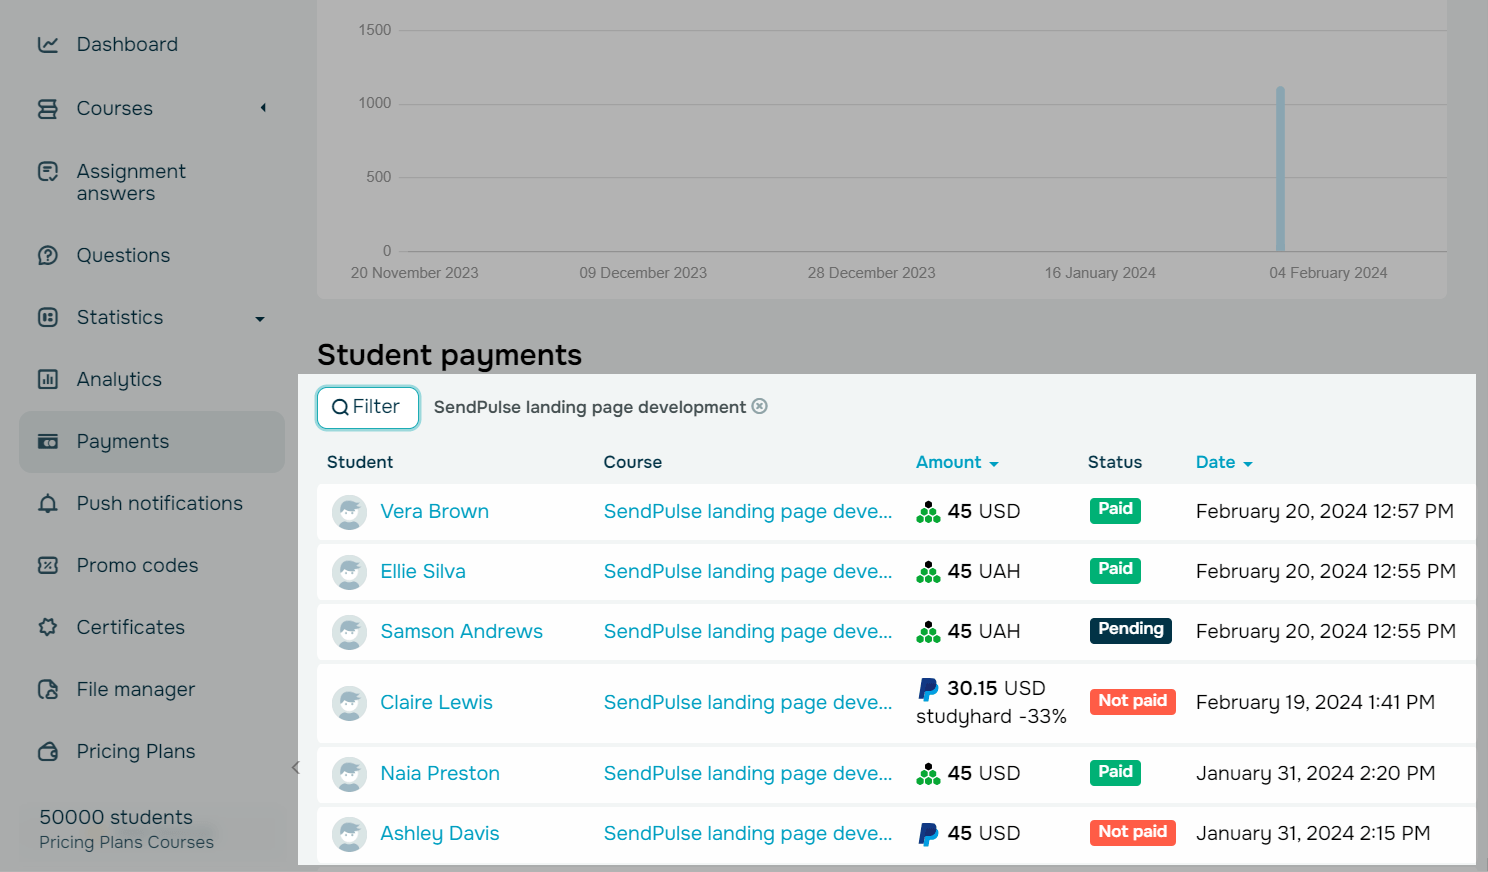
You can learn more in Statistics > Payments. Select a timeframe, and you'll see a graph along with payment details below. These details include student names, course names and links, amounts, currencies, payment methods, applied promo codes and discounts, dates of last status changes, and current payment statuses.
Read also: How to view payment information.
How to send a successful payment webhook
You can also send webhooks to your system notifying that the users have successfully paid for your products.
Go to Account Settings in the API tab. Under the Successful payment webhooks section, click Create Webhook.
Paste the URL you want to send the event to.

You can check the webhook structure and example in the Payment webhooks section.
Last Updated: 03.06.2025
or