Enroll students automatically after a chatbot payment
With SendPulse services, you can automatically enroll students in paid courses using a chatbot. This will make the enrollment process easier for students and course creators or managers.
In this article, we will talk about how to enroll students in your course automatically after a chatbot payment.
Create a course chatbot
You can create automated course chatbot flows to answer students’ questions, enroll them in your course, or collect student data. Add chatbot links to your marketing content or your website to facilitate course enrollment and payments.
Read more: How to work with the chatbot flow builder.
Using a chatbot, you can automatically enroll students who shared their email address and paid for your course. You can find out more about it in the following sections of this article.
Collect email addresses
Add an element with a user input field to your scenario so that a user can share their email address. This email address will be used to enroll them in your course in SendPulse.
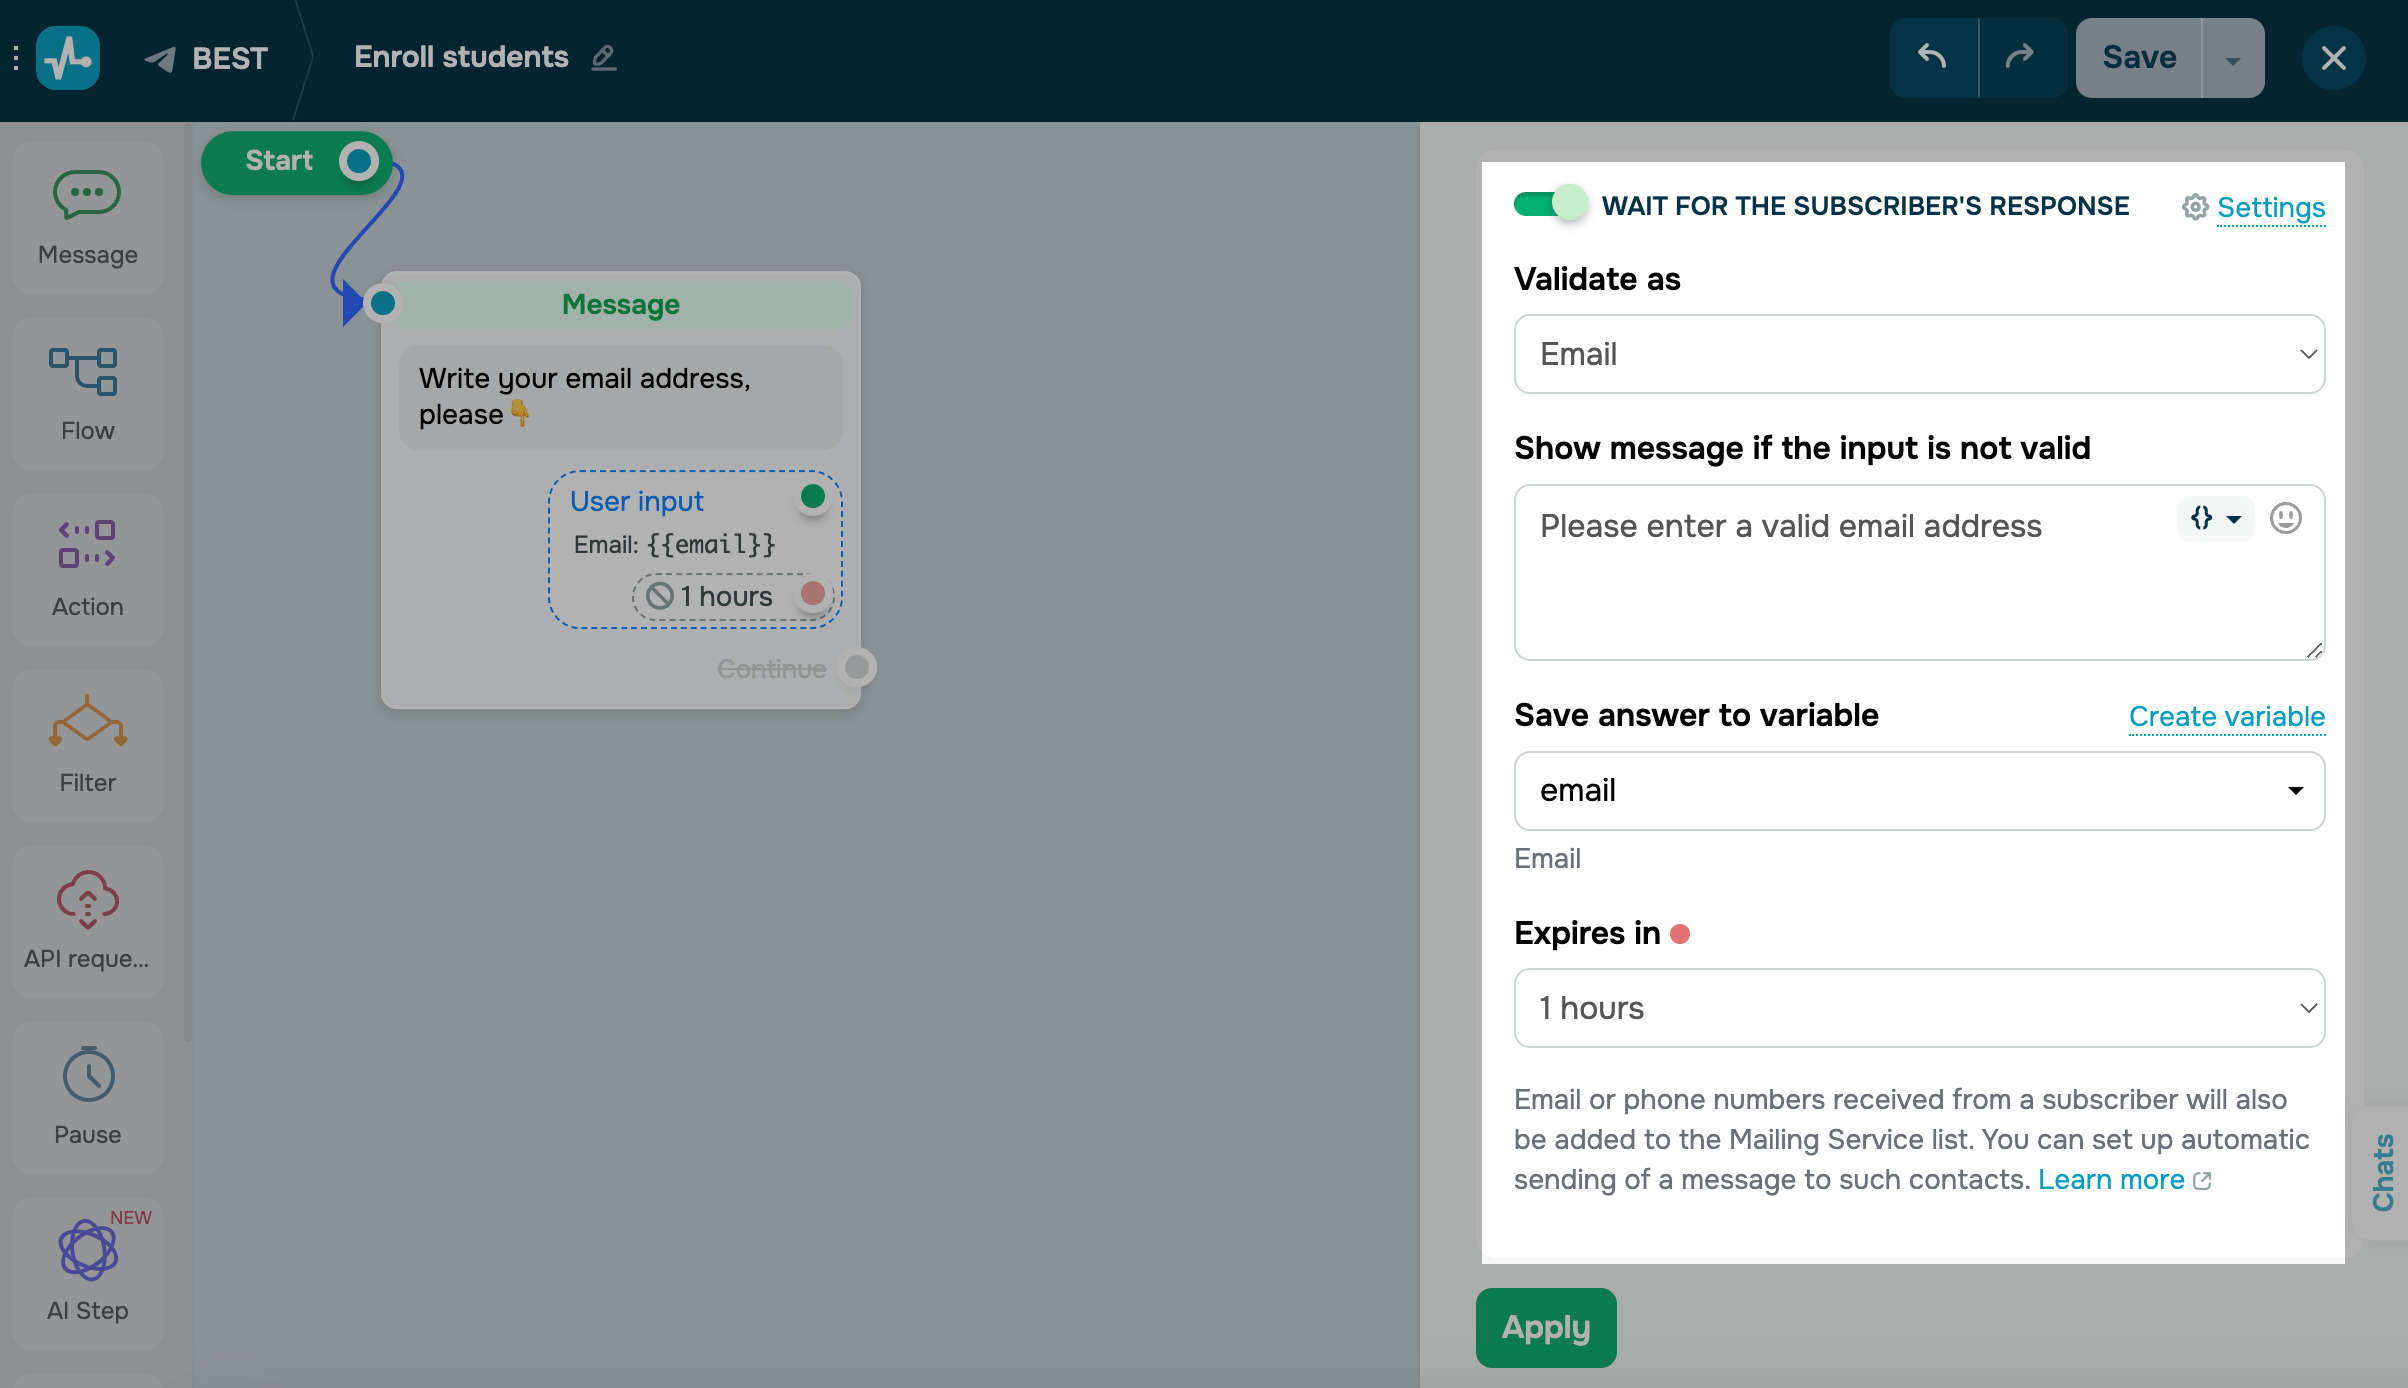
Go to the chatbot builder, add the Message element, and turn on the Wait for the subscriber's response toggle. Select the Email validation type, and type in the text that will be shown to users if they enter data incorrectly.
You can also add a variable where users’ data will be added and specify their response time. Click Apply.
If you have already gathered email addresses, you do not need to add the email address collection element again before payment — you can check this in the Audience section of your chatbot.
You can add the Filter element and check if you have each chatbot subscriber’s email address. Afterward, you can lead users with specified email addresses to your course payment element.
Add a course payment element
Add the Message element, click Add button, and select the Payment button type.
Enter your course price, currency, payment method, and product name, and select a CRM pipeline where you want to save your deal data. Click Add.
Read more: How to accept chatbot payments.
Invite students
You can continue setting up your flow in a chatbot or Automation.
Using a chatbot
Once you added the Message element with the Payment button, you can continue your flow. Add a Filter to segment paying students. Link it to the Action: Enroll in the course element and select your course and the email variable. Then, select the Mark as those who paid for the course checkbox.
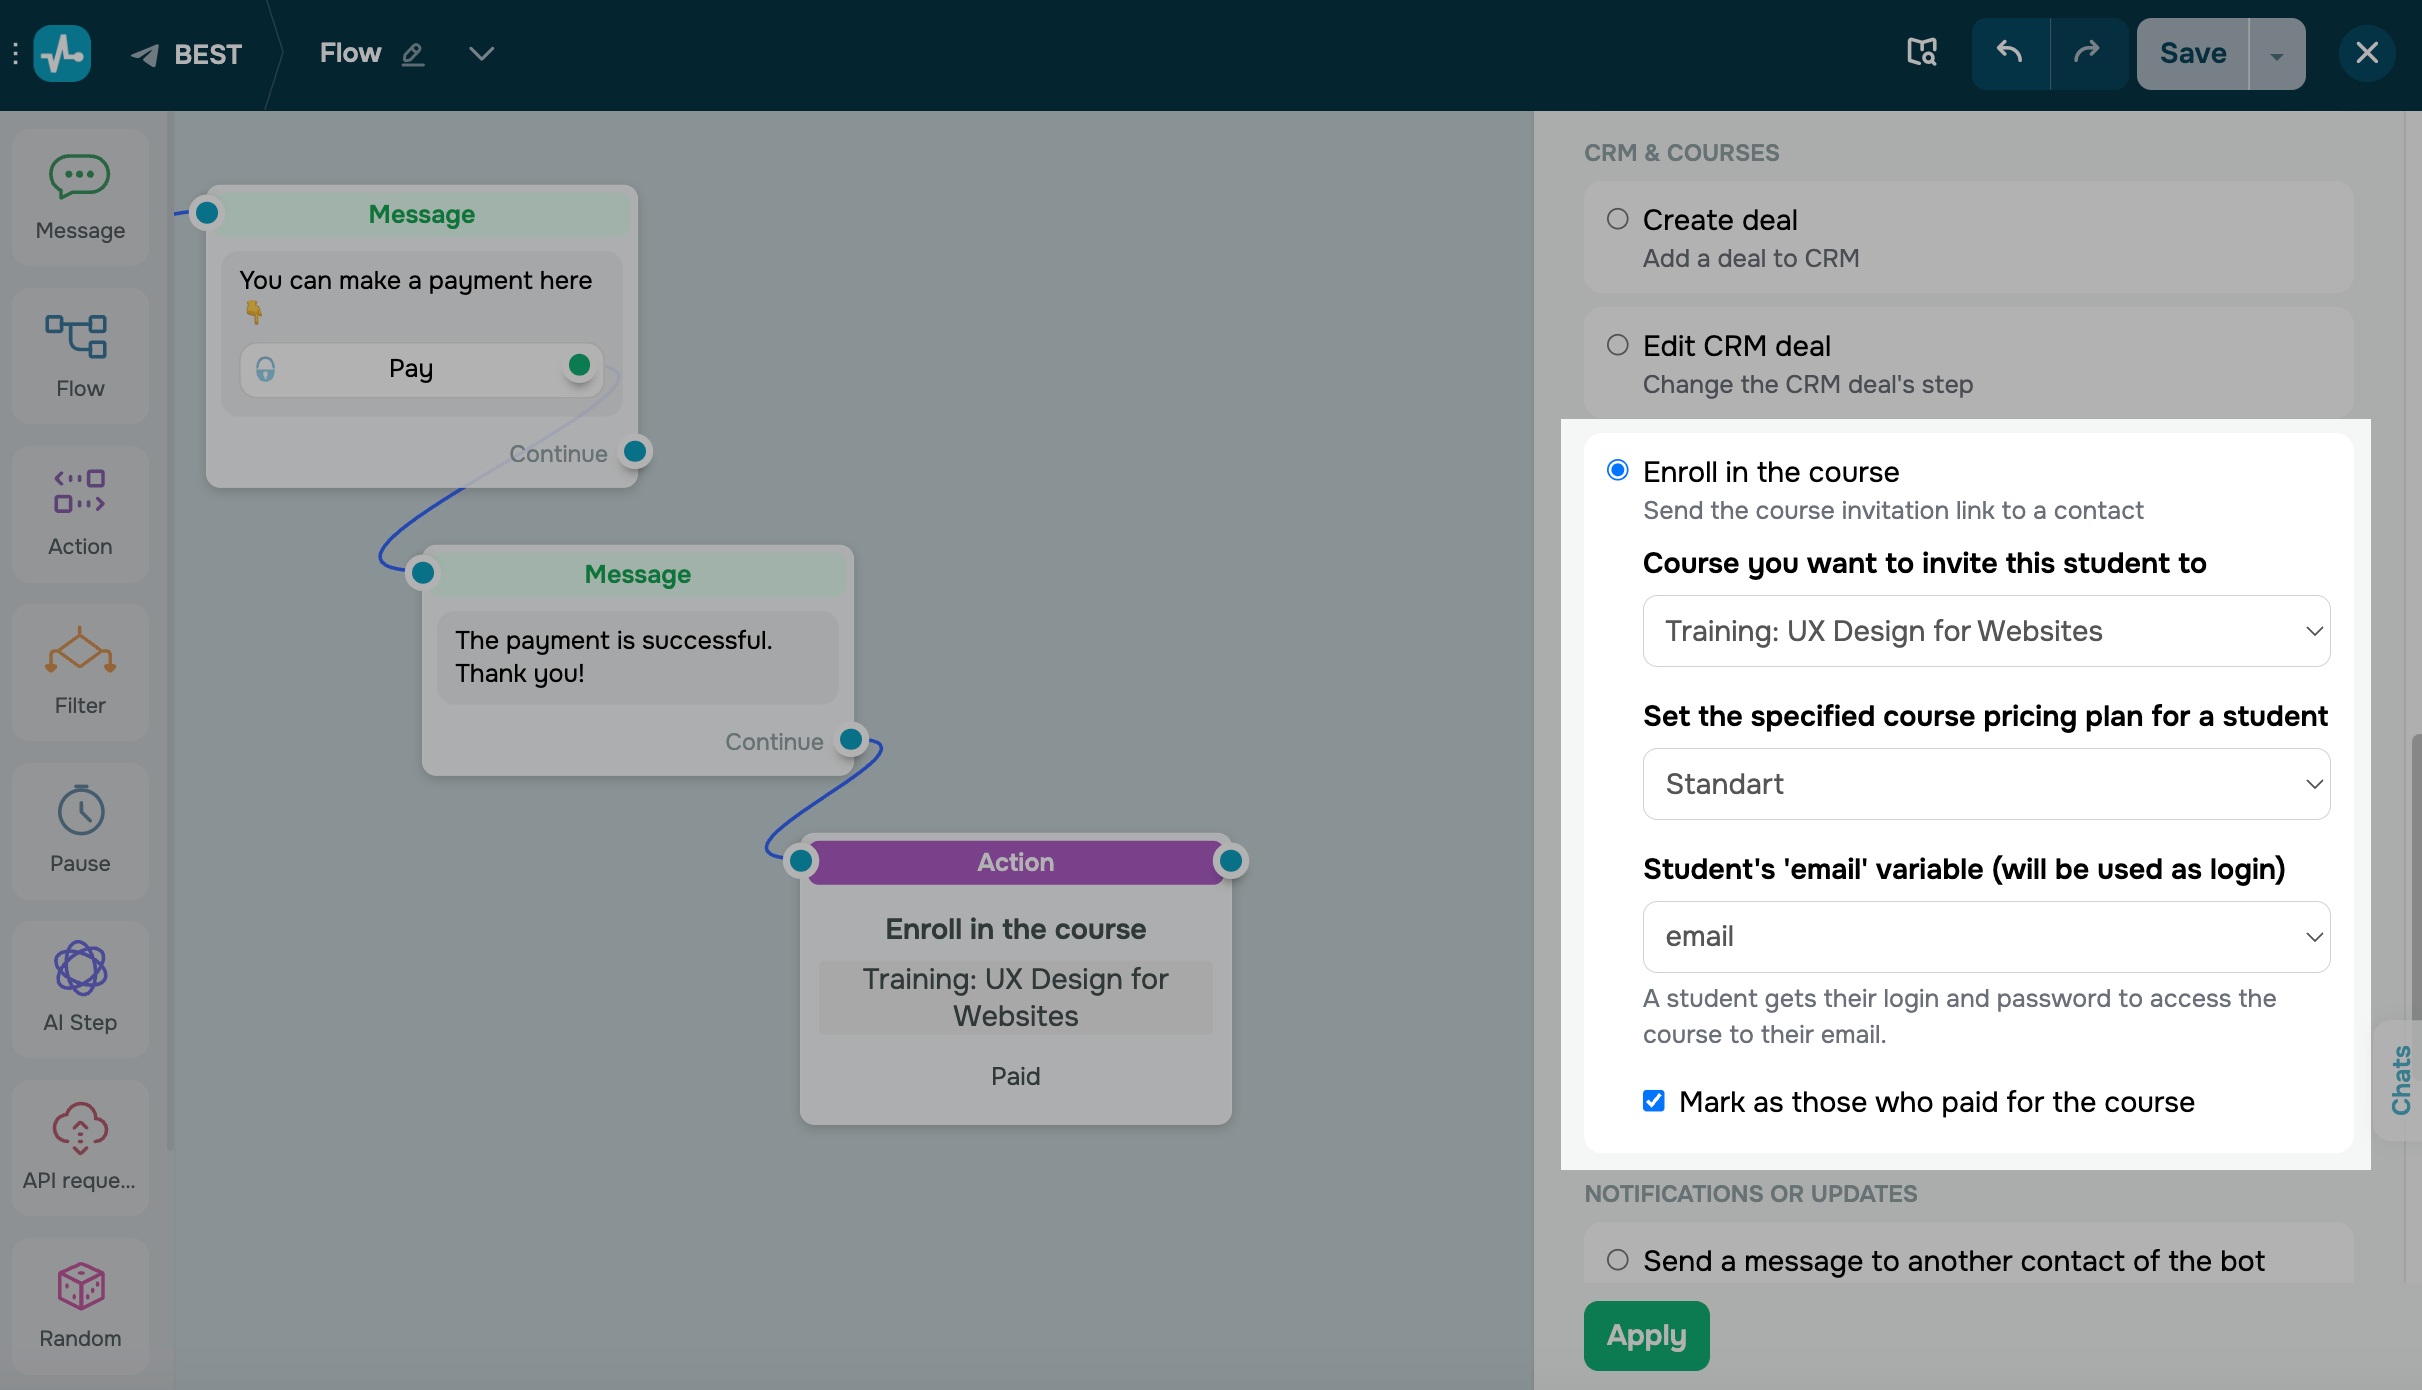
Save your flow.
Using Automation
You can add students to your course automatically once they pay. To do this, set up a pipeline in the CRM system and create a flow in the Automation section.
Set up a CRM pipeline
Go to the CRM section, and open your course pipeline. Click Settings.
Select the pipeline stages where your deals will be saved based on their payment status.

Create a flow in Automation
Go to the Automation section, and click Create flow to develop your post-payment flow.
Read also: How to work with the A360 builder.
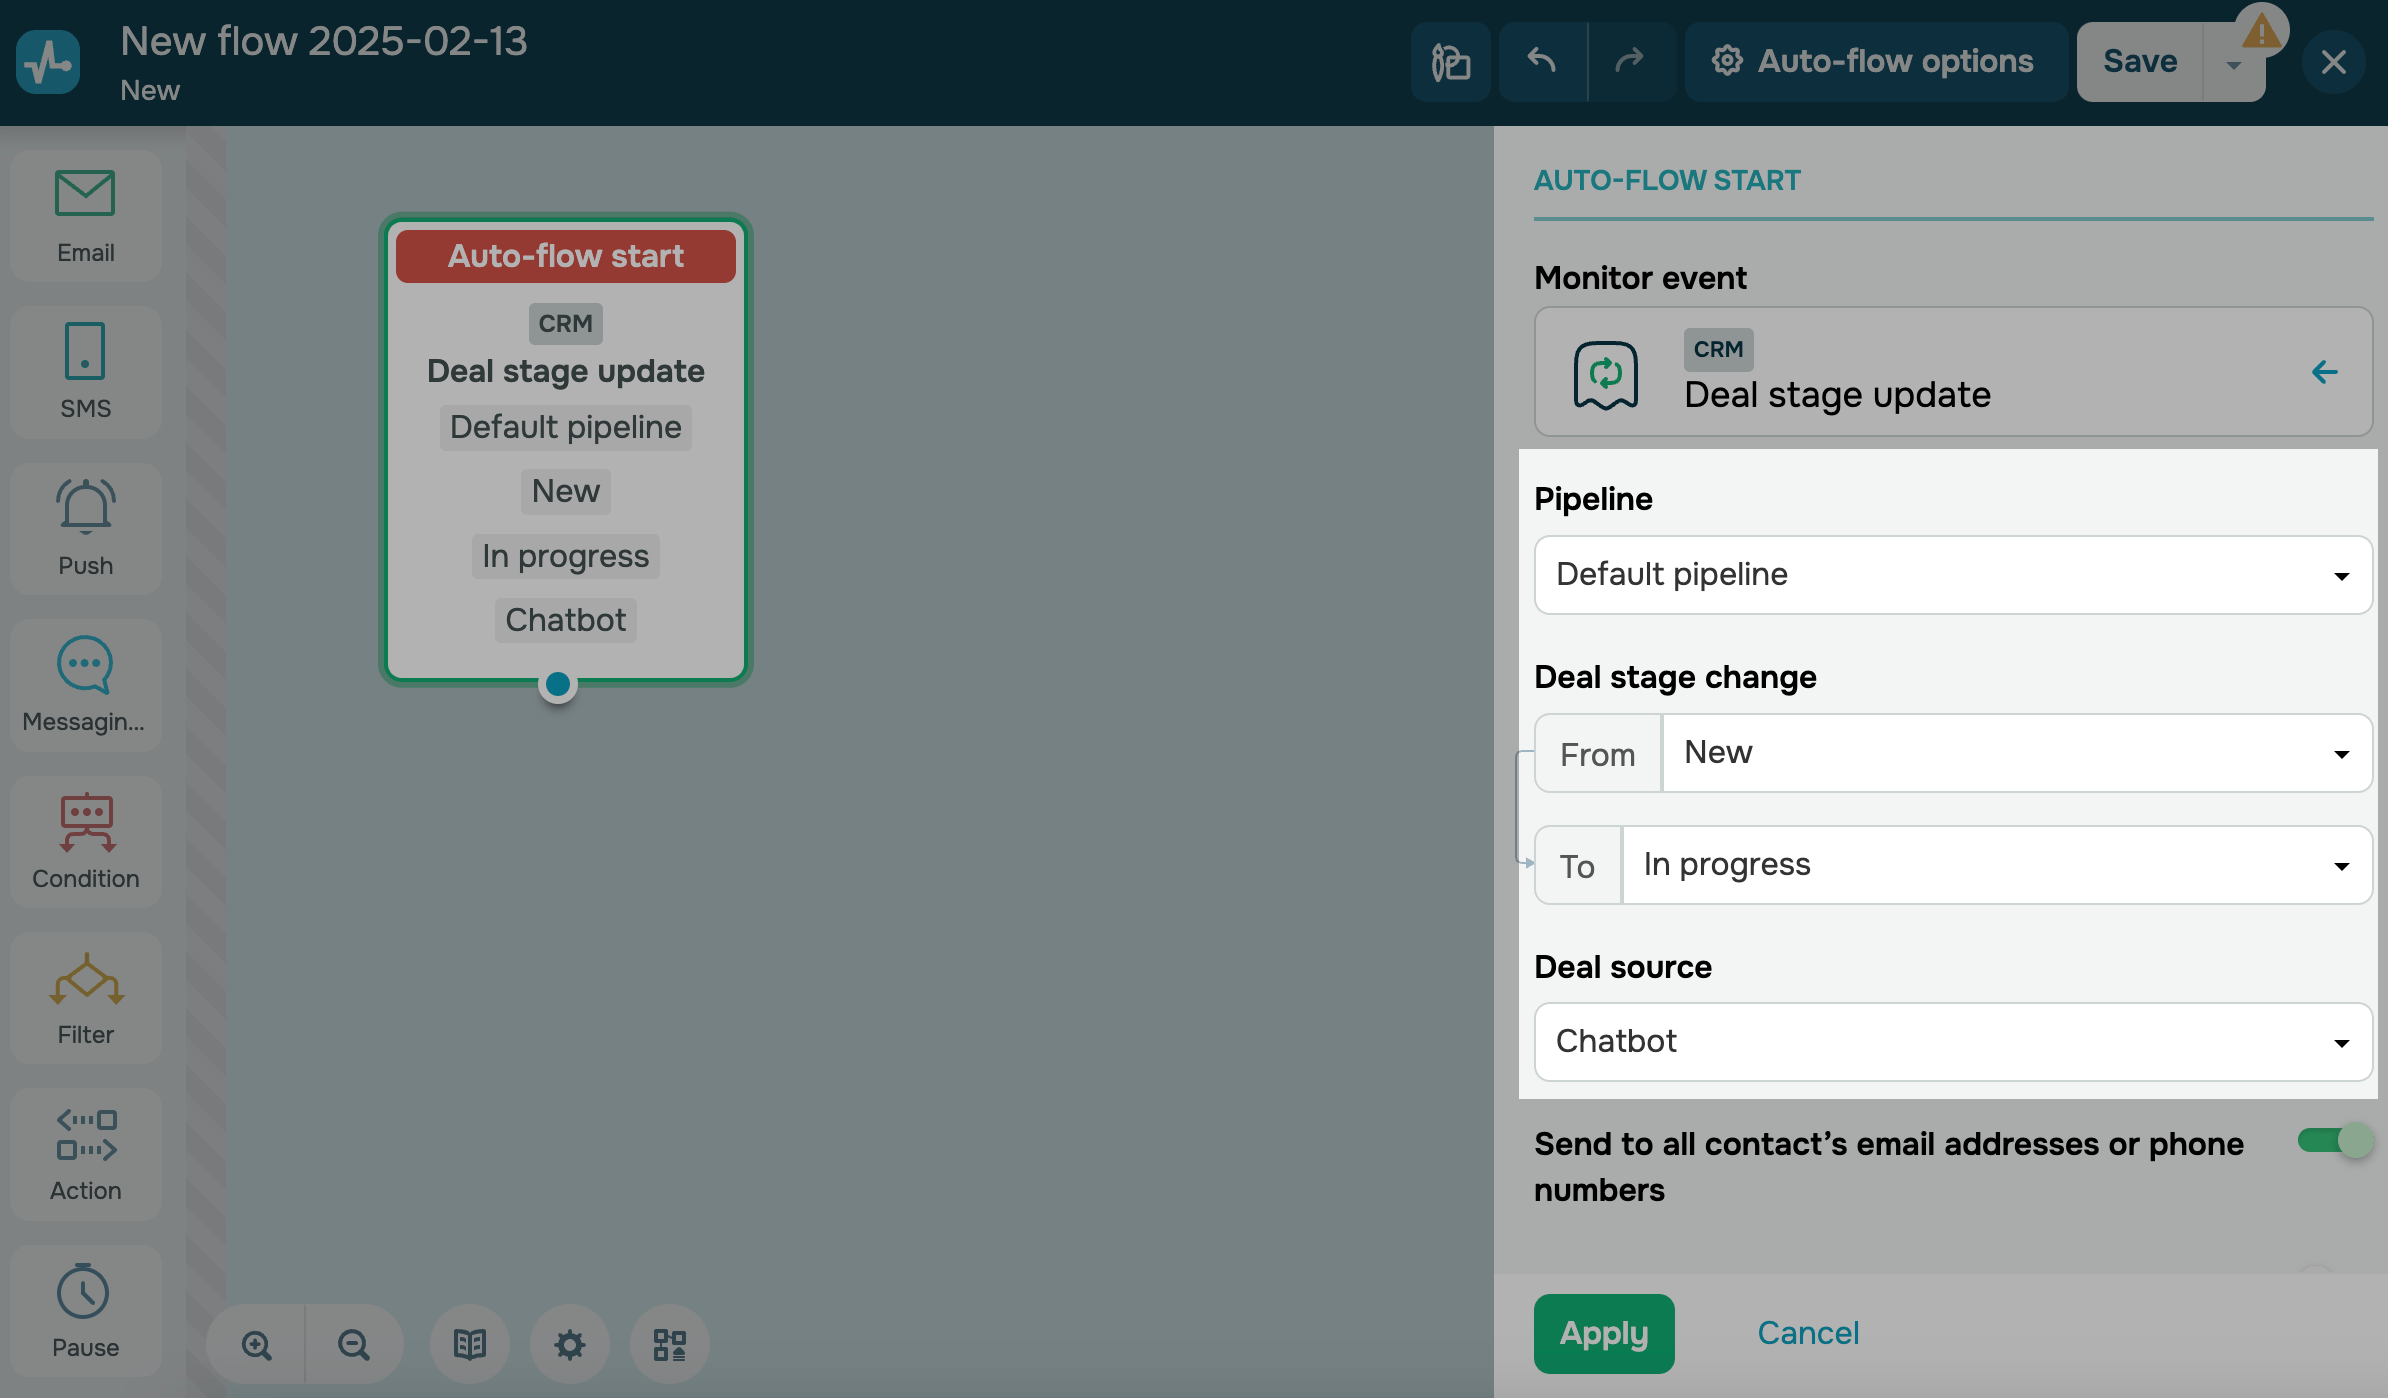
In your start element, click CRM, and select Deal stage update.
Select the pipeline linked to your courses. In the From and To fields, select the statuses respectively: from unpaid to paid.
In the Deal source field, you can select the Chatbots or All sources.
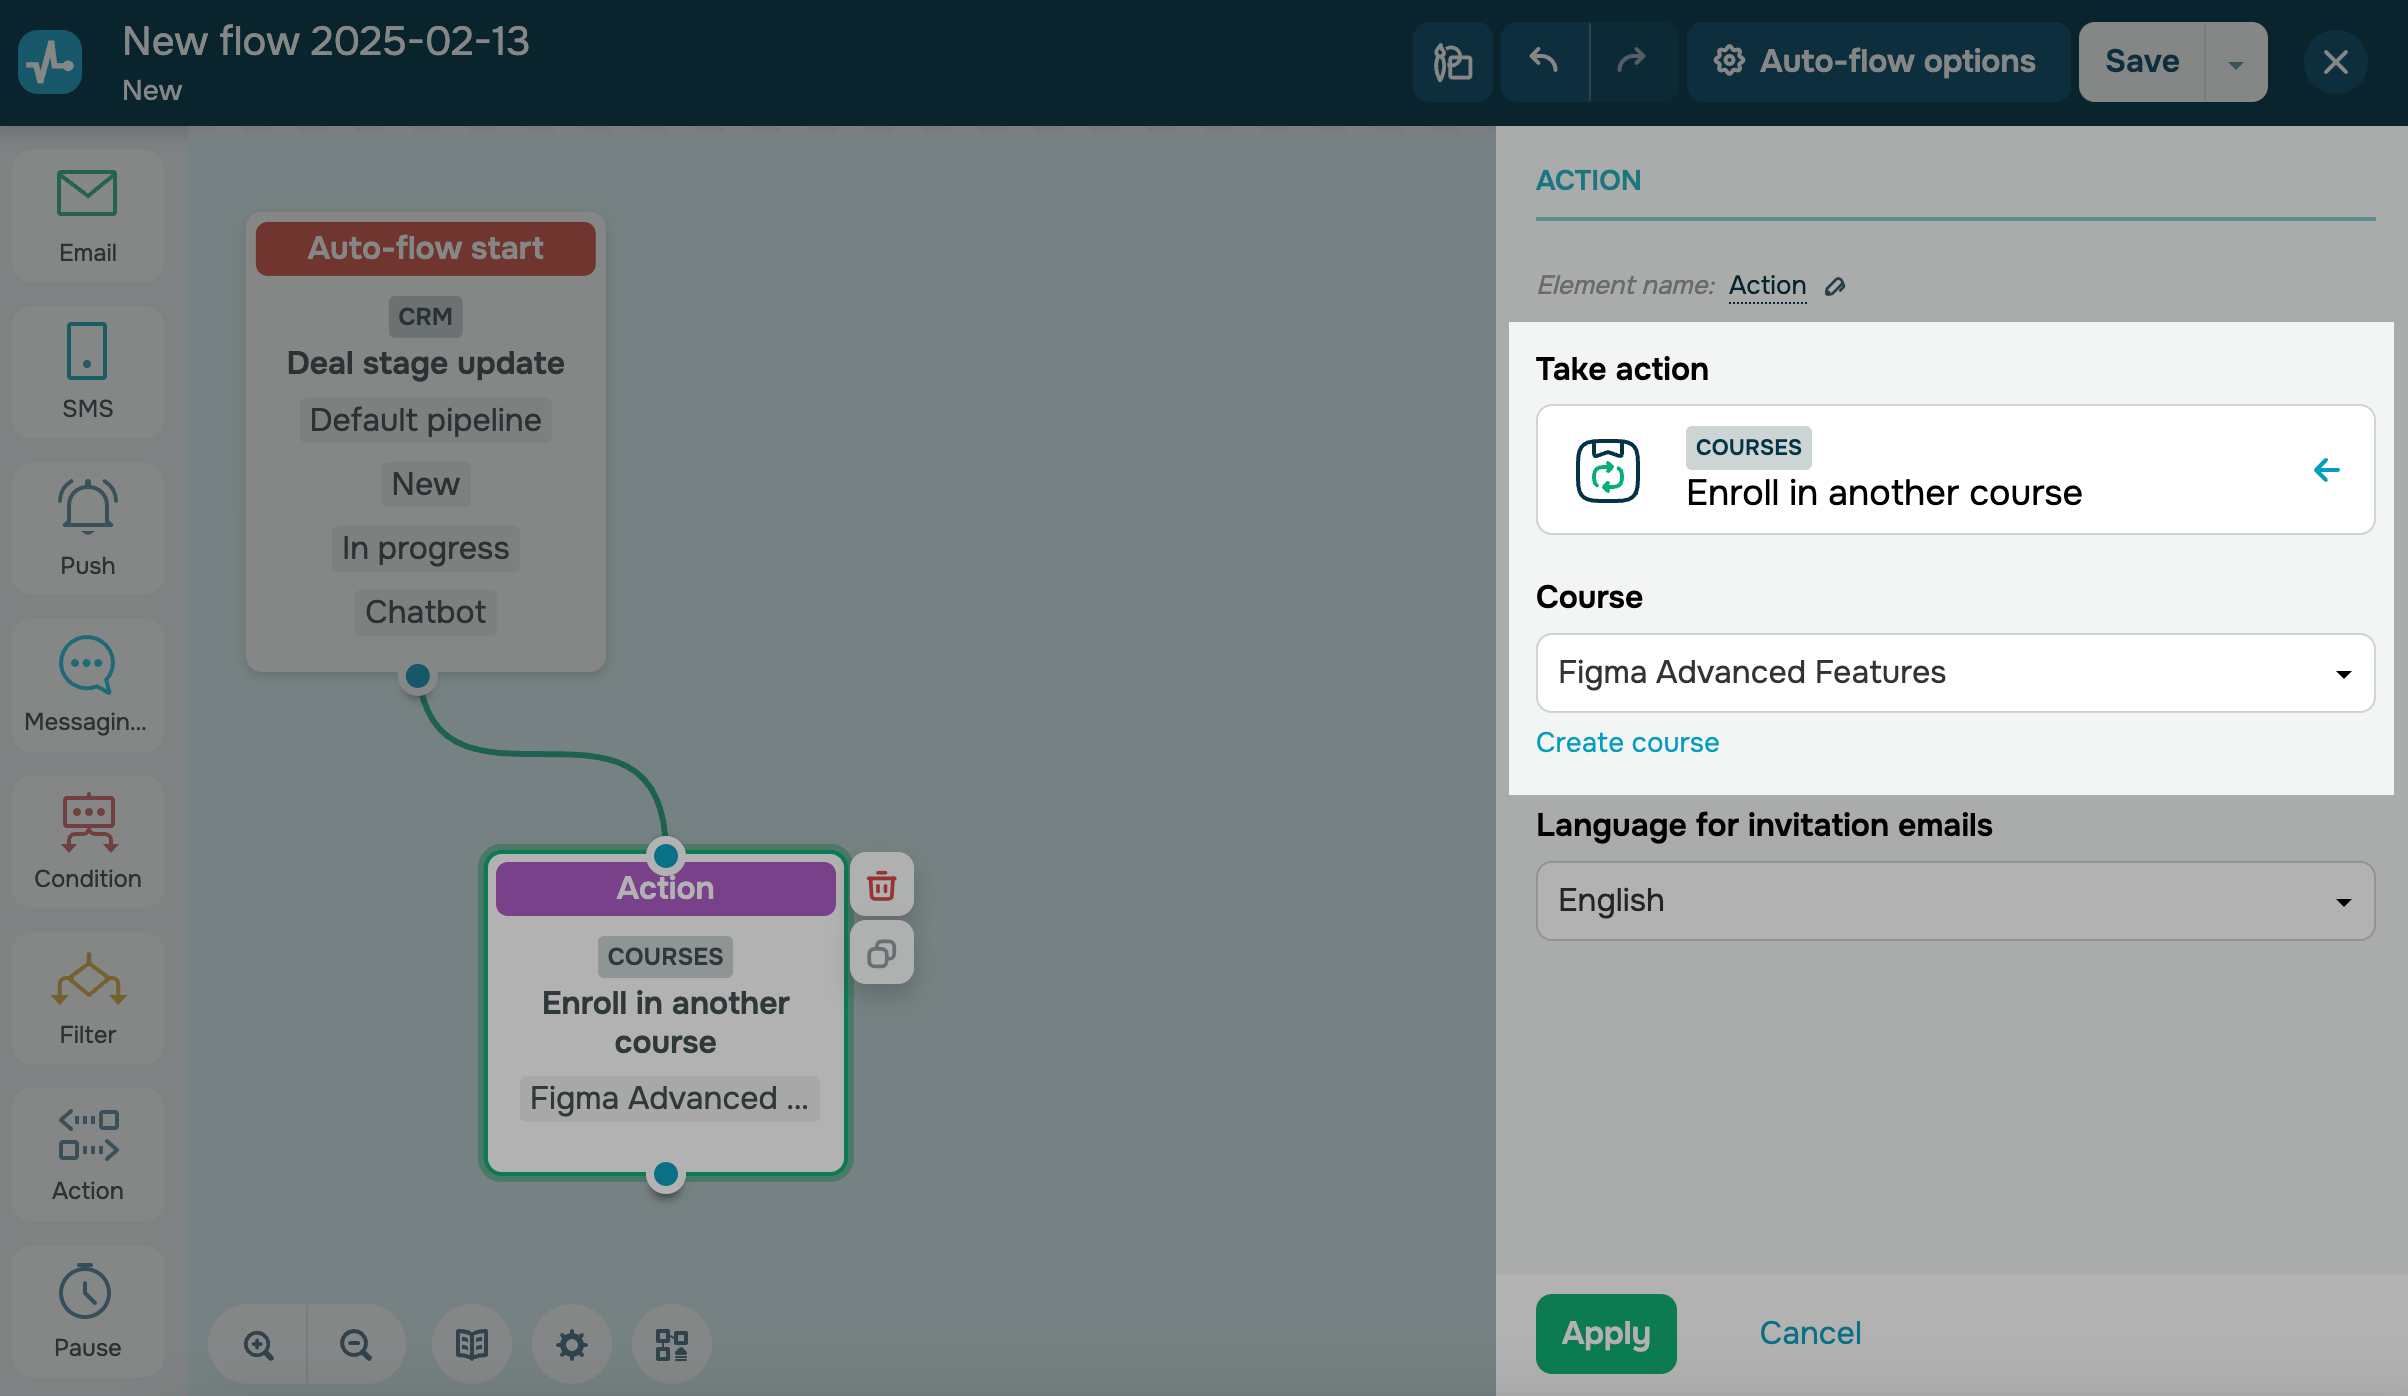
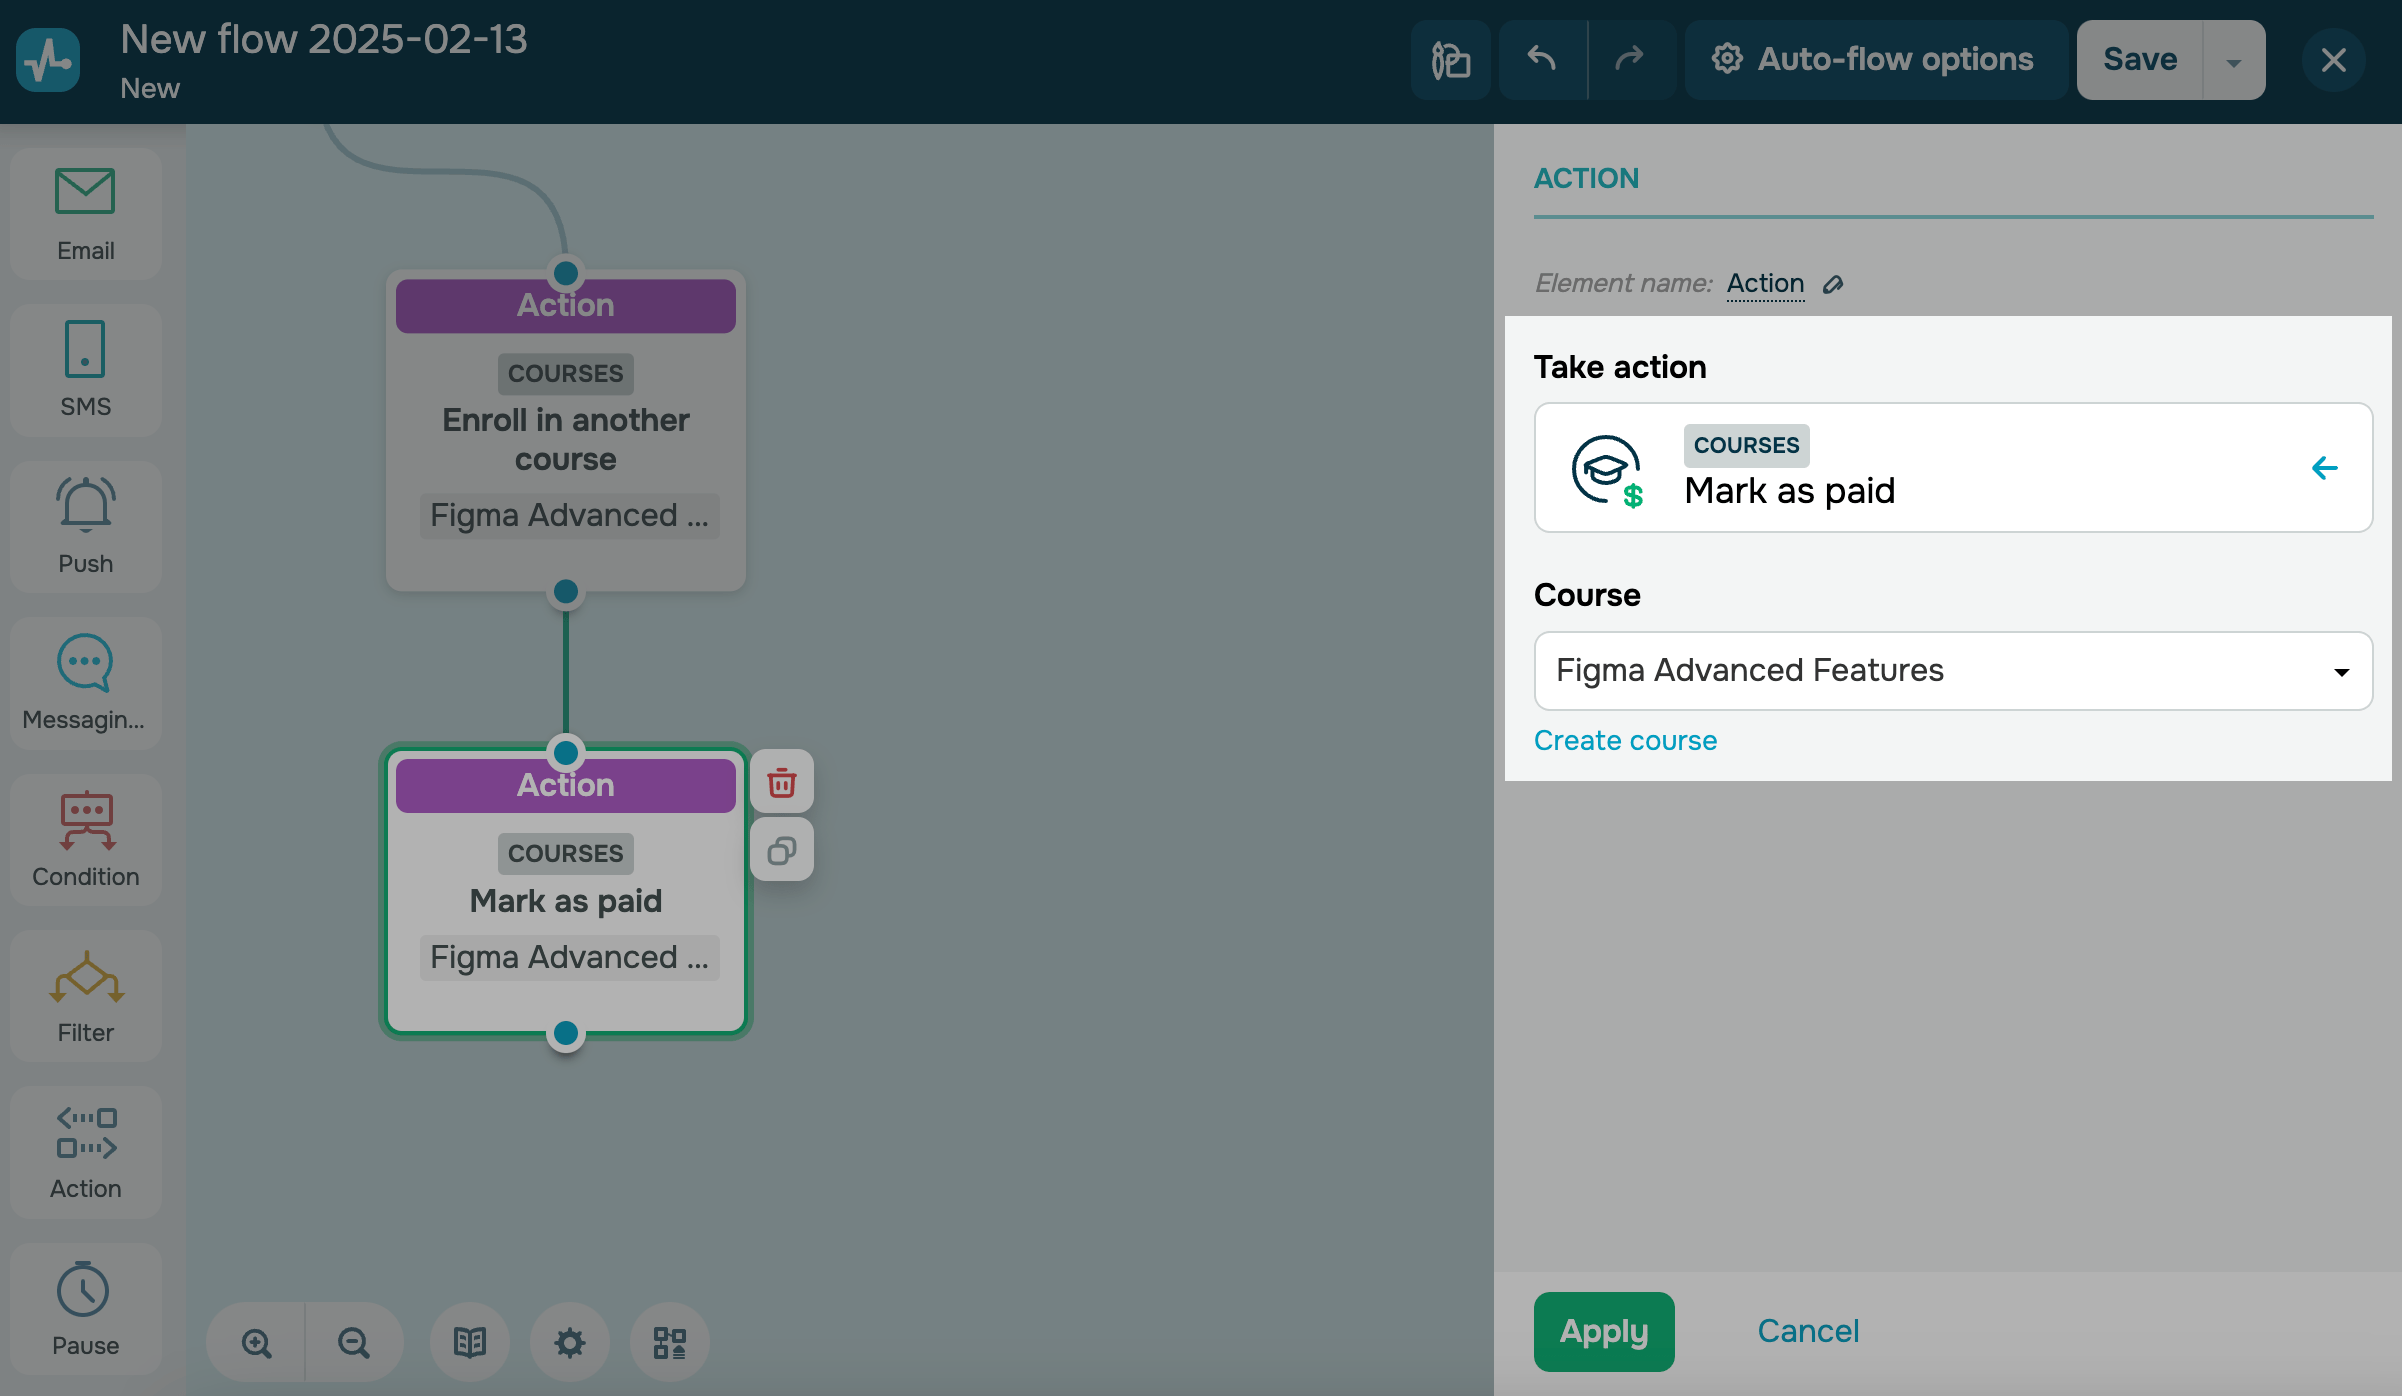
You need to add two Action elements to automatically enroll students who have successfully made a payment via your chatbot.
Add the Action element, and in the Cources section, select the Enroll to another course option.
Select a course from the list.
Add the Action element next, and in the Courses section, select the Mark as paid option. Select a course from the list.
Once you create a flow in Automation, save and launch it.
You can copy the link to your course enrollment and chatbot payment flow and place it on your website. What’s more, you can also create a chatbot campaign with a button that will launch your automated flow.
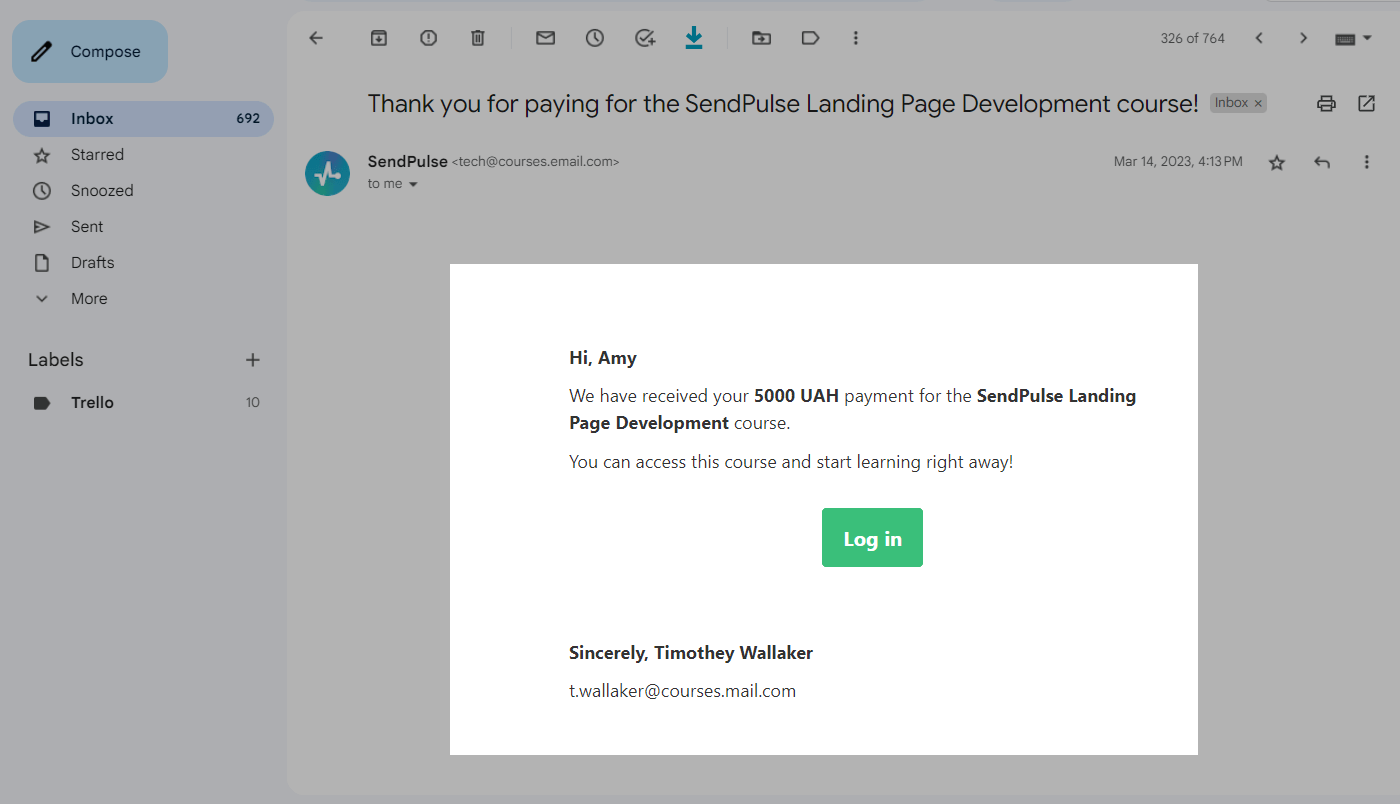
Once you launch your flow, your collected student data will be saved and displayed on your course overview page. Students will receive an invitation with their account login and password to the email address they entered during registration, notifying them that their payment has been successful. They will be able to start your course in their student account or a mobile app.
Last Updated: 03.07.2024
or