Сonnect SendPulse's MCP server to ChatGPT
ChatGPT is an AI assistant developed by OpenAI with support for MCP integrations. Once you connect SendPulse's MCP server to it, you will be able to manage your SendPulse account directly from a ChatGPT chat using natural-language requests.
Let's talk about how to connect SendPulse's MCP server to ChatGPT.
To learn more about SendPulse's MCP server and how it works, see MCP basics.
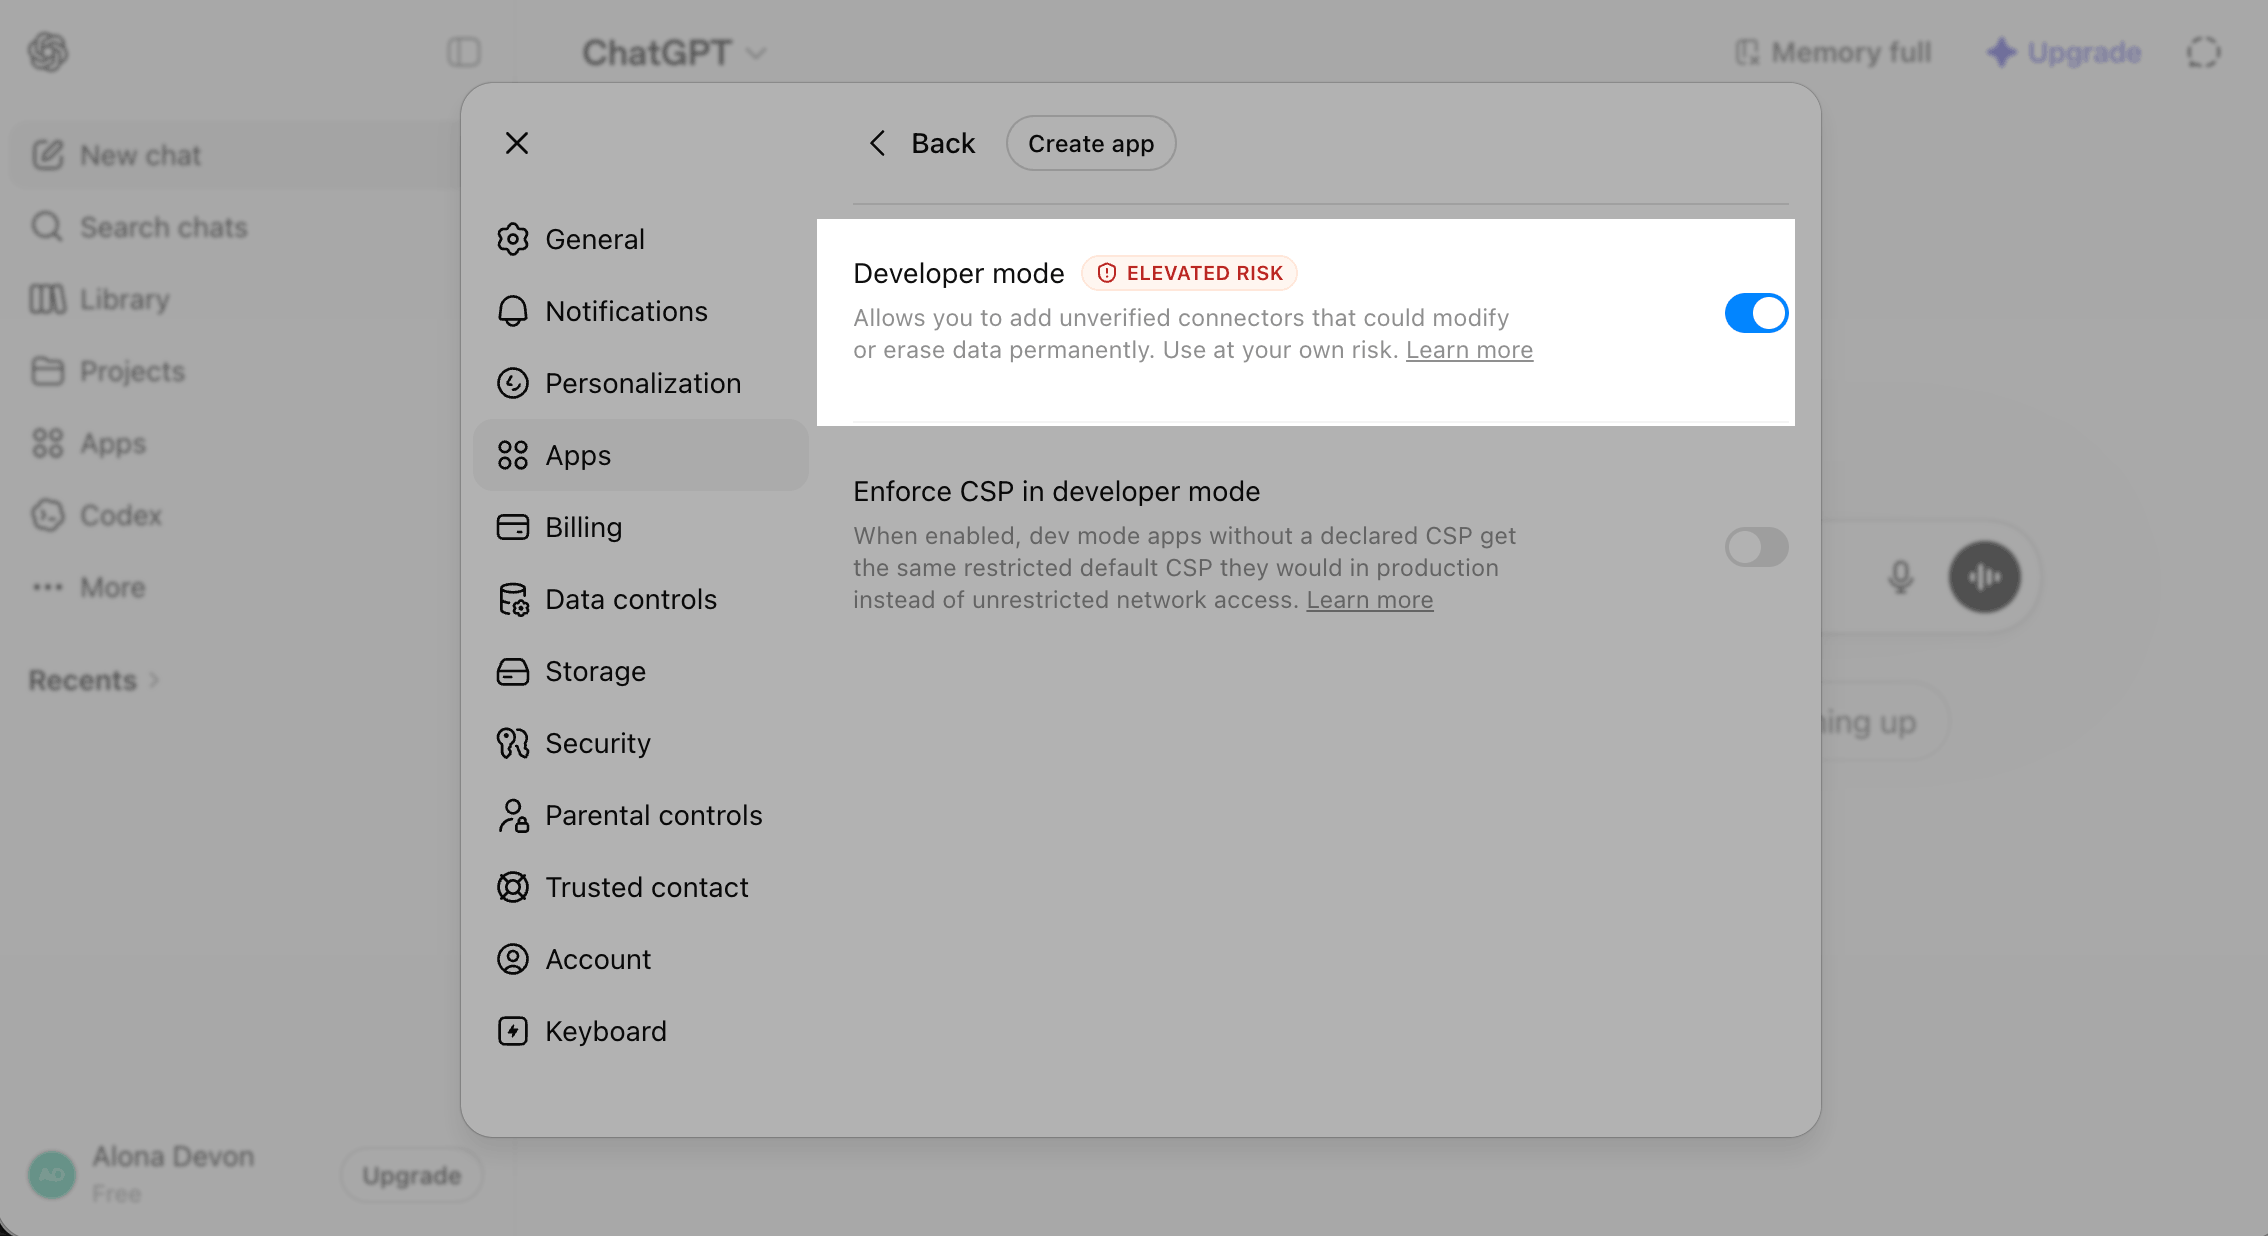
Enable developer mode
In the ChatGPT app, click your profile picture. Go to Settings > Apps > Advanced settings and turn on the Developer mode toggle.
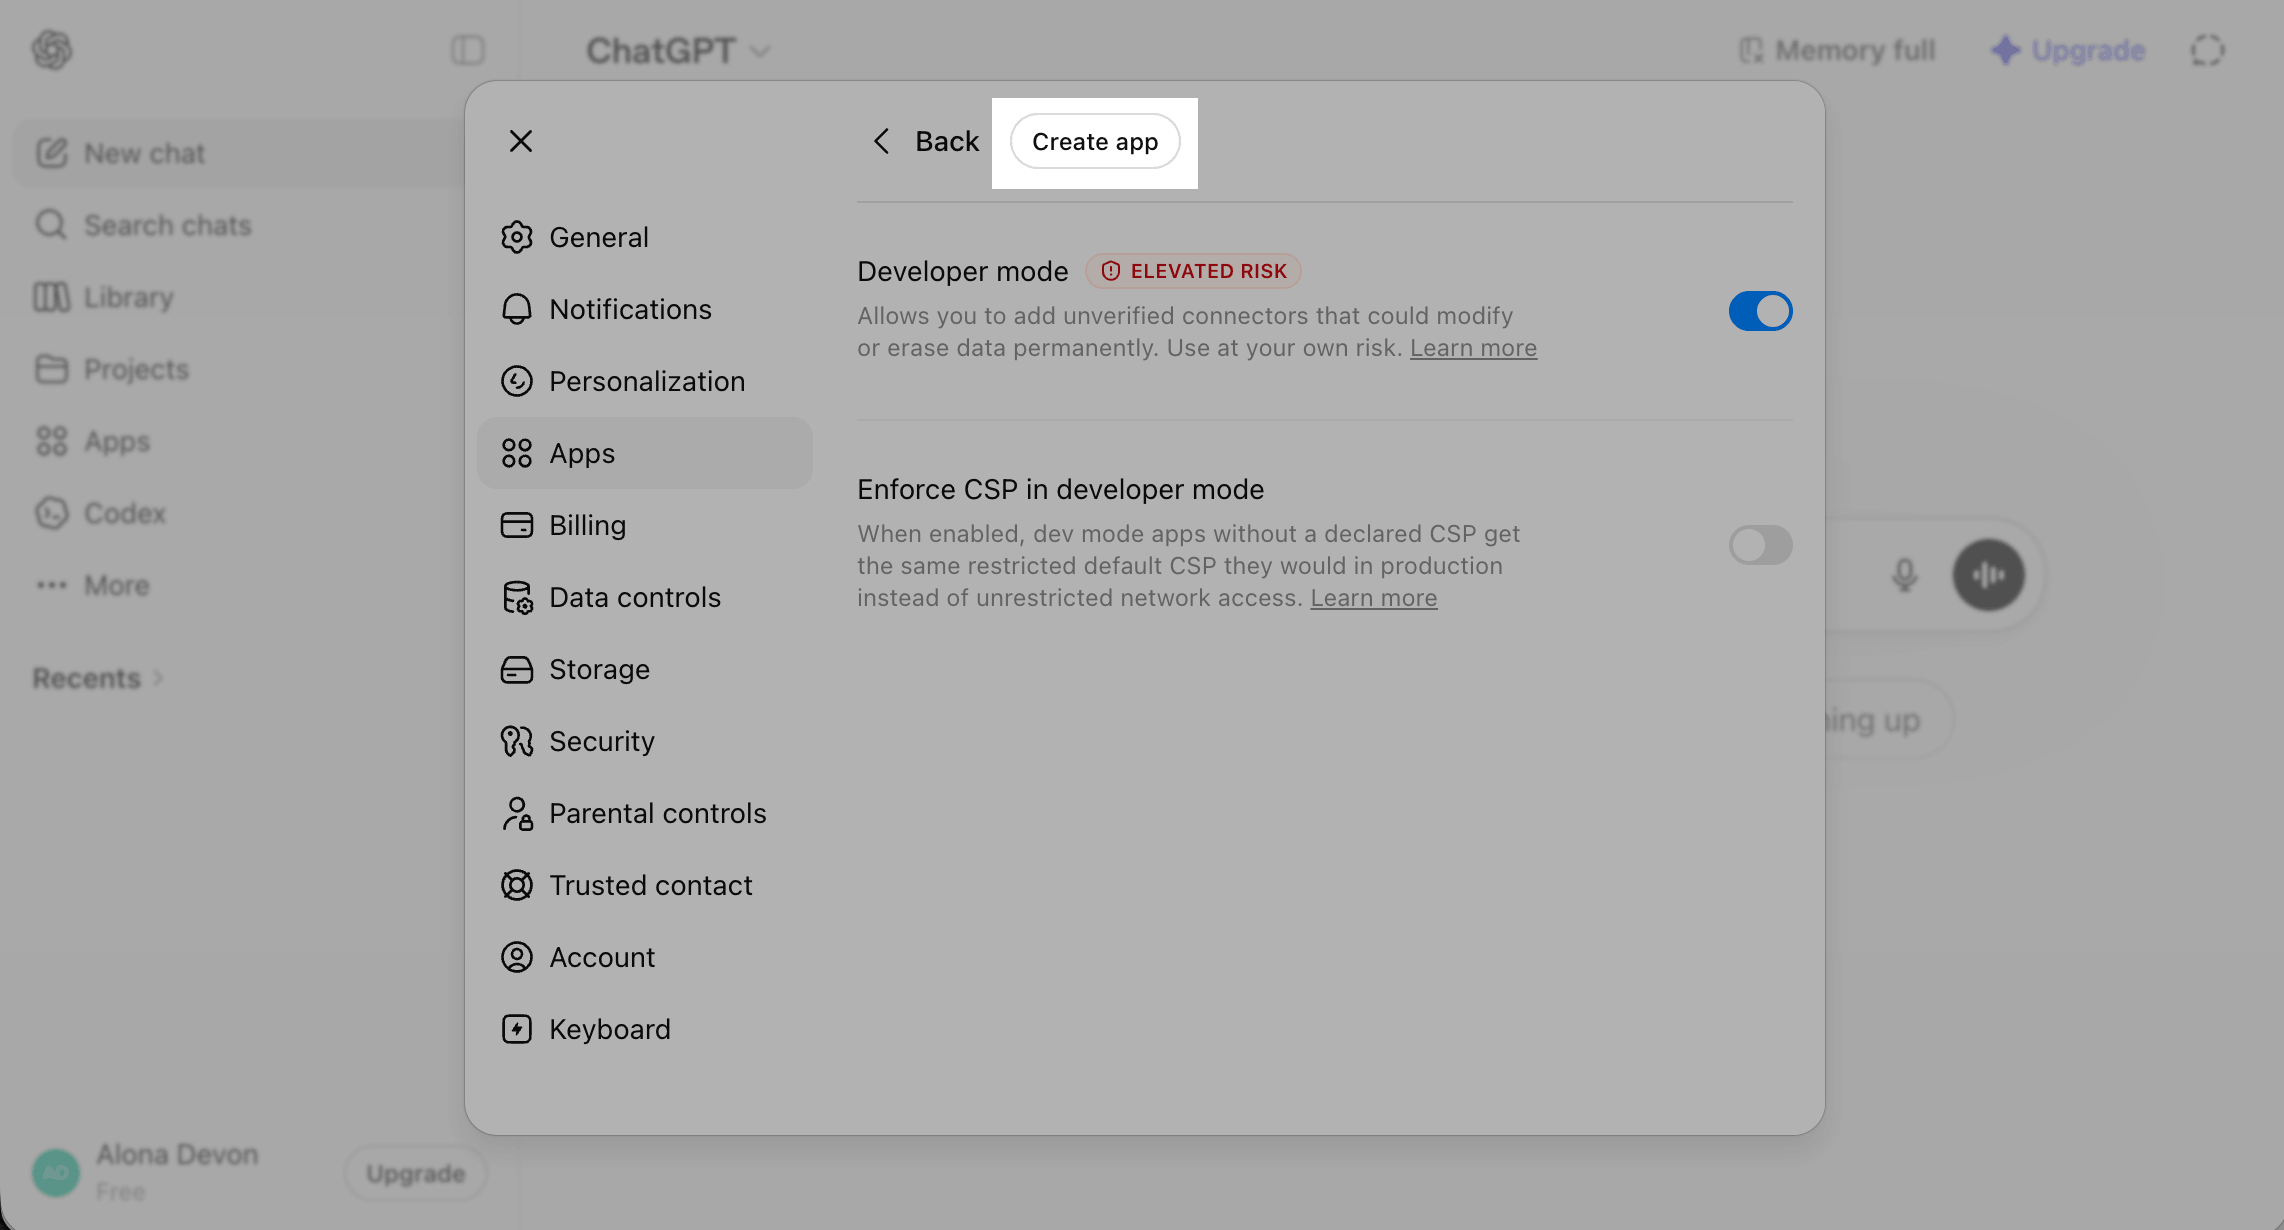
Add SendPulse’s MCP server
On the same page, click Create app.
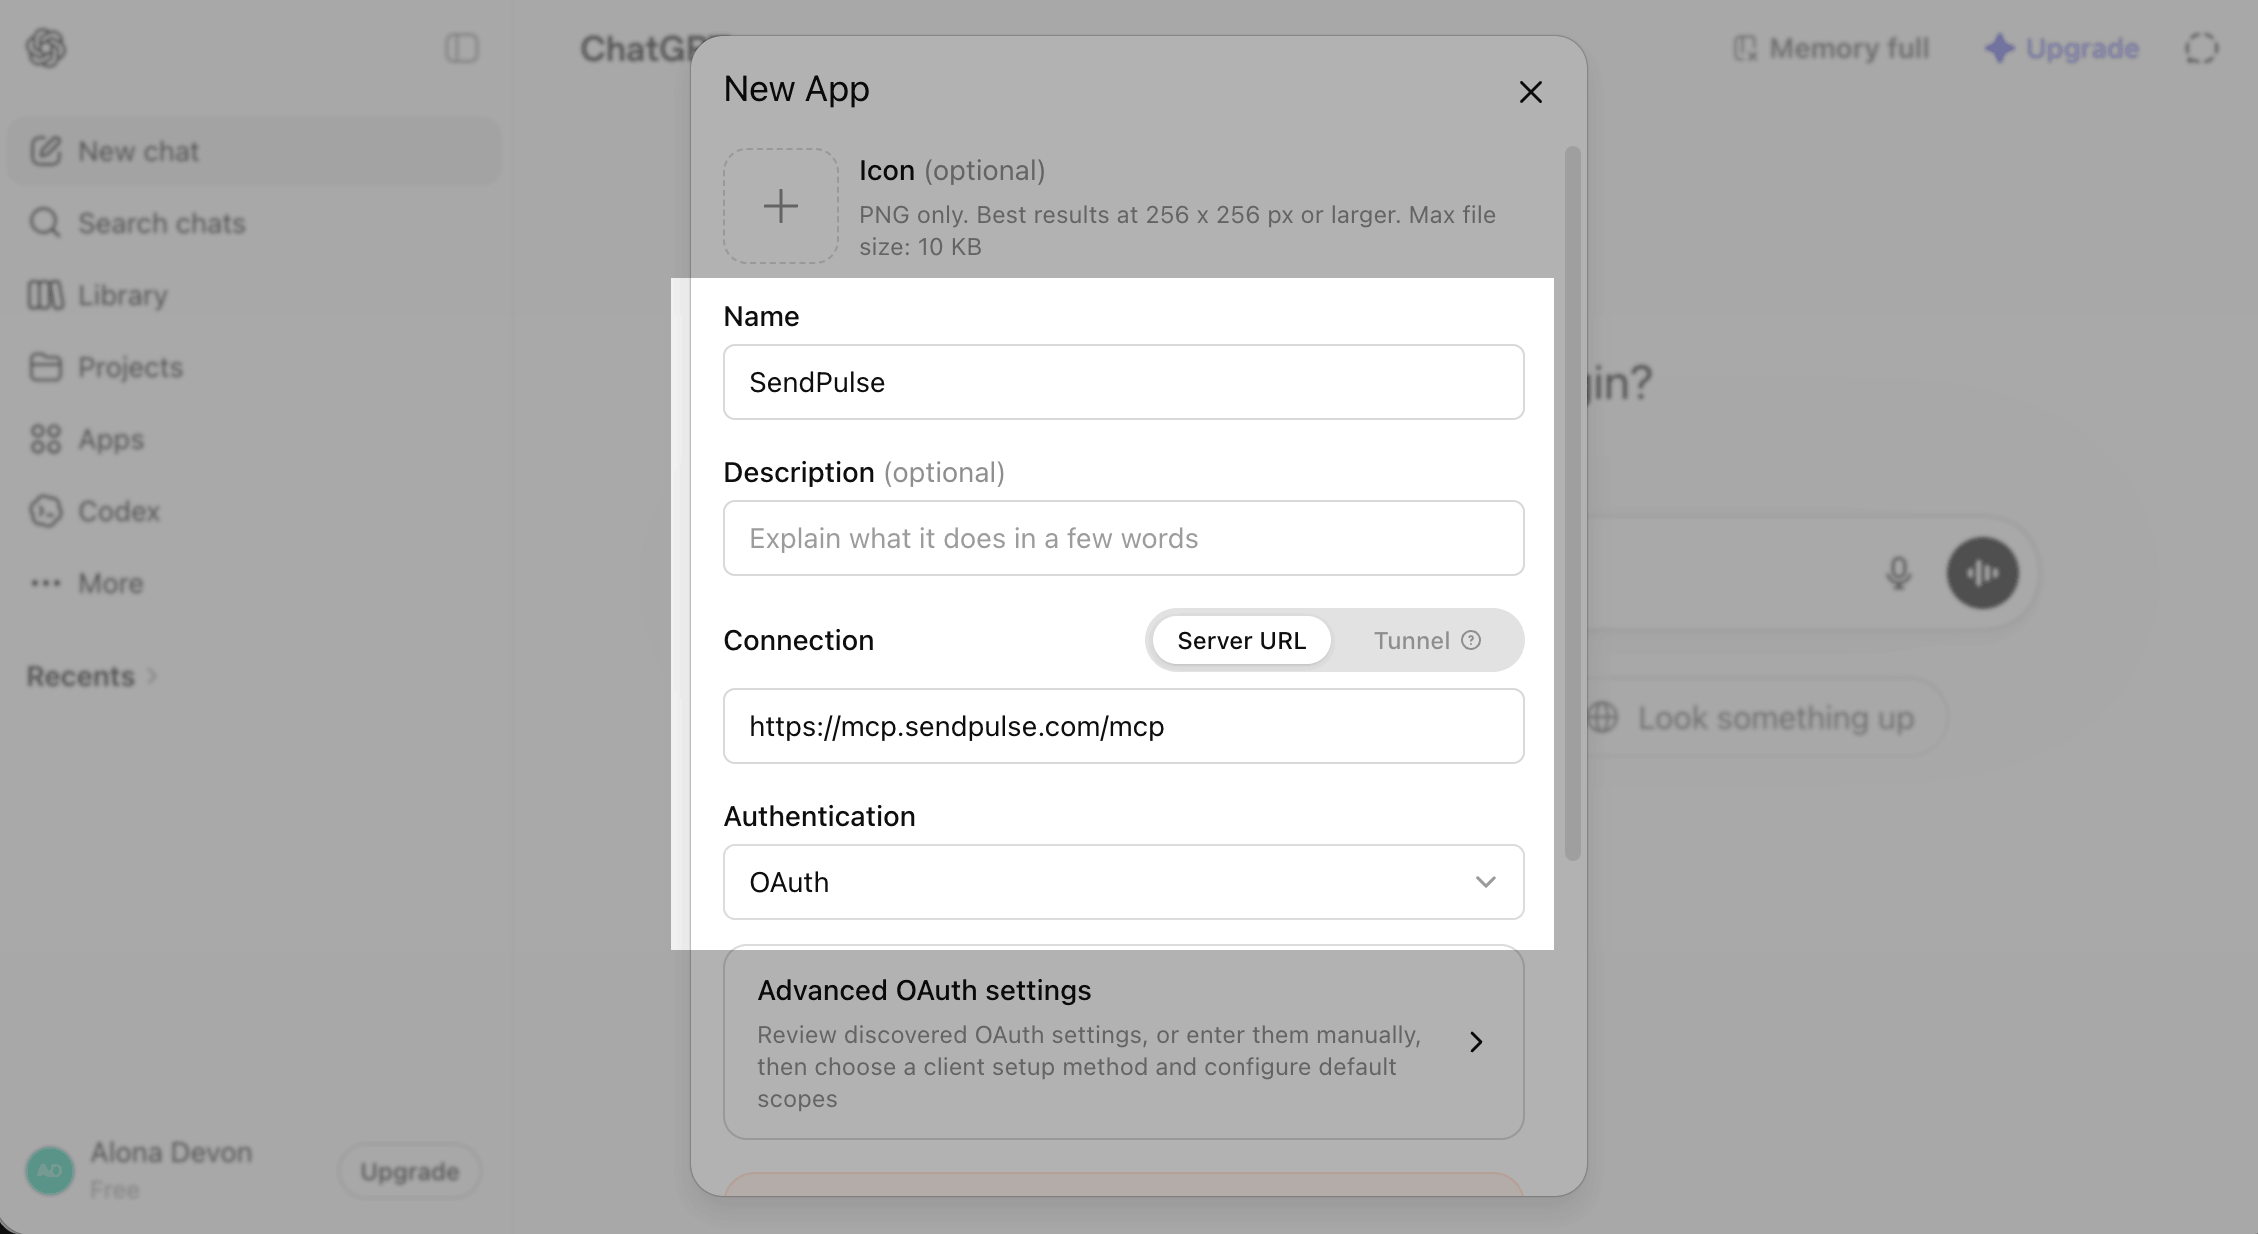
In the window that appears, fill in the fields:
| Name | Enter a custom app name using Latin characters so that you can quickly find it on the list. |
| Connection | Paste SendPulse's MCP server link: https://mcp.sendpulse.com/mcp. To find the link, log in to your SendPulse account. Go to Account settings > API, and in the MCP section, copy the link. |
| Authentification | Select OAuth to authenticate with your login credentials. |
Select the checkbox to accept the app’s terms and click Create.
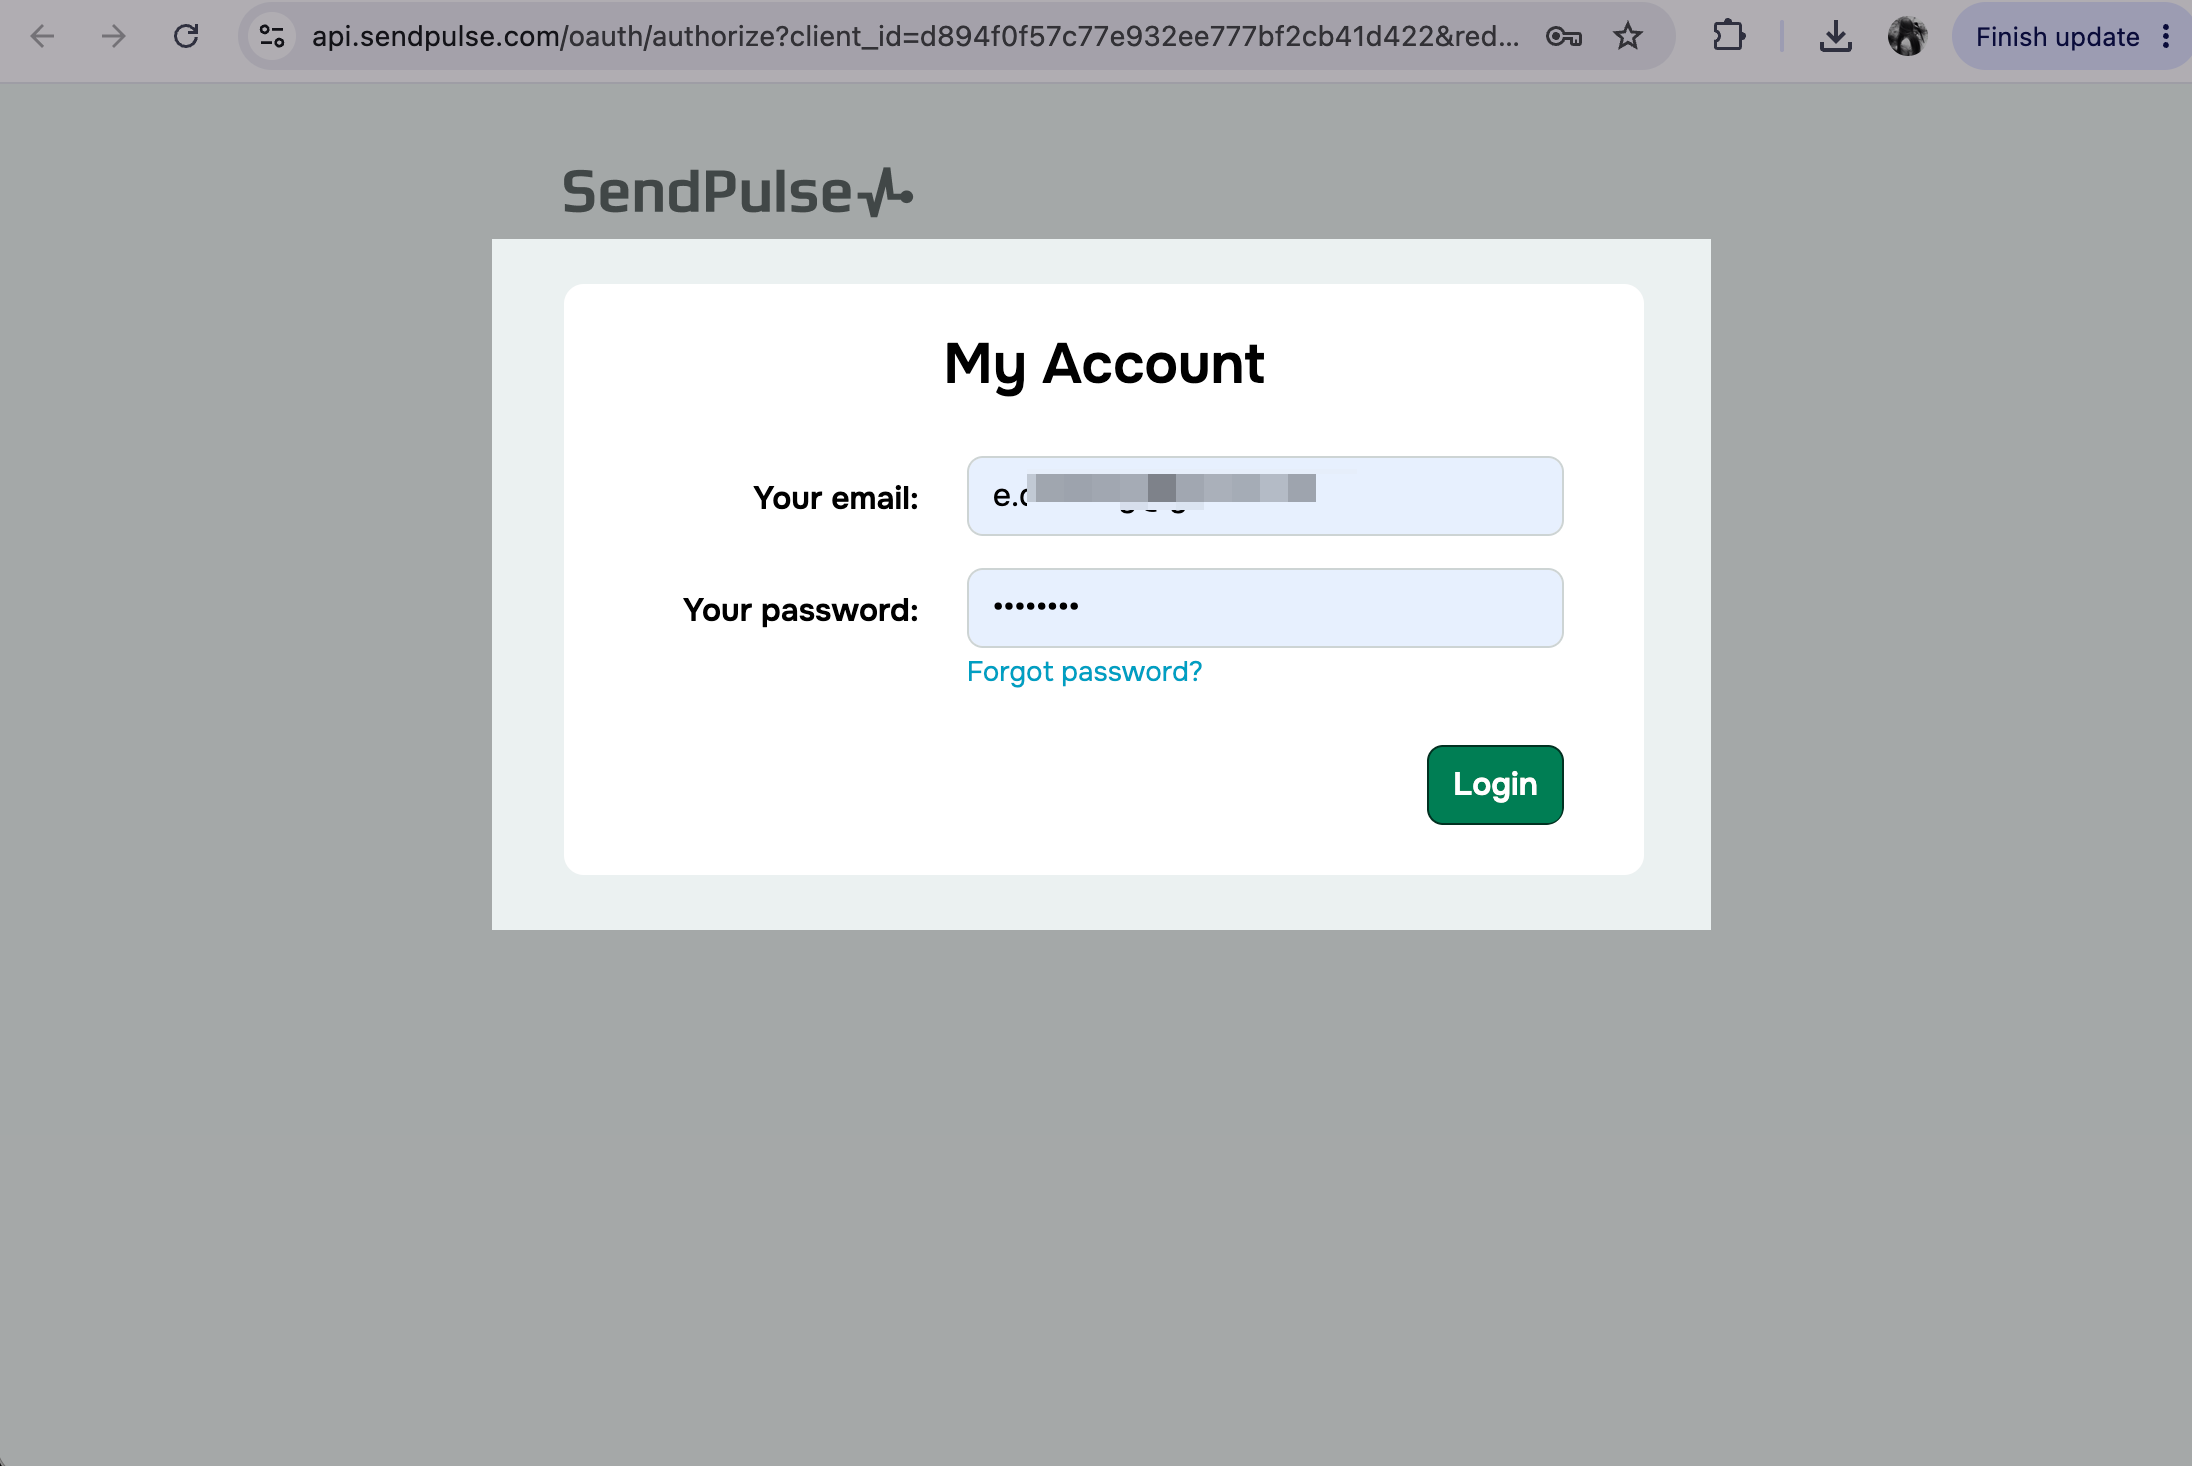
In the modal window click Sign in with SendPulse.
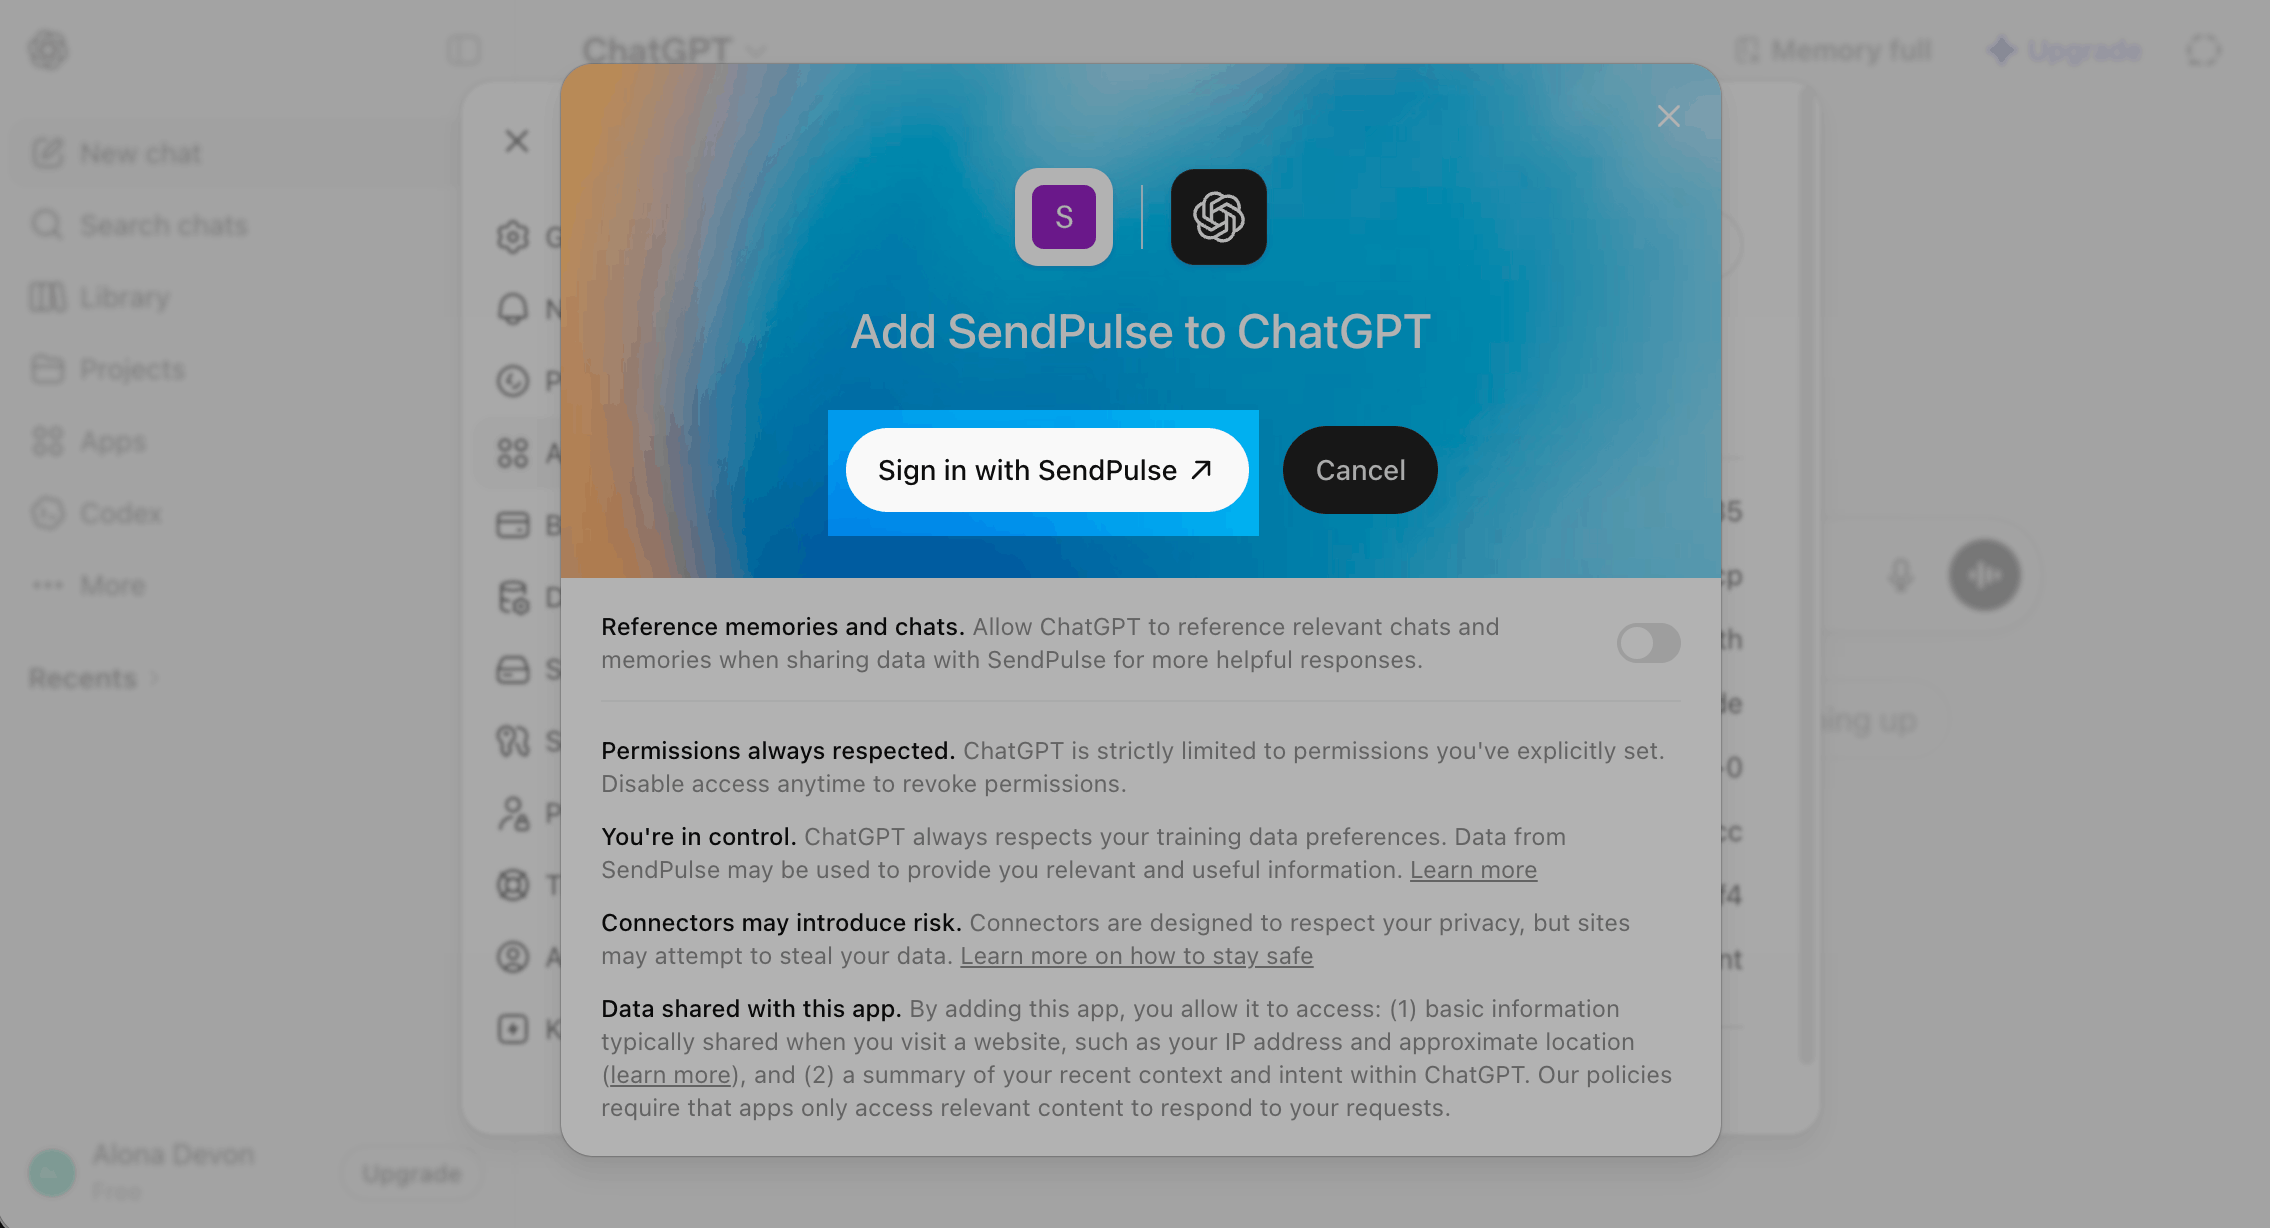
You will be redirected to the SendPulse authentication page in your browser. Enter your login credentials and click Login.
Run actions through MCP
Once you’ve connected the MCP server, you can send messages and take other actions in your SendPulse account using tools.
To see available tools, tool descriptions, and required request parameters, scroll down to the Actions section.
Read more: List of MCP tools.

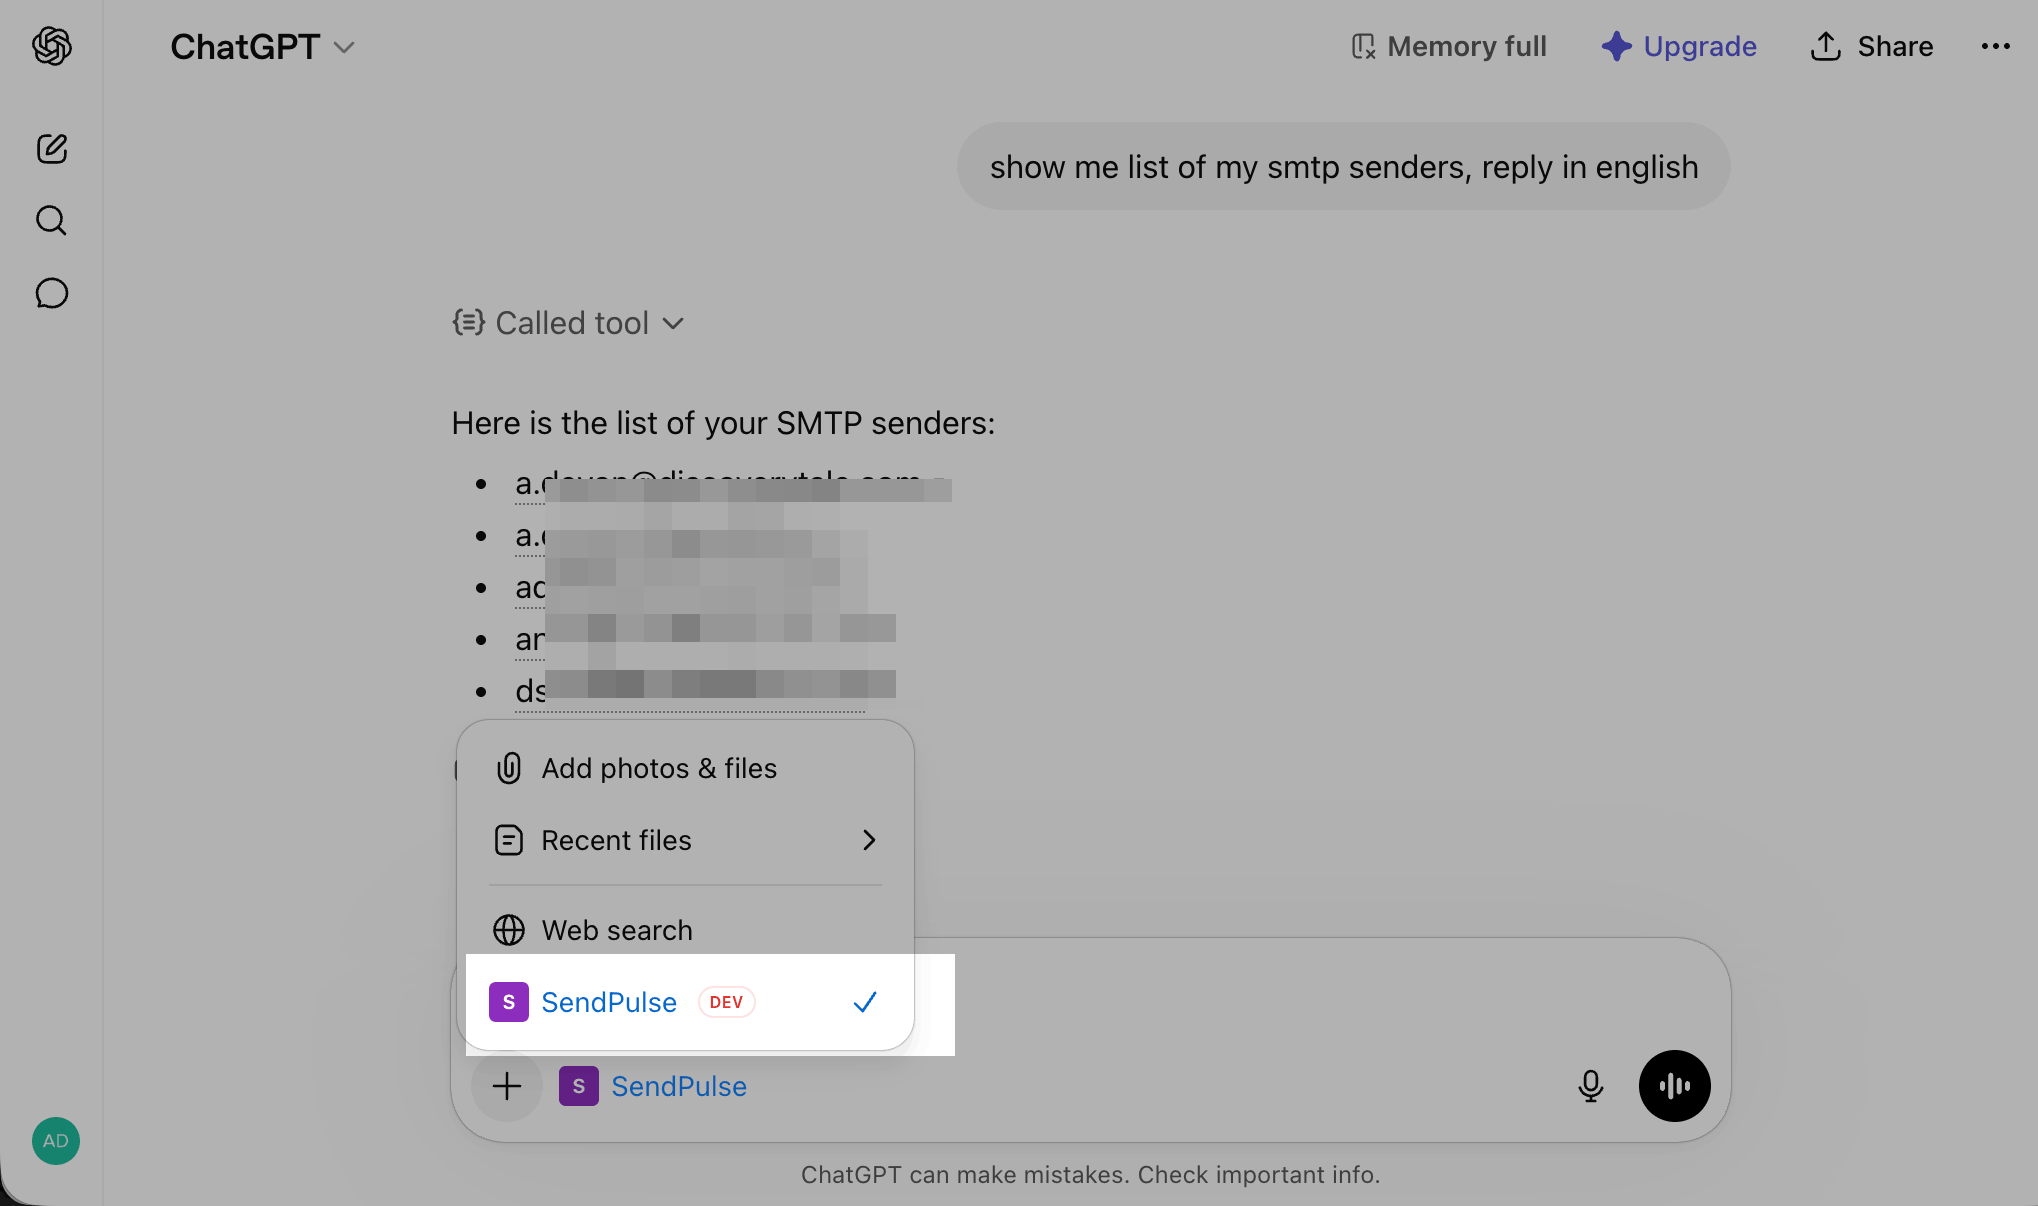
To begin, start a new chat. In the chat, click the + icon and select SendPulse to connect the server.
Enter your request using natural language and send it. If the command is successful, the AI agent will show you the tool it used and the information you asked for. If you requested an action, it will show the action status.
Read more: Chat with your AI assistant.
Last Updated: 10.06.2026
or