How to customize your push notification subscription request window
Site visitors have already gotten used to the usual appearance of request windows and click "Block" out of habit, so SendPulse offers you to customize your request window. Set the appearance of your web push subscription request window in the site settings section.
To set up a custom design for push notifications, go to Push > My websites > Website settings > Subscription Request.
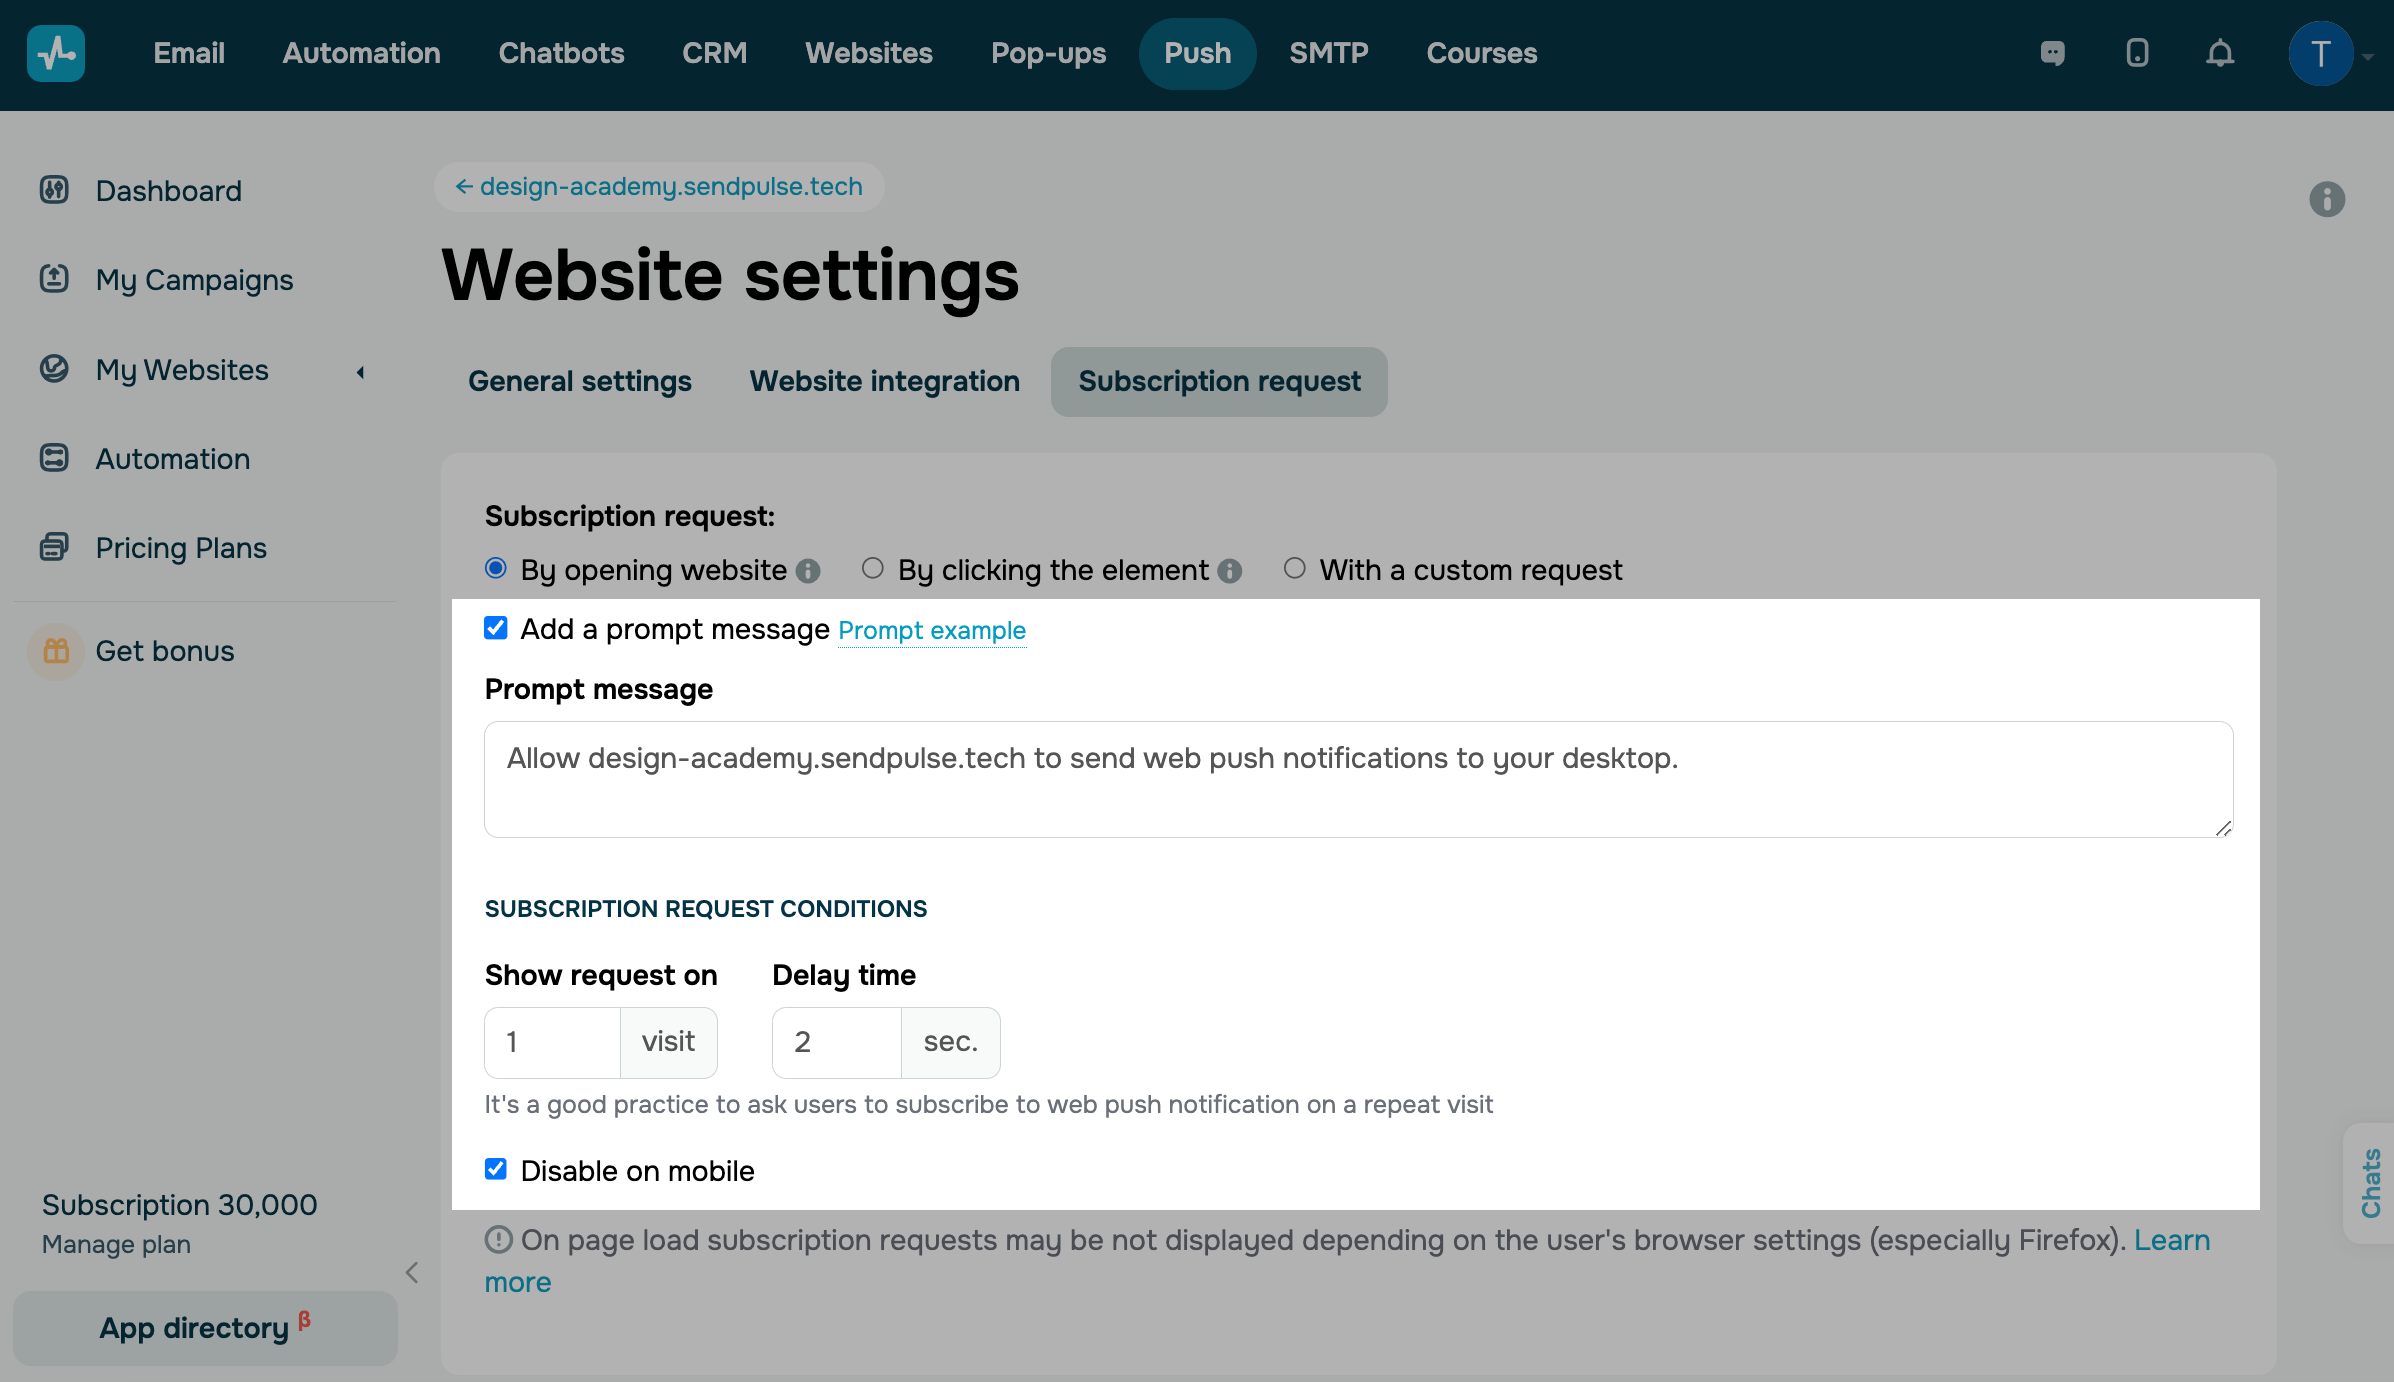
By opening website
To customize the request window that appears when a user visits your site, type in your hint text, and indicate the number of visits and delay time after which you want to display the request.
Mark the Disable on mobile checkbox to hide the subscription request on mobile devices.

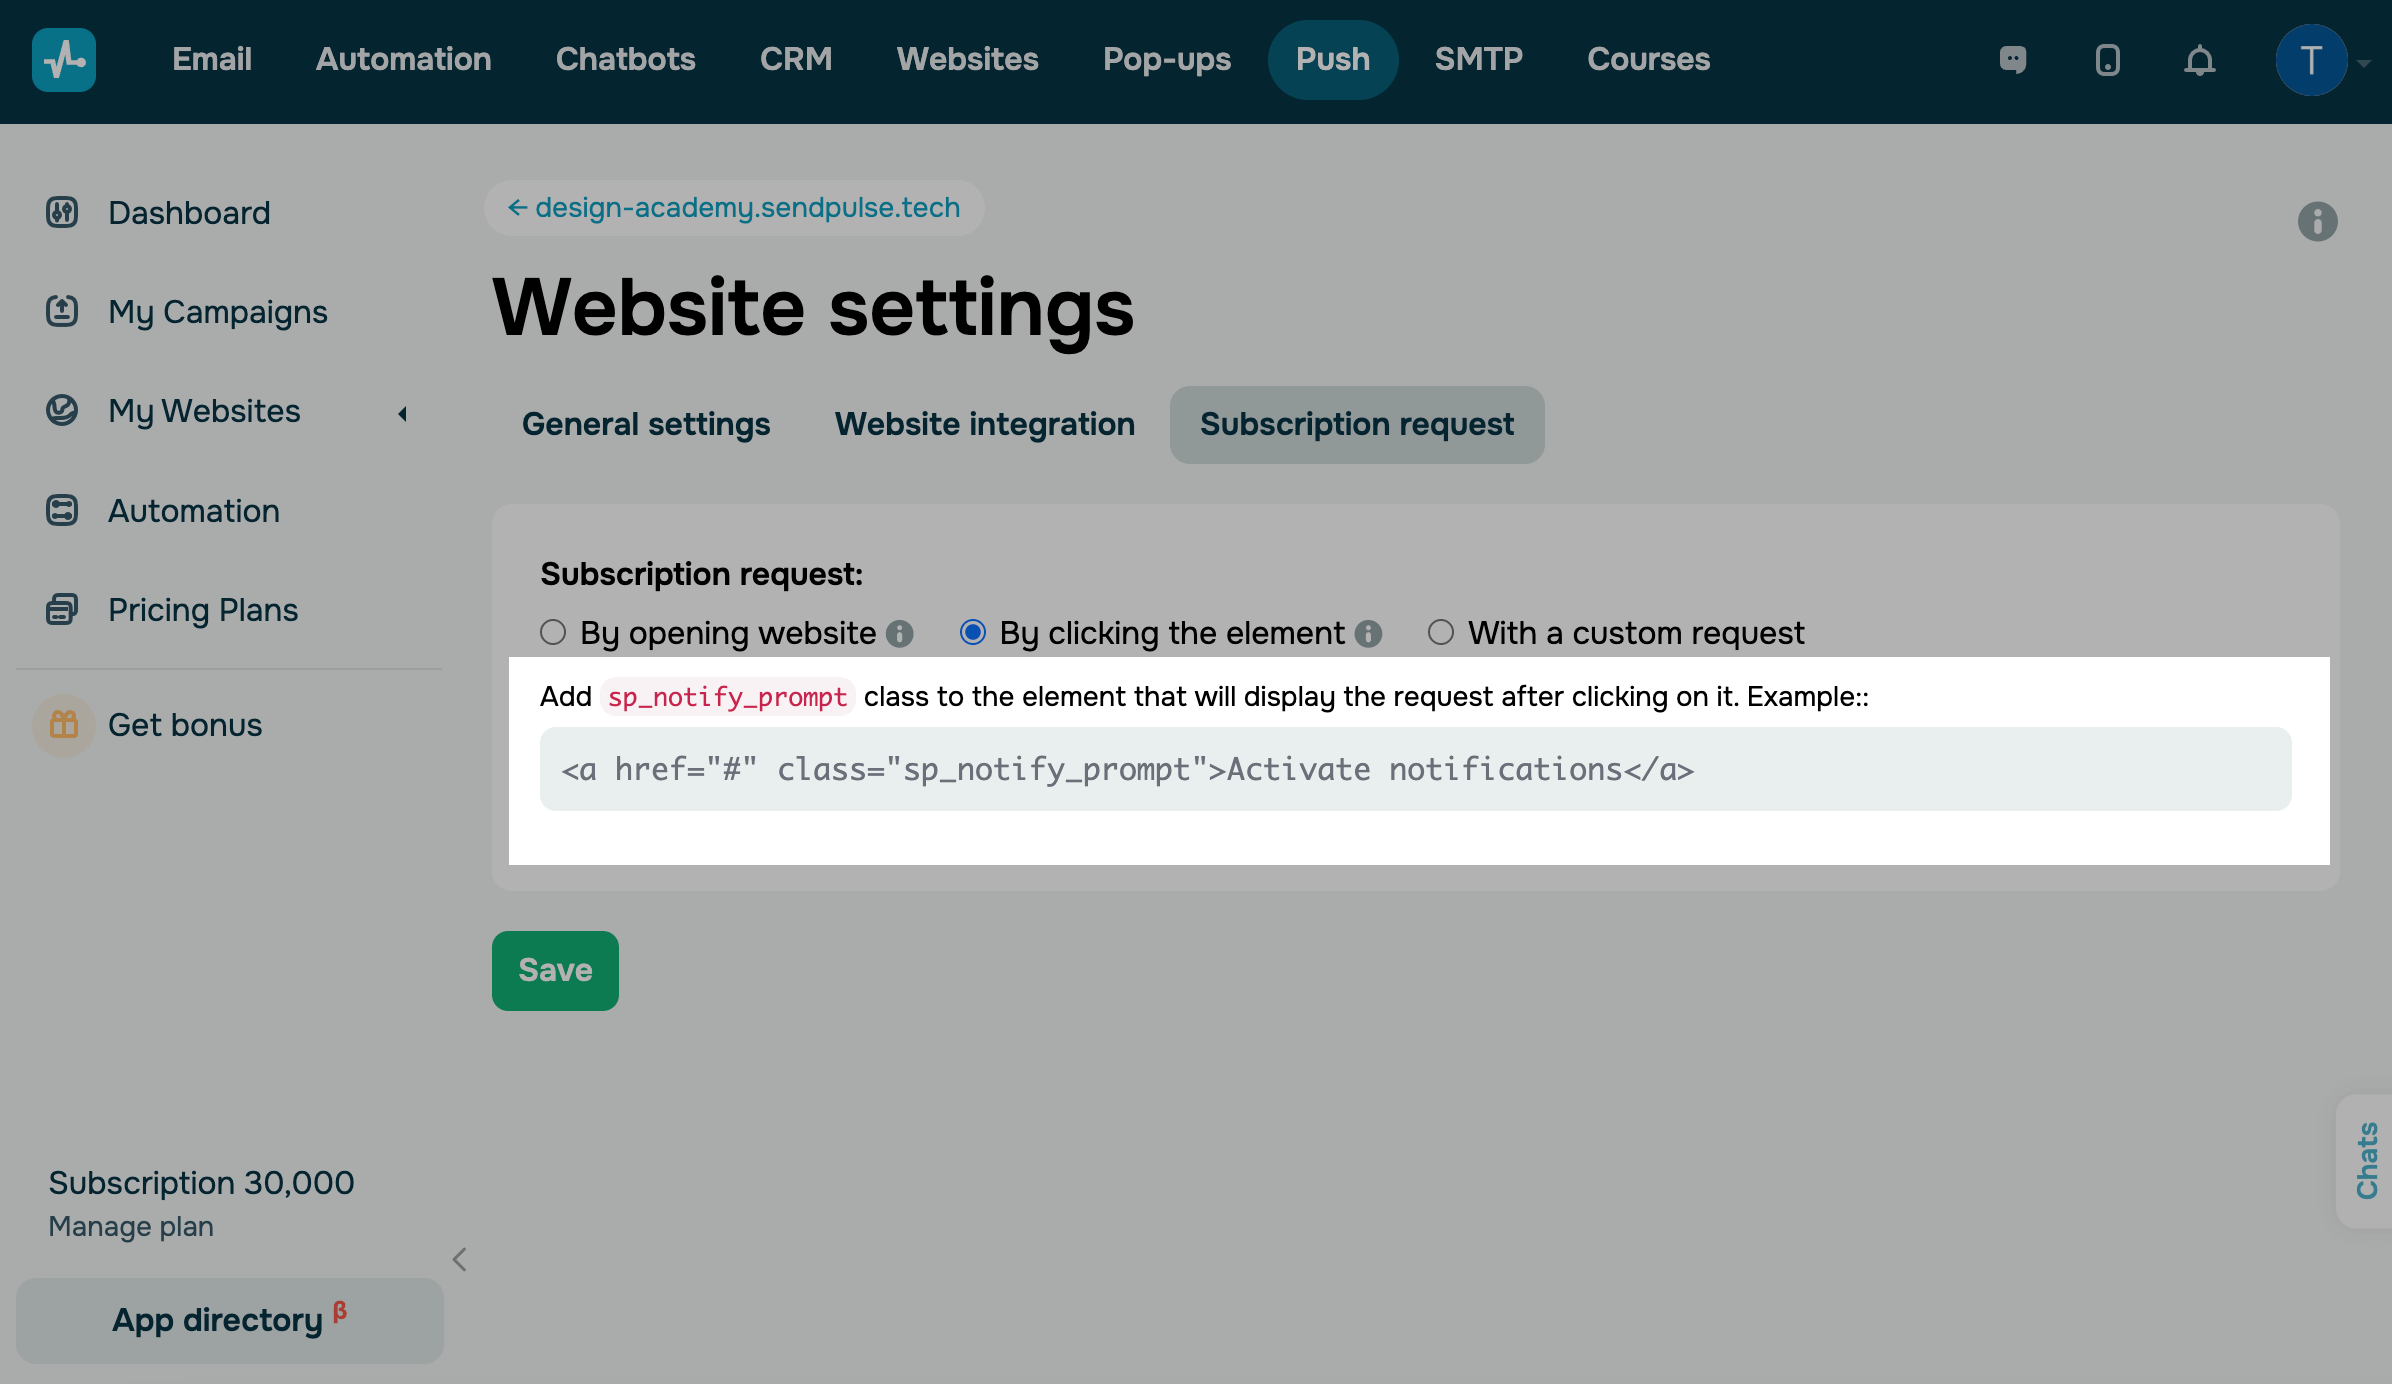
By clicking the element
To display your subscription request when a user clicks a site element, add the sp_notify_prompt class to this element.

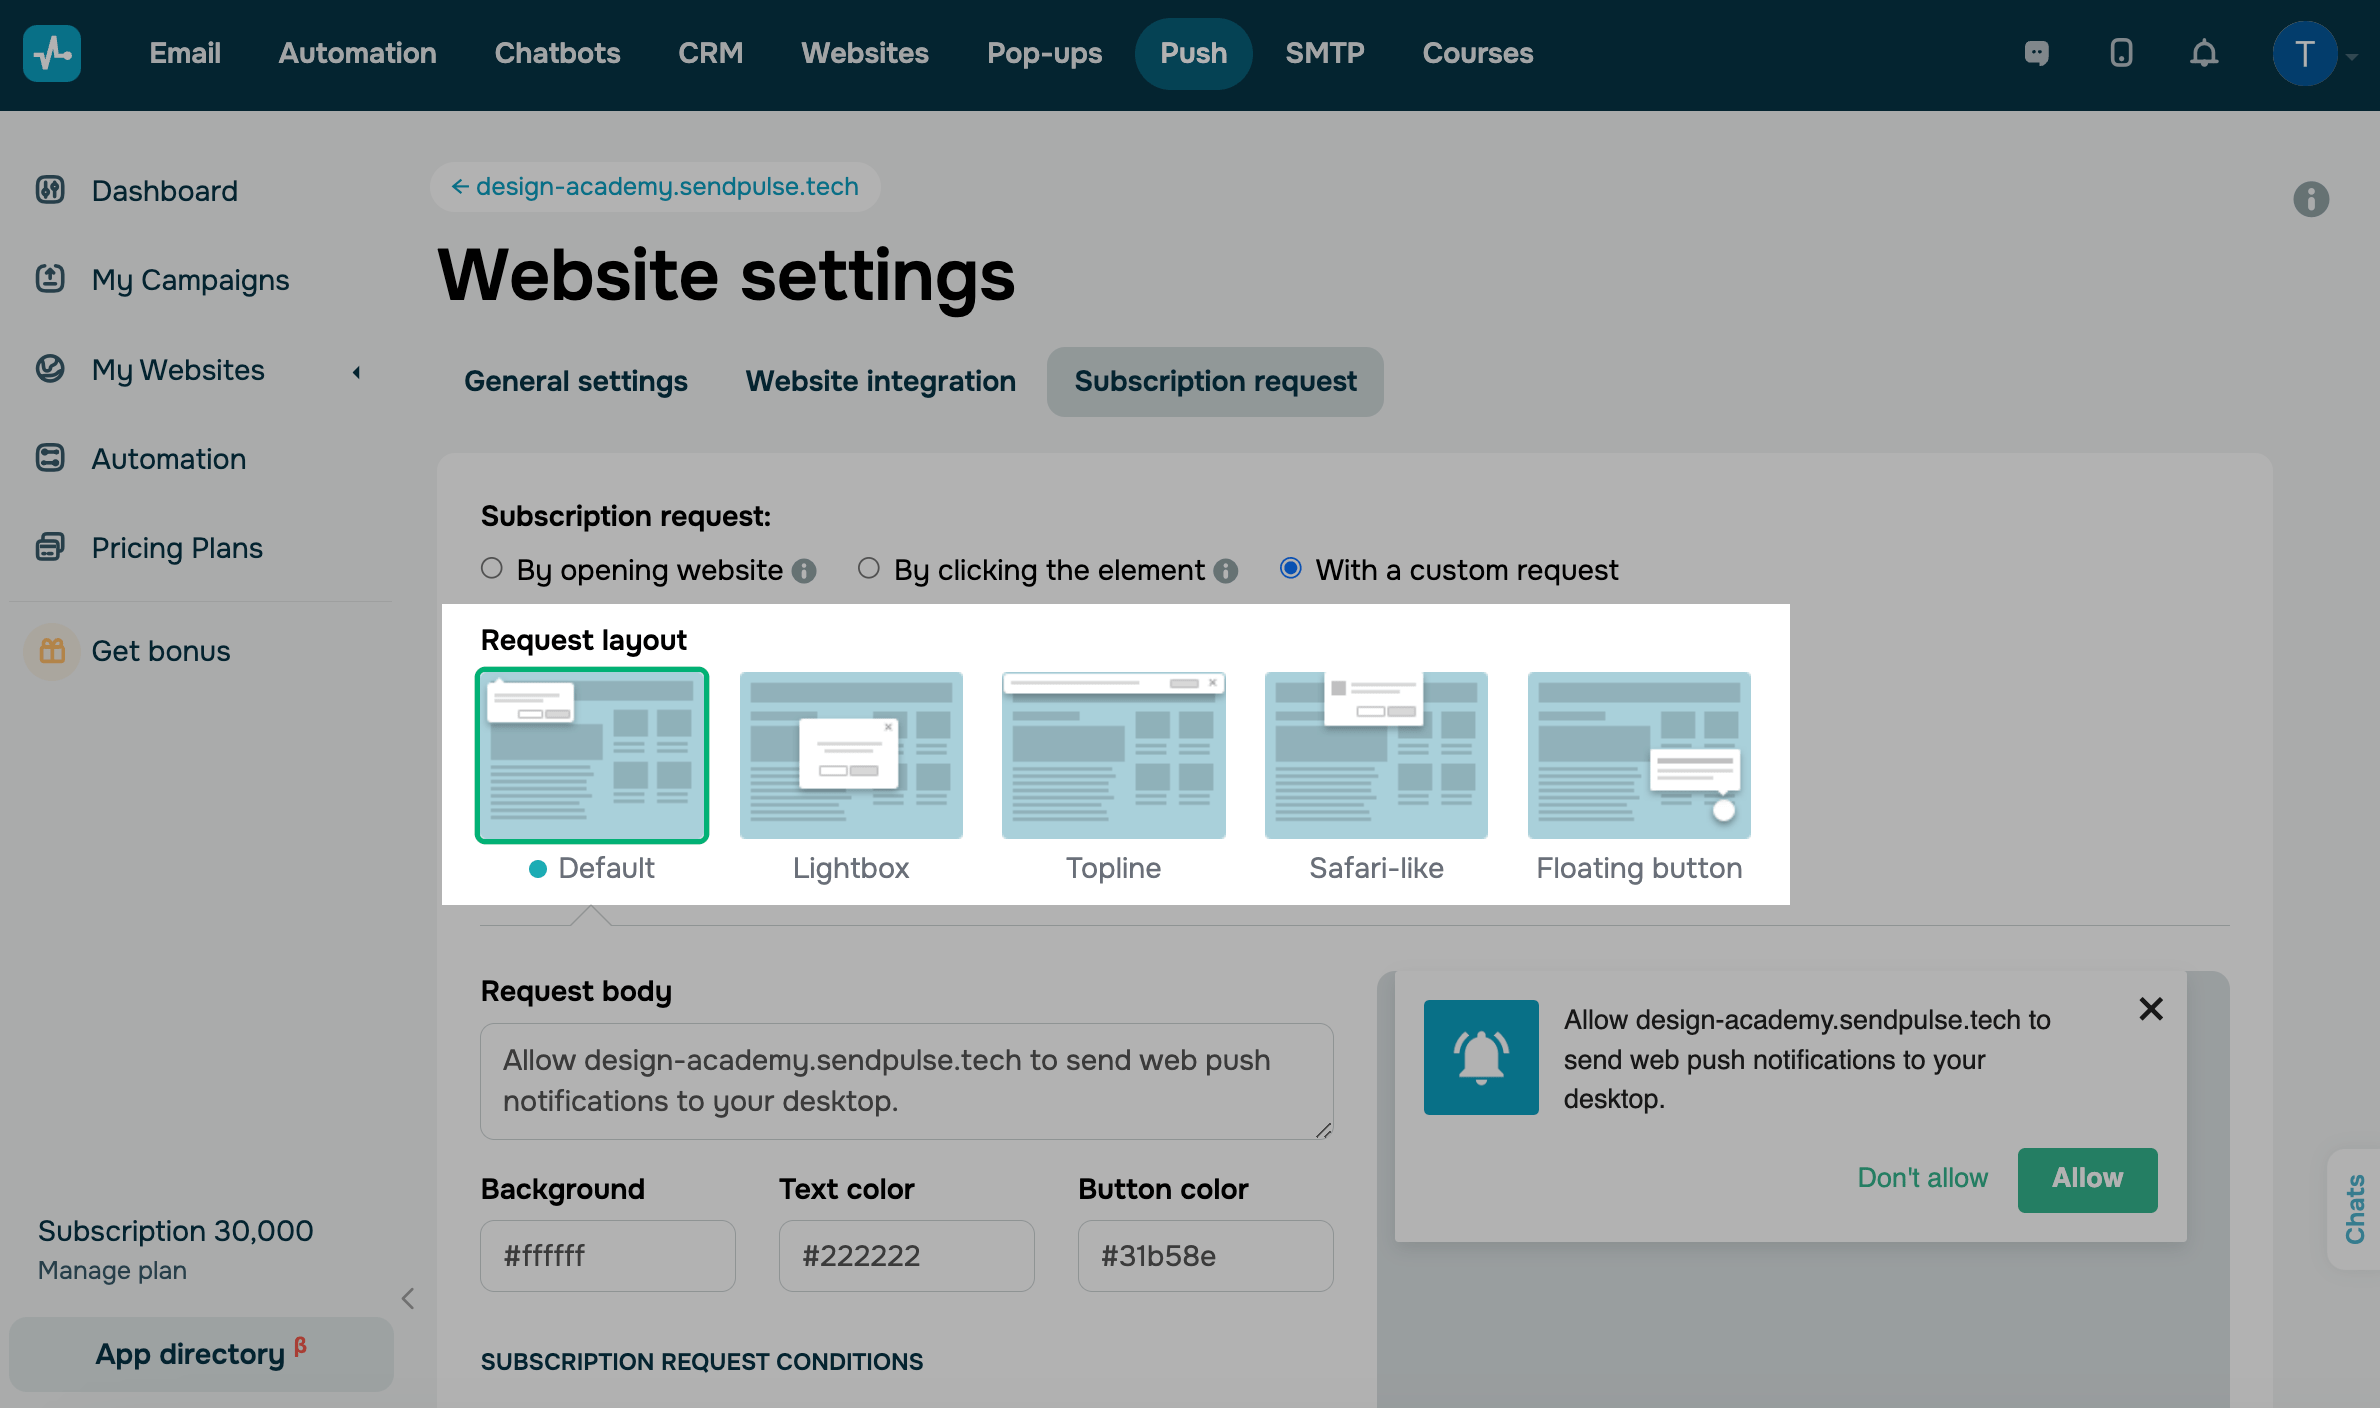
With a custom request
To add a custom request, you need to display an additional window. First, the user subscribes via your subscription request, and then they need to reconfirm their subscription using a standard window that appears in the upper-left corner.
To display a custom request, select the subscription request type: Default, Lightbox, Topline, Safari-like, or Floating button.

Customize the request's appearance and placement, if applicable.
Specify the conditions for displaying the request: on what number visit and after how long after opening the site, the subscription request appears.
Select the Disable on mobile checkbox so that the subscription request doesn't appear on mobile devices.
For the Floating button layout, you can also select the size of the button.
As soon as you finish customizing the subscription requests, click Save to confirm the changes.
Users of the free web push plan have the SendPulse logo added to the subscription request box. Upgrade your plan to remove the logo.
Last Updated: 11.01.2024
or