How to connect the web push service to your WordPress-powered site
With the SendPulse Free Web Push plugin for WordPress, you can enable web push notifications on your WordPress website. Once connected, you will be able to collect subscriber data on your website, send web push notifications, and view your campaign performance in SendPulse.
In this article, we will talk about how to connect SendPulse’s web push service to your WordPress-powered website.
Add your site to SendPulse
Go to the Push section and click Add new site.
In the first field, enter your WordPress-powered website's root domain. In the next fields, customize subscription request settings and click Next.
Learn more: How to add a site to send push notifications.
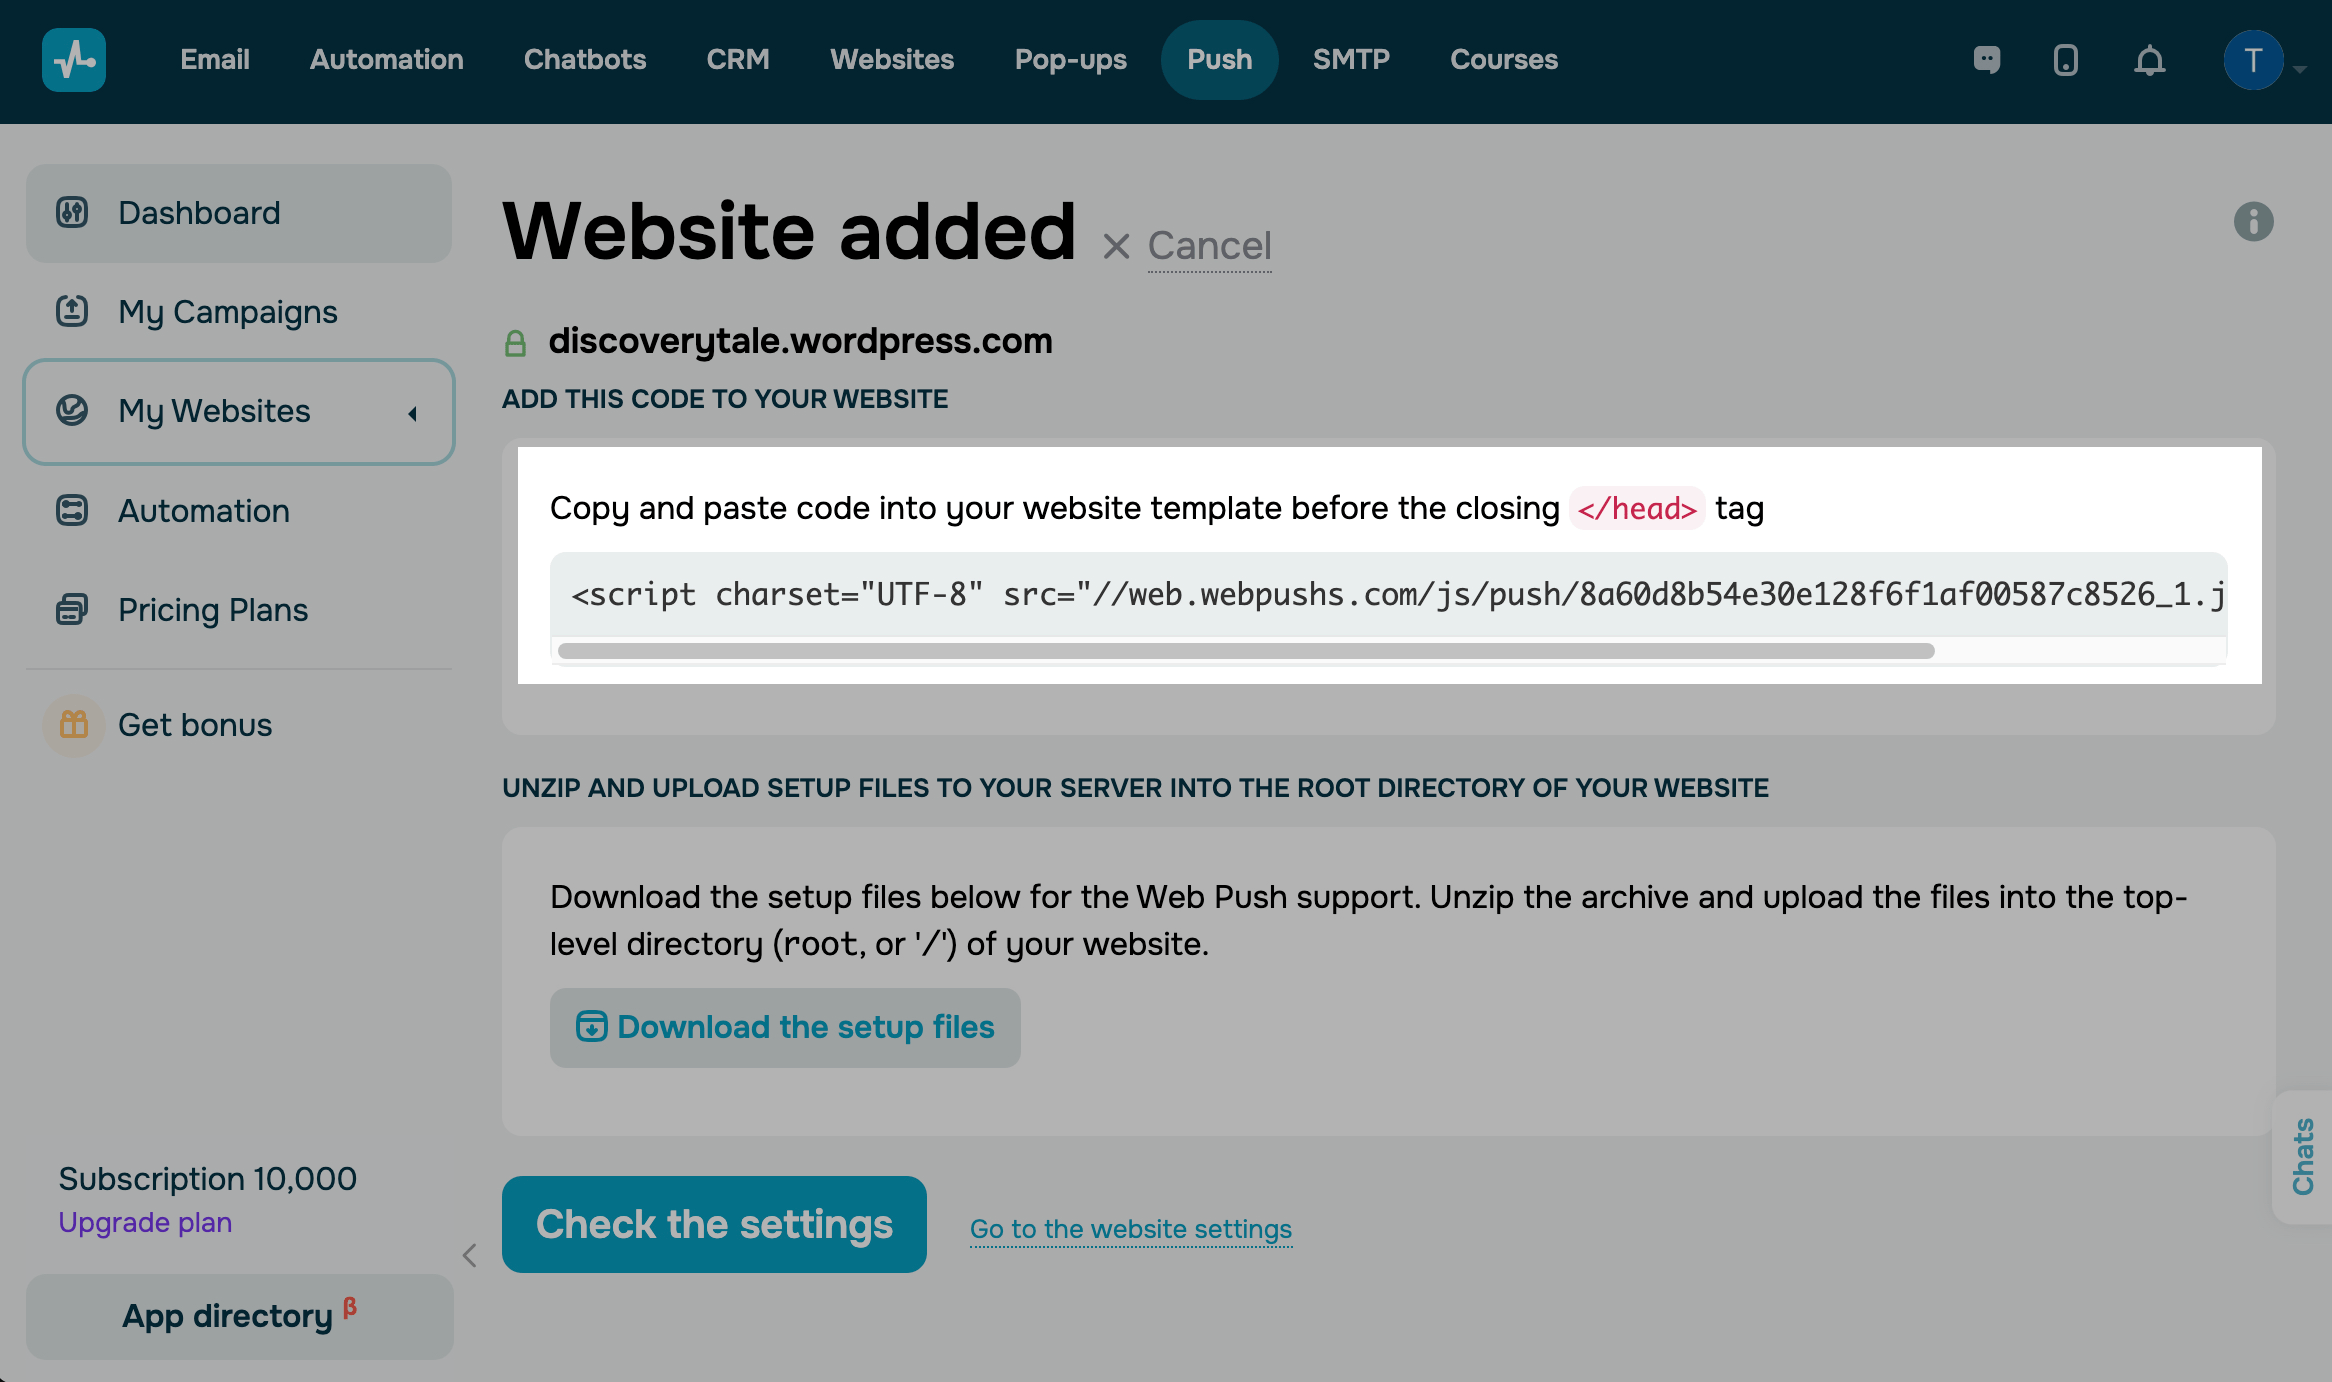
Copy the SendPulse script
Copy the SendPulse script — you will need it to configure the plugin connection.
If you have added a website before, you can find the script in Site Settings > Site Integration.
To install the plugin, you don’t need to add any extra files to your website’s root directory.
Install the plugin
Go to the left panel and select Plugins > Add New. Type SendPulse Free Web Push in the search bar and press Enter. Next to the plugin, click Install.

Once the installation is complete, click Activate.
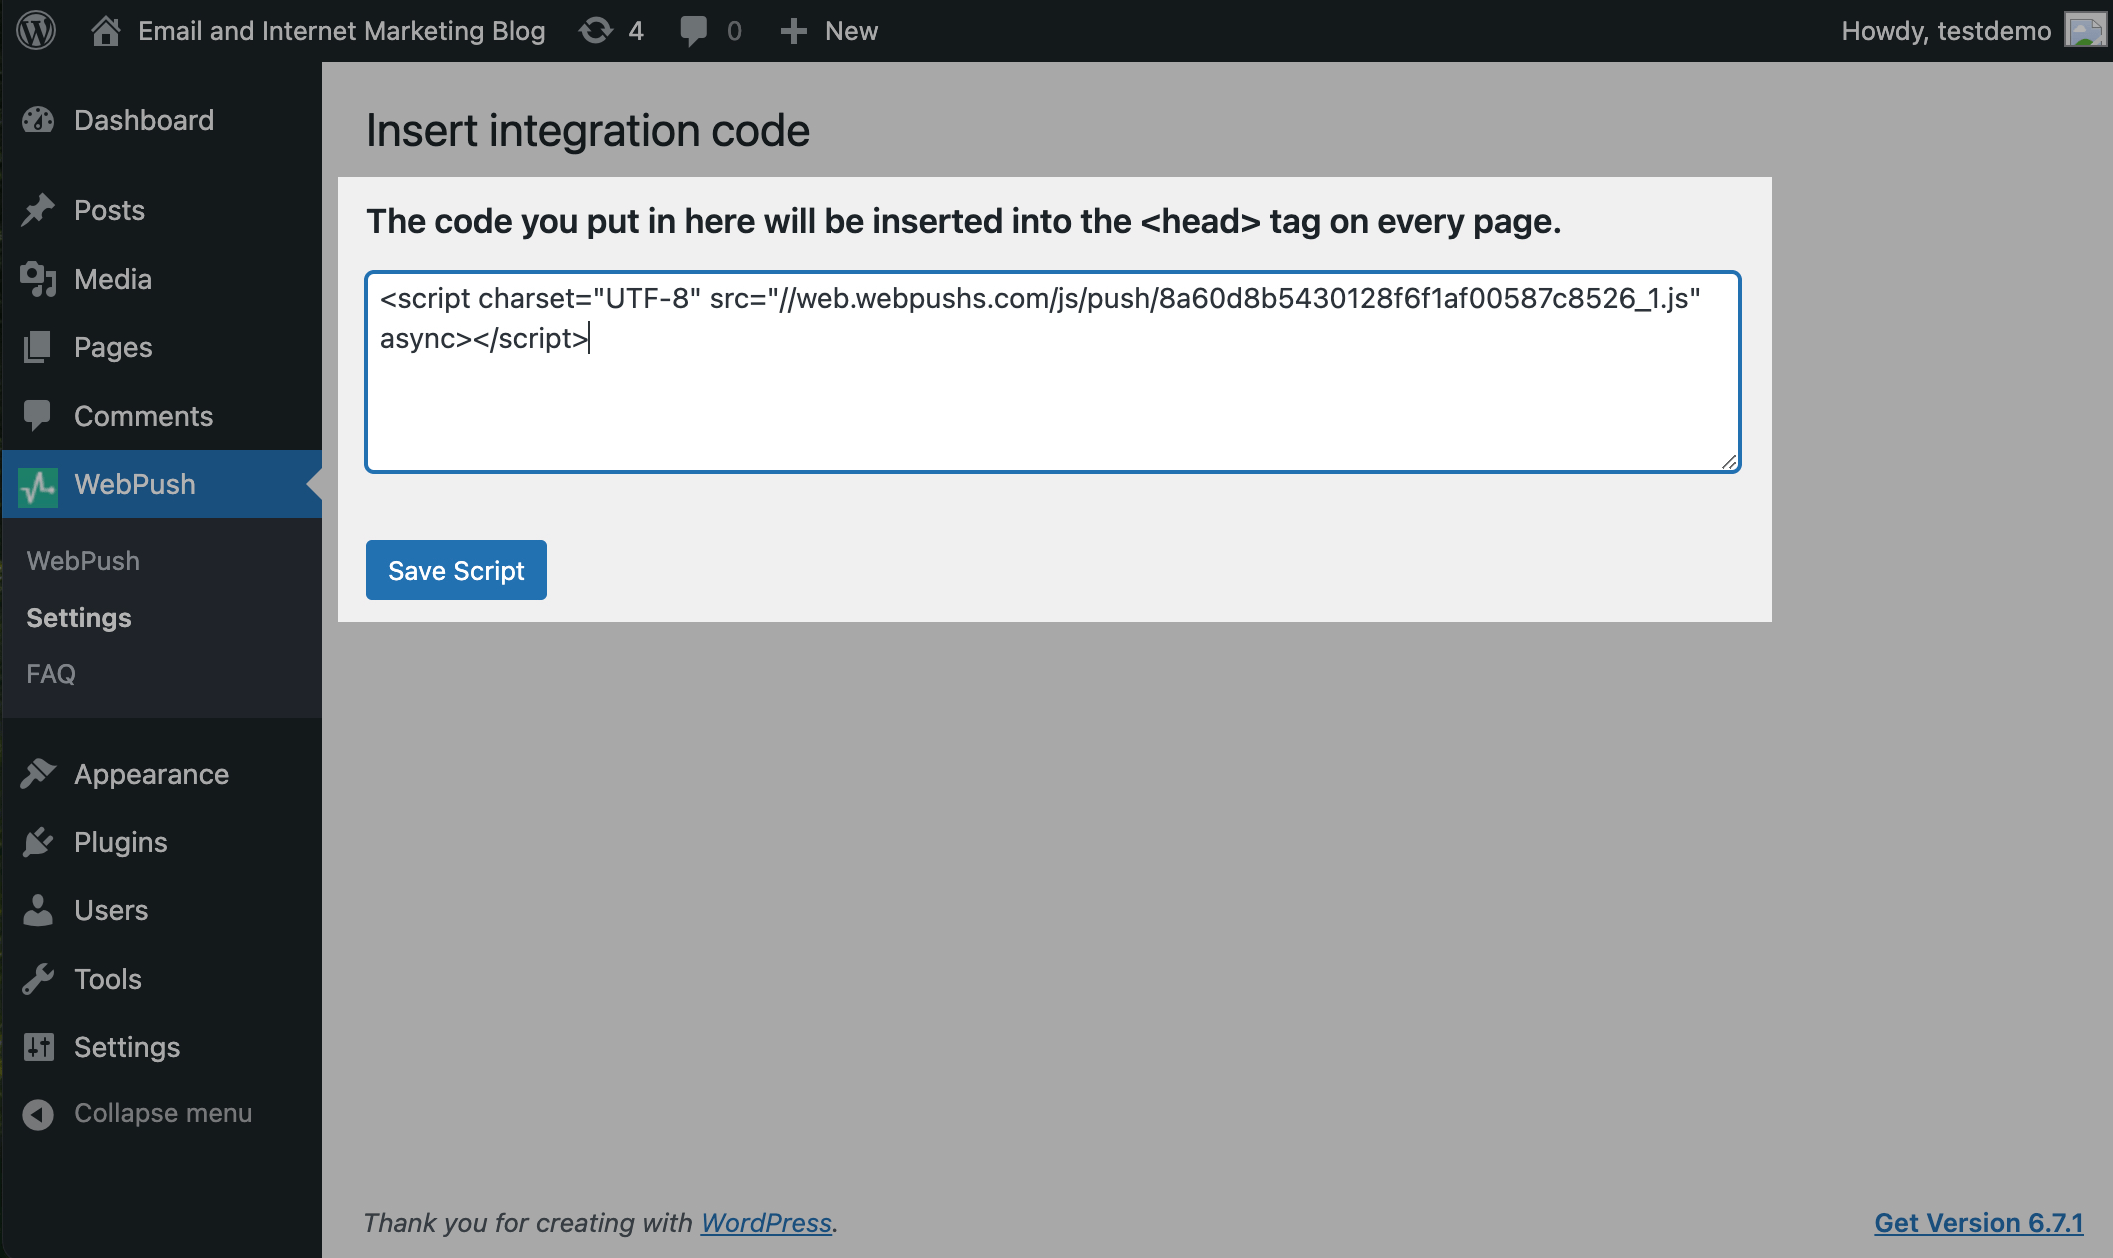
Add the script to the plugin
Go to the left panel and select WebPush > Settings. Paste the script and click Save Changes.
Check the connection
Go back to your SendPulse account. If you haven’t closed the setup window, click Check the Settings.
If you have closed the setup window, go to Site Settings > Site Integration and click Check the Settings.
You will see a green checkmark if you have added the script correctly.
Learn more: Check the installation status.
Next, go to your website, where a web push subscription request should appear.
Last Updated: 04.12.2024
or