Customize your cart page
A cart page appears on your online store's website automatically once it is activated. On this page, visitors can select a payment method, delivery option, and other details when placing an order.
In the Cart widget settings, you can customize the style of your product card and cart icon, add available payment methods and more information, and connect analytics.
You can also add other elements to your cart page and adjust its style to match your brand visuals and needs. For example, you can add a top menu, page footer, or related product recommendations.
Let’s talk about how to customize the style of the Cart widget and its elements.
Go to the website page list, and select Edit from the menu next to the Cart page. You can also access your cart page from the list of pages in the builder.
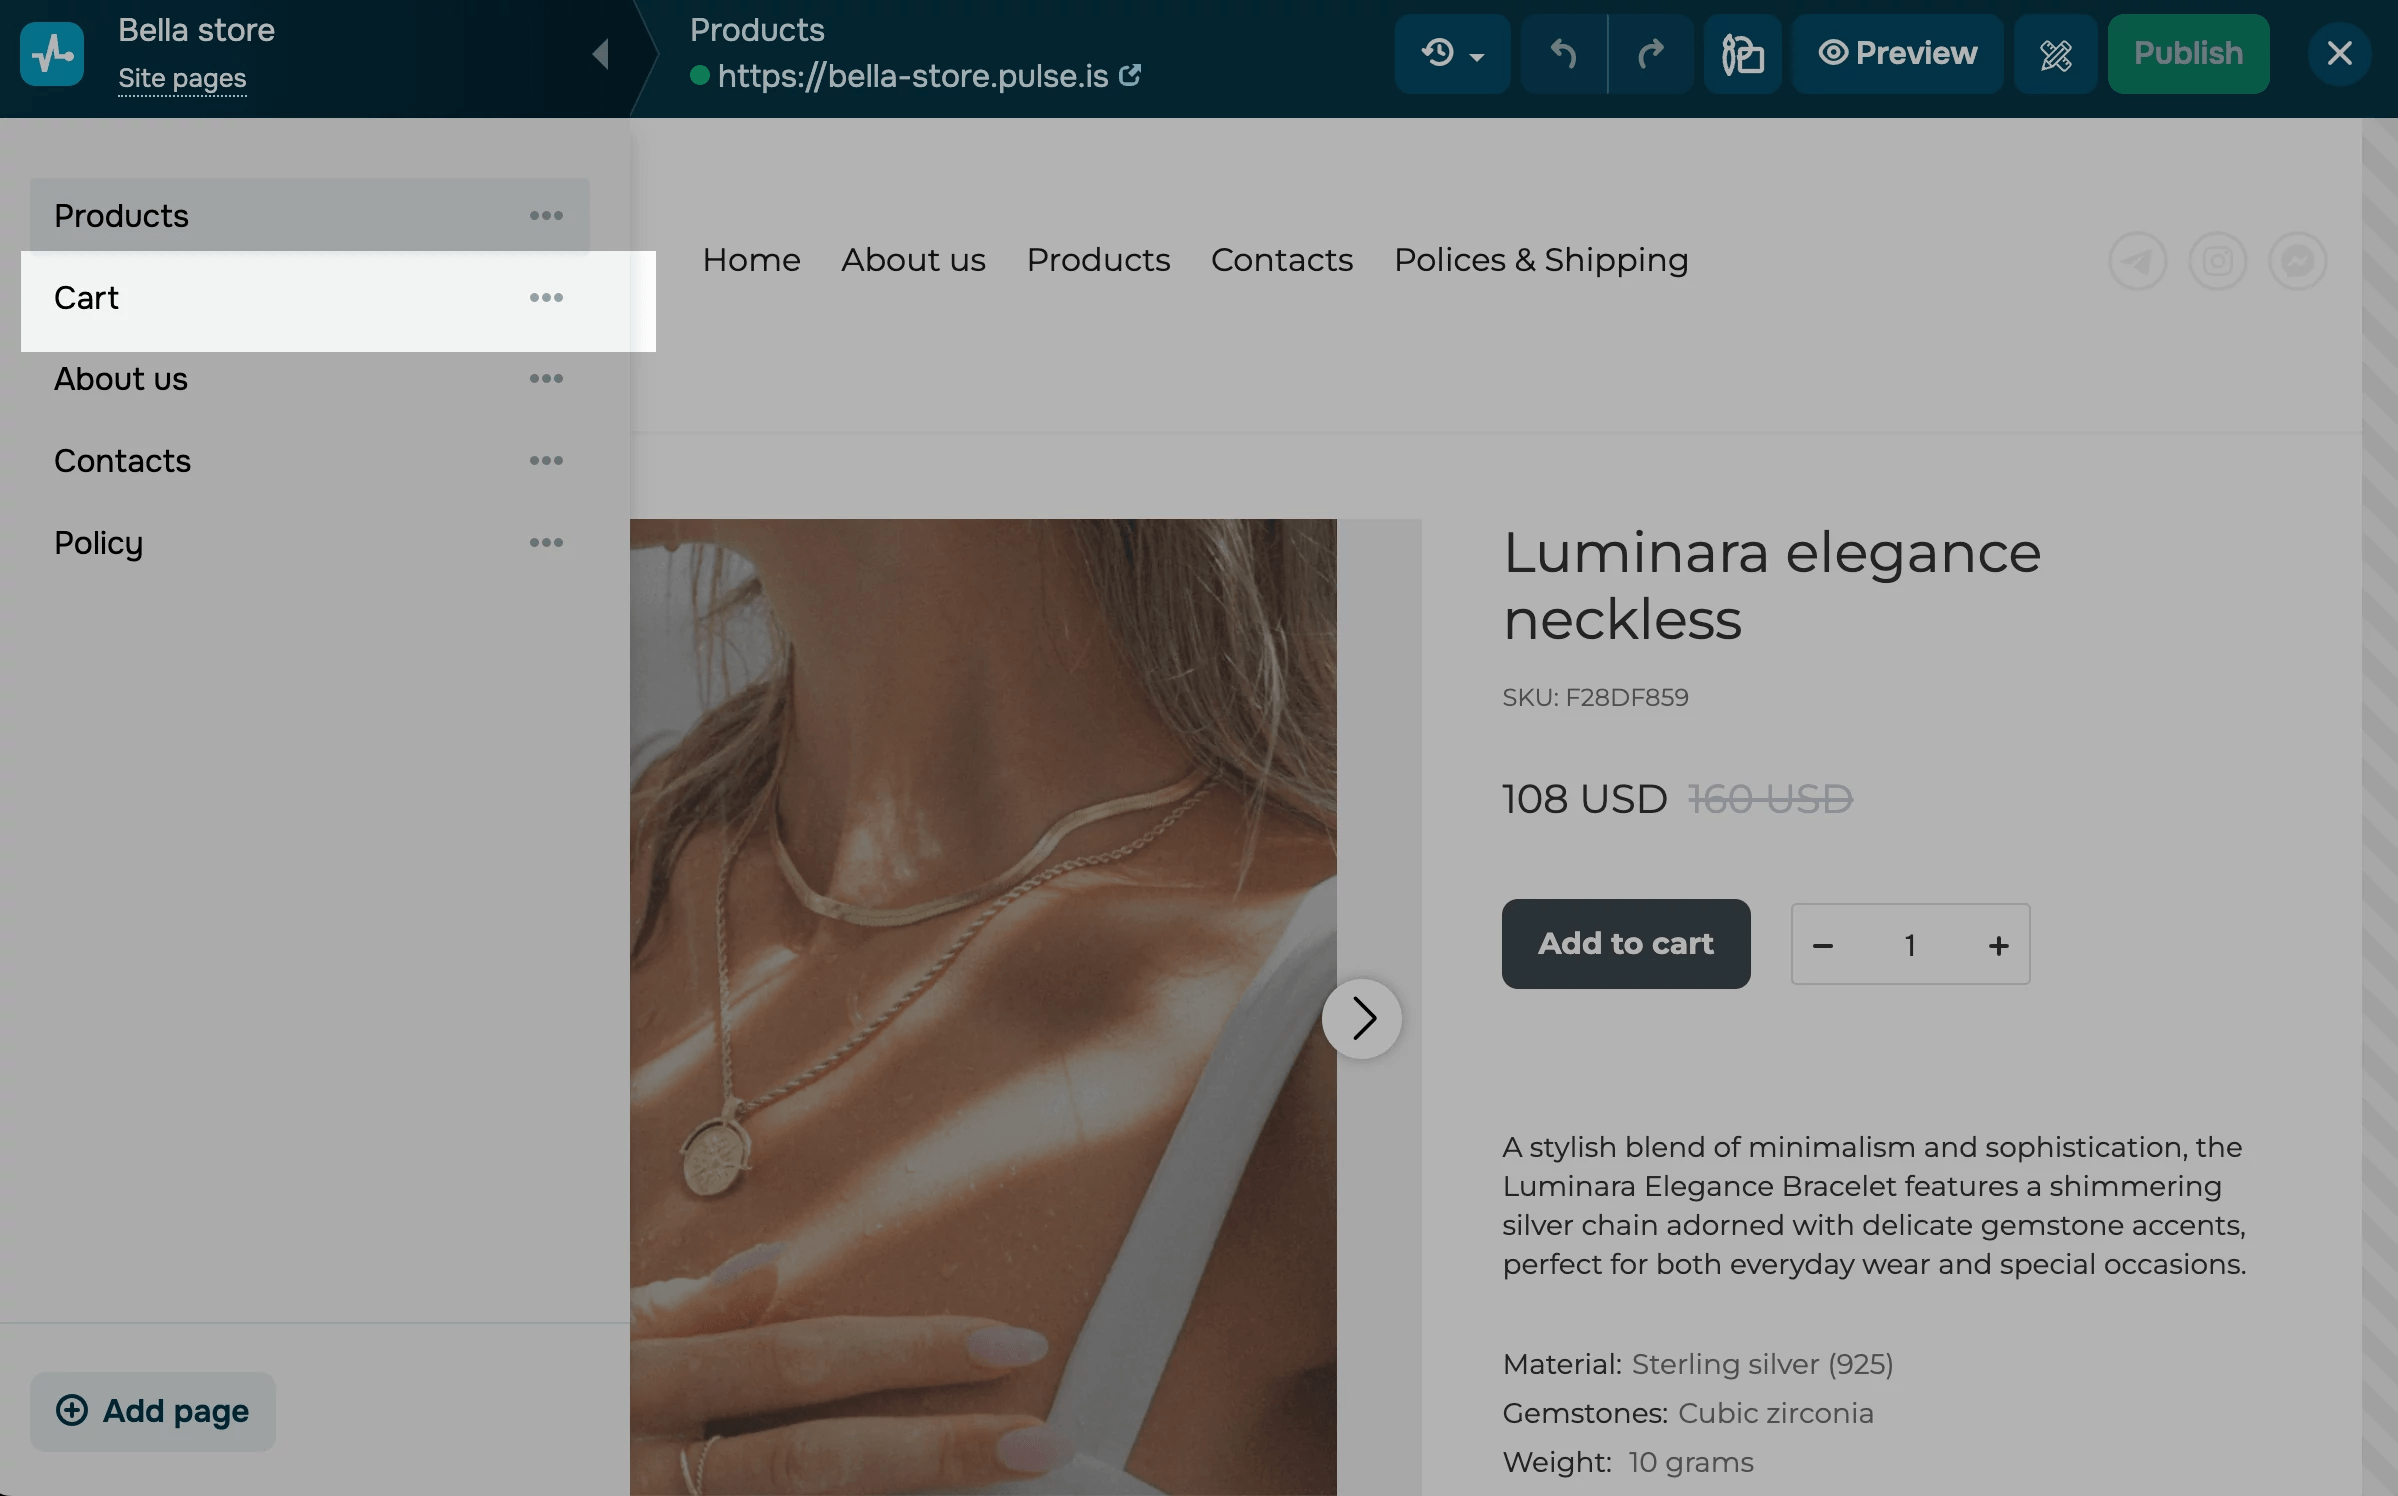
Click the widget, and in the element editing panel, select the element you want to customize.
Customize your cart appearance
In the Cart style section, click the element you want to update.
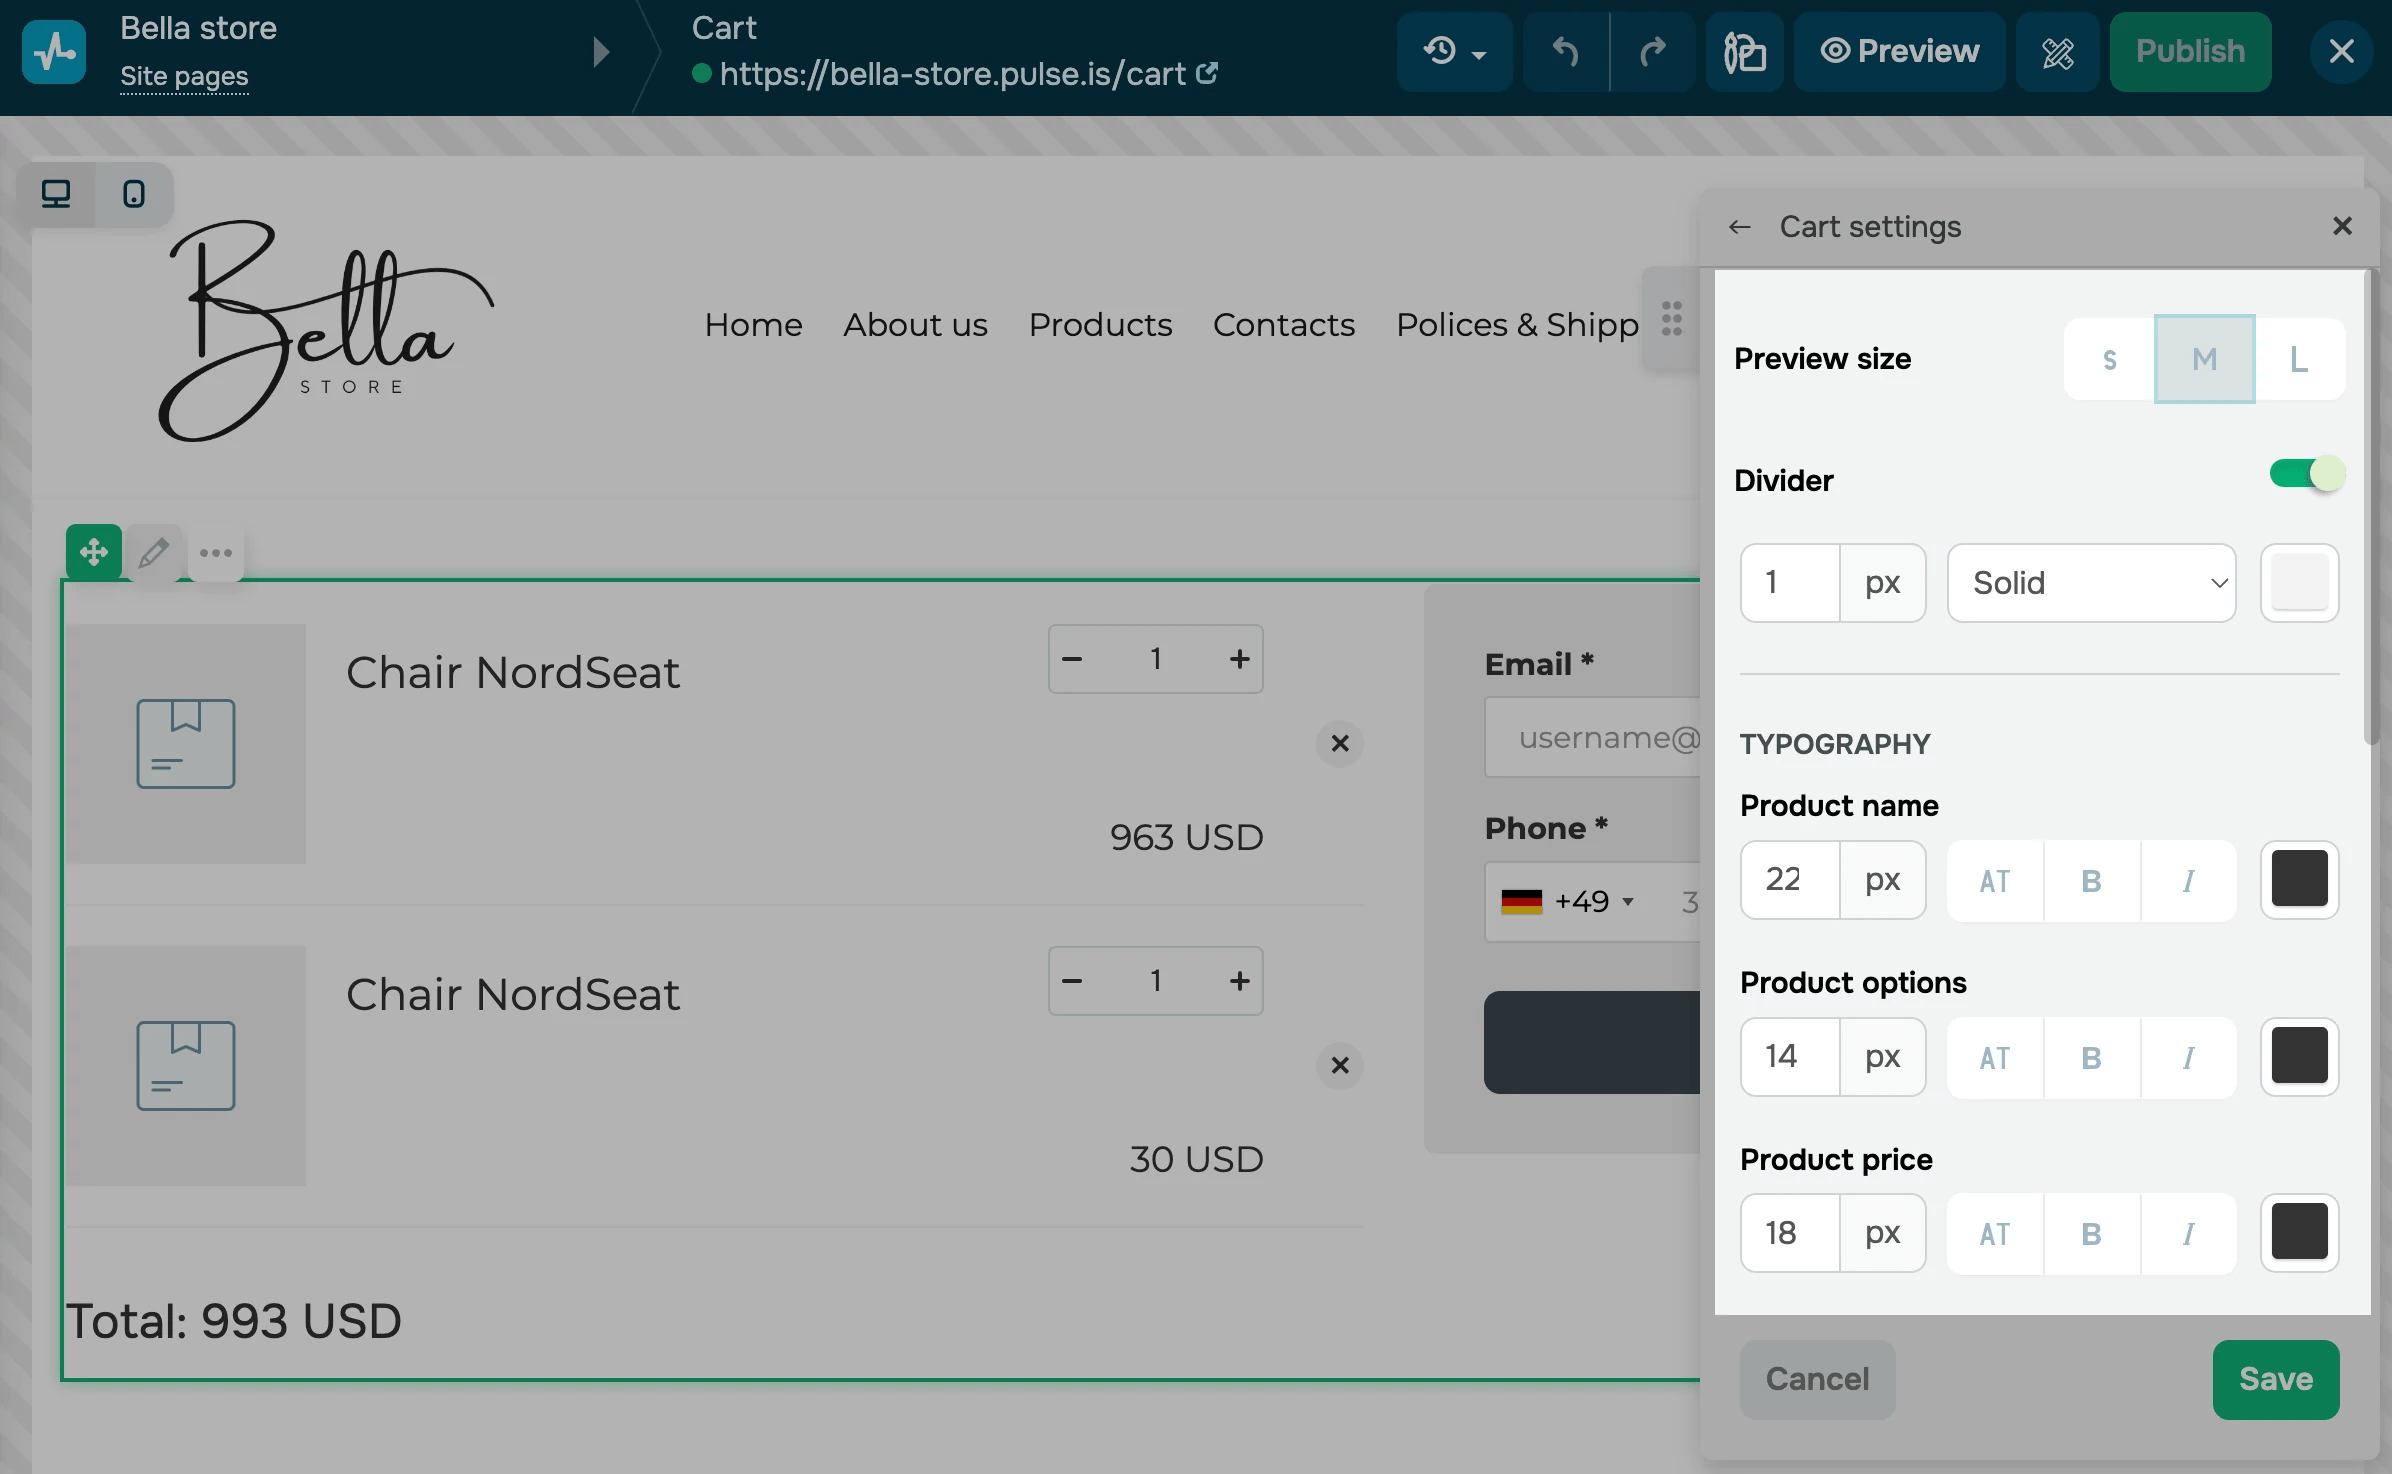
Cart
In the Cart settings section, you can customize the element style in your added product card:
| Preview size | Changes your product preview size. Select S, M, or L. |
| Divider | Adds spacing between product previews. Choose a size, style, and color. |
| Typography | Changes your text style size in product previews. Select a text size, format, and color of your product name, option, price, and total amount. |
| Delete product button | Changes the cart’s remove icon. Select an icon color and background color. If you add a color, the icon will be circular. |
| Card product counter | Changes the style of the counter where users can select how many items to add to their cart. Select a field style, color, rounding, and size. |
Cart icon
In Cart icon settings, you can set icon styles that will appear on every page of your website. In Appearance, select an icon style.
| Floating | The cart icon will be pinned to the right corner of the screen and stay in place as users scroll. |
| In header | The cart icon will be embedded in your header. |
Select an icon shape, element colors, rounding, and size.
Use preview mode or visit your published website to see how the cart icon appears.

Customize your order form
Specify a payment method
To add a new payment method, click Add a payment method. To edit an existing payment method, click the pencil icon next to it.
Select the payment system you will use to accept payments. If you accept payments through multiple methods, you can add an additional one.
You need to add payment methods that use the same currency as your store. If the currencies don't match, the payment amount will be incorrect.
To learn more about how to connect various payment methods, refer to the Accept Payments section.
You can also enter a custom name for your payment method. Site visitors will see this name at checkout. In the Payment method name section, enter the name you want to display.

You can also redirect users to a specific page after payment confirmation. To do this, scroll down, and select the Additional Form Settings section. Select or enter the link to the page that should appear after payment confirmation.
During checkout, the system checks if your CRM products are in stock. If a product is out of stock or there are not enough items in stock, your customer will see a message saying their purchase cannot be completed. The product amount and total price in their order will be updated based on your current stock.
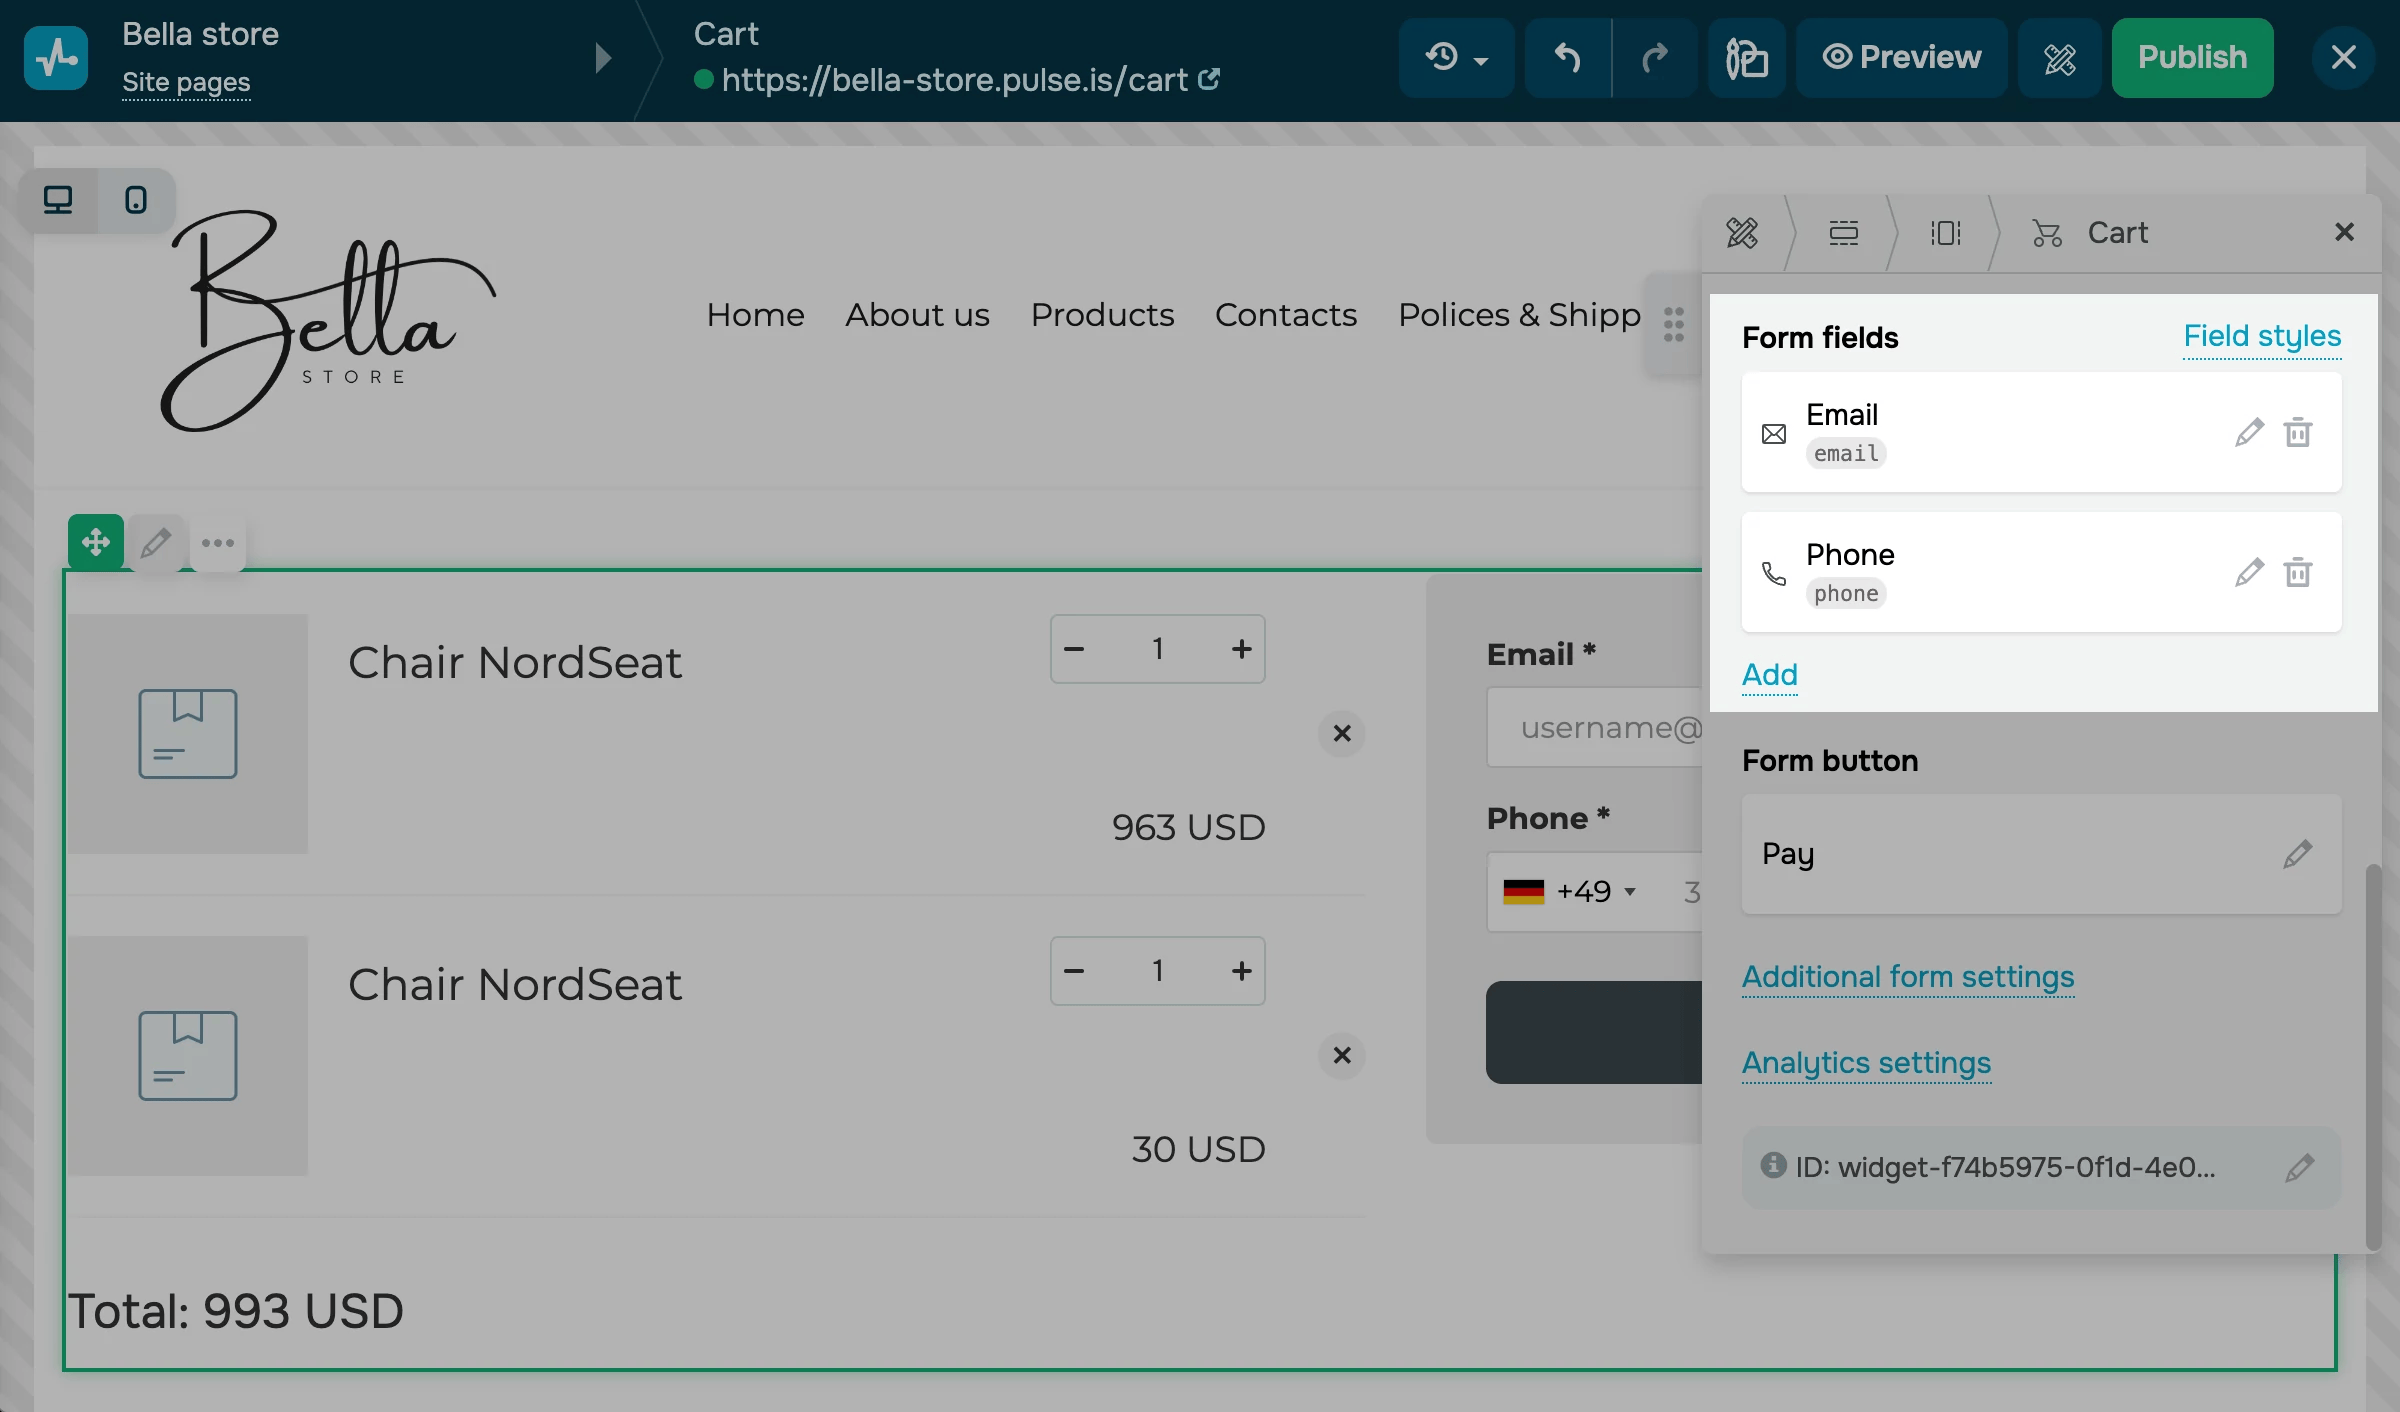
Add fields
By default, your order form already includes the Email field which the system uses to identify customers across all SendPulse tools. You can also add your own fields to collect more information, including names, addresses, and phone numbers.
Click Add in the Form fields section. To configure a field, click the pencil icon next to it. Select a field type, enter its name and placeholder, and link it to CRM fields. You can also move and delete fields.
Read also: Which custom field types you can configure.
Integrate with other tools
To integrate with the CRM system, enter a deal name, select a pipeline, and set the deal stage where your deal should be saved. When your website visitor places an order, a deal and contact will be created in the CRM system using the cart field data they entered, and their ordered product list will be added to the deal's comments.
To save contacts with specific CRM tags, turn on the Assign tag to a contact toggle and select the tags. The list includes all tags created across all pipelines and CRM system tabs.
You can also integrate with the Email section. Turn on the Add to a mailing list toggle, and select a mailing list.

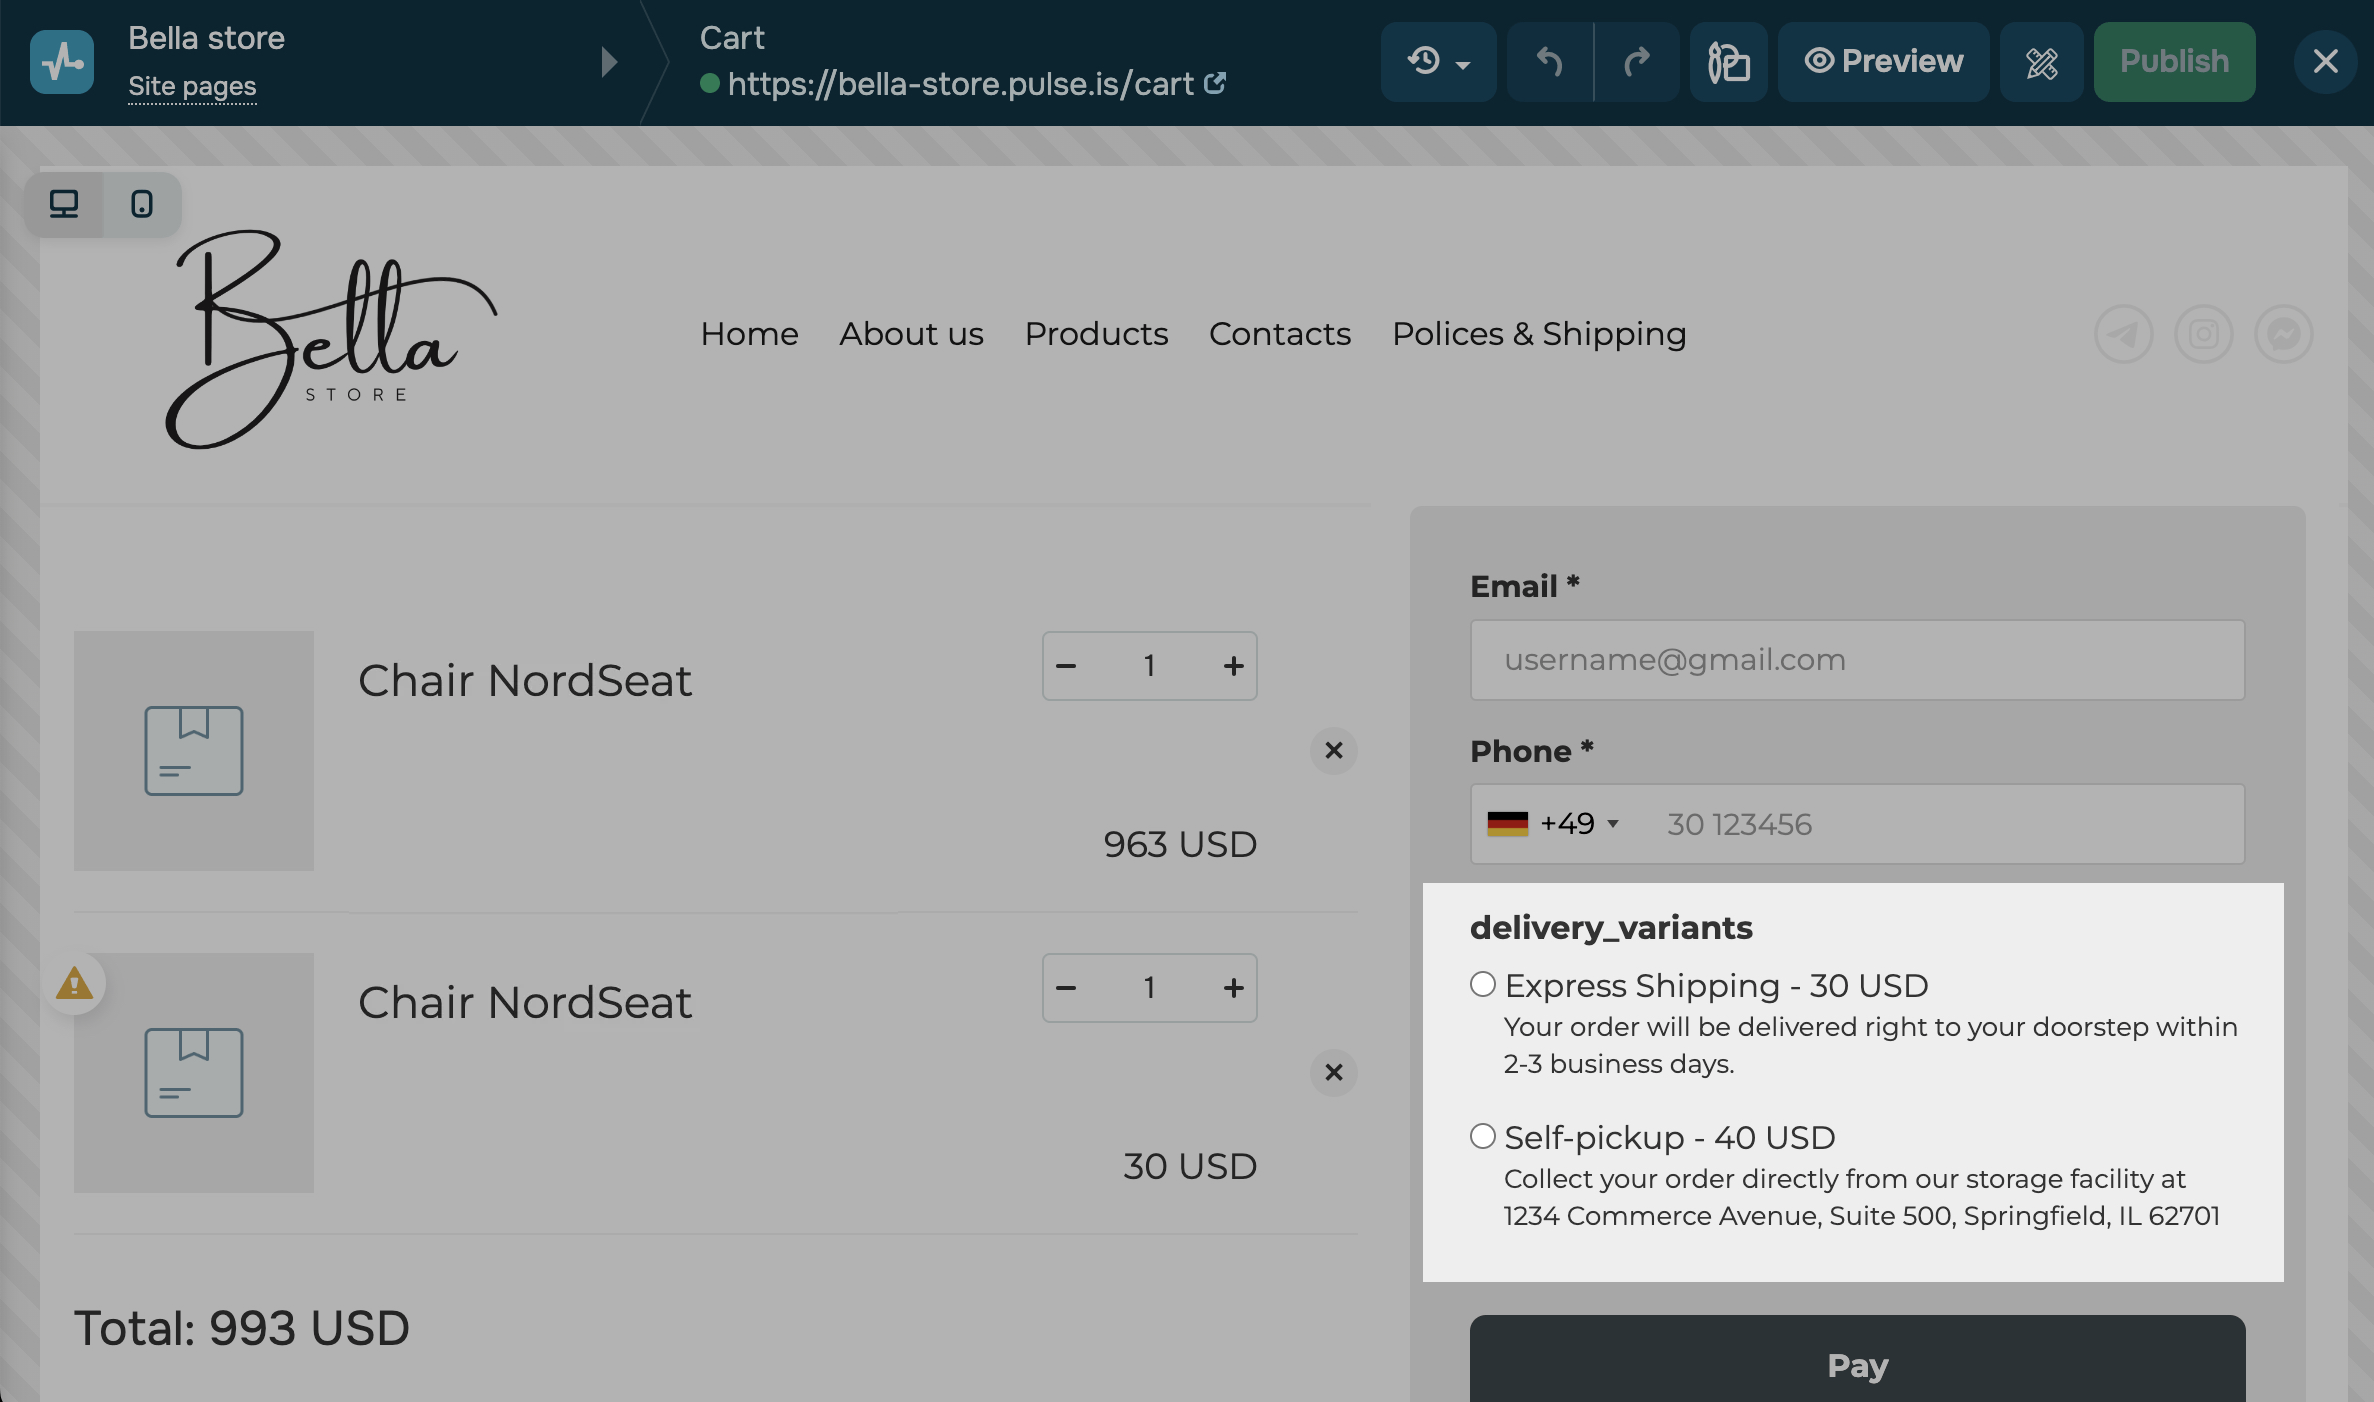
Select a delivery option
Once you add physical products to your online store settings, available delivery options will appear automatically.
If users add only digital products to their carts, no delivery options will be shown.
Customize the payment button
To customize the Payment button, click the pencil icon in the Button section. In the Text field, enter your button text, and in the Style field, select a button size and style. Primary and Secondary follow your general page style, while Custom allows you to set a text color, background color, border, and hover effects.
Add the post-checkout page
You can redirect users to a specific page after payment confirmation. Scroll down and select Additional form settings. Add the link to the page where users will be redirected after successful payments. You can also select a website page from the menu or add a chatbot link.
Read more: How to create a payment page and encourage ongoing purchases.
Add a promo code
You can allow users to apply promo codes from the CRM system at checkout, which helps offer discounts or bonuses.
Go to Additional form settings, turn on the Add a promo code field toggle, and decide which promo codes can be used.
In the Title field, enter the text that will appear above the field, such as "Apply a promo code." In the Placeholder field, enter the helper text that will appear within the field. In the Promo code field, choose one or more promo codes.
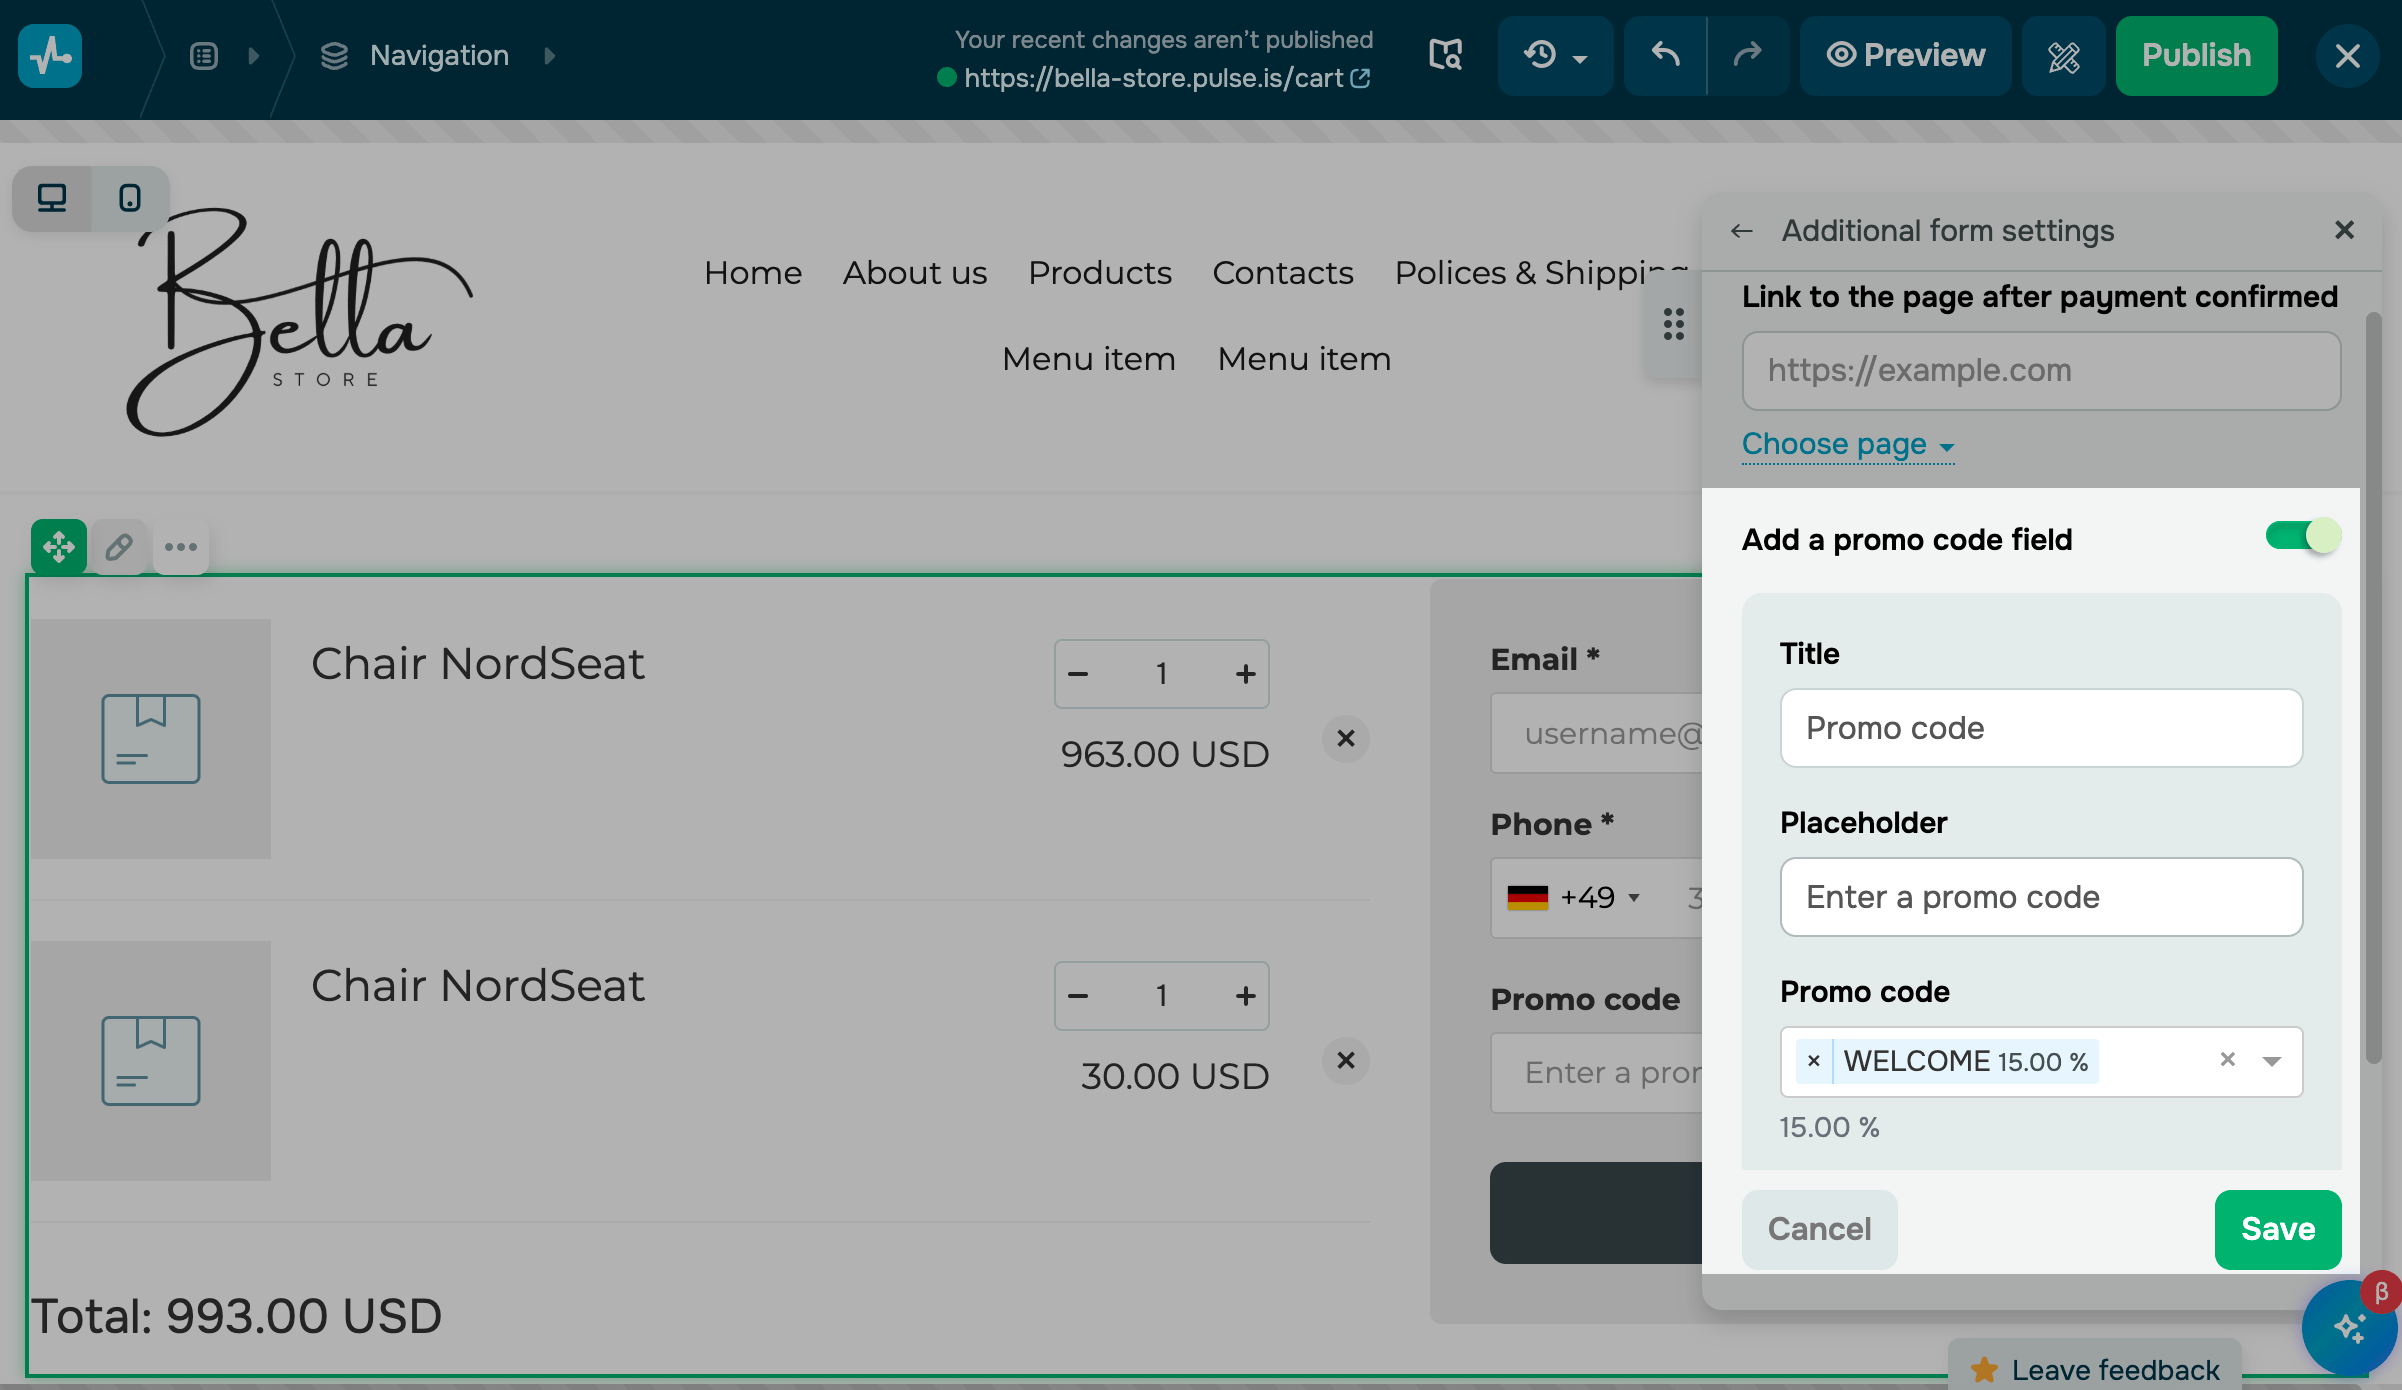
Once you publish your website, its payment form will include a field where users can apply promo codes. When they enter a promo code, the system will validate it automatically. If valid, the discount will be applied to the order total.
Set up analytics
You can transfer goals from your form to Google Analytics and Facebook Pixel events. Click Analytics settings.
Turn on the Transfer the goal to Google Analytics or Transfer the goal to the Facebook pixel toggle.
To complete your data transfer, add the Facebook pixel and Google Analytics code to your website settings. Read more: How to connect Google Analytics to your site and How to connect Facebook pixel to your site.
After you finish editing your cart page, click Publish.
Last Updated: 24.10.2025
or