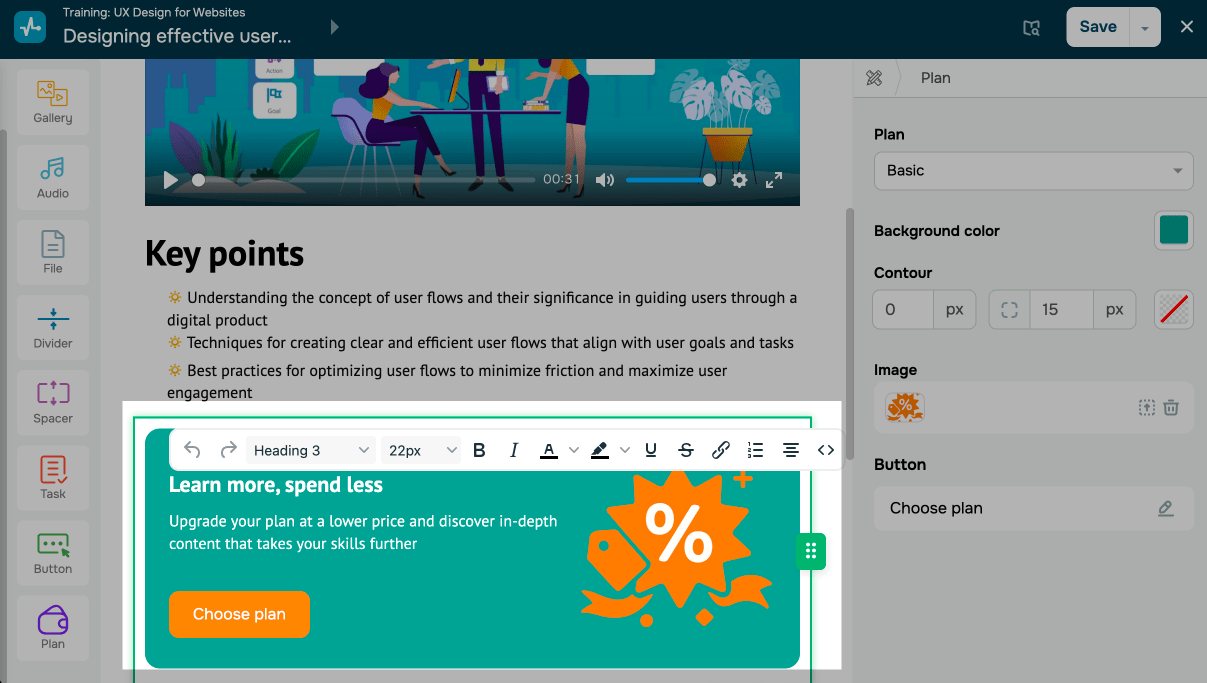
Element Plan in course builder
You can encourage students to upgrade to a higher-tier pricing plan or unlock extra course content while they are taking your course.
This helps instructors:
- sell content flexibly (modules, lesson packages, and more);
- create tiered plans with progressively unlocked content;
- let students upgrade whenever they choose.
Let’s talk about how to add a plan upgrade option to your lesson.
Add the Plan element
Drag the Plan element under the main content of your lesson.
Add your content
Edit or replace the text in the workspace. To format the text, select it and choose an option from the toolbar.
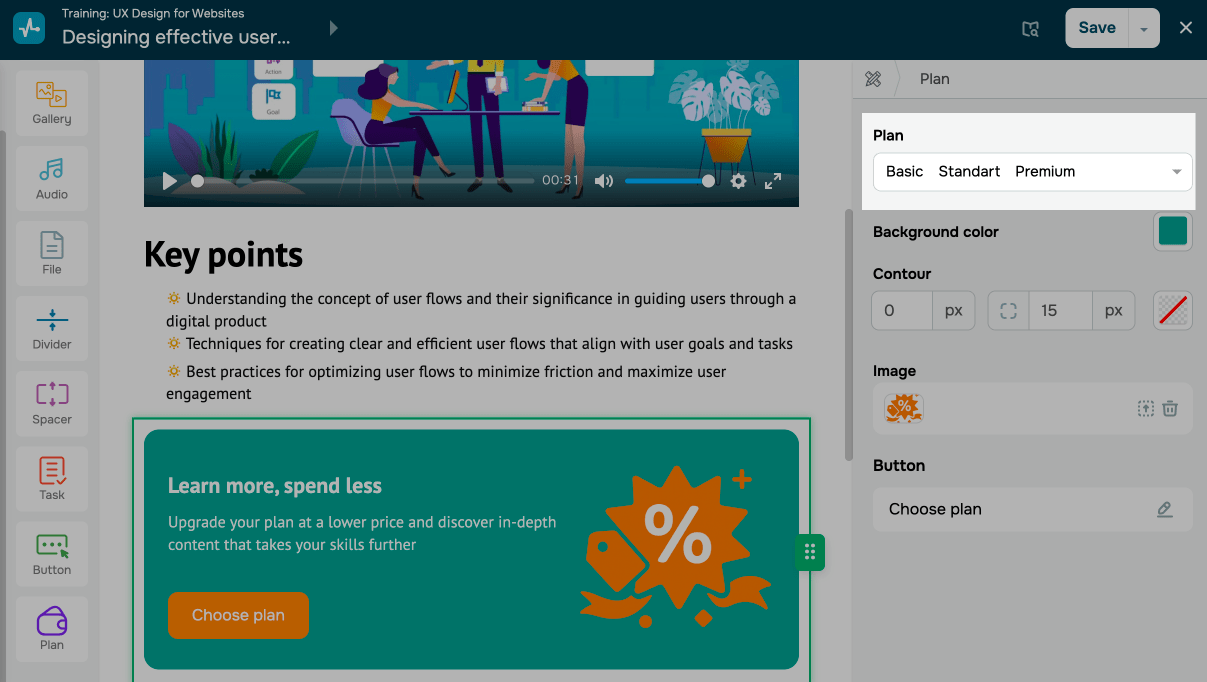
Select a pricing plan
In the Plan section on the right, choose a student pricing plan. You can select multiple plans so that students can go over them and choose the one they prefer.
To allow students to upgrade to this plan from other plans, turn on the Pricing plan switch toggle.
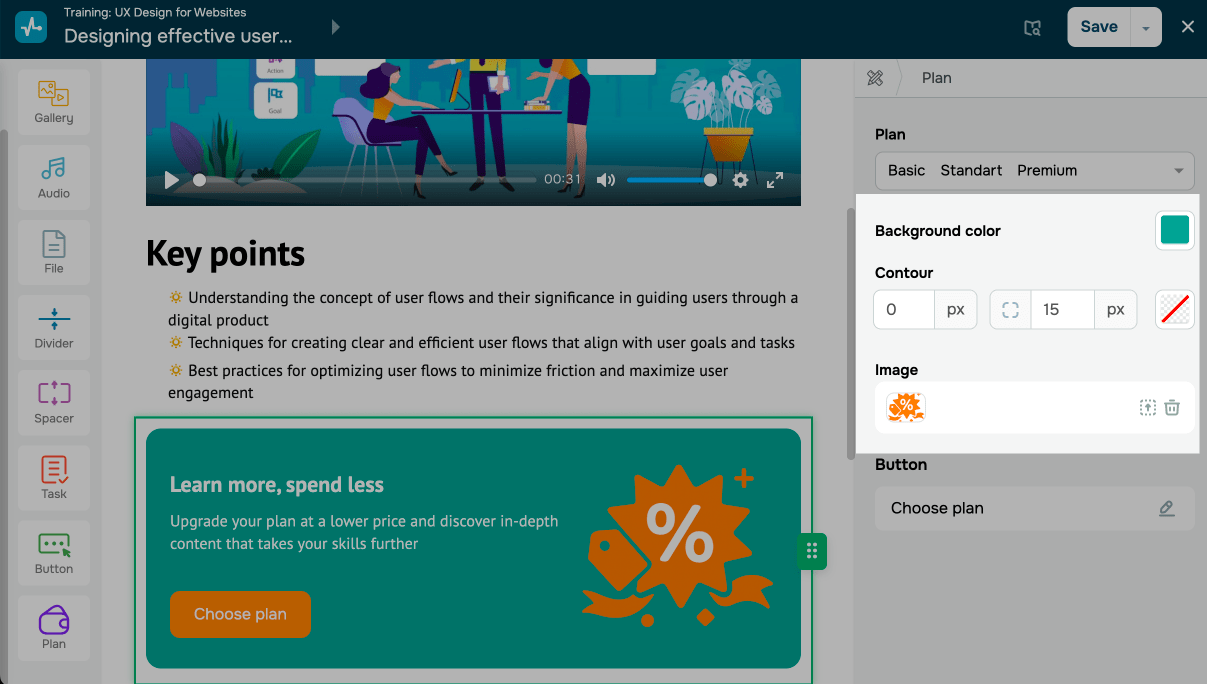
Customize the style
Decide what this element will look like:
| Background color | Sets a background color.
Click the icon and choose a background color. |
| Contour | Sets a shape and adds an outline.
Select a line thickness and corner radius. |
| Image | Adds an image on the right.
To replace the image, click the icon and select or upload a file to the file manager. You can also delete the image. |
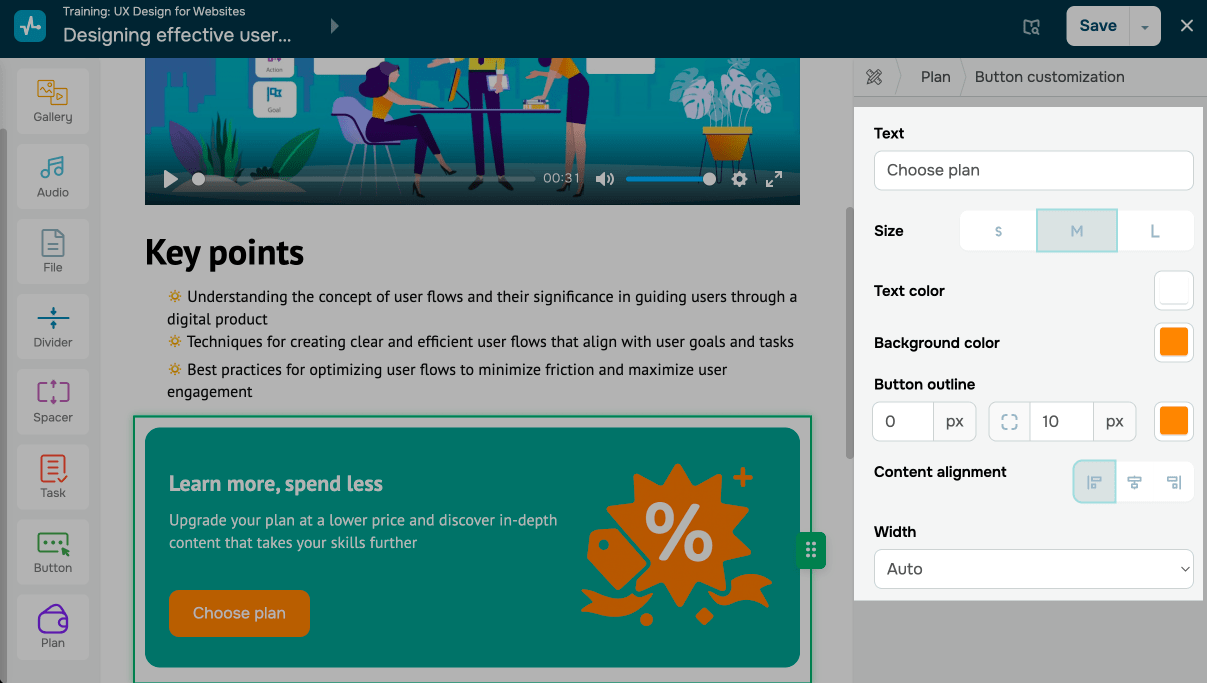
Set up the button
In the Button section, click the edit icon. Decide what the button will look like:
| Text | Enter or edit the text that appears on the button. |
| Size | Choose a button size. |
| Text color | Choose a button text color. |
| Background color | Choose a button color. |
| Button outline | Choose a button outline. |
| Content alignment | Choose a button position, such as left, centered, or right. |
| Width | Choose a button width:
Auto adjusts the button to the length of its text. Full width with container expands the button across the entire block up to the image. Fixed lets you enter a fixed button width. |
Last Updated: 09.12.2025
or