How to create an automated web push campaign
Web push campaigns are designed to attract, retain, and motivate visitors to take action on your website. You can schedule multiple notifications to be sent automatically at set intervals, making it easy to deliver a cohesive campaign or plan all notifications for the month ahead.
In this article, we will talk about how to create an automated web push campaign.
Create an automated campaign
Go to Push > Automation. Click Create automation > Web push series.
In the Automation name field, name your web push campaign. This name will only be visible to you.

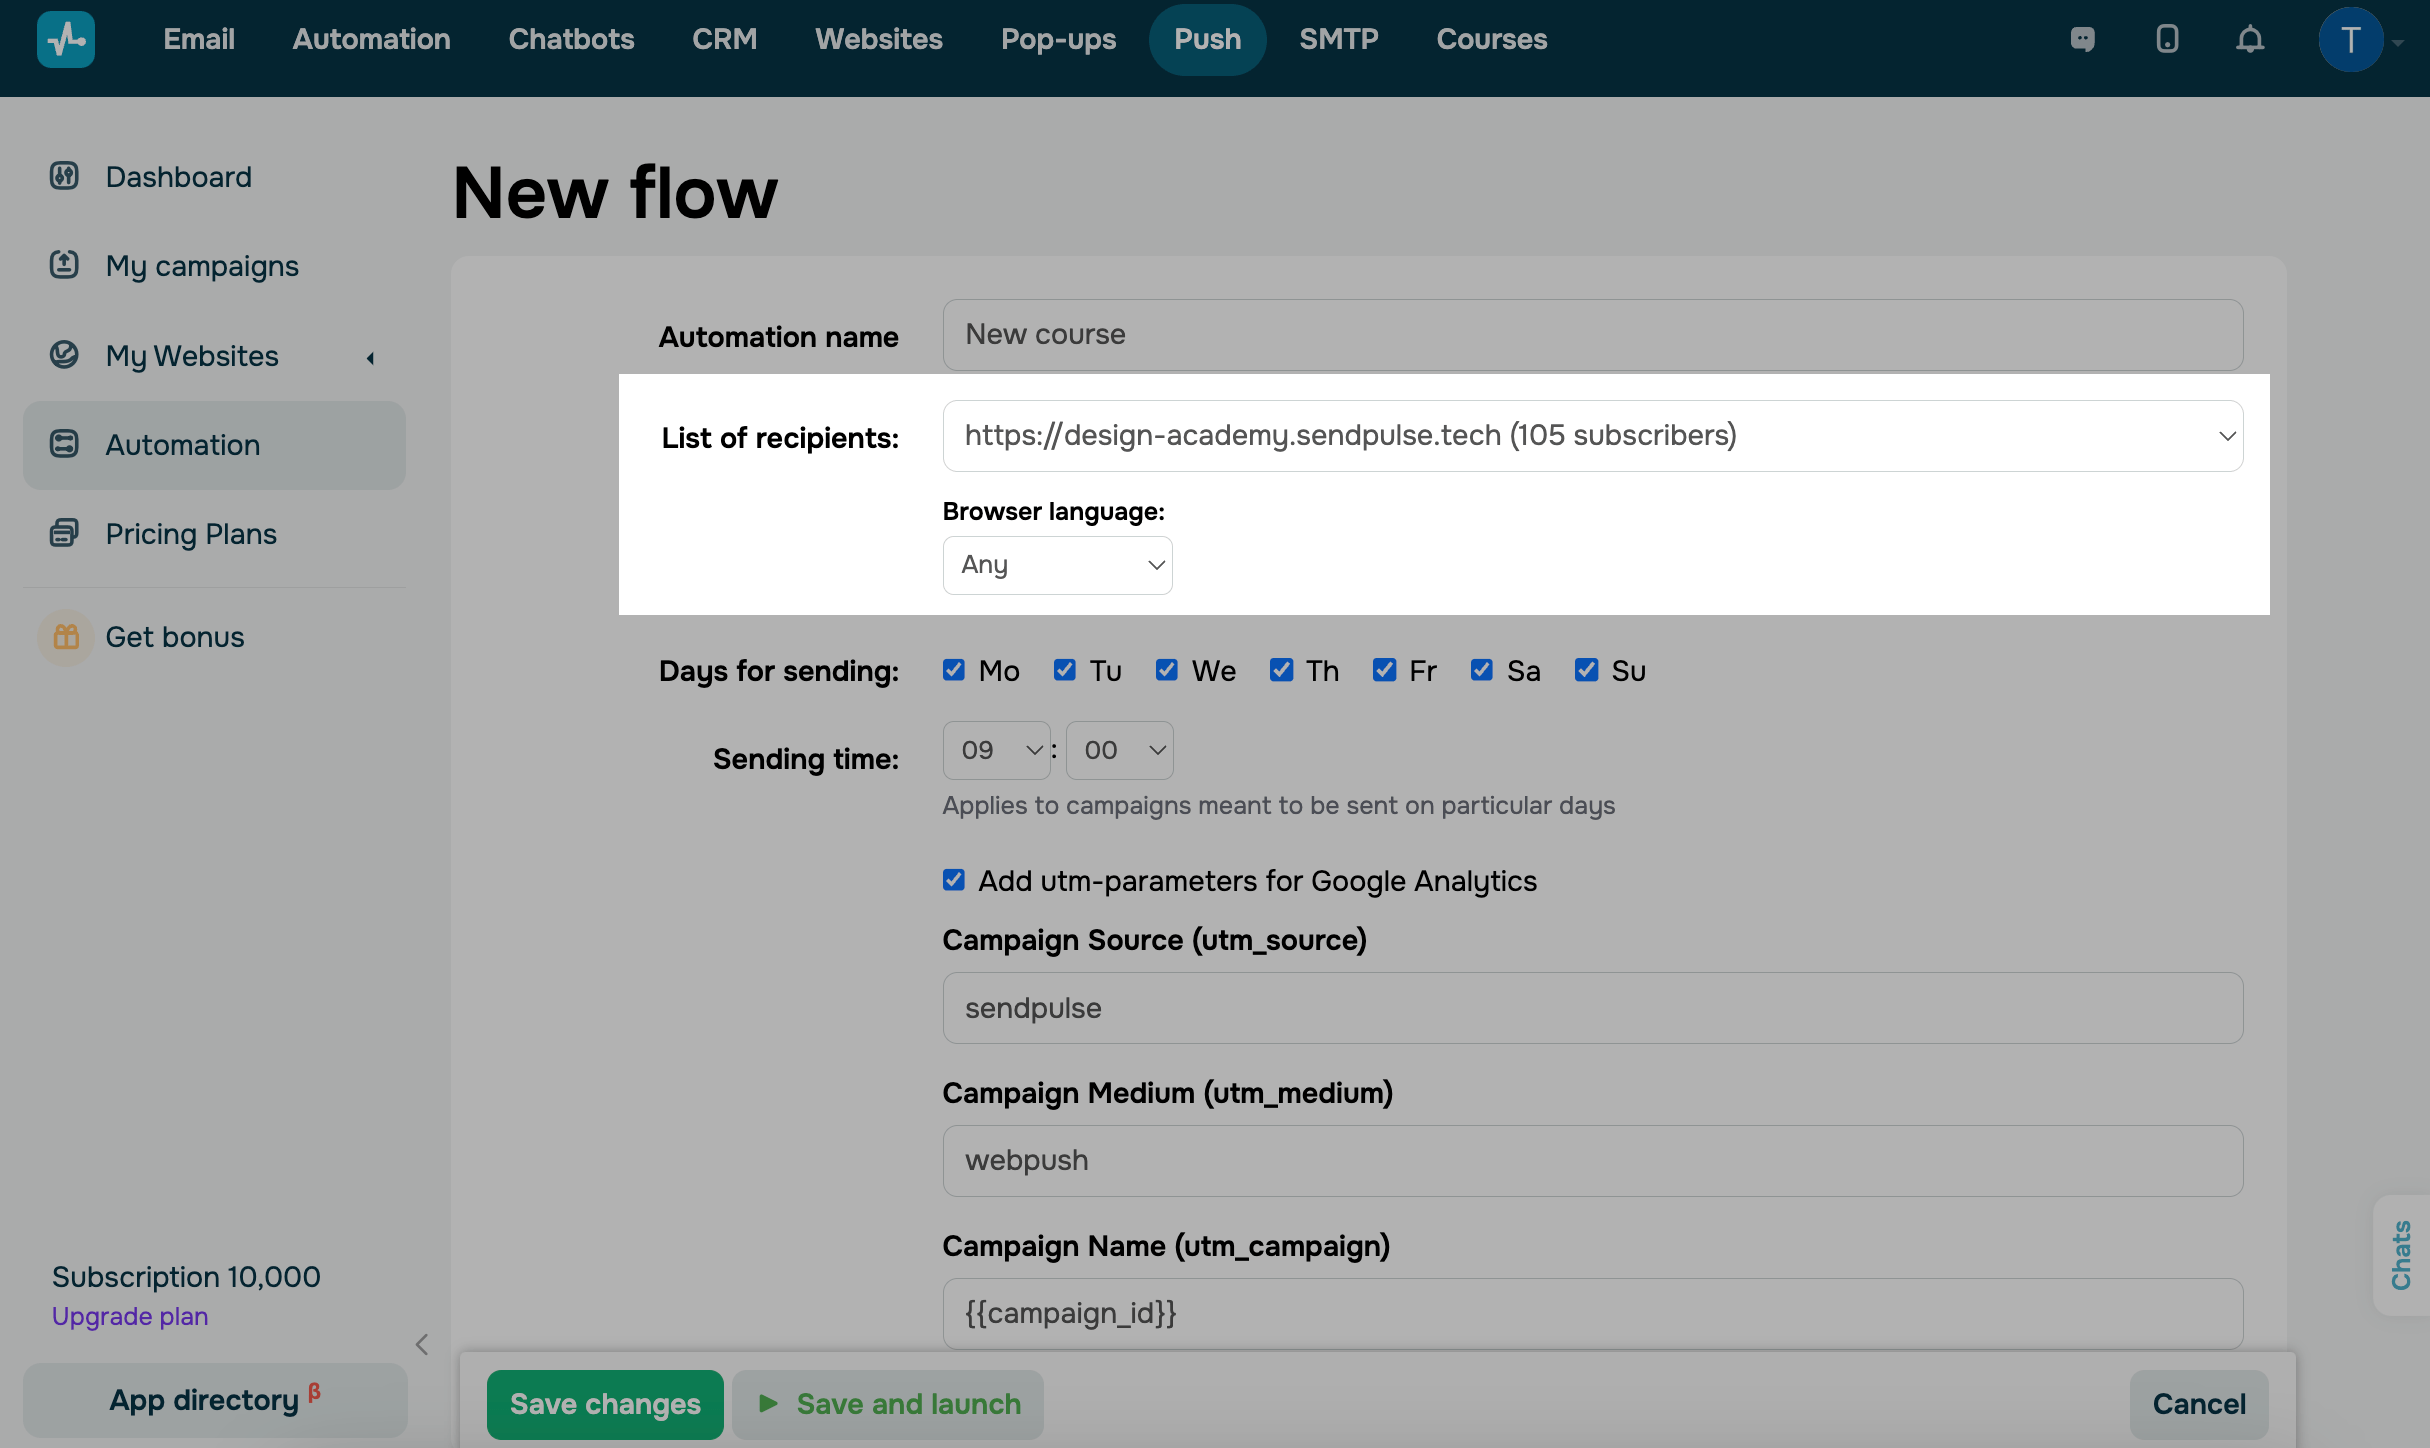
Select recipients
Set the audience for your web push campaign in the following fields:
| List of recipients | Select the website whose subscribers will receive your campaign from the dropdown list. |
| Browser language |
Select a language from the dropdown list. Your campaign will be sent to users whose browser settings match your selected language. Select Any to send your campaign to all users. |
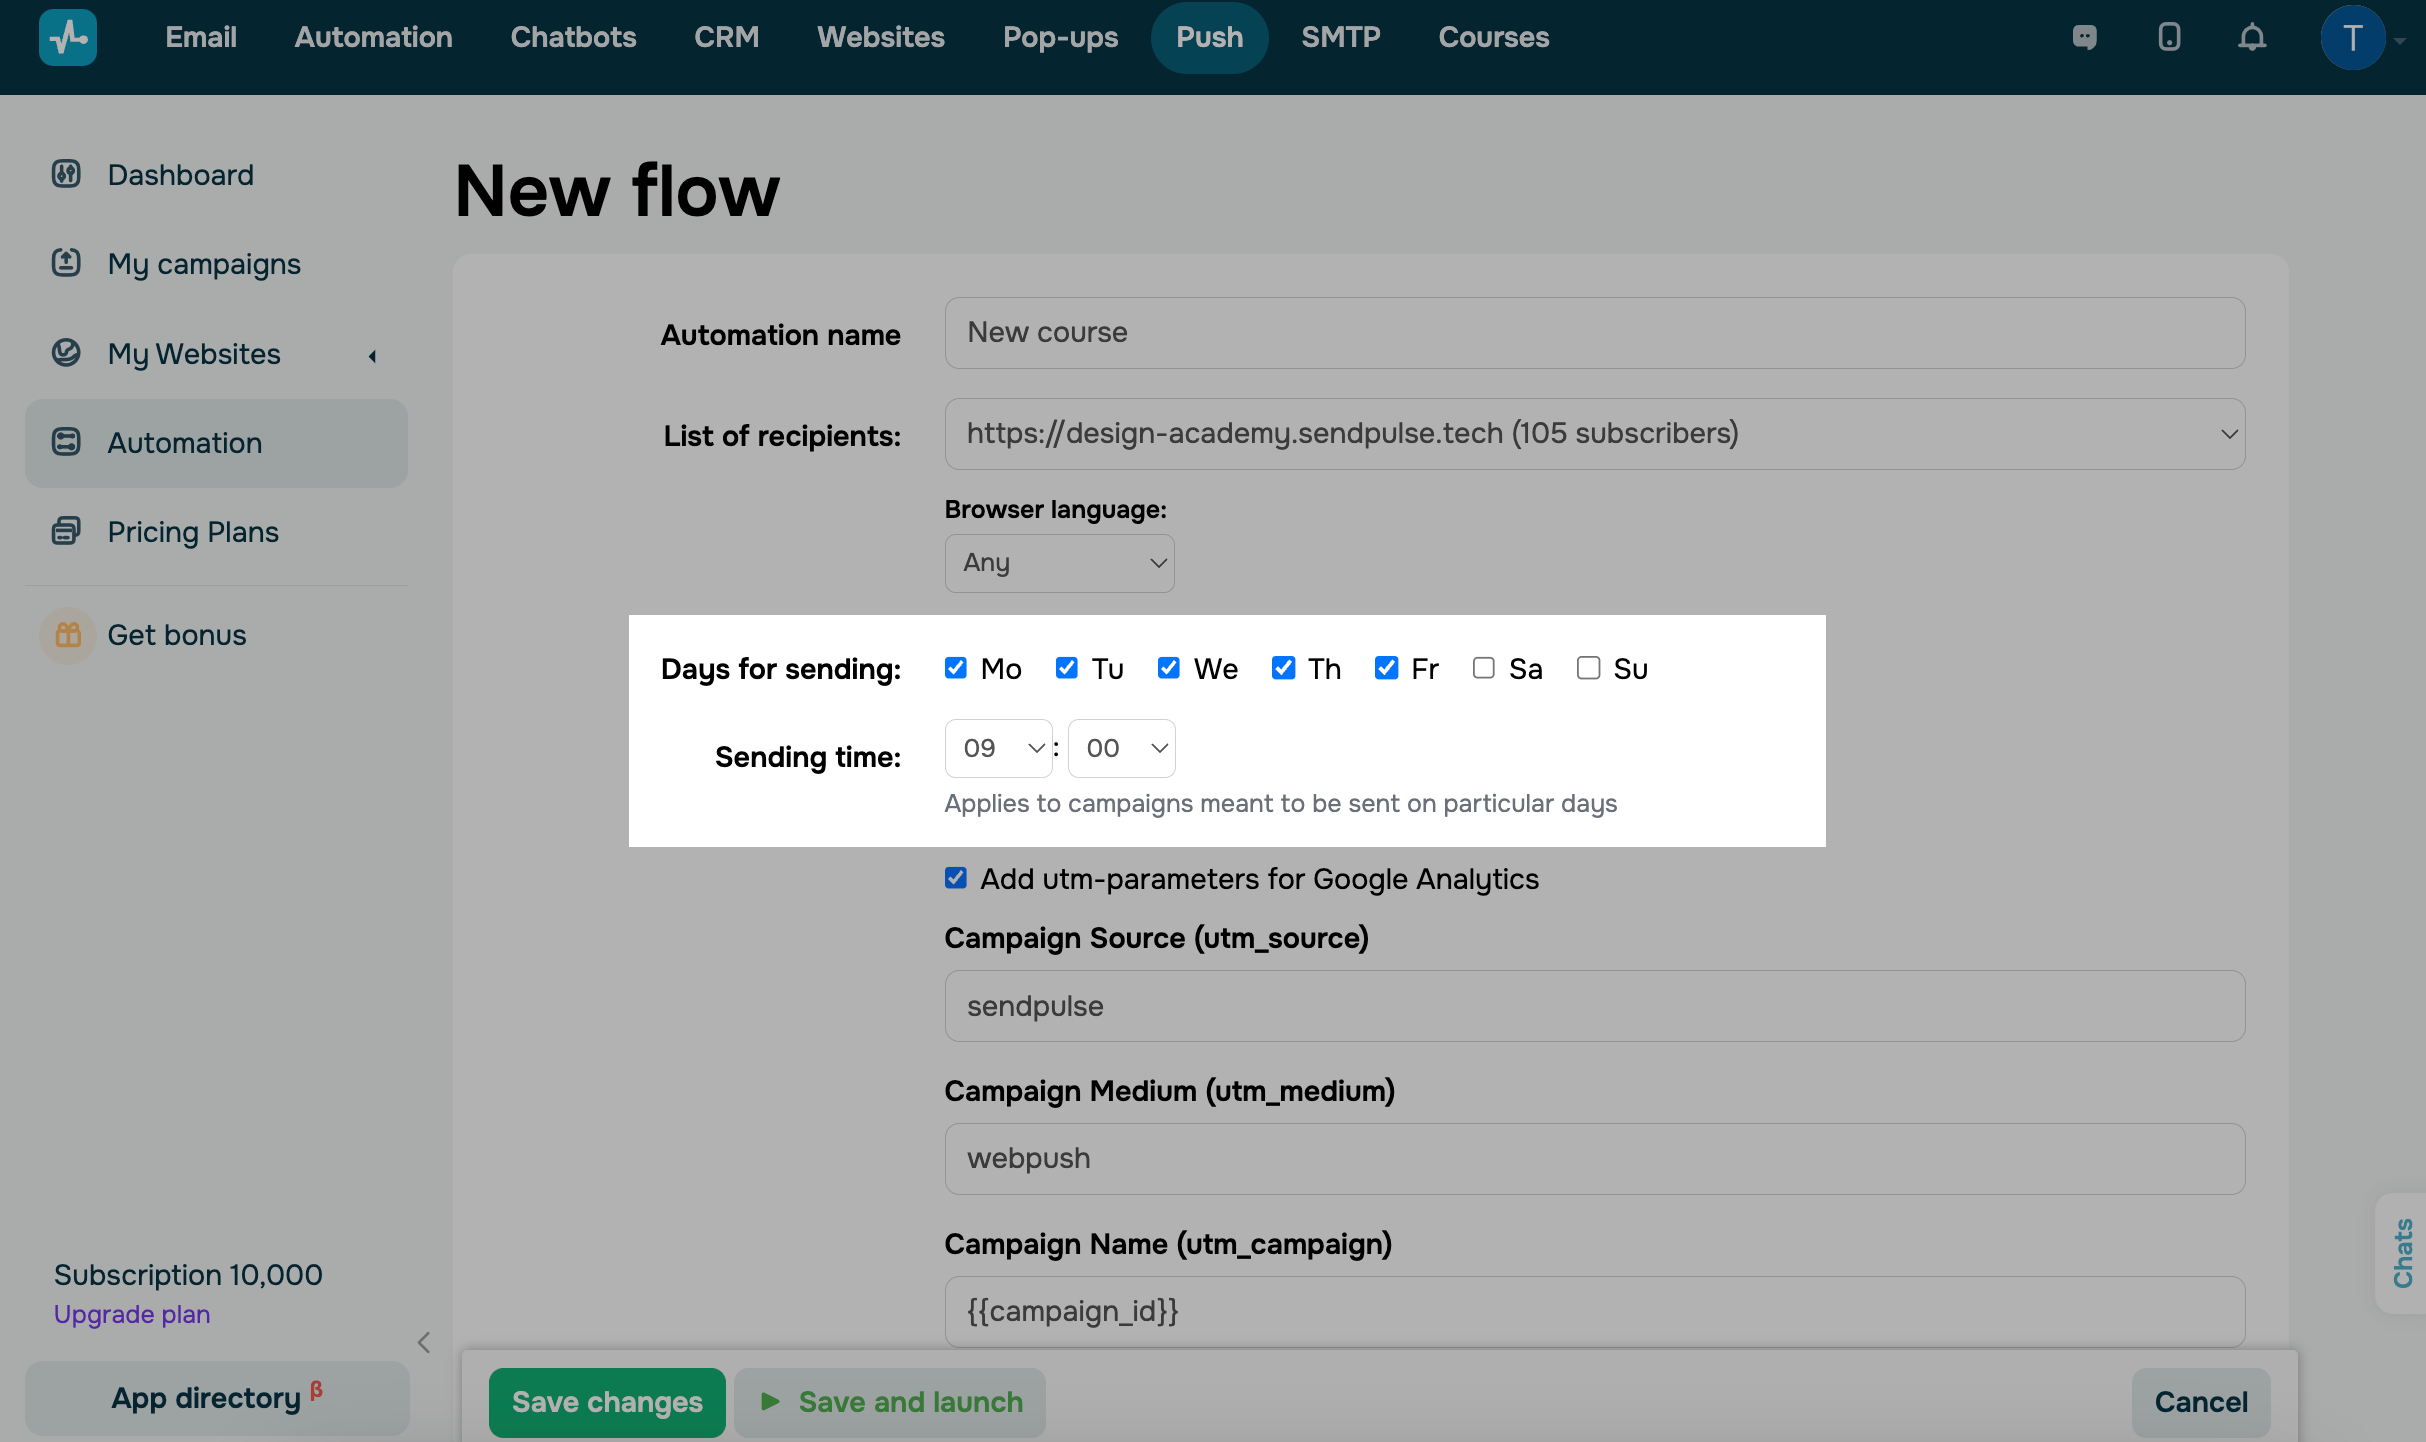
Select a sending time
Decide when to send your campaign to users.
| Days of sending |
Select the days of the week when web push notifications will be sent. If a user visits your website on the selected days, they will receive a web push notification. |
| Sending time |
Select the time when web push notifications will be sent. Applicable only to campaigns scheduled for specific days of the week. |
Add UTM tags
To send data to Google Analytics, select the Add UTM parameters for Google Analytics checkbox and fill in the fields:
| Campaign Source (utm_source) | Identifies the traffic source, such as push or sendpulse (as your campaign sending tool). |
| Campaign Medium (utm_medium) | Identifies the traffic type, such as notification or webpush. |
| Campaign Name (utm_campaign) |
Identifies the campaign name. By default, the |
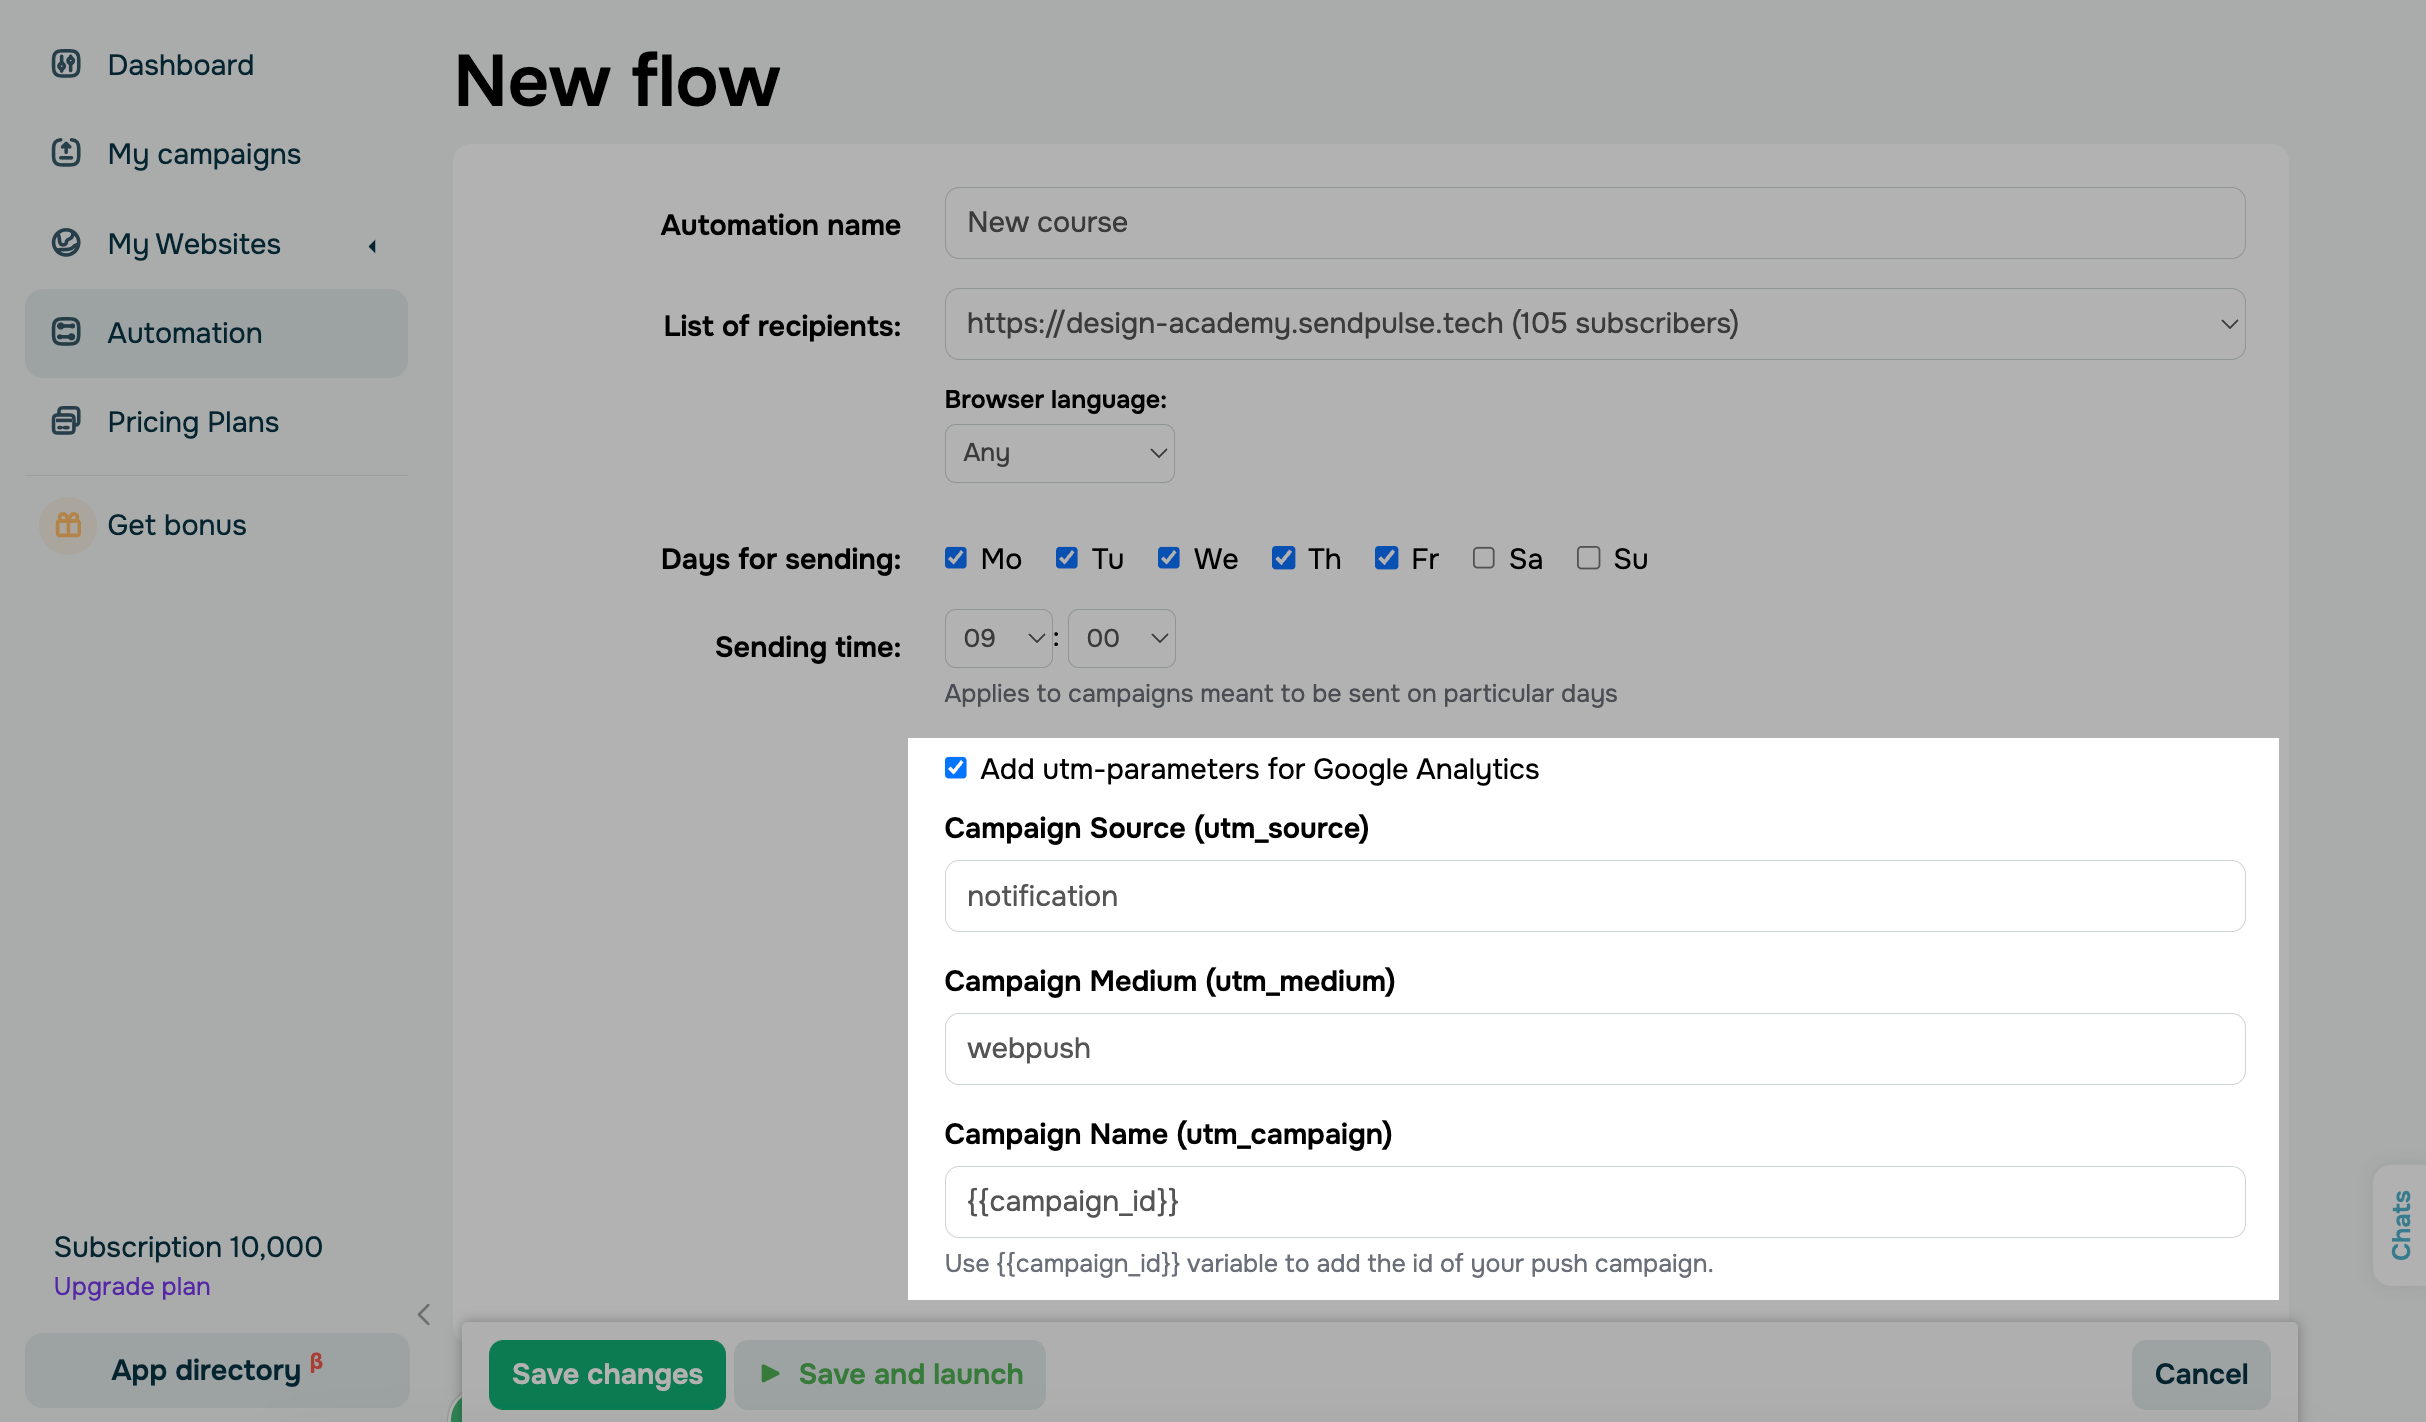
These tags are added to your notification link and will automatically move data to Google Analytics.
Add web push campaign content
Add and edit your notification content in the following fields:
| Send push | Set a sending time. You can select right away to send your campaign immediately or deliver it in a specific number of days after subscription or previous notification. |
| Title | Type in a notification title that will be visible to users. It can be up to 50 characters long. |
| Web push text | Type in a notification body text. It can be up to 125 characters long. |
| Web push link | Add the page link to which your notification will lead. By default, it is the link to your selected website with UTM tags. |
| Replace the standard website image |
Select this checkbox if you want to add your own image. Recommended size: 128×128px. Supported formats: JPG and PNG, up to 200KB |
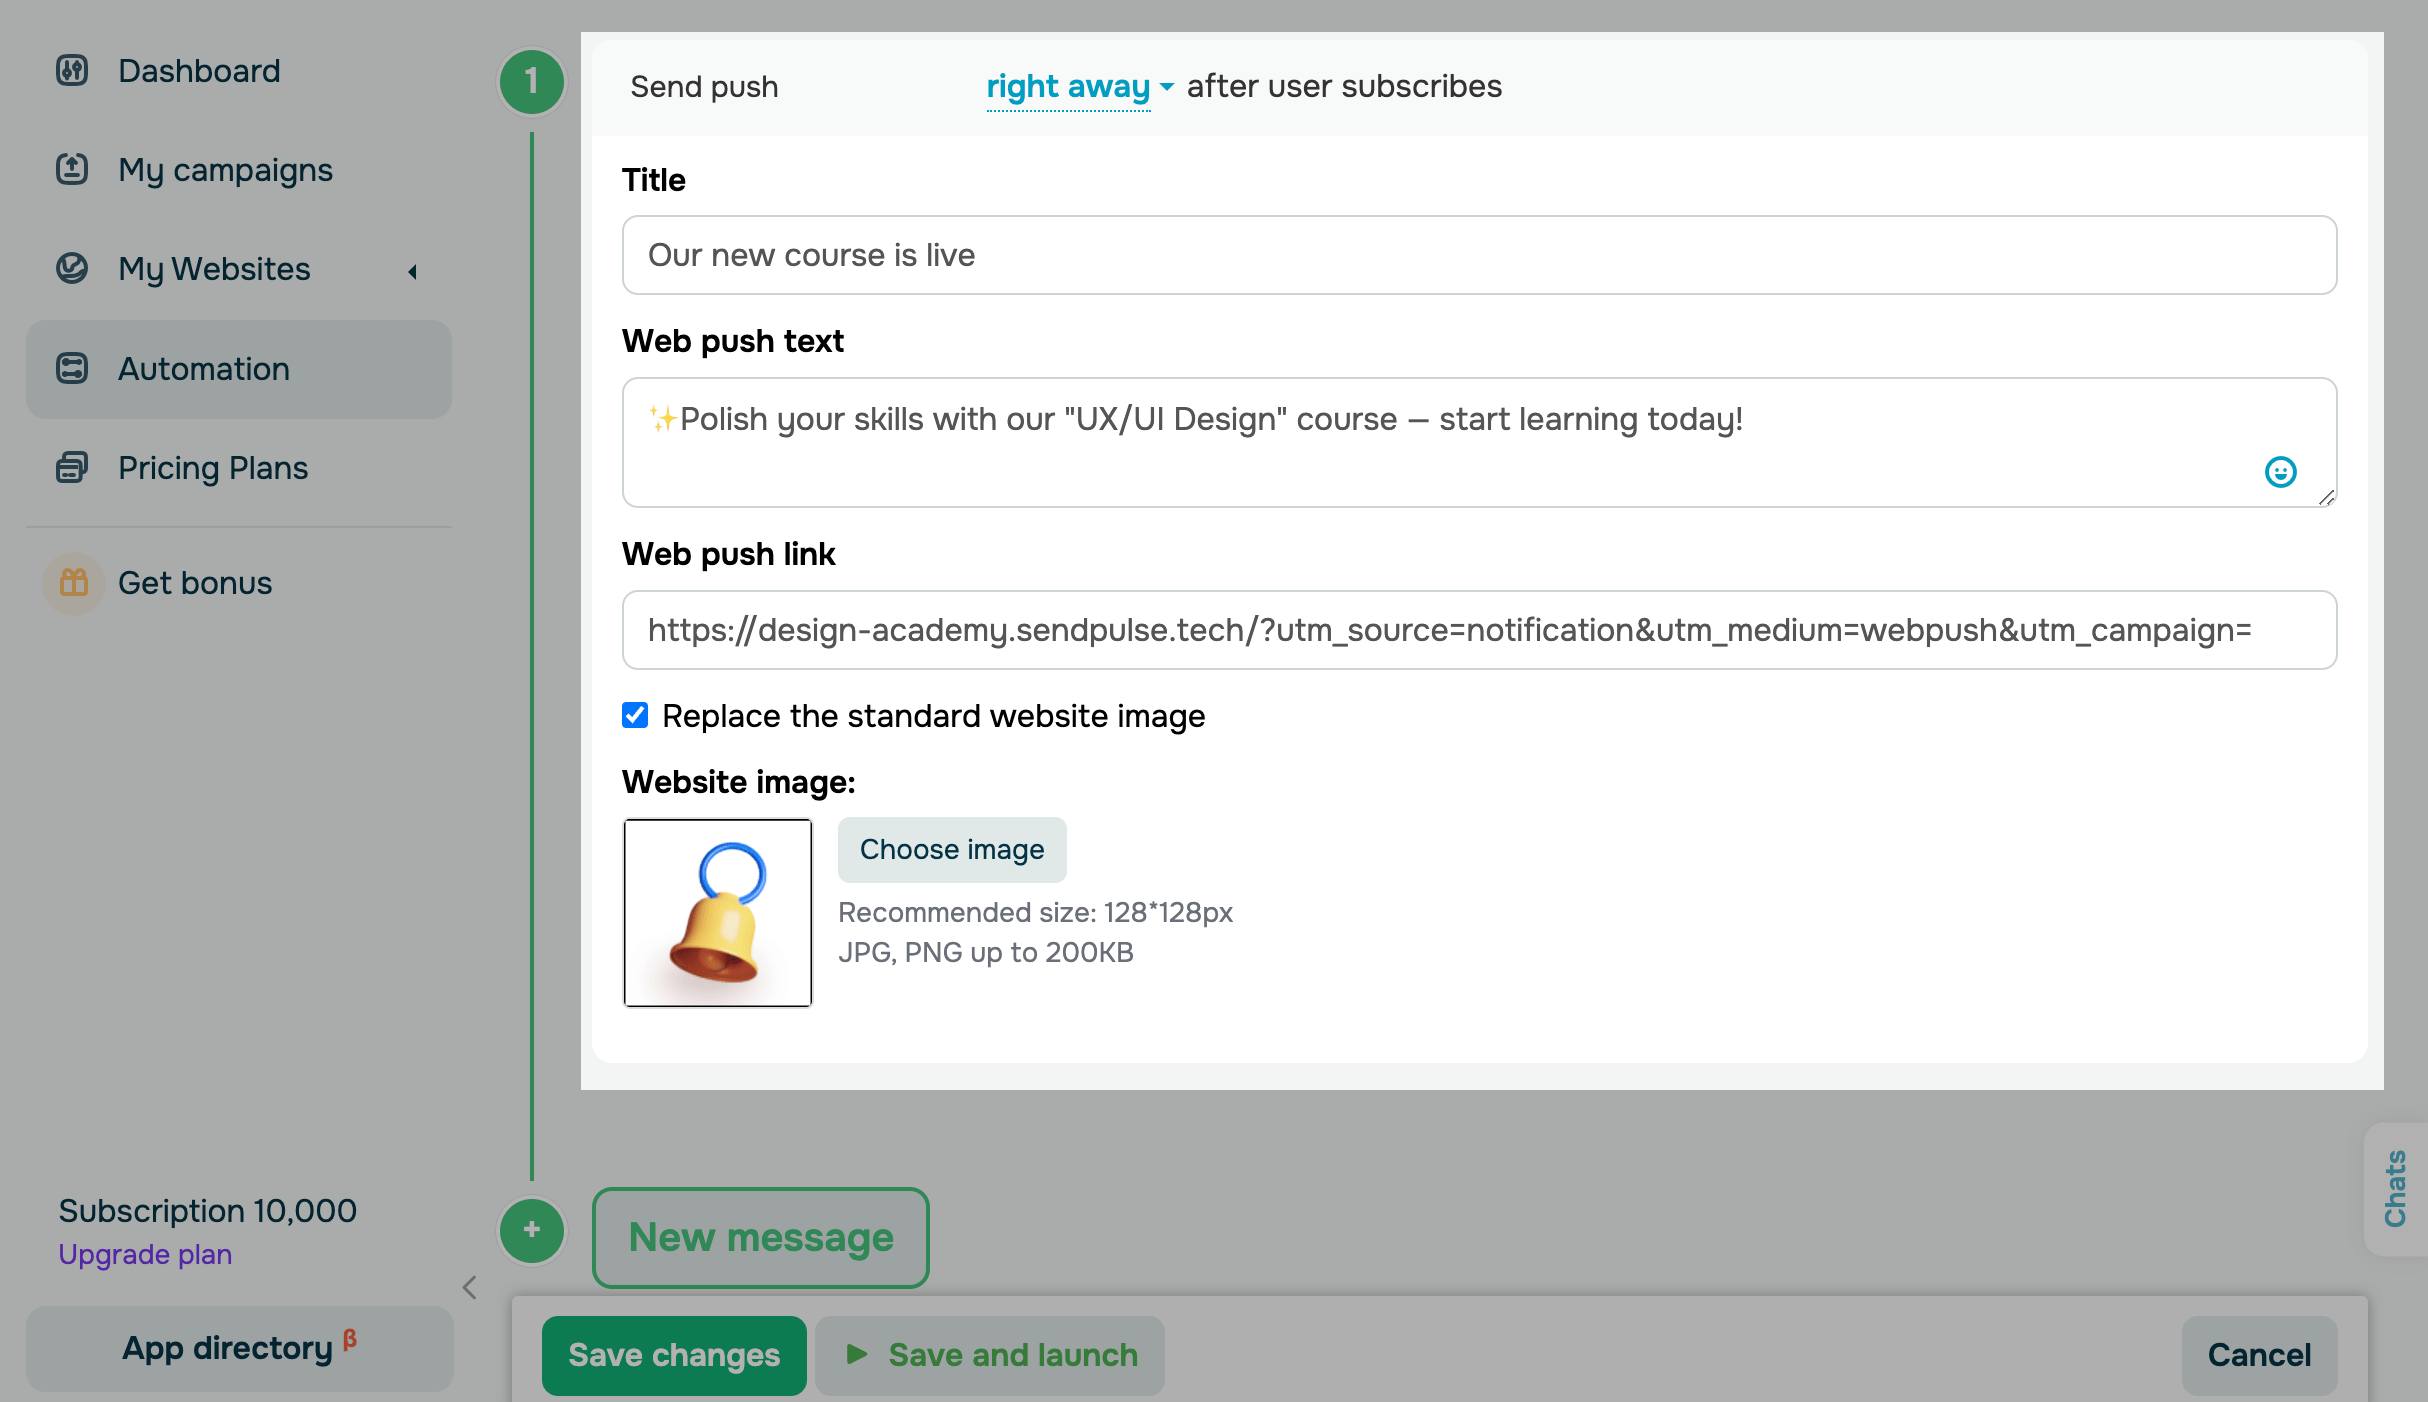
To add your next notifications, click New message and customize the sending schedule and content.
Run your automated campaign
Once you add and set up your web push notifications, click Save changes to save your campaign without running it. To run your campaign, click Save and launch. Your web push notifications will be sent automatically according to the schedule.
You can view campaign statistics in Push > Dashboard.
Read also: How to track your web push campaign statistics.
Last Updated: 16.01.2025
or