Send a Facebook campaign
Facebook campaigns allow companies to advertise their products or services, notify people about events, send invitations, or congratulate users. With SendPulse, you can create and send campaigns to all of your bot subscribers or a specific audience segment.
Facebook Messenger chatbot subscribers are users who interacted with your Page, for example, clicked "Message" and asked a question, subscribed via a widget or subscription form, or started communicating with your bot by clicking "Get started" in the chat window.
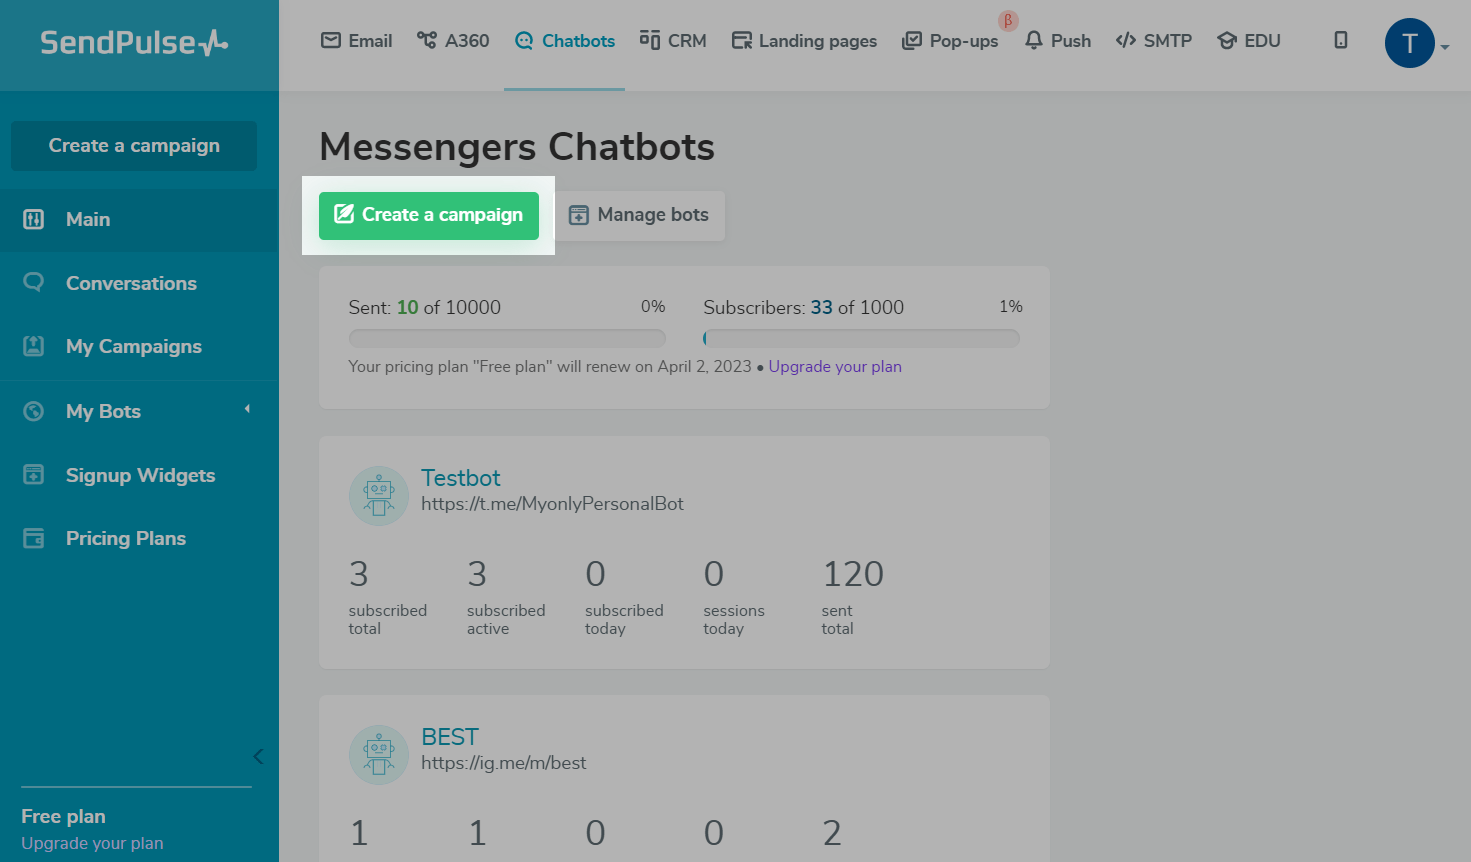
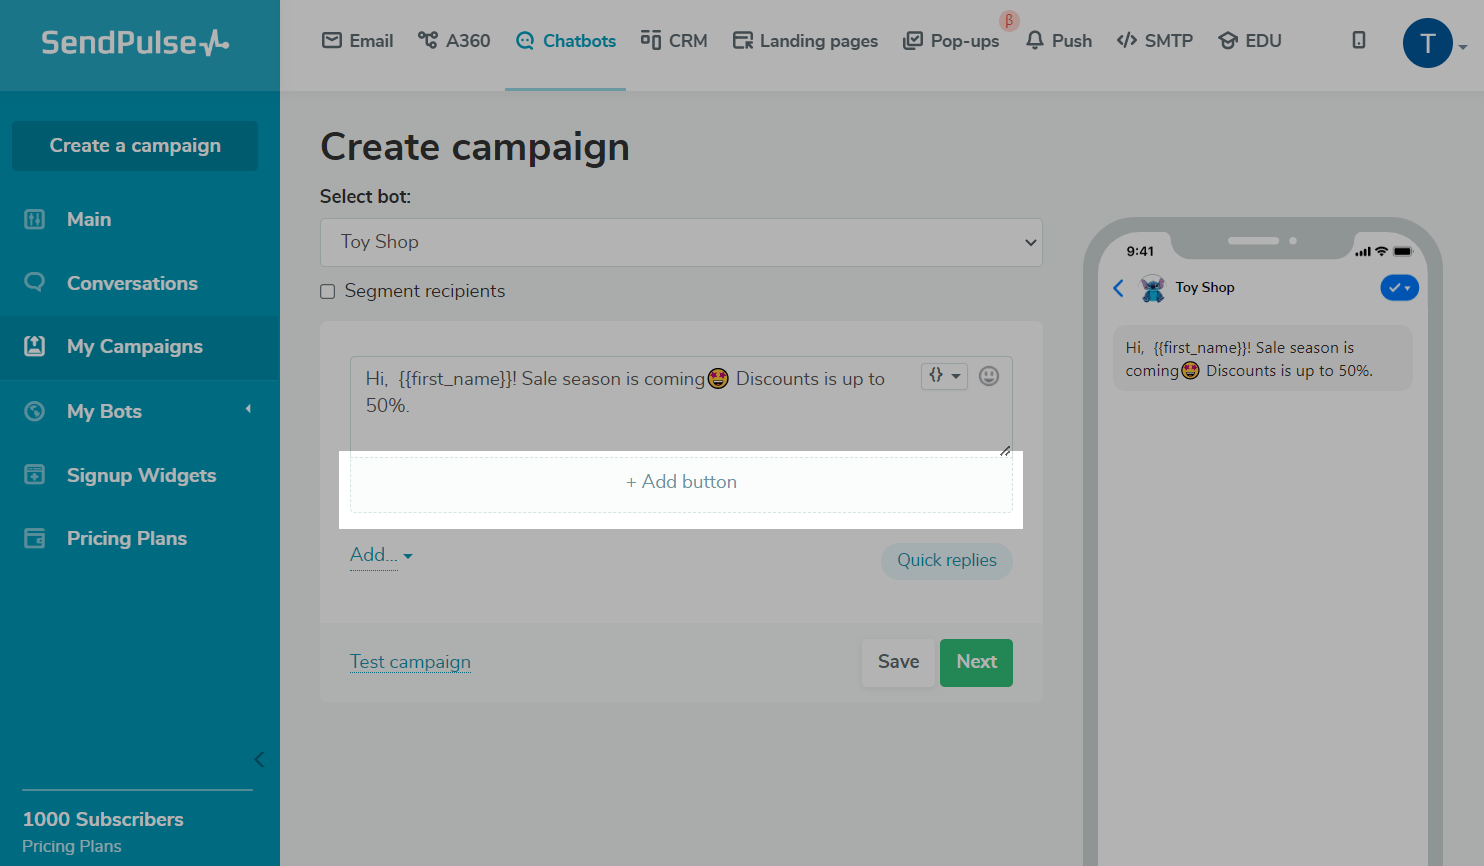
Go to the Chatbots section to create a campaign and click Create campaign.
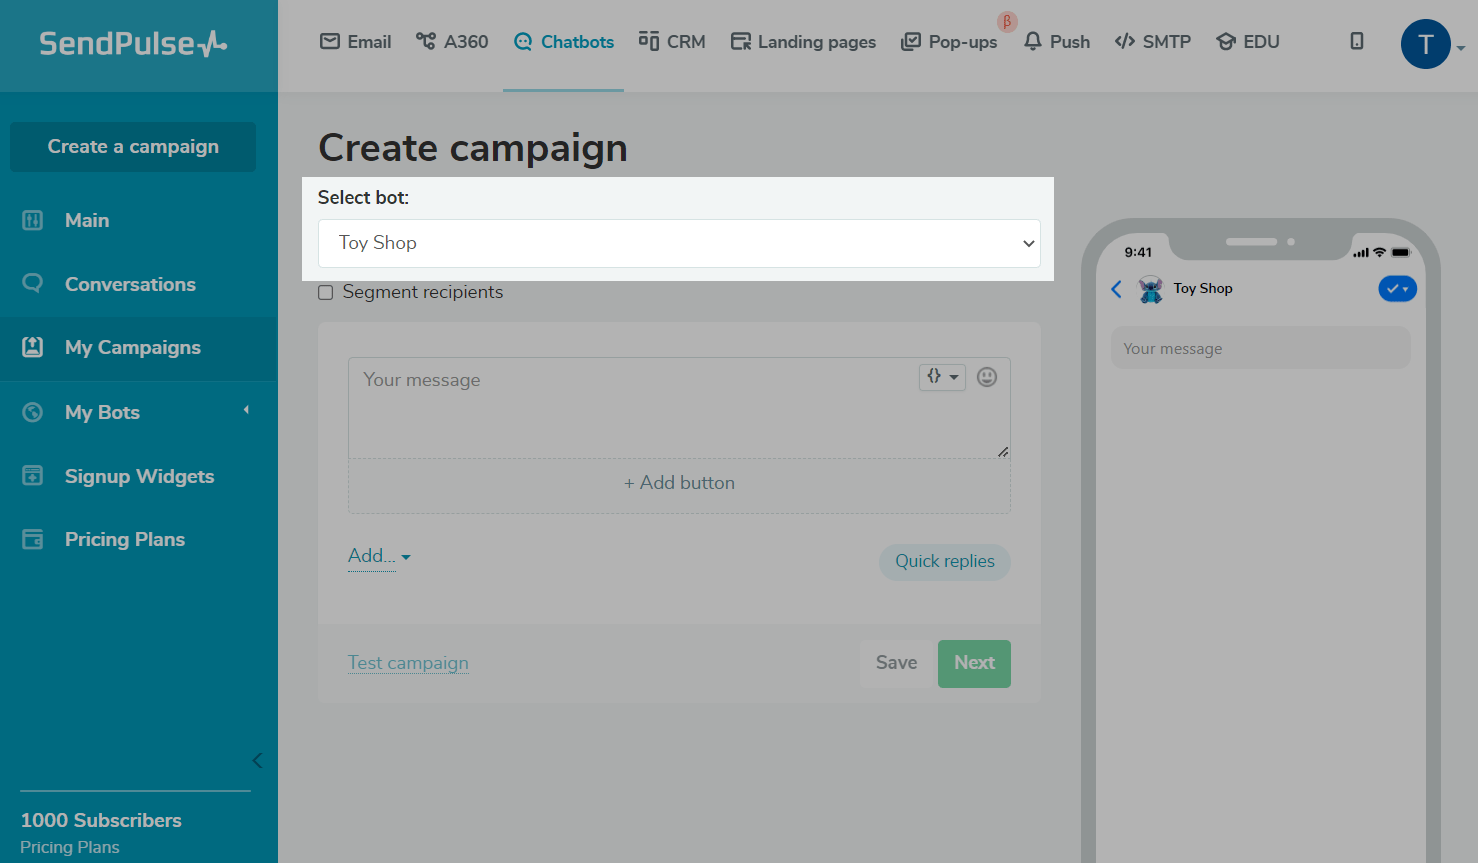
Select a bot
Choose a previously connected bot from the drop-down list and the campaign will be sent to that chatbot’s audience list.
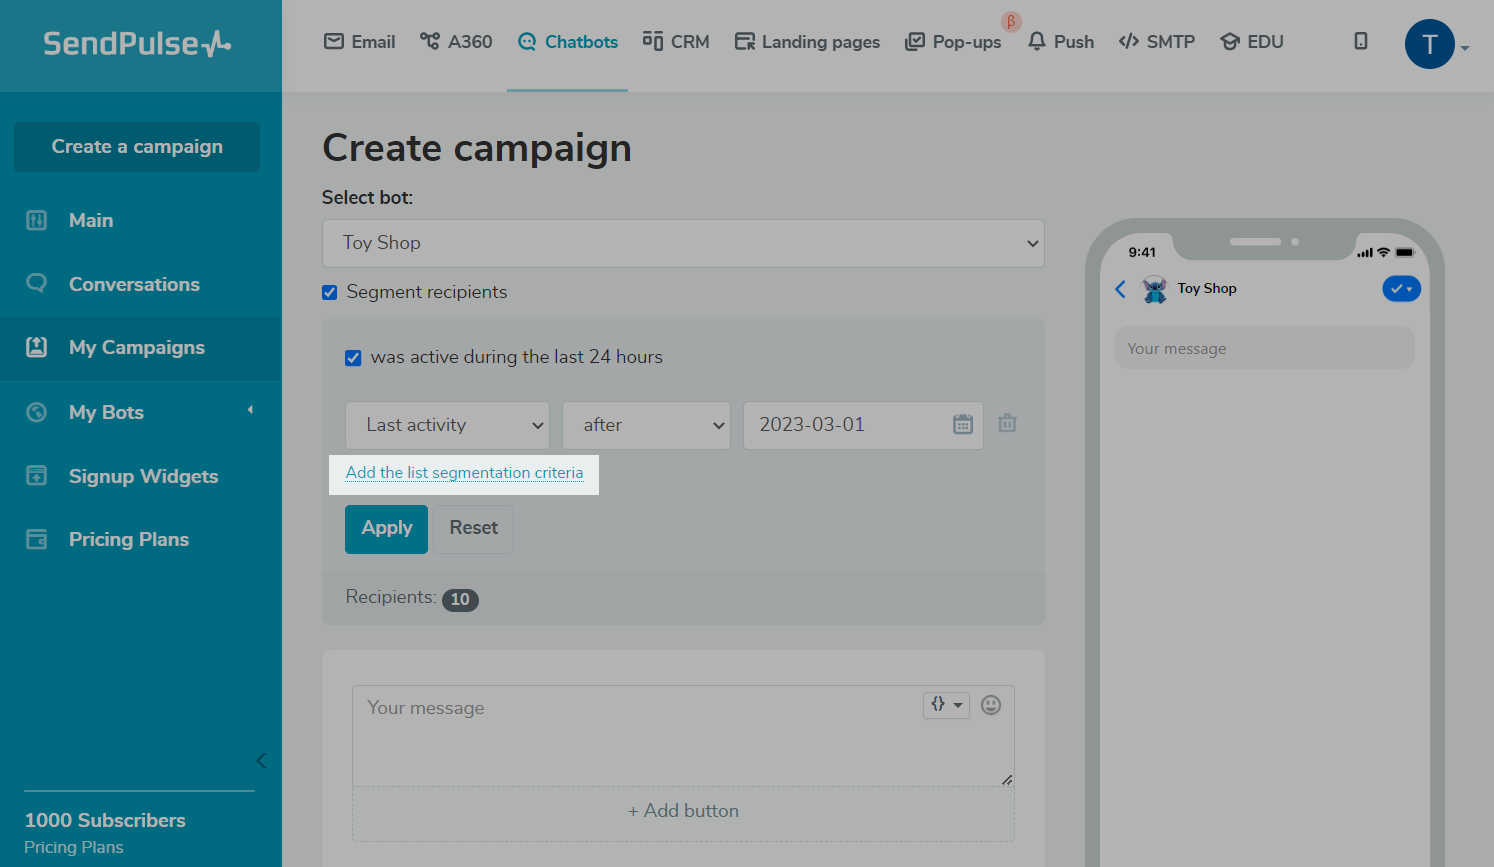
Segment your audience
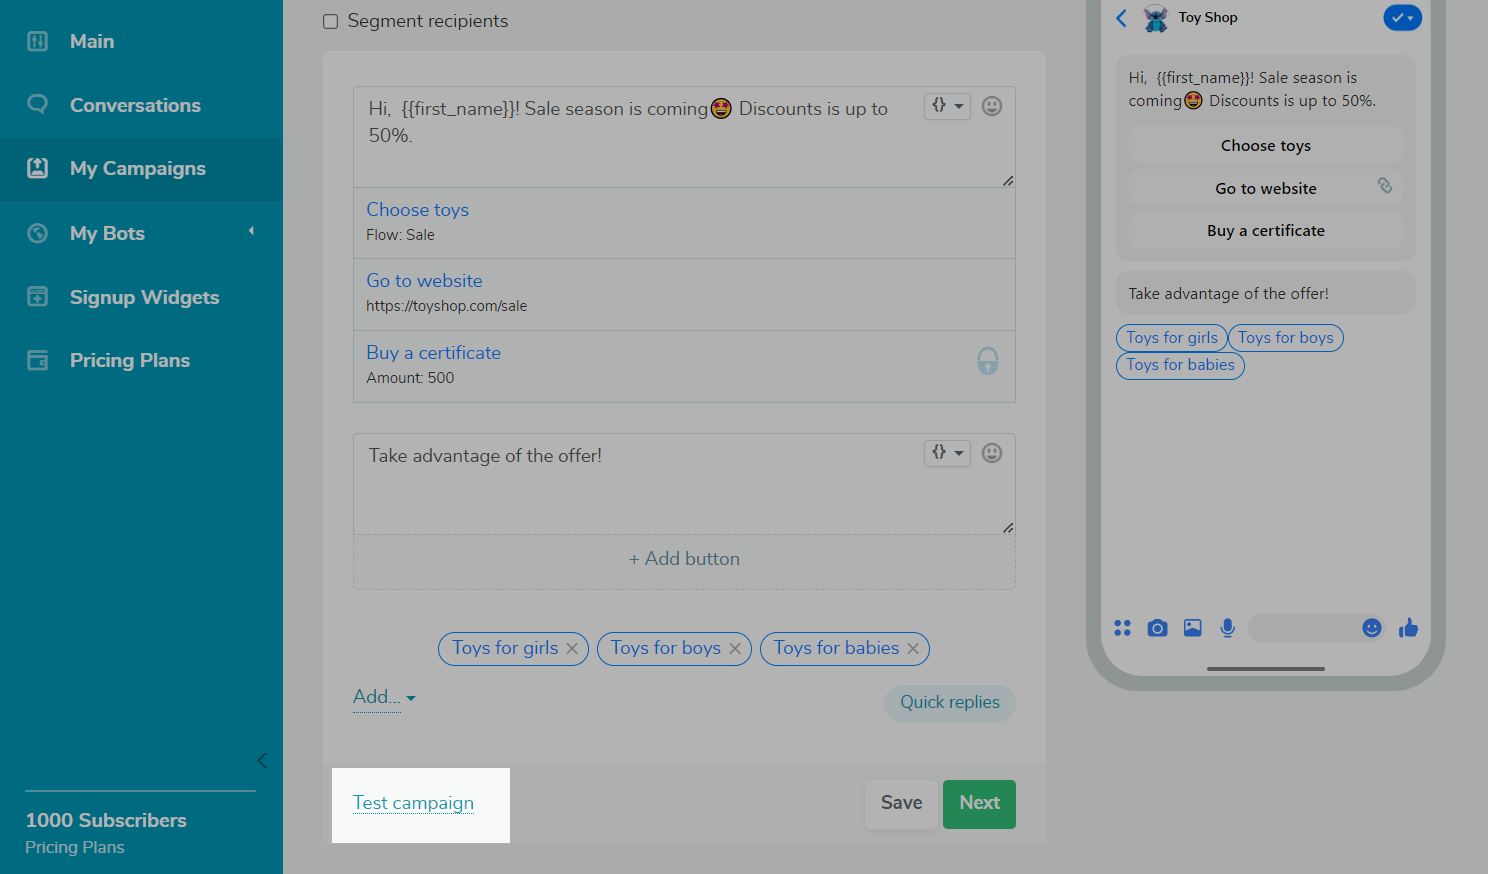
If you need to segment your audience, select the Segment recipients checkbox. Your campaign will be sent only to those who meet the specified criteria. For example, if you collect additional variables during subscription, create global variables, or add tags, you can segment your audience according to the conditions Variable and Tags.
You can select the was active in the last 24 hours checkbox to send a campaign to those who have been online on Viber in the last 24 hours.

To add multiple conditions for a more personalized message, click Add the list segmentation criteria. Once you add them, click Apply.
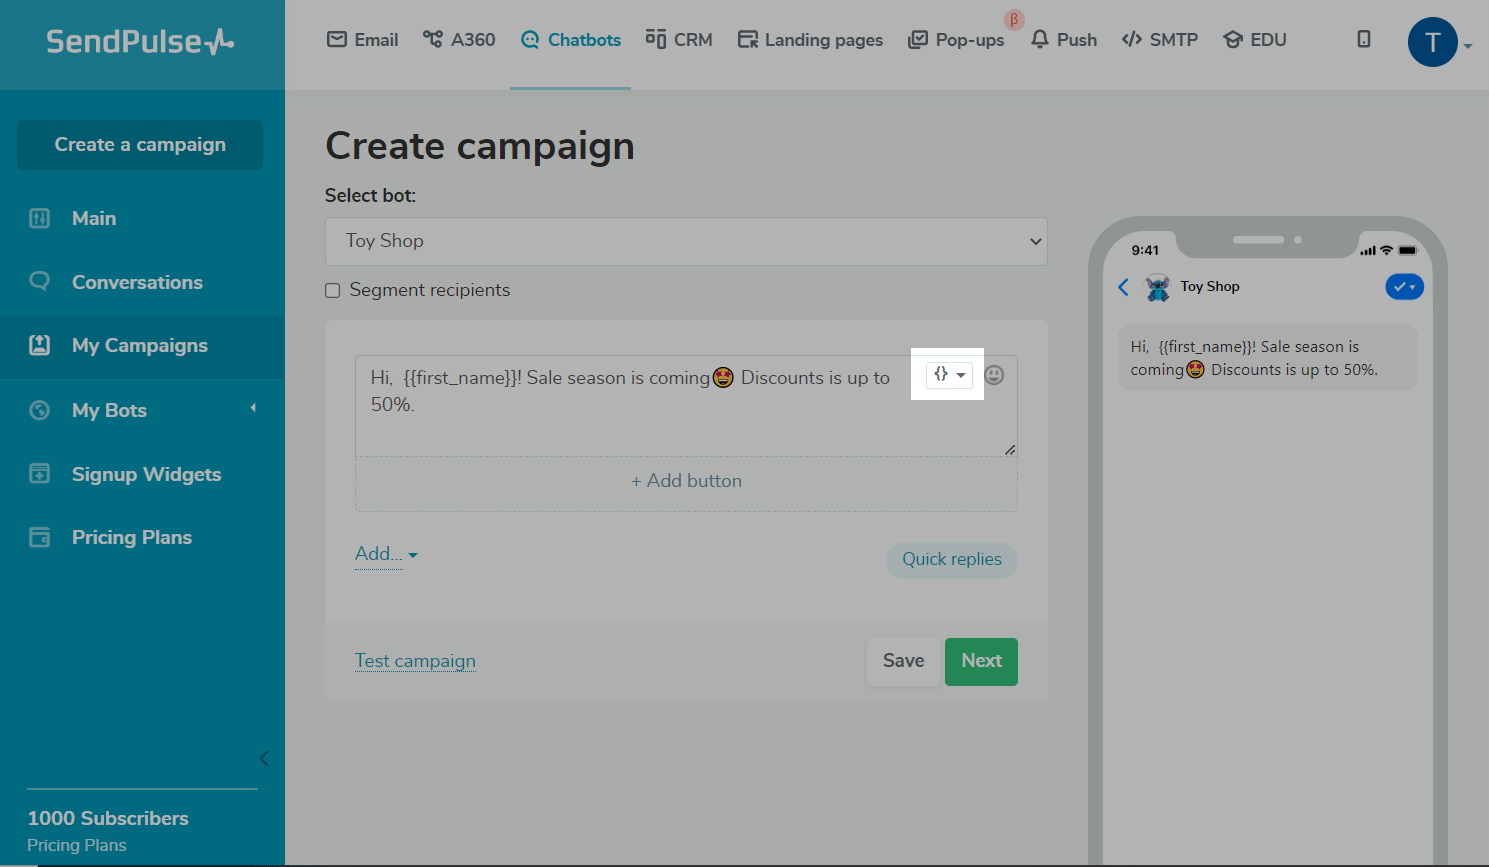
Type in your message
You can also send a campaign to your entire audience using an approved message template. It's useful for transactional notifications outside the 24-hour support window.
Next, type in your message — it should not be longer than 512 characters.
You can also add variables and emoji to it. To do this, click {} in the upper-right corner of the text field, and select a variable from the drop-down list. Each user will receive a message with a variable value from their contact info.
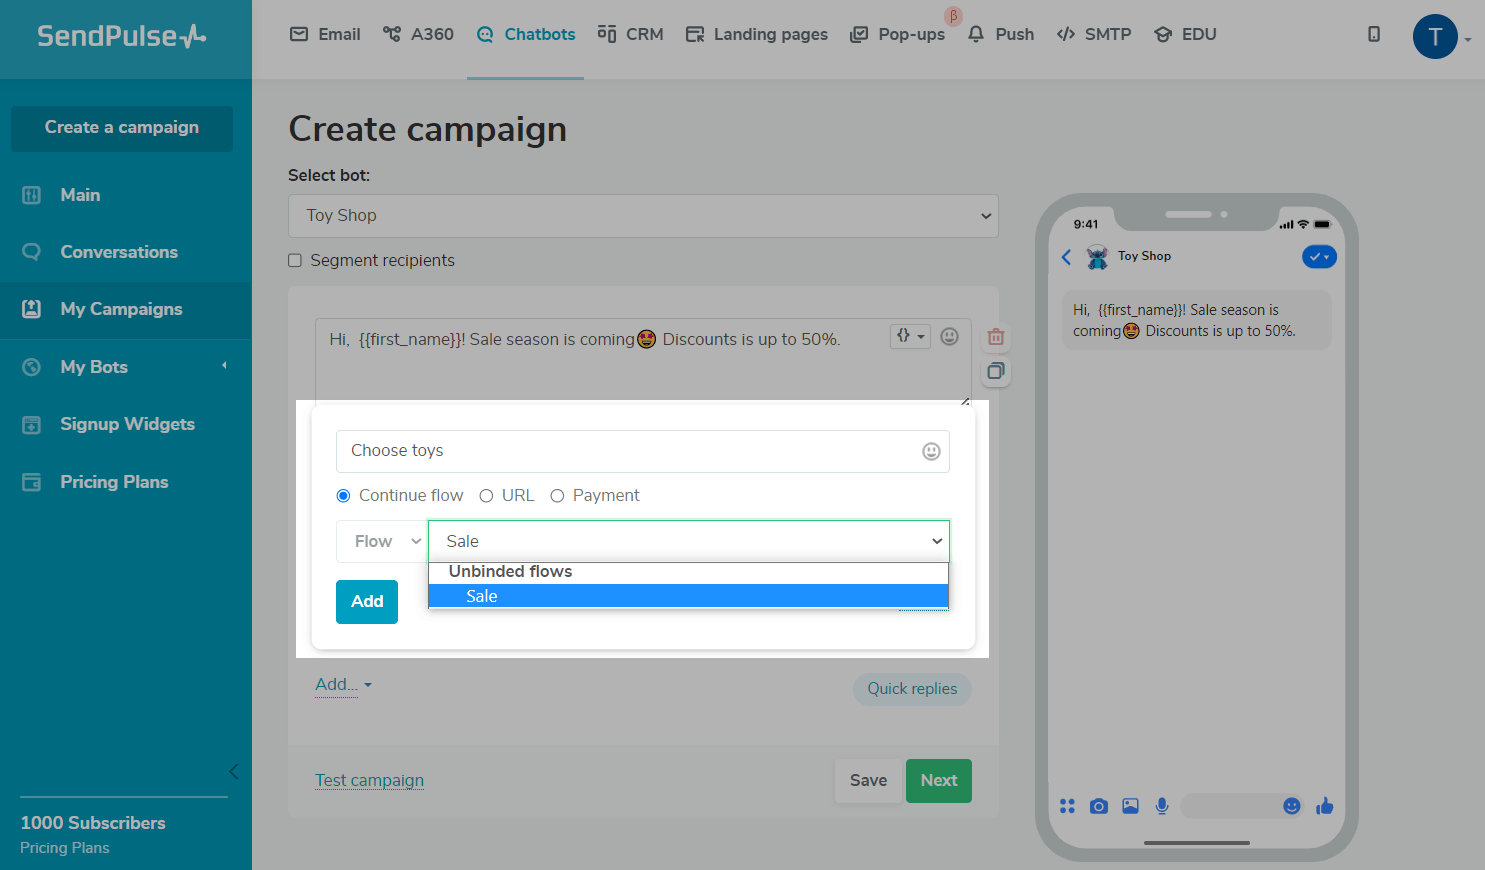
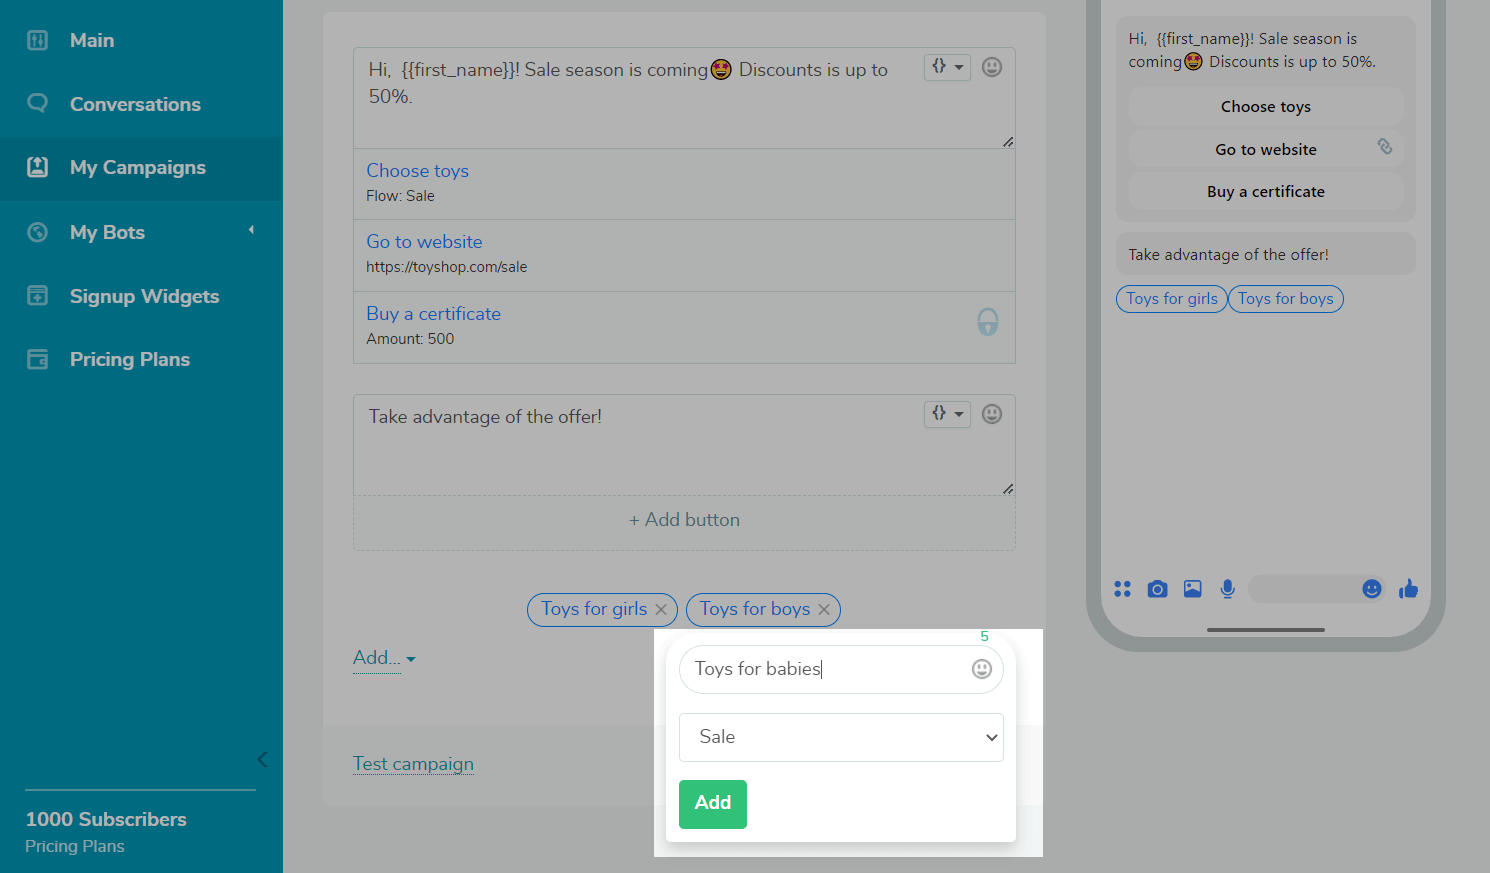
Add a button
You can add a button with a link, use it to launch a flow, or add a payment method. Place the button under your text or any other element. Clicking the button will trigger the appropriate action: follow the link, make a payment, or start a flow. You can add up to 3 buttons in one mailing.
Continue the flow
Select the type of button Continue flow a flow that will be sent when a user clicks the button.
Link
You can add a link to an external source and start a flow when a subscriber clicks on the link.
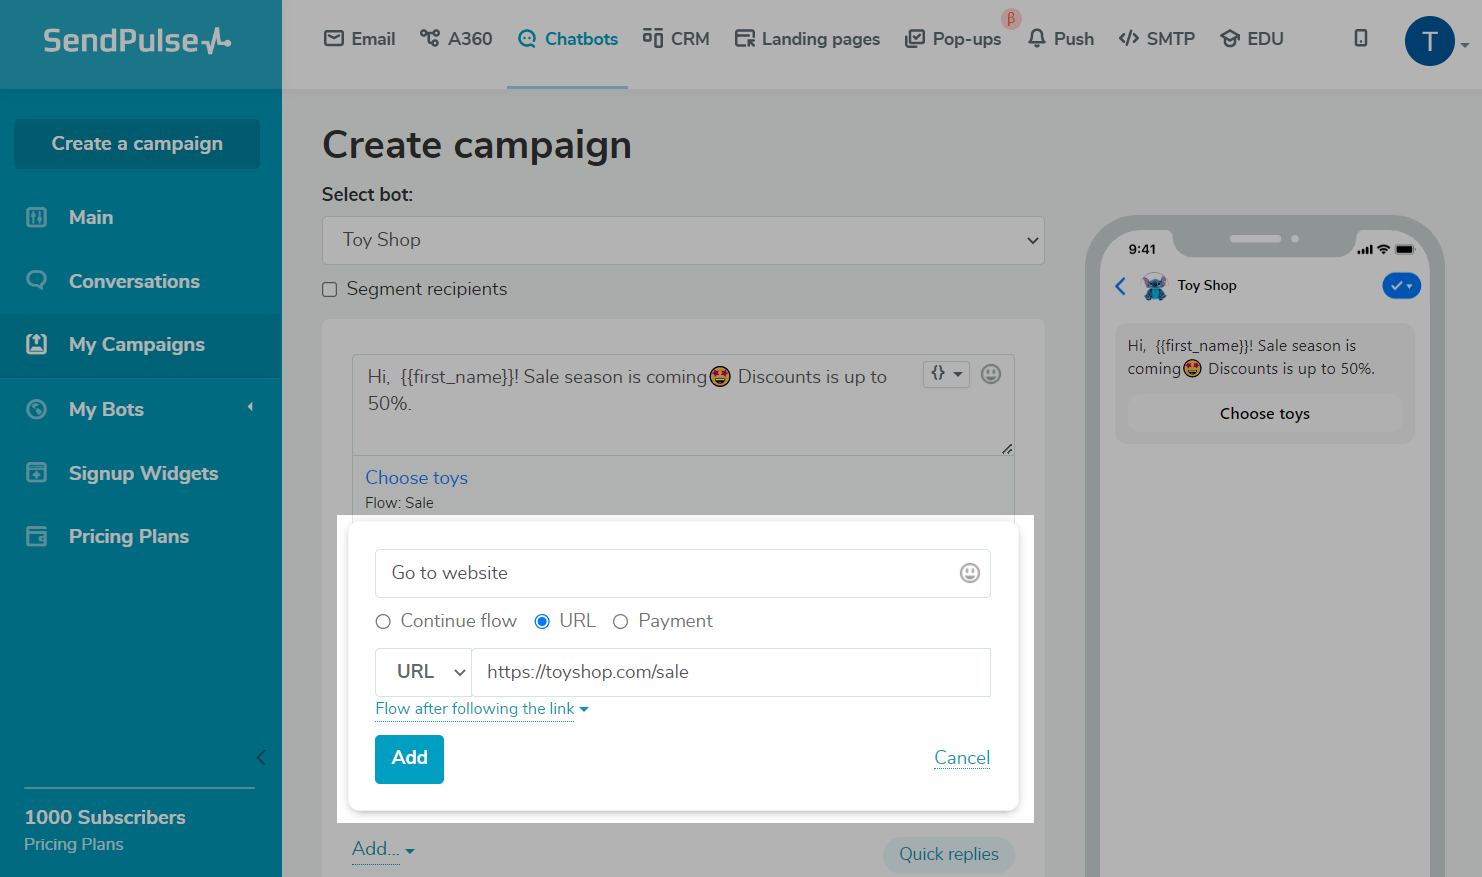
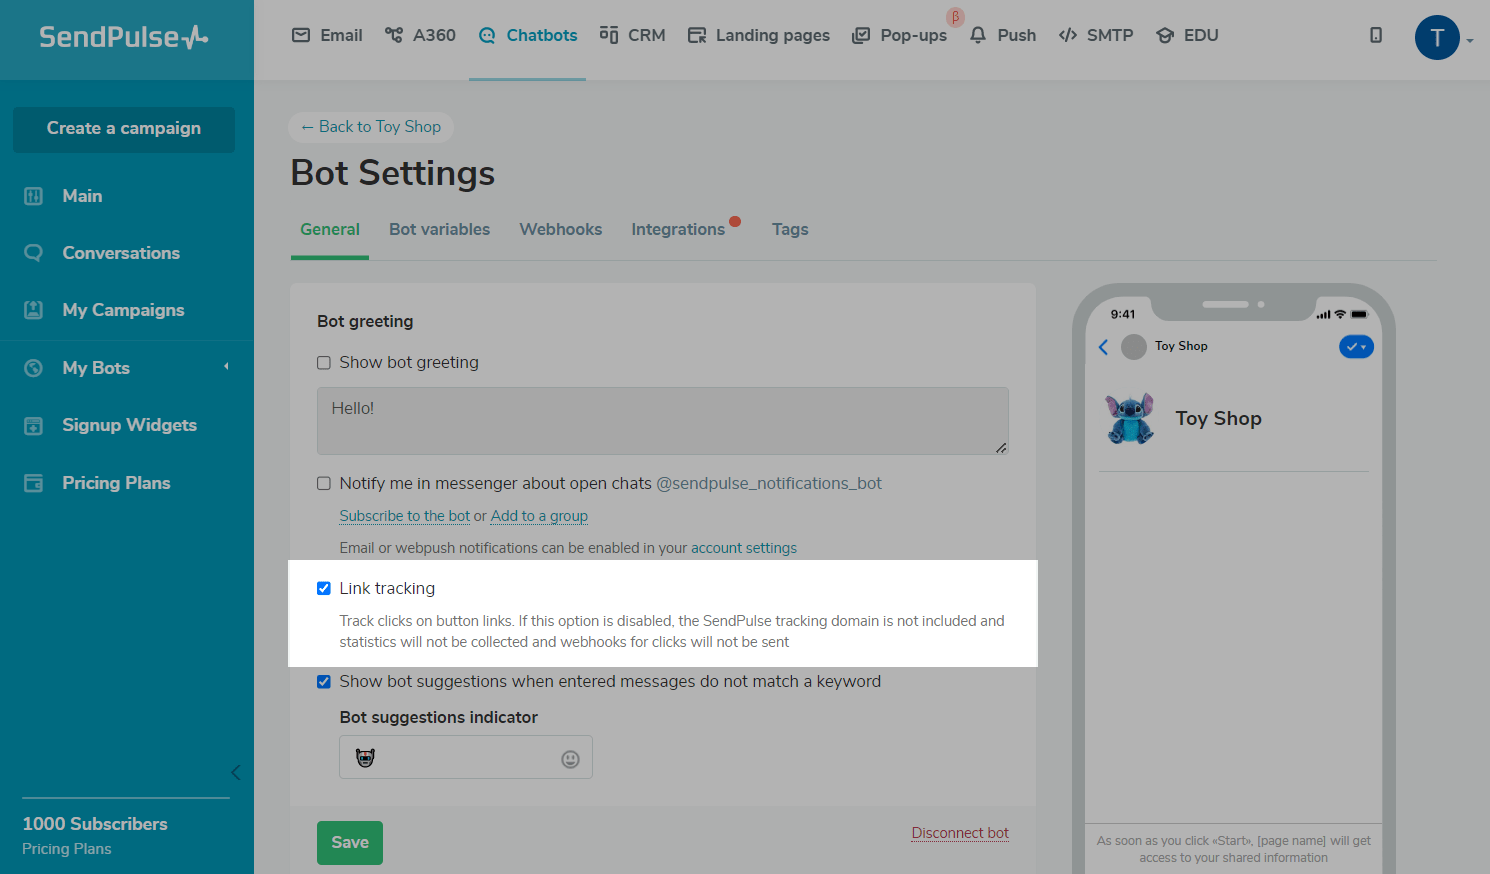
To send a flow after a user follows a link, enable link tracking in the bot settings.
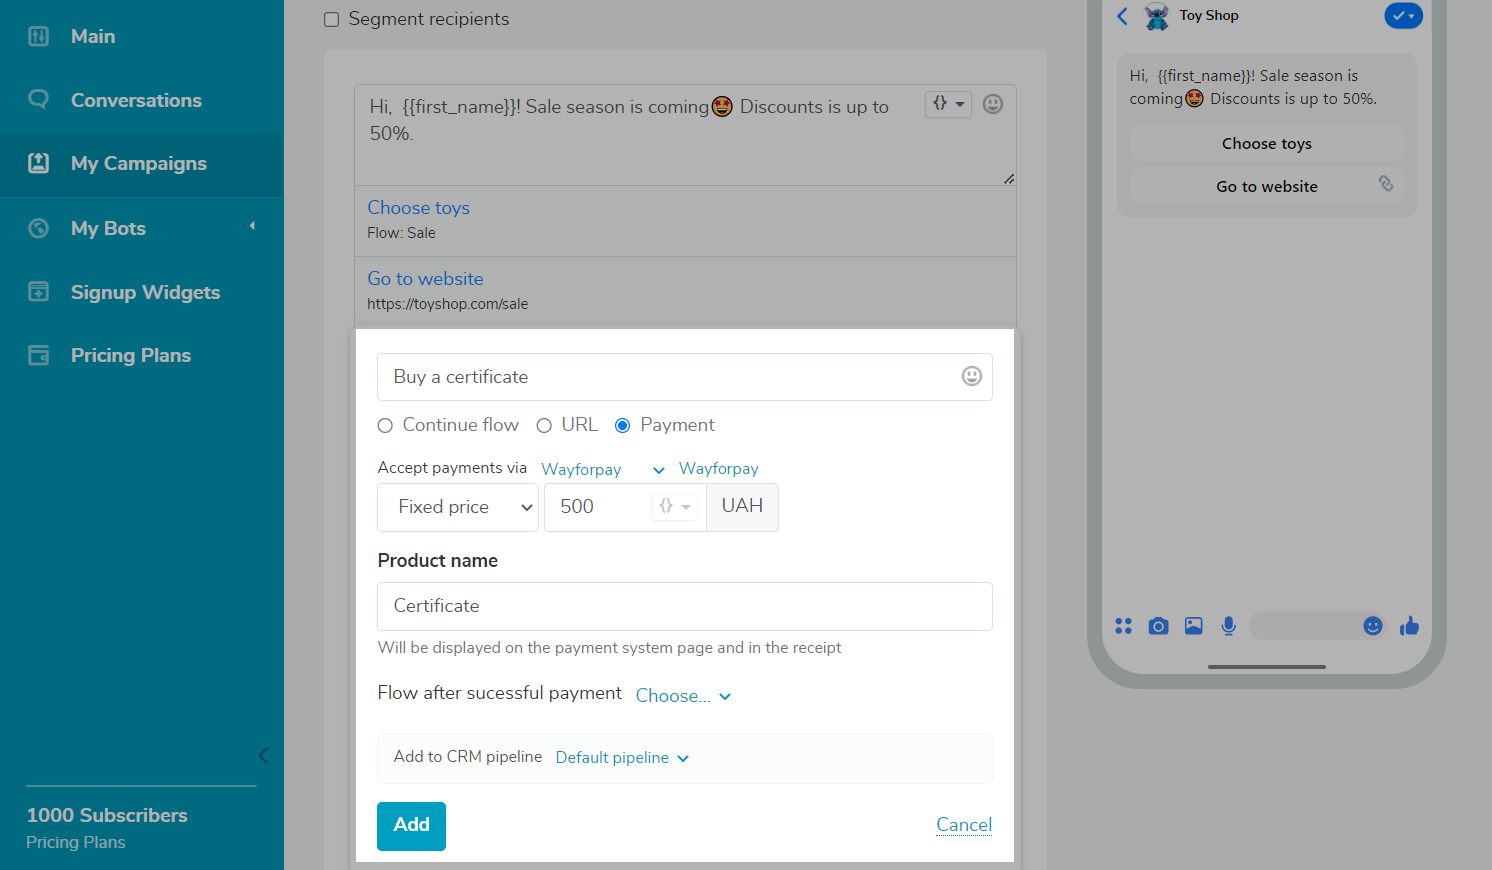
Payment
Add payment buttons that allow subscribers to purchase products right in your Viber chatbot. To do this, add a payment method, and in the button settings, select a payment system, and enter your product name and payment amount.
Alternatively, you can launch a chatbot flow after a successful payment.
Available only with the paid plan. Read more: How to accept chatbot payments.
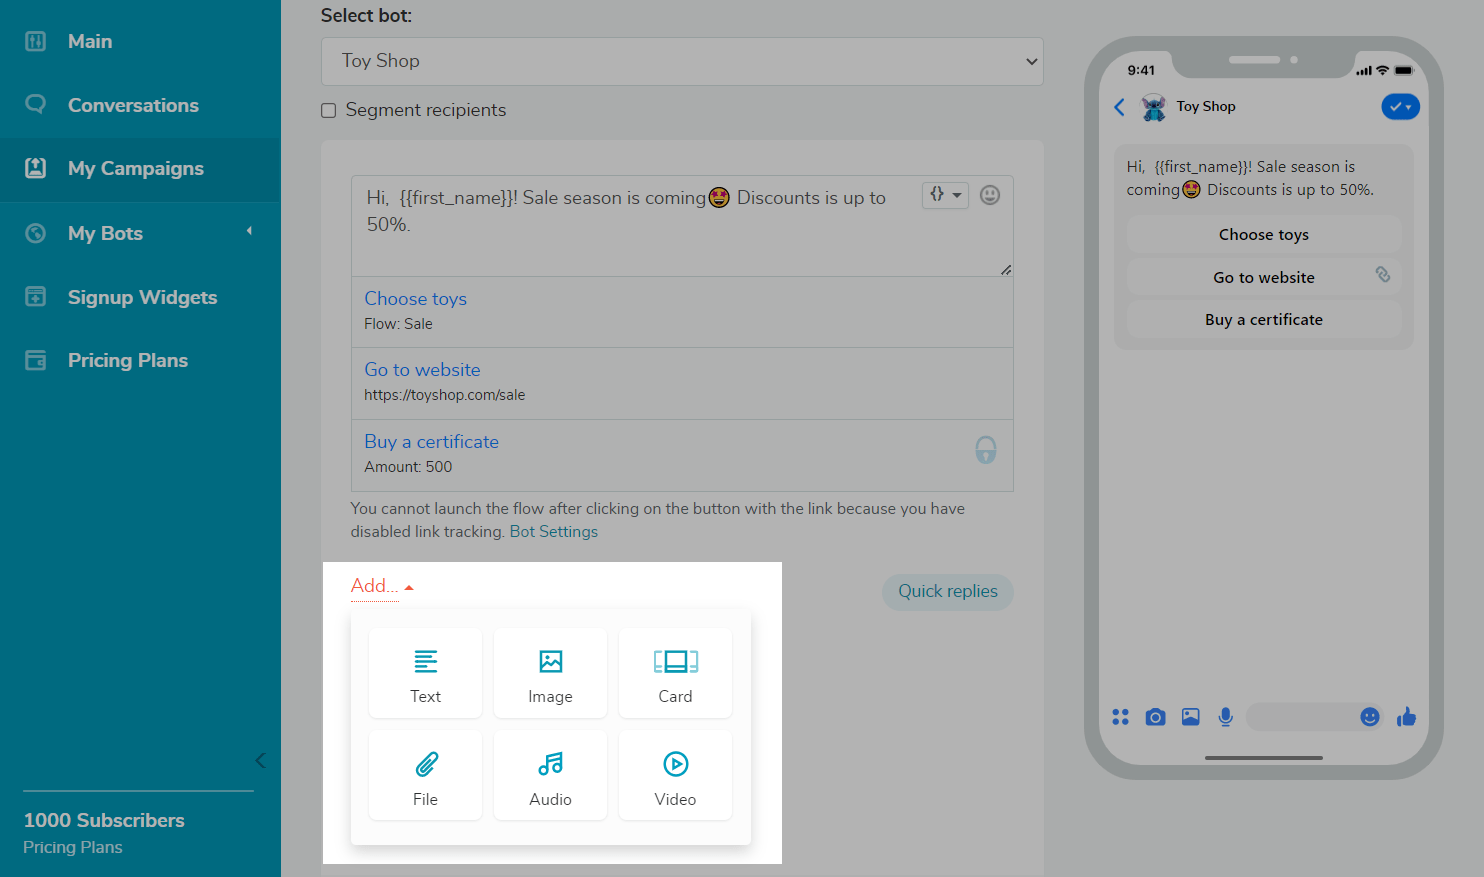
Add elements
You can also add additional media elements: image, product card, file, video, audio, and text.
To do this, click Add, and select an element.
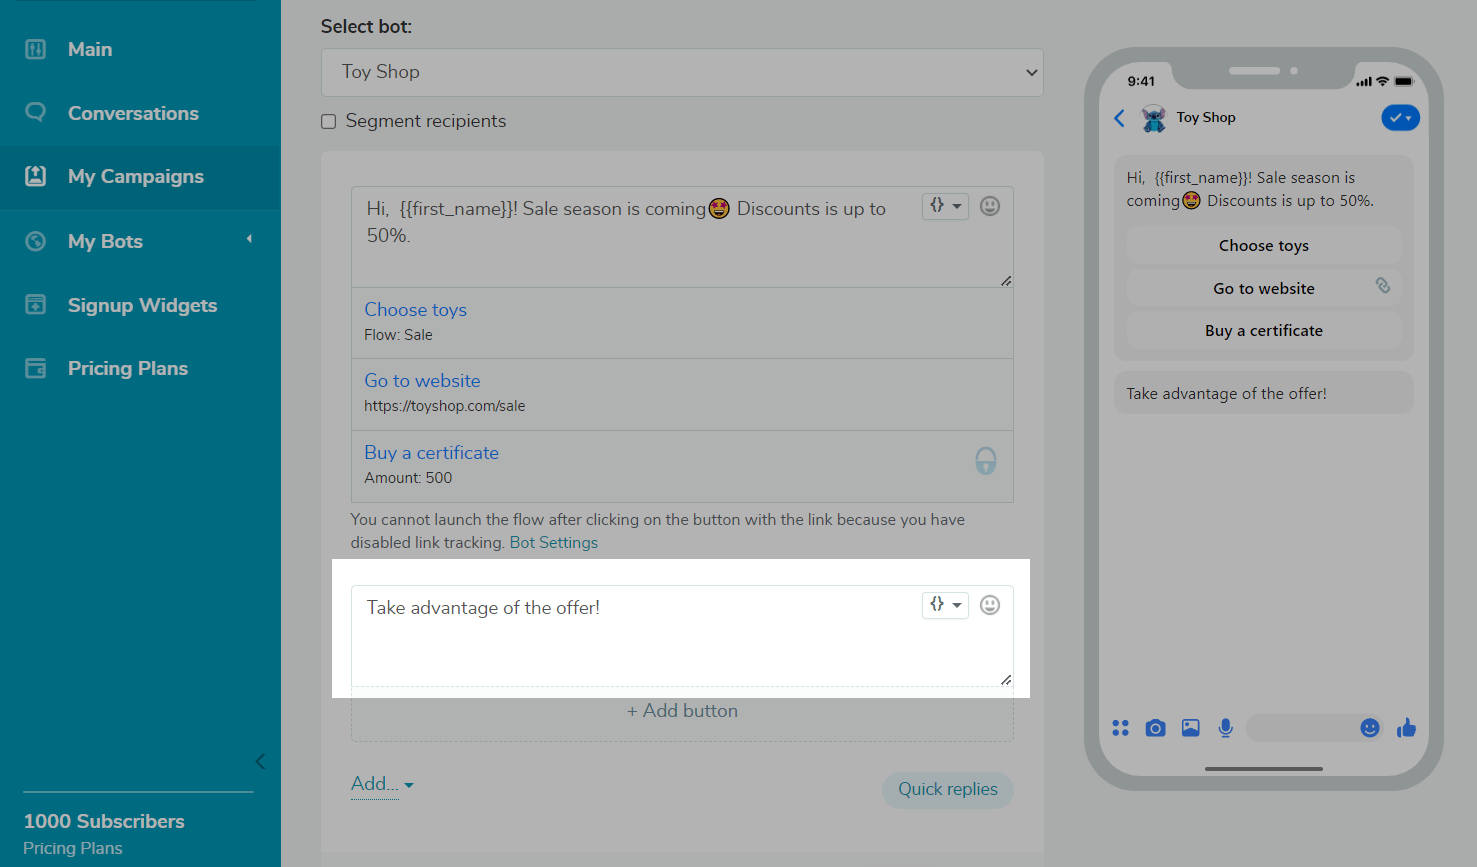
Text
You can choose an additional text block that will be visually separated from the main message.
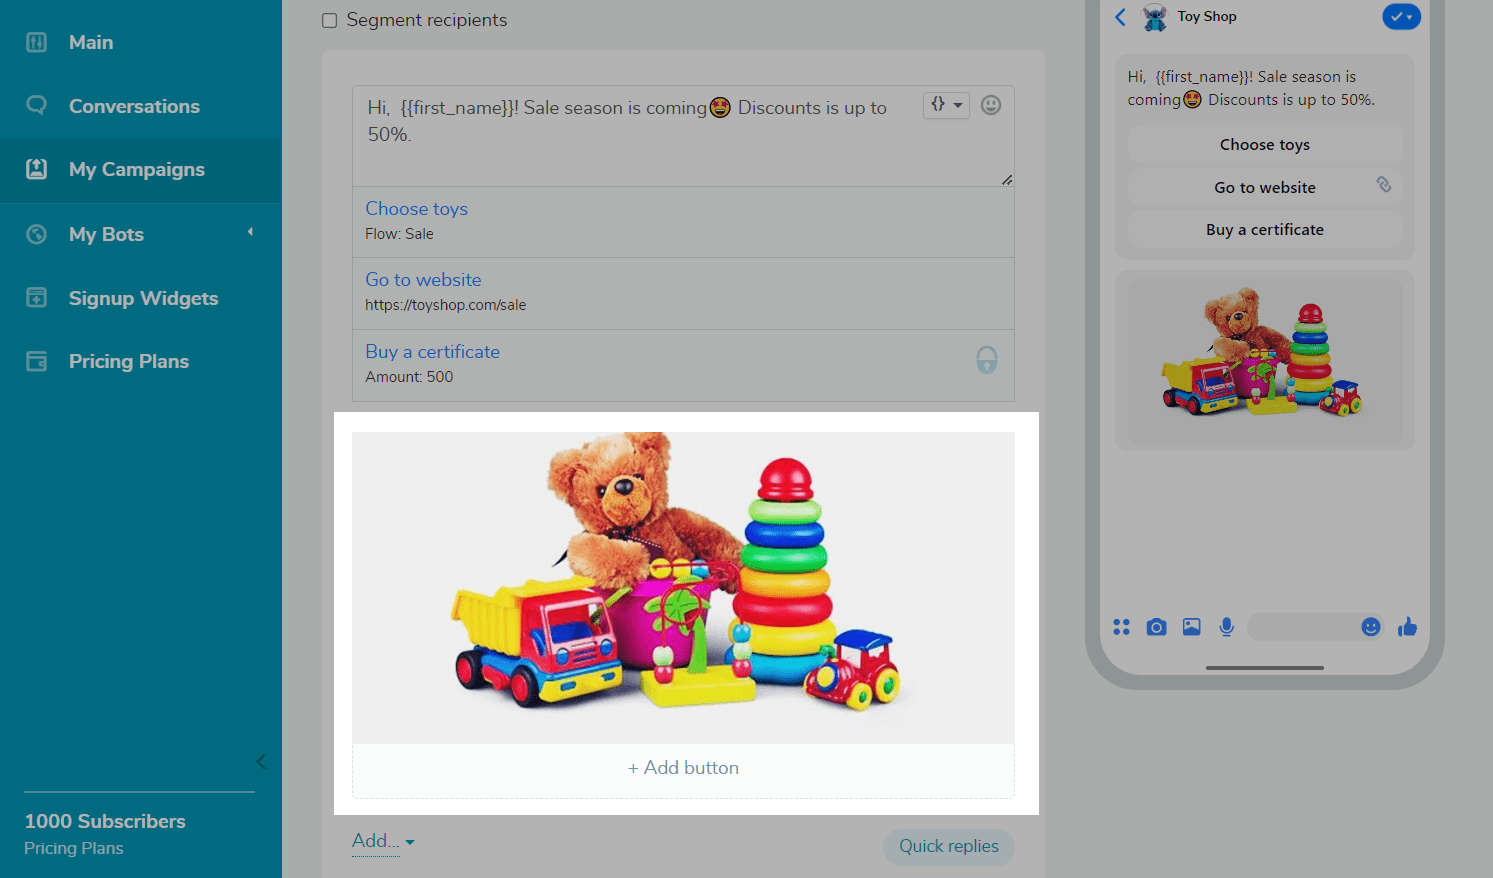
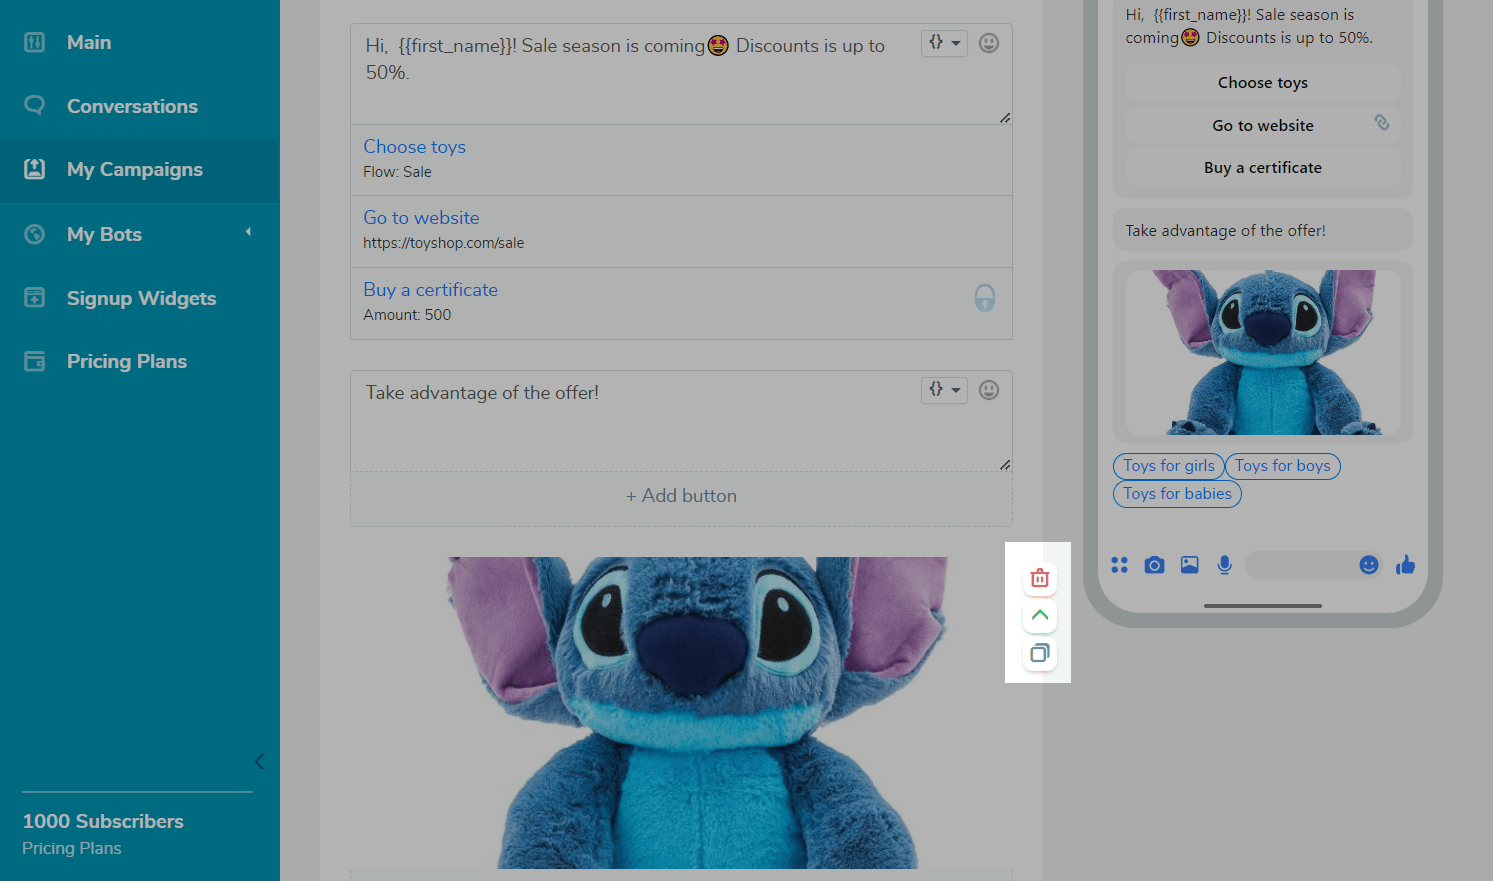
Image
It is possible to add a picture in JPG and PNG formats up to 2 MB in size.
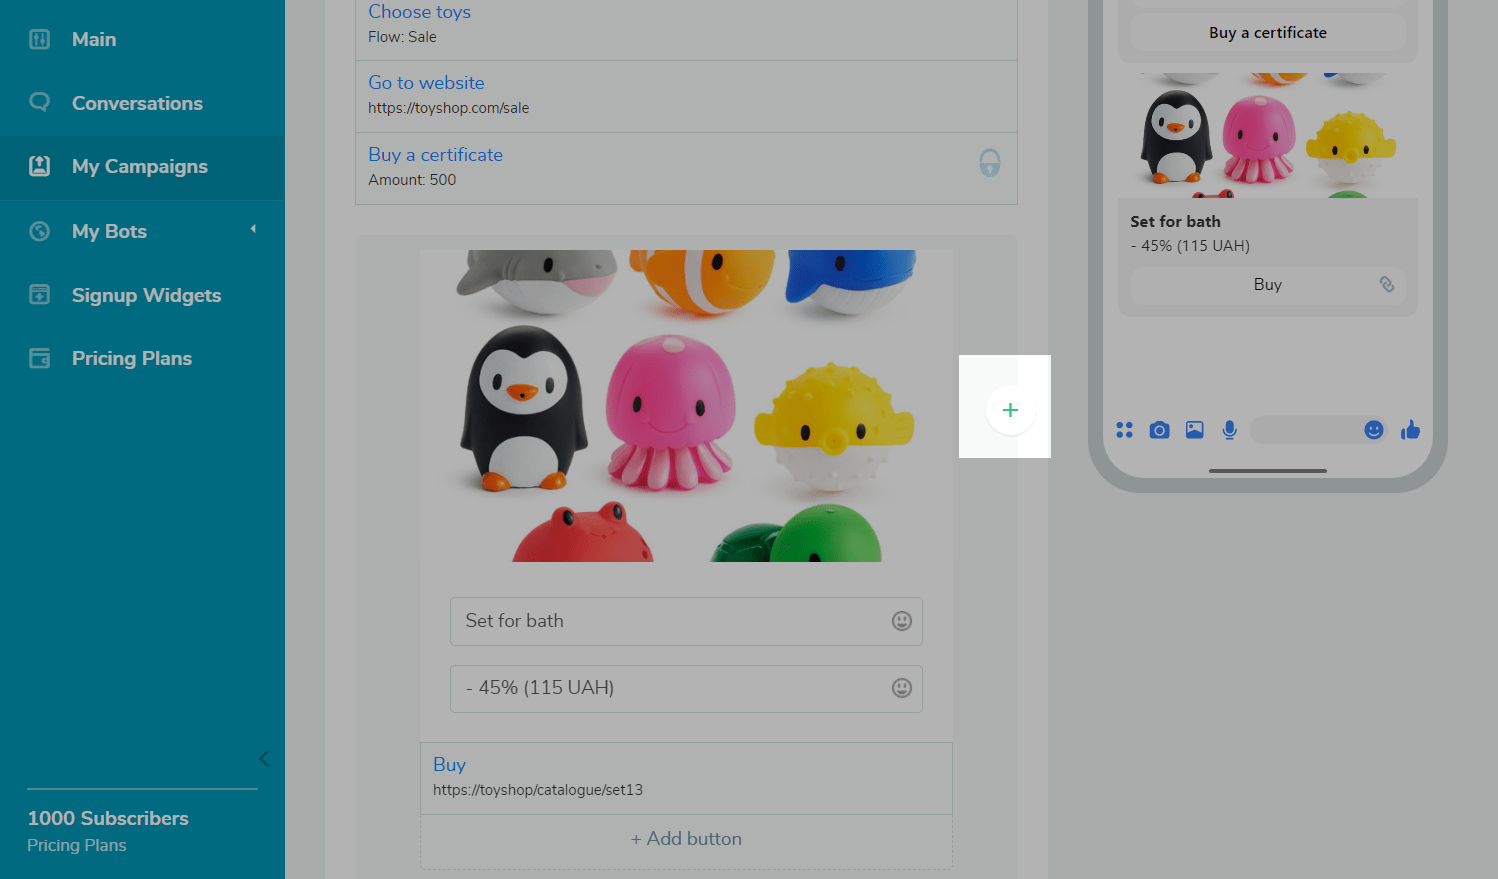
Card
In one card, you can add an image, up to 40 characters of a title, up to 80 characters of description, and 3 buttons with a link to another flow, an external source, or a payment form. There can be no more than 10 cards in the carousel. To add a new one, click the plus icon on the right.
File
Supported file formats: ZIP, PDF and GIF. The maximum attachment size is 20 MB. You can upload a file from your device or add a link to it.
Video and audio
You can upload videos up to 20 MB. The file's description must not exceed 40 characters.
Quick answers
Set up tooltip buttons in your newsletter with quick replies. Add a button name, then select flow, which will be sent to the subscriber after clicking this button.
Preview your campaign
To the right of the campaign settings, there is a preview window displaying all campaign content changes.
You can rearrange, delete, and copy your elements. To do this, hover over an element, and you will see icons with each of these options.
Once you add all the elements you need, send a test campaign to see what your messages look like to users.
If everything is correct, click Next.
Select a sending time
In the next window, choose a name for your campaign — only you will see it in My Campaigns.
You can send your campaign immediately or schedule it for a specific date and time.
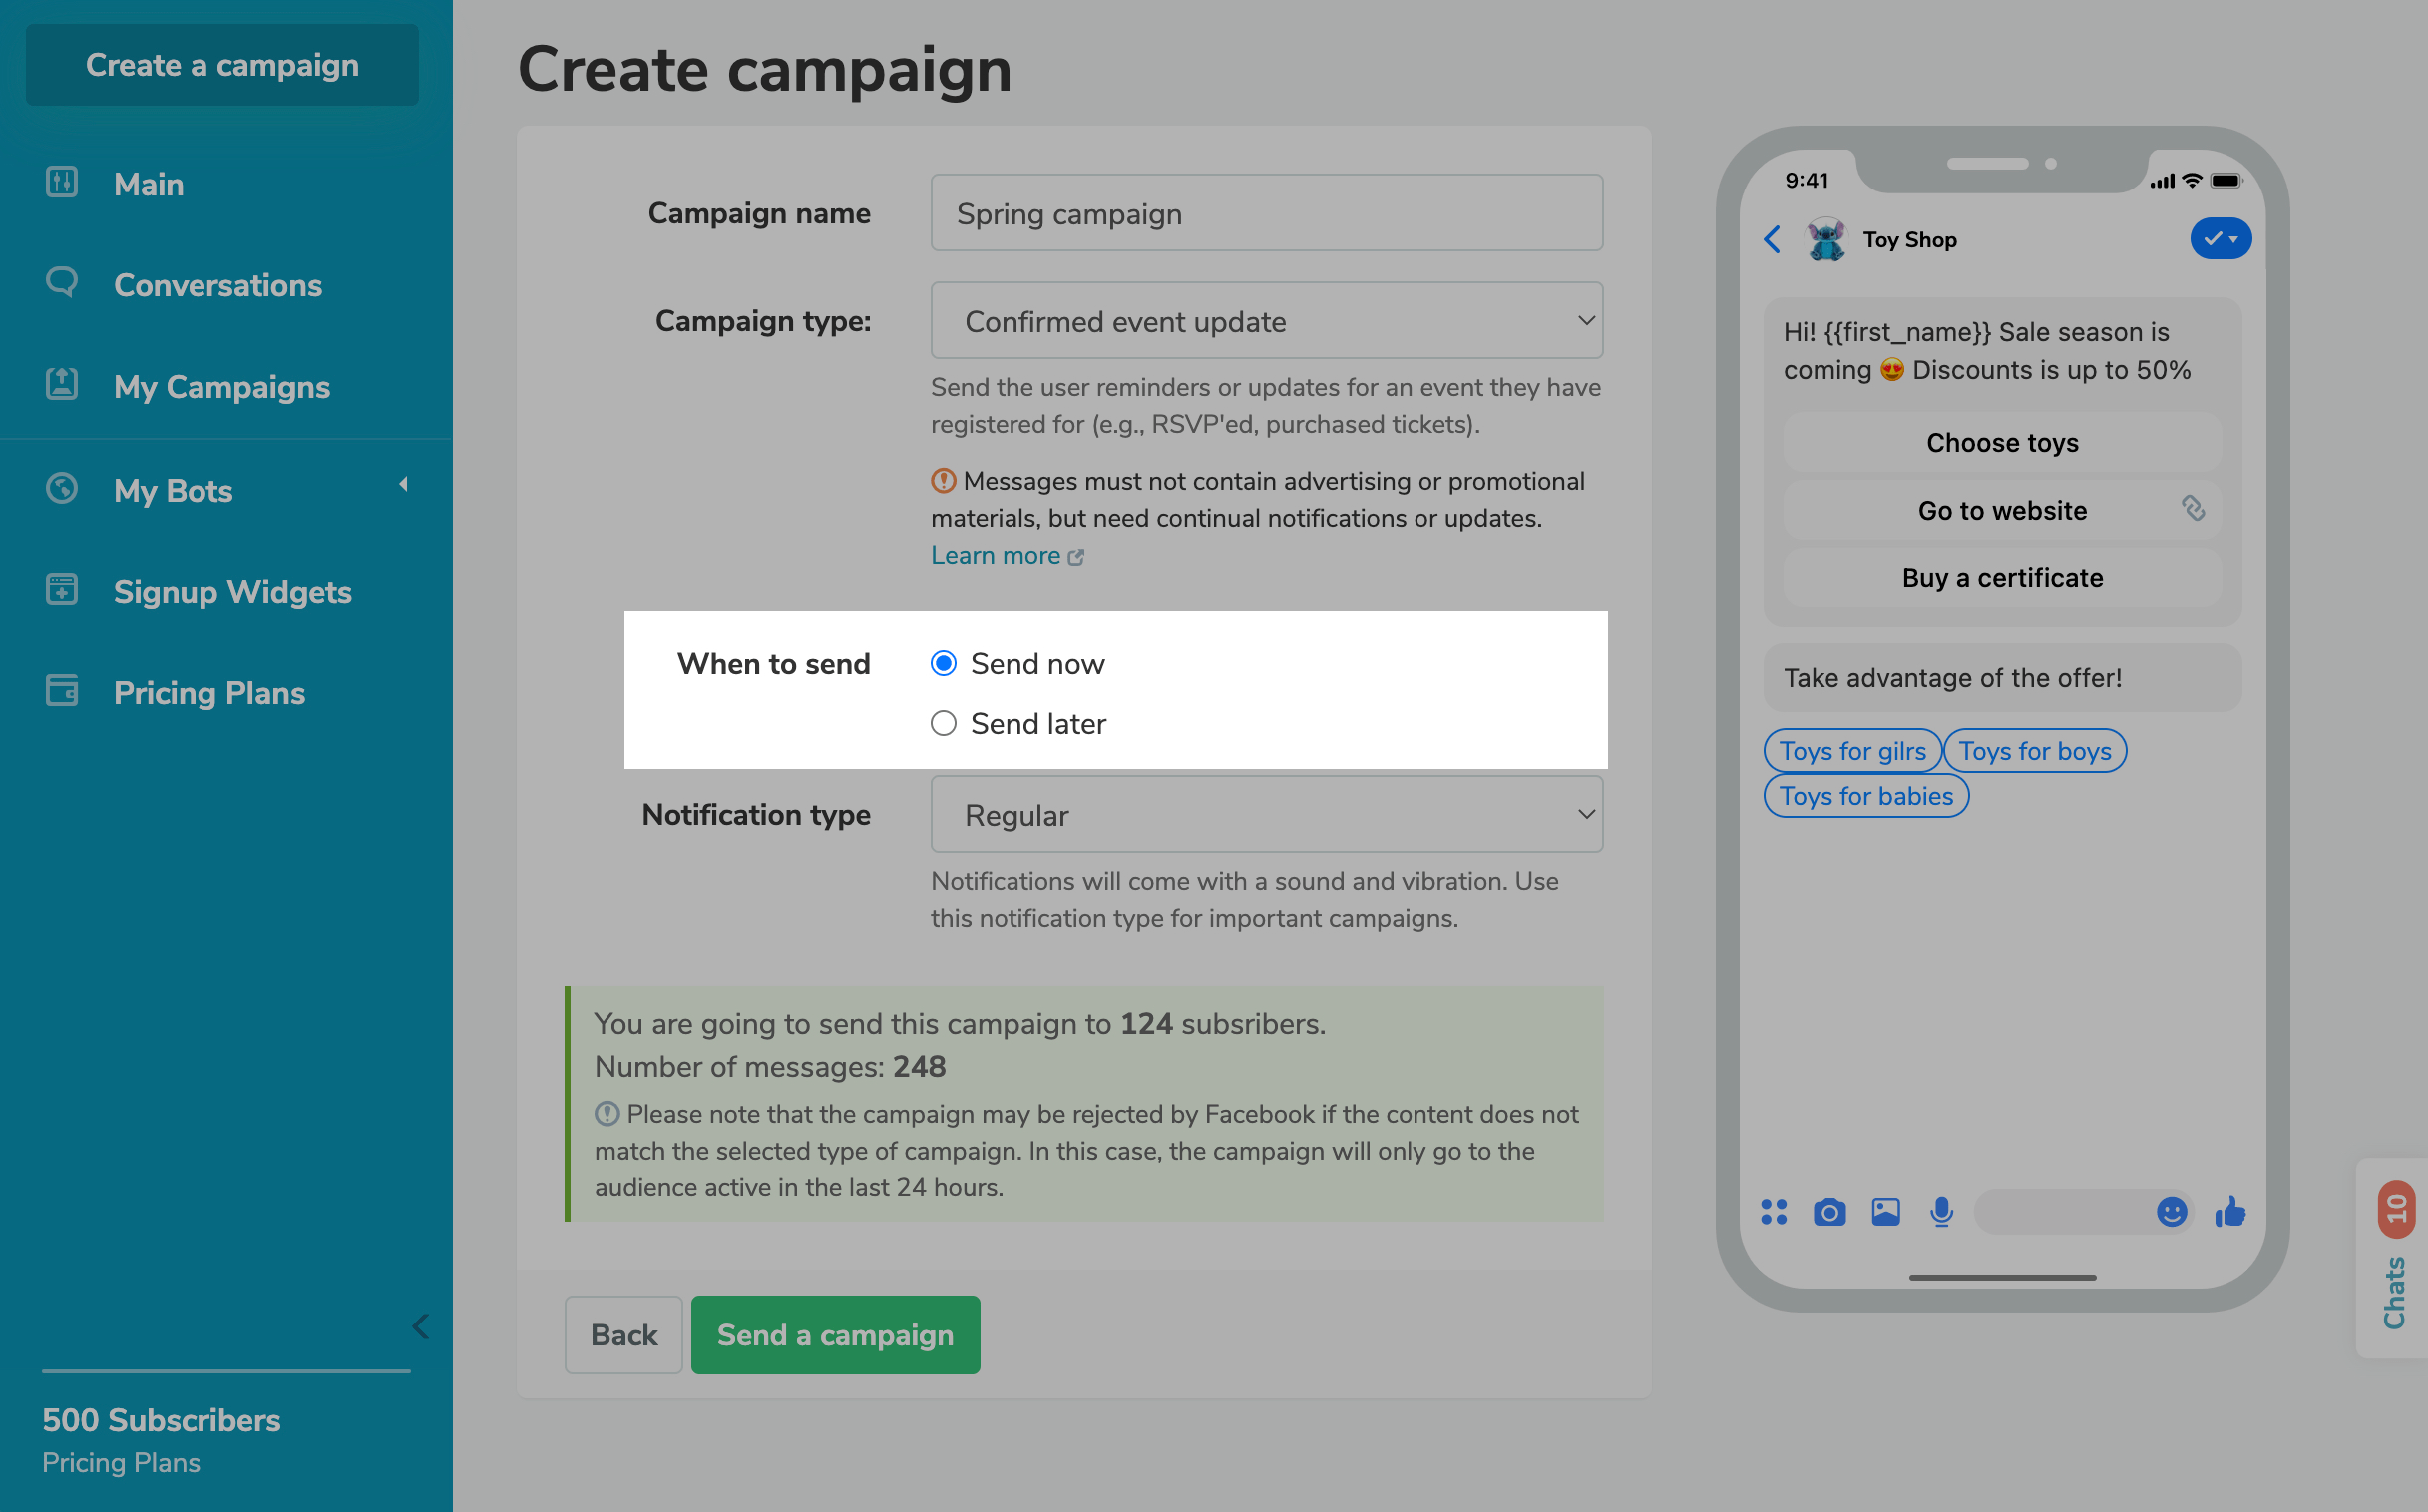
Click Send campaign — your mailing will be sent to the recipients.
Edit scheduled campaign
If you schedule your campaign to be sent later, you can edit it again before sending it. Go to the list of campaigns, select the campaign, and in the Status field, click Edit. To cancel sending, click Cancel.

Analyze your results
You can check detailed information about each campaign: how many messages were delivered and how many recipients interacted with your bot
To do that, navigate to the My campaigns tab and choose a campaign from the list. You will see the status and statistics of the campaign and its list of recipients.
Read more: Campaign statistics.
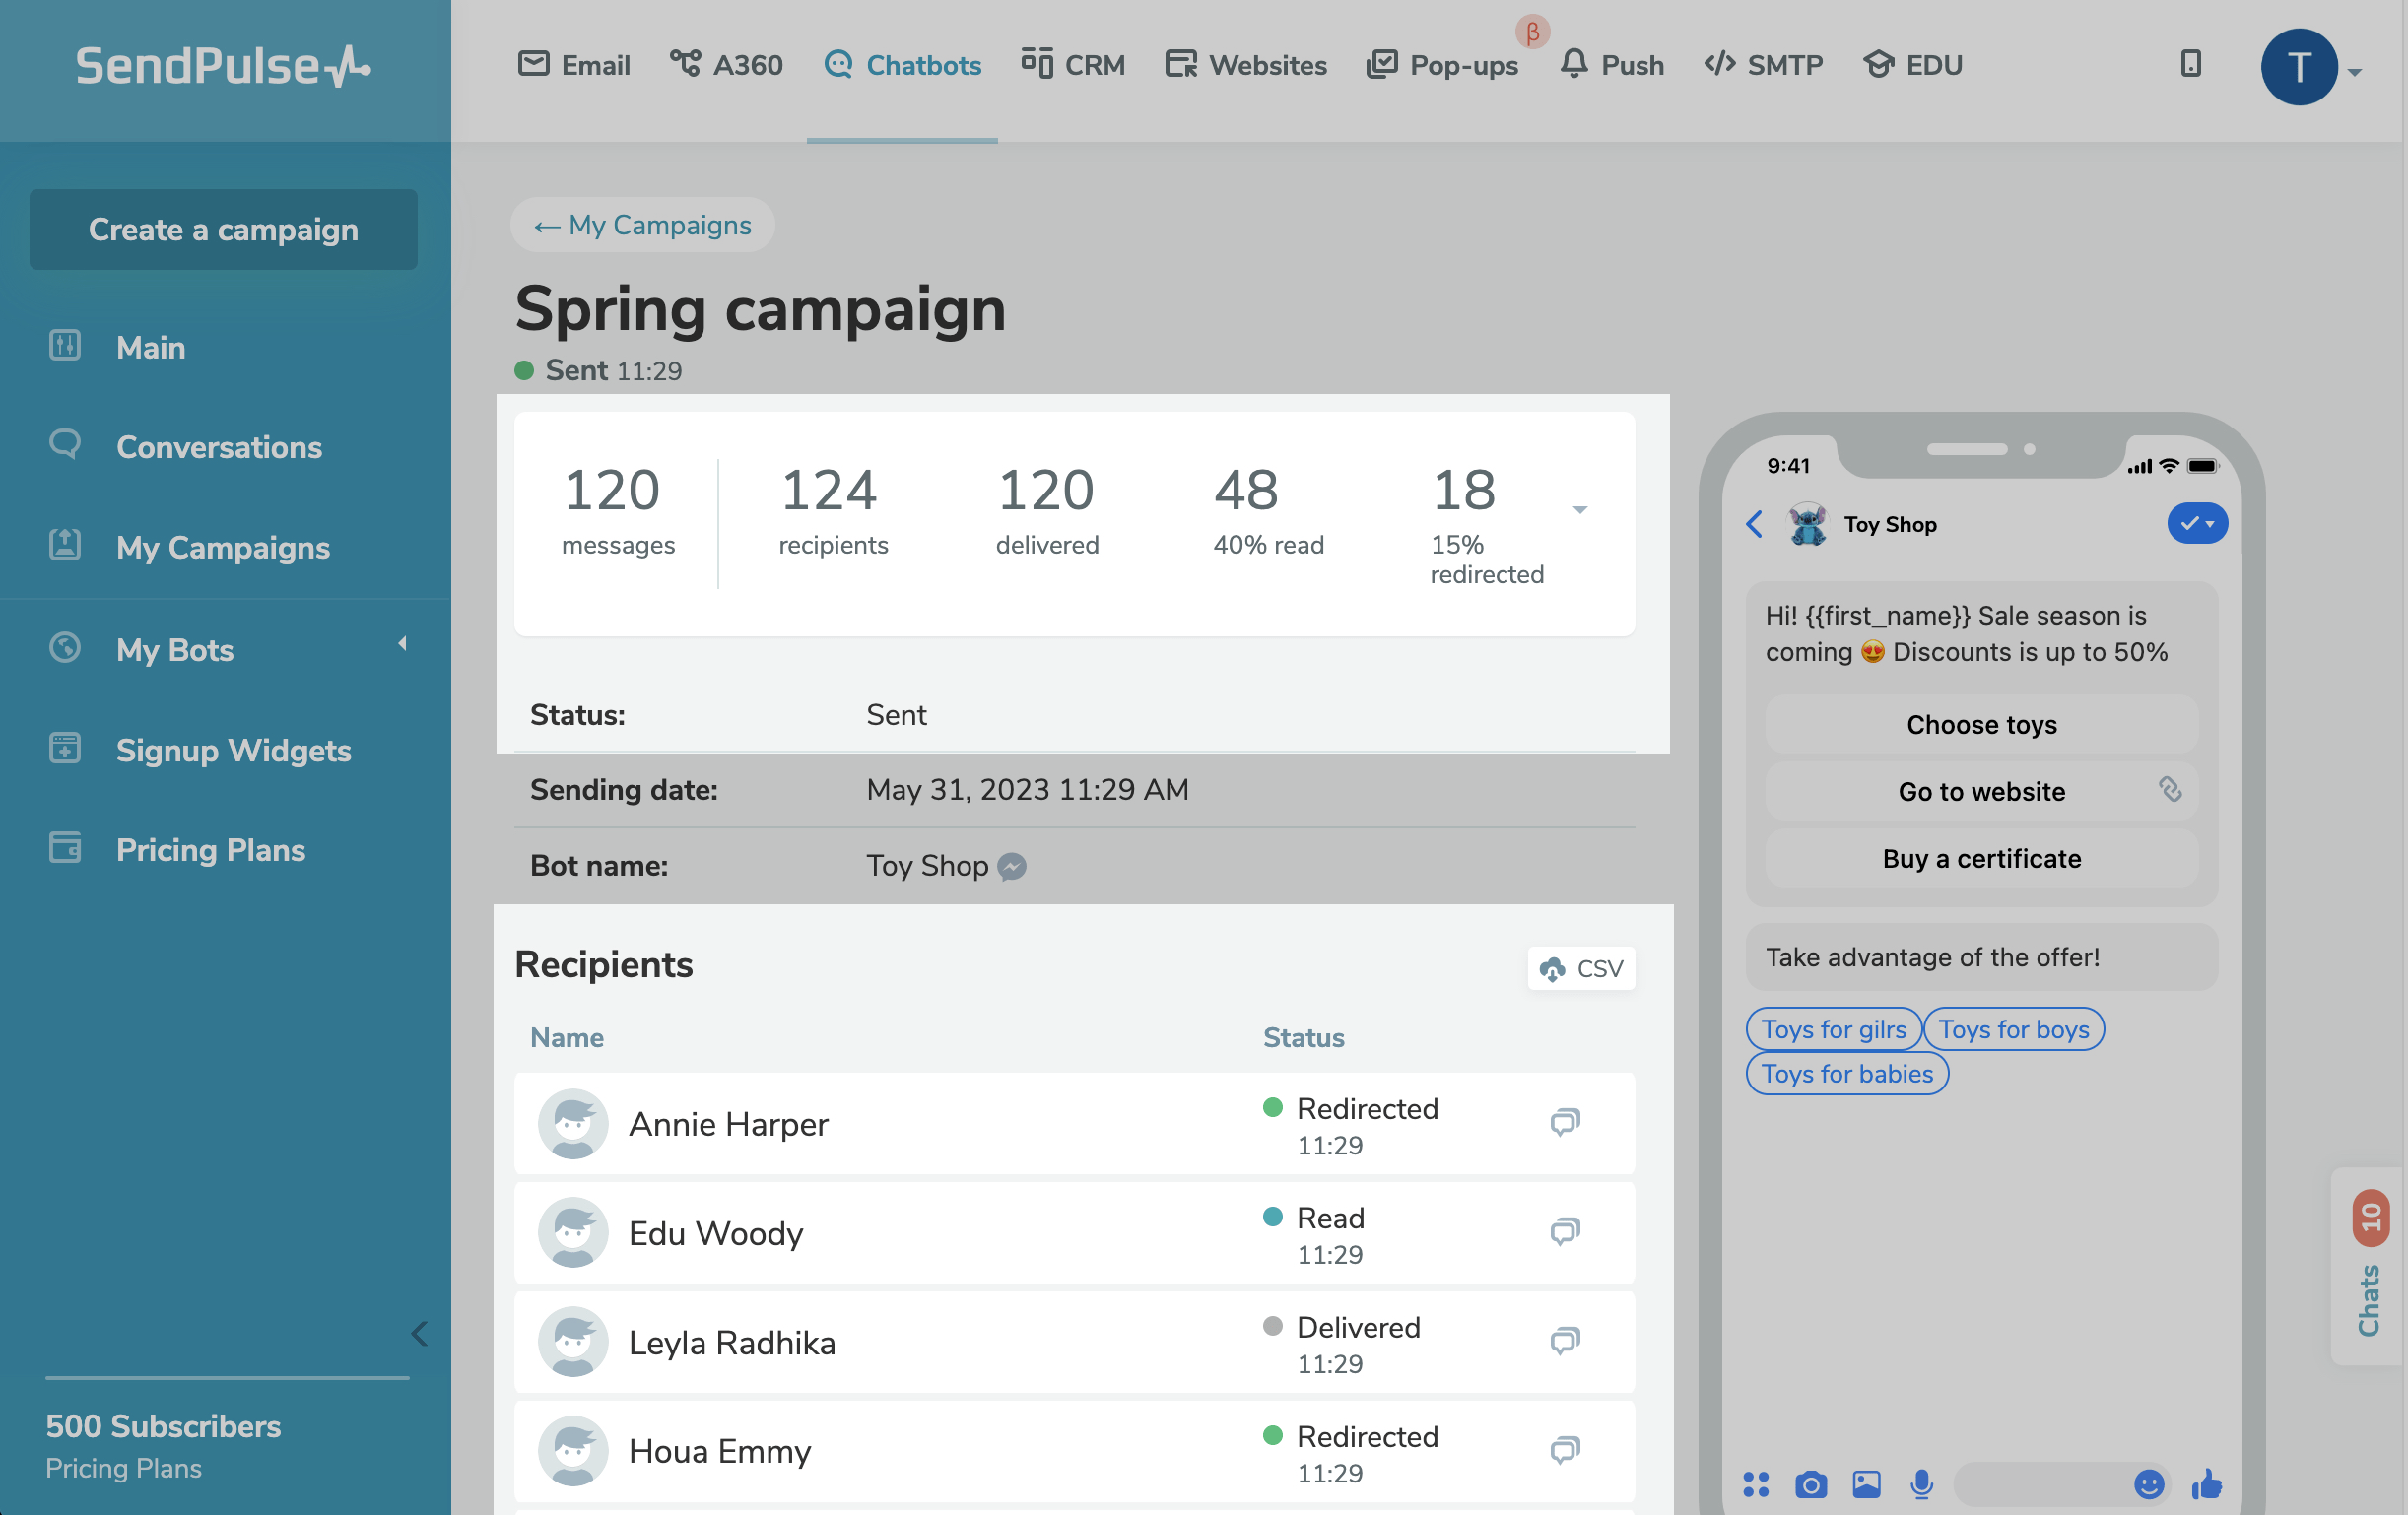
You can also export a CSV file along with your campaign recipient list and delivery status on a paid pricing plan.
Last Updated: 06.06.2024
or