MCP server basics
SendPulse's MCP server is a tool that helps you manage your account through a chat with an AI assistant. It uses SendPulse API methods to get information and take actions, such as request statistics, run message campaigns, or update user data.
You can connect this MCP server to OpenAI, Claude, Cursor IDE, and more. Choose an environment, and the server will connect it with your SendPulse account.
Let's talk about how the MCP server works and how to interact with it through an AI client.
Overview
The MCP server acts as middleware between your AI assistant and your SendPulse account. It processes requests through the SendPulse API and sends results back to chat, so you can manage everything without leaving the conversation.
Key terms to learn before setup:
- Client is the app where you chat with your AI assistant, such as ChatGPT or Cursor IDE.
- MCP is the middleware between the client and your SendPulse account. It shows available actions and executes them through the API.
- Tools are specific actions you can take in your account.
Once connected, the MCP server operates as follows:
- You ask your AI assistant something in chat.
- It forwards your request to the MCP server.
- The MCP server calls the API to get data or take an action.
- The AI assistant sends the result back to your chat.
All requests are billed according to your client's API pricing policy.
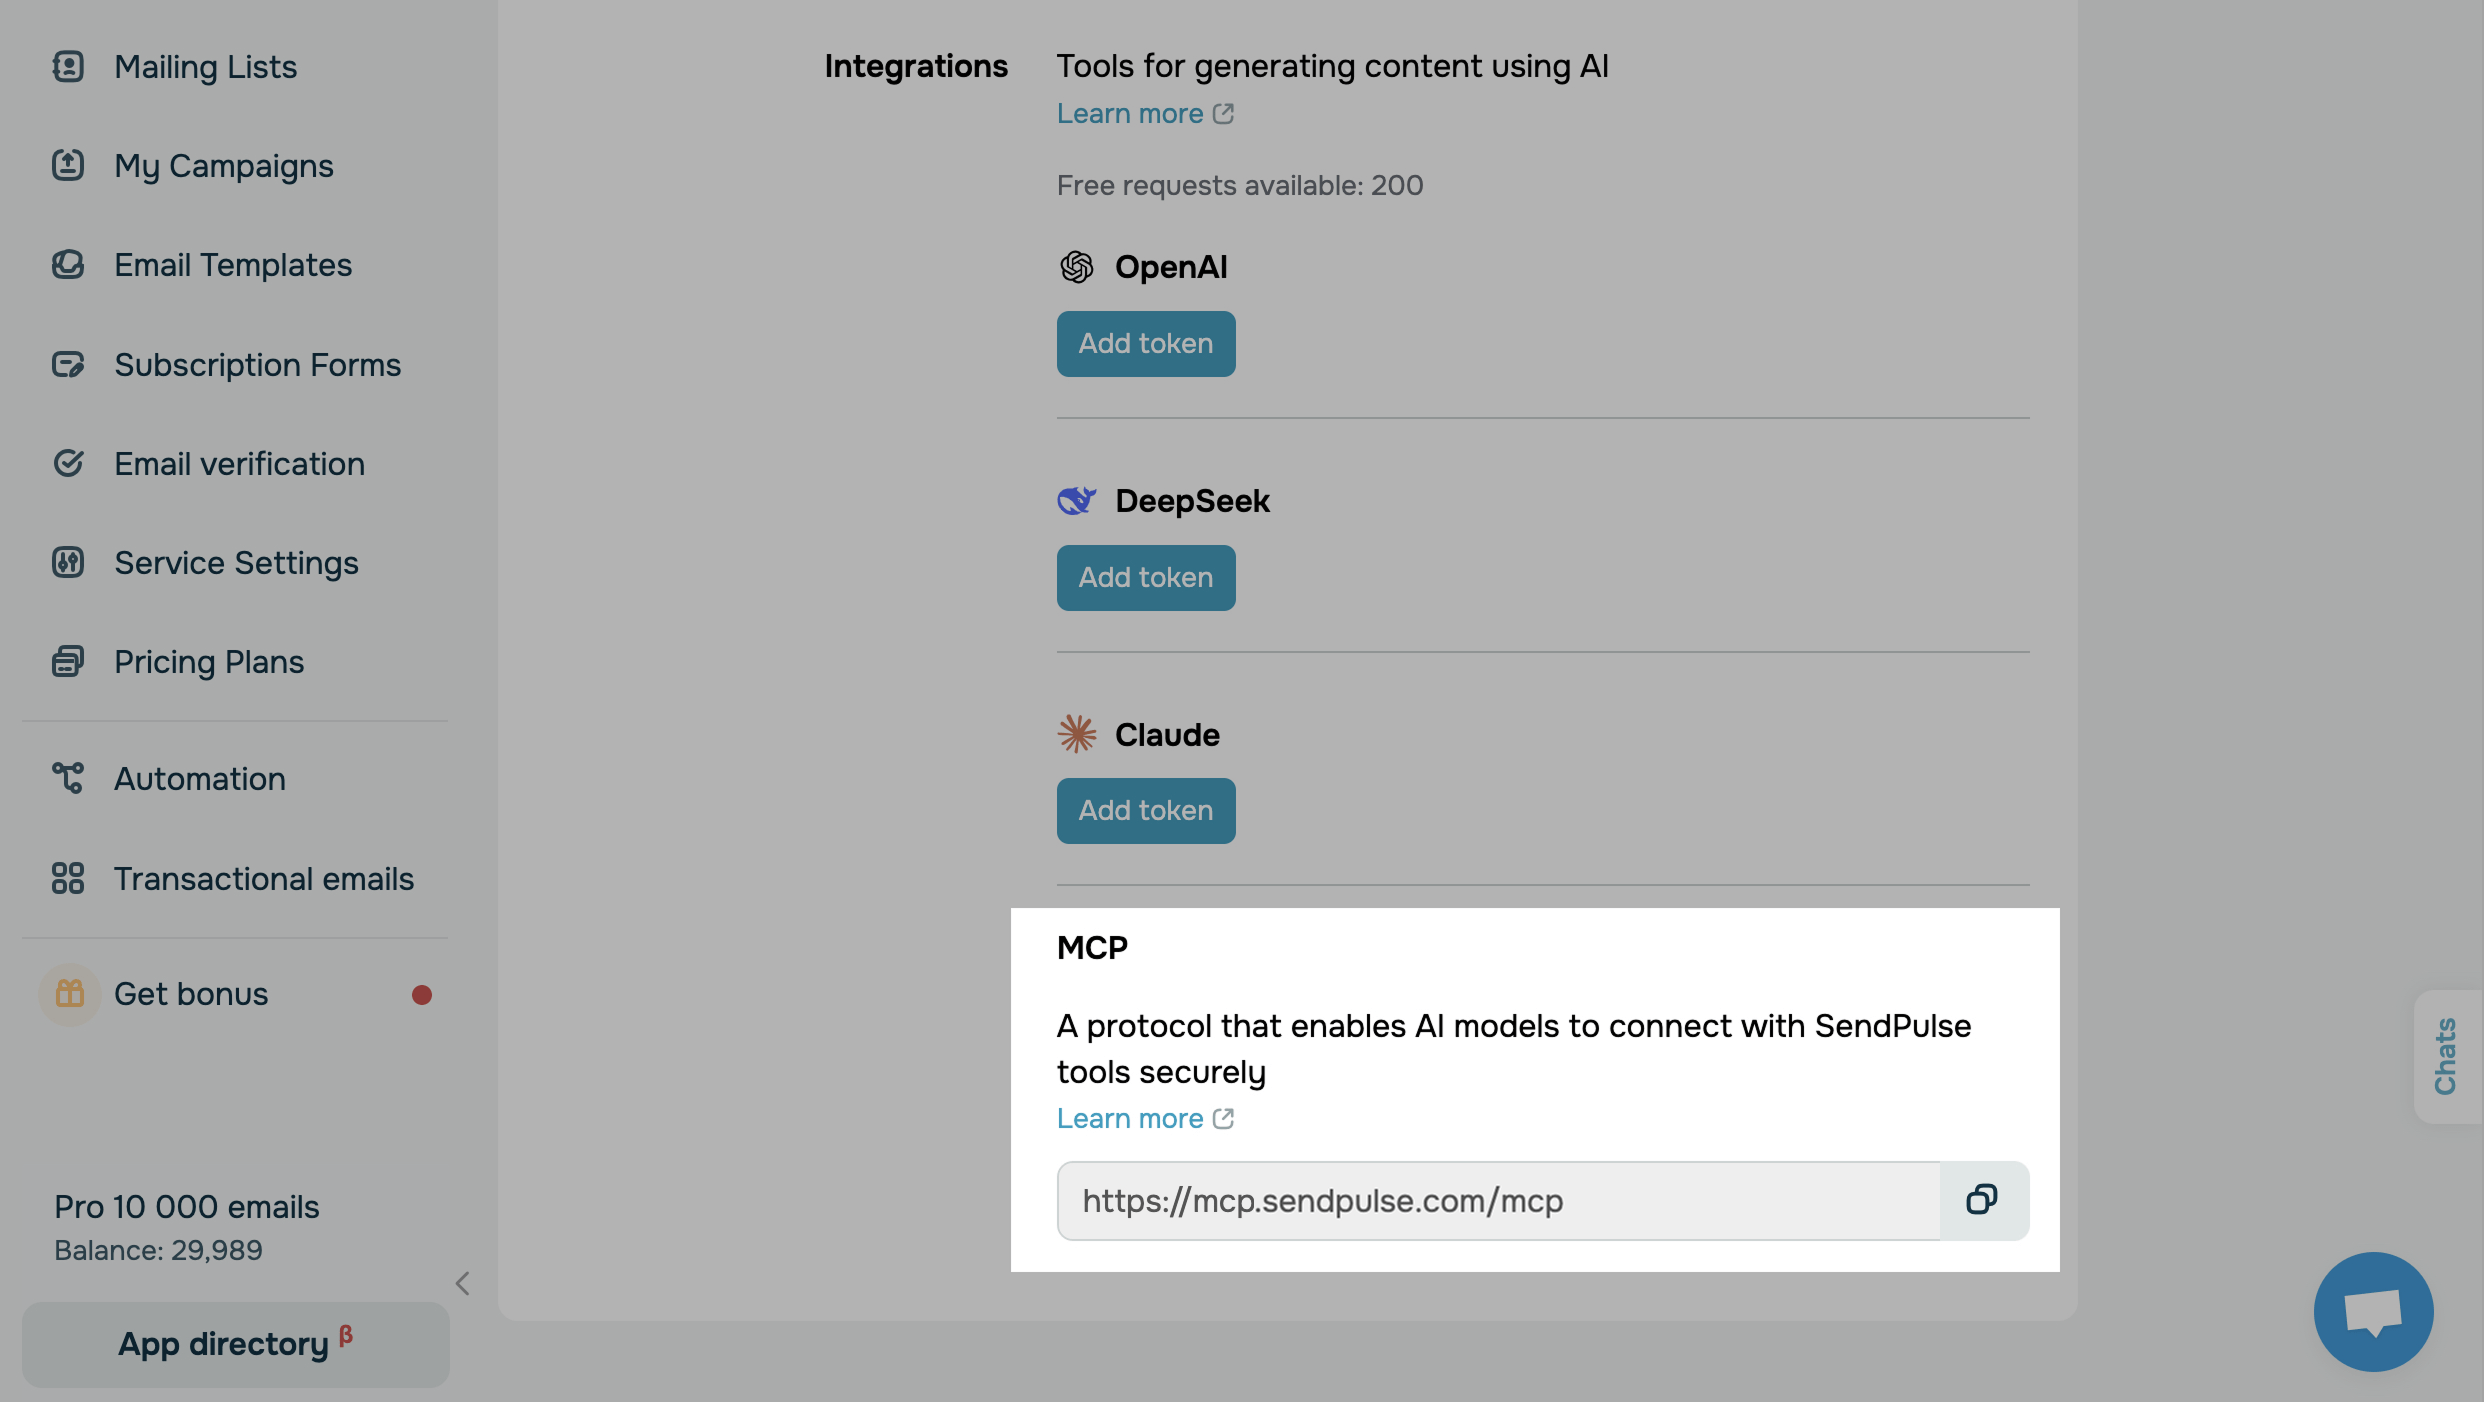
Add SendPulse’s MCP server
You can add SendPulse's MCP server to various clients. Setup instructions vary by client. To connect the MCP server, you need its link.
To get it, go to Account settings > API and copy the link in the MCP section.
Most clients use basic authentication to recognize and access the supported API methods. Once you add the configuration file, the client redirects you to the browser, where you enter your login credentials.
Here is an example of a configuration file for basic authentication:
{
  "mcpServers": {
    "sp": {
      "url": "https://mcp.sendpulse.com/mcp"
    }
  }
}
Some clients use API credentials instead. In this case, you need a Client ID and Secret. To get them, go to Account settings > API > Client credentials.
Here is an example of a configuration file for OAuth 2.0 authentication:
{
  "servers": {
    "sendpulse": {
      "type": "http",
      "url": "https://mcp.sendpulse.com/mcp",
      "headers": {
        "X-Client-ID": "YOUR_CLIENT_ID",
        "X-Client-Secret": "YOUR_CLIENT_SECRET"
      }
    }
  }
}
See the setup instructions for your client:
Chat assistants
Connect MCP to Claude (via web apps, Cowork, and mobile apps)
Code editors and IDEs
Connect MCP to VS Code with GitHub Copilot
Connect MCP to VS Code with Cline
Command-line tools
Connect MCP to Claude Code (via terminal)
Chat with your AI assistant
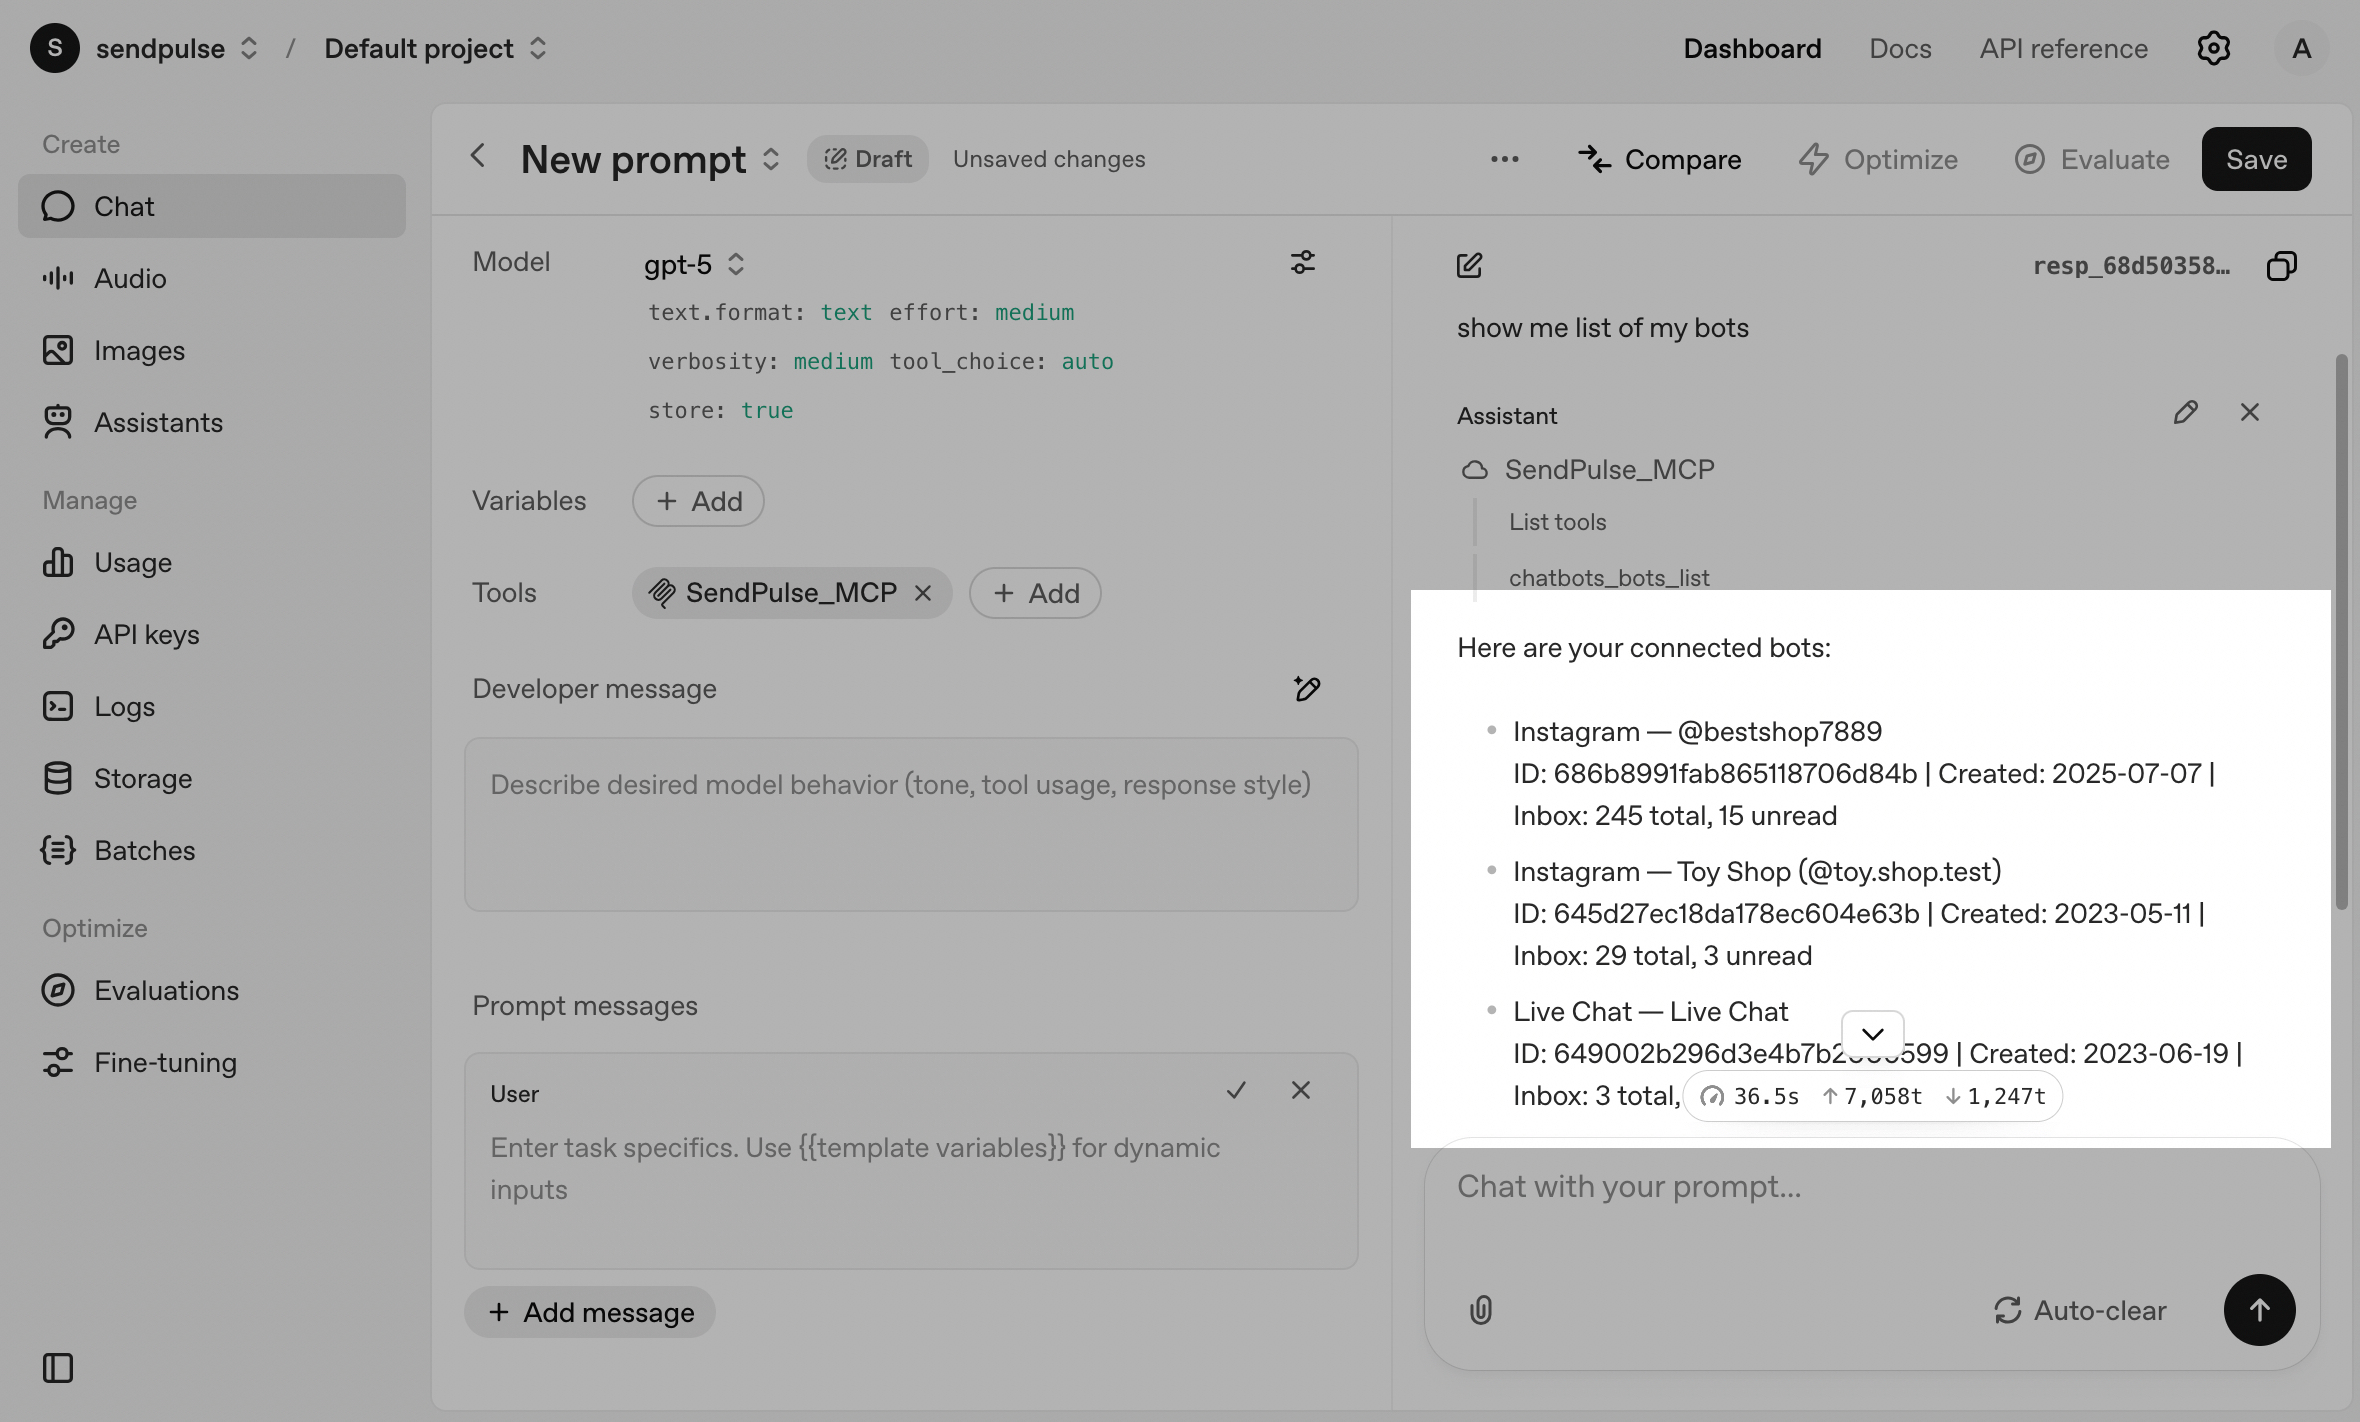
Once you've connected the MCP server, you can send messages and take other actions in your SendPulse account using tools.
To see all available tools and manage access permissions in your client, go to the Tools section.
SendPulse's MCP server is currently integrated with the chatbot builder, CRM, Courses, email service, and SMTP service. Read more: List of MCP commands.
Depending on the client, your tools and chats may be located in different areas of the interface. For more information, see client-specific guides.

To chat with your AI assistant, go to Chats and type in your request using natural language. The AI agent will then show the tool it plans to run. If you have multiple chatbots or subscribers with a similar name, it will ask which one you are referring to.
For example, if you enter "Show me the list of my chatbots," your AI assistant will suggest the chatbots_bots_list tool. Once approved, it returns a list of your chatbots and their details.
Before sending a request, check the list of tools and parameters to verify your data. To look up a specific chatbot or subscriber, use their username or ID. You can get this information using another request or from the URL in your account.
Here's how request results are returned to your chat:
- If successful, you will receive account information or action results.
- If an error occurs, check your client logs and authentication status.
Last Updated: 29.09.2025
or