Send emails via SMTP using email clients
You can send transactional emails to clients via SendPulse’s SMTP service from your website or using email clients. Then you can check the mailing history and the list of unsubscribers in your SendPulse account.
In this article, we will talk about where to find authorization data in SendPulse’s SMTP service and how to set up an SMTP server in Mozilla Thunderbird and Outlook.
Copy your SMTP login credentials
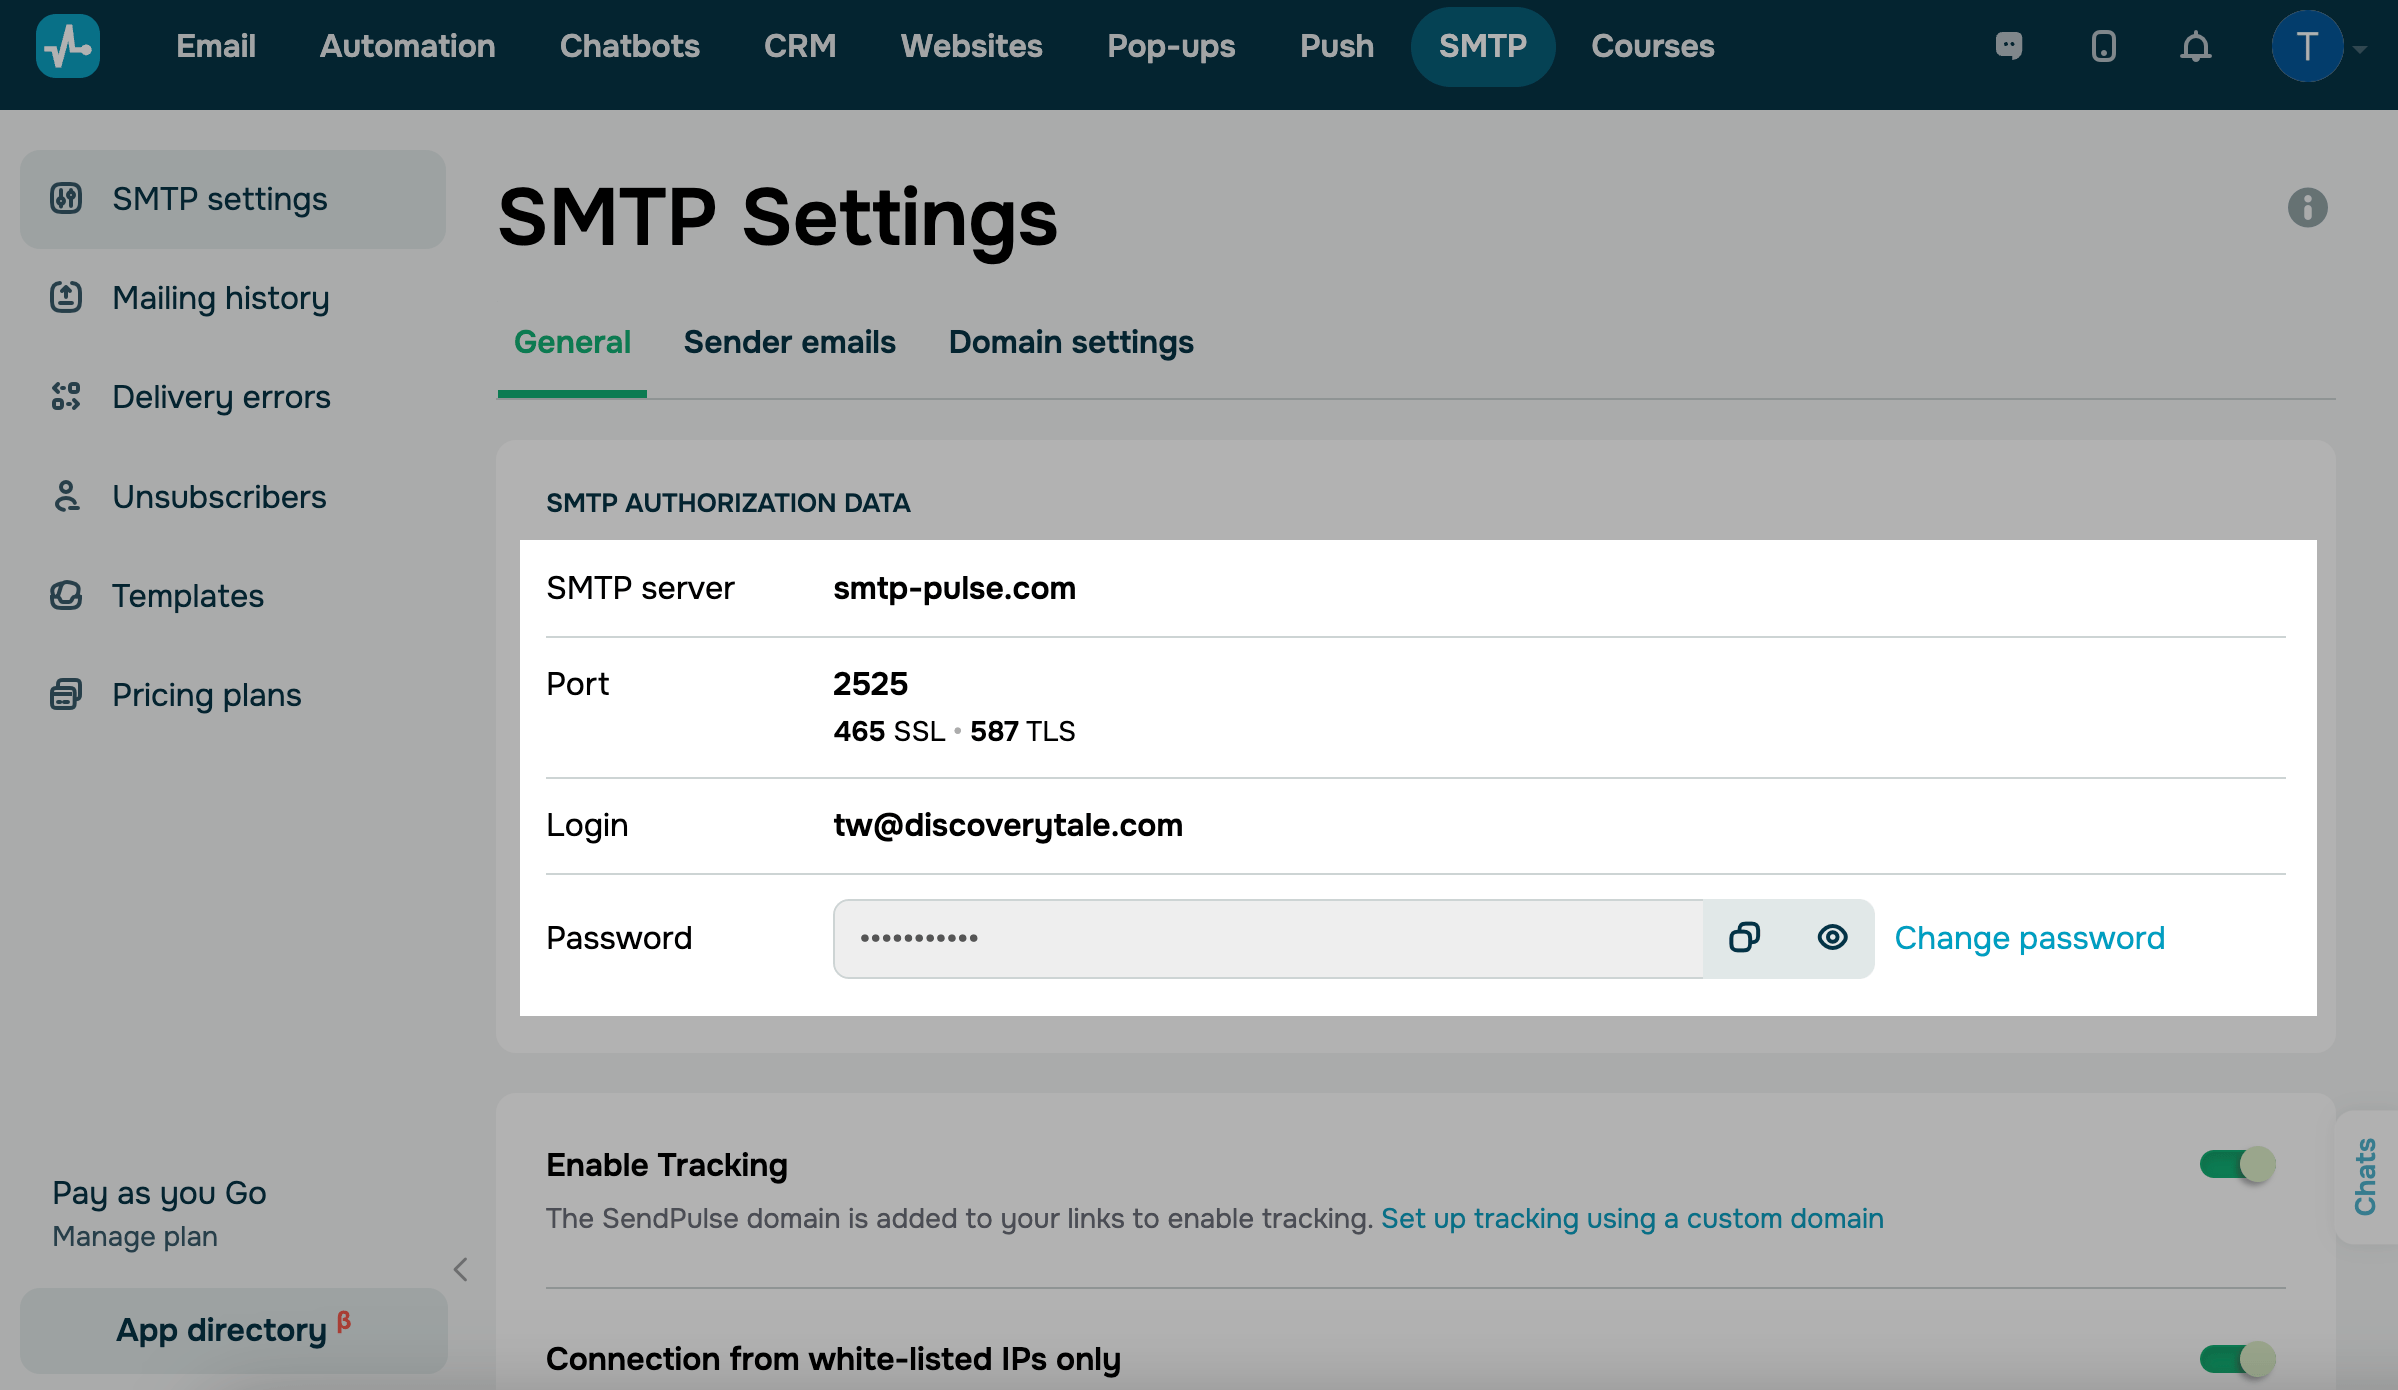
Go to the SMTP Settings > General tab in your SendPulse account. Copy your SMTP authorization values: server address, port, login, and password.
You can access the SMTP settings after your profile gets activated. The “Your profile is being moderated” message will disappear from the page, and you will receive an email notifying you that your account has been approved and activated.
Set up email sending in Mozilla Thunderbird
Read more: Manual Account Configuration.
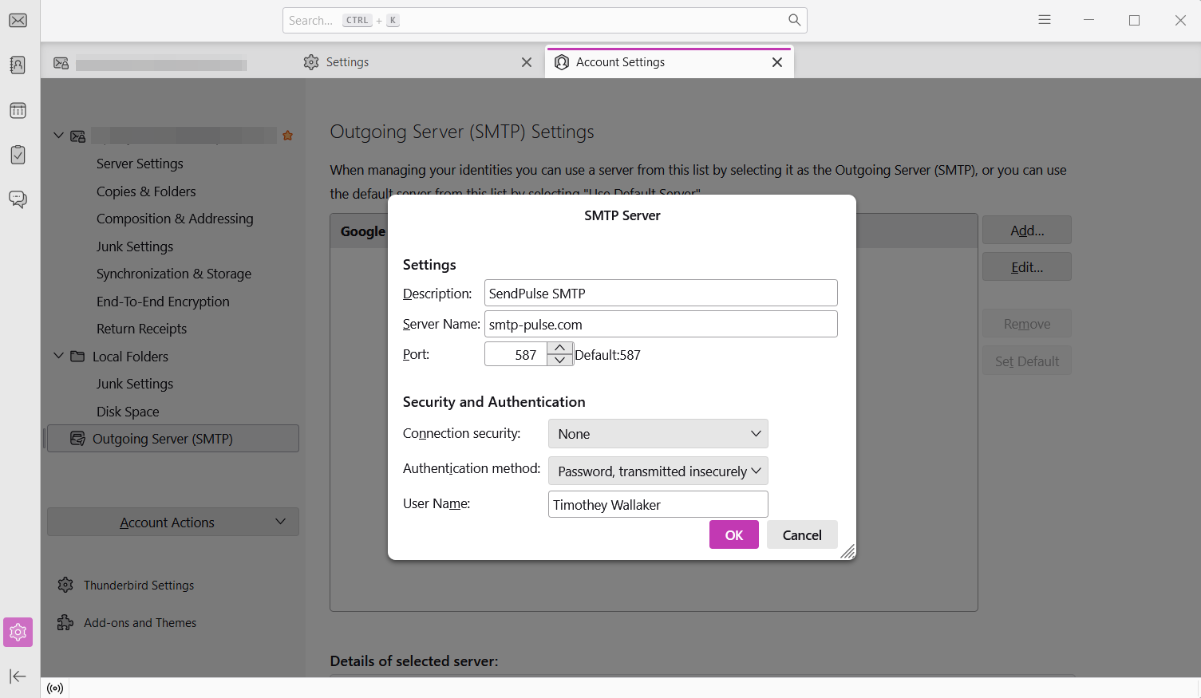
Go to Settings > Account settings. Select Outgoing Server (SMTP) settings, and click Add. Enter your SMTP server settings.
The sender address must be verified in your SMTP account.
Select the created server from the list, and click Default.
Setup email sending in Outlook
Read more: Add an email account to Outlook.
Go to the File menu, click Account Settings > Manage Profiles.
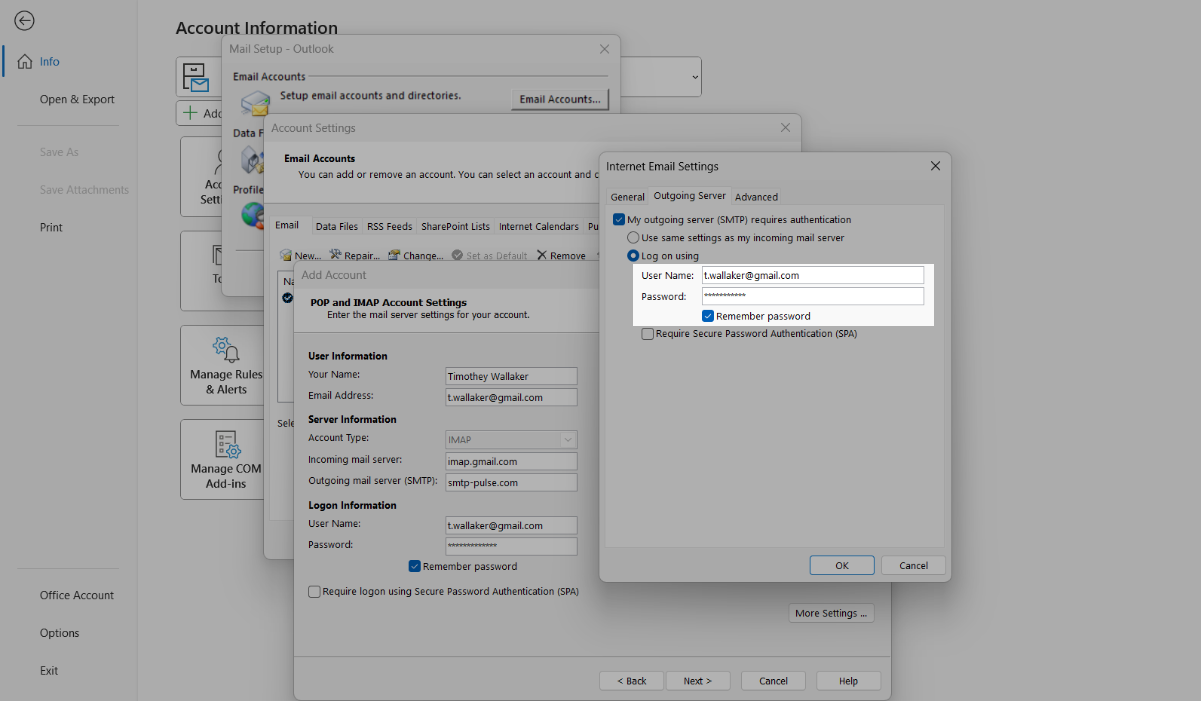
In a new window click New. Then, select the option to manually configure the server and choose the POP or IMAP option. Enter your SMTP server settings.
The sender address must be verified in your SMTP account.
Click More settings, and go to the Outgoing server tab in the window that opens. Select the Login with option, and paste the login and password from the SMTP settings in your SendPulse account in the User Name and Password fields.
Open the Advanced tab, and check the SMTP server’s port settings.
Last Updated: 03.01.2024
or