Get started with SMTP
Use SendPulse’s SMTP to send transactional emails from your own website or app. These include order confirmations, password resets, shipping notifications, and other messages triggered by a user action.
Suppose an online store sends a confirmation the moment a customer places an order, and a password reset link the moment they ask for one. Both emails go out through the same SMTP connection, and their delivery status appears in your account.
With SendPulse SMTP, you can:
- send emails through an SMTP server or the API;
- send a test email without adding a domain;
- integrate SendPulse with an AI tool through an MCP server and send emails without writing code;
- authenticate your domain with DKIM, SPF, and DMARC records to improve deliverability;
- track sending statistics, delivery errors, and unsubscribes.
Let's talk about how to set up SMTP, send your first email, and connect your own domain.
Some features described in this article are being rolled out gradually and may not be available in your account.
Check your setup option
The first time you open the SMTP section, you'll see one of two setup options. The new setup includes a demo plan, and the previous setup includes an application form. If you already have a free or paid plan, go to Set up the connection.
Before you start sending, we recommend you look through the Terms of Service.
Start with the SMTP Test plan
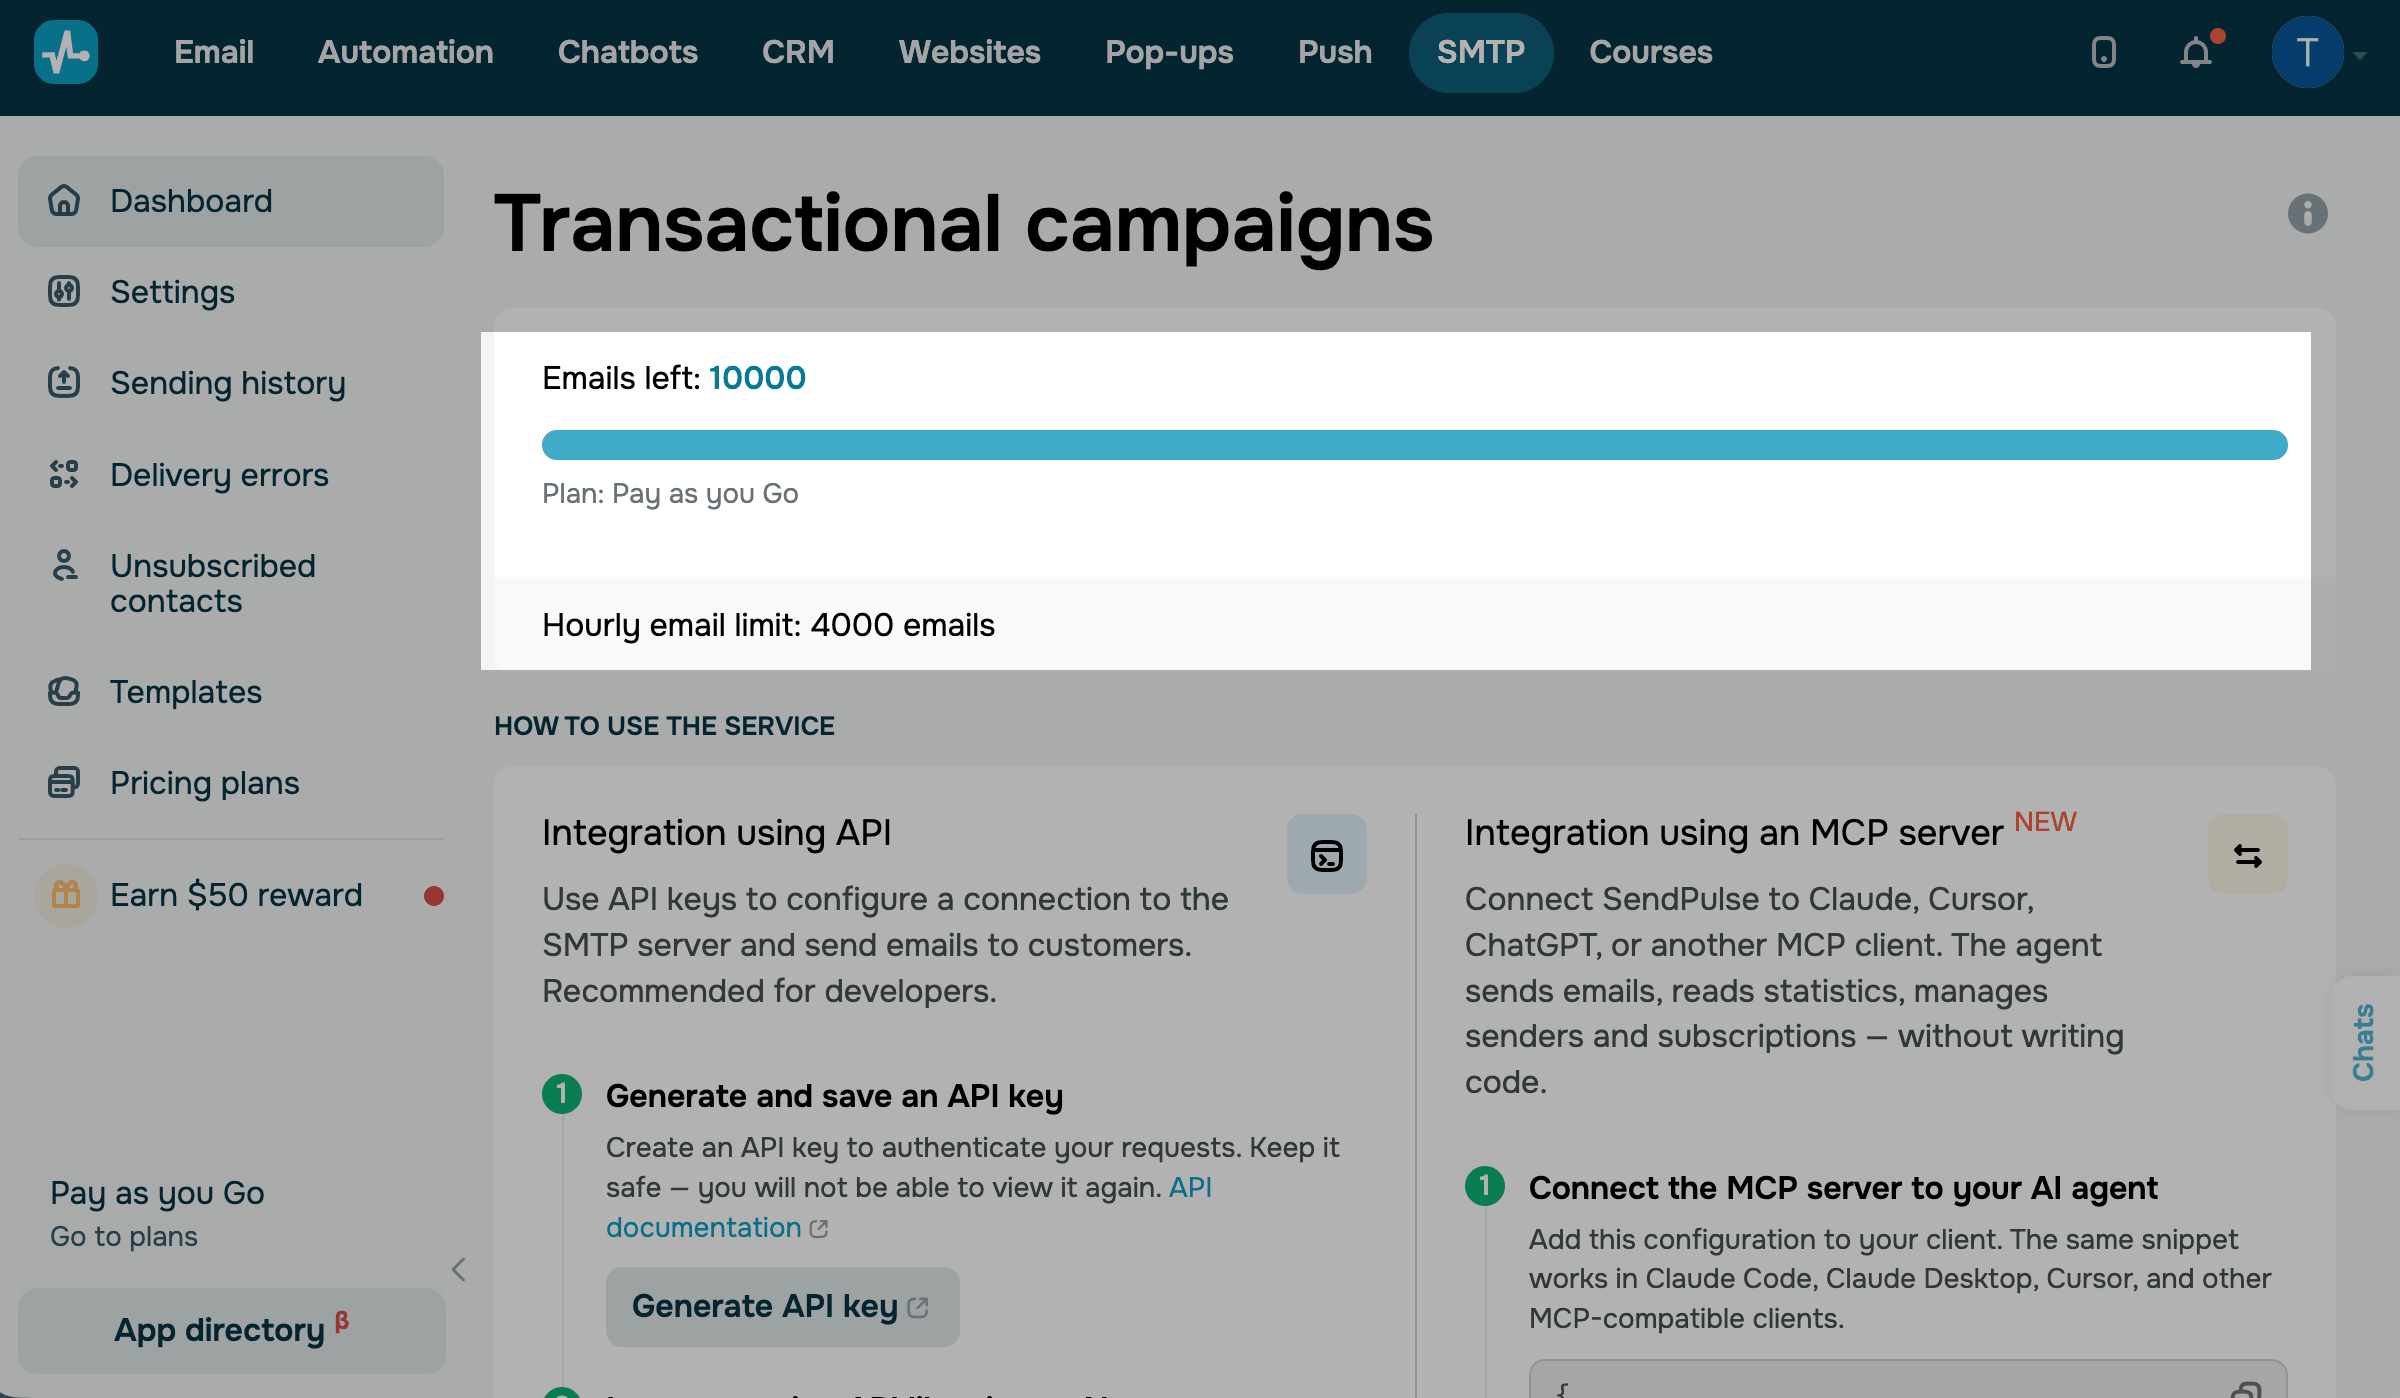
If SMTP > Dashboard opens right away and shows the SMTP Test plan, your account is in demo mode. Use it to test your integration. You can send emails without verifying a sender address or domain.
With this plan:
- You can send 50 emails in total and up to 10 emails per hour. The Dashboard shows Messages left and Hourly limit. The total limit is one-time only, so it doesn't reset each month.
- All emails are sent from
devtest@sendpulseemail.comwith the sender nameSP test. SendPulse replaces any sender name and email address you add to thefromfield. - SendPulse adds
For development purposes onlyto the beginning of every subject line. Recipients see this text in their inbox.
This is expected behavior in demo mode. To send emails from your own address with higher limits, verify your domain and add a sender email address on that domain. After that, your account automatically switches to the free plan.
Fill out your user profile
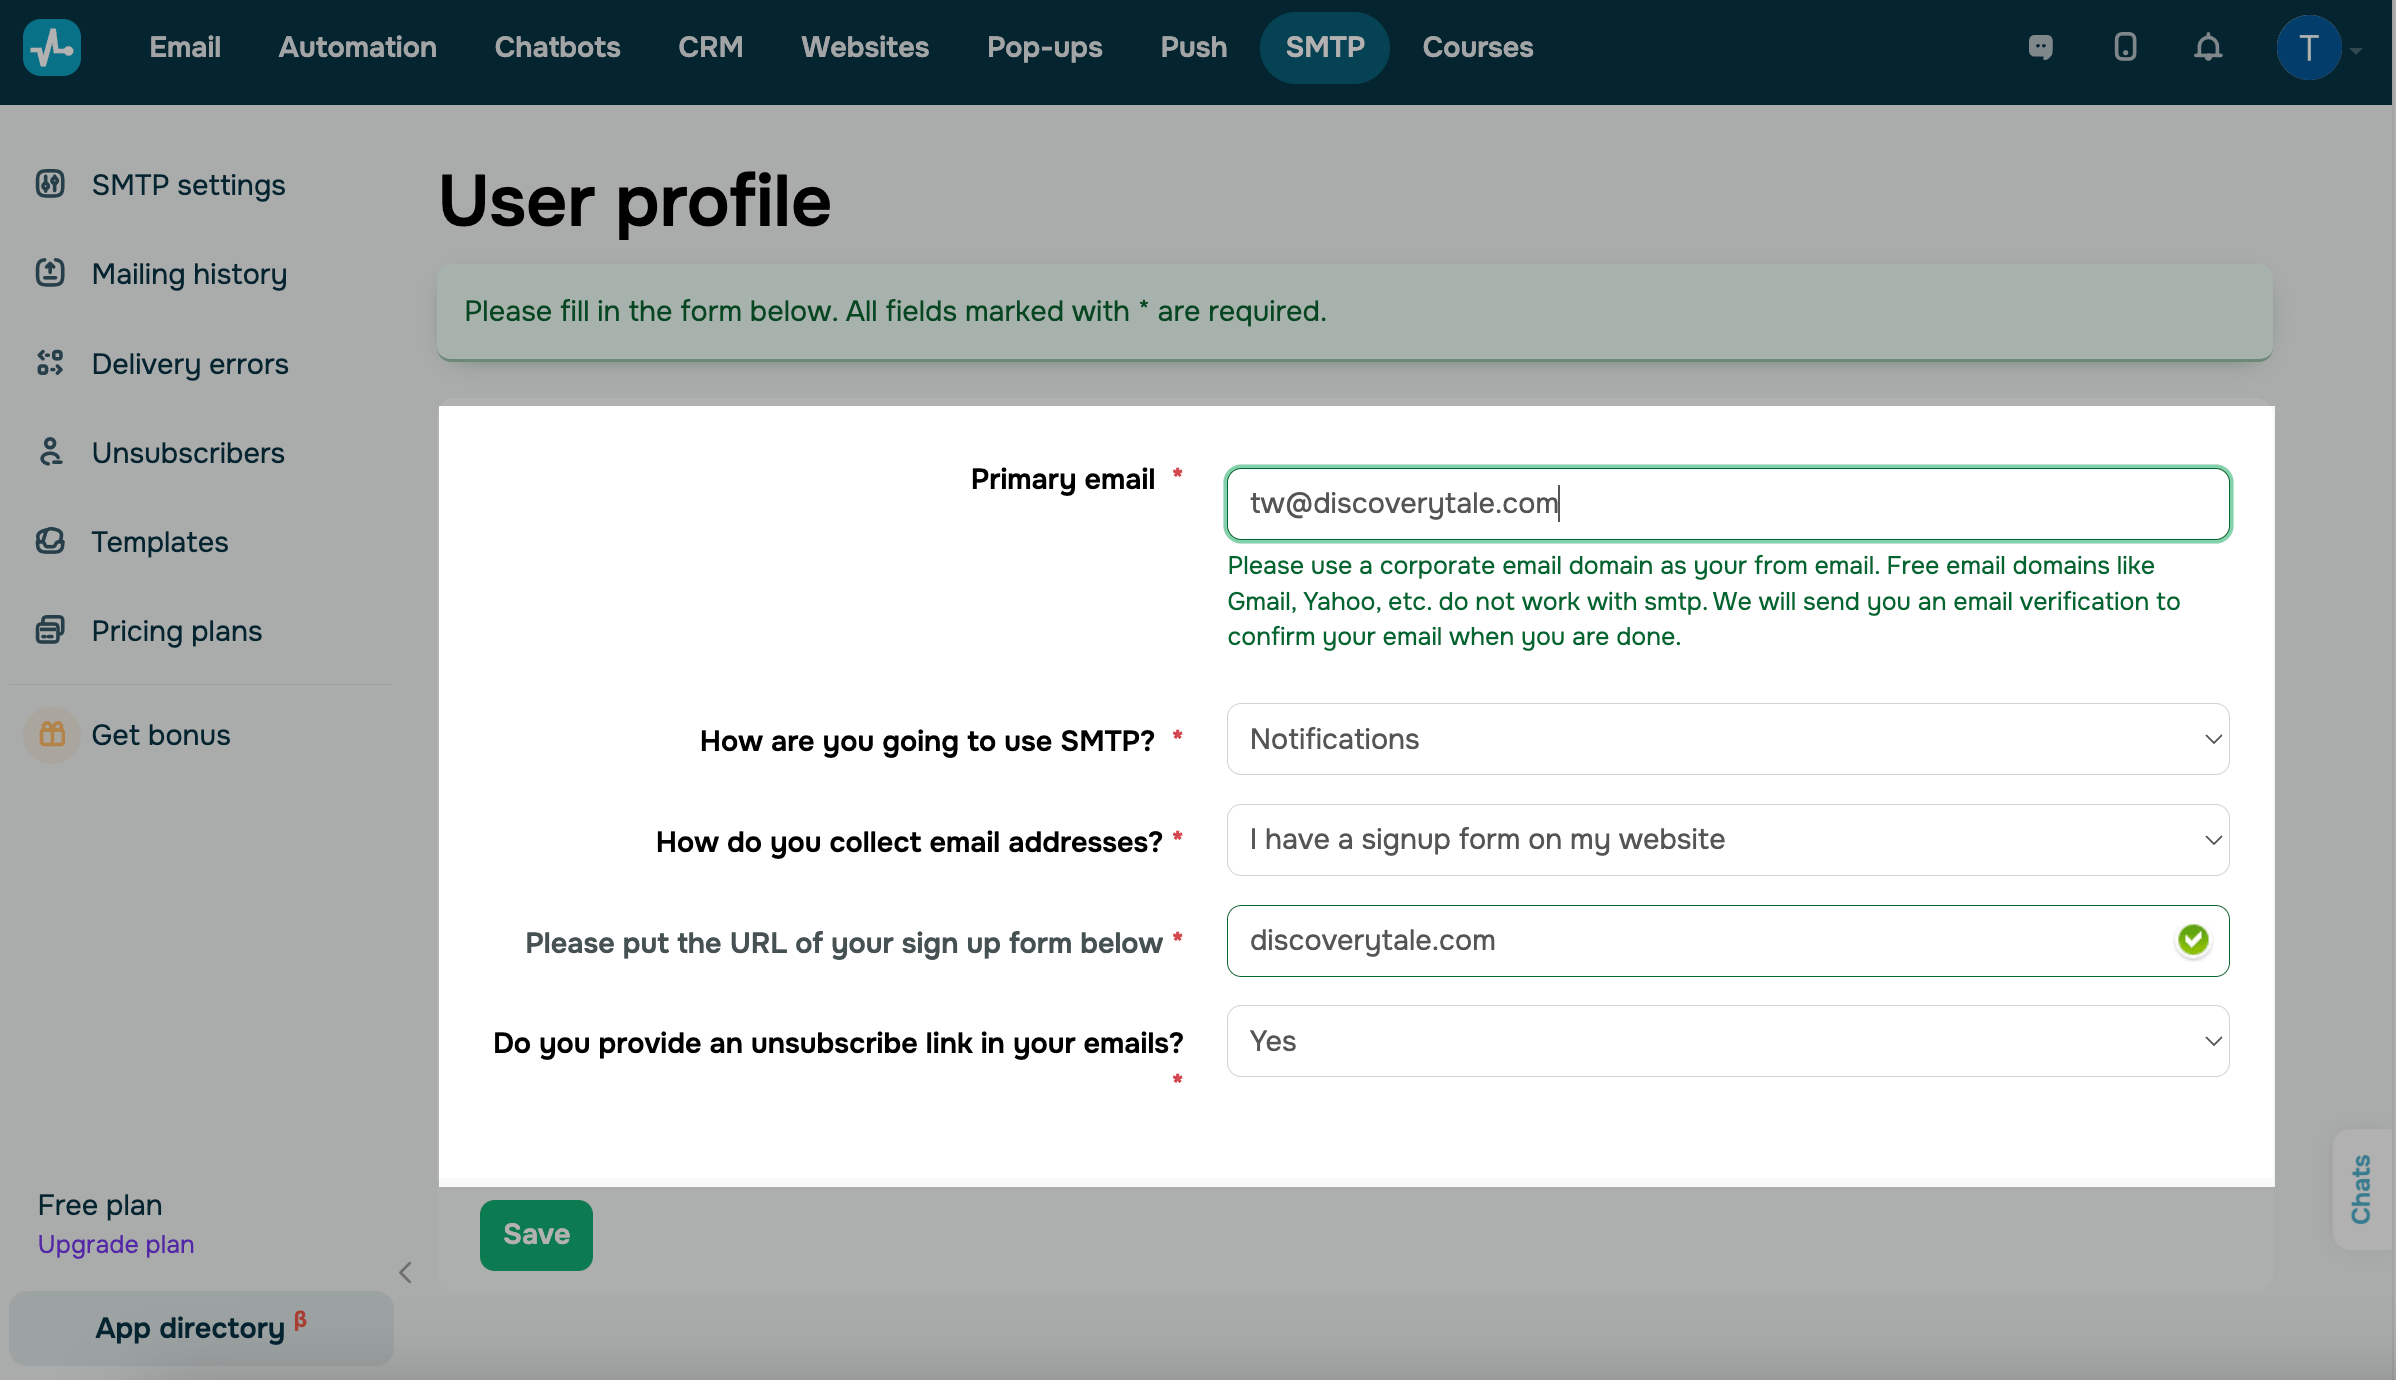
If you see a welcome page with a Get started button when you open the SMTP section, your account uses the previous setup option. Click Get started to open the User profile form.
Enter your primary email address, describe how you plan to use SMTP and how you collect email addresses, and indicate whether your emails contain an unsubscribe link. Click Save.
Open the email from SendPulse and click the confirmation link. Our moderators will then review your profile. This usually takes up to 24 hours. Once your profile is approved, you can set up the connection and send emails.
Set up the connection
Choose how to connect to SendPulse SMTP based on your project: via API, through an MCP server, or by adding SMTP server settings to your email client or app.
If the Dashboard shows the How to use SMTP section, your account uses the previous setup. In this case, generate an API key and copy the MCP server link in Account settings > API. Find your login and password in SMTP > Settings > General.
Connect using the API
Use the API if you send emails from your own application or website.
To connect, you’ll need an API key and the API method for sending emails. The SDK libraries and the AI prompt are optional.
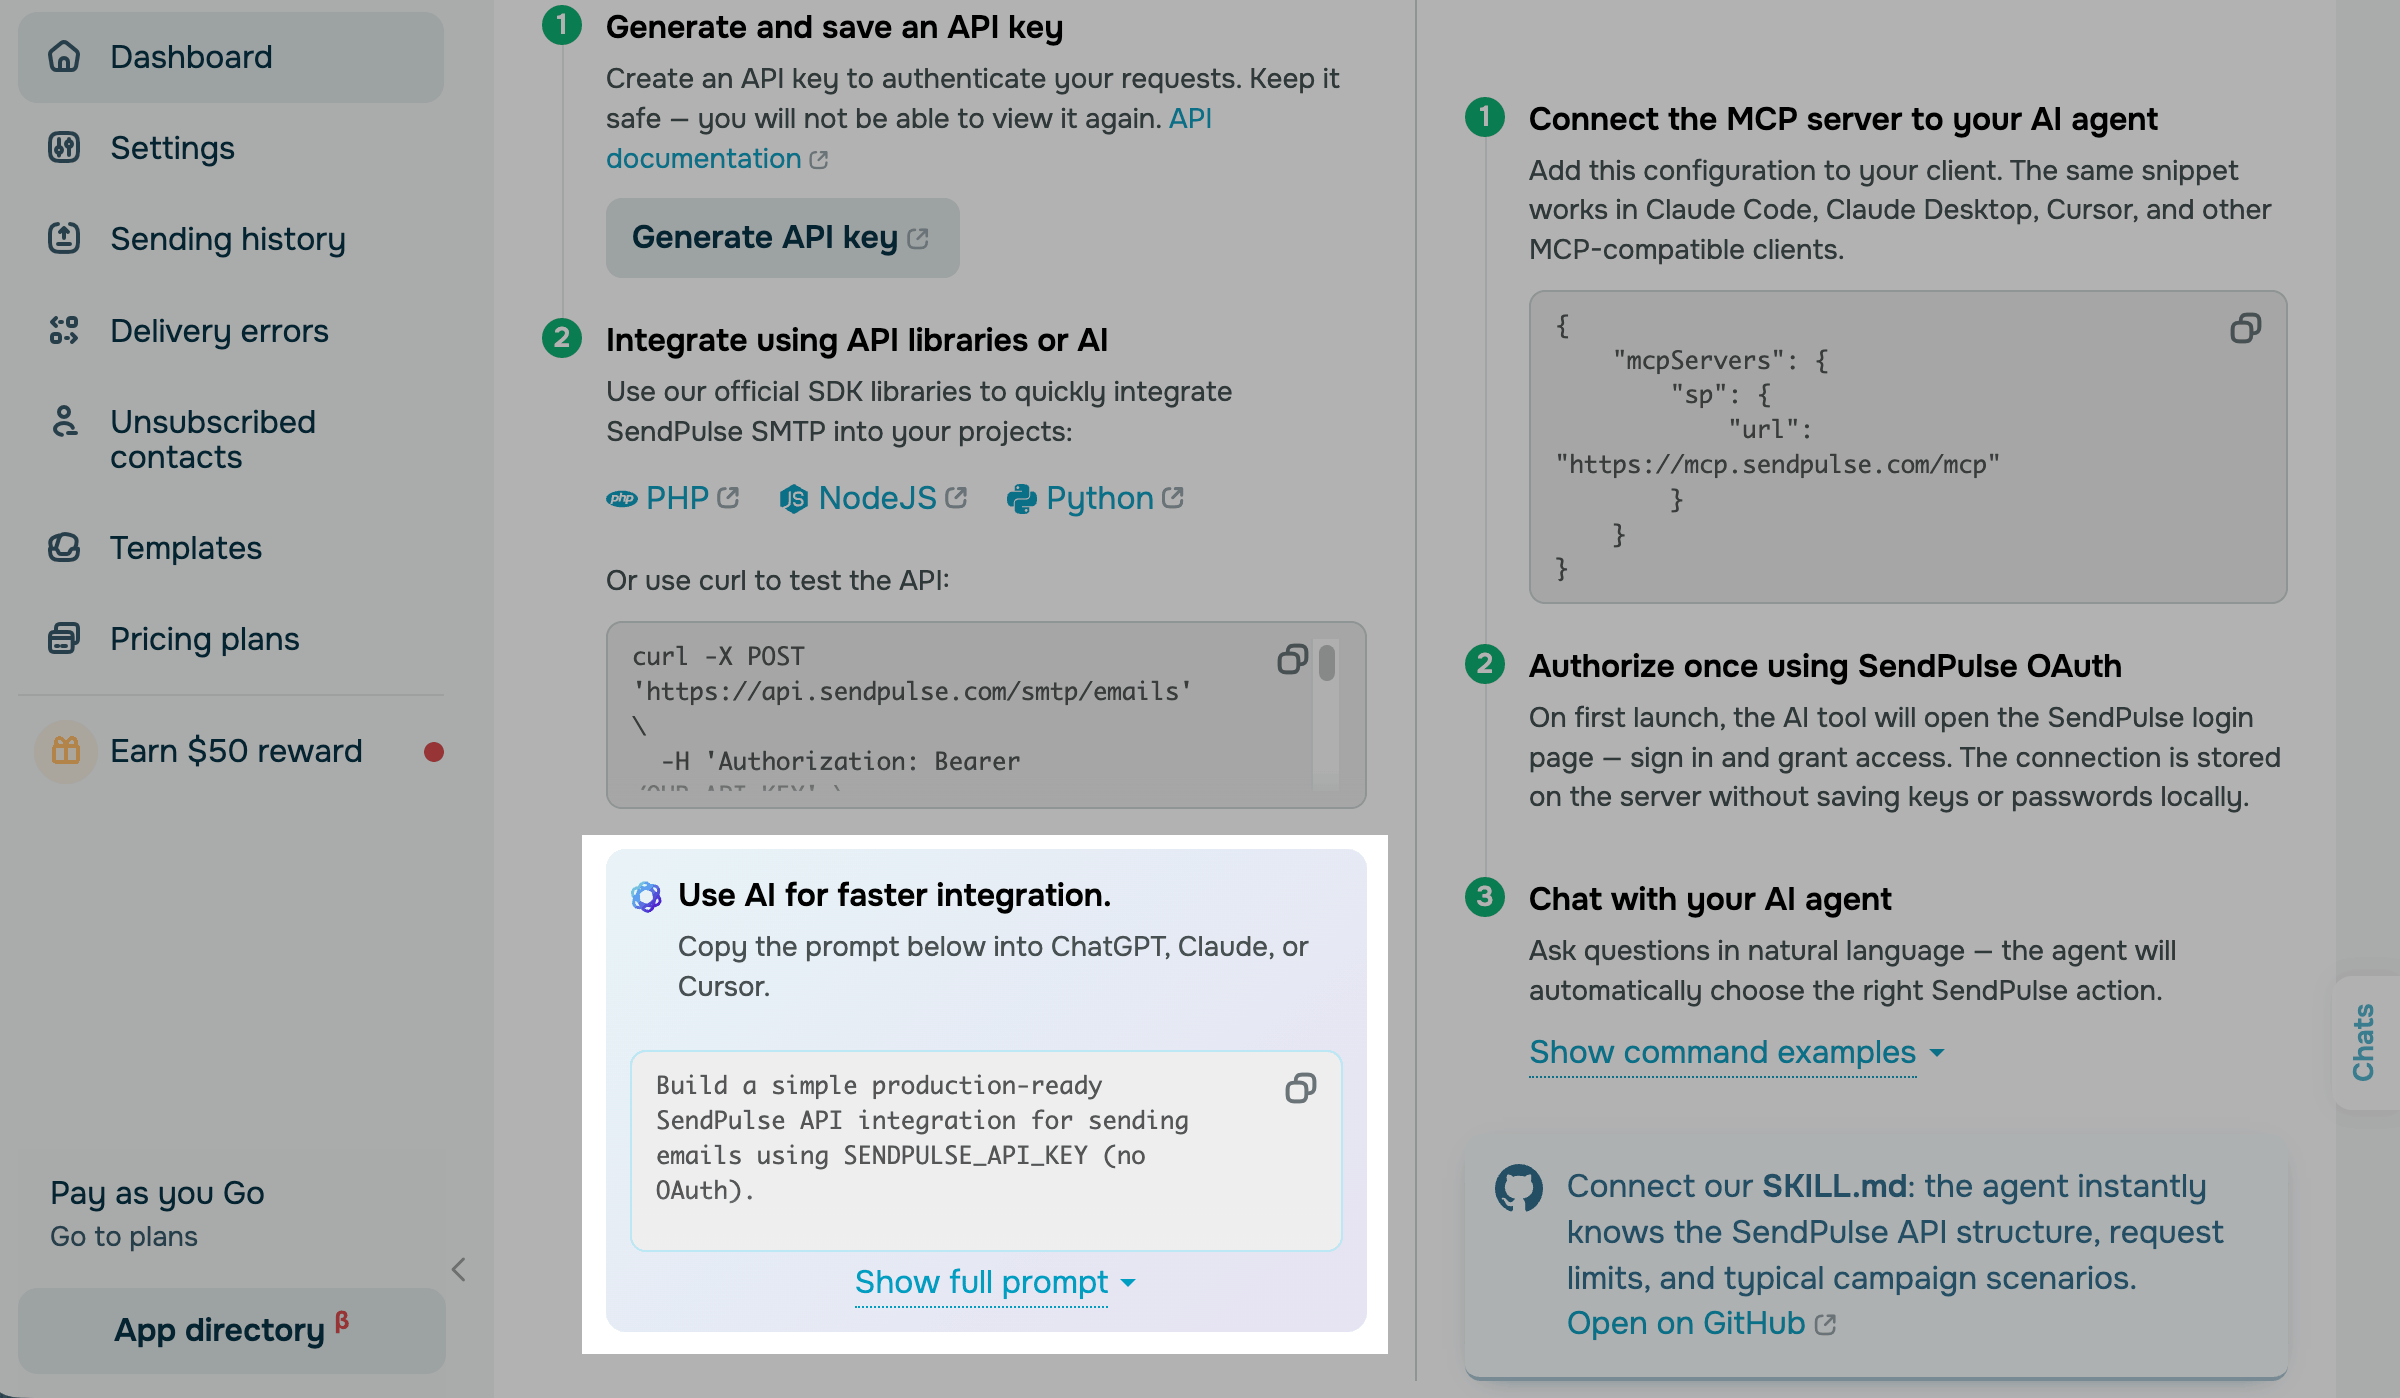
To generate an API key, go to SMTP > Dashboard. In the Integration using API section, find the Generate and save an API key step and click Generate API key.
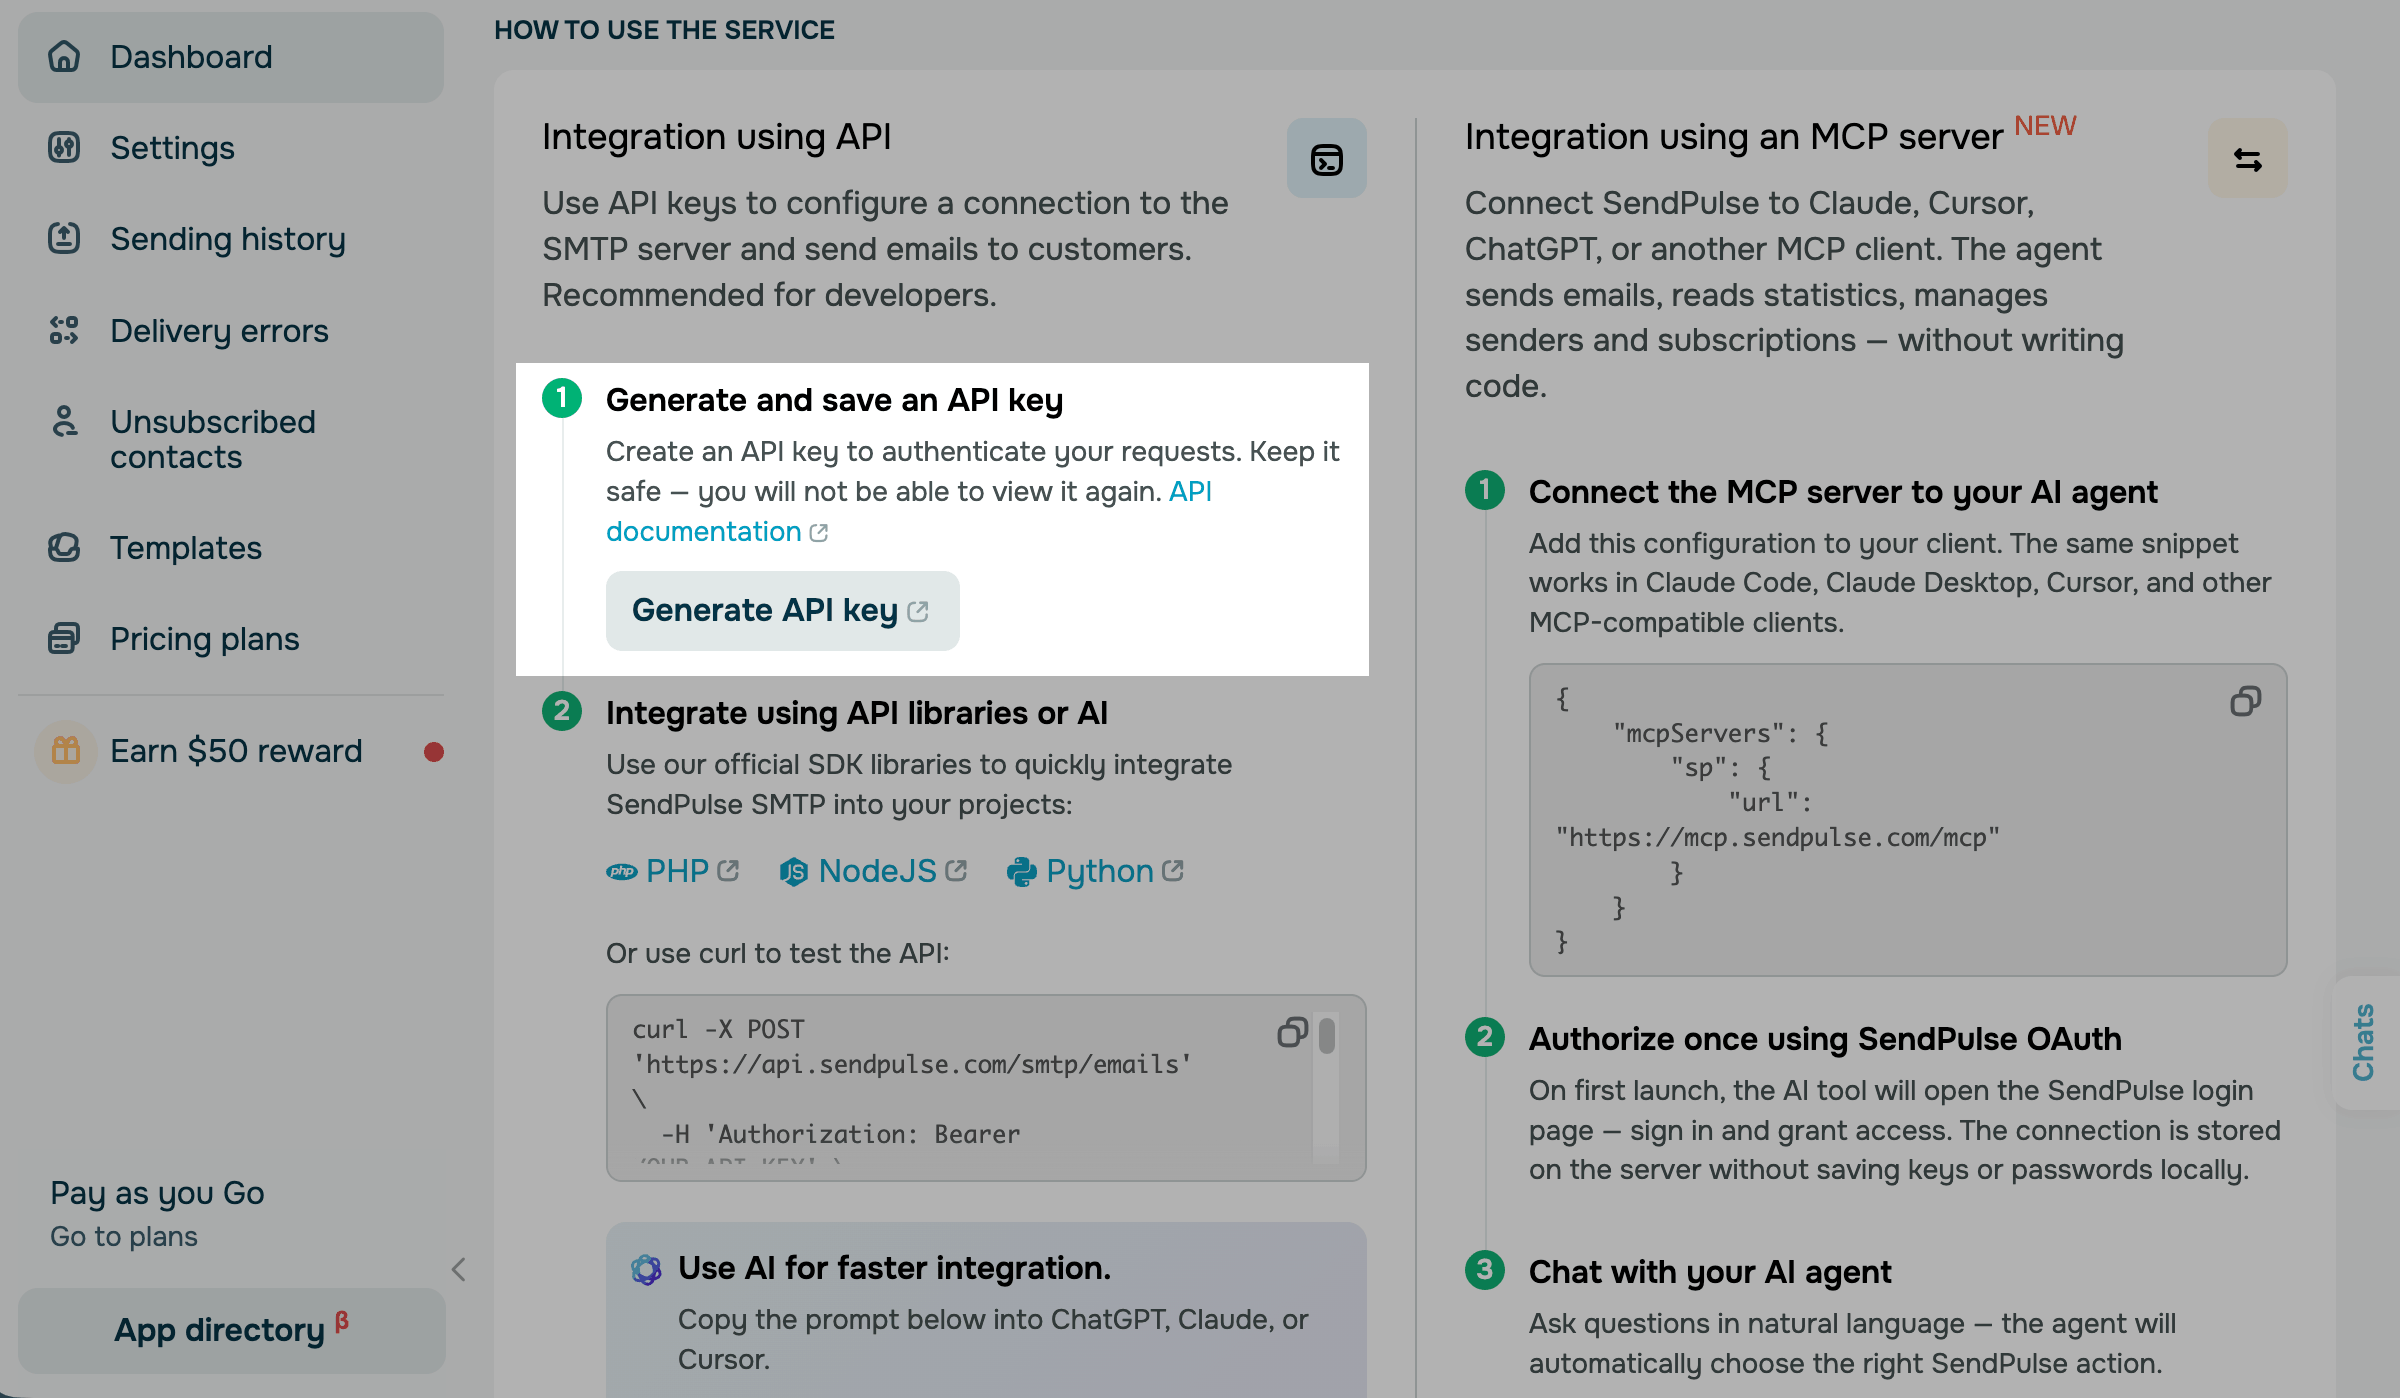
You will be redirected to Account Settings > API in a new browser tab. Under API access, open the API keys tab and click Generate. In the pop-up window, fill in the Name field to be able to easily find the key later. Click Generate.
Copy and save the key once you generate it. For security reasons, you won't be able to view or copy it again later.
Then, send your emails using the Send an email API method. The same method also sends emails with a SendPulse template.
Read more: Generate keys for integrations, SMTP Service API, API authorization.
To speed things up, use one of SendPulse's official SDK libraries. In the Integrate using API libraries or AI step, click PHP, NodeJS, or Python.
Before you build the integration, you can test the connection using cURL. Copy the example from the same step and replace YOUR_API_KEY in it with the key you generated.
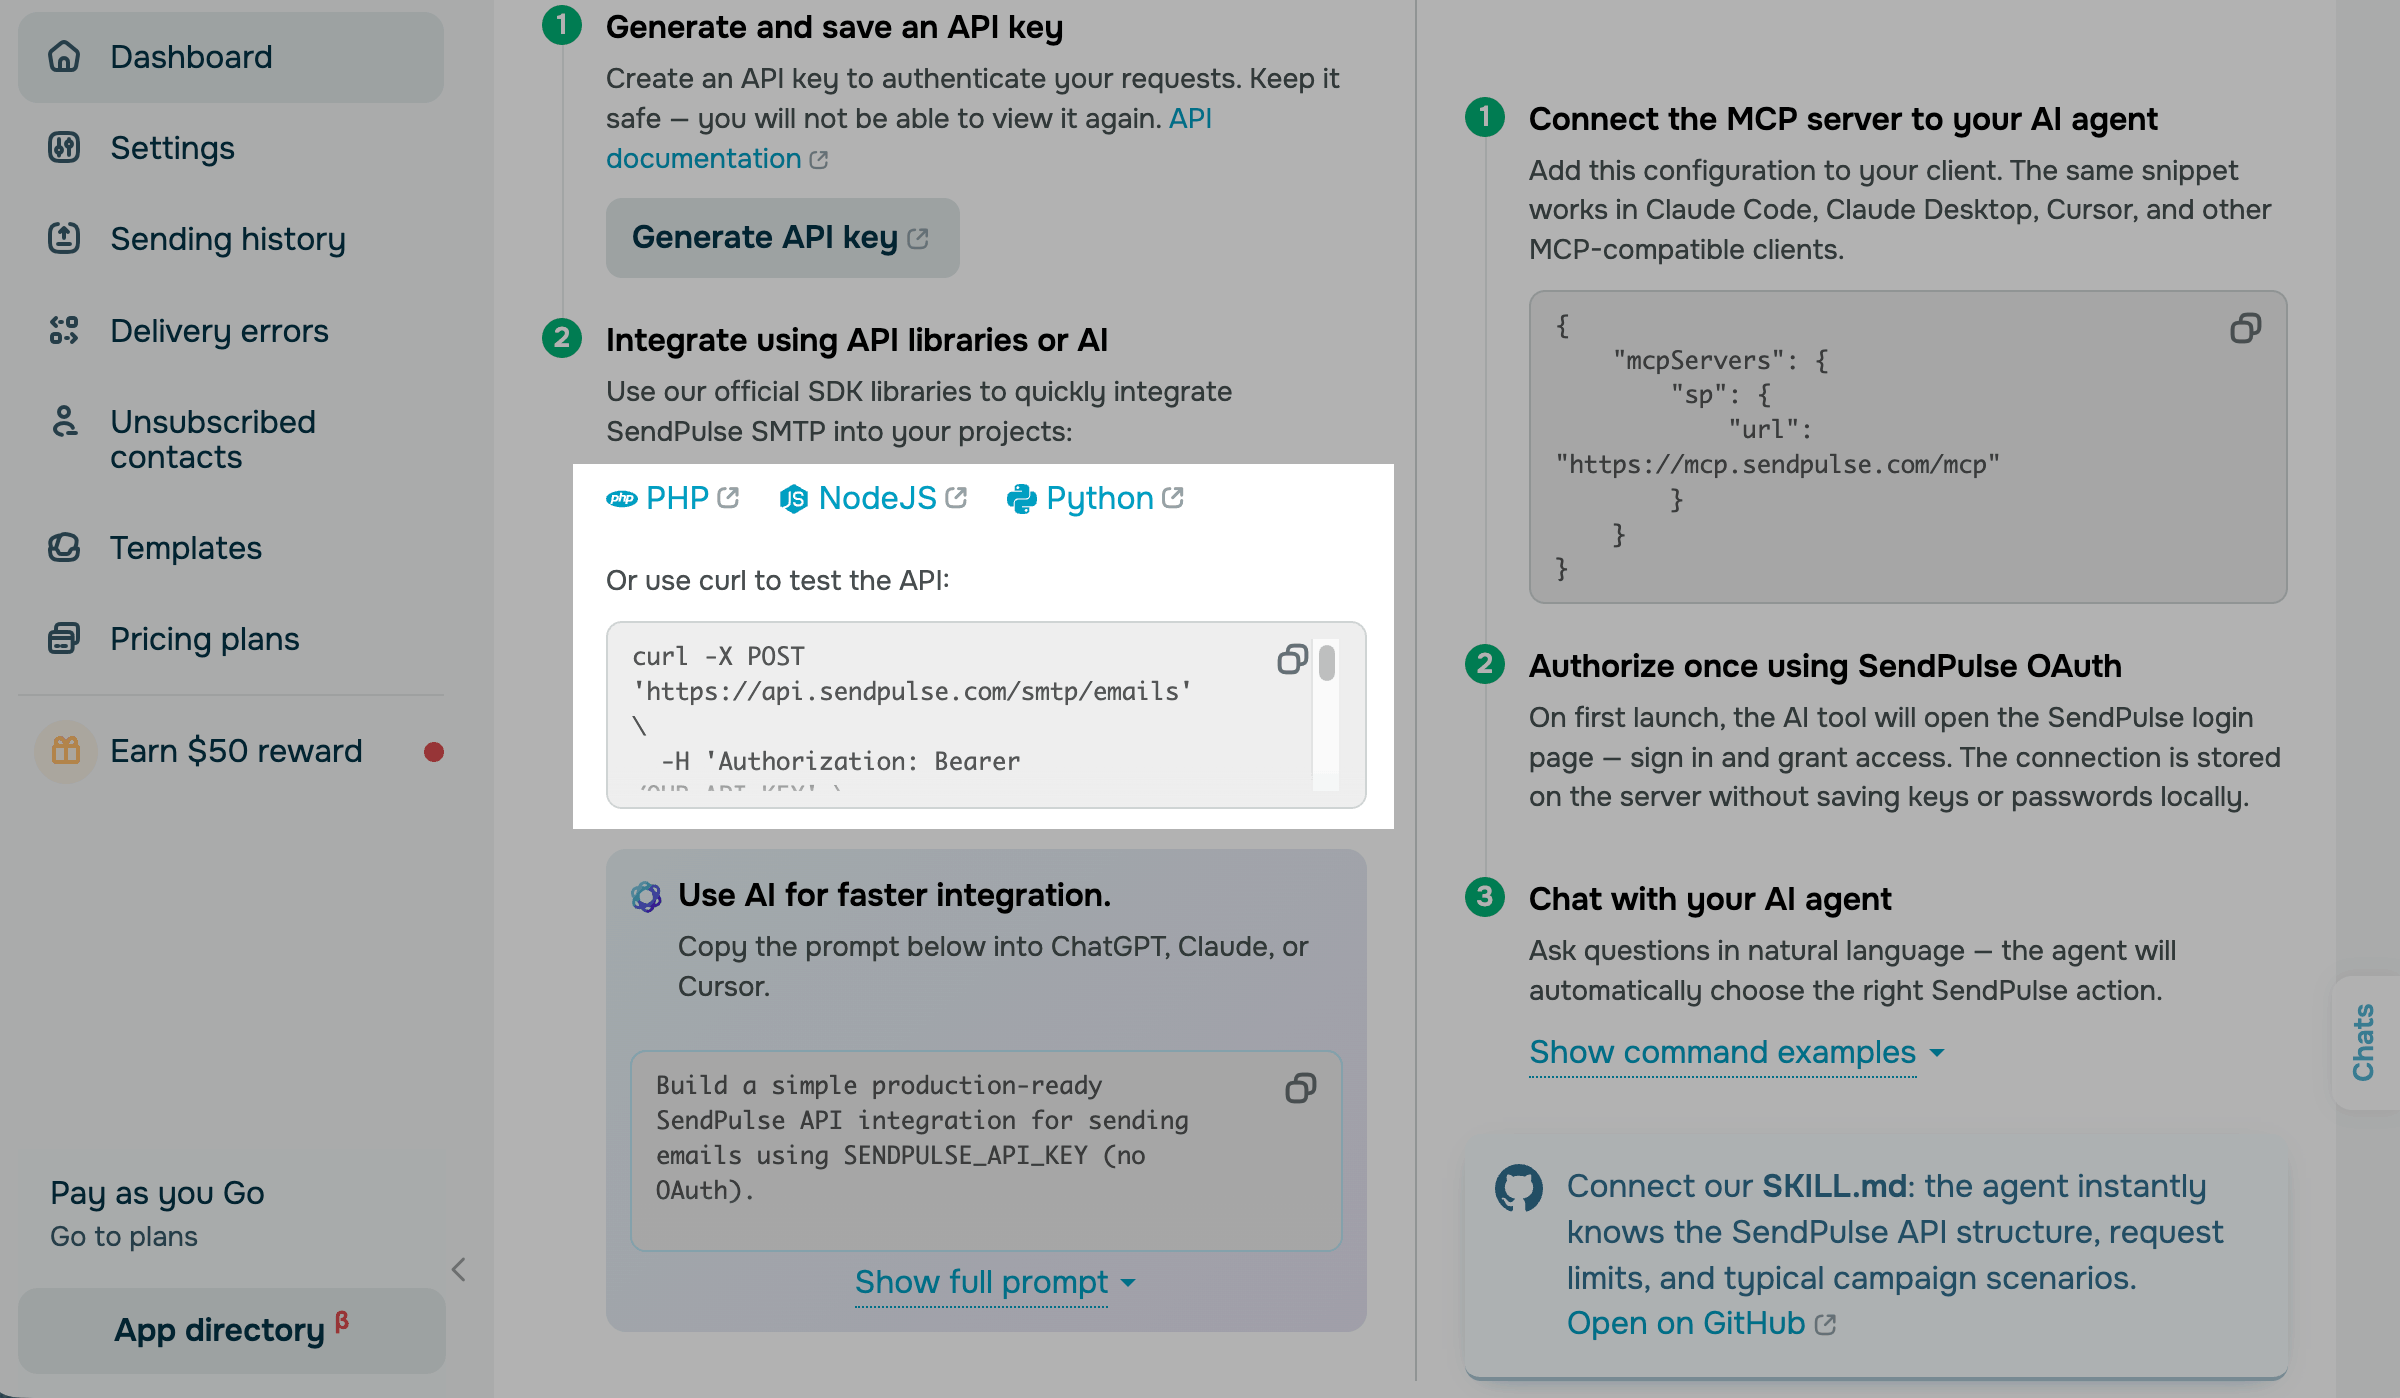
You can also build the integration with an AI assistant. Under Use AI for faster integration, copy the prompt into ChatGPT, Claude, or Cursor. The prompt describes how the SMTP Test plan behaves, so the generated code accounts for the substituted sender and the subject prefix.
Connect using an MCP server
Use an MCP server to let an AI agent send emails, read statistics, and manage sender addresses and subscriptions in your account.
To copy the server configuration, go to SMTP > Dashboard. In the Integration using an MCP server section, find the Connect the MCP server to your AI agent step. Copy the code snippet.
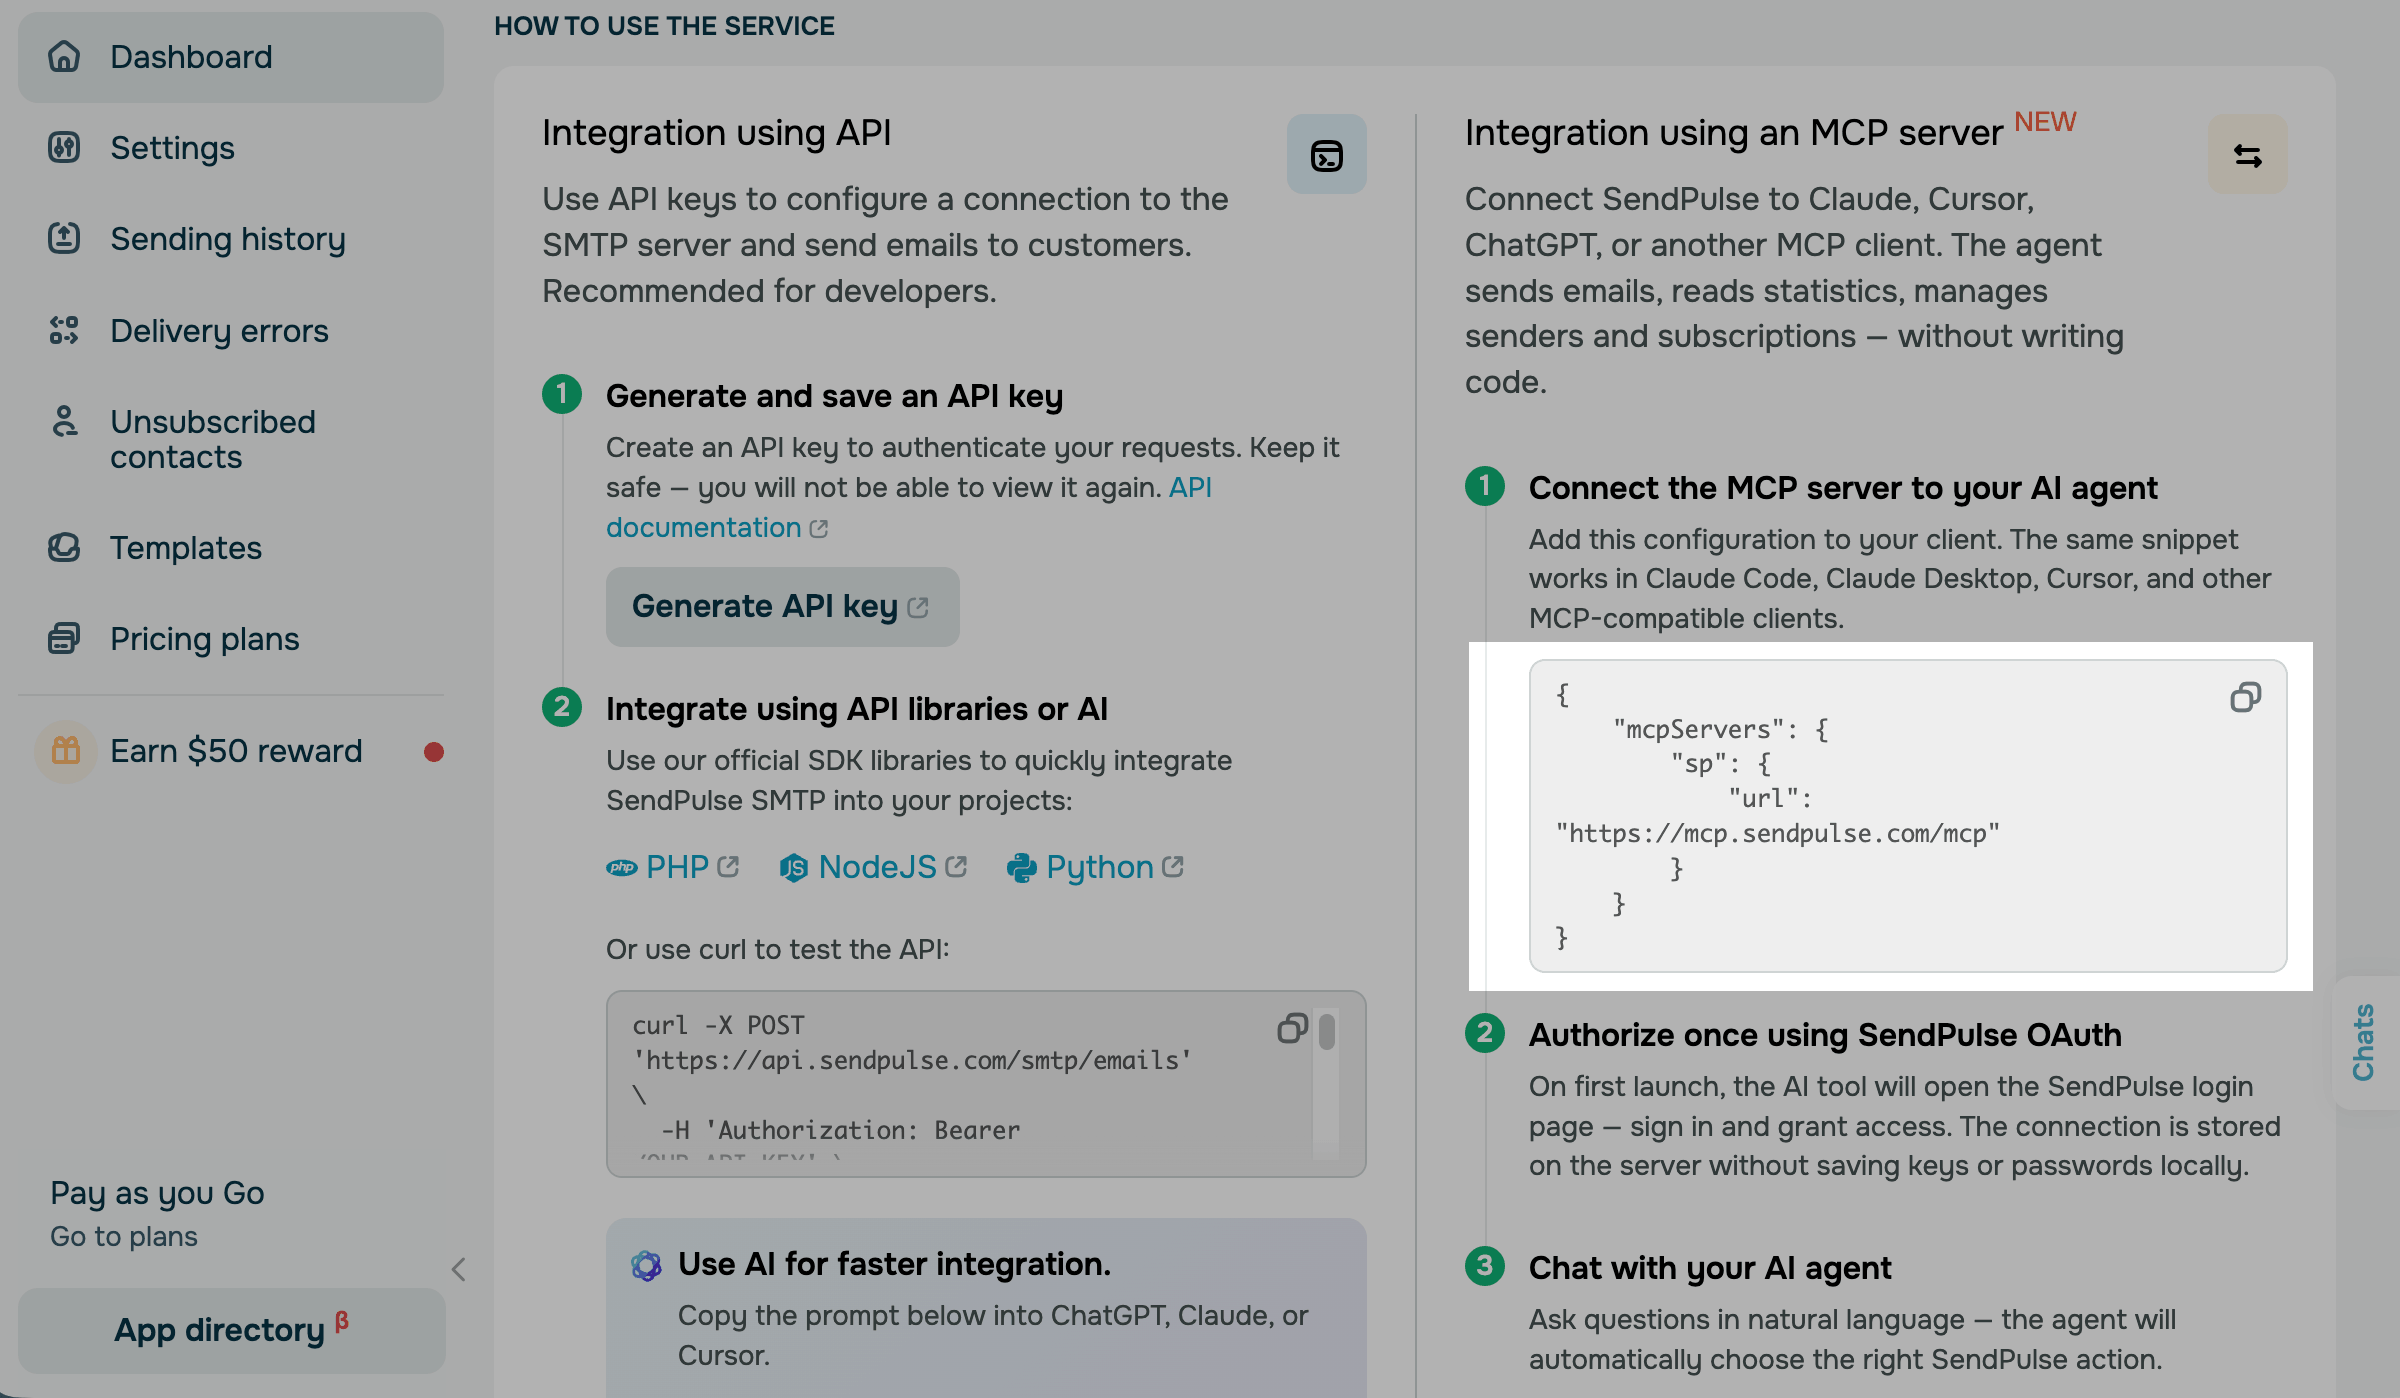
Add the snippet to the MCP configuration of your AI client. The file and its location differ from client to client. See the instructions for Claude, Cursor, ChatGPT, Claude Code, or another supported client.
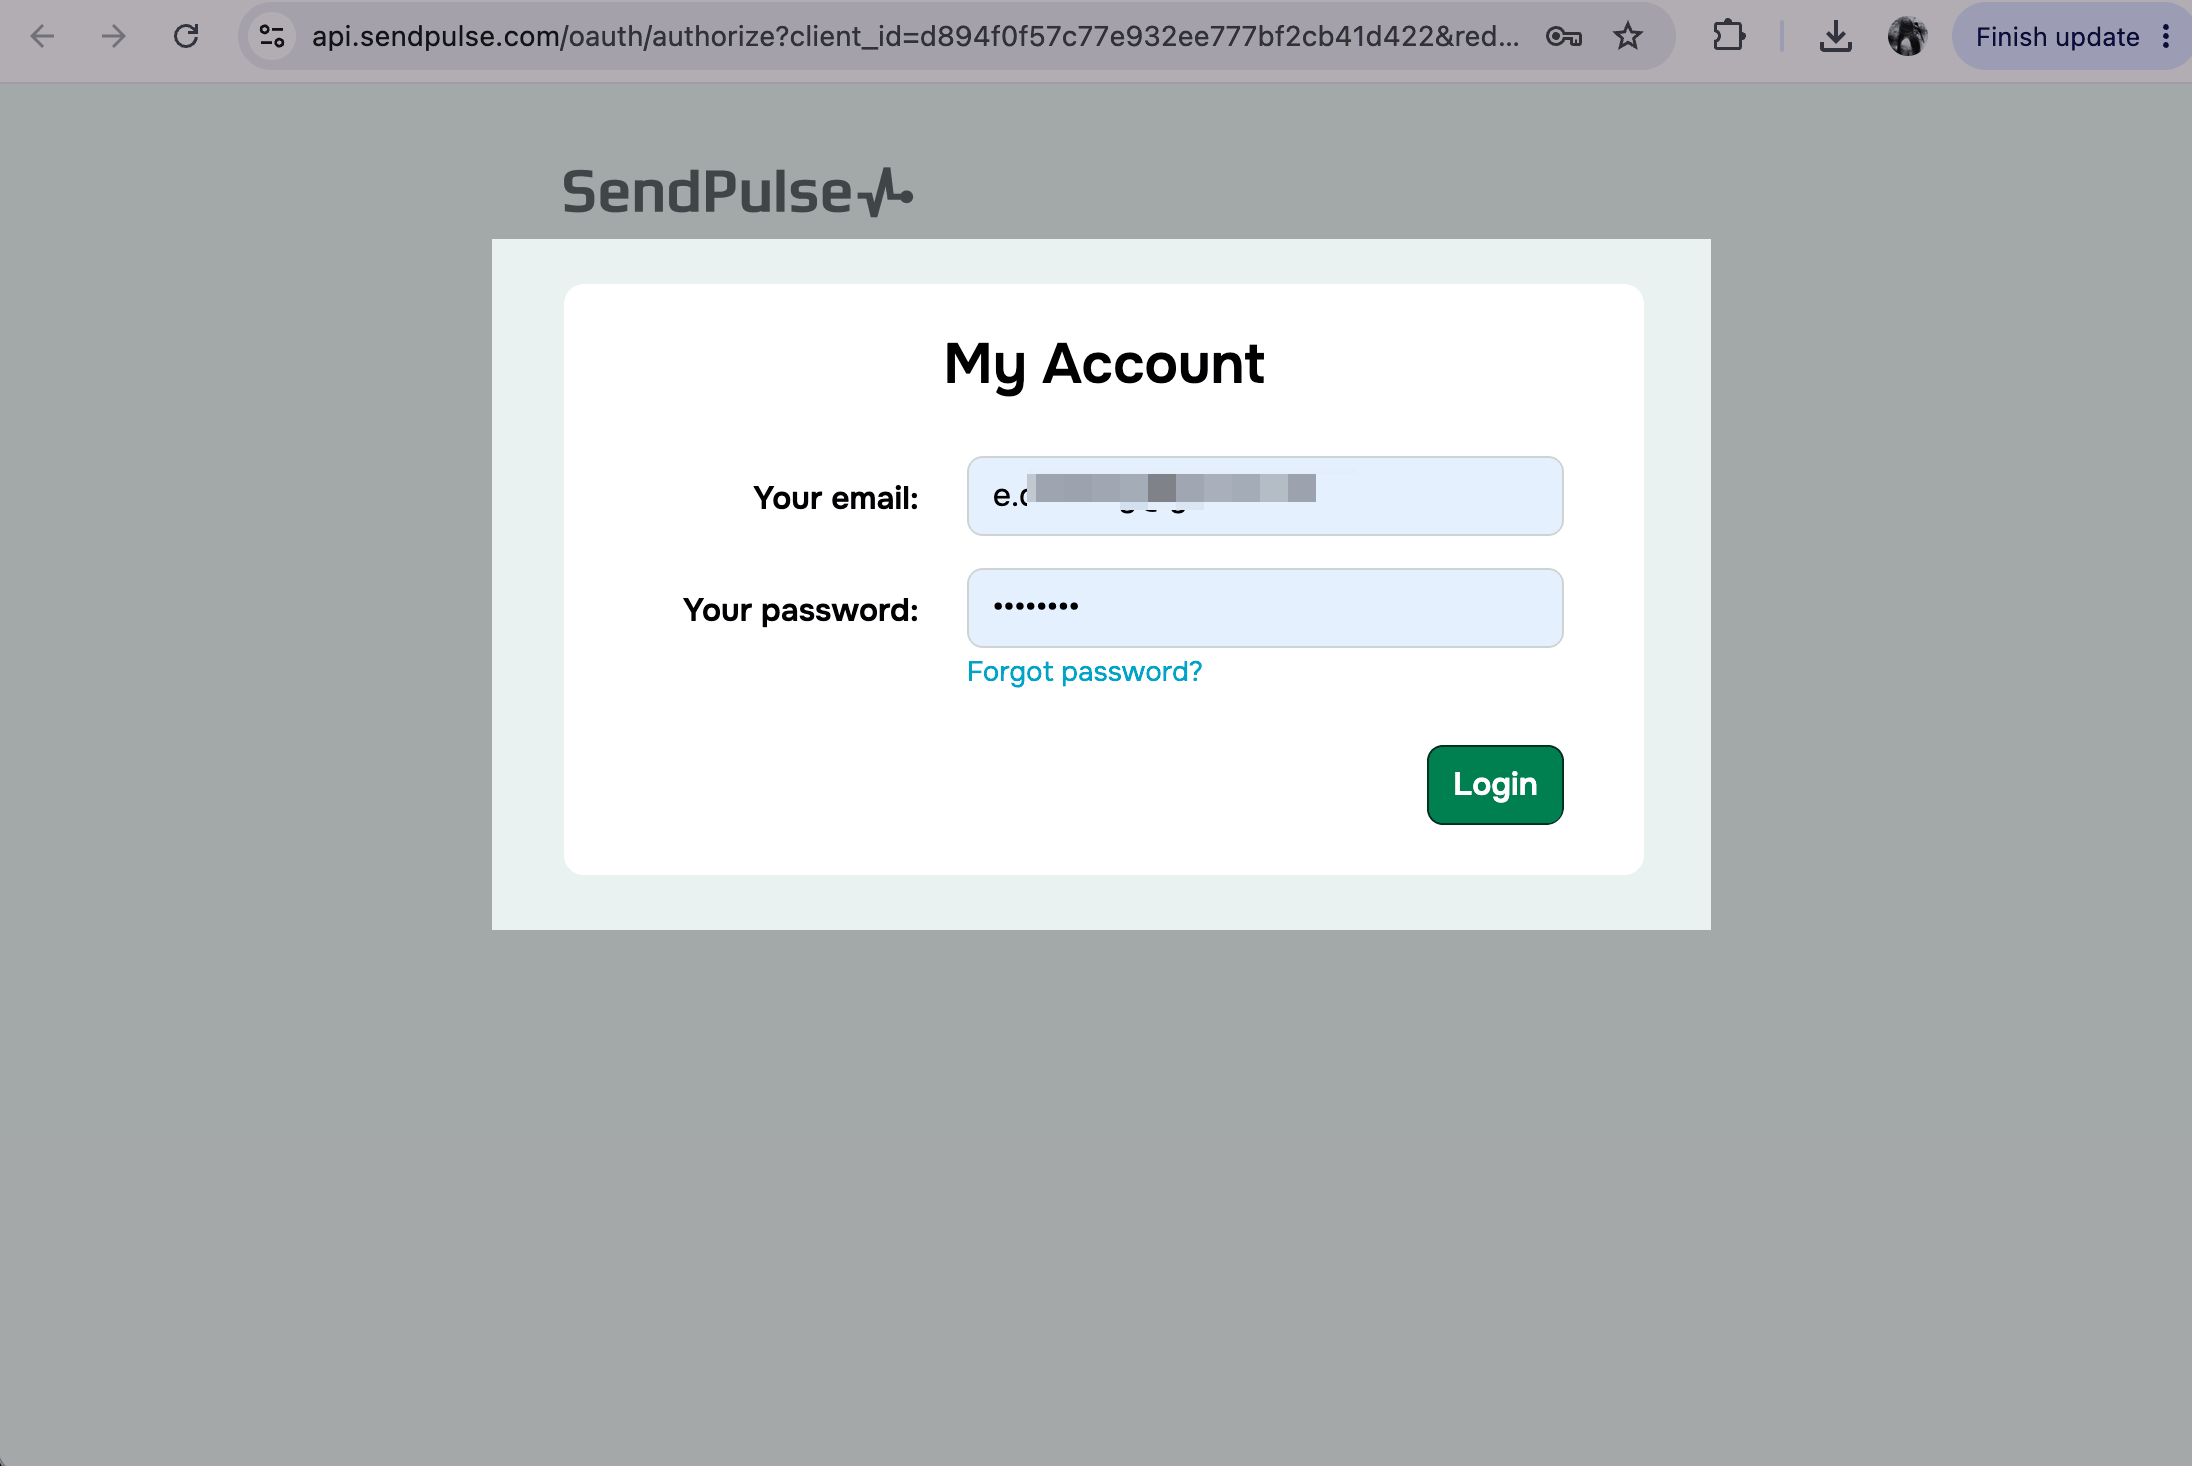
When you run a command for the first time, your client opens the SendPulse login page. Sign in and grant access. SendPulse stores the connection on its side and doesn't keep API keys or passwords in your client.
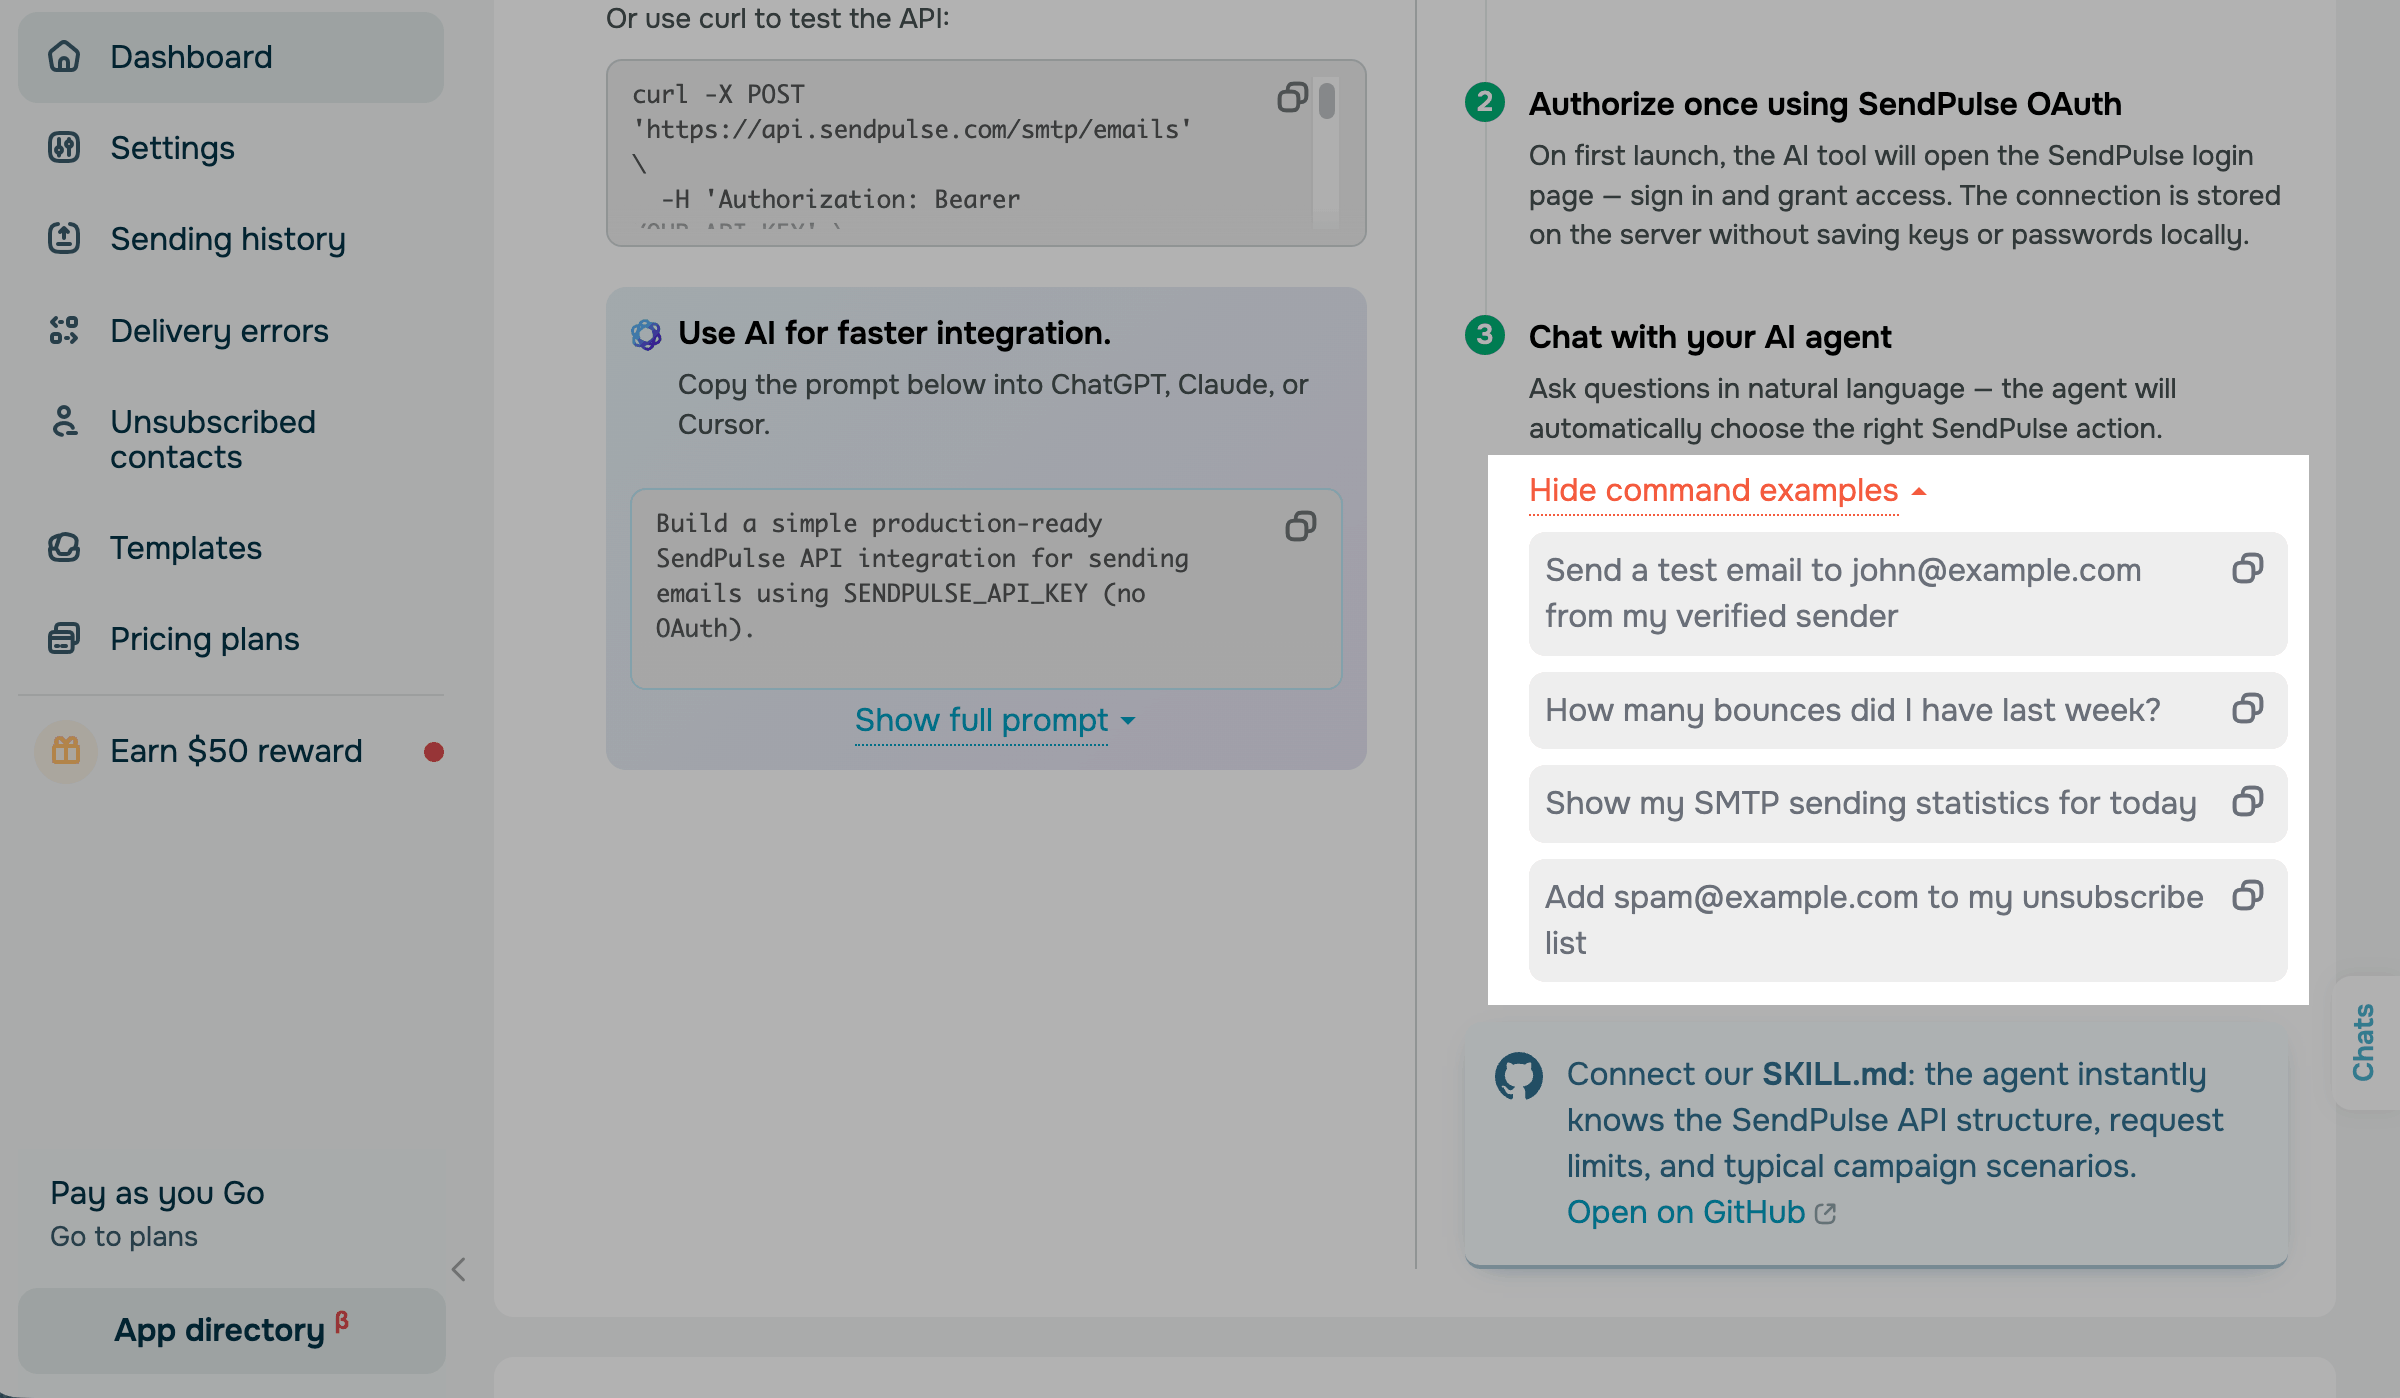
Type in a prompt using plain language, and your AI agent will choose a SendPulse action on its own. To see what you can ask, click Show command examples.
To give your agent the SendPulse API structure, request limits, and step-by-step guidance for sending emails and fixing errors, connect SendPulse's SKILL.md. Click Open on GitHub and follow the installation steps in the repository.
Read more: MCP server basics, List of MCP commands.
Connect using server settings
Use the server settings if you send emails from an email client, a CMS, or a plugin.
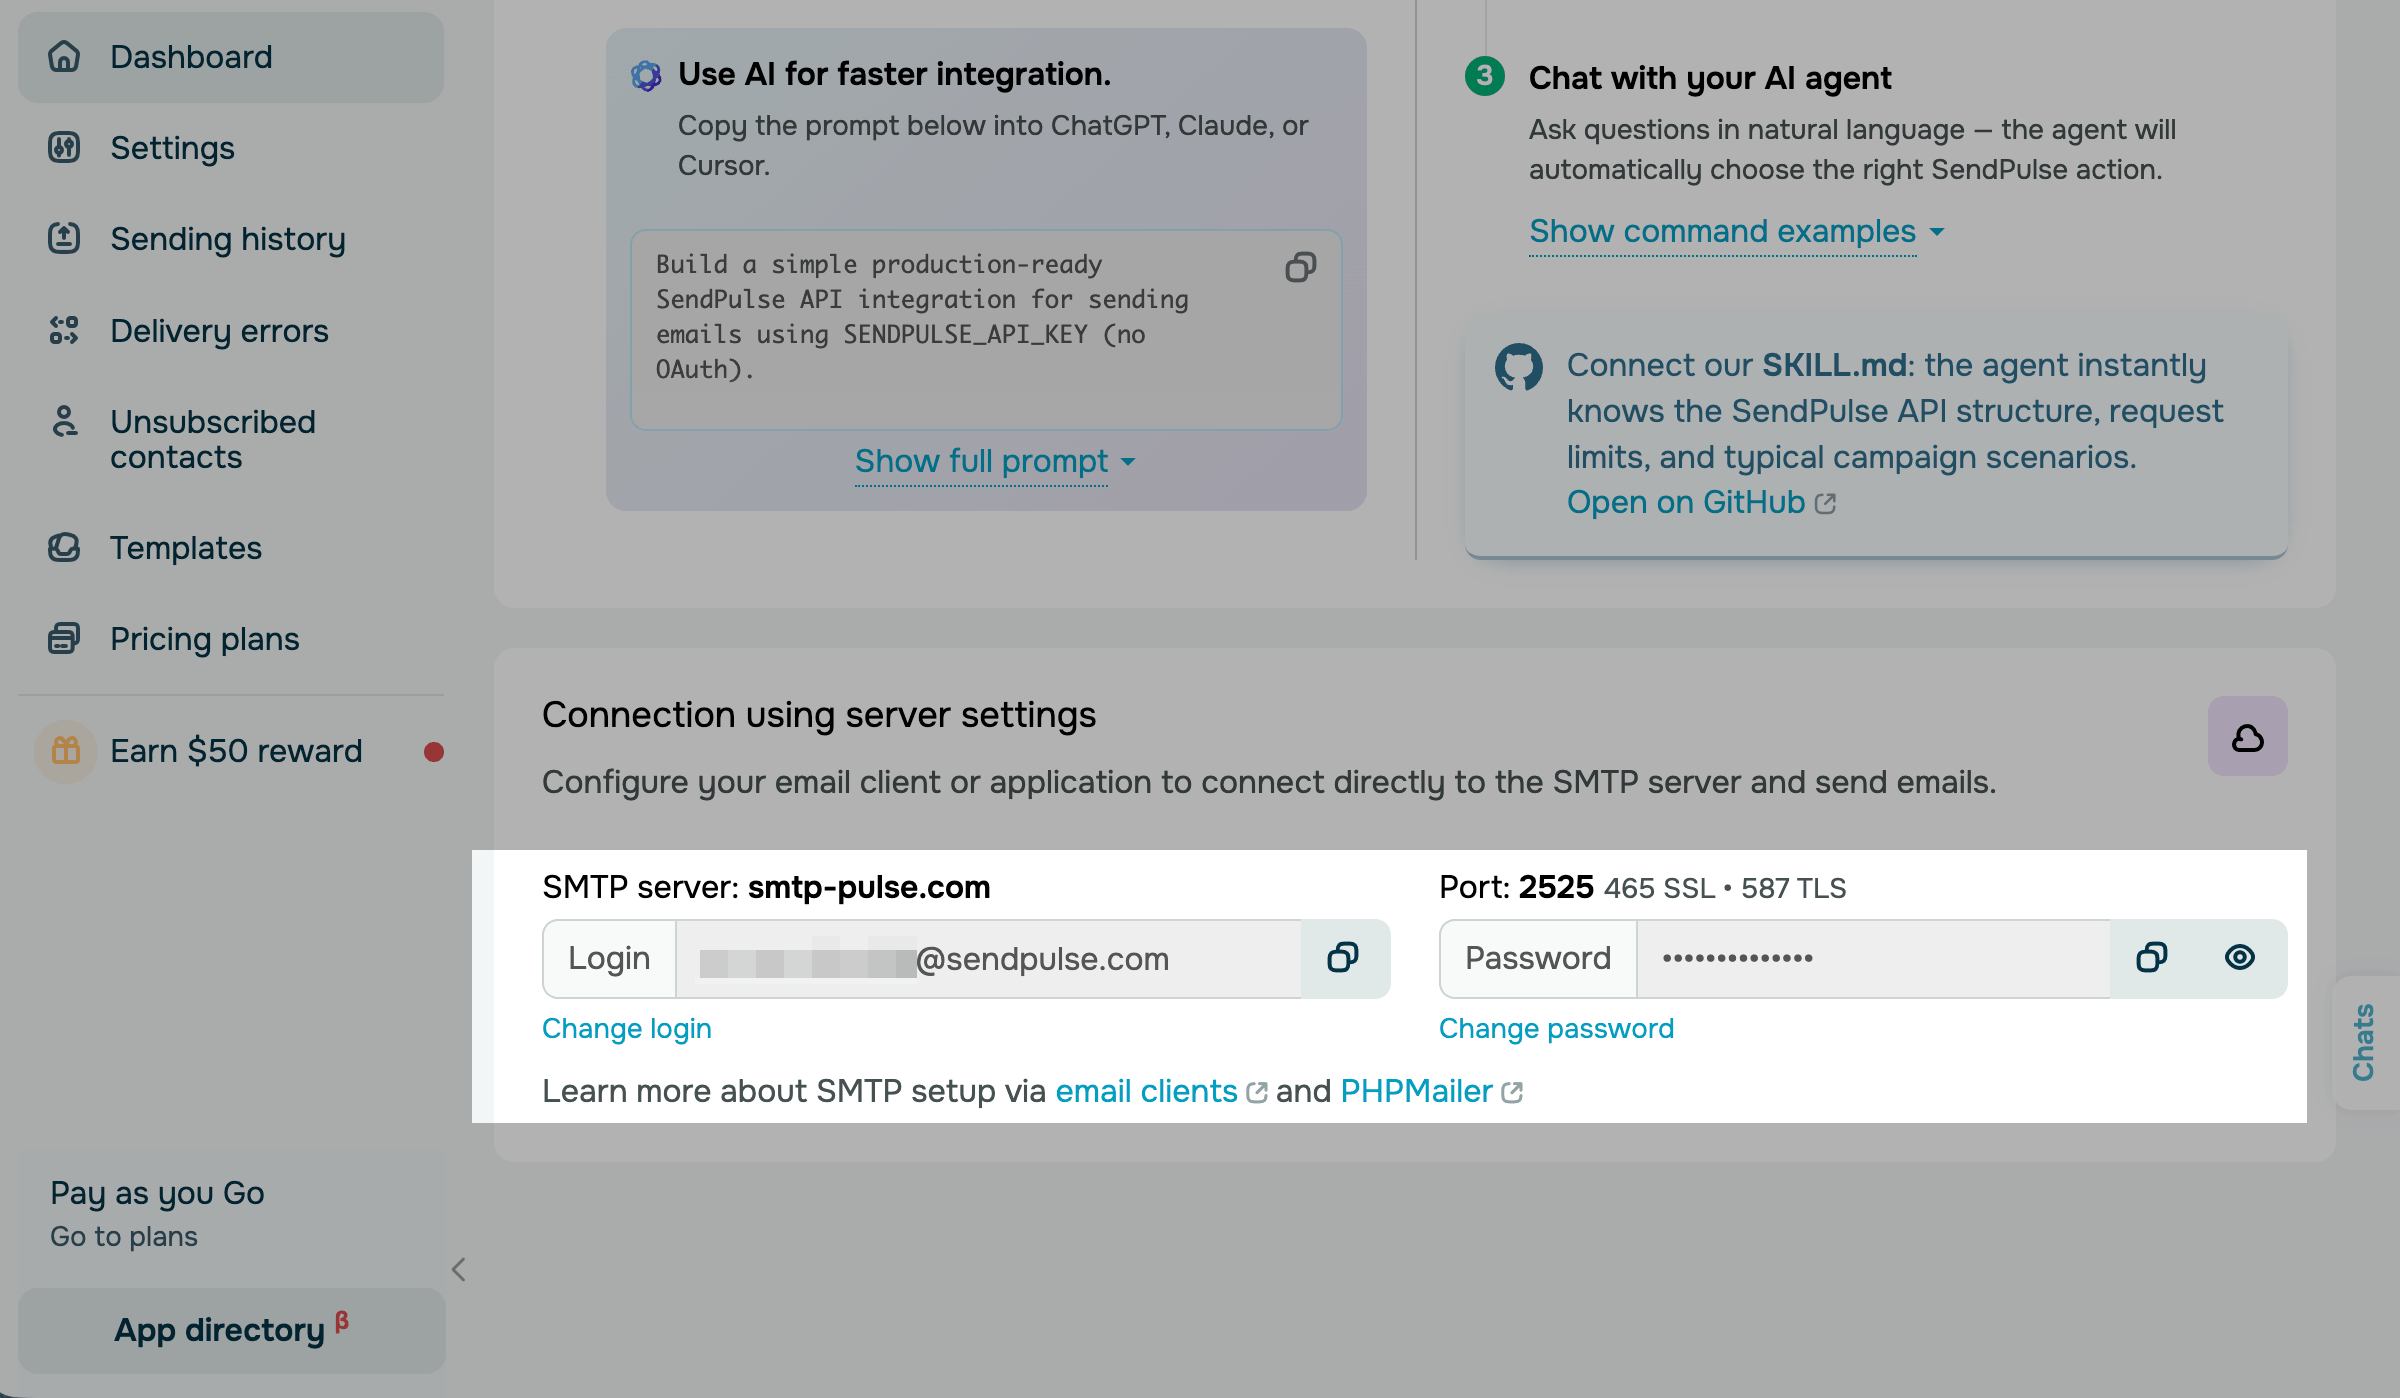
To connect to the SMTP server, go to SMTP > Dashboard > Connection using server settings. Copy the values of SMTP server, Port, Login, and Password into your email client or application.
Click the copy icon next to Login and Password to copy them without selecting the text.
Use port 2525 or 465 for an SSL connection and 587 for TLS. Choose the one your client supports.
To change your credentials, click Change login or Change password. Then, enter new values in the pop-up window.
Read more: Send emails via SMTP using email clients, Send emails via SMTP with WordPress plugins, Send emails with PHPMailer.
Switch to the free plan
To send emails from your own address and get higher limits, add a domain you own and a sender email address on it.
Make sure you've authenticated your domain and added a sender email address that belongs to it.
There's no need to activate the free plan manually. Once you authenticate your domain and add a sender email address on it, the plan activates automatically. Until then, the activation button on the pricing page stays disabled.
Once everything is set up, SendPulse automatically moves your account to the free plan (12,000 emails per month, up to 50 emails per hour) or to your paid plan if you have one. From then on, SendPulse sends emails with your own sender name and email address and without the subject line prefix.
To make sure your plan is active, go to SMTP > Dashboard. You'll see your new plan and limits in the status bar, and devtest@sendpulseemail.com will be removed from your sender addresses.
Once your account moves off the SMTP Test plan, you won't be able to switch back to it. Even if you delete your sender email address or domain later, your account will remain on its current plan.
Configure your authenticated domain
Domain authentication confirms that you own the domain and allows SendPulse to send emails on your behalf. If you authenticate your domain first and then add a sender address that belongs to it, you won't need to confirm the address with a code.
Add DKIM and SPF records
DKIM and SPF are email authentication protocols that verify the sender, help confirm that emails haven't been altered in transit, and protect recipients from phishing and spam.
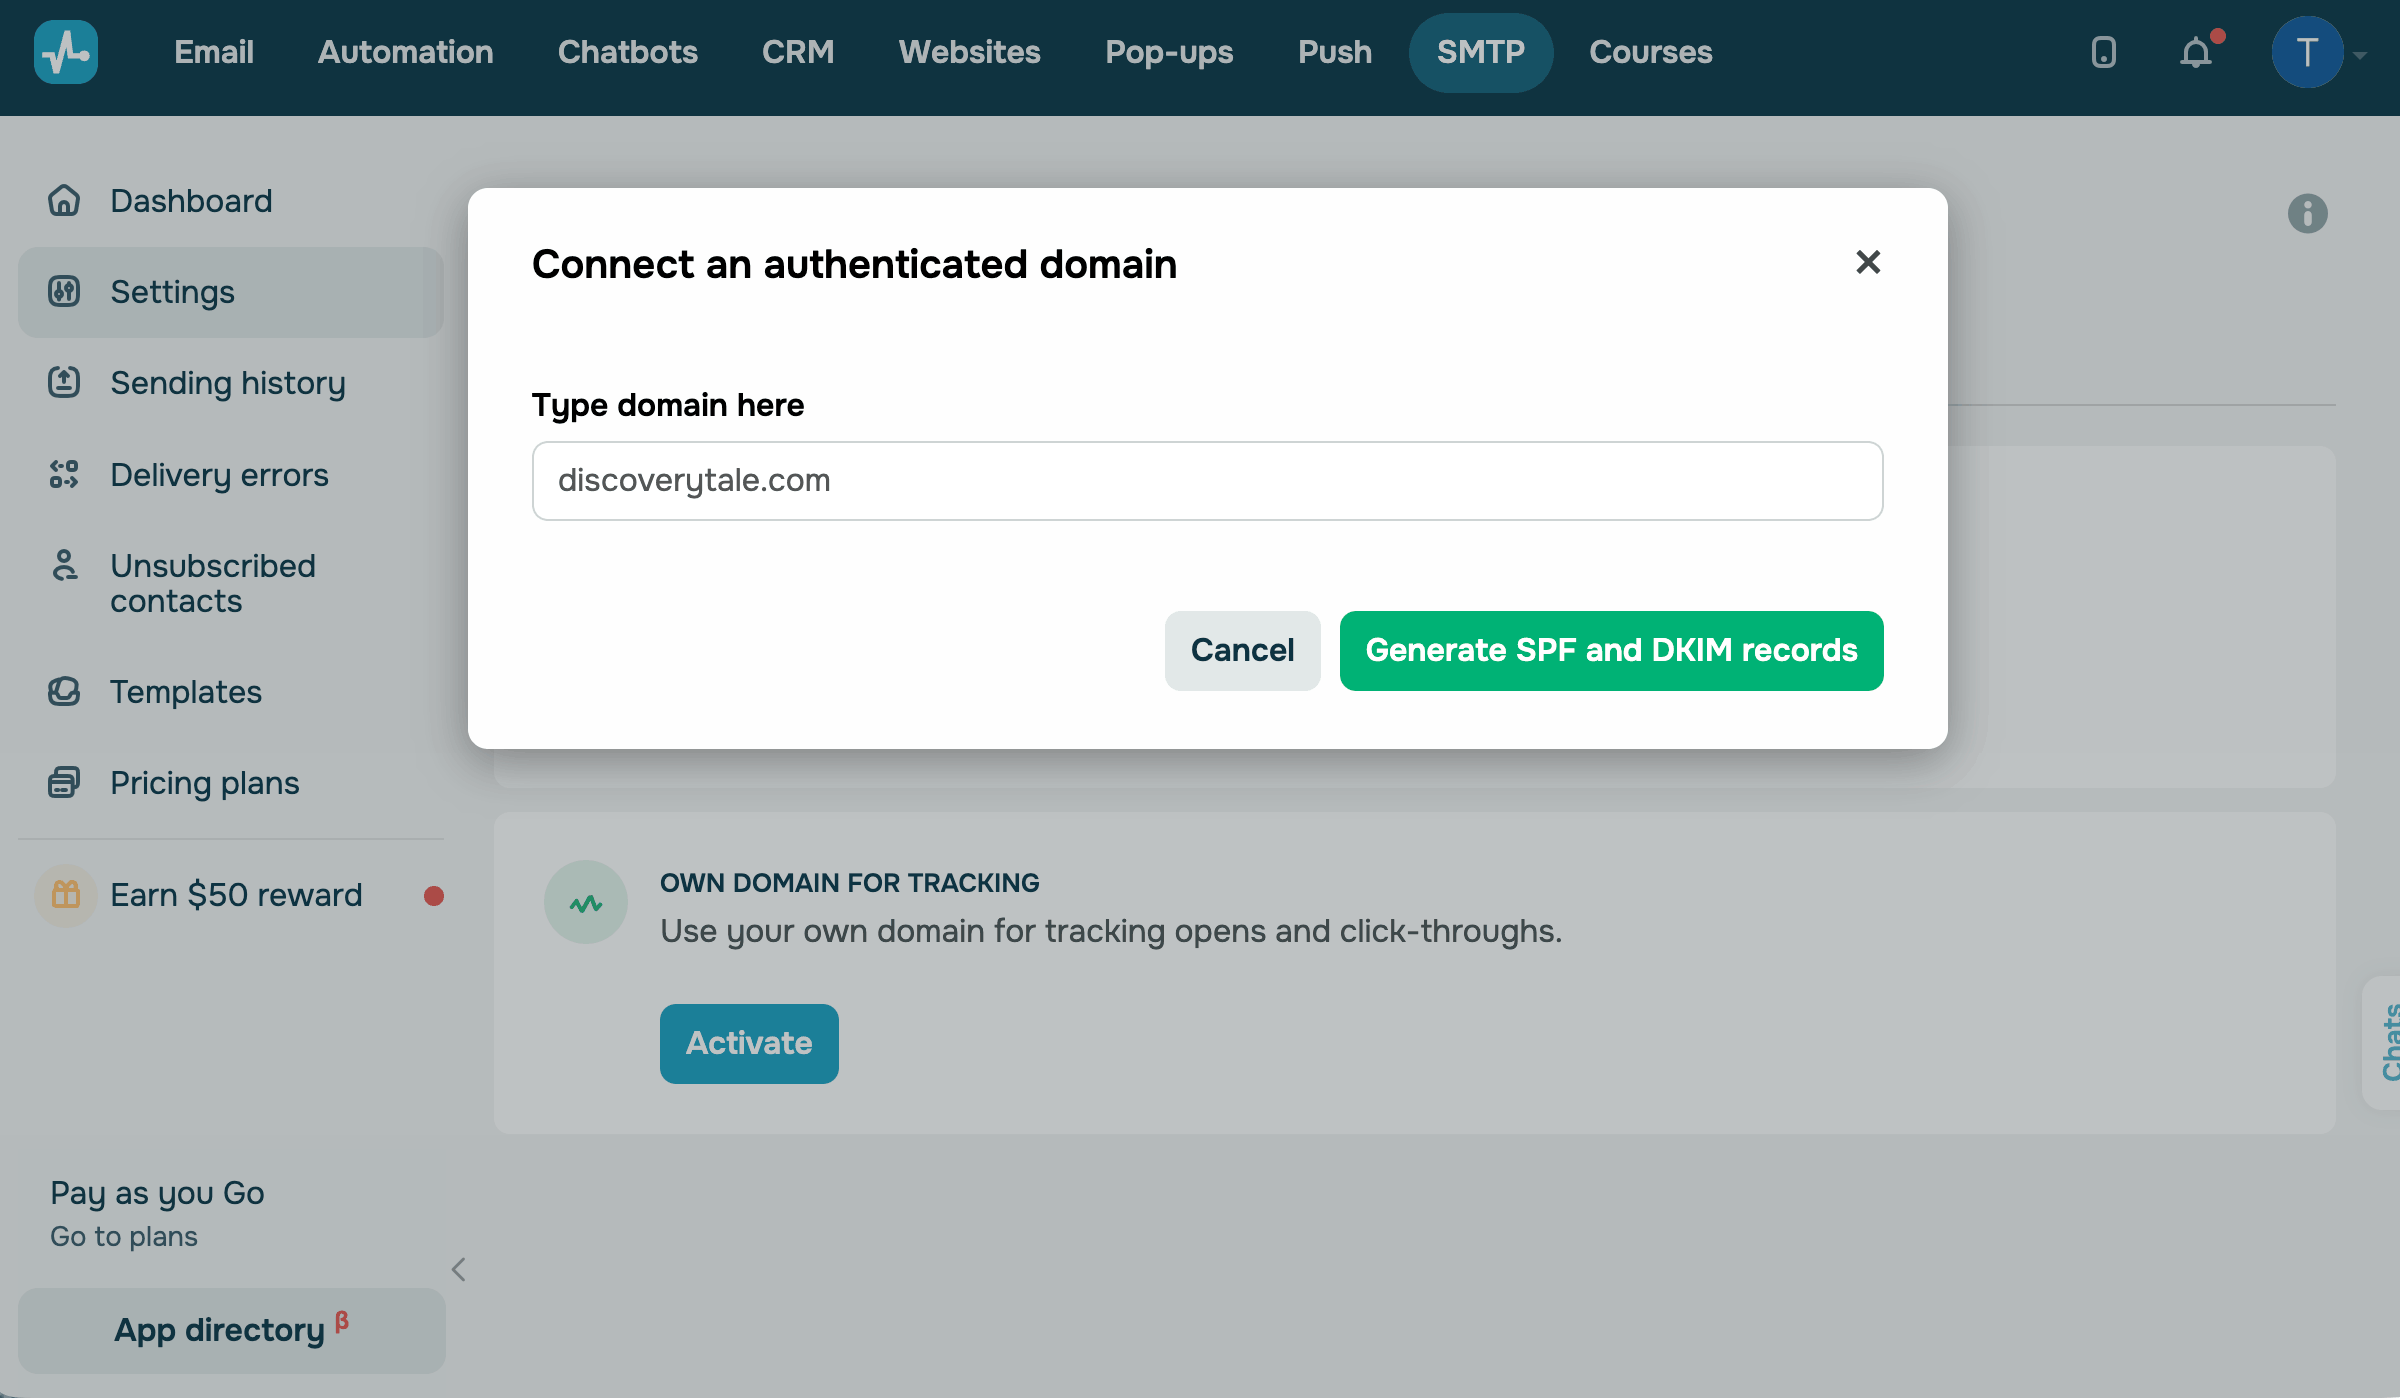
Go to SMTP > Settings > Domain settings. In the Authenticated domain section, click Activate.
Enter your domain in the Type domain here field and click Generate SPF and DKIM records. Copy the generated records, then add them to your domain's DNS settings in your registrar's account.
DKIM and SPF record verification can take up to several hours.
Read more: Set up a DKIM signature, Set up an SPF record, Configure SPF and DKIM for email authentication.
Add a sender email address
A sender address is the email address your recipients see in the From field.
Email and SMTP share sender email addresses. If you've already added a sender address in Email, it's available in SMTP, so you don't need to add the DNS records again.
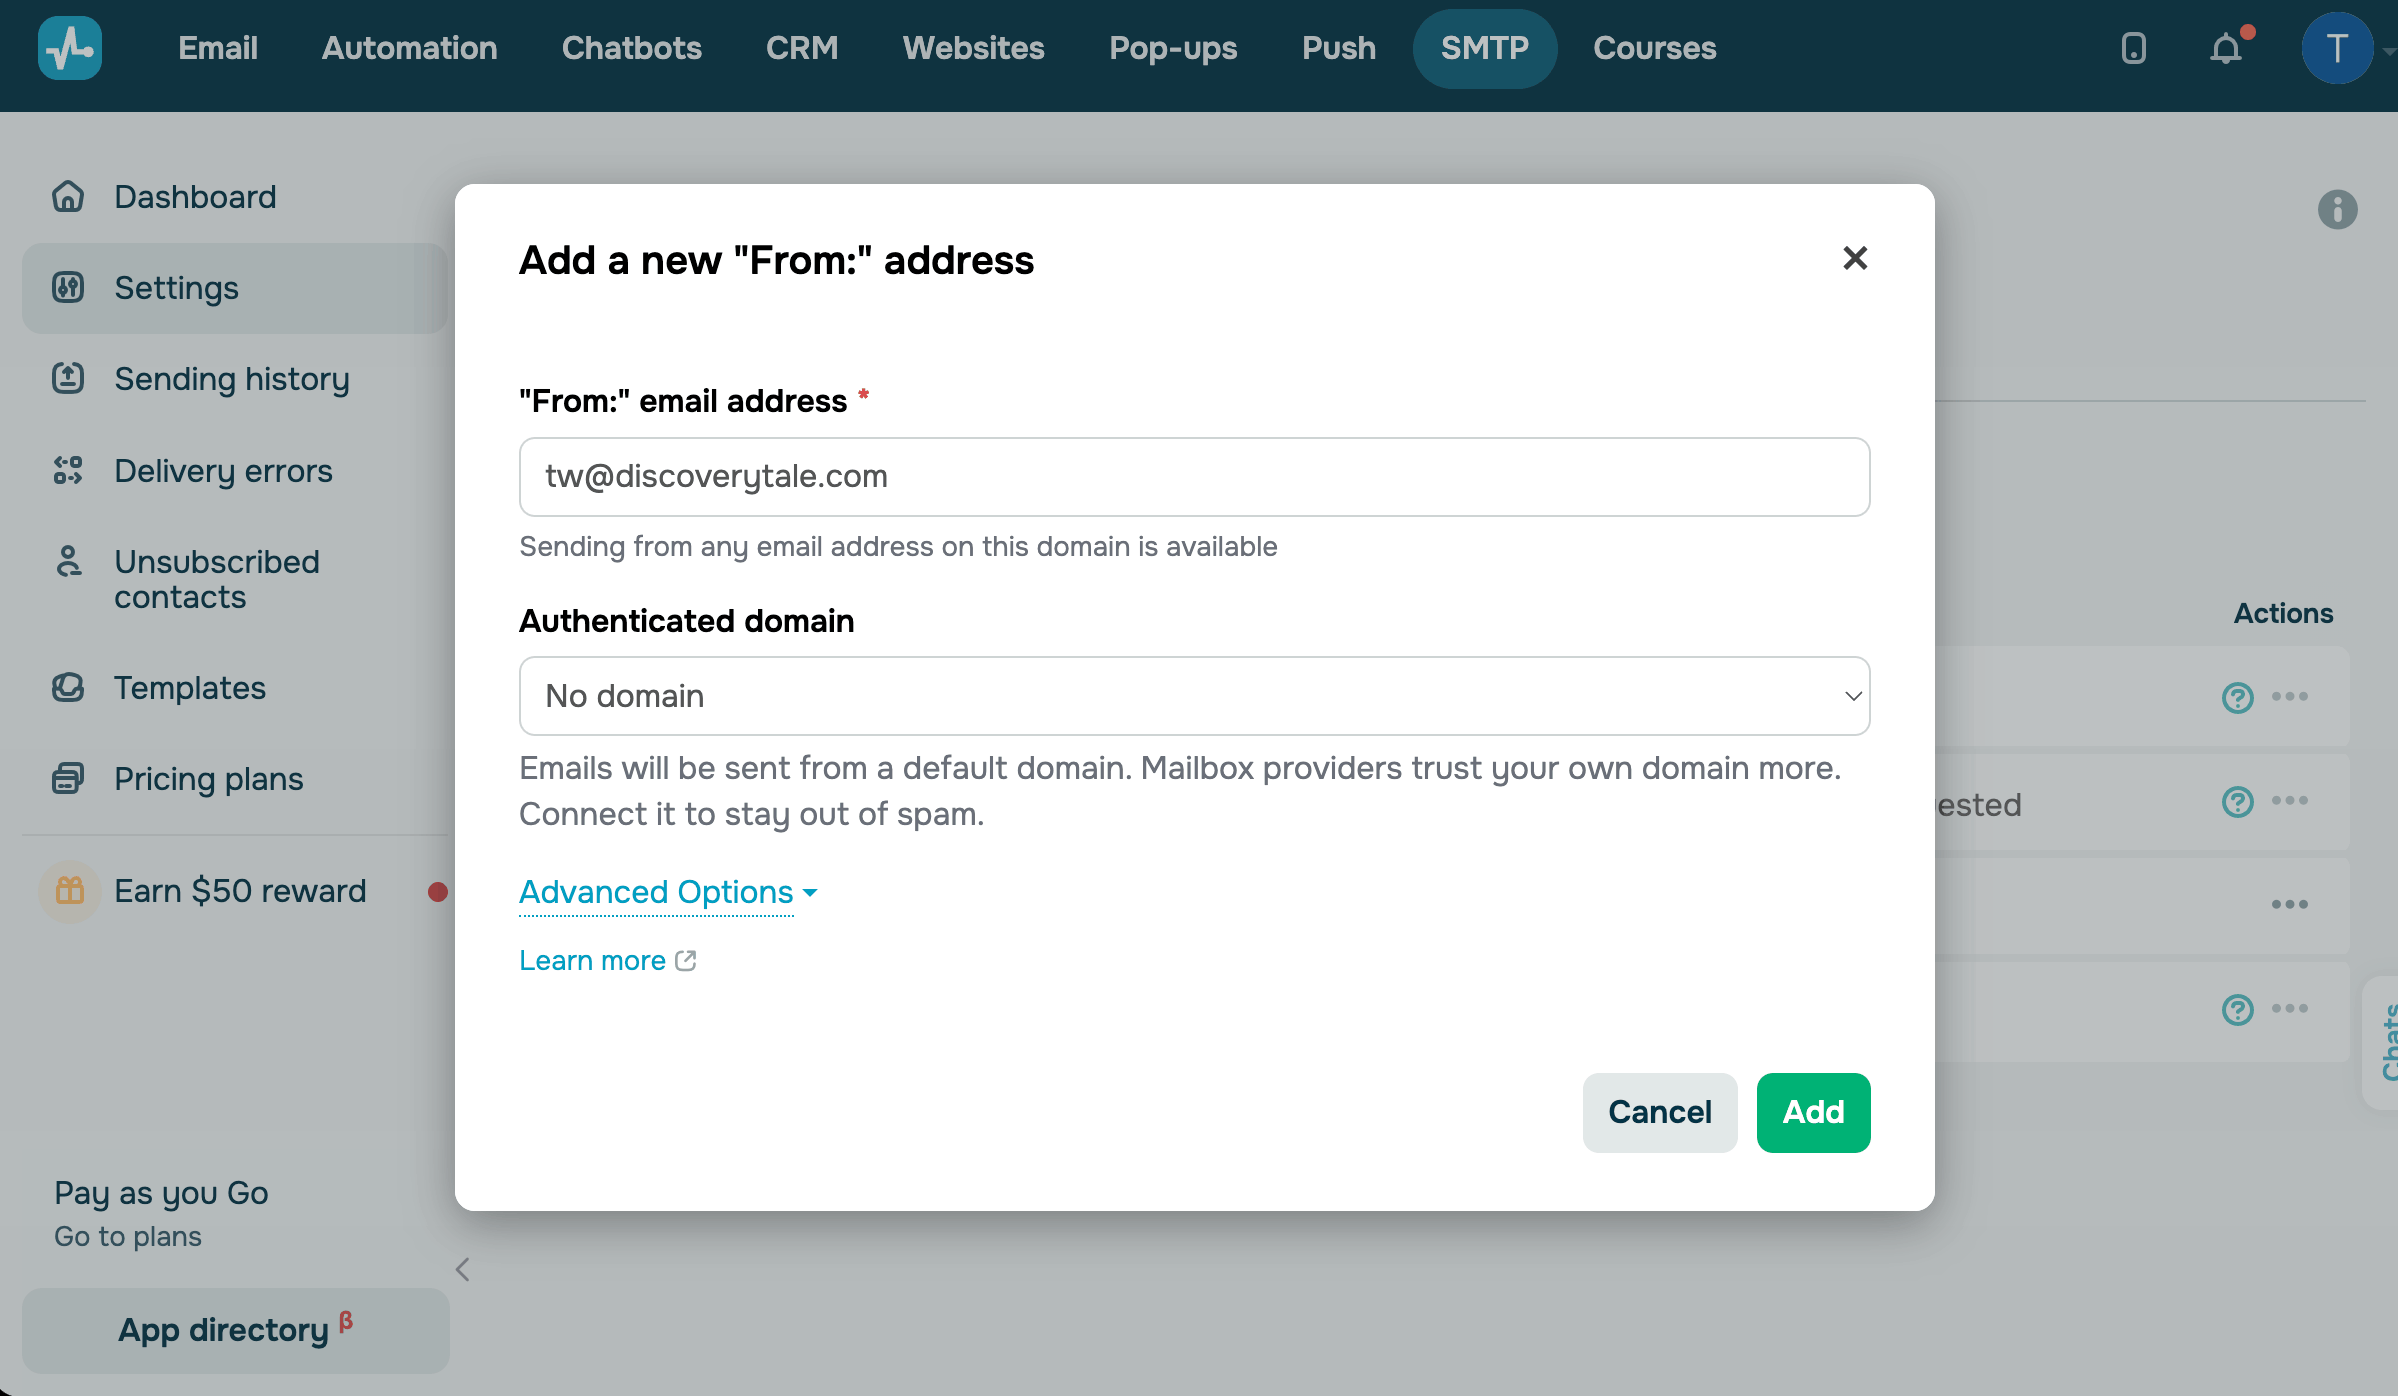
To add a sender email address, go to SMTP > Settings > Sender emails. Click Add sender address. In the "From:" email address field, enter an address on your authenticated domain, for example, jane@example.com. In the Authenticated domain list, choose your domain.
Optionally, expand Advanced Options to add your company name and a link to your terms of service or privacy policy. Click Add.
If your domain is already authenticated, SendPulse activates the sender email address right away without sending a confirmation email.
If your domain isn't authenticated, No domain appears next to the address in your sender list. In this case, your emails are sent through a shared domain that doesn't match your sender address. Email clients detect this mismatch, so your emails are more likely to land in spam.
Add a CNAME record
A CNAME record replaces SendPulse's domain in your tracking links with your own domain, so recipients see your company's domain in every link.
To set it up, go to SMTP > Settings > Domain settings. In the Own domain for tracking section, click Activate. Enter the name of your domain that will be used for tracking emails, then decide whether to use an SSL certificate for tracking. Click Add and check DNS record.
Adding a CNAME record can take up to several hours.
Read more: Enable email tracking statistics sent via SMTP.
Add an unsubscribe link
To let recipients opt out of emails they no longer want to receive, include an unsubscribe link in your email's HTML. You can add the link to your own HTML code or to a SendPulse template.
Insert the {{unsubscribe_url}} variable as the link source:
<a href="/{{unsubscribe_url}}">Unsubscribe</a>Read more: Unsubscribers, Create an unsubscribe link.
Configure optional settings
You can manage sending and tracking settings in SMTP > Settings > General.
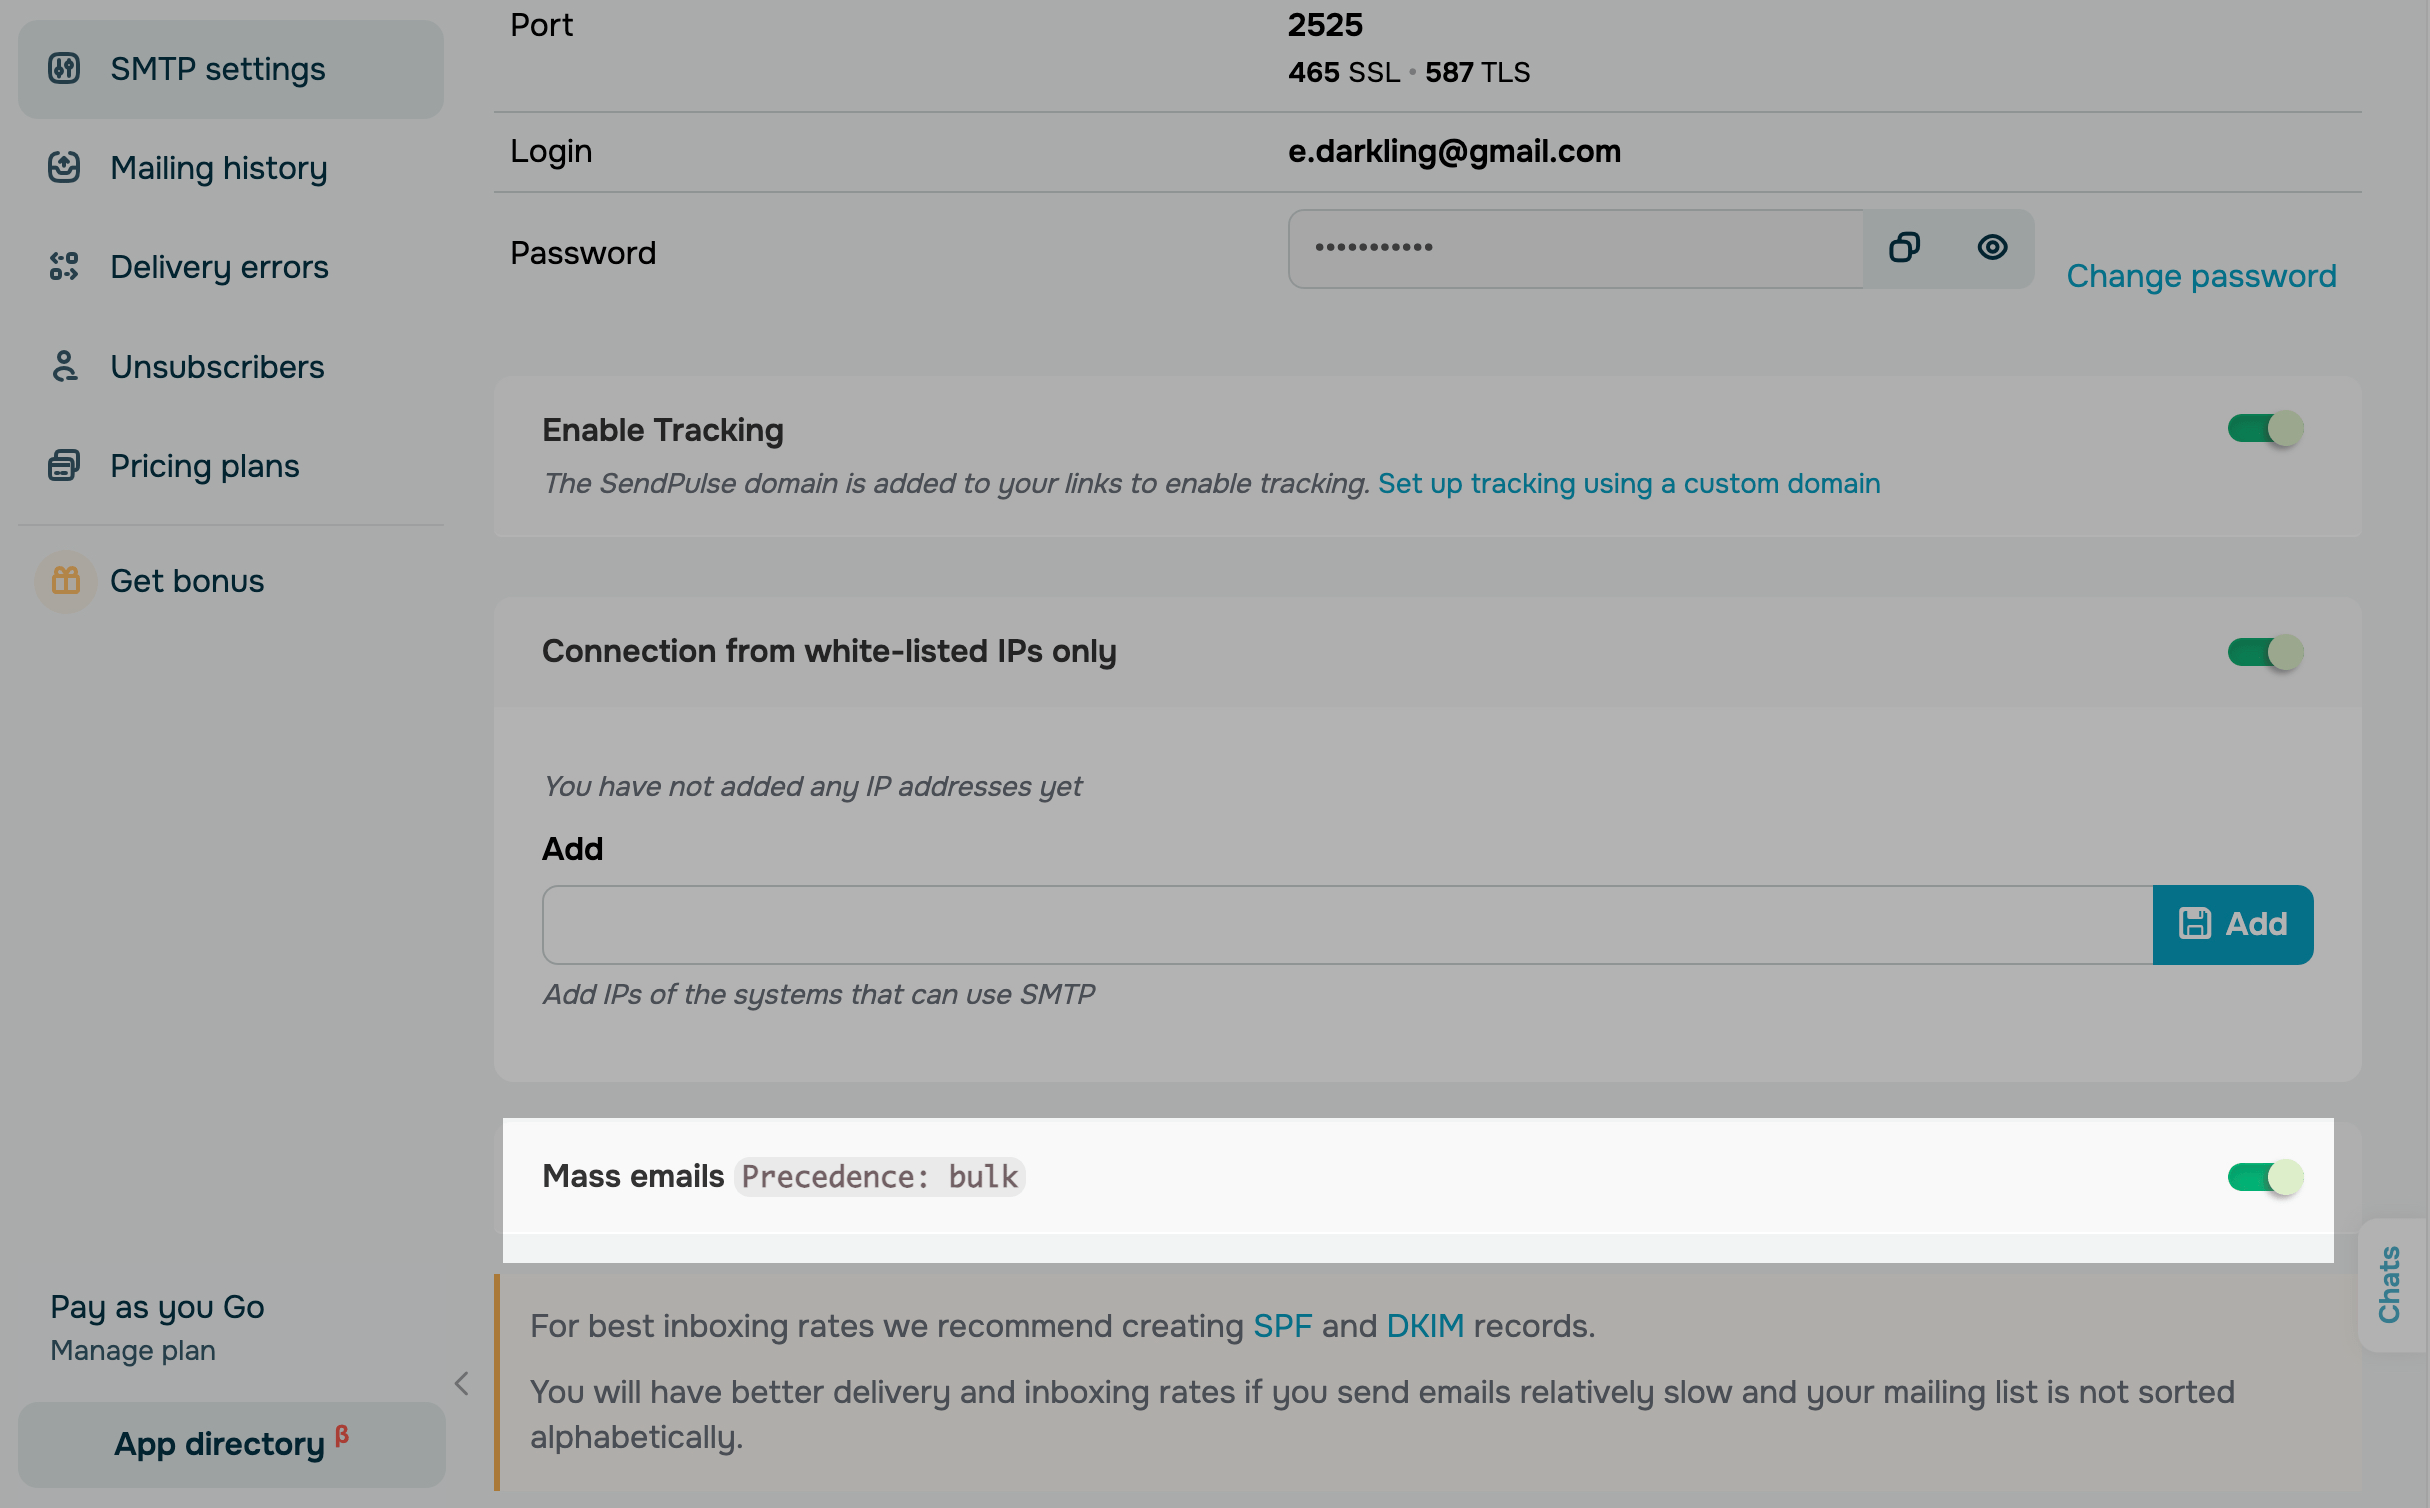
Limit sending by IP
To protect your account, you can allow connections only from your servers' IP addresses.
Turn on the Connection from white-listed IPs only toggle, enter the IP address, and click Add.
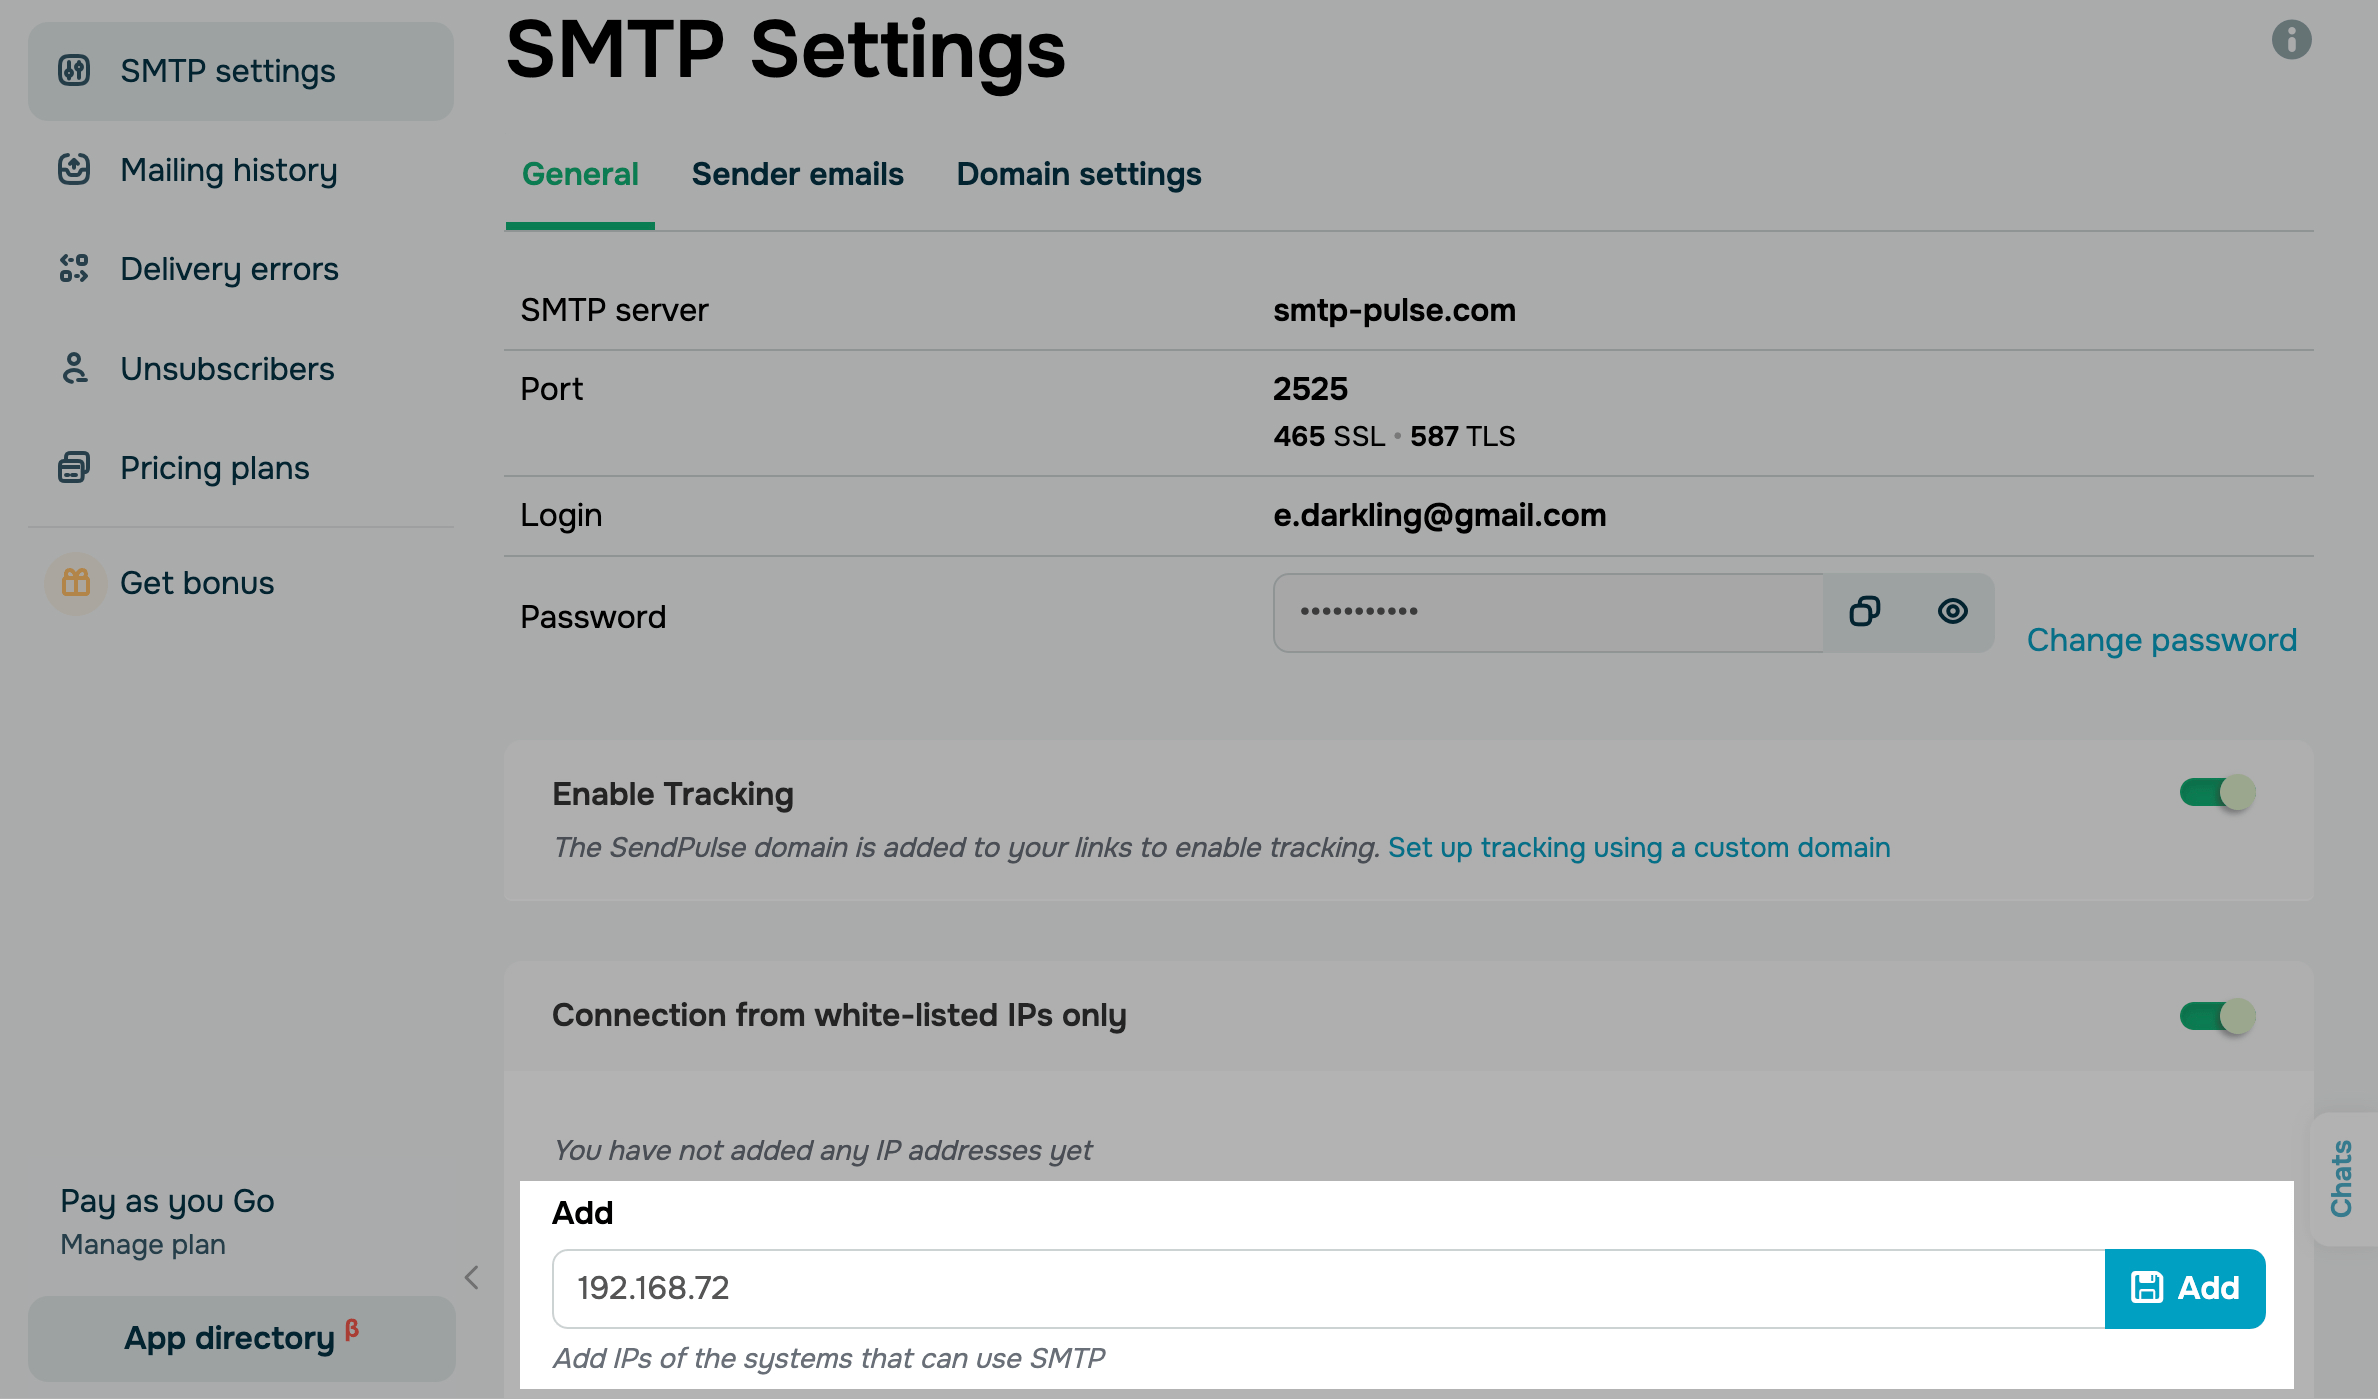
To remove an added IP address, click the trash can icon next to it.
Mark emails as bulk
To let recipient mail servers know that you send emails in bulk and reduce the chance they land in spam, use the Mass emails option.
SendPulse turns on the Mass emails toggle by default.
Track email sending statistics
After you send your first email, you can see how it performed.
To view each sent email with its subject, size, and delivery status, go to SMTP > Sending history.
To view email addresses where delivery failed, go to SMTP > Delivery errors.
To view recipients who have unsubscribed, go to SMTP > Unsubscribed contacts.
Read more: View SMTP statistics.
Troubleshoot SMTP issues
If an email doesn't look or behave as expected, one of these is the likely cause:
| Issue | Cause | What to do |
Your email is sent from devtest@sendpulseemail.com, and the subject line starts with For development purposes only |
You're still on the SMTP Test plan, so SendPulse sends your emails with a test sender address and adds a prefix to the subject. | To send emails from your own address, authenticate your domain and add a sender address on it. |
554 5.9.3 Sending quota exceeded. |
You've sent all 50 emails included in the SMTP Test plan. | Authenticate your domain and add a sender address on it. Your account will switch to the free plan with 12,000 emails per month. |
451 4.9.5 Requested action aborted: This mail account has sent too many messages in a short amount of time. Please try later. |
You've sent too many emails through the SMTP server within an hour. | Wait until the hourly limit resets, then resend your emails. |
422 Sending quota or bandwidth exceeded |
You've sent too many emails through the API within an hour. | Wait until the hourly limit resets, then resend your emails. |
554 5.9.2 Sender domain is not valid. |
Your account has left the SMTP Test plan, but you're still sending through the SMTP server from devtest@sendpulseemail.com. |
Replace the test email address with your own sender address in your app or server settings. |
422 Sender is not valid |
You're sending an API request from an email address that isn't on your sender list. | Add the email address in SMTP > Settings > Sender emails, or send from one that's already on the list. |
Read more: Fix SMTP sending errors, SMTP limits, SMTP limits after exceeding the bounce rate.
 Last Updated: 05.10.2026





or