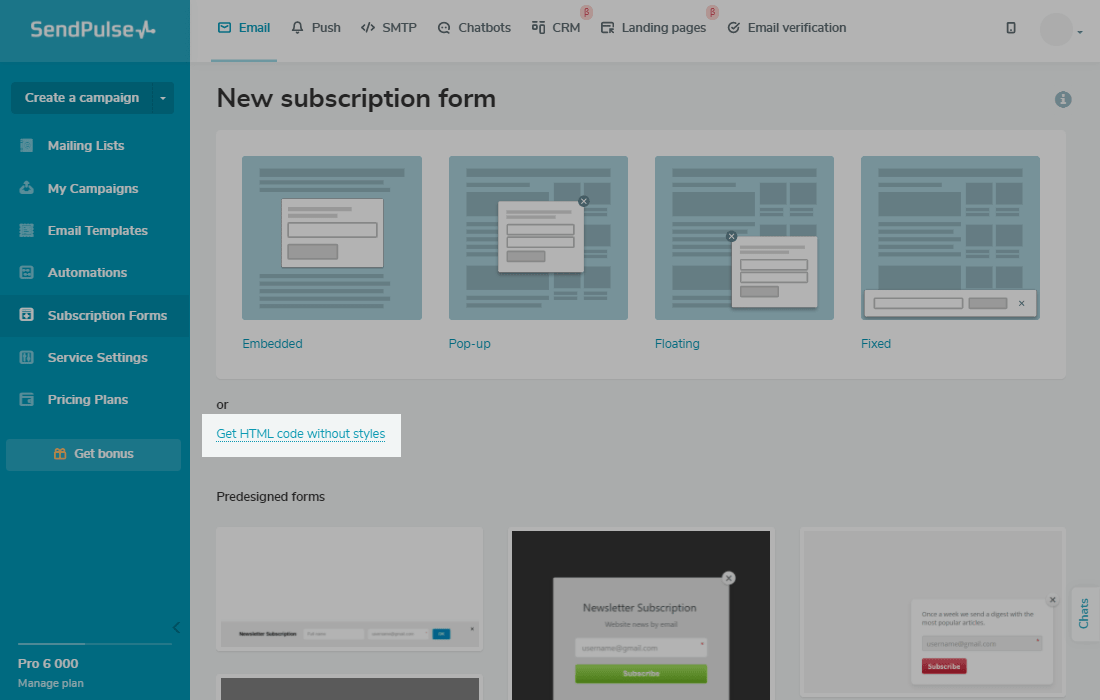
Create a simple subscription form
You can fill up your email mailing list using a subscription form — place it on your website or blog page. With SendPulse, you can choose a pre-made form, create one with our drag and drop editor, or get the HTML code without styles and behavior scripts to customize it yourself.
In this article, we will analyze how to create a simple subscription form with our straightforward editor.
Go to Email > Subscription Forms. Сlick Create a new form, and select Get HTML code without styles.
Select a mailing list
Select the mailing list you want to add your subscribers to. You can choose from a list of existing ones or create a new one.
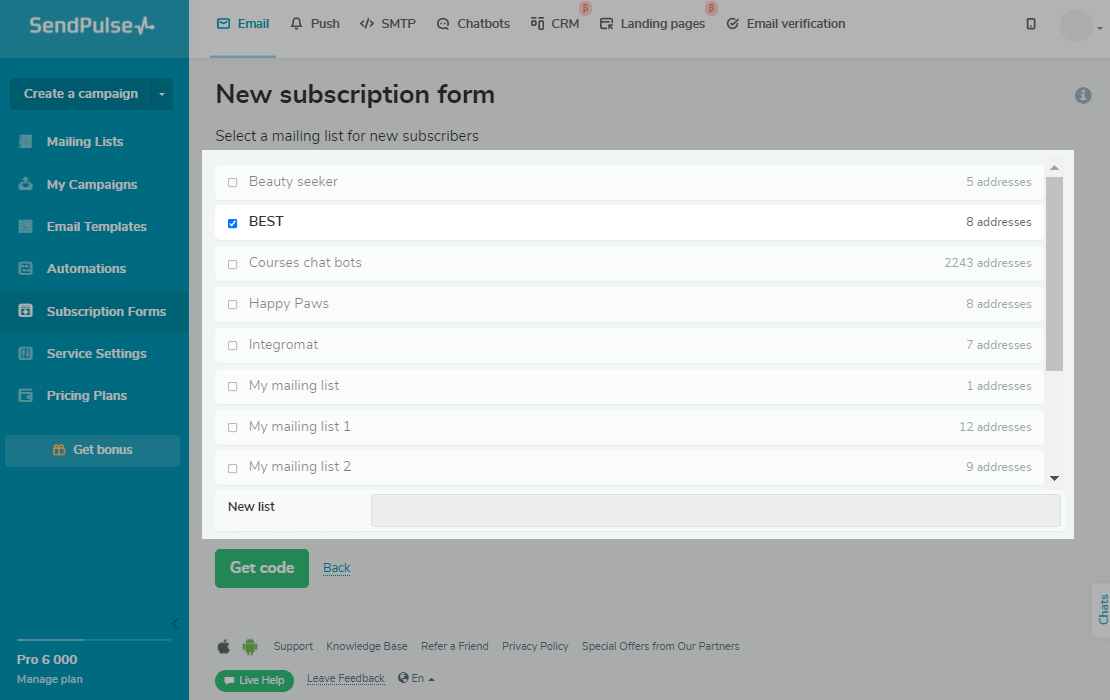
Click the Get code.
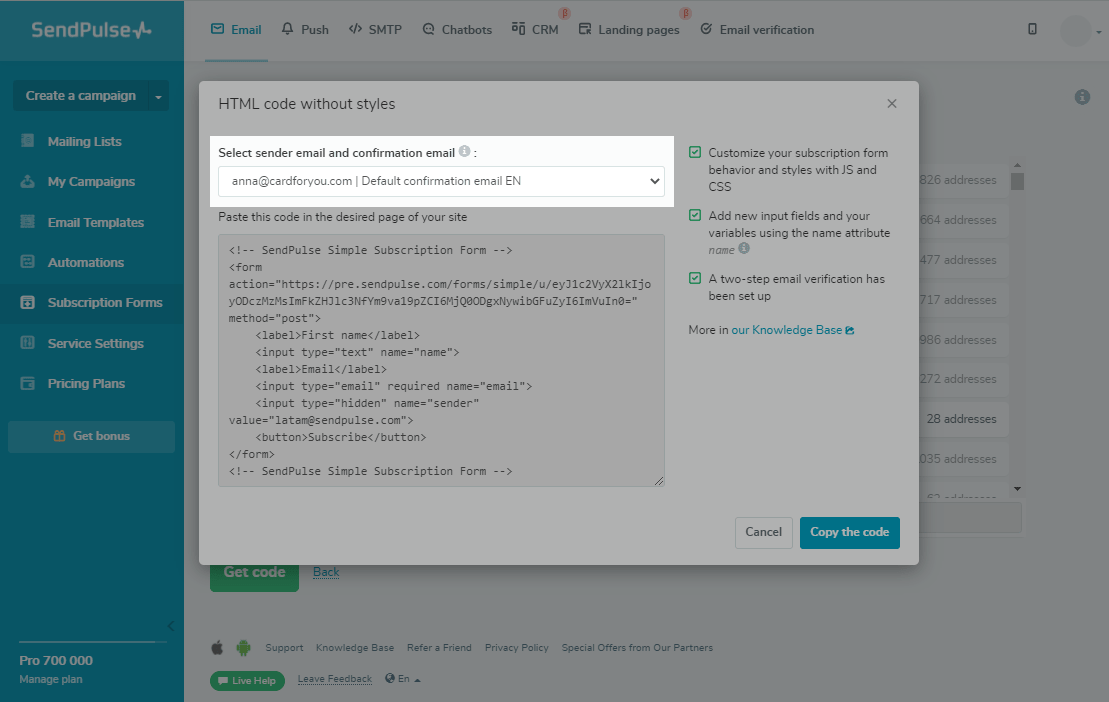
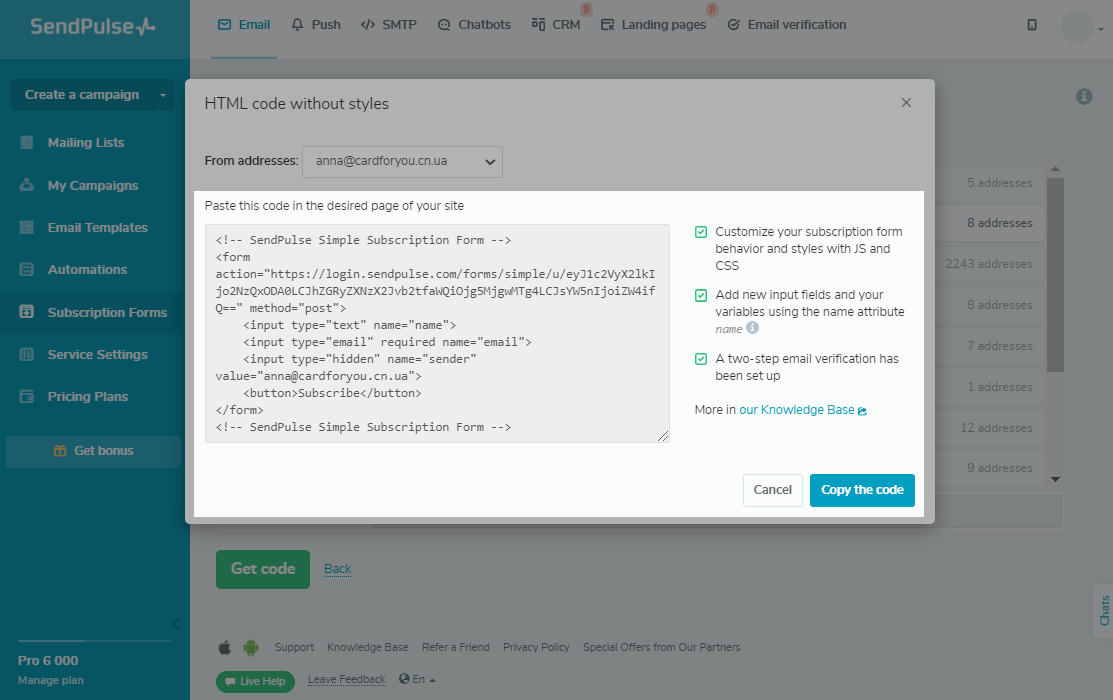
Select a sender
Select the sender address from which confirmation emails will be sent.
Subscriptions via a simple form are performed using the double opt-in option. This means that users have to confirm the subscription by clicking a link in your automated subscription confirmation email.
Be sure to use a sender address that is on your corporate domain. This is important for passing spam filters and sender recognition alike.
To set up a confirmation email, go to Service Settings > Subscription tools > Confirmation emails. Select a default confirmation email to edit, or click the New confirmation email.
Read more: How to create a custom subscription confirmation email.
Copy the code
To add the code to your page, click Copy the code and paste the code into your website.
Please note that the field with the code is not intended for editing and does not save the entered changes. To customize the form for your request, copy the proposed code and edit it in the editor before adding it to your site.
Customize the form
The form consists of two fields by default — one for entering a name and an email address, and the "Subscribe" button.
You can customize the form using tags — markup language (HTML) elements and style them using CSS. You can also configure the display condition, the number of characters, and other settings for the form’s behavior using JS.
When customizing your form, pay attention to the following points:
- the
emailvariable is required, as subscription confirmation emails are sent to this address. You cannot create a subscription form for collecting only phone numbers. For correct submission of the form data, do not remove<input type = "email" required>from the form. - you can add up to 10 fields;
- the text field contains up to 64 characters;
- the dropdown menu (
<select>tag) does not support the "multiple" option.
Map the variables
To make form fields correspond to variables in your mailing list, assign the field names (in the input name) with case-sensitive variable names. For example, if you have the city variable in your mailing list (City), input name = "City".
The form elements
Let's learn tags used to create the form.
Learn more about HTML, CSS, and JavaScript in this reference book.
The <form> tag
The <form> tag adds a subscription form to the page. You can apply the following attributes to this tag.
action |
Accepts the full or relative path to the server file (in our case, the URL is issued by SendPulse, and there is no need to change it). |
method |
Informs the server about the request method (the form only accepts the POST method). |
name |
Defines a unique form name. |
autocomplete |
Enables or disables form autocompletion (can be on or off). |
target |
Window or frame where the handler loads the result (can take the values _blank, _self, _parent, _top). |
novalidate |
Cancels checking the entered data for correctness. |
enctype |
Specifies the encoding of the form data before it is sent to the server. Can take the valuesmultipart/form-data або text/plain. |
The <input> tag
Using the <input> tag, you can create various interface elements, such as a button or checkbox, and thus provide an interactive form to the user.
To send data to the server, place the <input> tag inside a <form> container.
Form can contain up to 10 input fields, including hidden input.
The most common attribute of the <input> tag — type — tells the browser what type of form element is (for example, checkbox, radio, text, email, and so on).
You can use checkboxes when you need to select several options from the proposed list:
<input type="checkbox" attributes>A checkbox can have the following attributes.
checked |
Checkbox preselection. |
name |
The checkbox name for identification by the form processor. |
value |
The value to be sent to the server. |
If you need to select only one option, use radio:
<input type="radio" name="name" attributes>A radio can have the following attributes.
checked |
Radio preselection. |
name |
The name of the radio group; radio is a group item, the name of all radios in the same group must be the same. |
value |
The value to be sent to the server. |
You can add a text area for data entry. To do this, use the type attribute with the text value:
<input type="text" attributes>The most common attributes for a text input field are.
value |
Initial value. |
size |
Size (in characters) for the input field, you can add up to 64 characters. |
The <select> tag
With the <select> tag, you can create a dropdown item.
Each new list item is created using the <option> tag inside the <select> container:
<select>
 <option>Item 1</option>
 <option>Item 2</option>
</select>
The most common attributes of the <select> tag are.
name |
Defines the element’s name. |
required |
Determines if a selection is required before submitting the form. |
The <button> tag
With the <button> tag, you can create clickable buttons, for example, to send data to the server.
To send data to the server, place the <button> tag inside a <form> container.
The most common attributes for this tag are.
name |
Button name. |
value |
Initial value. |
disabled |
Boolean attribute indicating that the user can not interact with the button. |
type |
Button type:
|
Last Updated: 05.12.2023
or