Set up a chatbot launch
Conversations start when a user opens your chatbot or when you start a flow for a subscriber. Users can open your chatbot through a link, a QR code, your website, a subscription form, a pop-up, or an ad. You can also start a flow for existing subscribers yourself or from Automation.
With SendPulse, you can:
- share a link or a QR code that opens your chatbot and launches a specific flow;
- add a subscription widget to your website or your bio link page;
- add your chatbot to a subscription form or a pop-up;
- run ads that start a conversation with your chatbot;
- start a flow for subscribers manually or using Automation.
Here's how businesses can use these entry points:
- A restaurant can print a QR code on its flyers or table cards so that guests can open the chatbot and get the menu.
- An online store can add a subscription widget to its website so that visitors can subscribe to the chatbot from any page.
- A business can run an Instagram ad so that users who click it start a conversation with its Instagram chatbot.
- An online school can add the Messenger element to an automated flow to send a chatbot message to students who have paid for a course.
Let's talk about how users can start a conversation with your chatbot.
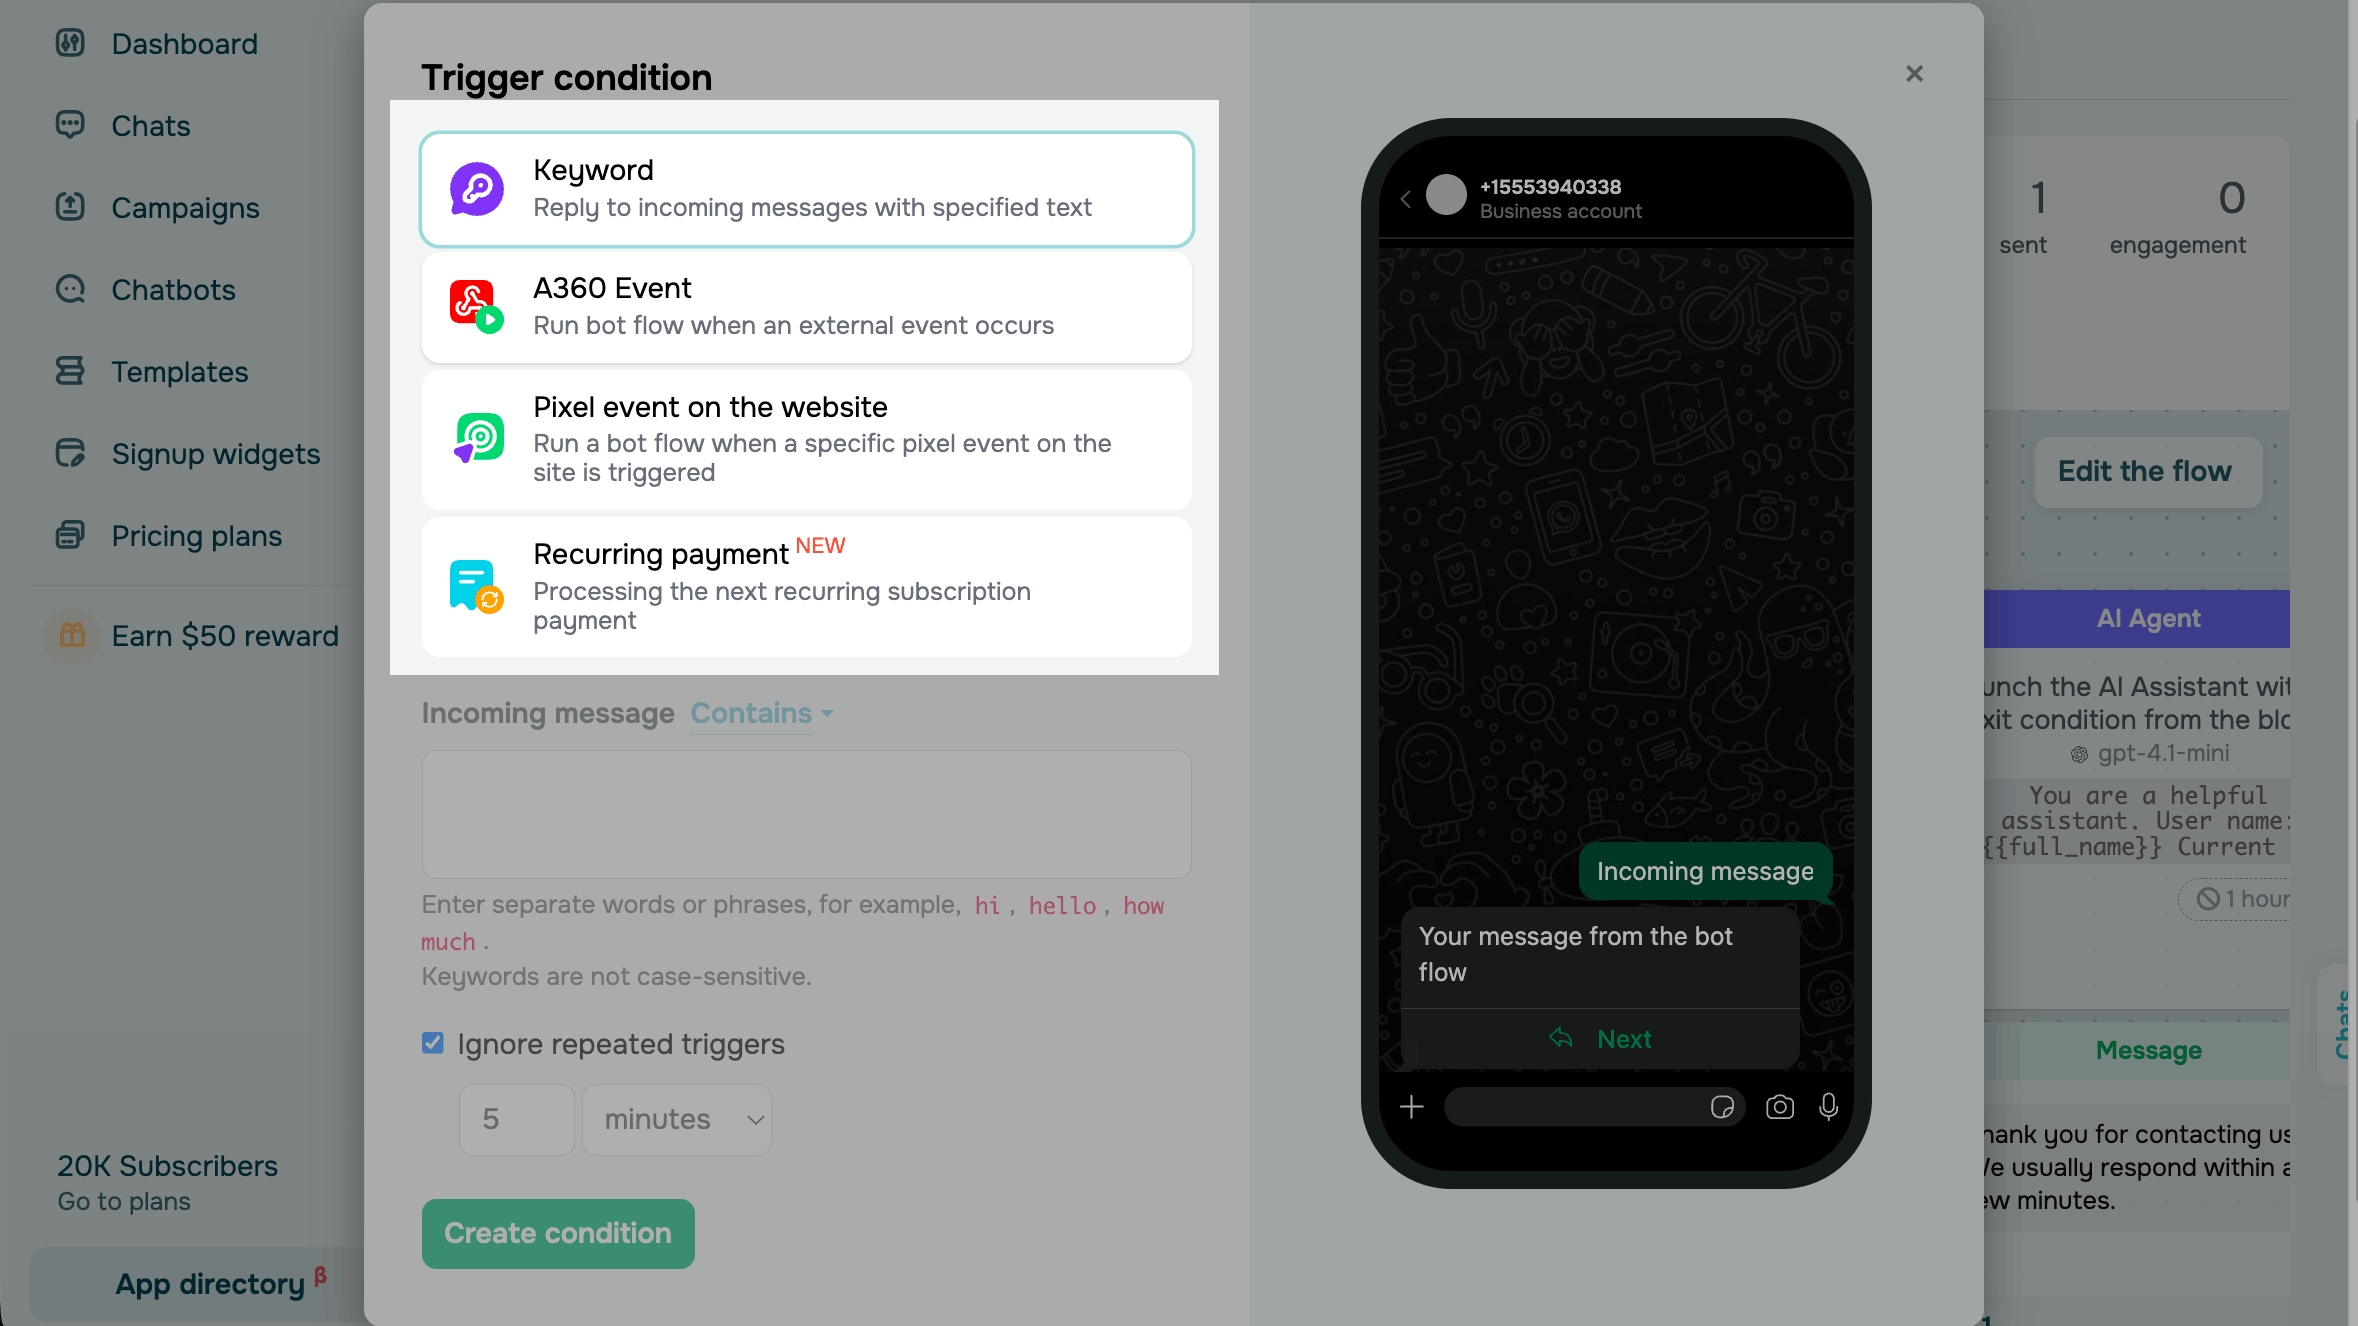
Launch a flow with a trigger
A trigger launches a flow when a subscriber takes an action in the chat or when an event occurs. For example, a flow can start when a user subscribes to your chatbot, sends a keyword, or comments on your post. Each chatbot has standard triggers, and you can add your own.
Read more: Chatbot flow triggers basics.
Share a link or a QR code
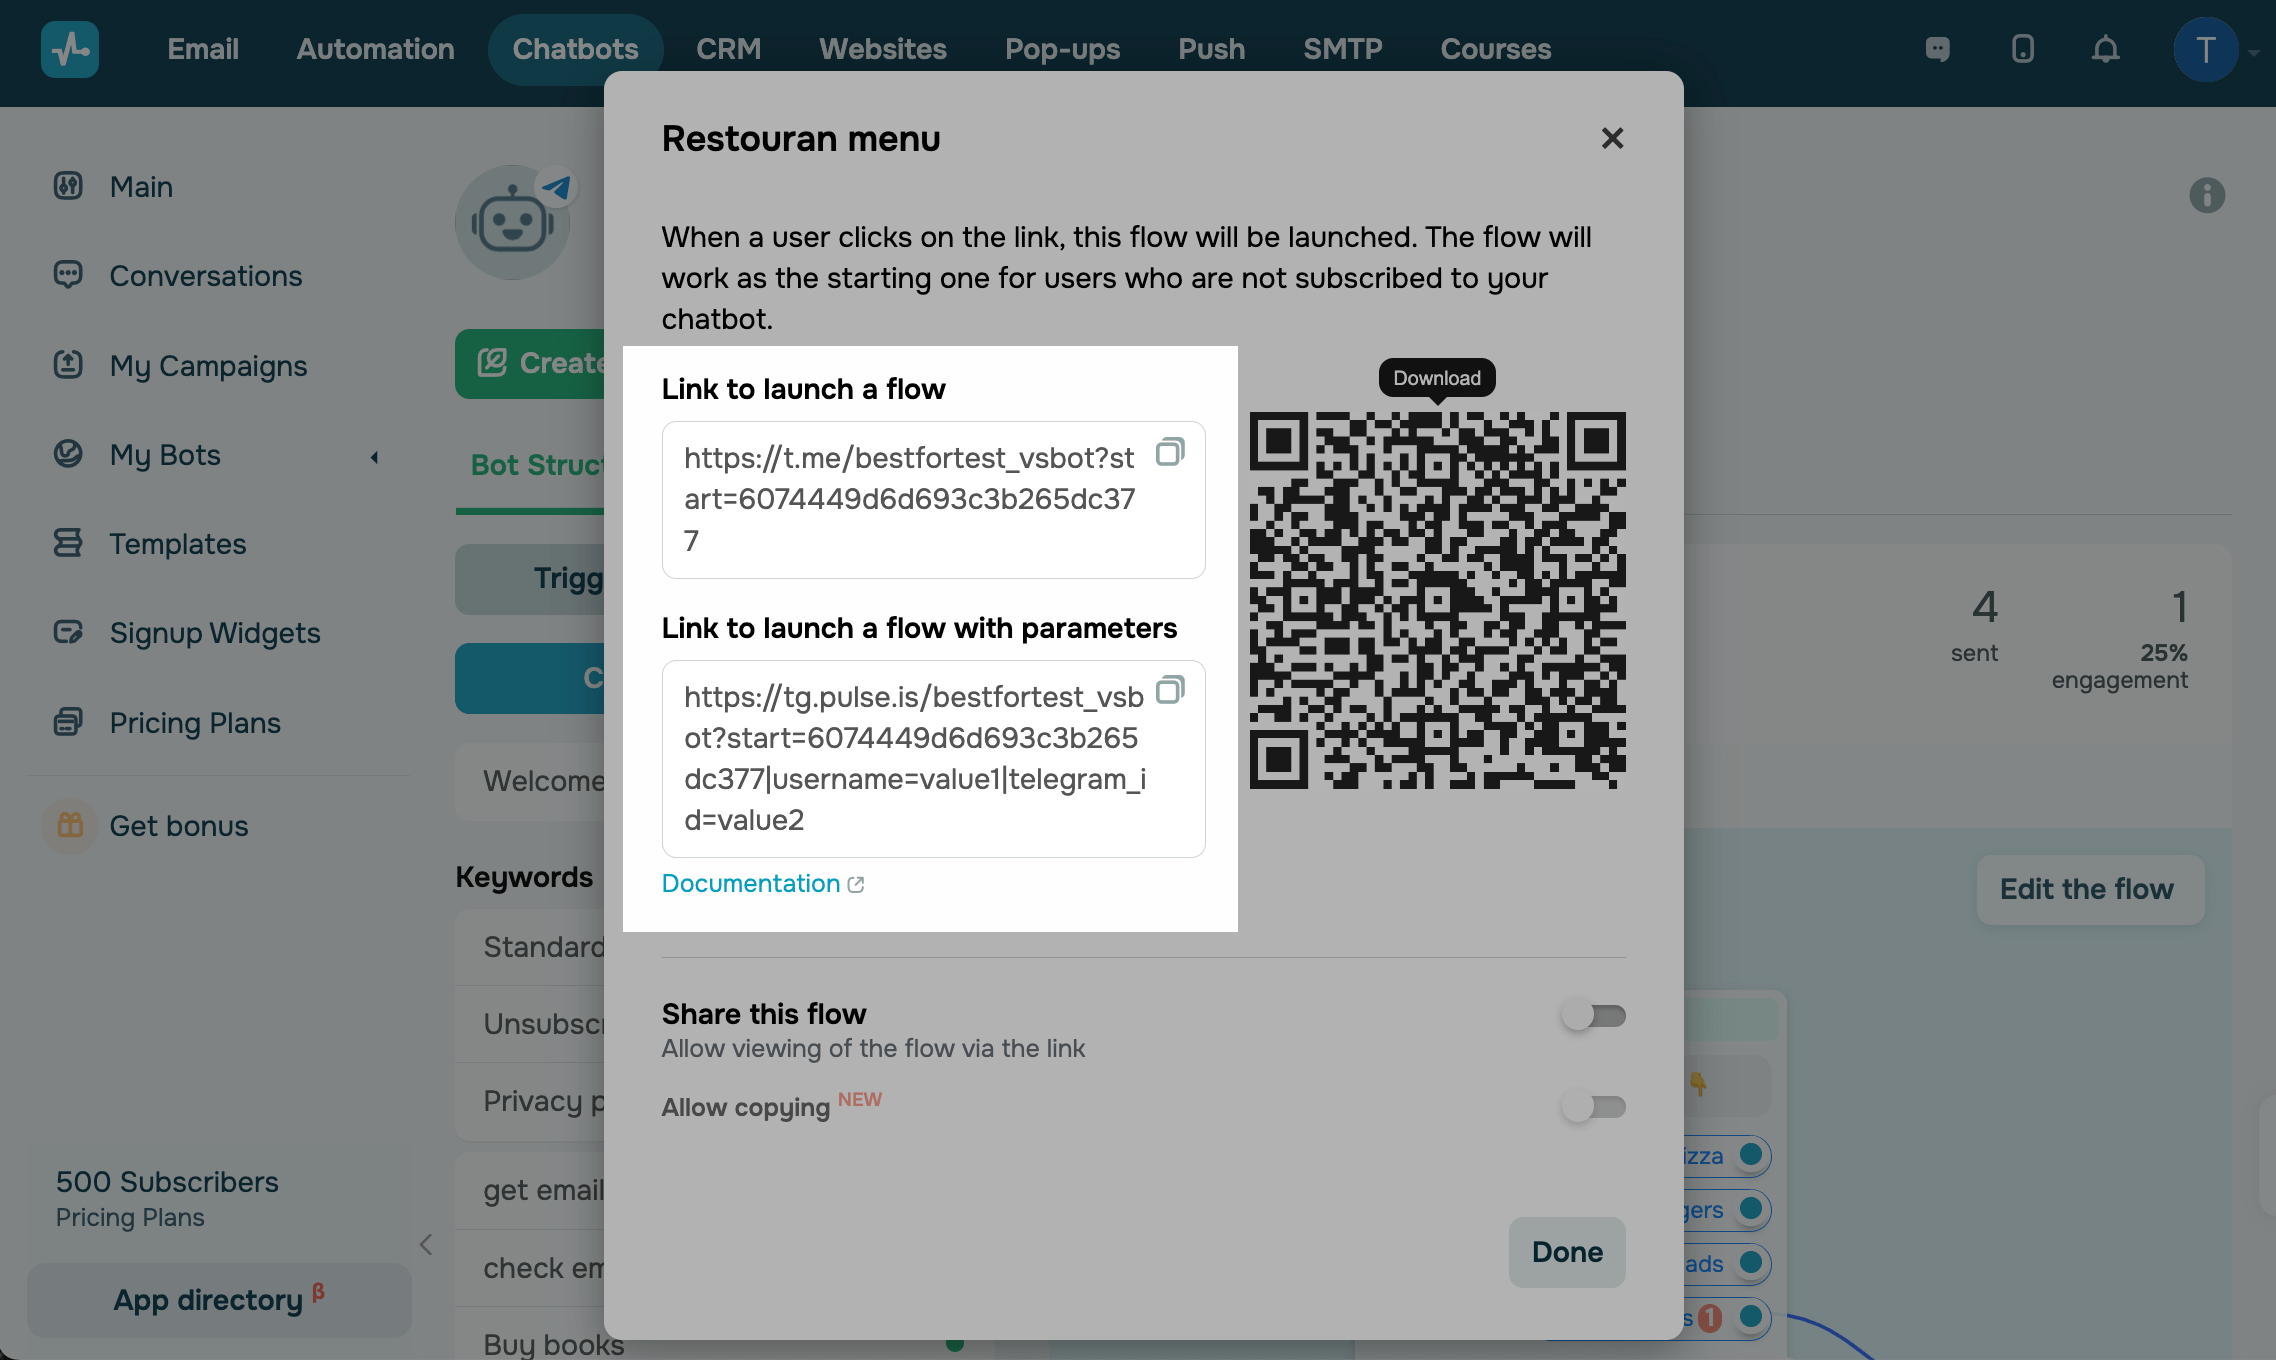
To invite users outside your messaging app, place a link or a QR code in your promotional materials, on your website, or on receipts. When a user follows the link, your chatbot launches the linked flow. Depending on the messaging app, users may see the Start button, your account page, or a prompt to enter a command.
To get a link or a QR code, click the three dots icon next to a flow and select Link to launch a flow. You can copy a standard link, a link with tracking parameters that passes data to your chatbot, or a QR code.
Read more: Launch a bot via a link or QR code.
Add subscription options to your website
To let visitors subscribe while they browse your website, add one of the following entry points:
| Chat widget |
Visitors subscribe from a widget on your website. To create it, go to Signup widgets and click Add widget. For example, an online store can add a widget to its product pages so that visitors can subscribe without leaving the website. |
| Chatbot landing page |
Users subscribe from the page SendPulse generates for each chatbot. For example, an influencer can add the landing page link to their social media profiles. |
| Website and bio link page |
Visitors of your SendPulse-powered website subscribe with a chat widget and start the selected flow. For example, a beauty salon can add the widget to its services page so that visitors start a booking flow. |
| Subscription form in Email |
Users subscribe to your chatbot when they submit a multichannel subscription form. For example, an online school can collect email addresses and phone numbers with one form on its blog. |
| Pop-up |
Website visitors subscribe from a messaging app widget and start the selected flow. For example, a store can show a pop-up when a visitor is about to leave and start a flow that sends a discount code. |
Get subscribers from ads
To reach new users on social media, run an ad that starts a conversation with your chatbot. When a user clicks the ad, the chat appears, and your chatbot launches a flow:
| Facebook Messenger ad | Users click your ad and start a conversation with your Messenger chatbot. |
| Instagram ad | Users click your ad and start a conversation with your Instagram chatbot in Direct. |
| WhatsApp ad | Users click your ad and start a conversation with your WhatsApp chatbot. |
You can also add a chatbot flow to your Meta Ads Manager account to use it in click-to-message ads.
Read more: Add a flow to your Meta Ads Manager account.
Follow up after a payment
When a customer pays, your chatbot can send a payment confirmation, share access to the product, or explain what to do next. Here is how you can set it up, depending on where the customer pays:
| Recurring payment in a chatbot |
After the first payment, the flow continues from the green dot of the payment button in the CRM Product element. For renewals, failed payments, or cancellations, create a flow with the Recurring payment trigger. For example, an online school can unlock the next module after each monthly payment. |
| SendPulse-powered website |
In the Payment widget or the cart page, select Additional form settings and paste the link to launch a flow. After the payment, the customer subscribes to your chatbot and goes through the flow. Read more: Create a page after successful payment. For example, an online store can send order details in WhatsApp after the payment. |
| Other SendPulse tools through Automation |
Turn on the Automated payments toggle in CRM > Deals > Settings > General to create a deal after each payment across all SendPulse tools. Read more: Sources of automatically added deals and contacts: Payments. Then, in Automation, сreate a flow that starts with the Create deal or Product purchase trigger, and add the Messenger element. For example, an online school can send onboarding instructions in WhatsApp when a payment deal moves to the Paid stage. |
Launch a flow through API, MCP, or integrations
To launch flows from your own system or other tools, use the chatbot API, the SendPulse MCP server, or an integration:
| Chatbot API |
Your system can call the Run a flow by its ID or Run a flow by trigger keywords method to start a flow for a contact and send data to the flow. For example, a delivery service can pass a tracking number and insert it into the message as {{$['tracking_number']}}. |
| MCP server |
An AI assistant, such as Claude or ChatGPT, runs a flow for a contact with the chatbots_flows_run tool. For example, a marketer can use the following prompt to run a flow for a specific contact: "Run the welcome flow for contact 6930338aae1f752ca105943f." To get a contact ID, find your chat with the contact and copy the ID from your browser's address bar. To get a flow ID, use the Get a list of flows API method. Read more: List of MCP tools. |
| Сonnectors like Make, Zapier or n8n |
Connect your chatbot to other apps and trigger flows automatically using events in these apps. For example, when a customer places an order in your online store, the connector sends the customer and order data to your chatbot and launches an order confirmation flow. The flow can then send the order number, delivery details, or other data to the customer. Read more: Cross-platform integrations and Send a WhatsApp chatbot message triggered by an event via Make. |
Start a flow manually
To send a flow to existing subscribers, launch it manually. You can start it for a specific subscriber from chats or the CRM system, for selected subscribers from the Audience tab, or for subscribers that reached a specific flow element from flow statistics.
In Facebook, Instagram, and WhatsApp chatbots, you can start a flow manually only within the 24-hour support window.
Read more: Launch a chatbot flow manually.
 Last Updated: 27.12.2024




or