Add a SendPulse-powered pop-up to CMS platforms
With SendPulse’s pop-up builder, you can personalize your communication with customers to increase engagement, boost conversions, and reduce your unsubscribe rate. Add a pop-up to your website and set when and how it appears.
Let's talk about how to add a SendPulse-powered pop-up to a CMS platform or a custom website.
You only need to paste the pop-up code in your CMS platform. Then, set the timing, frequency, and page targeting under Display conditions in SendPulse’s pop-up builder.
WordPress
Go to Plugins > Add plugin.
Use the search bar to find the Insert Headers and Footers plugin, then click Install Now. Once you install it, click Activate.
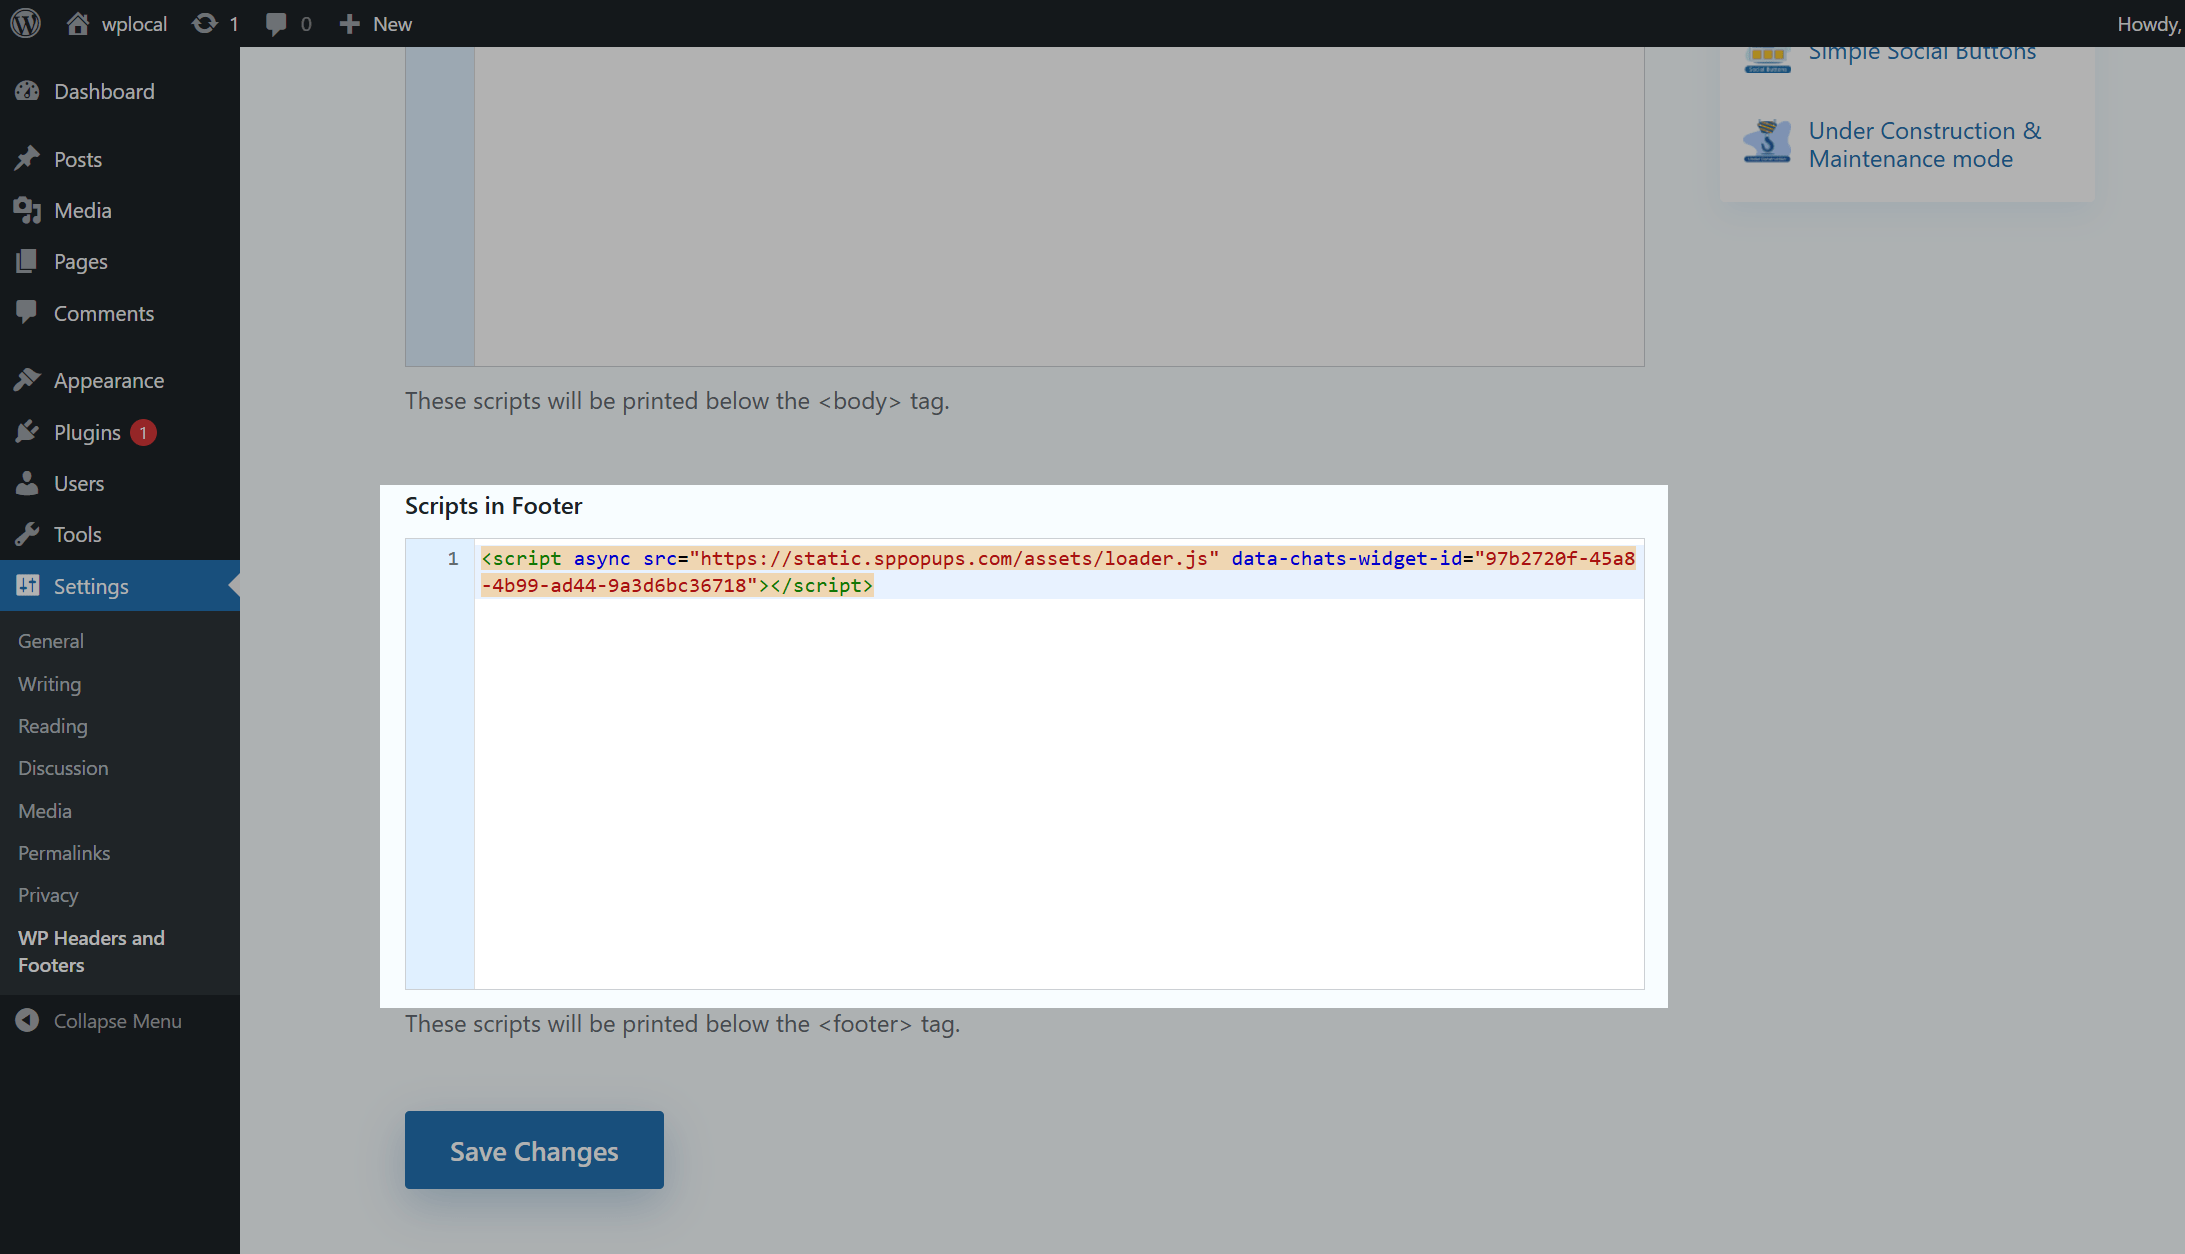
Go back to Plugins. In WP Headers and Footers, go to Settings > Insert Headers and Footers.
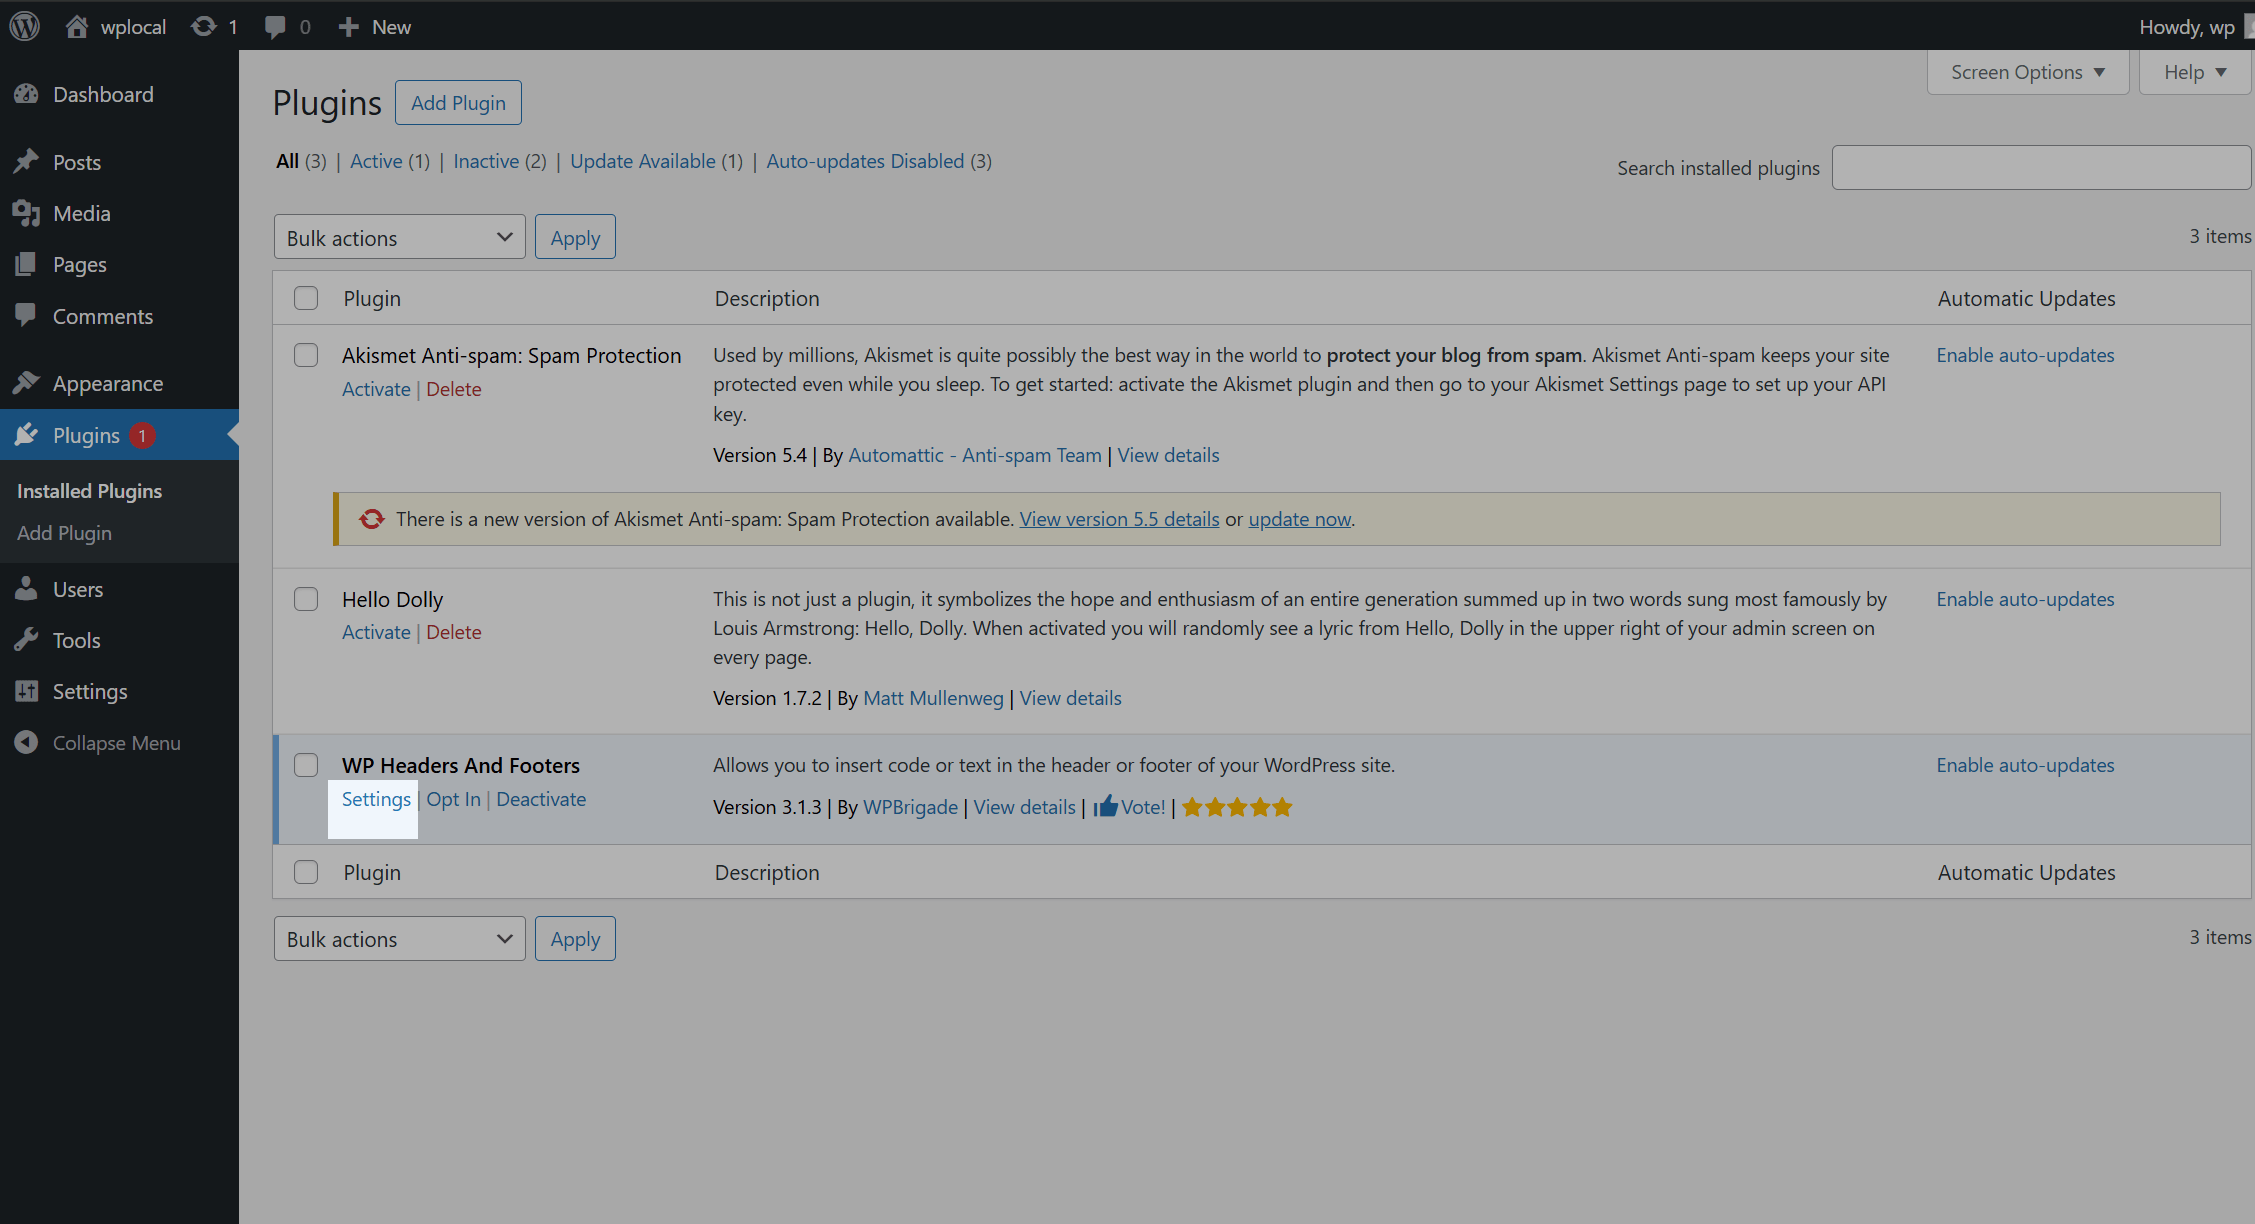
In the Scripts in Footer field, add your pop-up code.
Joomla
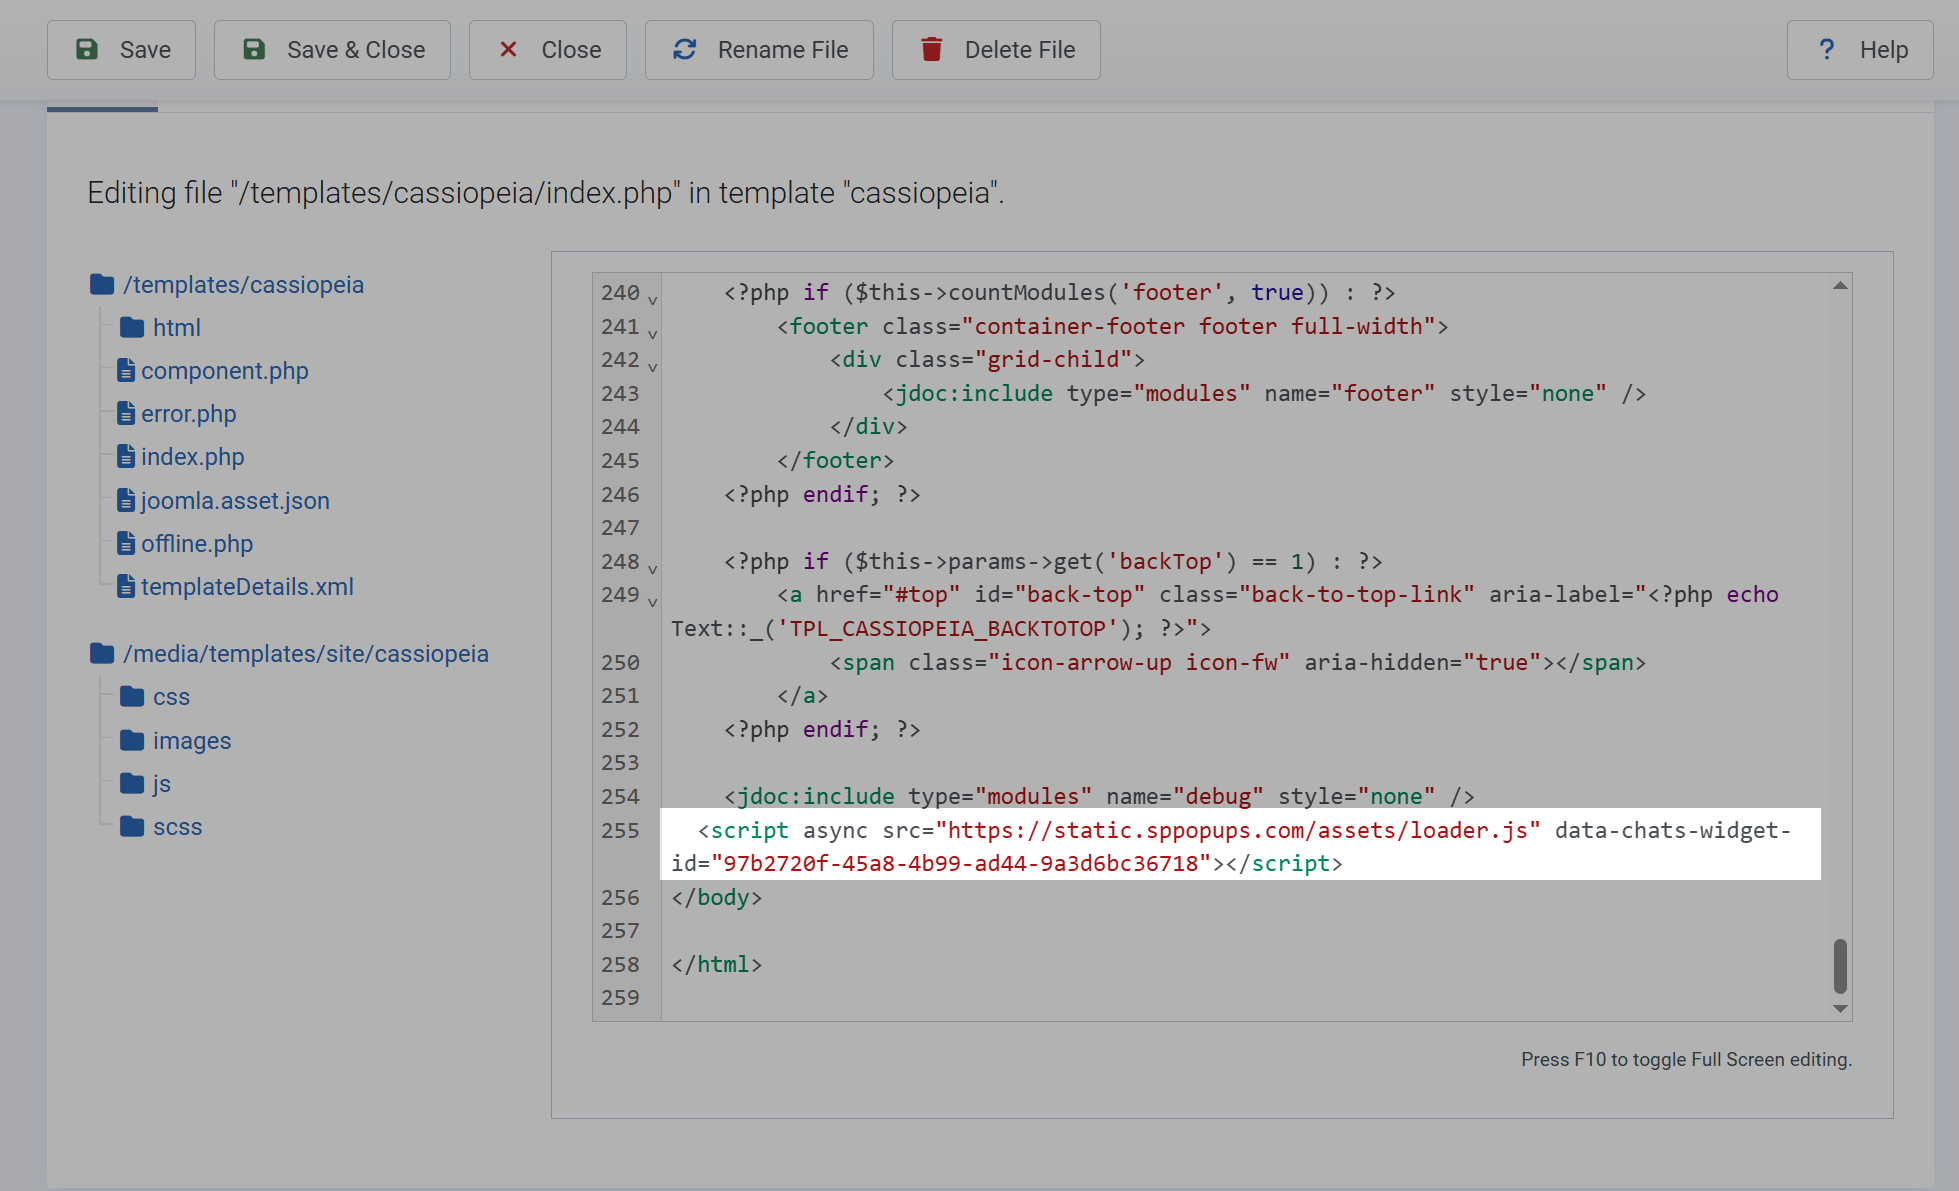
Go to your Joomla dashboard and select System > Templates > Site Templates.
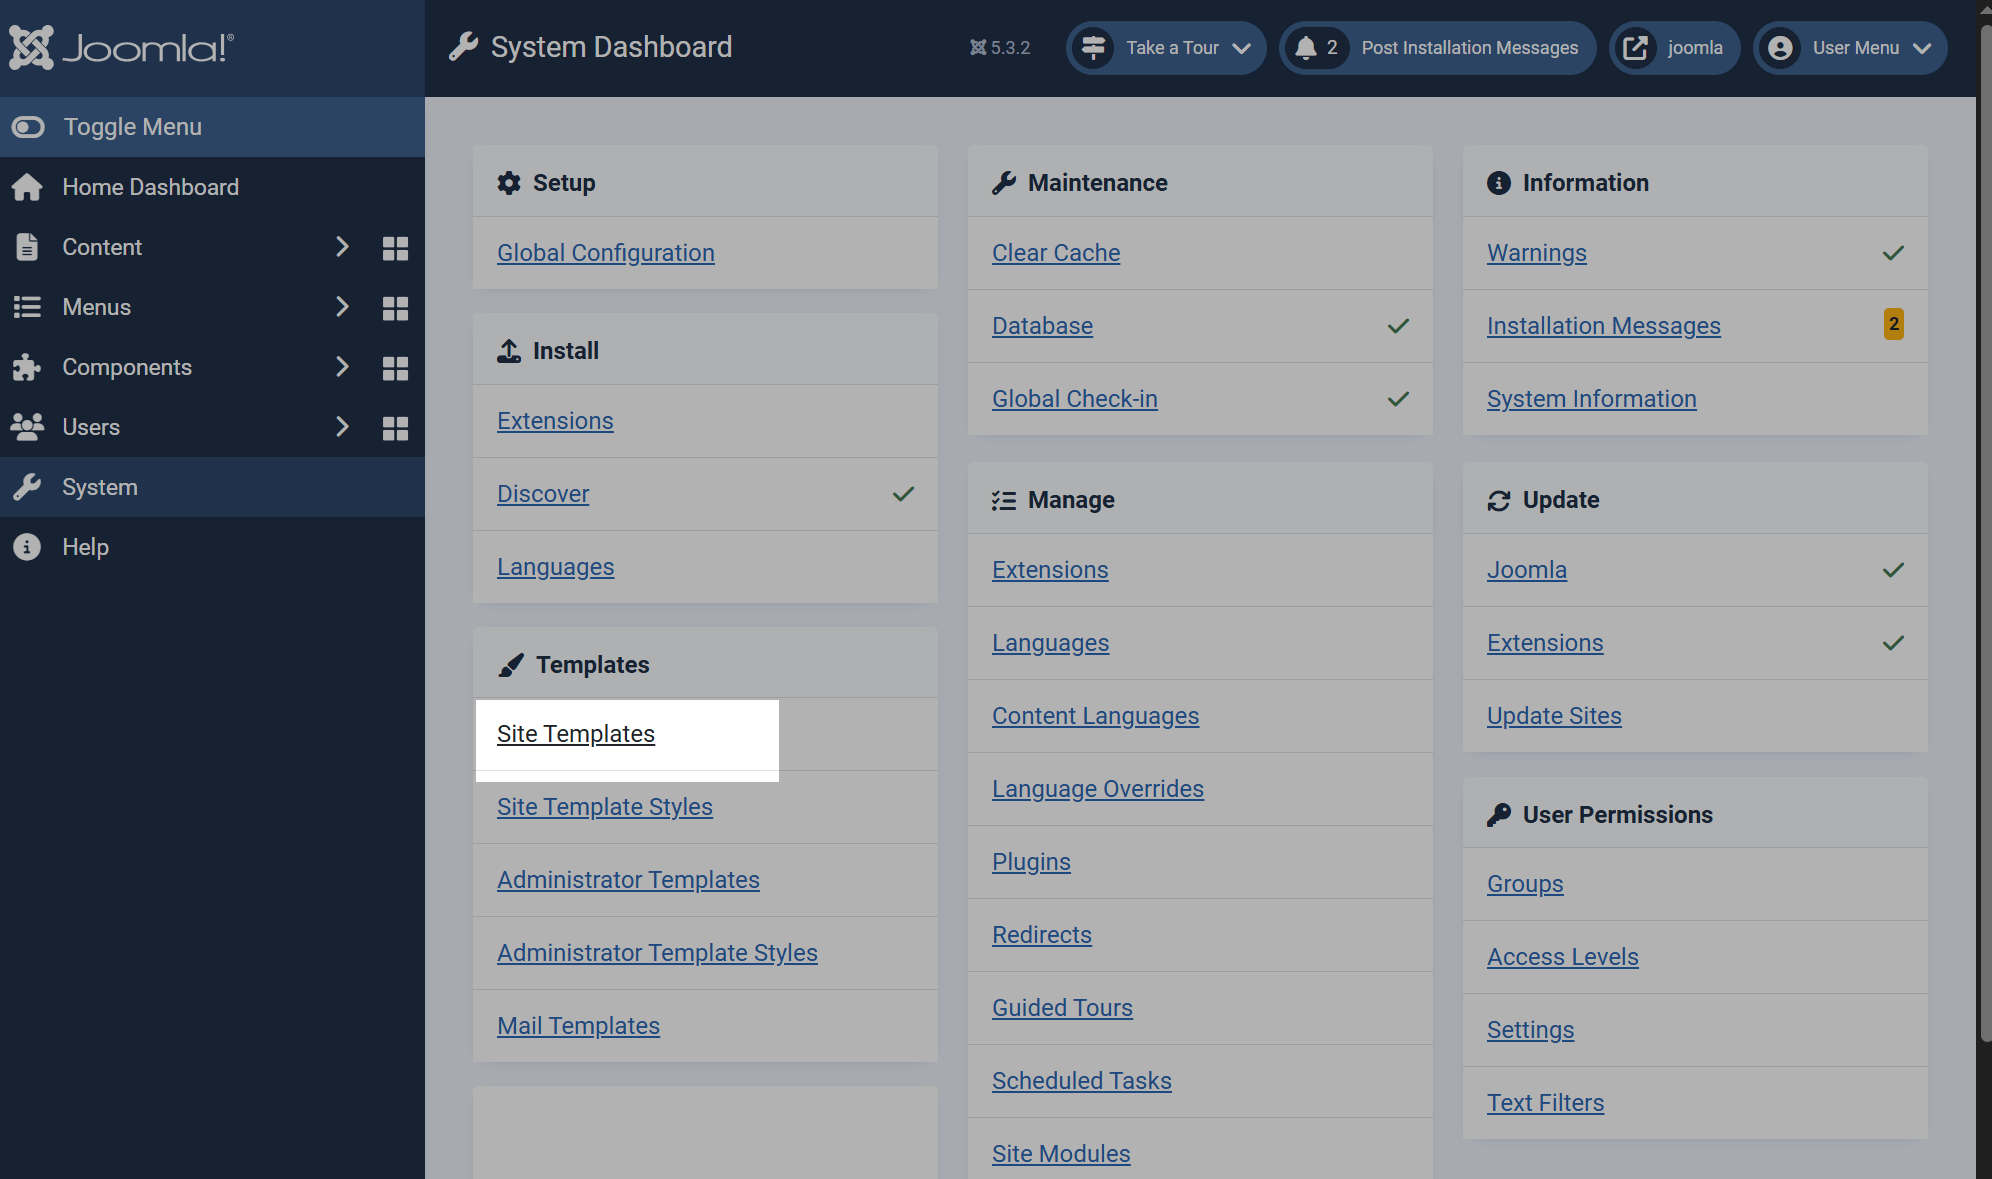
Find your website and click its name. In the left sidebar, select the index.php file. Scroll down to the bottom of the file and paste the copied pop-up code just before the closing </body> tag.
Click Save.
Shopify
Go to your online store in Shopify and select Online Store > Themes. Next to your theme, click the three dots and select Edit code.
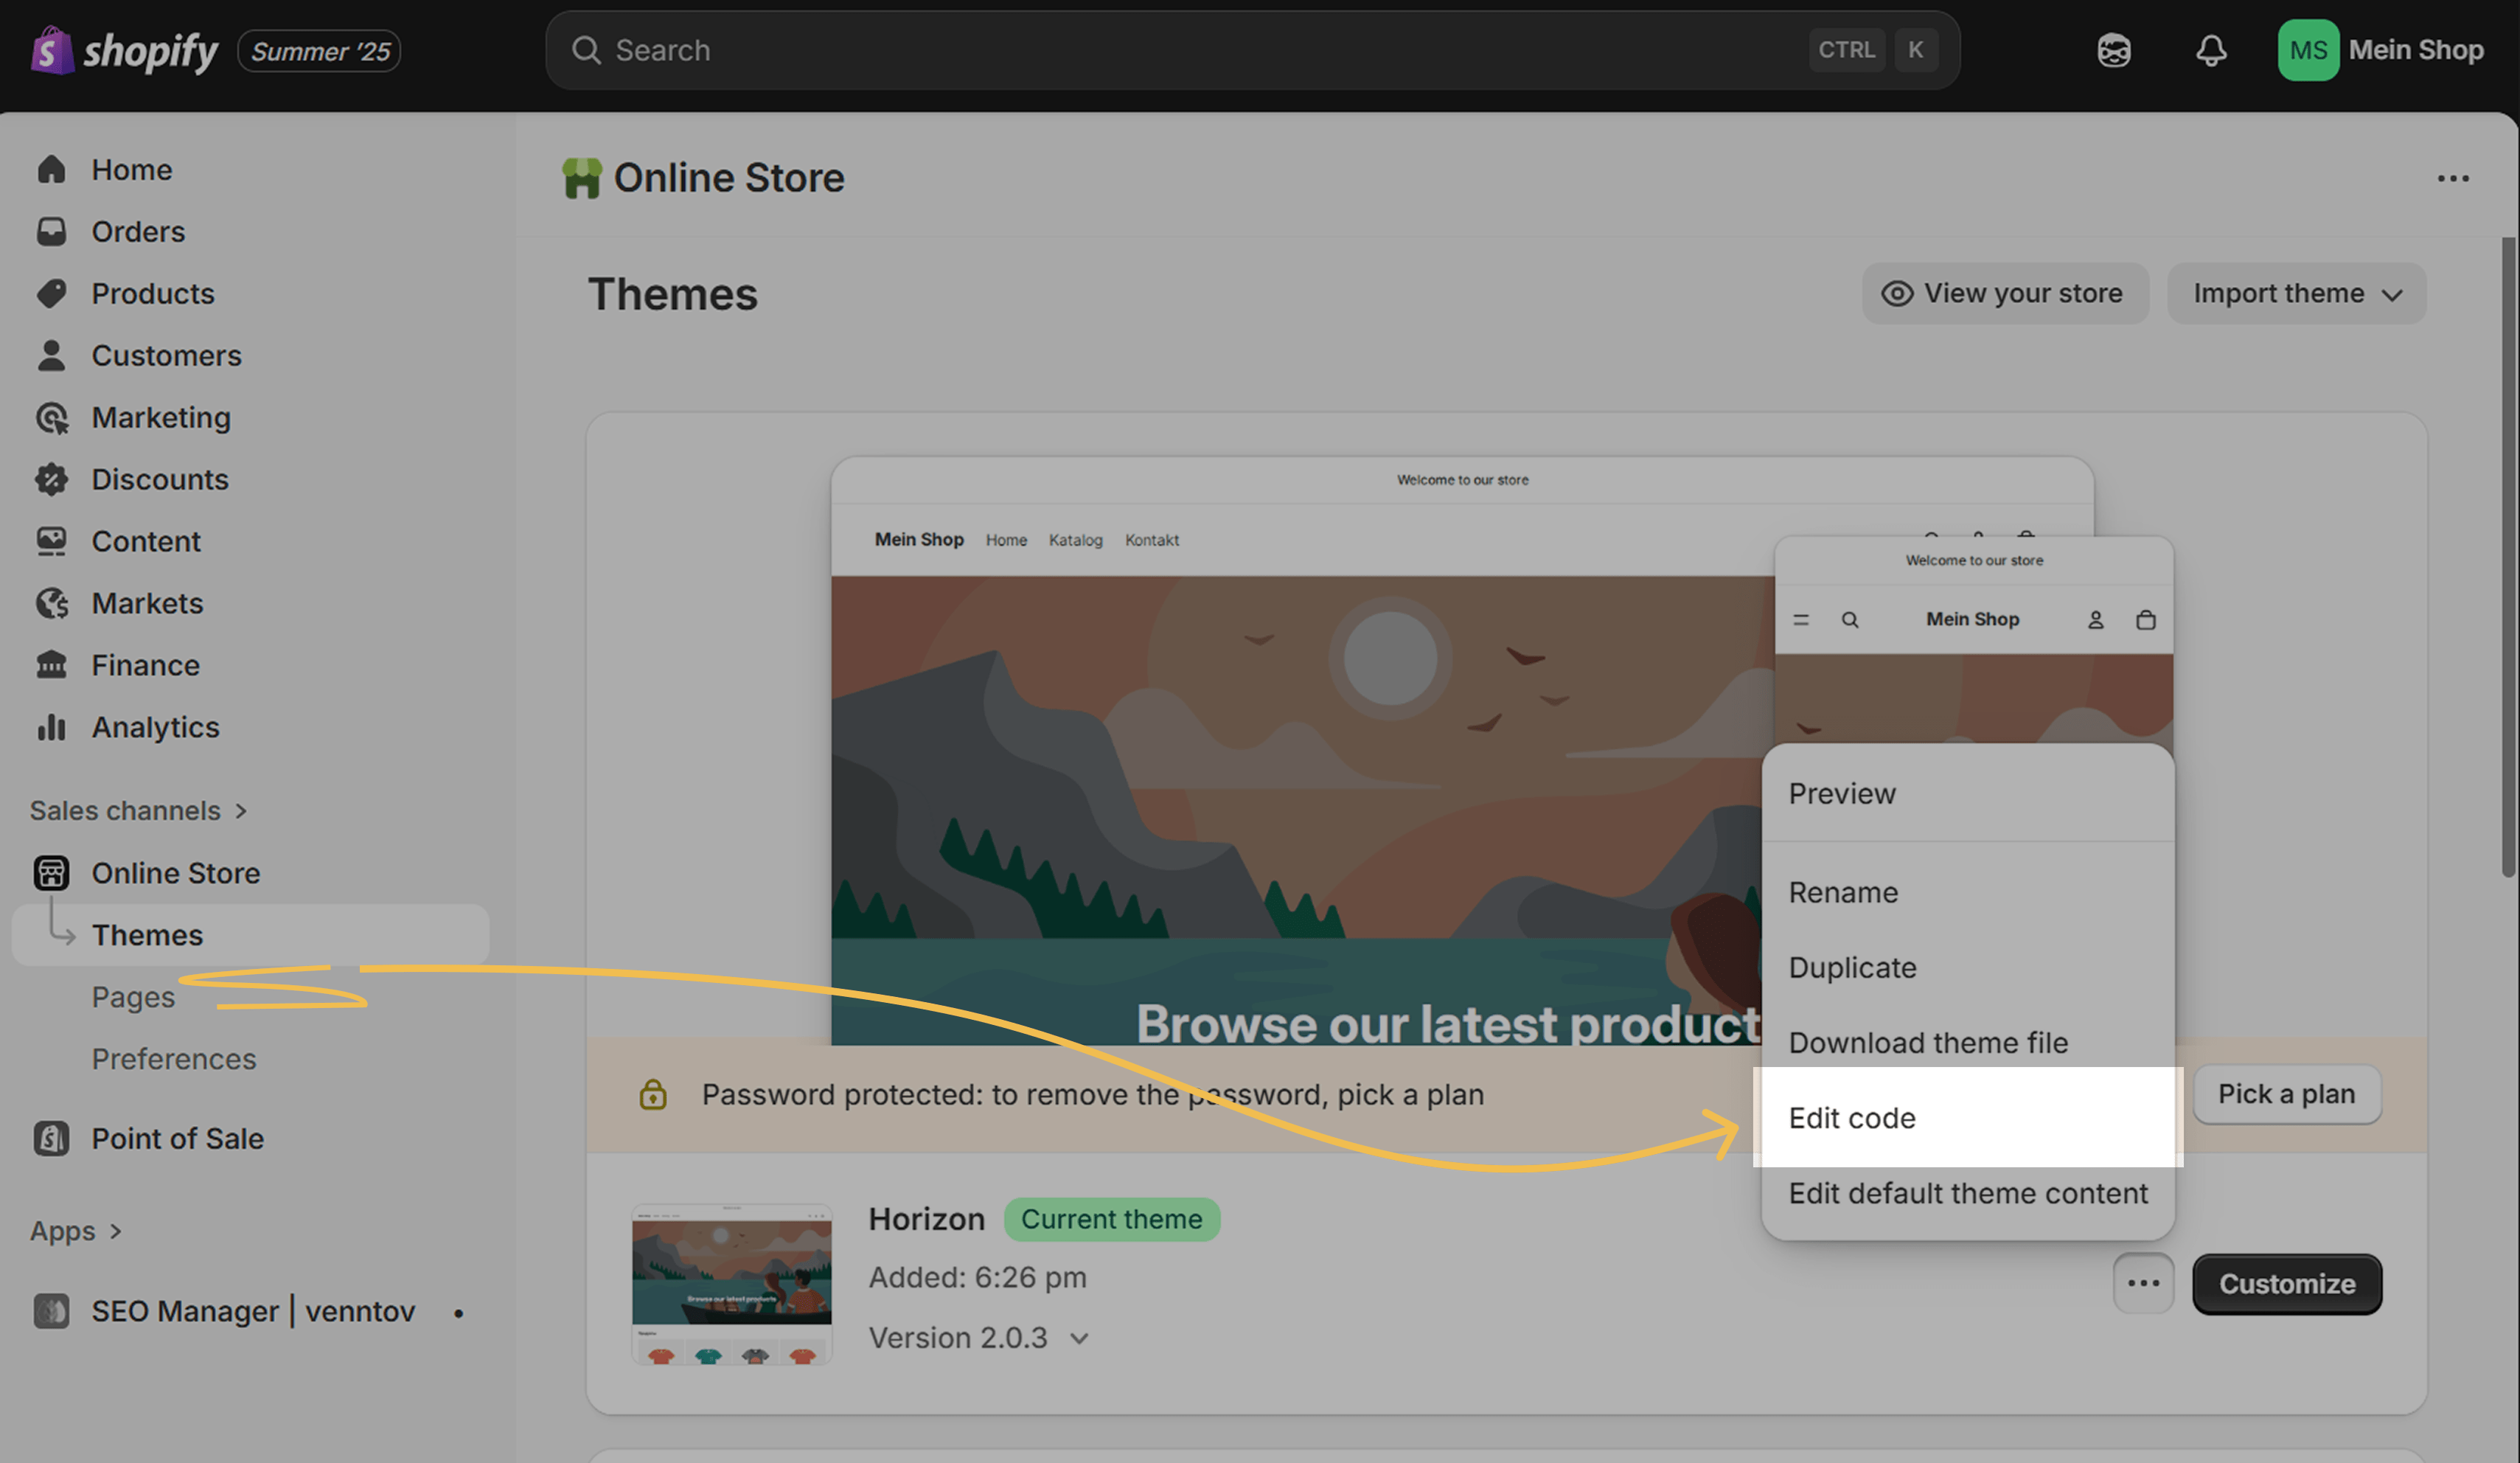
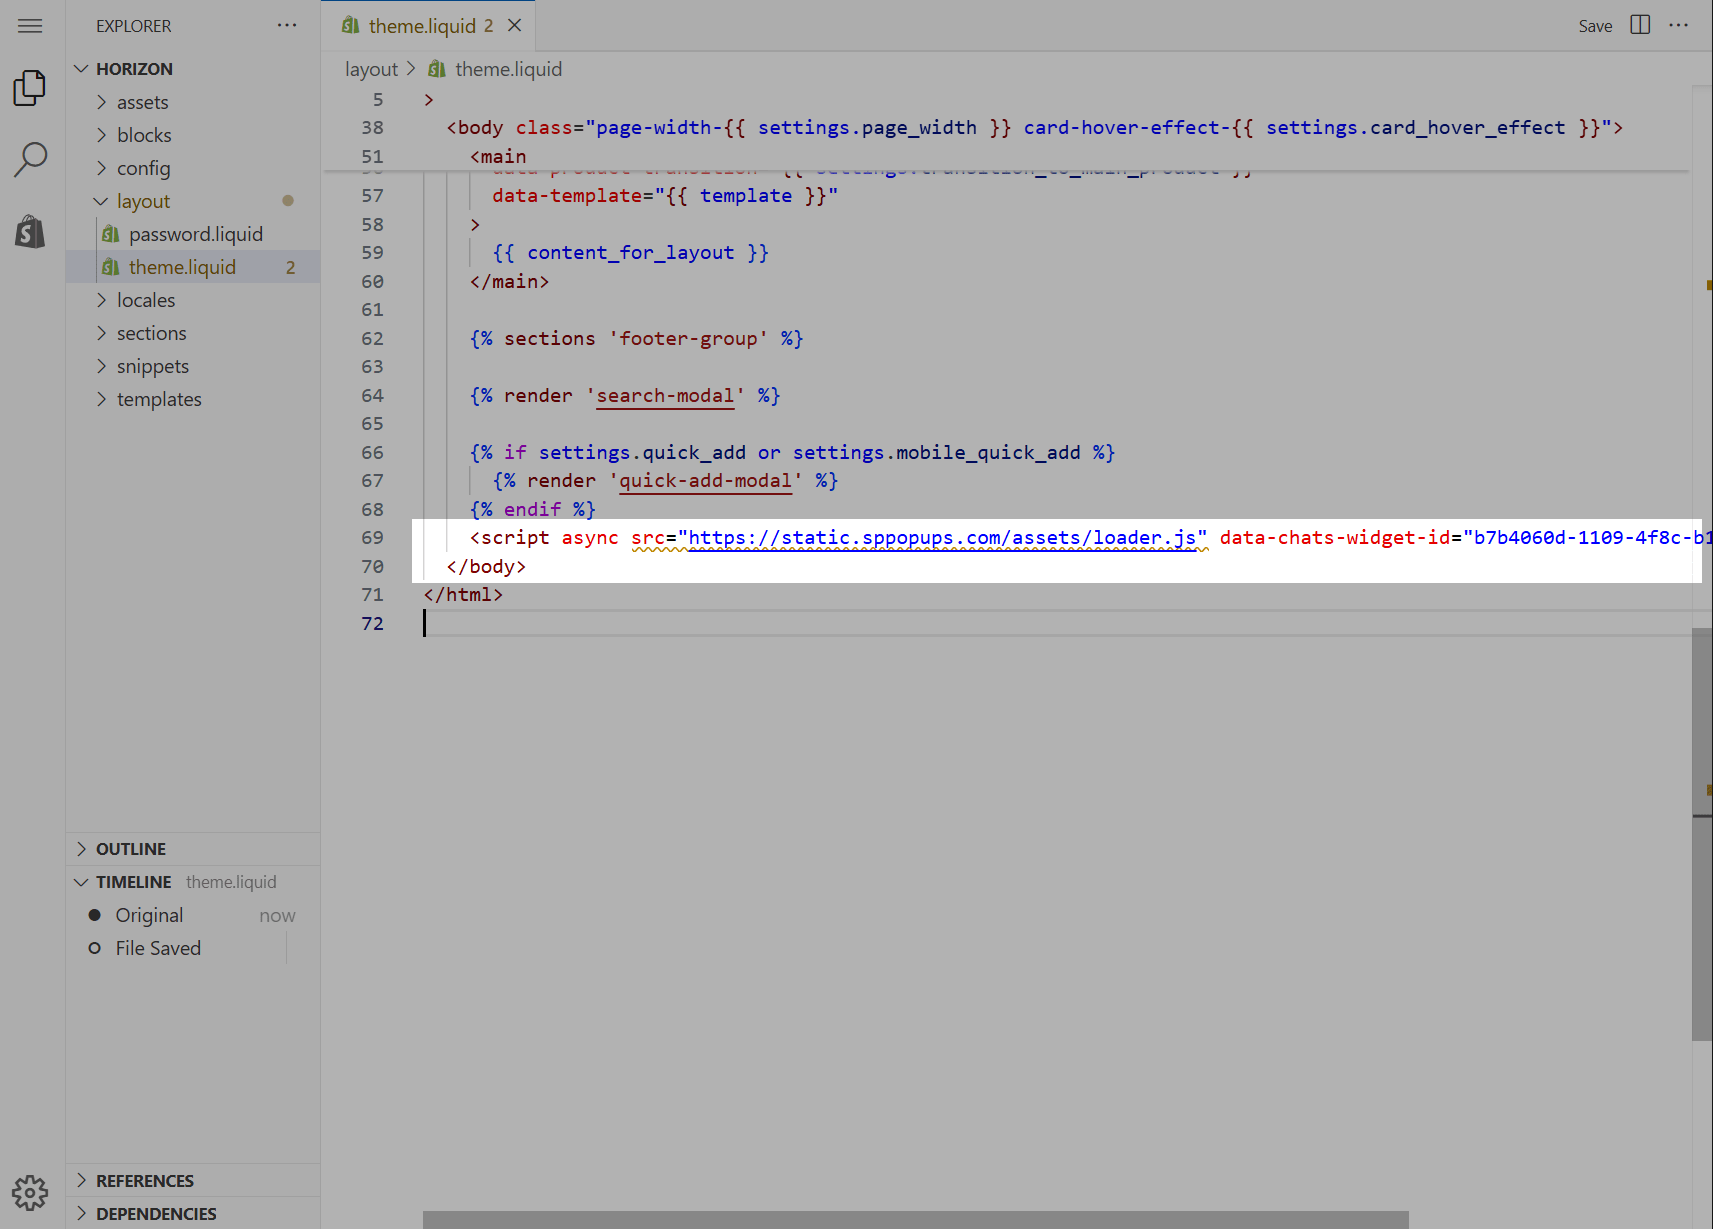
Open the layout > theme.liquid file. Add your pop-up code right before the closing </body> tag.
To save your changes, click Save in the upper-right corner.
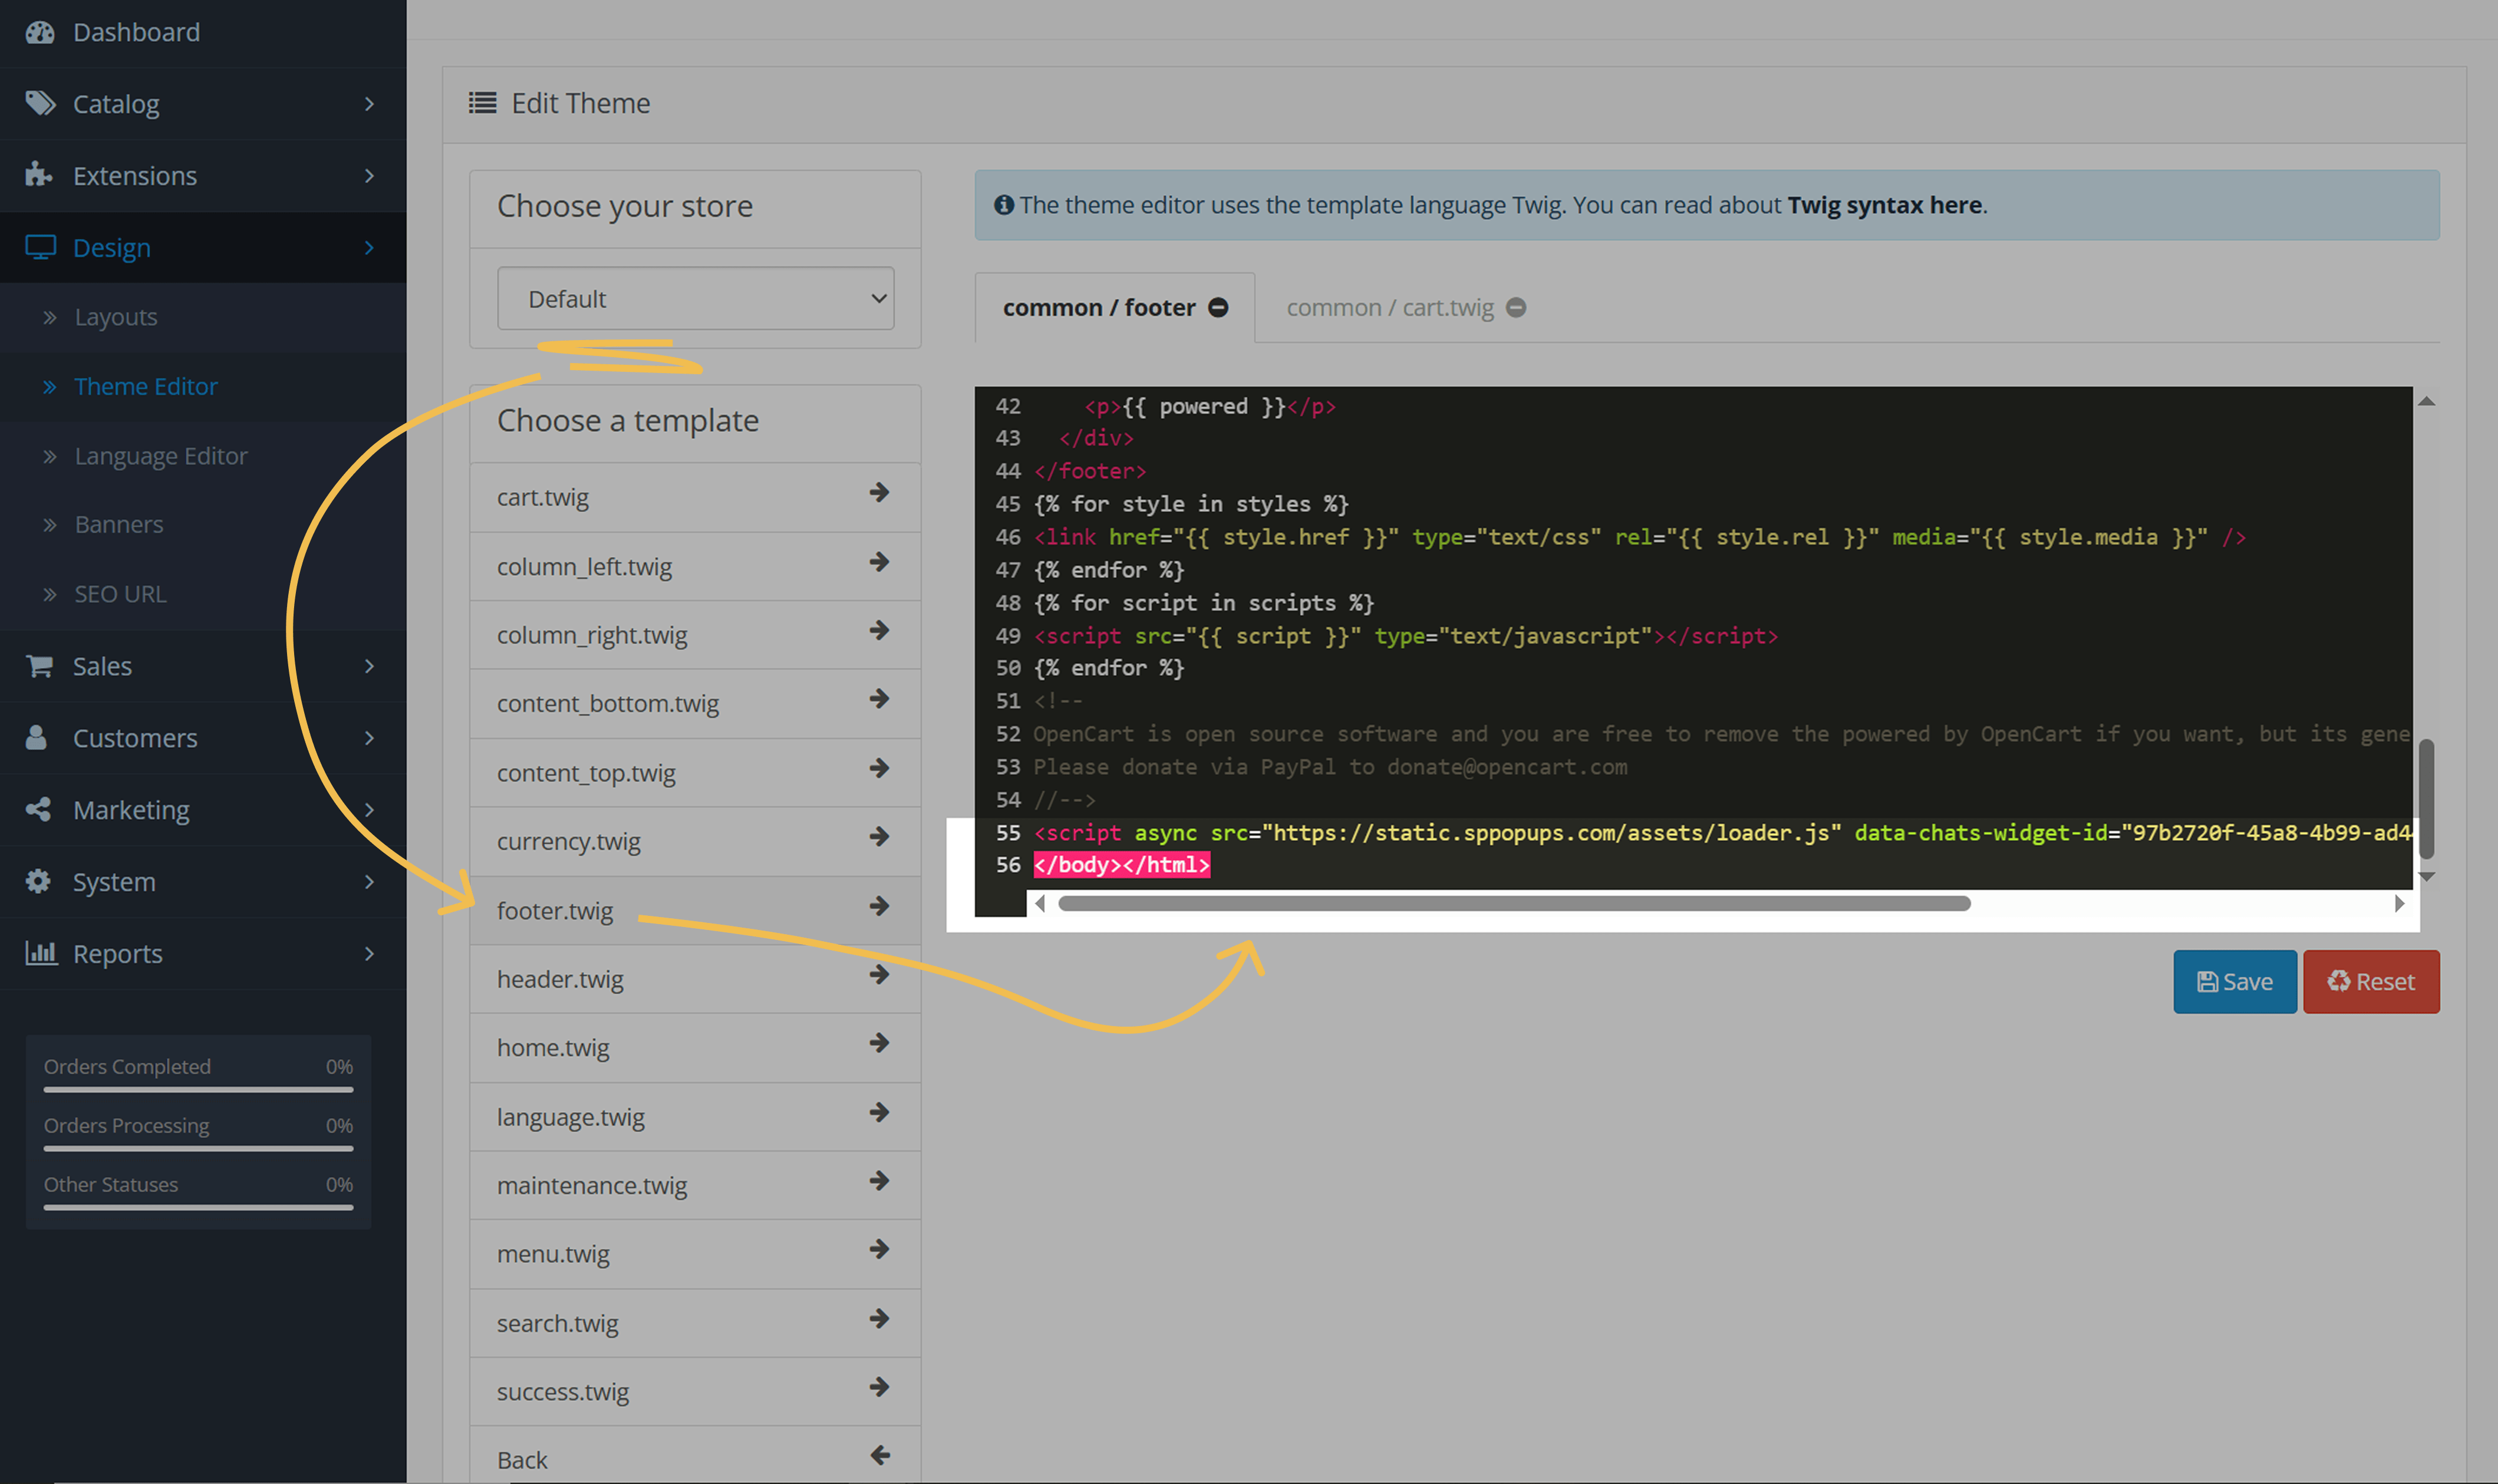
OpenCart
Go to your OpenCart dashboard. In the sidebar, click Design > Theme editor.
In Choose your store, select your store from the dropdown list. Then, under Choose your template, open Common > footer.twig.
Scroll down to the bottom of the file and paste the copied pop-up code just before the closing </body> tag.
Click Save.
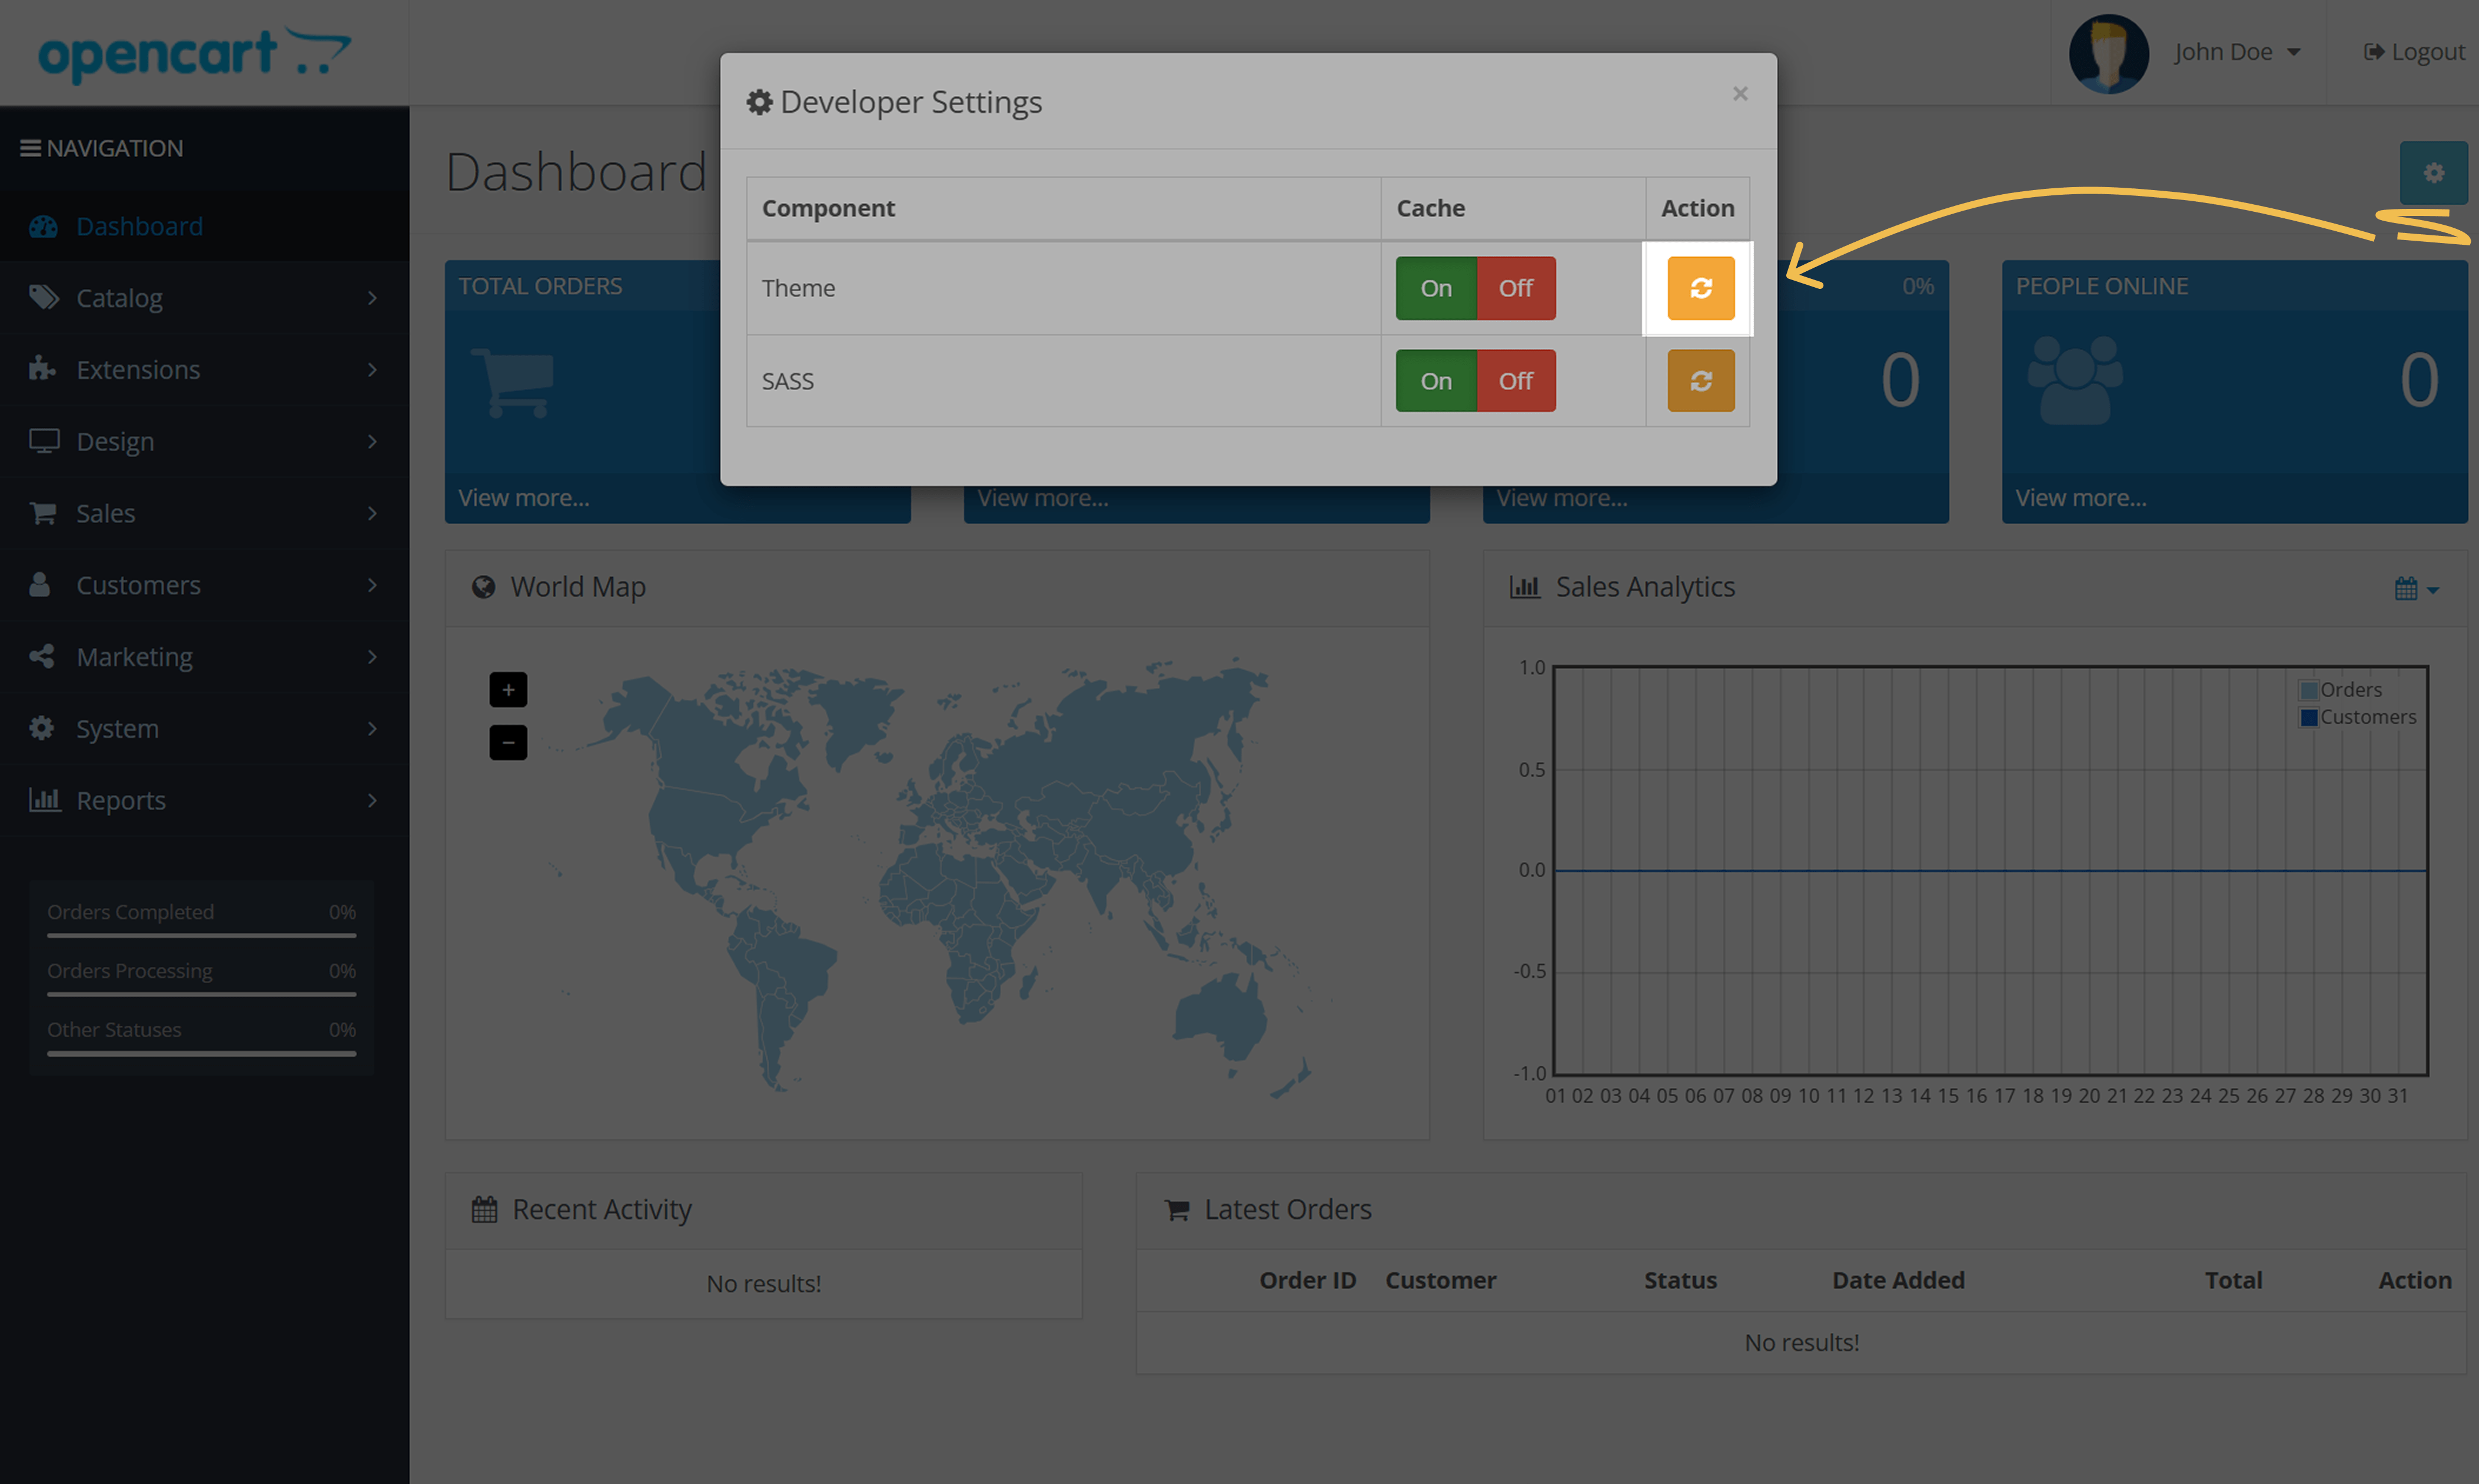
To show the pop-up on your website, clear your theme cache after adding the code.
Go to Dashboard and click Developer Settings.
In the modal window, under Theme cache in Action, click the refresh icon.
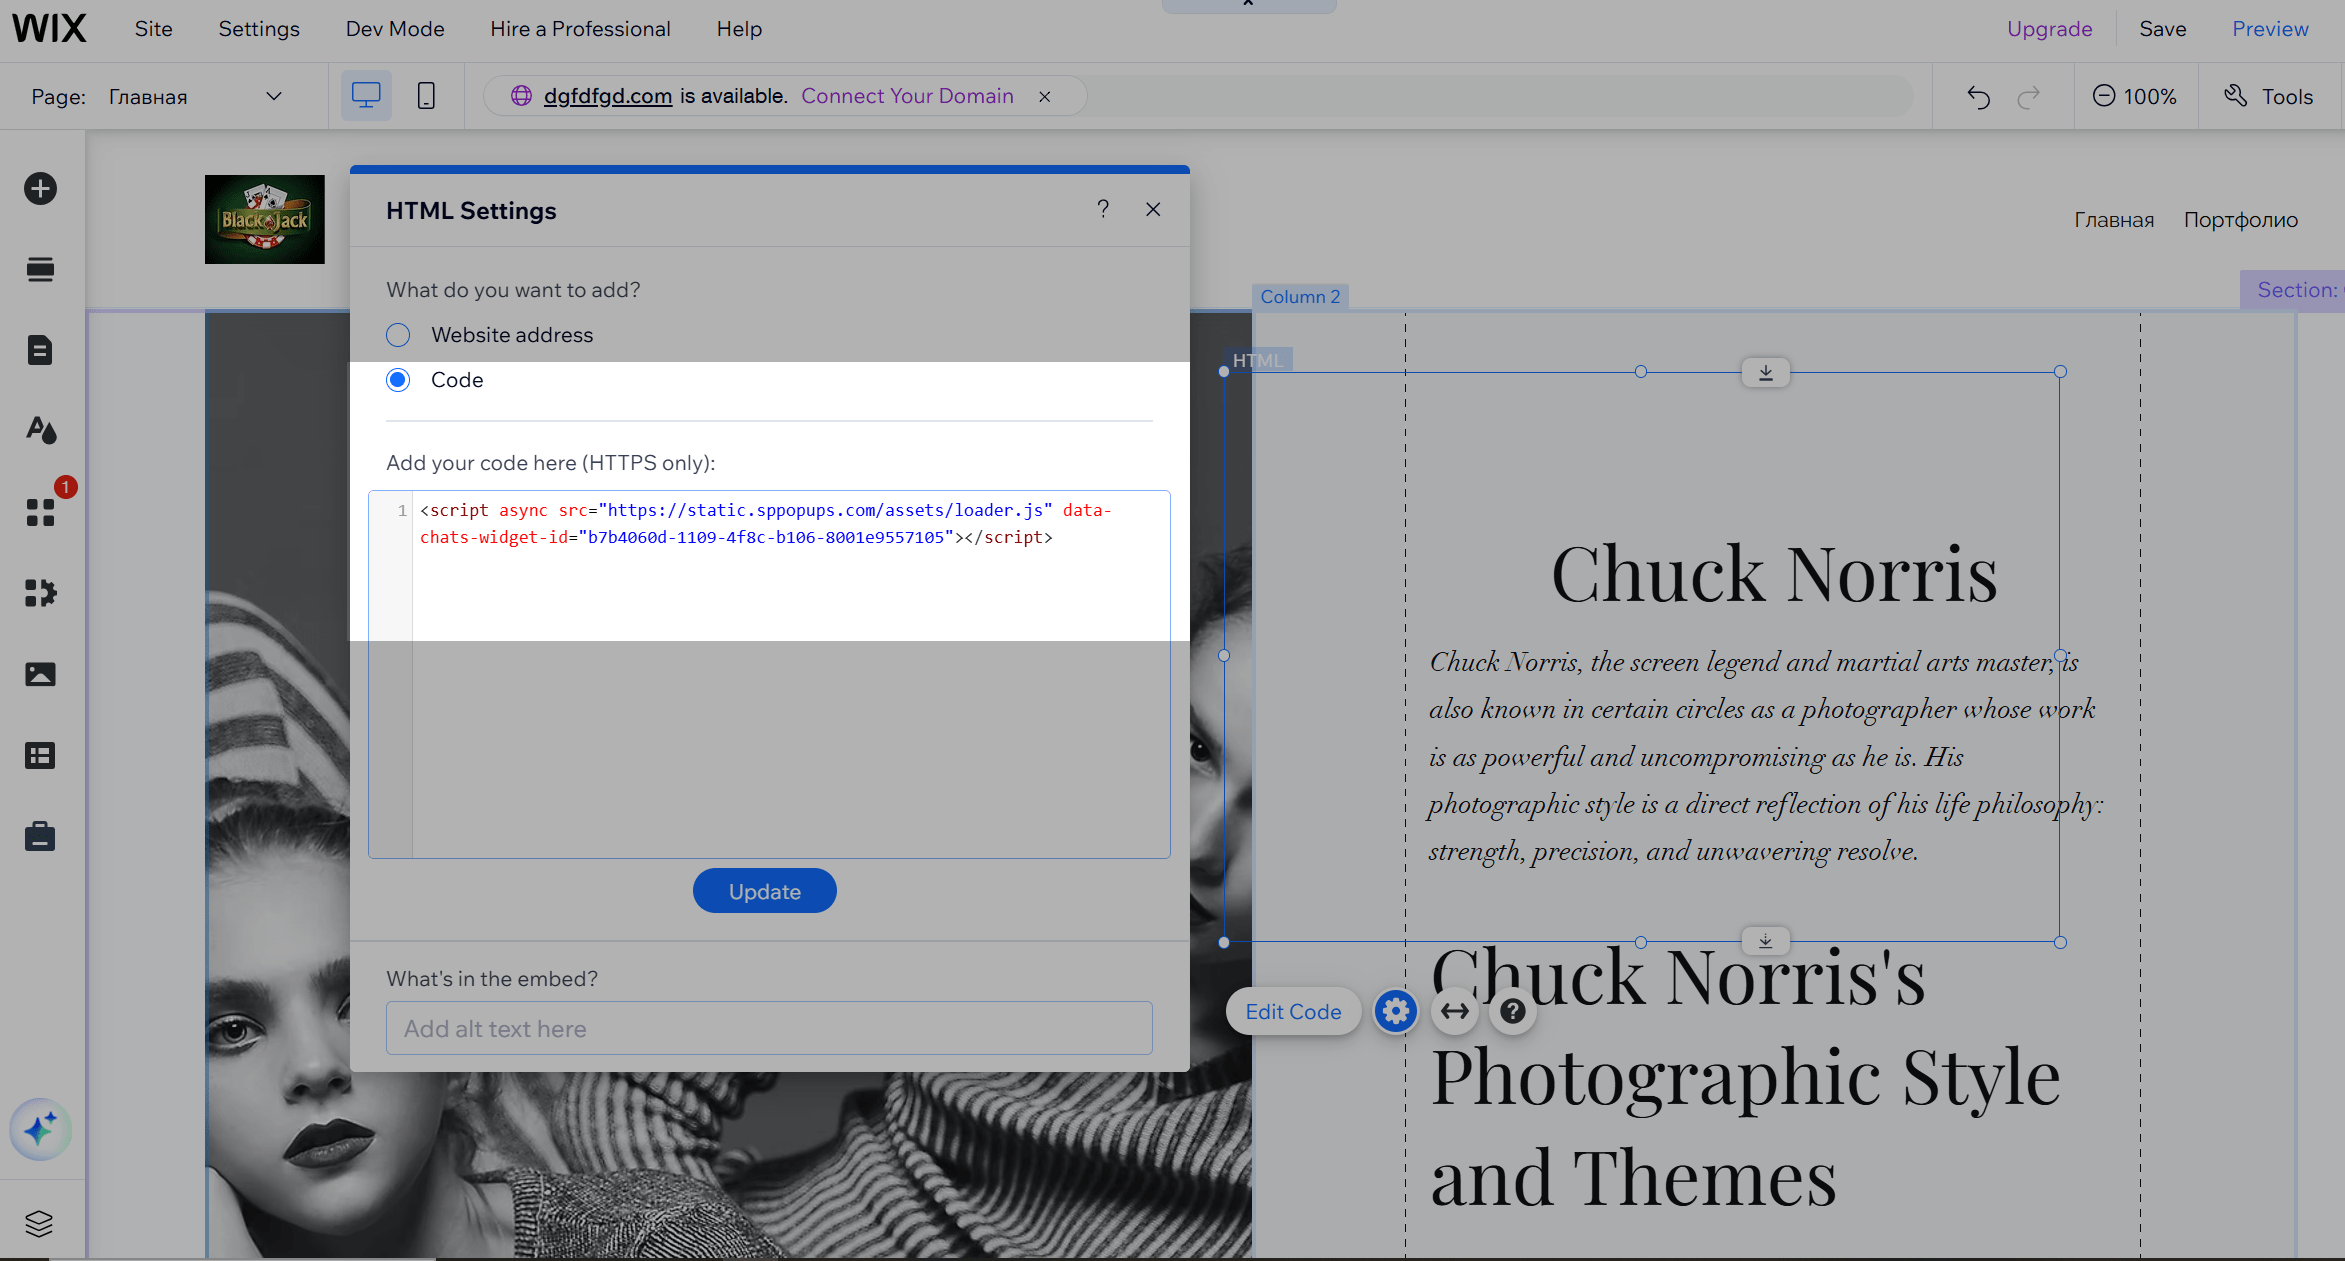
Wix
Go to your Wix dashboard and click Edit Site.
Click + Add elements, then select Embed code > Embed HTML.
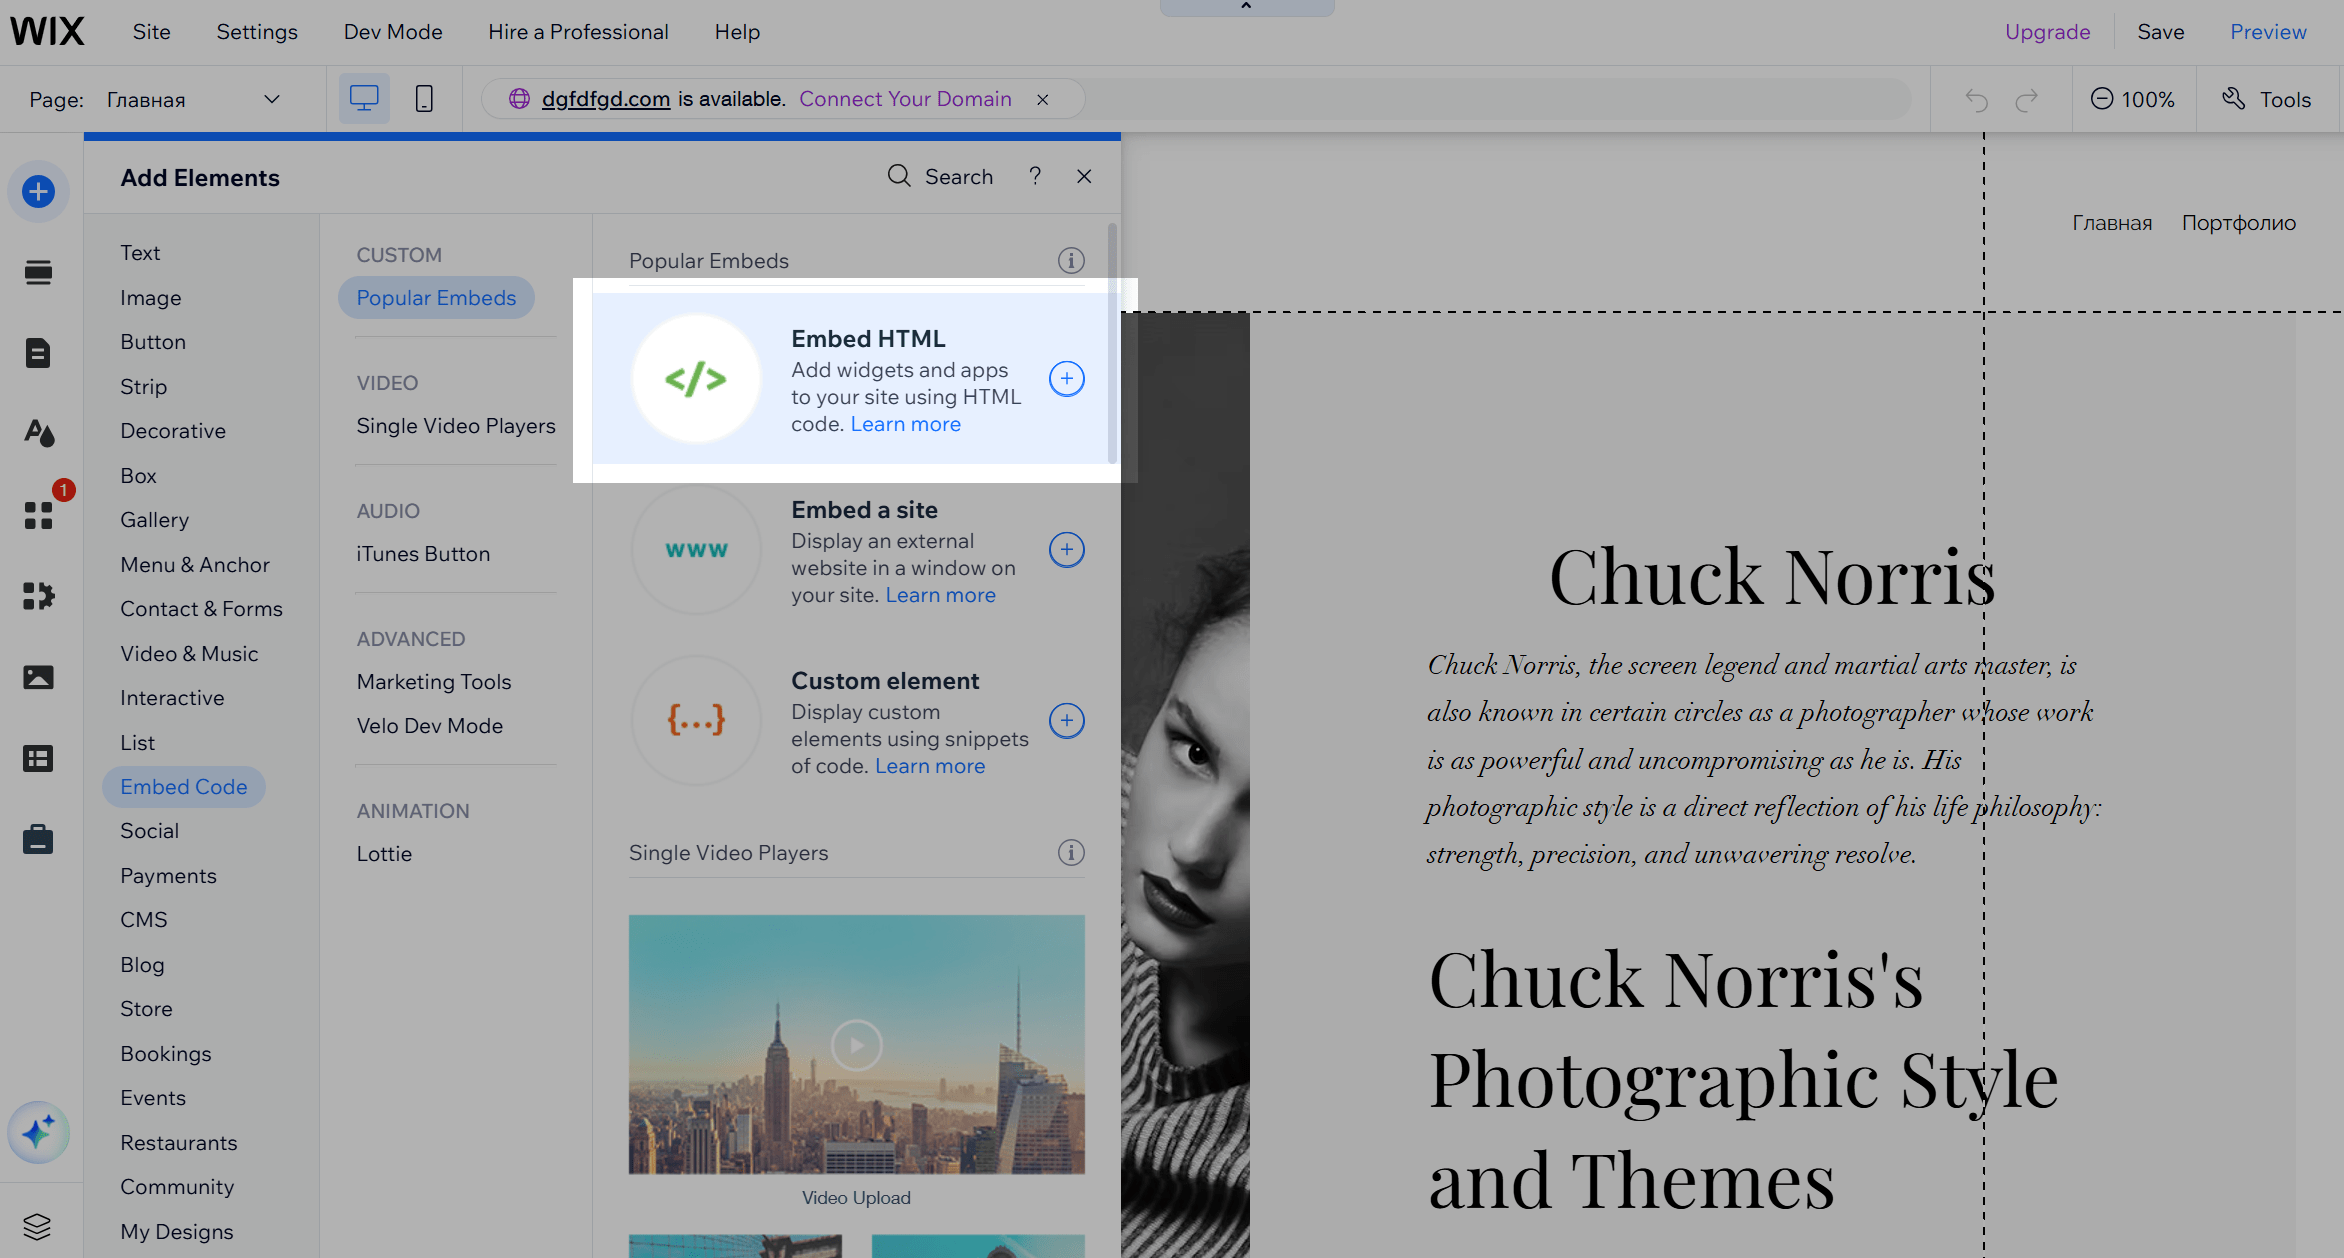
Select the Code as the embed type, paste your pop-up code, and click Update.
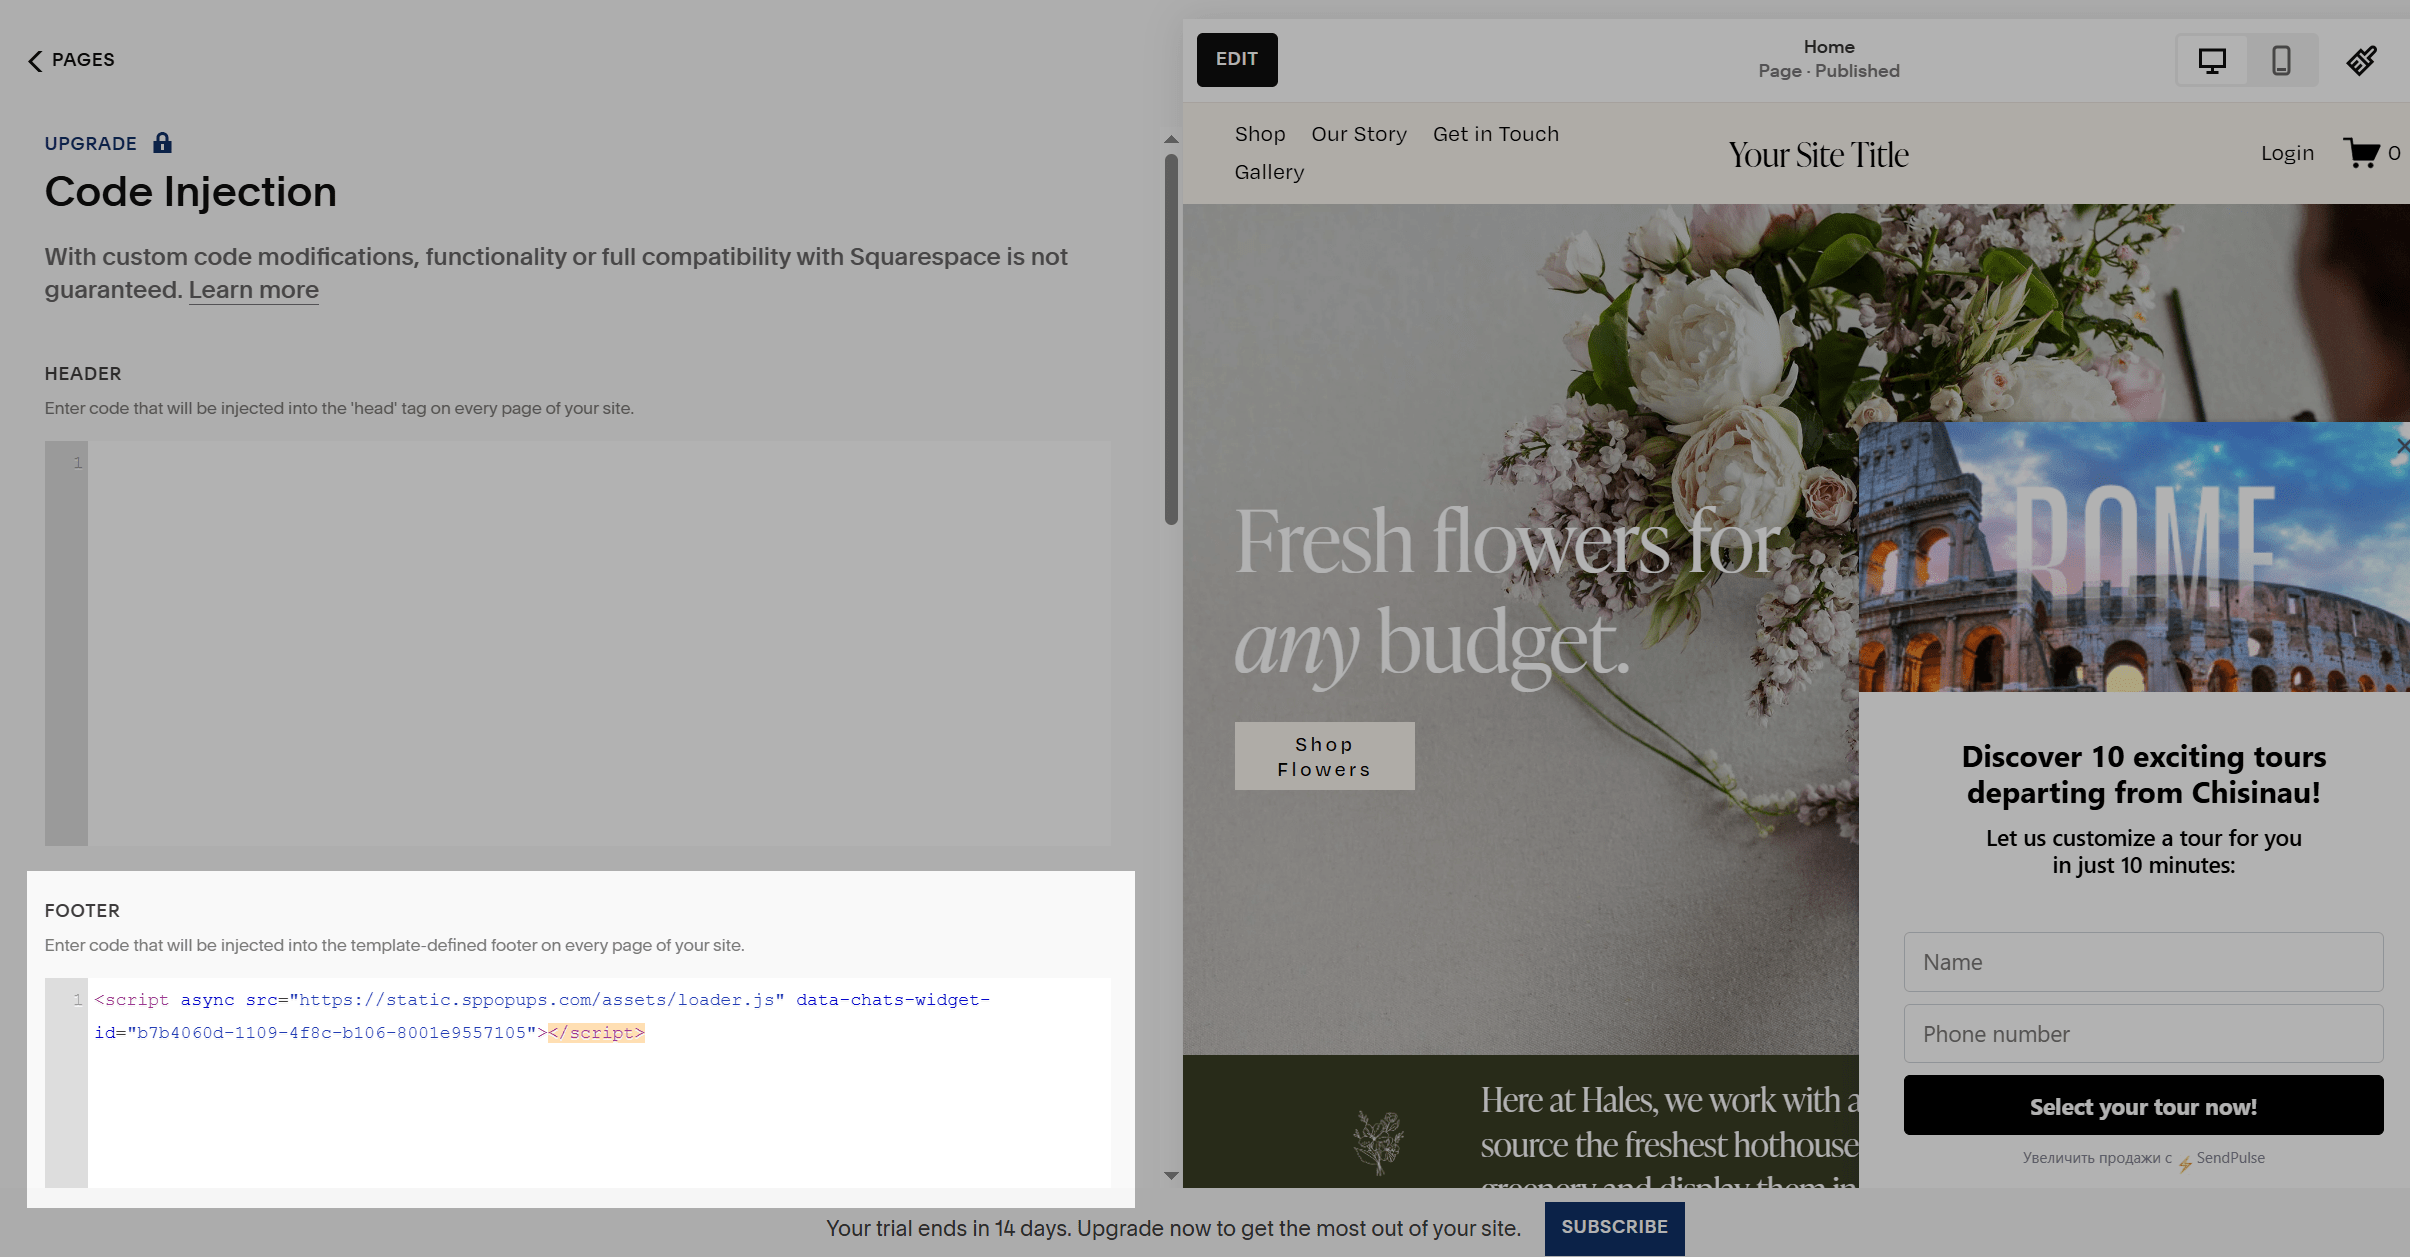
Squarespace
Go to your Squarespace dashboard and click Settings > Custom code > Code injection
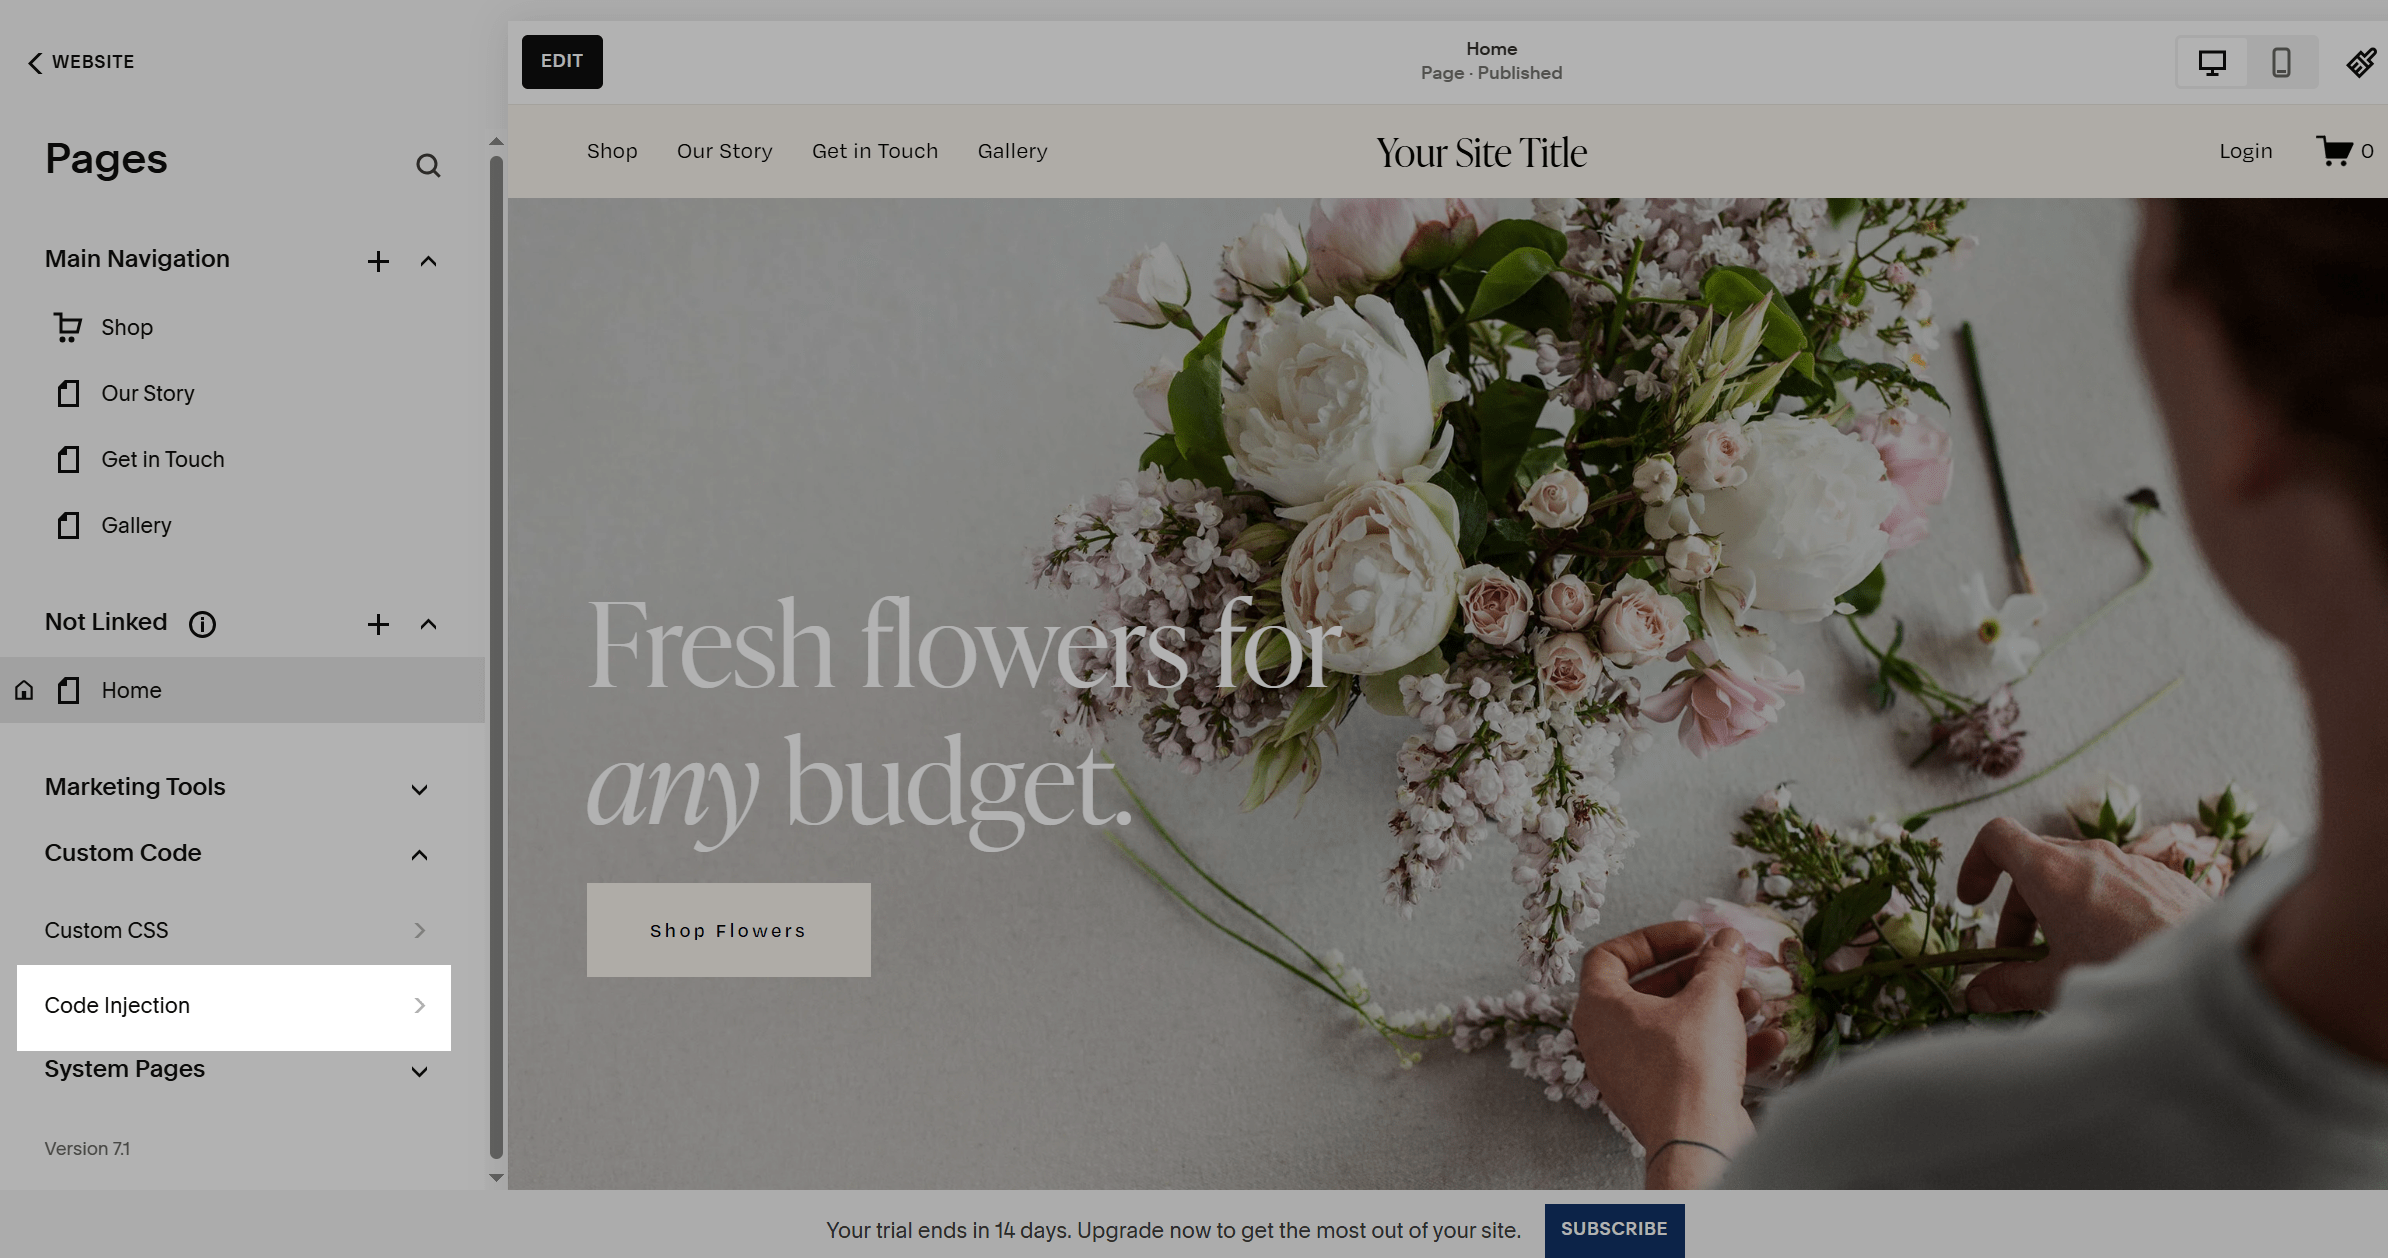
In Footer, add your pop-up code.
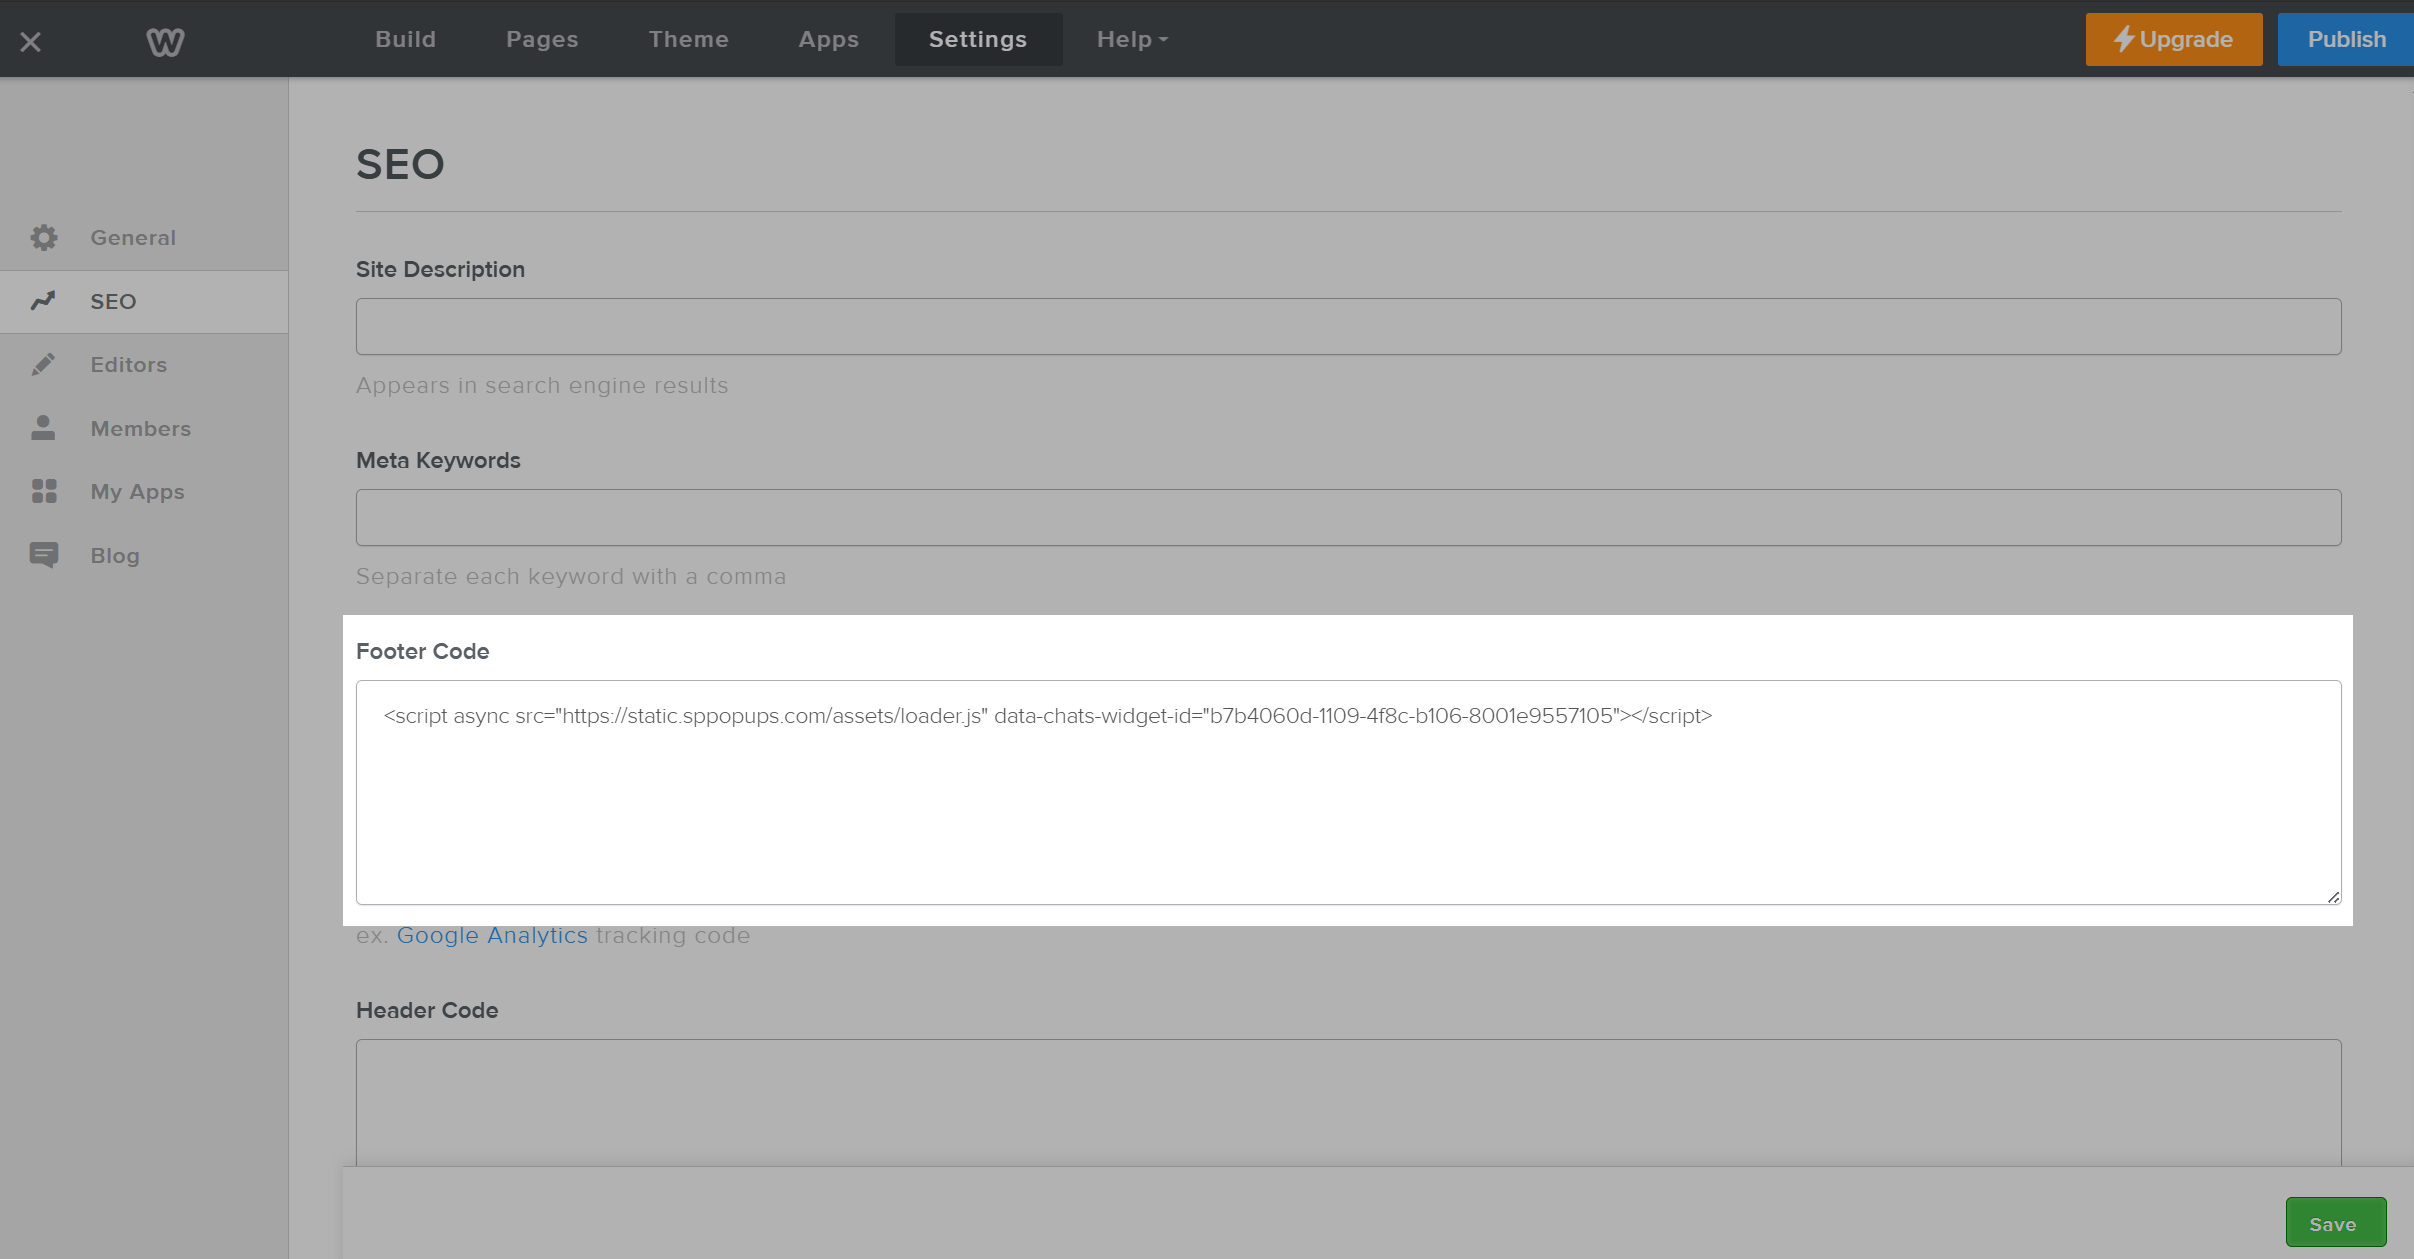
Weebly
Log in to your Weebly dashboard and go to Settings.
In SEO, find the Footer Code field and paste your pop-up code there.
Click Save.
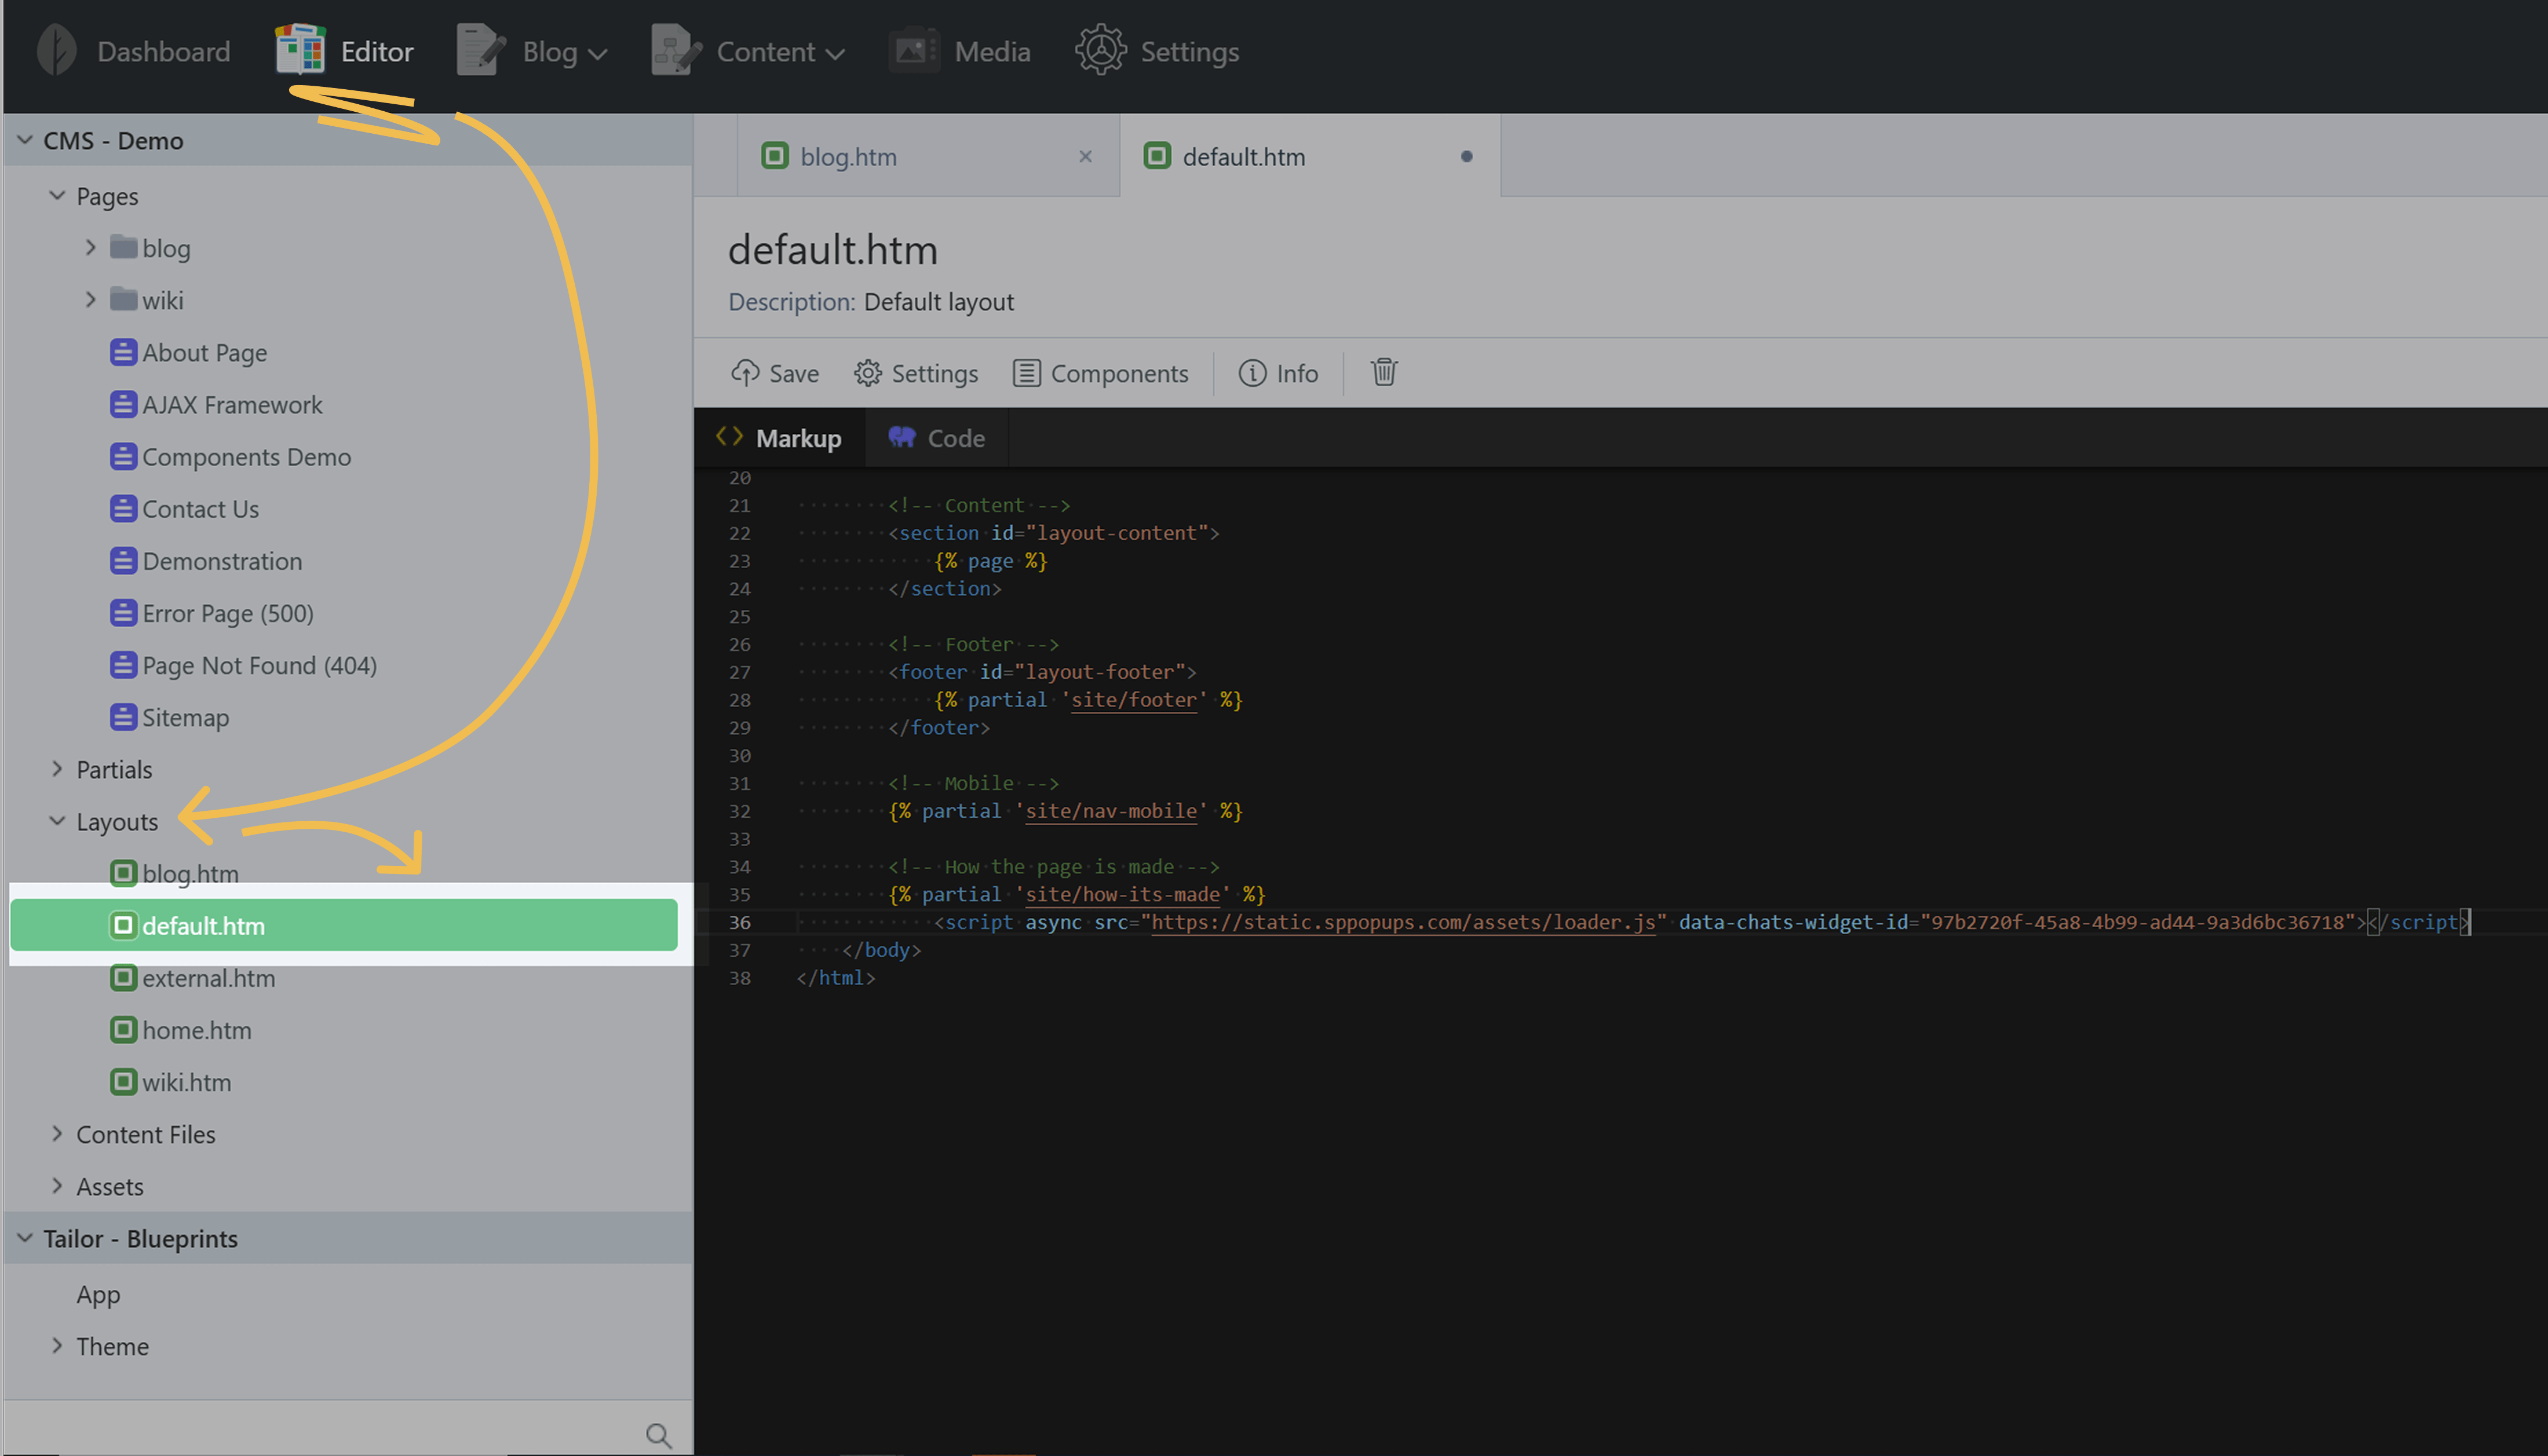
OctoberCMS
Go to your OctoberCMS dashboard > Editor > CMS > Layouts.
Choose the layout used on your pages, for example, default.htm.
In the layout, add your pop-up code just before the closing </body> tag, right after the {% page %} tag.
Click Save in the upper left corner.
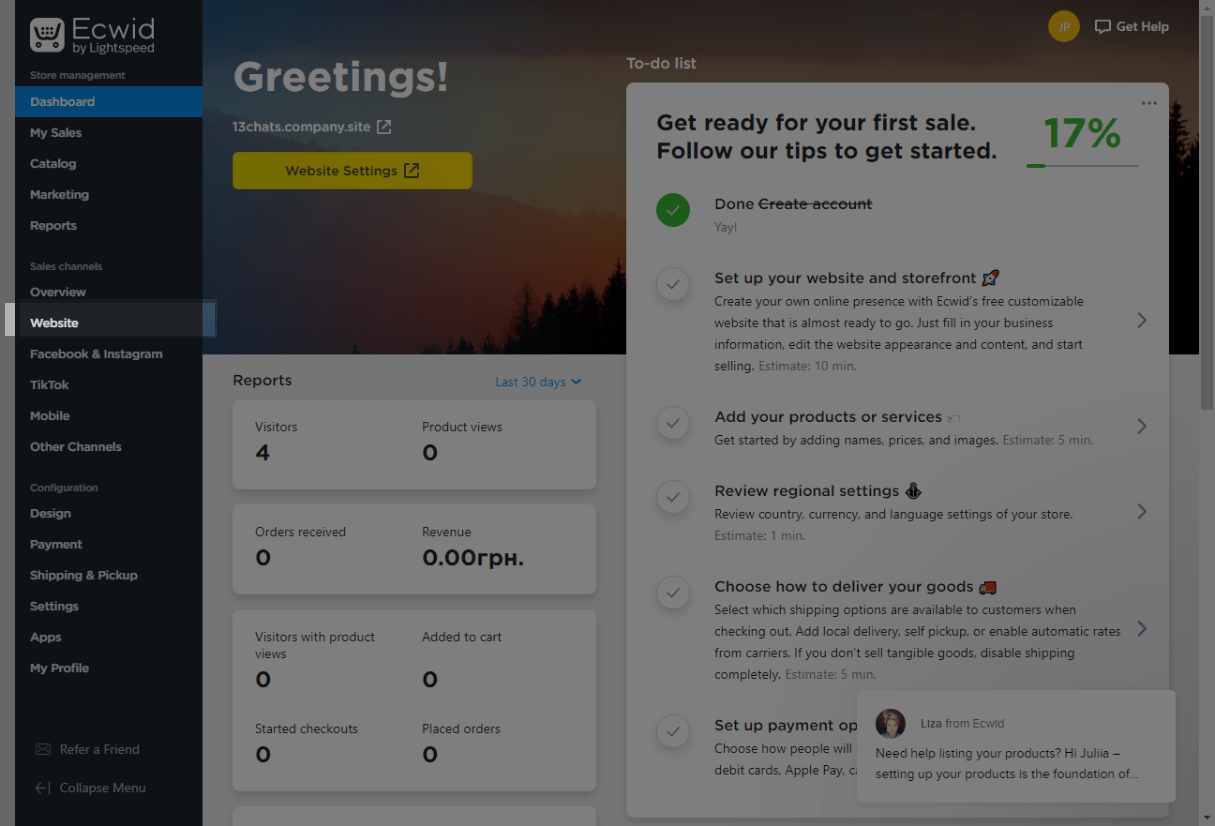
Ecwid
With Ecwid, you can show your products on any website created from scratch or using a CMS. We recommend adding the pop-up code to your website before the closing </body> tag or through Google Tag Manager.
You can embed a pop-up only with paid Ecwid plans.
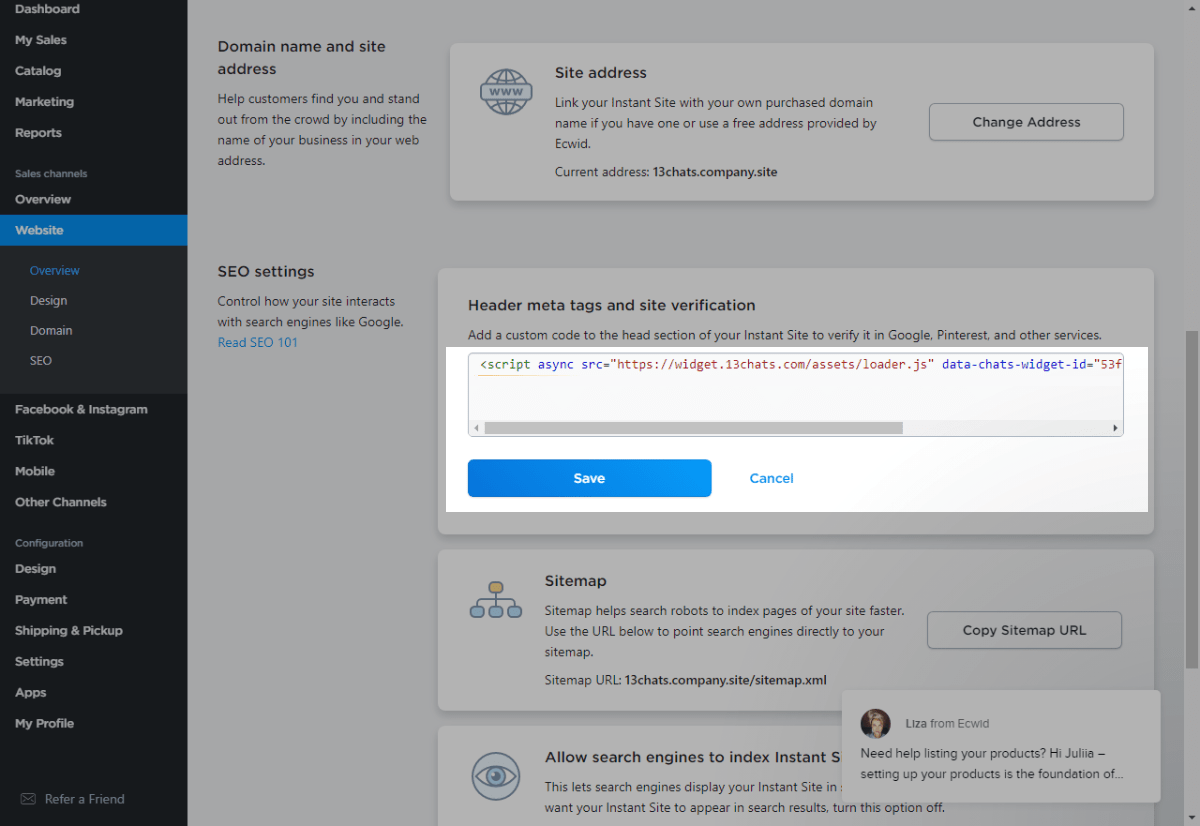
If you’re using Ecwid’s Instant Site, you can paste the code in the <head> element in the meta tag field since you cannot edit the </body> tag to add your JavaScript code.
We recommend using this method only as a last resort because scripts placed in the <head> element may not operate as expected. For example, this can lead to incorrect statistics and other inaccuracies.
If you are aware of all the risks and ready to use this method, log into your Ecwid account, and select the Site tab on the dashboard.
Scroll down to the SEO Settings section, find the Meta tags for site verification block, and click on the Add code button.

Paste your pop-up code into the opened field, and click Save.
Paste your pop-up code into the opened field, and click Save.
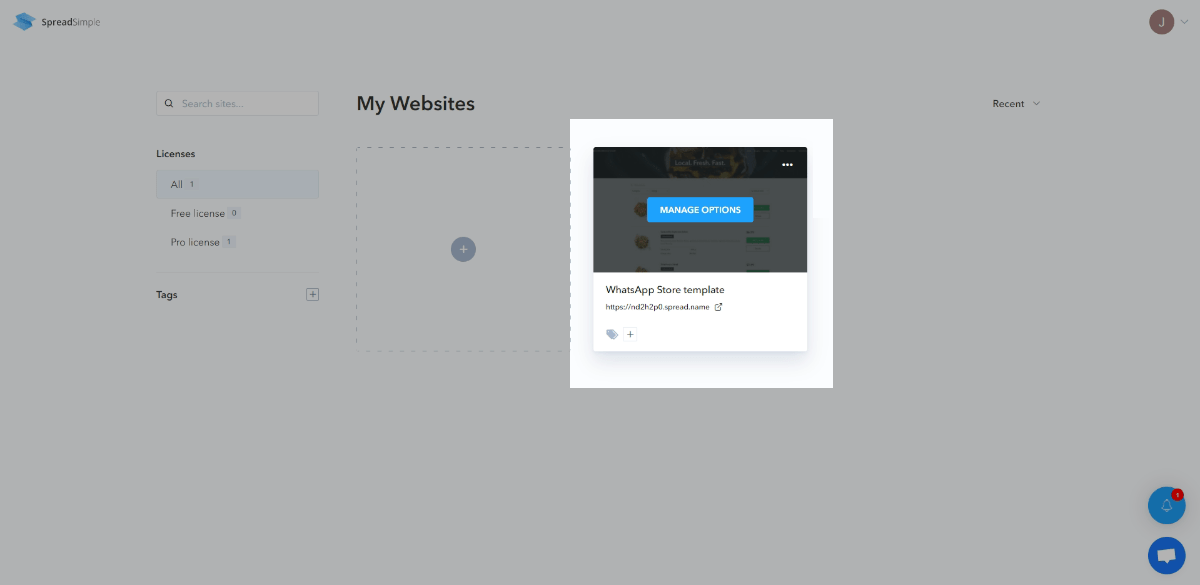
SpreadSimple
You can add SendPulse’s pop-up code to your site only with the paid SpreadSimple Pro plan.
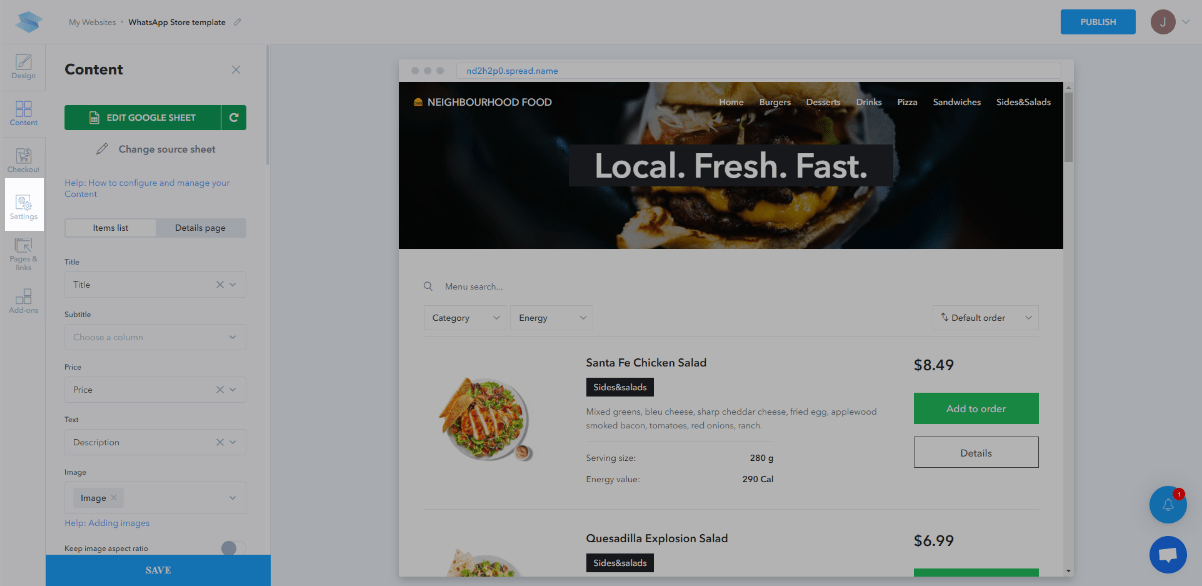
Log in to your SpreadSimple account, and select the Manage options option in your website settings.
In the left sidebar, select the Settings tab.
Click Inject custom code.
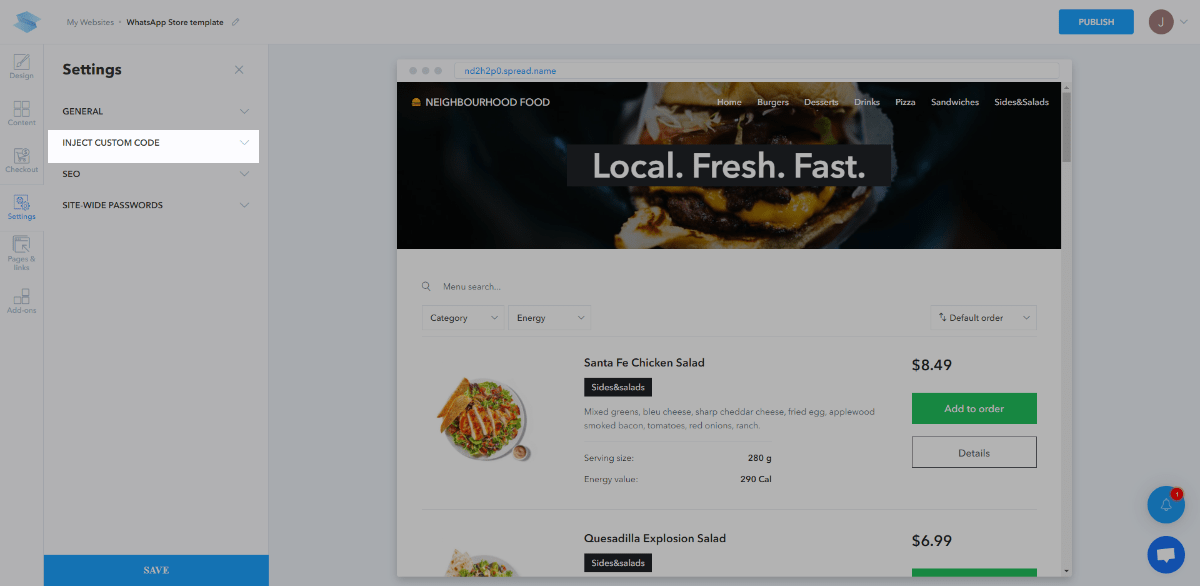
Paste your code in the </body> - end field, and click Save.

Click Publish to publish the changes.
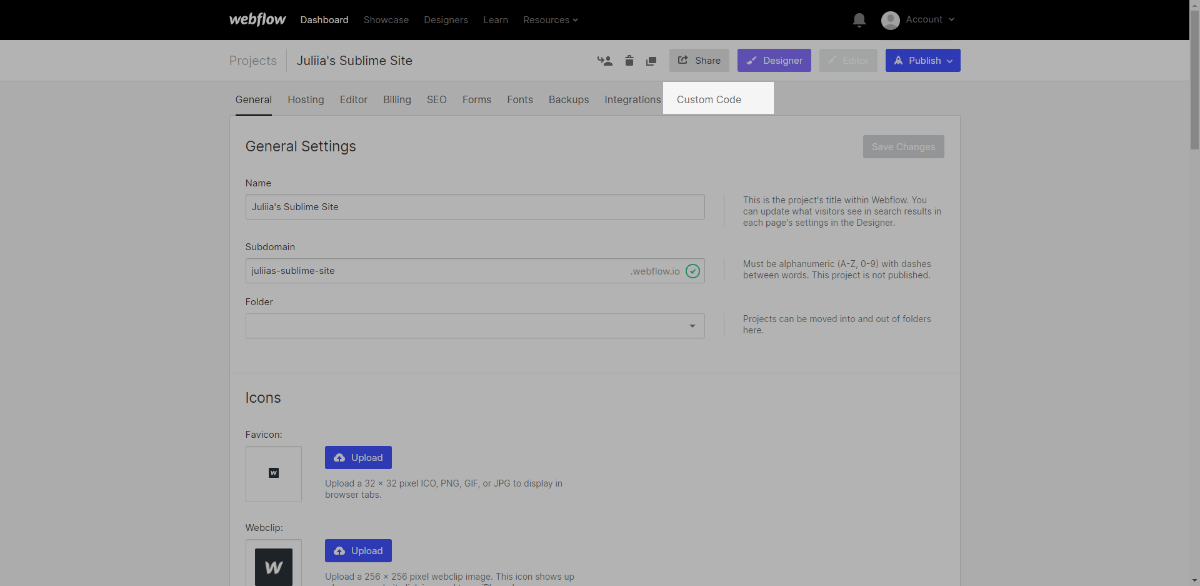
Webflow
You can add SendPulse’s pop-up code to your site only with paid Webflow plans.
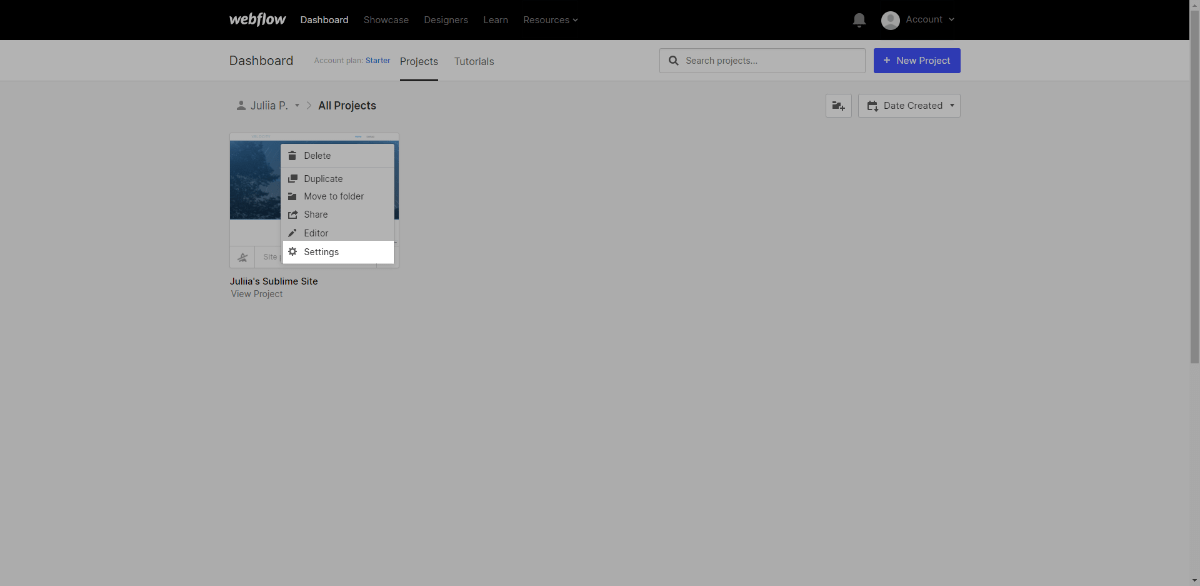
Log in to your Webflow account, find your project, click the three dots, and select Settings.
Go to the Custom Code tab.
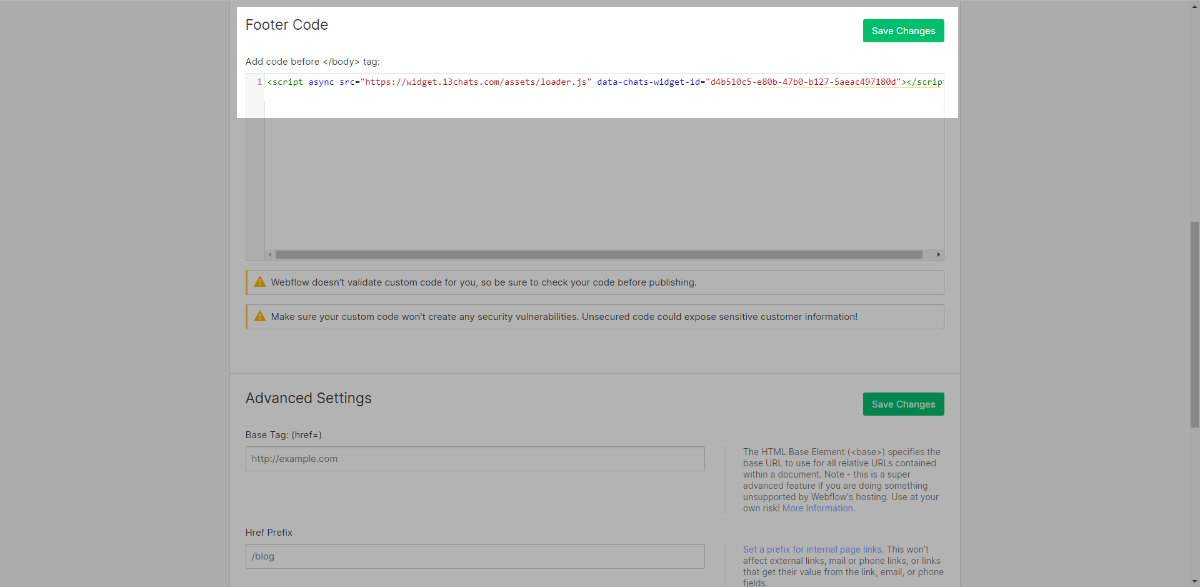
Paste your pop-up code into the Footer Code field, and click Save Changes.
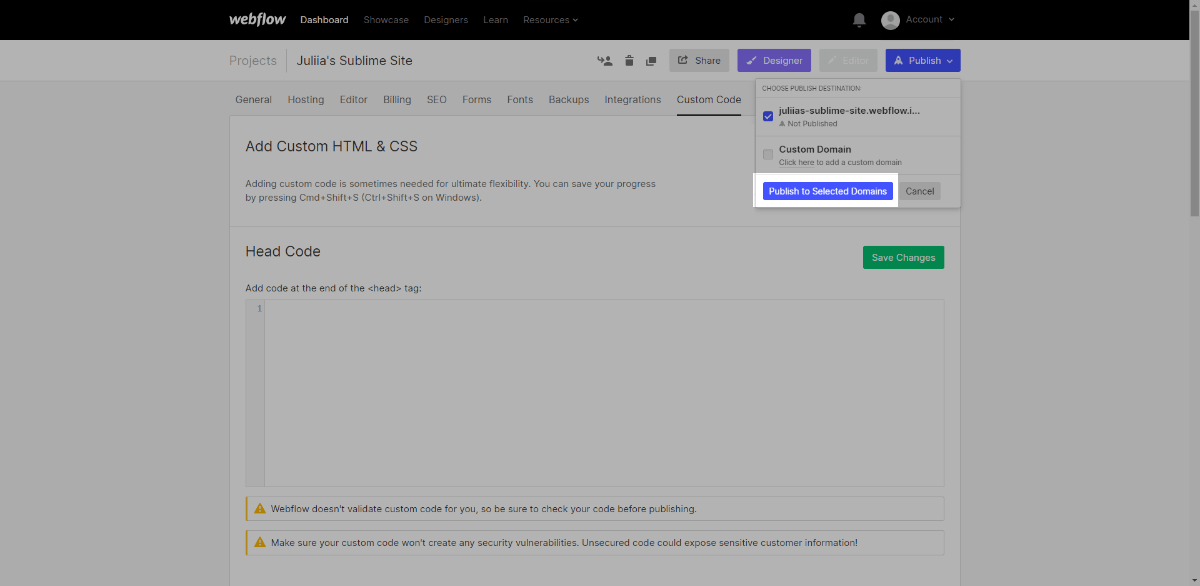
To show SendPulse-powered pop-ups on your website, publish your project. To do this, click Publish in the upper menu bar, select your project using its checkbox, and confirm the publication by clicking Publish to Selected Domain.
https://sendpulse.com/knowledge-base/pop-ups/settings/add-popup-to-sitebuilder
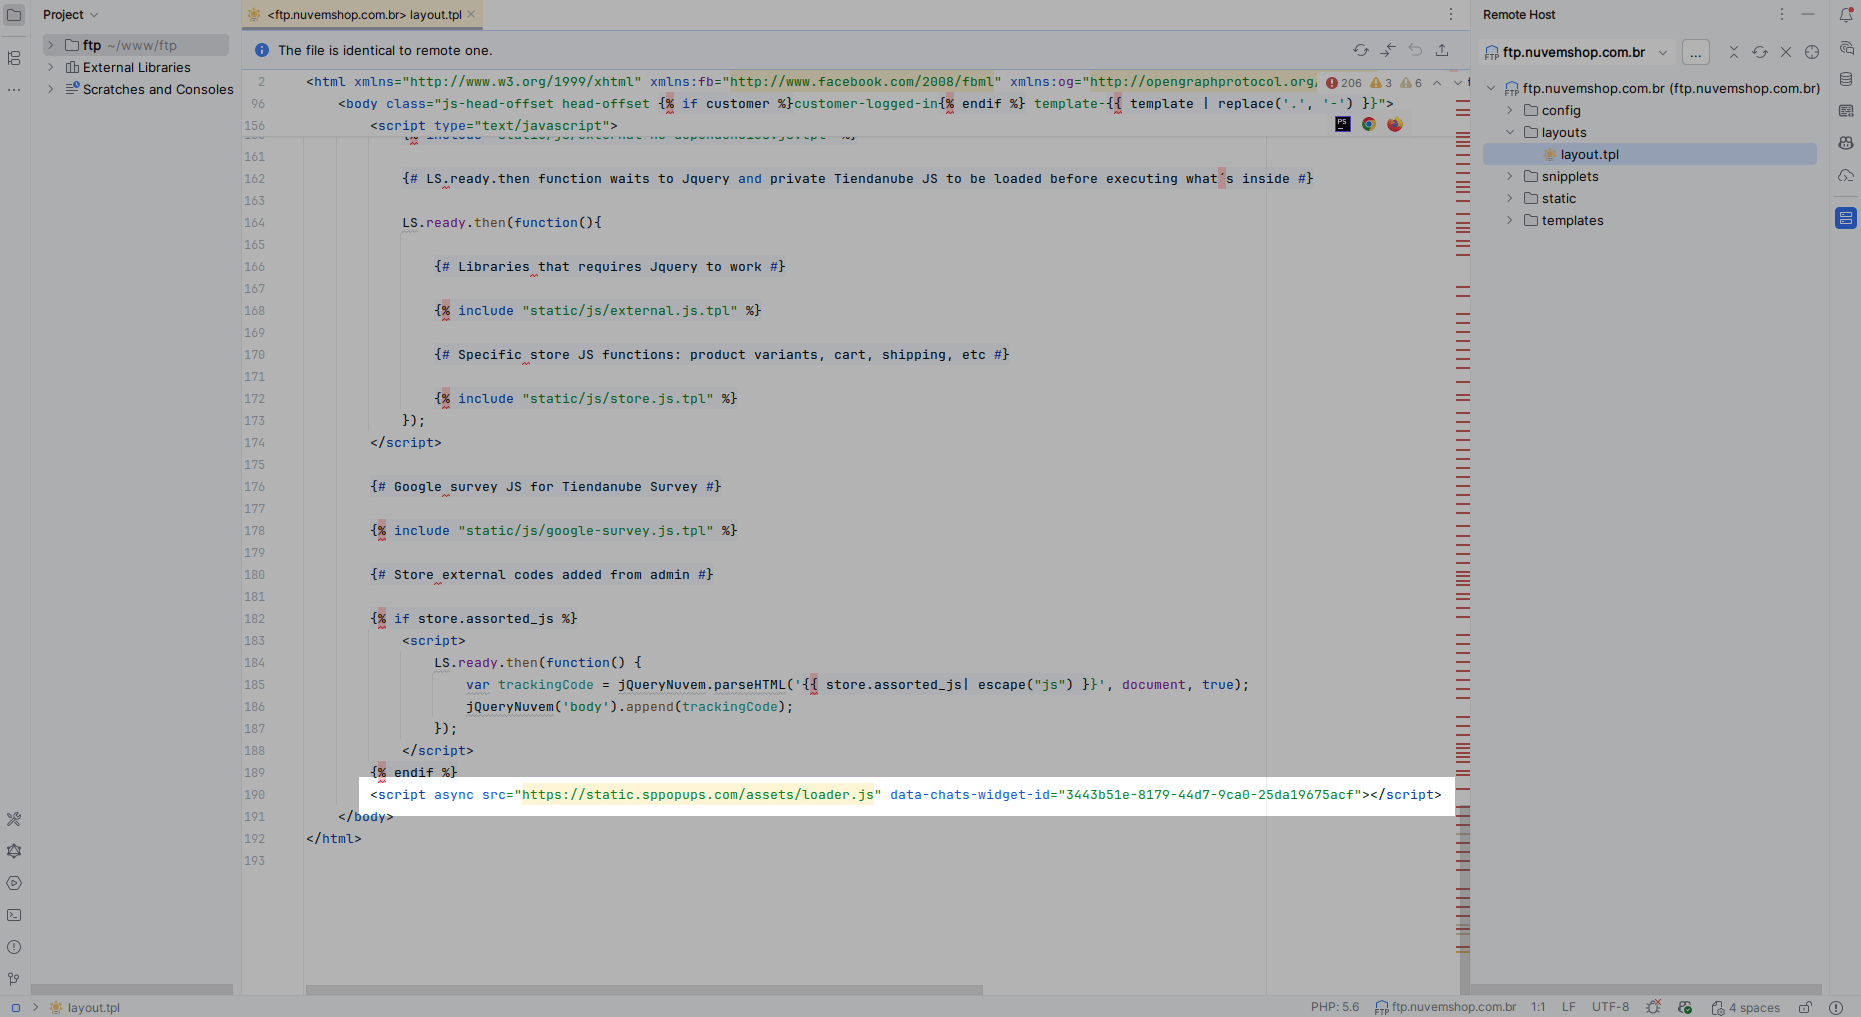
Nuvemshop
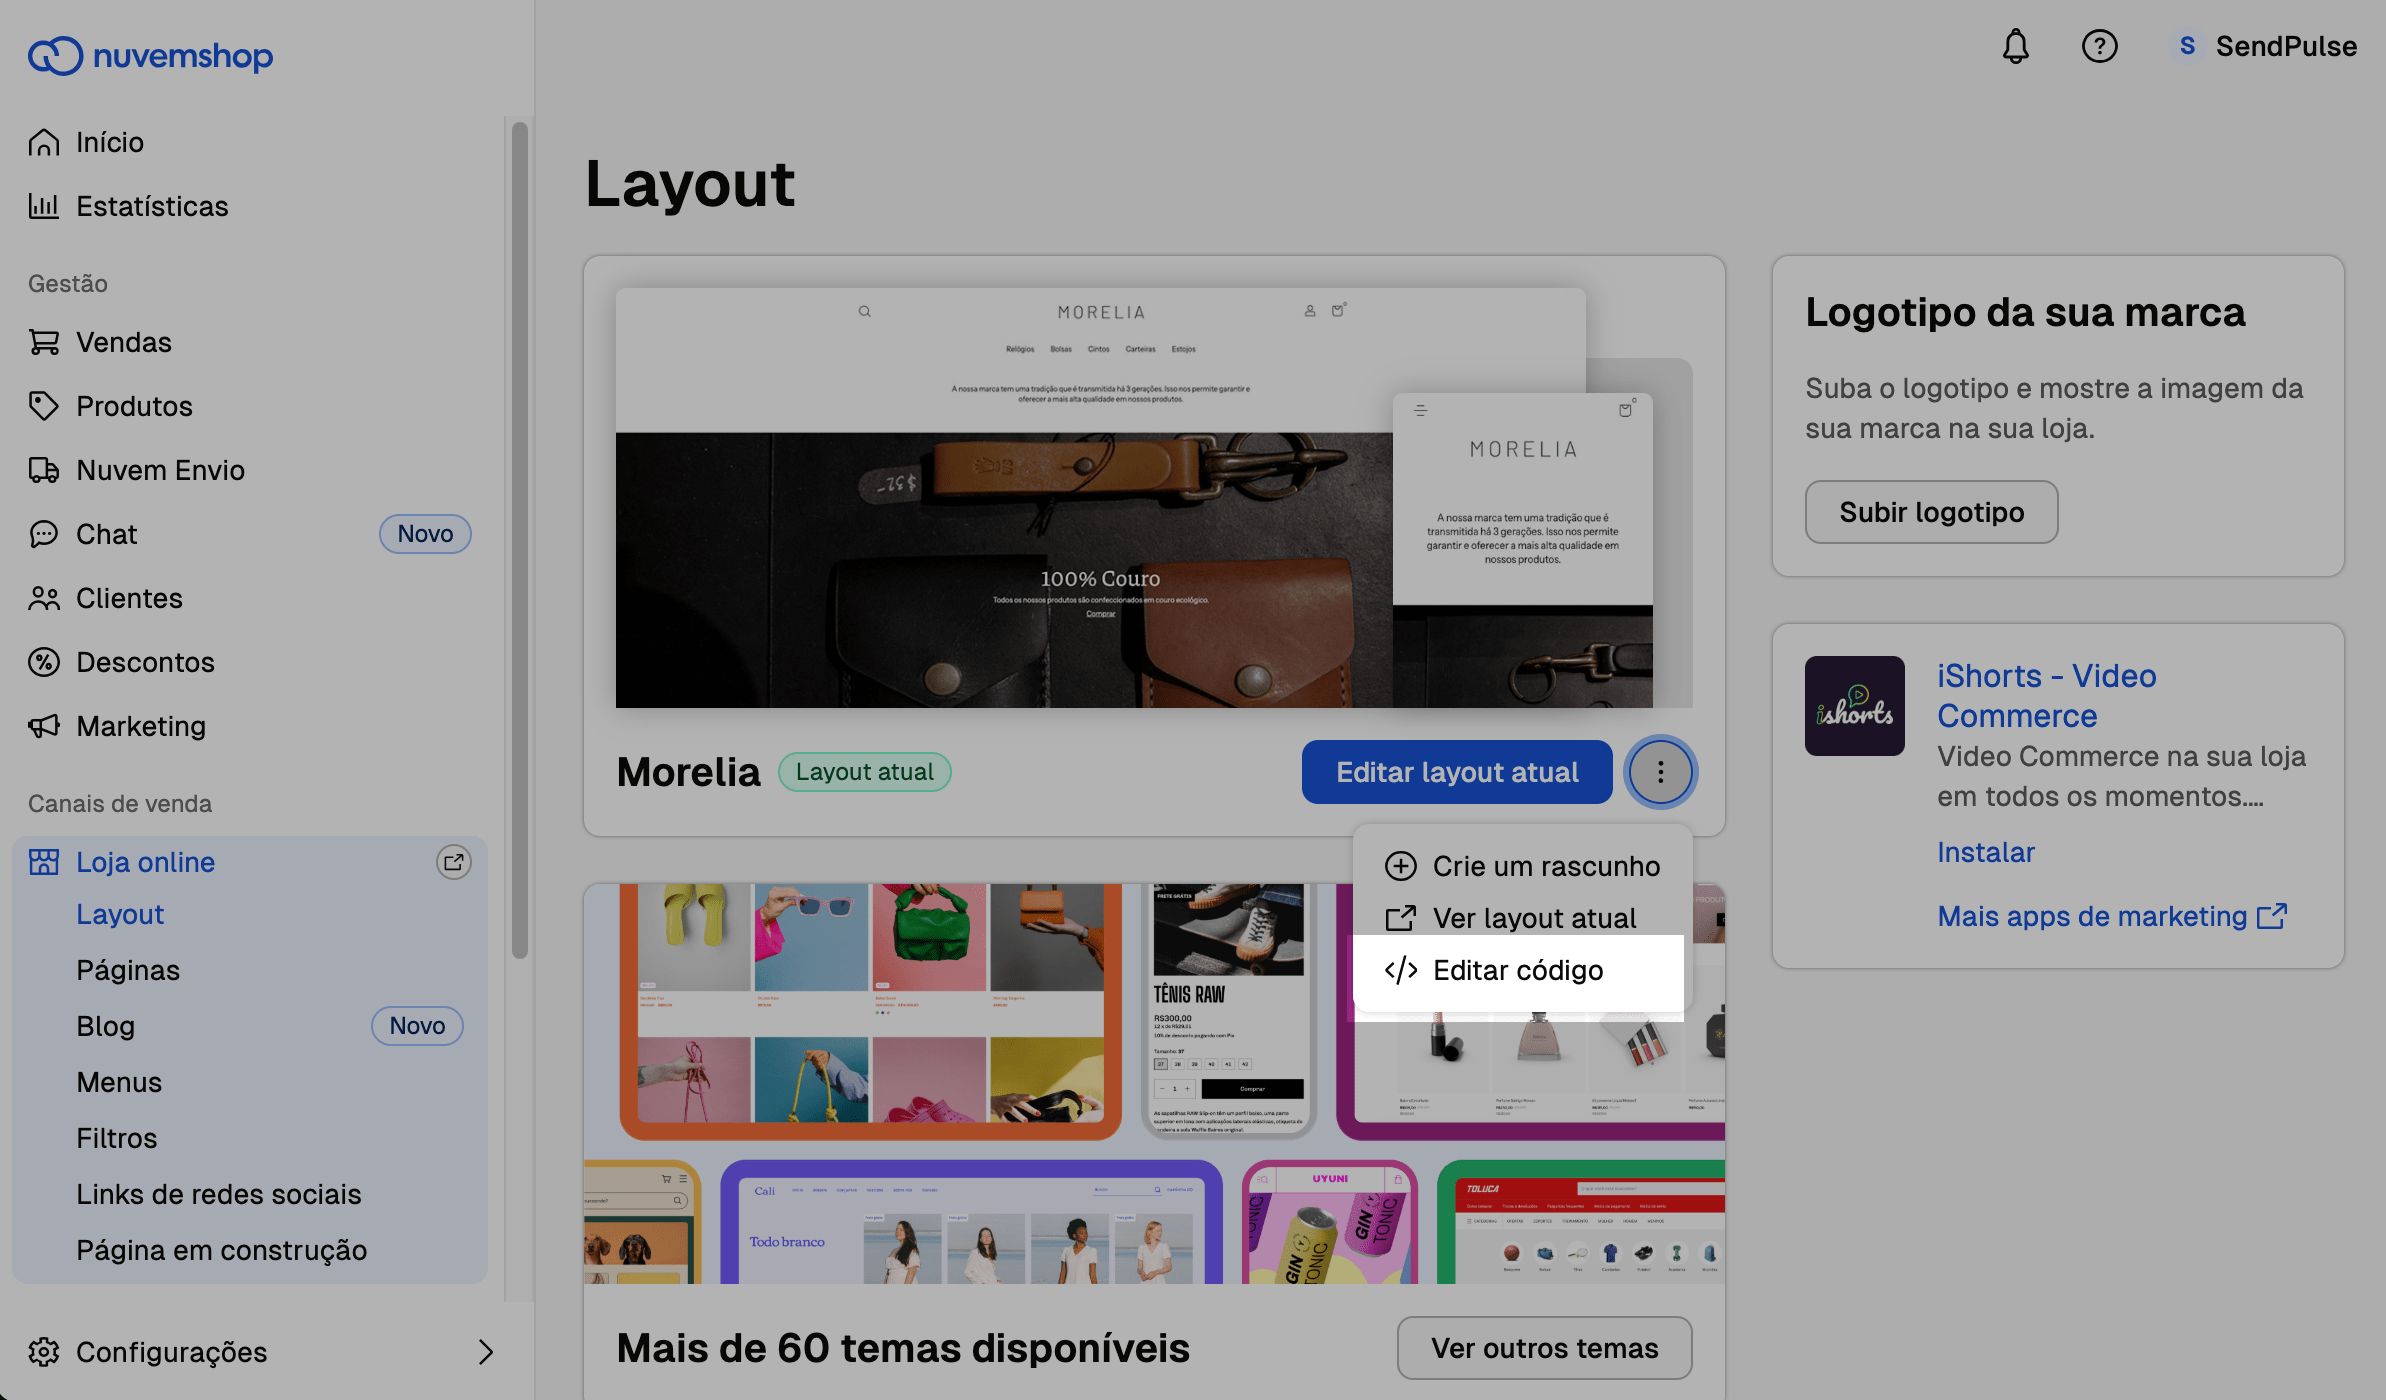
In your Nuvemshop store, go to Loja online > Layout. Find your layout, click the three dots, and select Editar código.
In the modal window, click Abrir FTP and download the layout file.
Open the layout in your editor through FTP. Scroll to the bottom of the file and paste the copied pop-up code right before the closing </body> tag. Then, upload the layout file back.
FTP is available only with paid pricing plans.
Drupal
In your Drupal admin dashboard, go to Structure > Block layout. Next to Footer Bottom, click Place block.
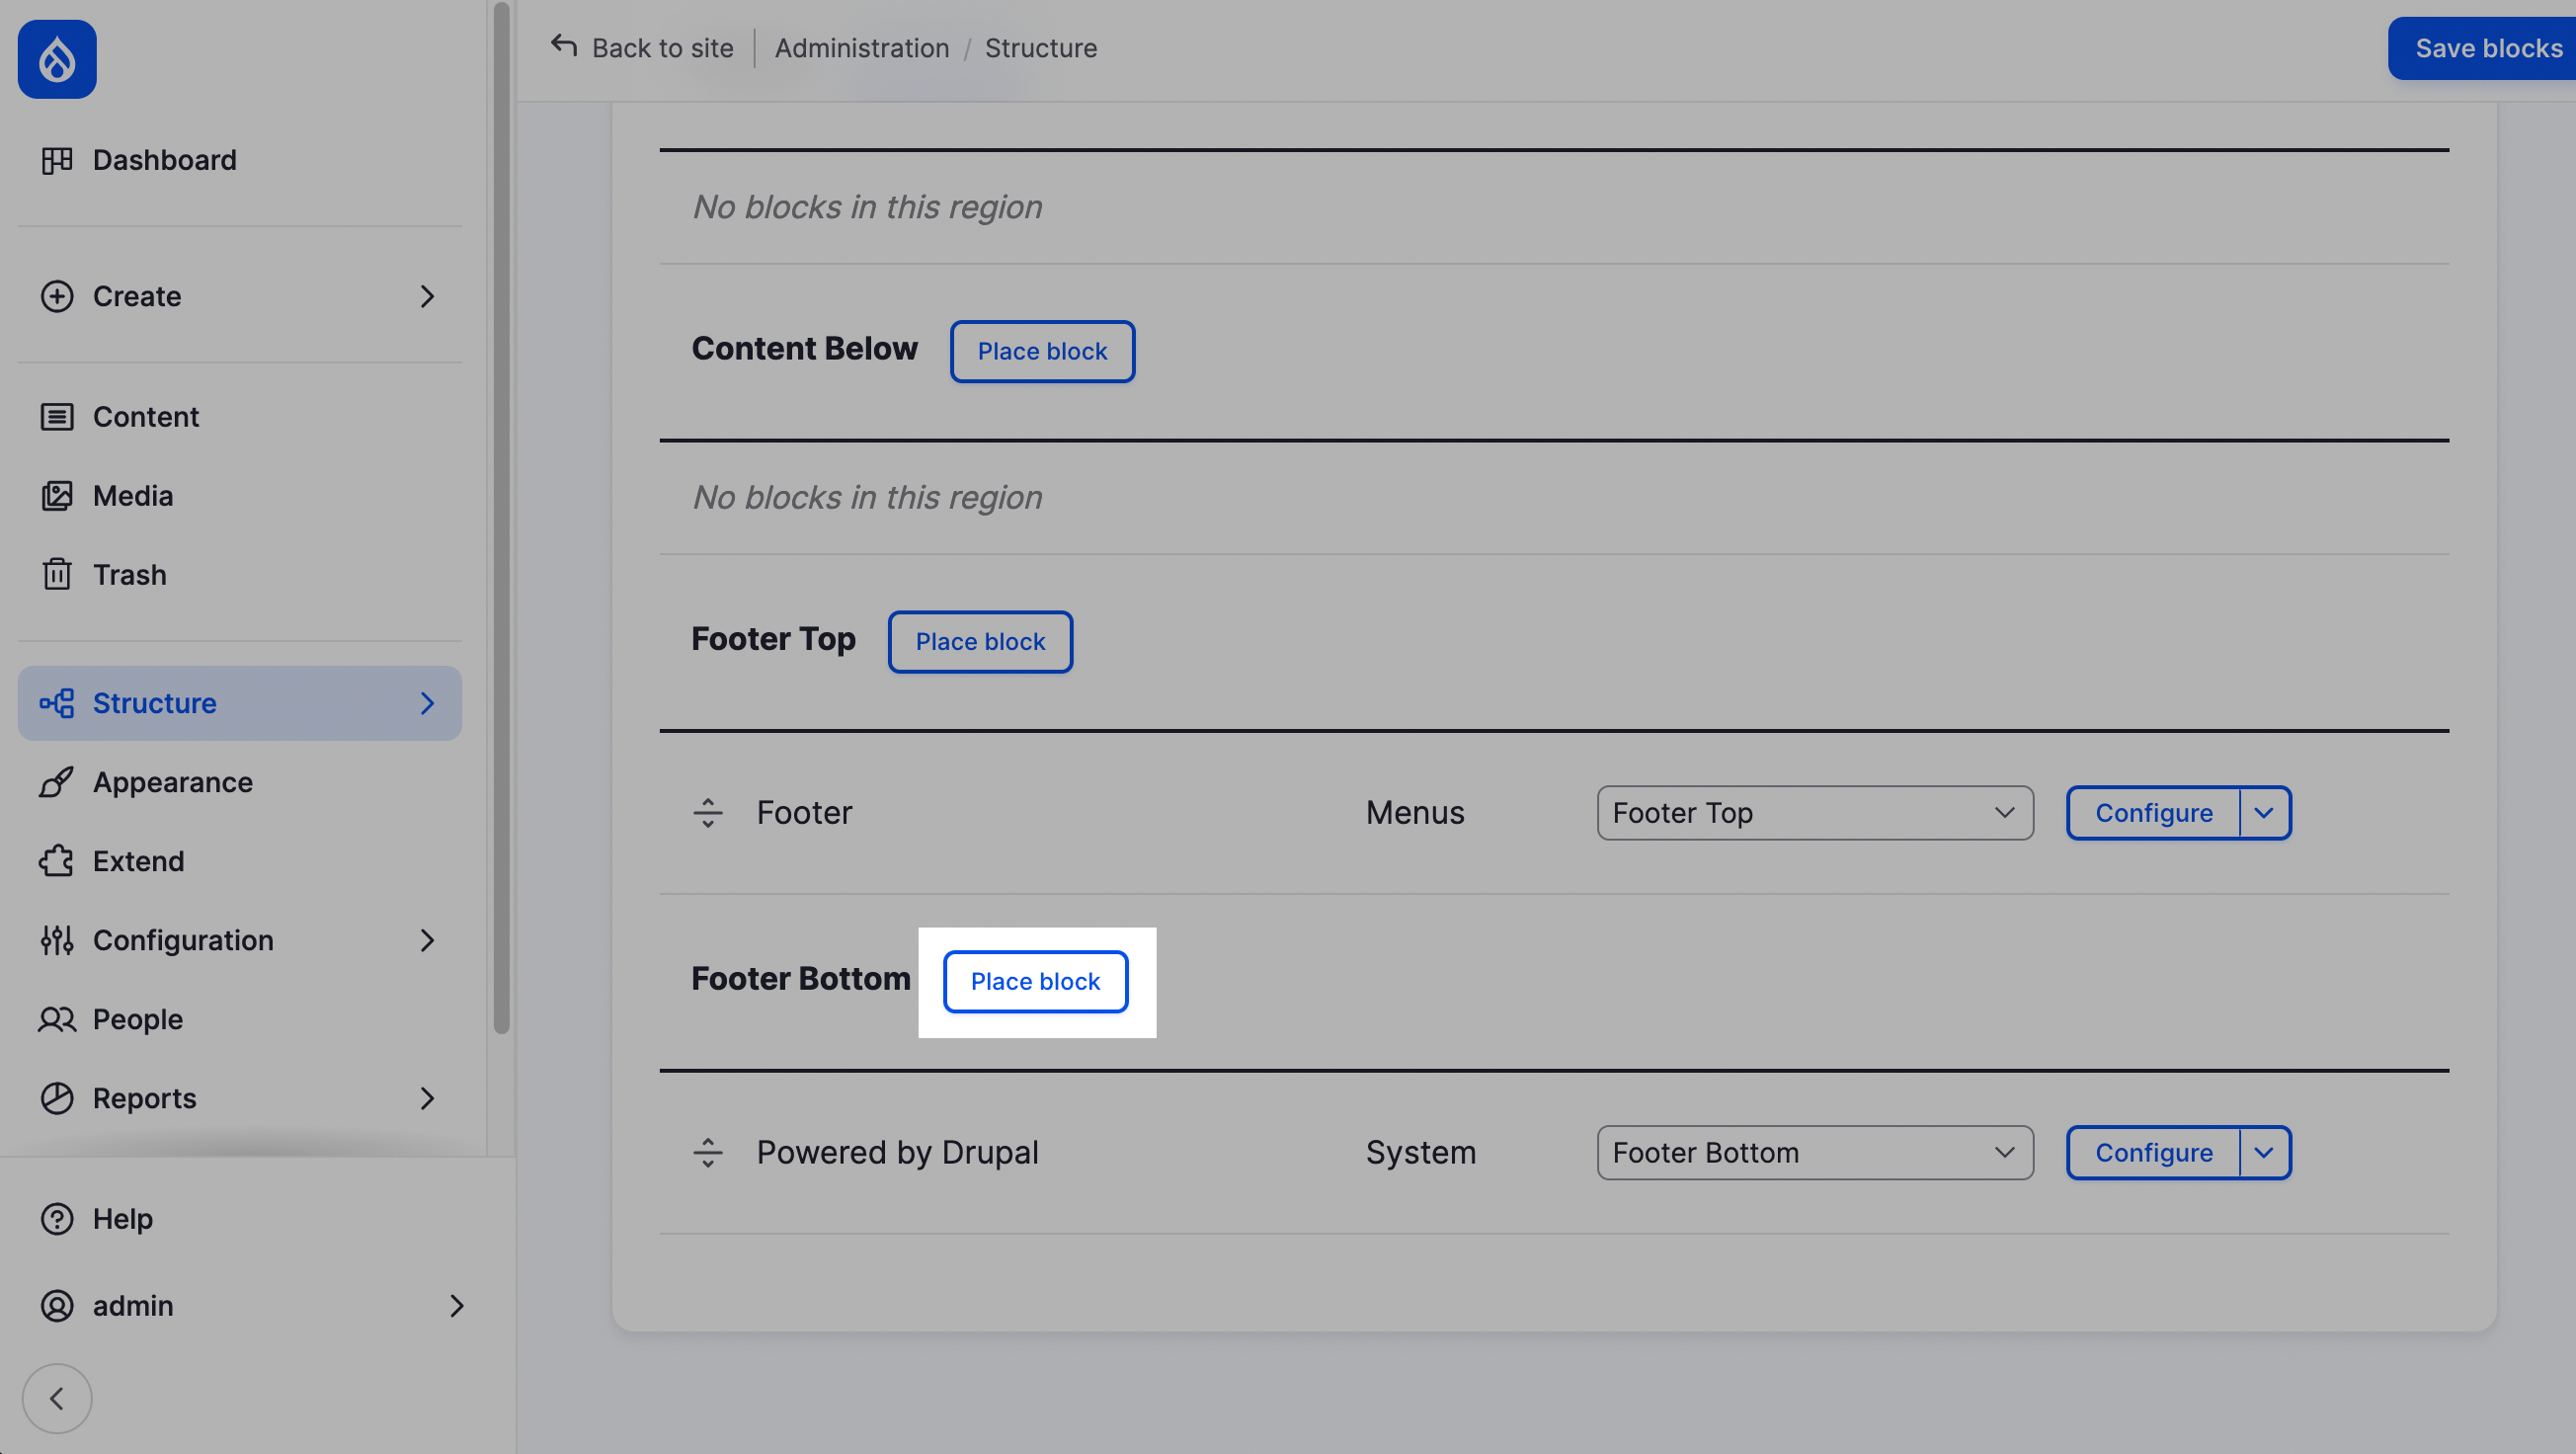
In the modal window, click Add content block.
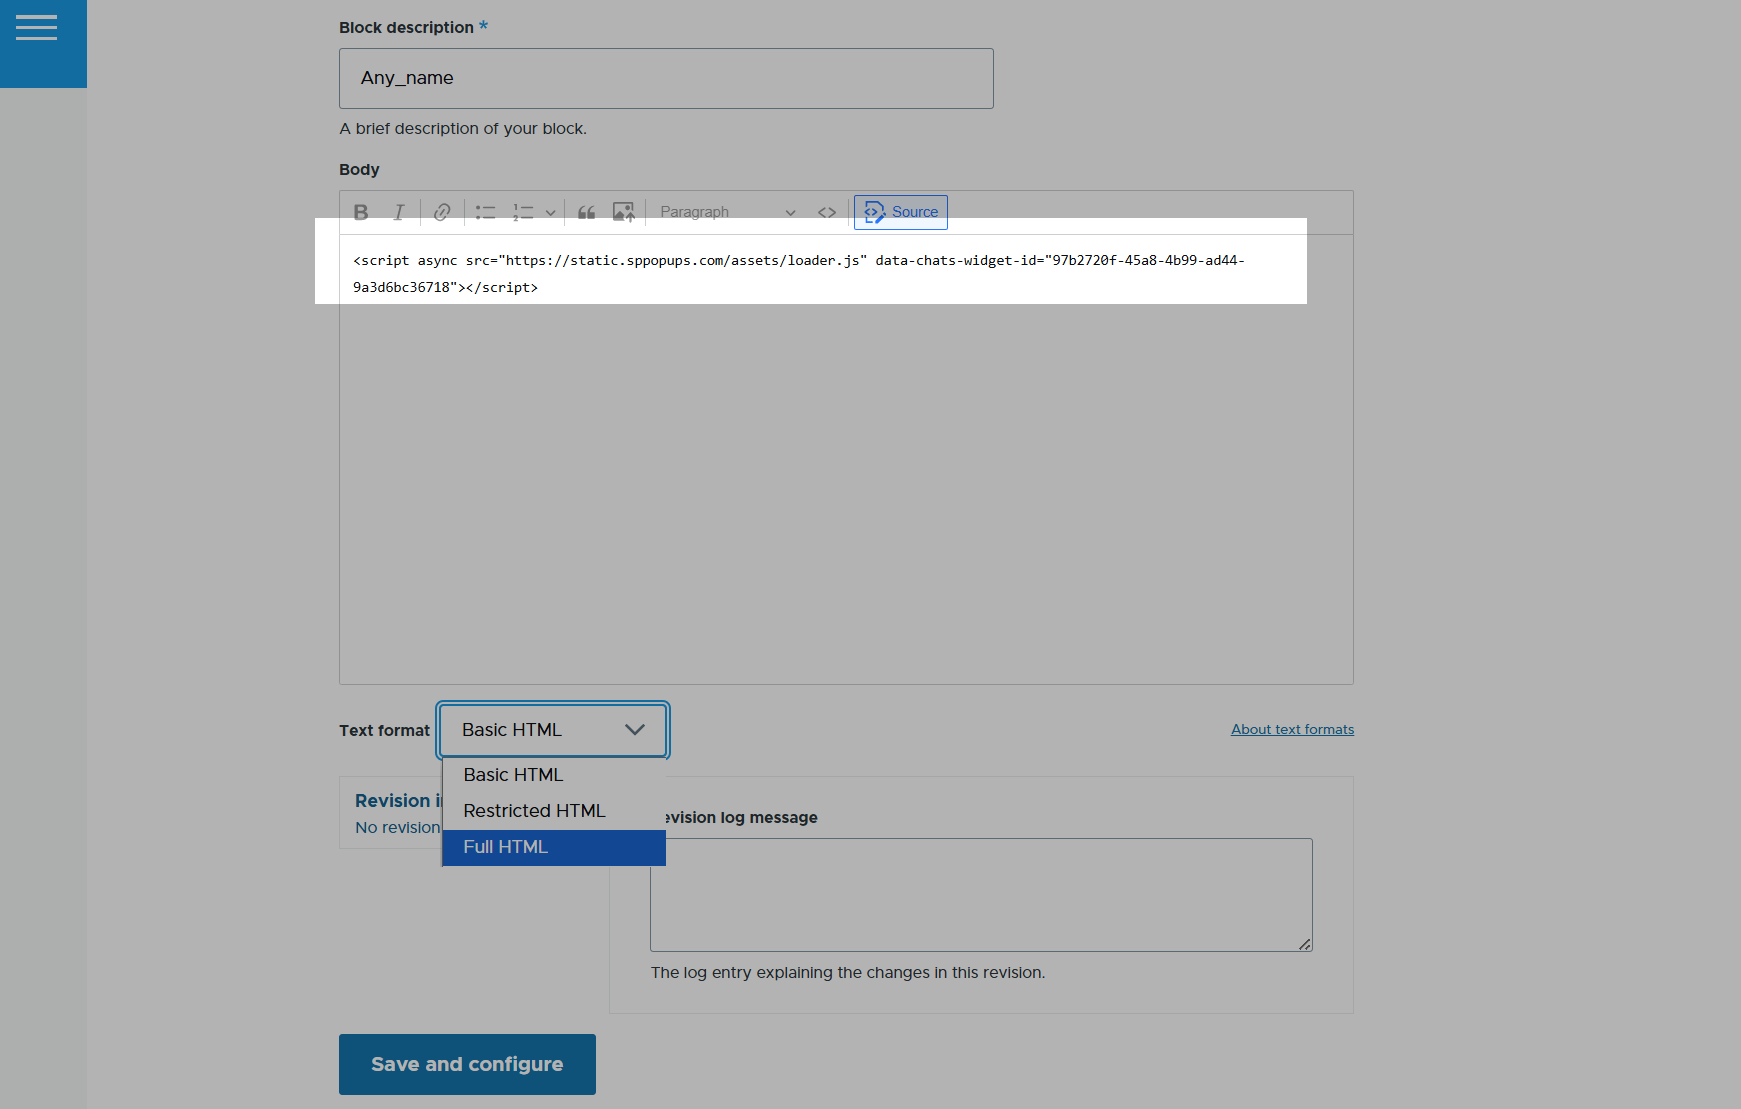
In the Block description field, enter a block name. In the Body field, click Source. Next to Text format, select Full HTML and paste the copied pop-up code. Save the changes.
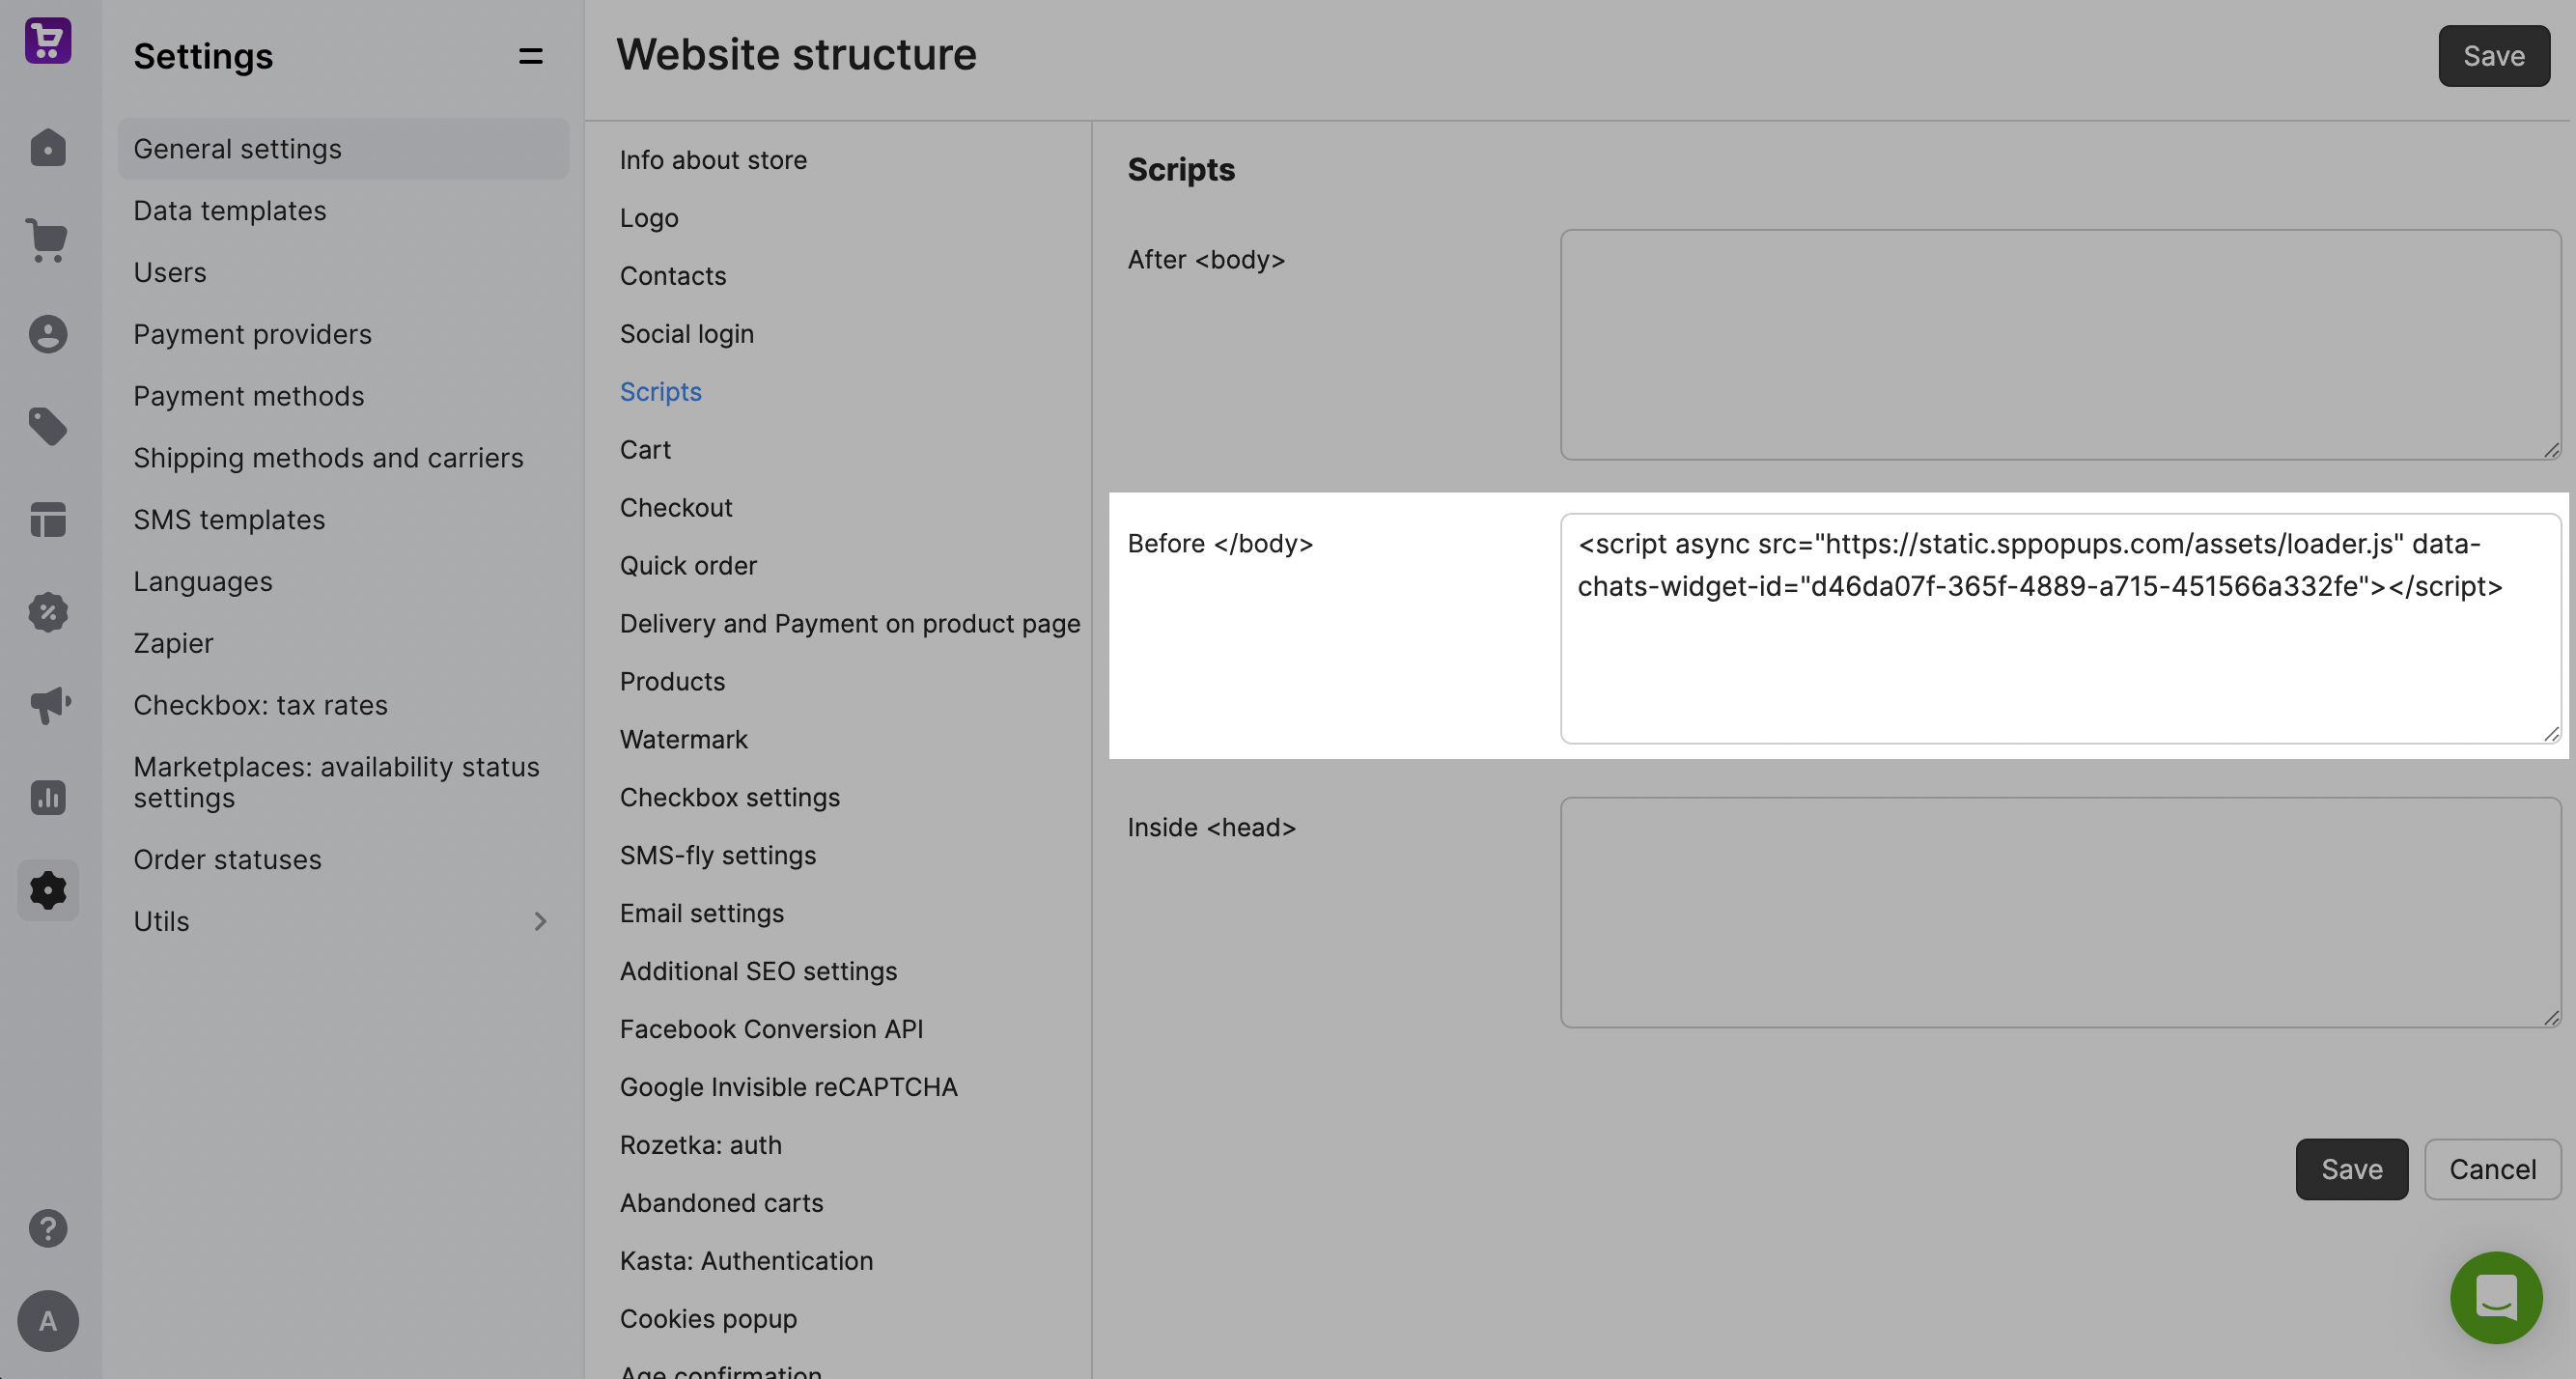
Horoshop
In your Horoshop account, go to Settings > General settings > Scripts. Next to Before </body>, paste the copied pop-up code. Save the changes.
BigCommerce
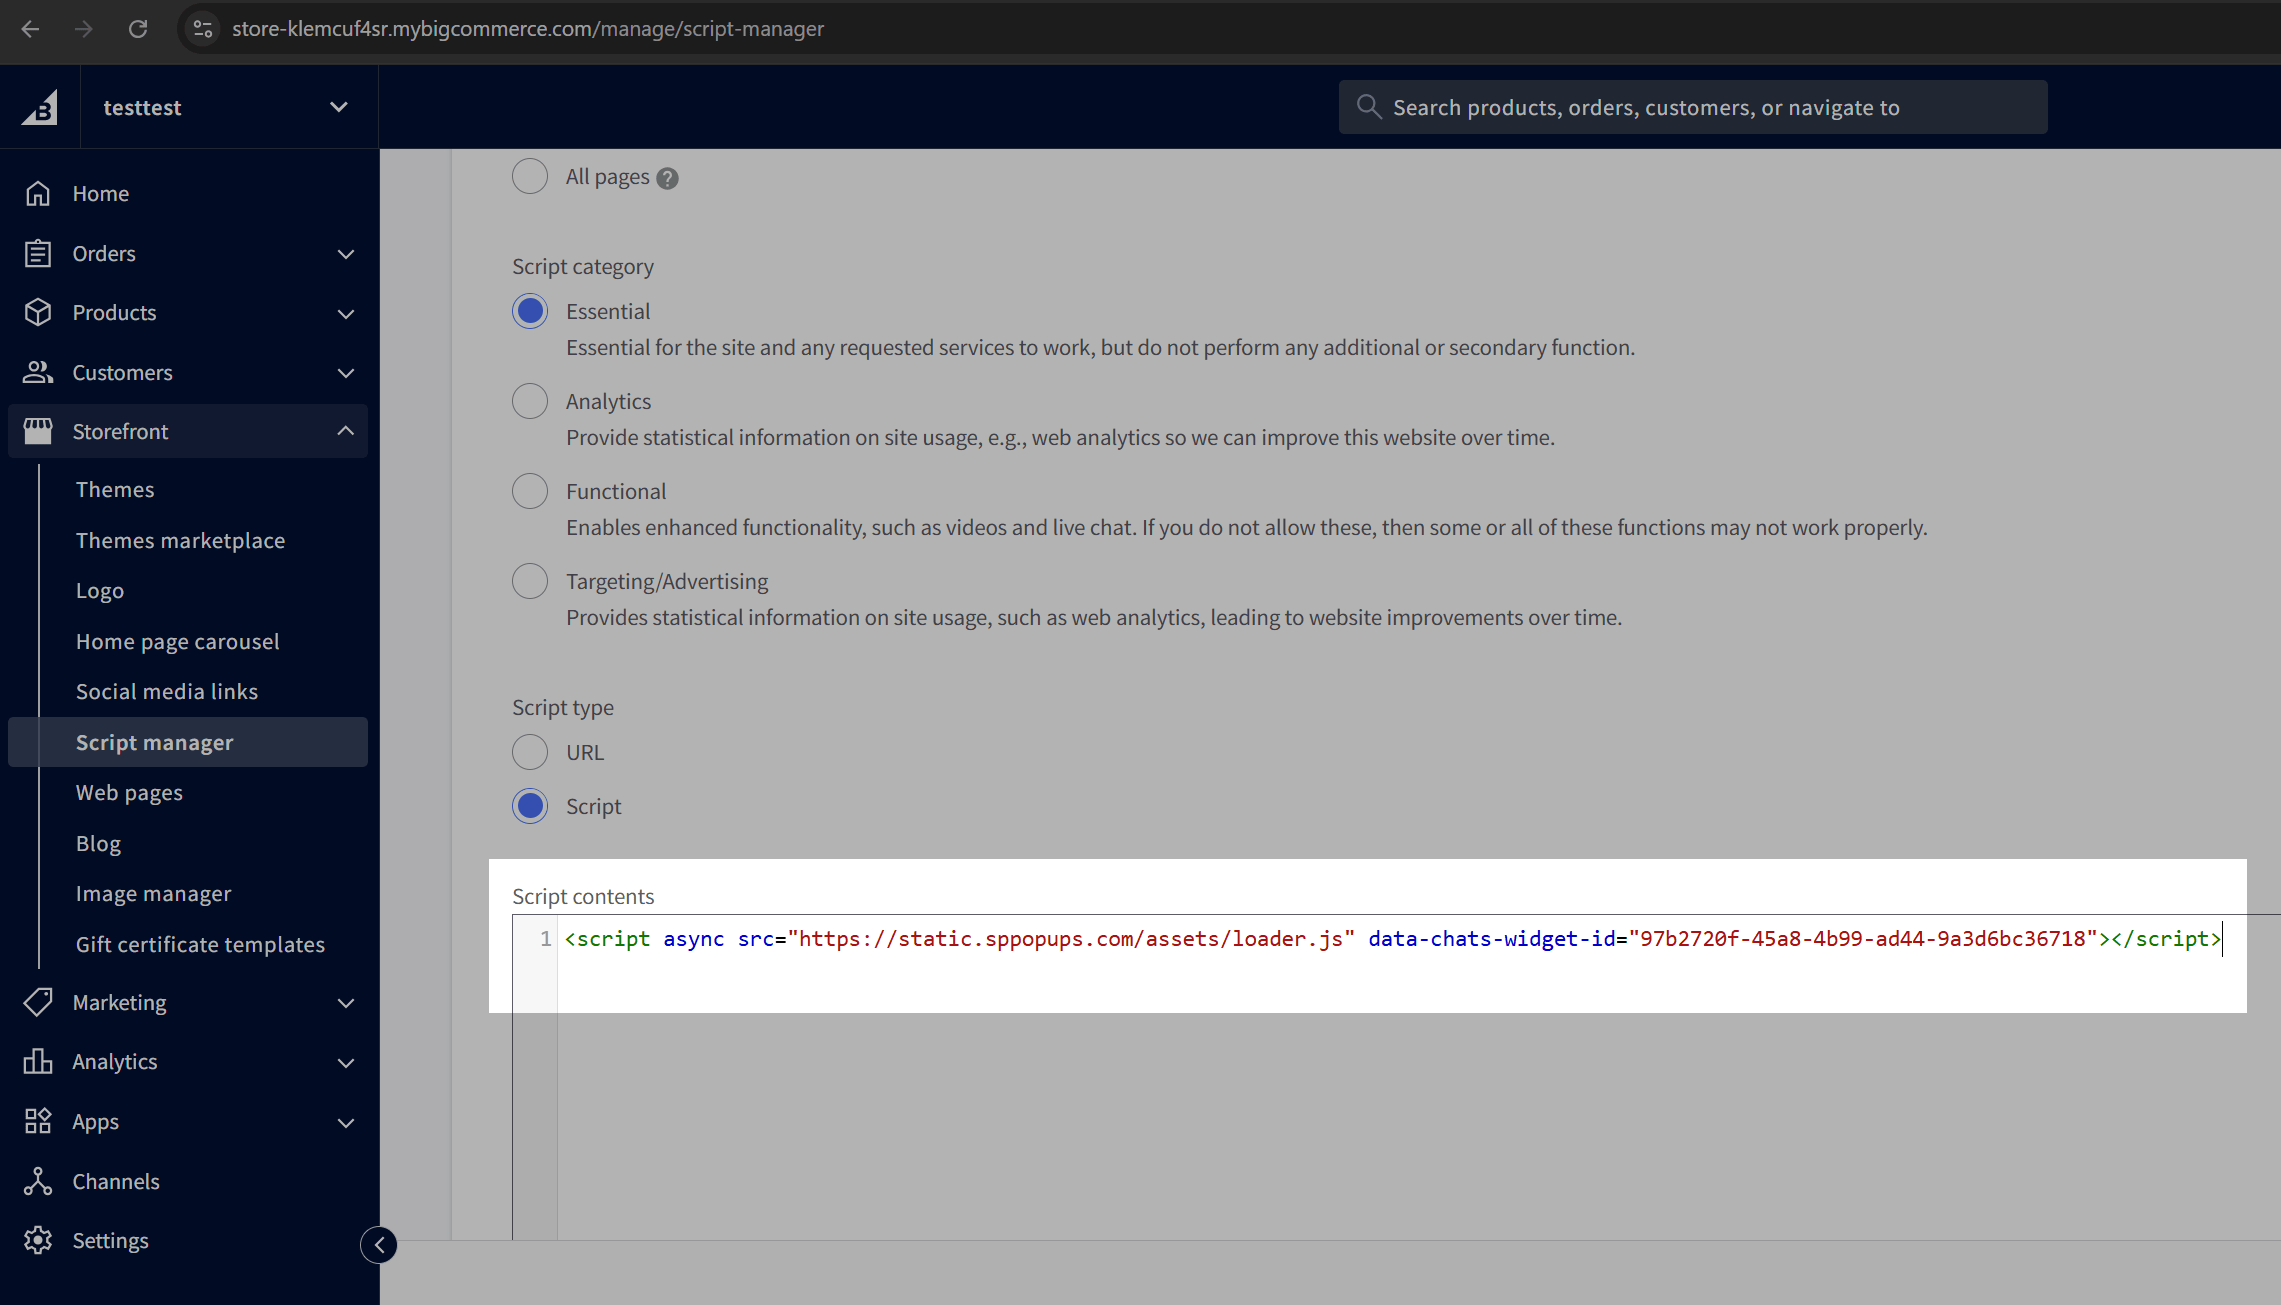
In your BigCommerce account, go to Storefront > Script manager and click Create a script.
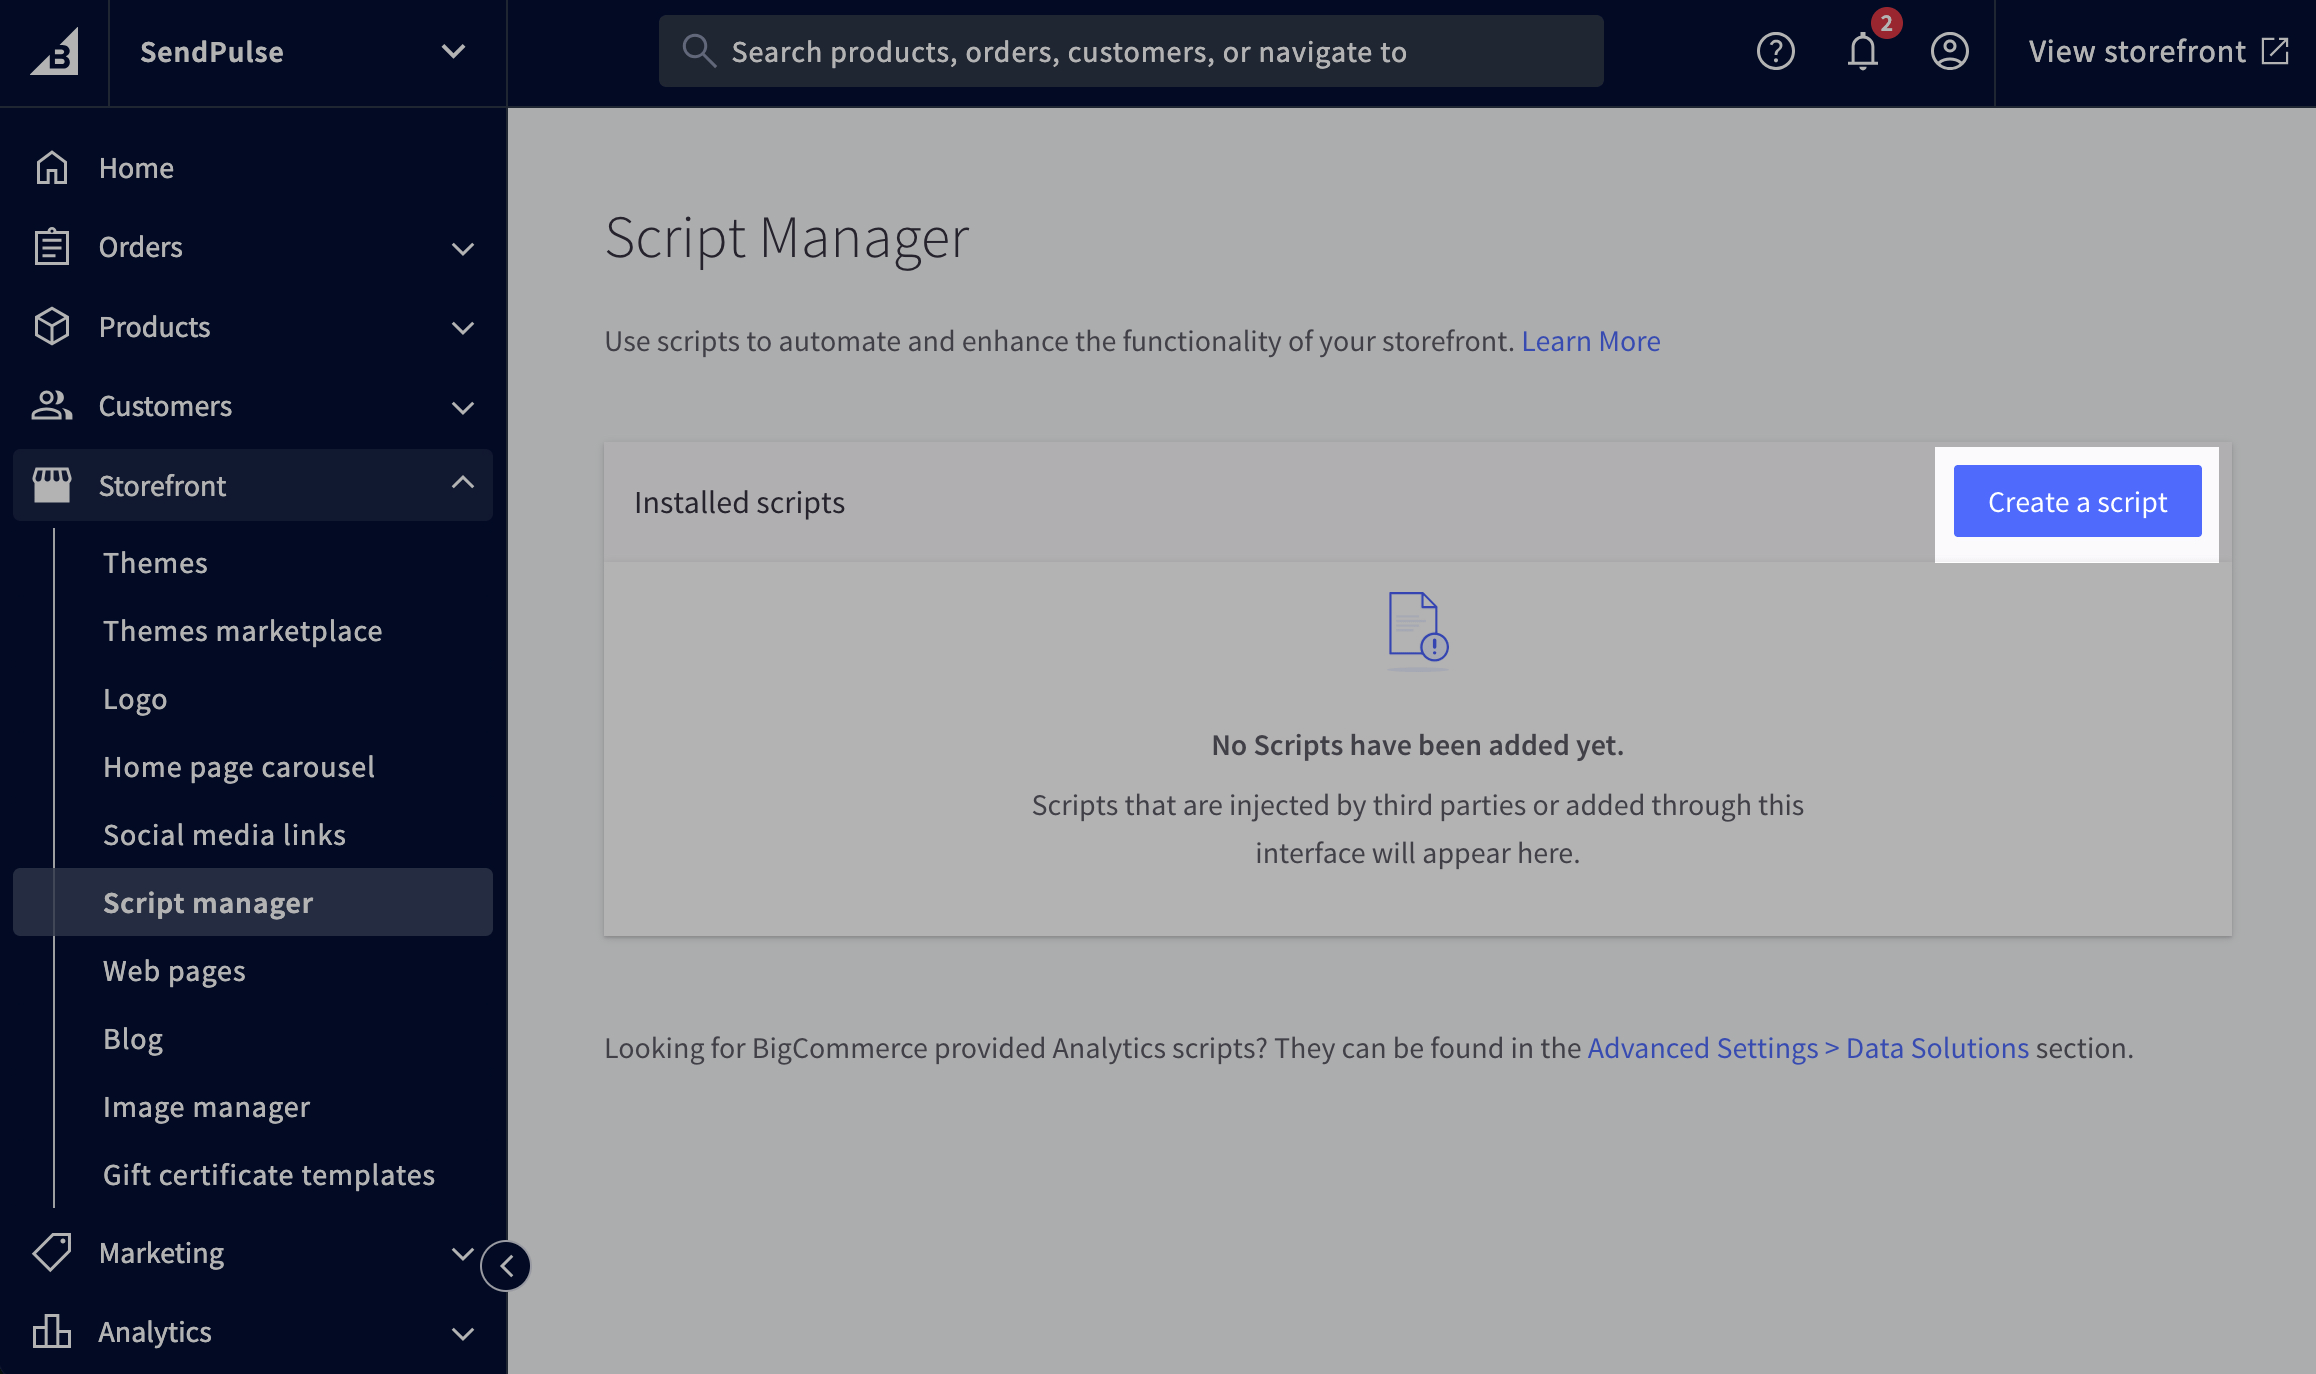
Enter a script name, then select a script location and type. In Script contents, paste the copied pop-up code and save the changes.
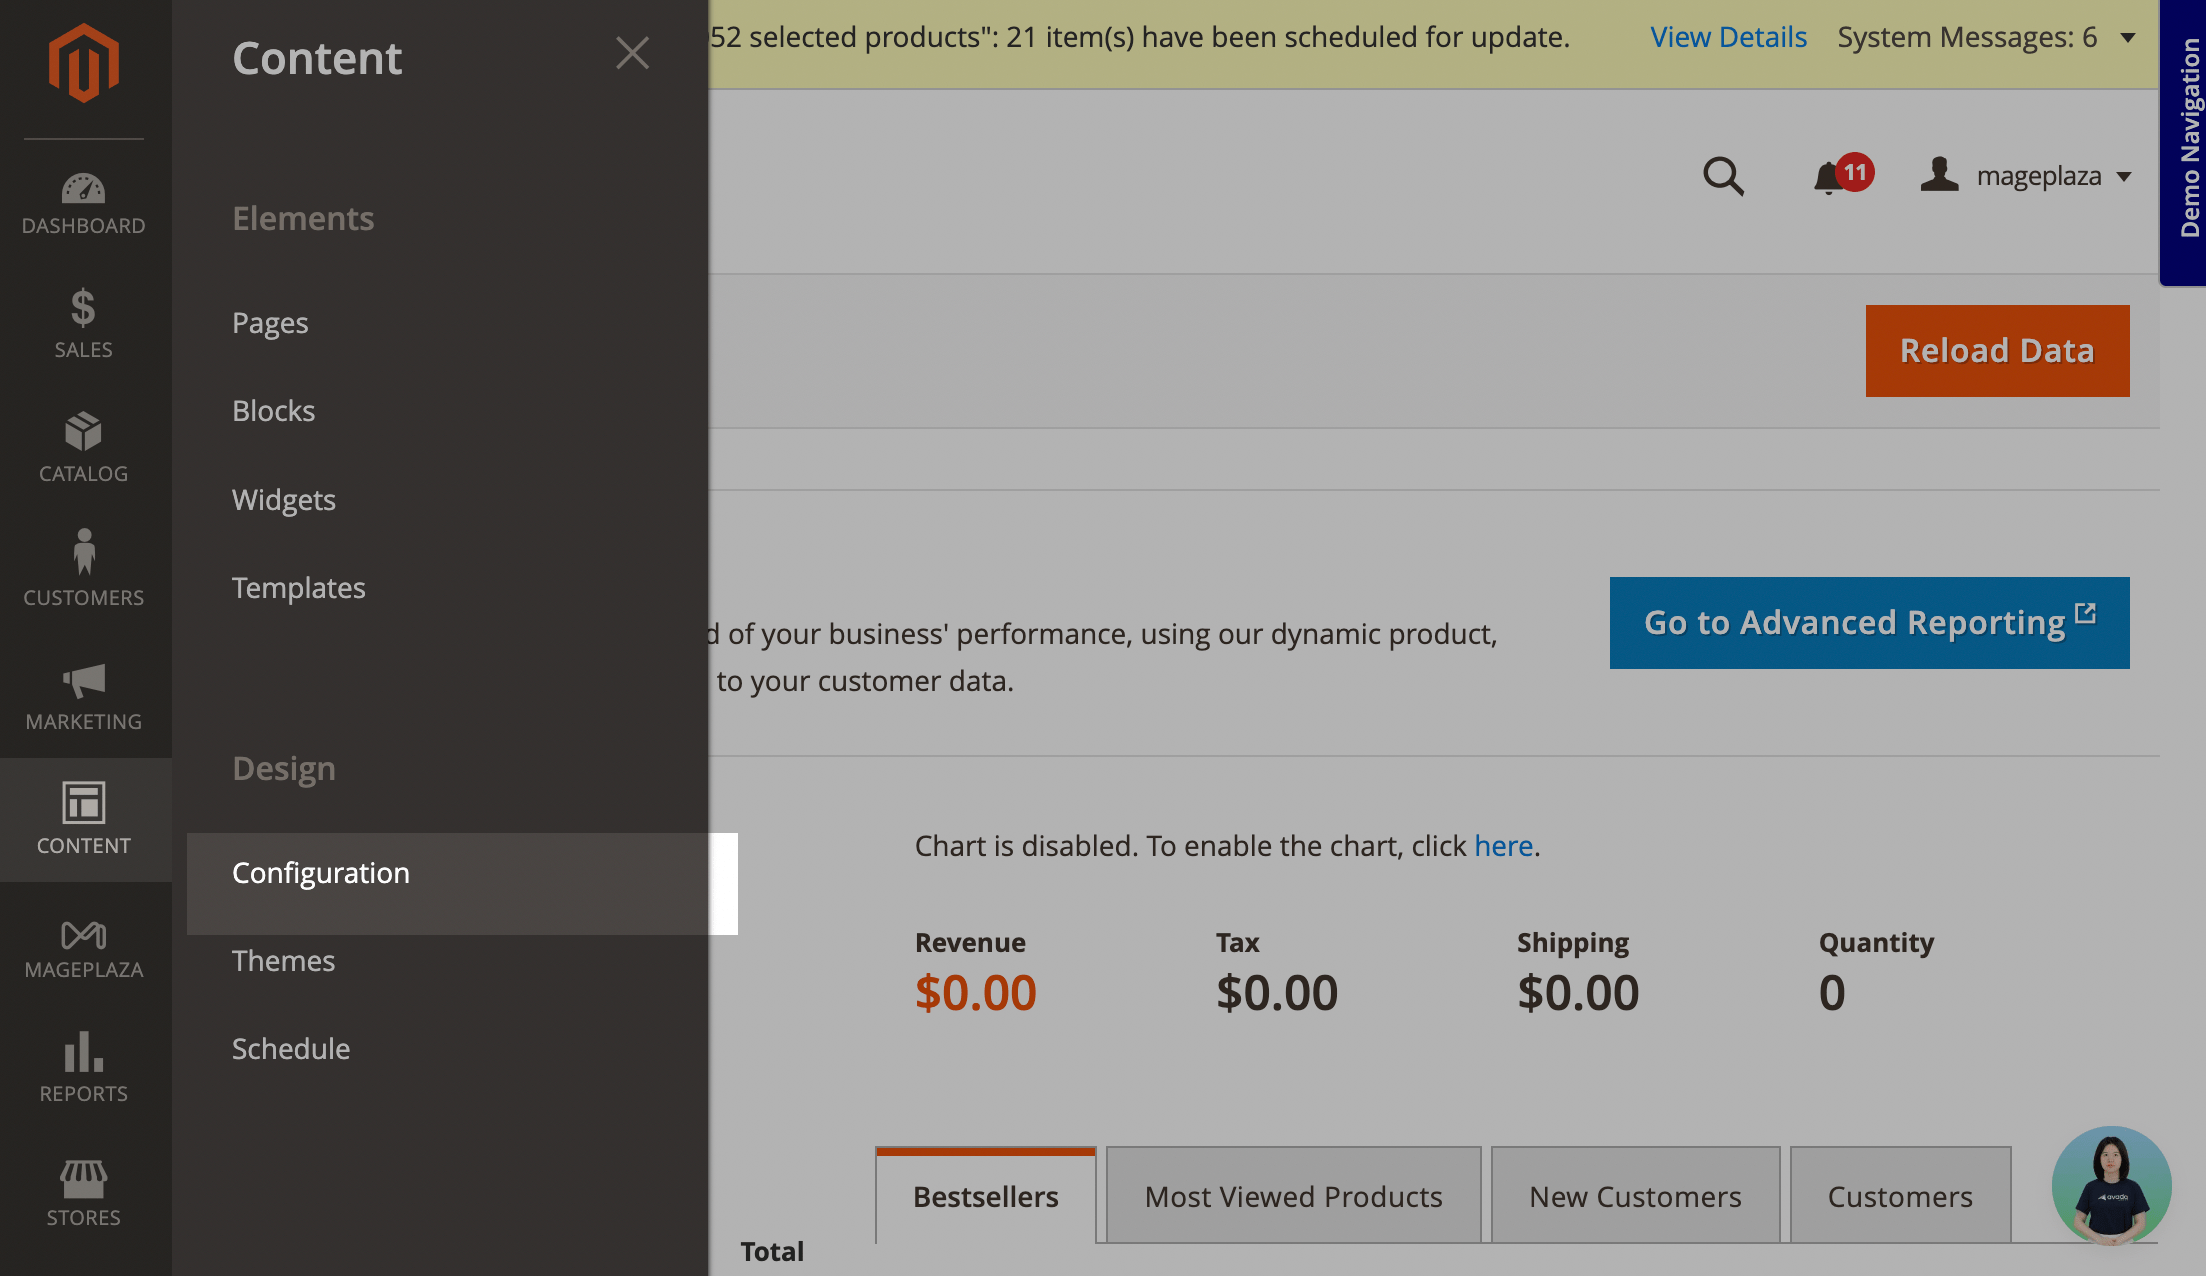
Magento
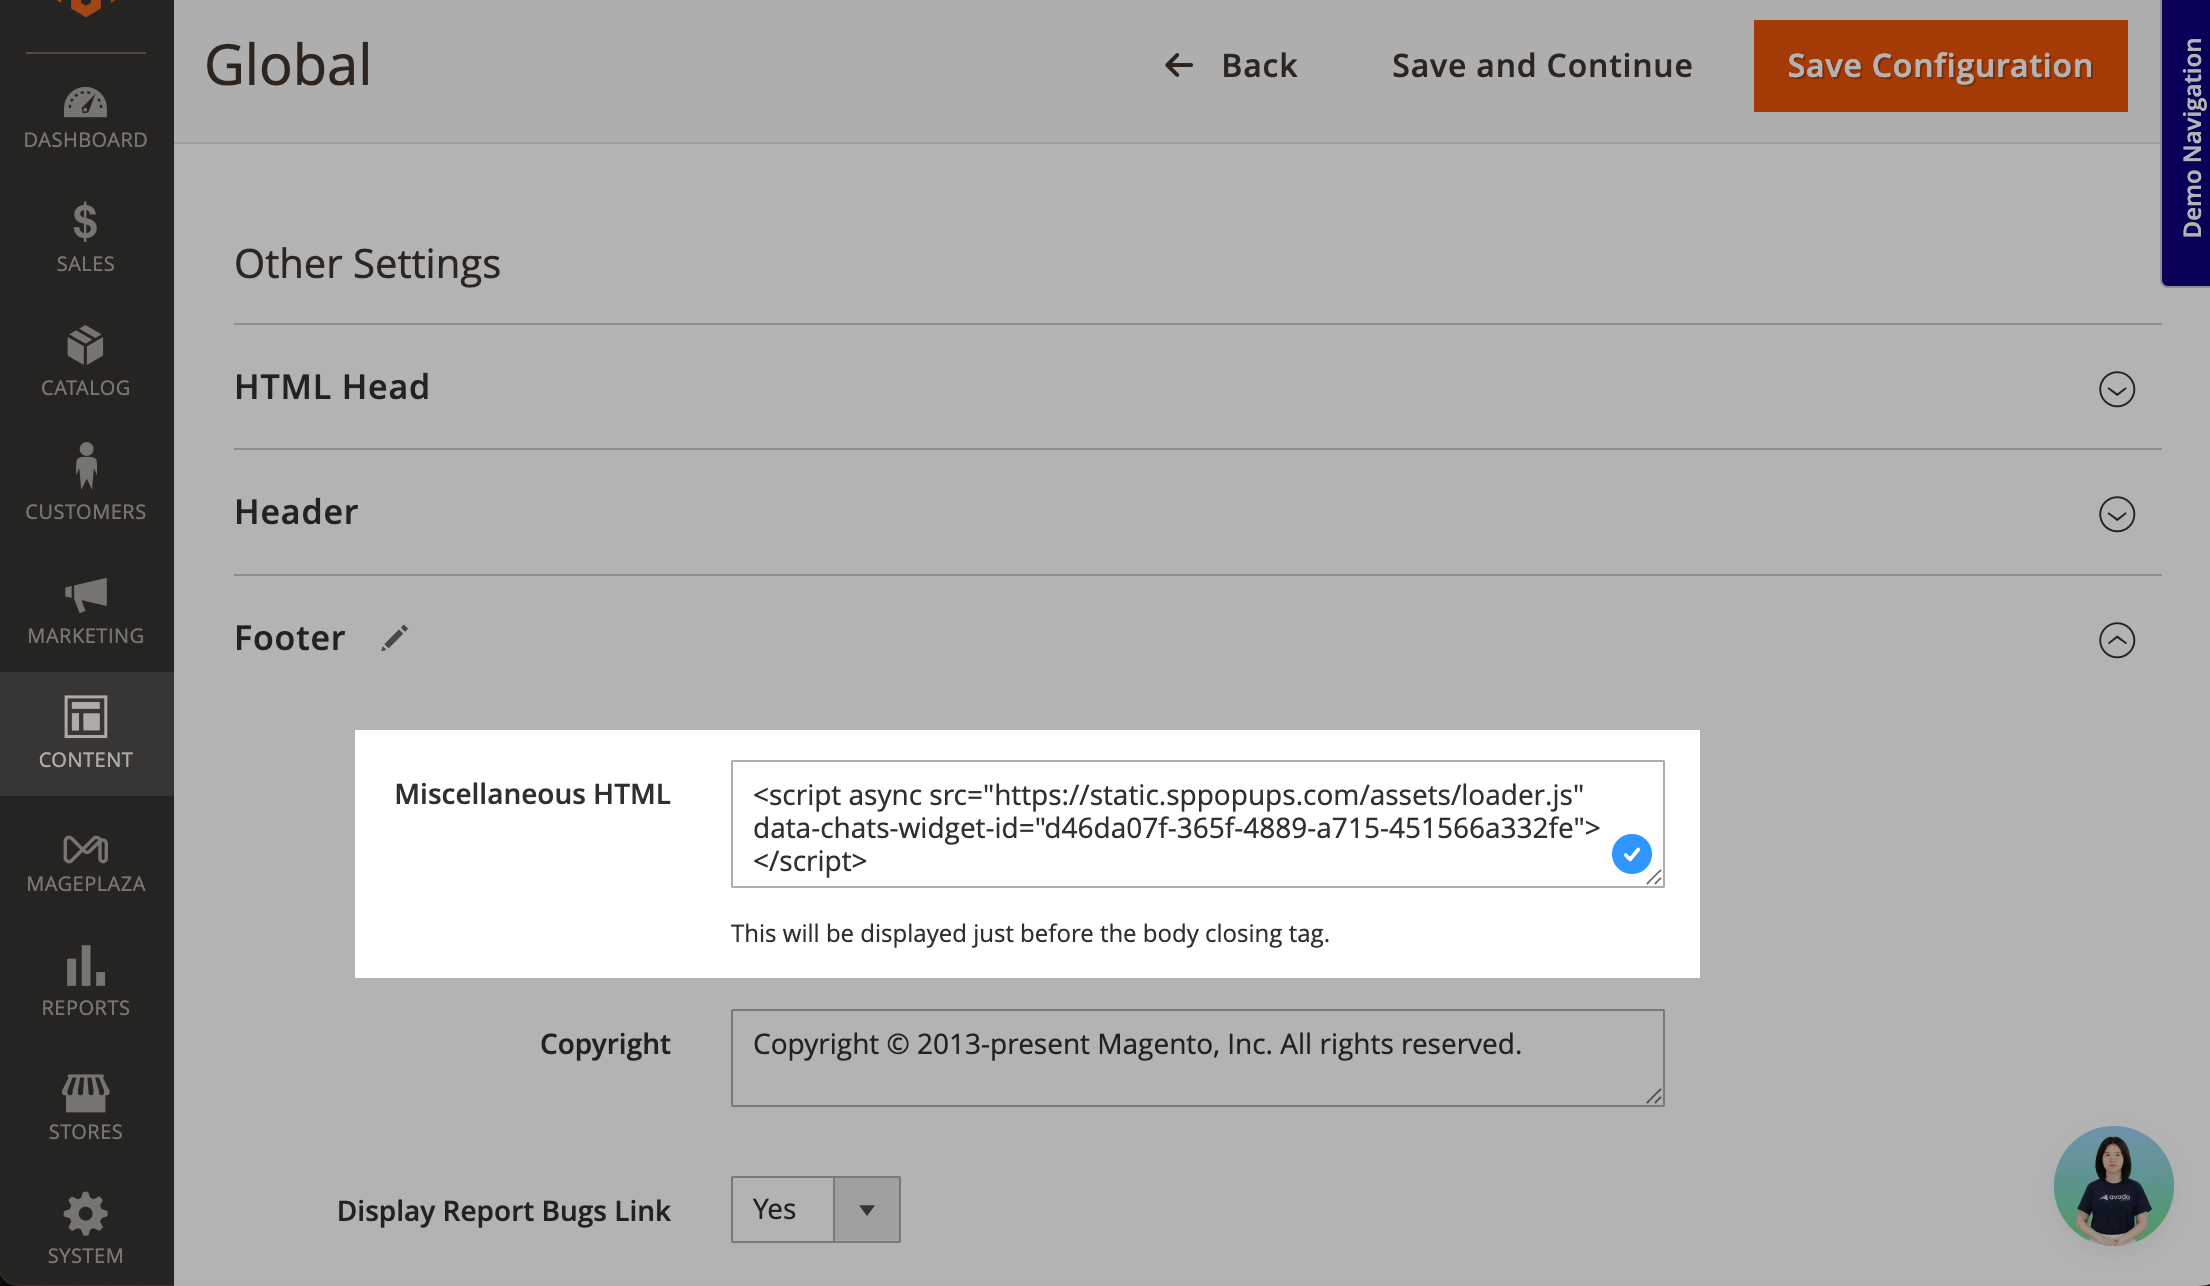
In your Magento admin dashboard, go to Content > Configuration.
Next to your website, click Edit. Expand Footer, and in Miscellaneous HTML, paste the copied pop-up code. Save the changes.
Then, you need to clear Magento cache. Go to System > Cache Management and click Flush Magento cache.
GoDaddy
In GoDaddy, you can add only embedded pop-ups.
Go to GoDaddy and click Add Section. Scroll down to Files & Web, select HTML, and click Add.
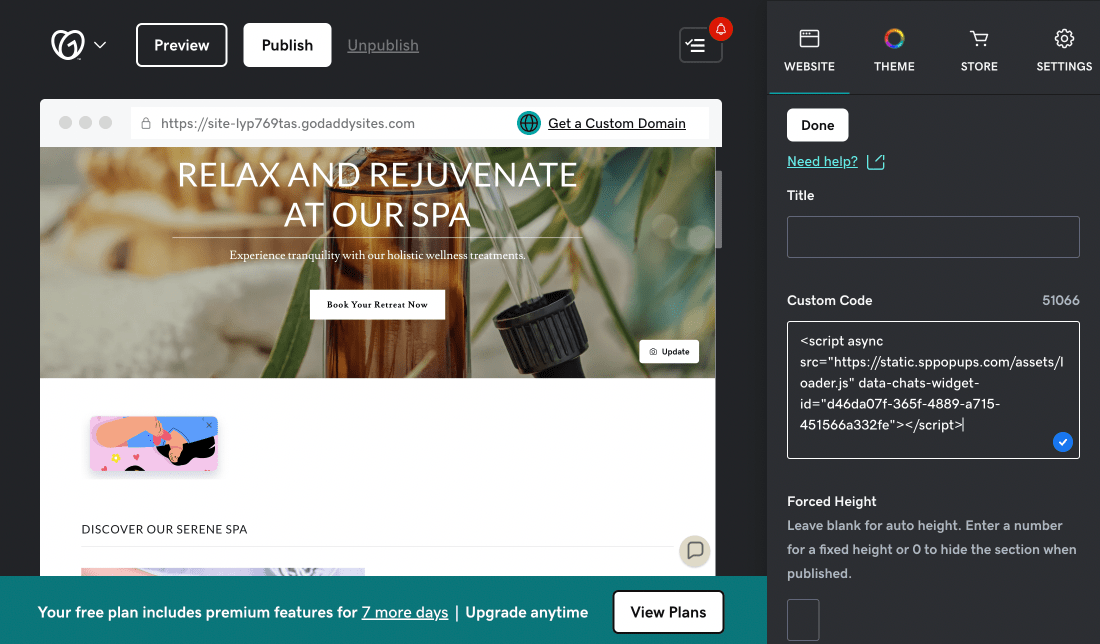
Click the added section. In Title, enter a name. In Custom code, paste the copied pop-up code. Save the changes.
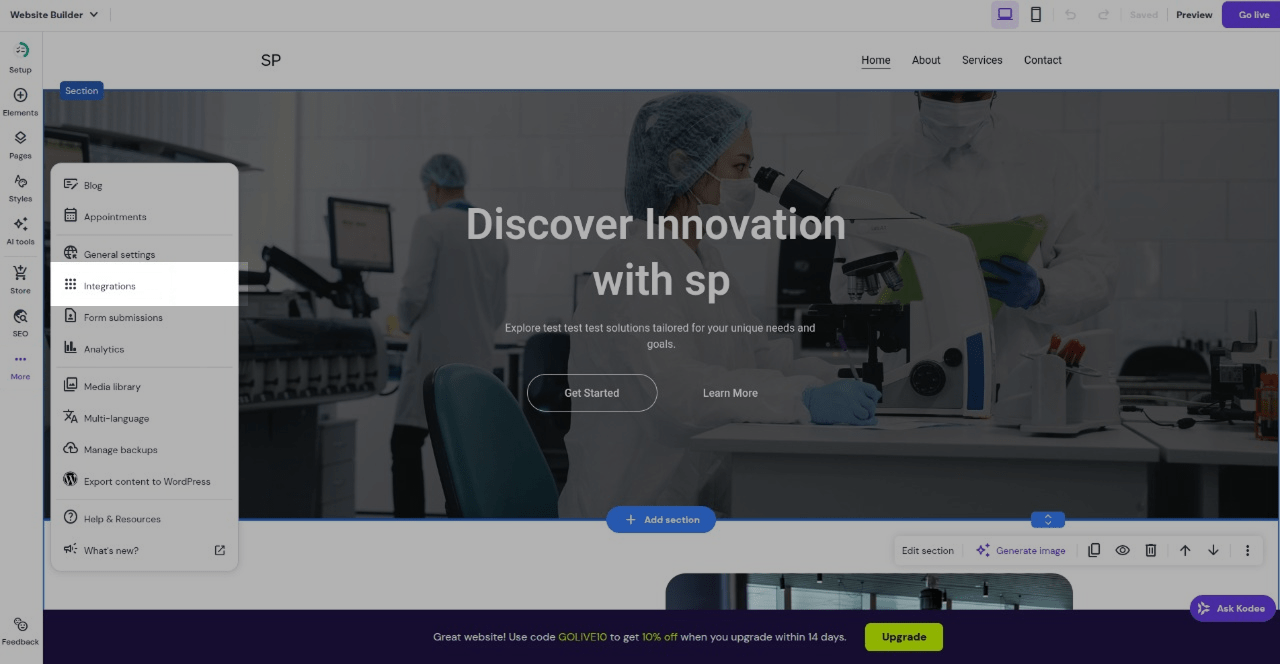
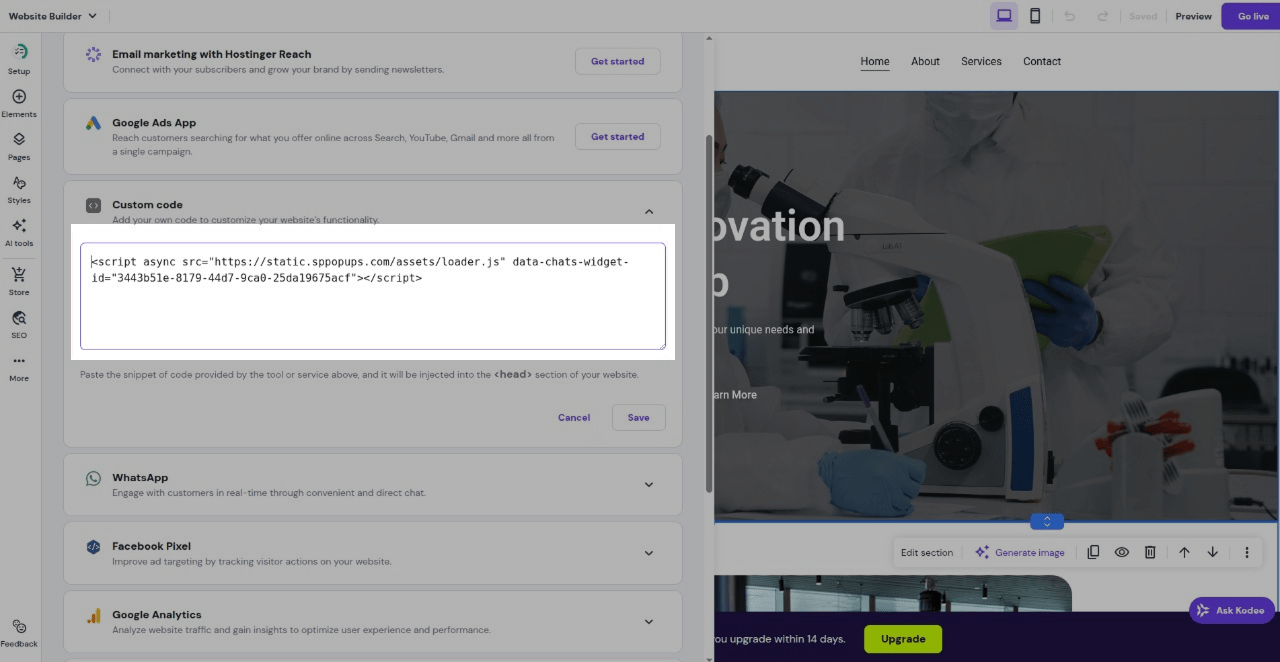
Hostinger
Go to Hostinger and select More > Integrations.
Expand Custom code and paste the copied pop-up code. Save the changes and update your website.
Add pop-up code using Google Tag Manager
To show pop-up surveys on your website, you can install their code directly or use Google Tag Manager. To do the latter, copy the pop-up code, go to Google Tag Manager, create a tag of the Custom HTML type, and paste this code.
Select the All Pages trigger so that your pop-up appears on all website pages.
Read more: Add pop-up installation code to a website using Google Tag Manager.
Last Updated: 12.09.2025
or