In May 2019, MailChimp released an update that forced some of its users to start searching for another email service provider. Many of them have chosen SendPulse as an alternative, which is, of course, a great pleasure but also a great responsibility for us.
To help you easily transfer from MailChimp to SendPulse, we are publishing a detailed instruction on how to export contacts and templates from one service to another. For users who are going to move from a paid MailChimp plan, SendPulse offers two months of the same plan for free! You will find the details of this offer below.
Content:
How to export MailChimp lists of subscribers to SendPulse
There are two ways to export MailChimp lists and import them to SendPulse. The first one is by importing email addresses via our API and the second is by exporting Audiences from MailChimp to a CSV file and uploading them to SendPulse with the help of the import button. Let’s walk through each method step-by-step.
Exporting contacts via API
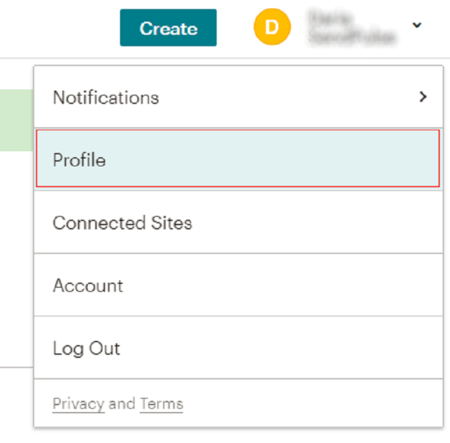
Step 1. Log into your MailChimp account and proceed to the Profile tab.
Step 2. In the top menu, click Extras > API keys.
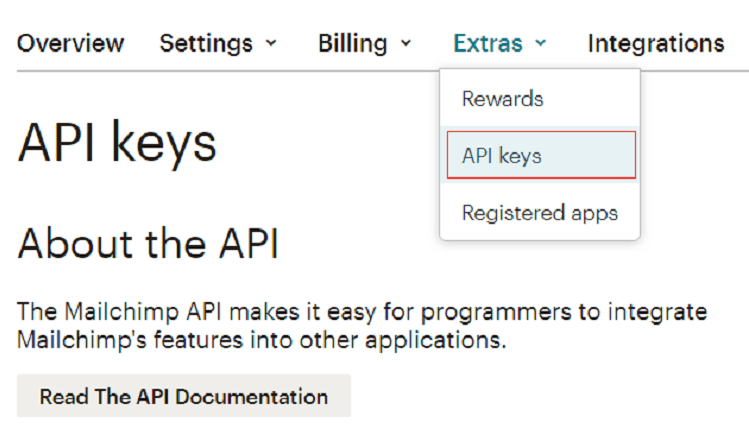
Step 3. Copy the long API key code.

Step 4. Log into your SendPulse account, go to the Mailing lists tab, and create a mailing list to which you will import your contacts from MailChimp. In our example, it’s called “MailChimp Audience.”
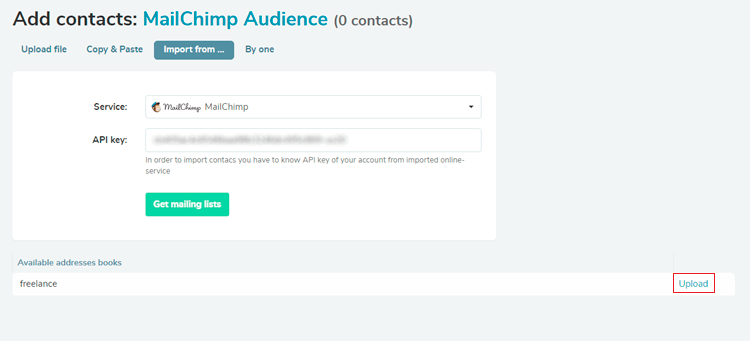
Then click “Import from” and paste your API key and click “Get mailing lists.”
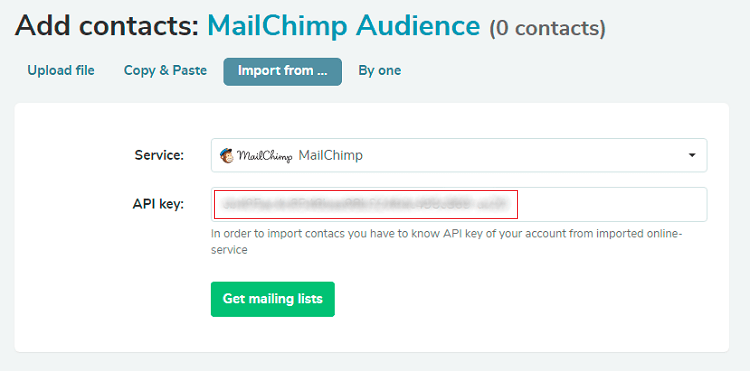
Step 5. You will see the available address books from MailChimp. Choose the list you wish to import and click “Upload.”
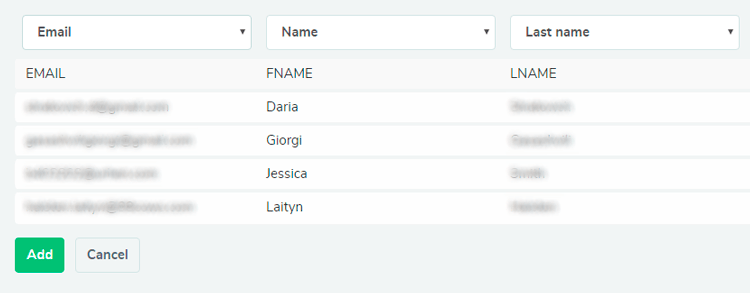
Step 6. Choose the variables you need in each column and click “Add.”
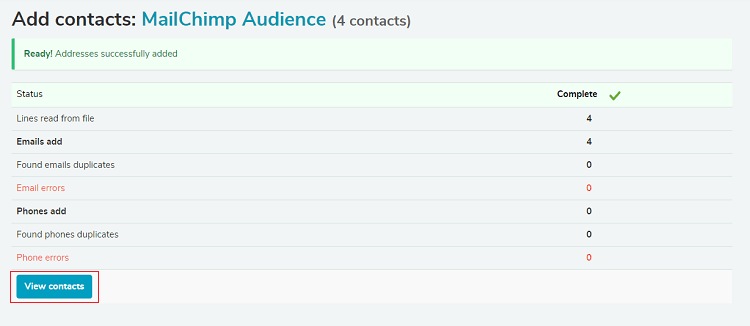
Step 7. The mailing list has been added to SendPulse. Now click “View contacts” to take a closer look at your mailing list.
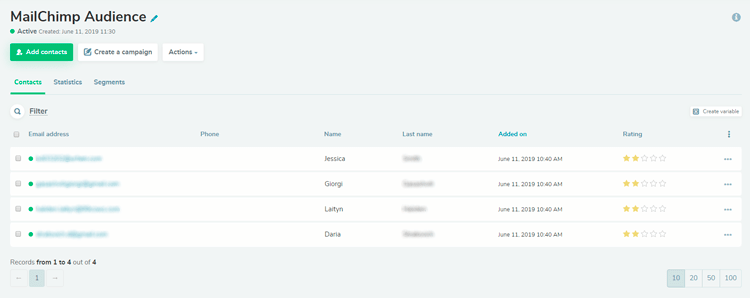
Step 8. Now the exported MailChimp list is available in your SendPulse account. The addresses from the list are active and can be used for your further email campaigns.
To export other MailChimp lists, you need to repeat the following steps: create a new mailing list in SendPulse, paste the API key, and choose the audience you want to import. This way, you will be able to recreate your MailChimp mailing lists in SendPulse.
Exporting contacts using a CSV file
To move your contacts using a CSV file, first, you need to export your “Audience” from MailChimp and then upload it to the “Mailing lists” in SendPulse. Every Audience list should be transferred separately, one after another.
This is how to do it step by step:
Step 1. Go to your MailChimp account and proceed to the “Audience” section. To see all of your lists, choose “View audiences” from the “View Contacts” drop-down.
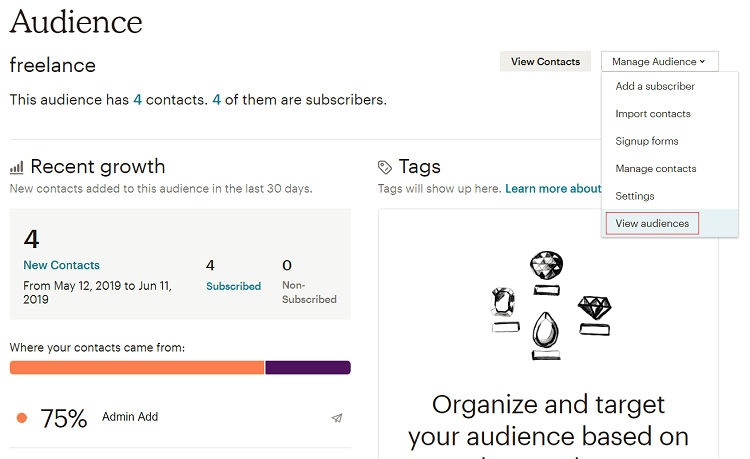
Step 2. Click on the name of the audience you want to export to see the contacts it contains.

Step 3. Above the list, there’s the “Export Audience” button. Click it to start the export process.
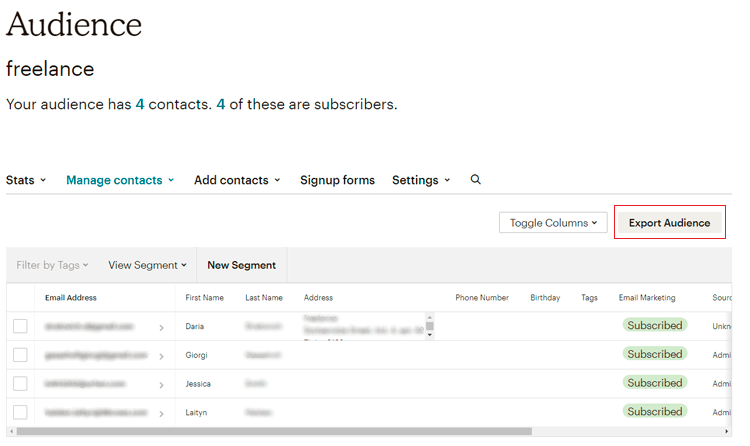
Step 4. The export can take time, especially if you have a lot of contacts. While the export is going on, the timer icon will be highlighted in yellow. As soon as it’s over, the icon will become blue. The list of contacts will be saved on your computer and will be sent to the email address you’ve registered.
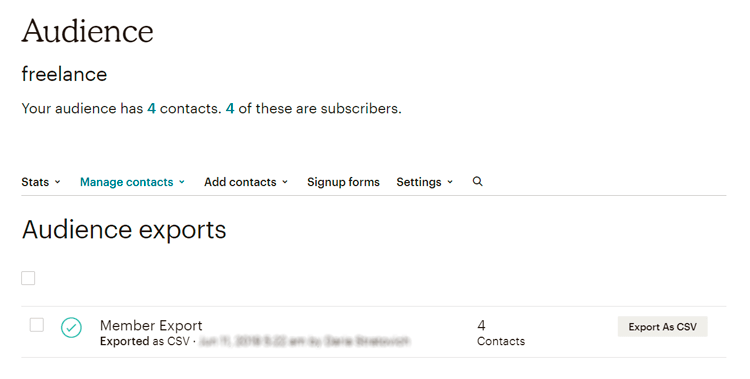
Step 5. To download the CSV file, open the email from MailChimp and click “Download List Data.”
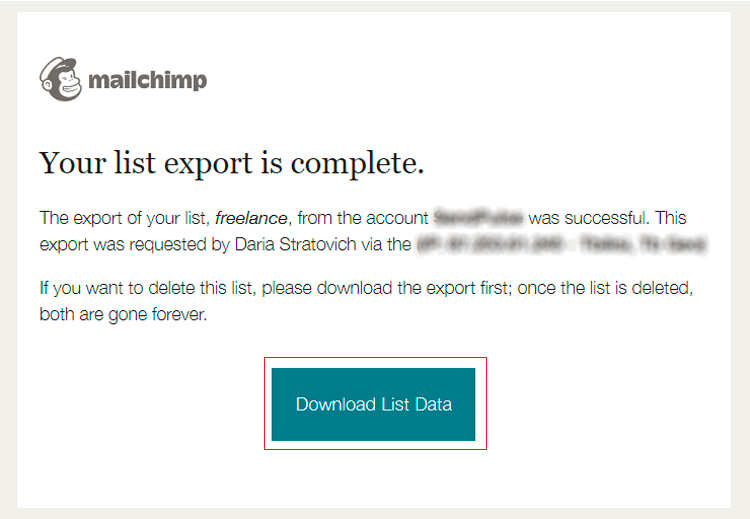
Step 6. The downloaded file will be archived, so you will need to extract it before importing contacts to SendPulse.

When you open the extracted file in Excel, you will see a spreadsheet that looks like this:

Step 7. Now let’s upload this file to SendPulse. First, go to your SendPulse account and click “Mailing lists.” We’ve already created the “MailChimp Audience CSV” list. To create a new list, click “New mailing list.”

Step 8. The new list has no contacts yet. To add exported contacts, click the “Upload file” tab. Choose the CSV file you’ve downloaded from MailChimp and then click “Upload.”
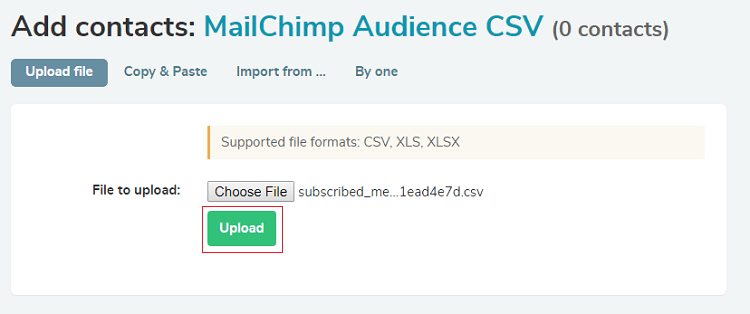
Step 9. The data is uploaded to SendPulse, but you still need to choose the variables for the actual contacts to appear on your mailing list.

Step 10. Once you’ve chosen the variables, tick “Update variable values” for existing contacts box and click “Add.”

Step 11. Finally, the import is completed and you can see the number of added emails.
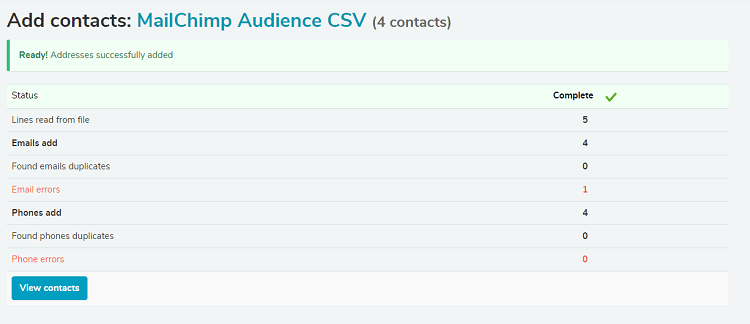
Now you can go to your mailing list and see all your contacts.
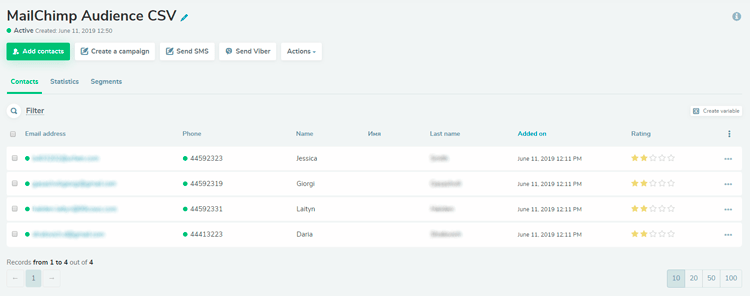
These steps can be repeated for every mailing list you wish to export from MailChimp.
How to export MailChimp templates to SendPulse
If you’ve created your own email templates with MailChimp, you can transfer them to SendPulse too. This is how to do it:
Step 1. Open Templates in your MailChimp account. Check the template you want to export and click “Export as HTML.”
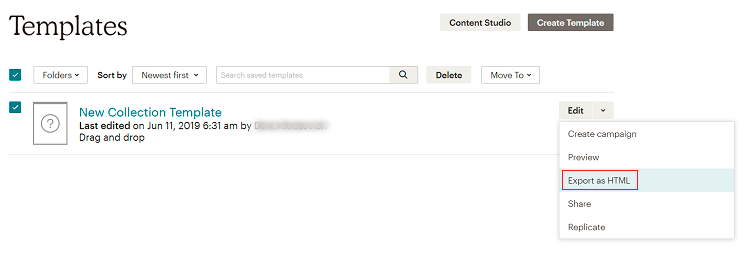
The template will be saved to your computer.

Step 2. Go to your SendPulse account, proceed to “Email templates,” and choose the “Template import” option.
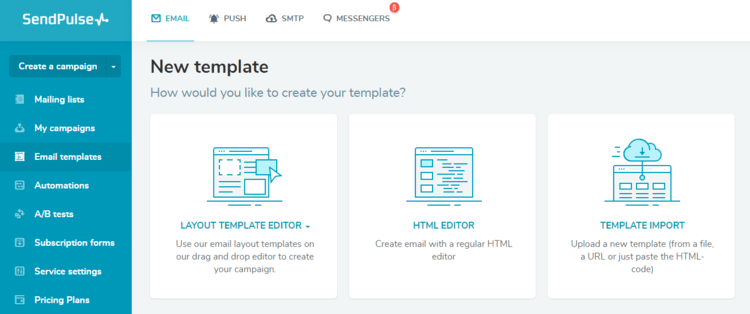
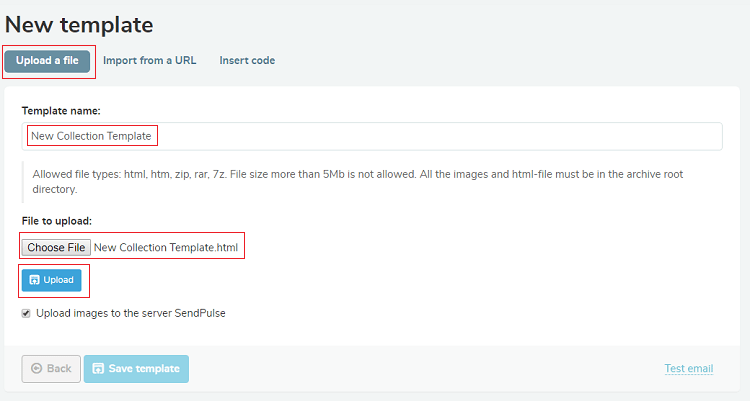
Step 3. In the “Upload a file” section, click “Choose File,” upload your MailChimp template, name it, and click “Upload.”
You will see a notification about a successful import. Click “Ok” to proceed.
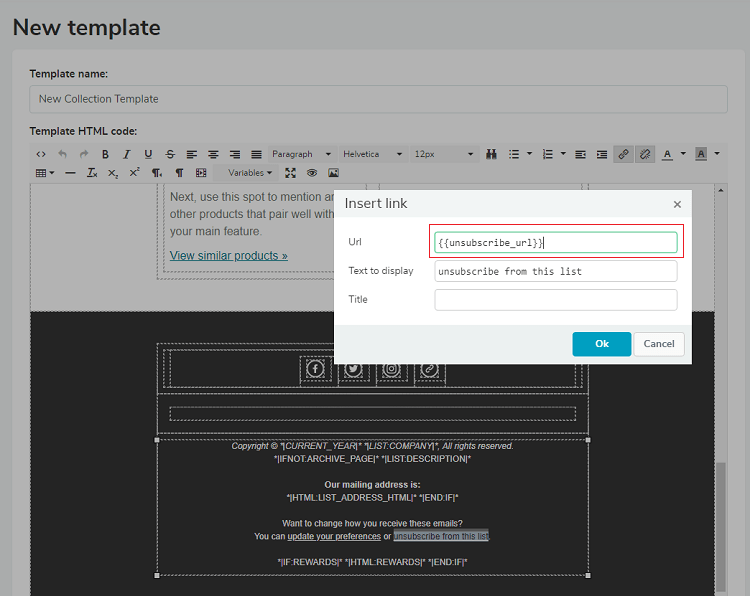
Step 4. Note! You need to change the unsubscription link in the email footer so that it will lead to the correct SendPulse page. For that, open an imported template, find the unsubscription link and click “Insert/Edit link” icon in the upper menu to see how the link looks.
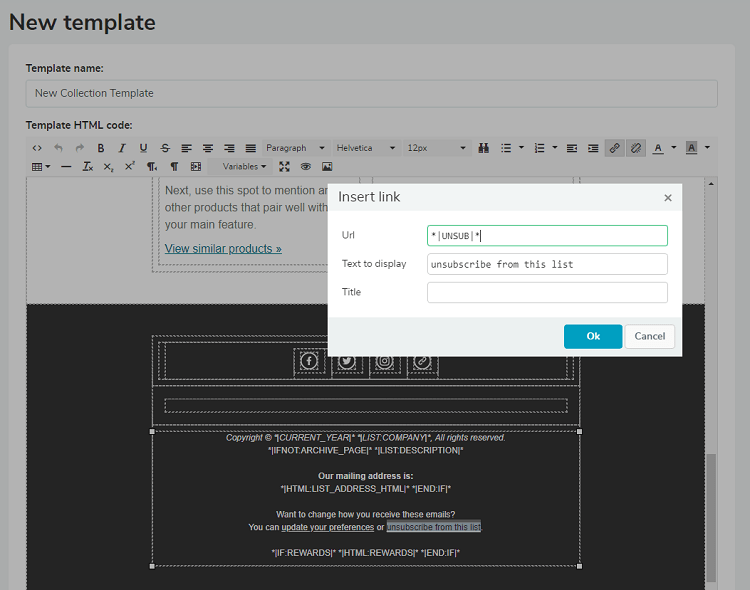
Open any SendPulse pre-designed template and copy and paste the unsubscribe link from it to your new template.
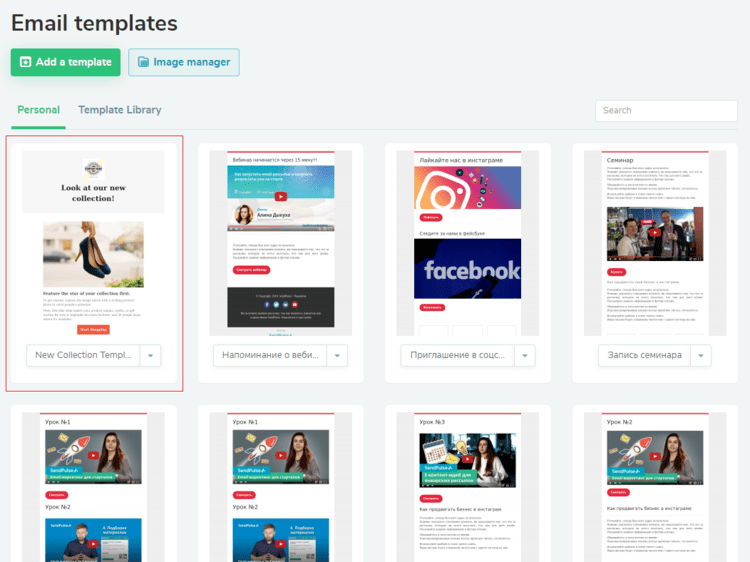
Done! Now you can find this email template in your library.
Free plan for those who are moving from MailChimp to SendPulse
If you are moving from a paid MailChimp plan, SendPulse gives you two months of the same plan for free. This time will be enough to transfer all your contacts and templates and try out the service.
To receive a free plan, copy the payment information about your MailChimp paid plan and send it along with the following text to sales@sendpulse.com:
If anything goes wrong or you have any questions, contact our support team, which is available 24/7.
We would like to remind you that SendPulse is a multichannel platform, where you can send email campaigns, SMS, and Viber messages, set up web push notifications, and Facebook Messenger chatbots. There’s a lot of useful videos on our YouTube channel and announcements about new features and updates on our Facebook page — sign up and be the first to know about them!


