In email marketing, the moment you hit the “Send” button is when your email campaign actually begins. You always need to analyze its performance to highlight the most reasonable decisions in your email marketing strategy and spot where it went wrong. Thankfully, there’s no need to reinvent the wheel as Google has created a service to relieve your email marketing stress — Google Analytics.
Read on to find out the whats and hows of including Google Analytics email tracking into your marketing strategy.
Why you need Google Analytics email tracking
How many emails were opened, how many links were clicked on, how many users unsubscribed after a particular email campaign — all these are important metrics. But your final goal should always be a conversion — for example, how many leads or customers you’ve generated owing to your email campaign.
In fact, there are many email tracking tools that help you see whether or not a subscriber took a specific action on your website after they have clicked on a link in your email.
Google Analytics, or GA, is a tool that allows you to do this. You can map the journey your subscriber takes after landing on your website from an email — beyond click tracking. With its help, you can understand which links in your email campaigns brought most clicks to your website and look into the users’ on-site behavior.
Now, let’s see how you can set up Google Analytics email tracking in three steps.
How to start tracking emails with Google Analytics
To start, sign up to the Google Analytics account and go to the Admin tab.
 Google Analytics home page
Step 1. Set up the goals
Running GA for the sake of running it won’t do your campaign any good; you also need to see if the tracked information meets your goals. So as soon as you signed up, don’t hesitate to set it up.
In Google Analytics, you can choose between three available options:
- a goal template;
- a smart goal;
- a custom goal.
Pick the corresponding goal and specify its additional details.
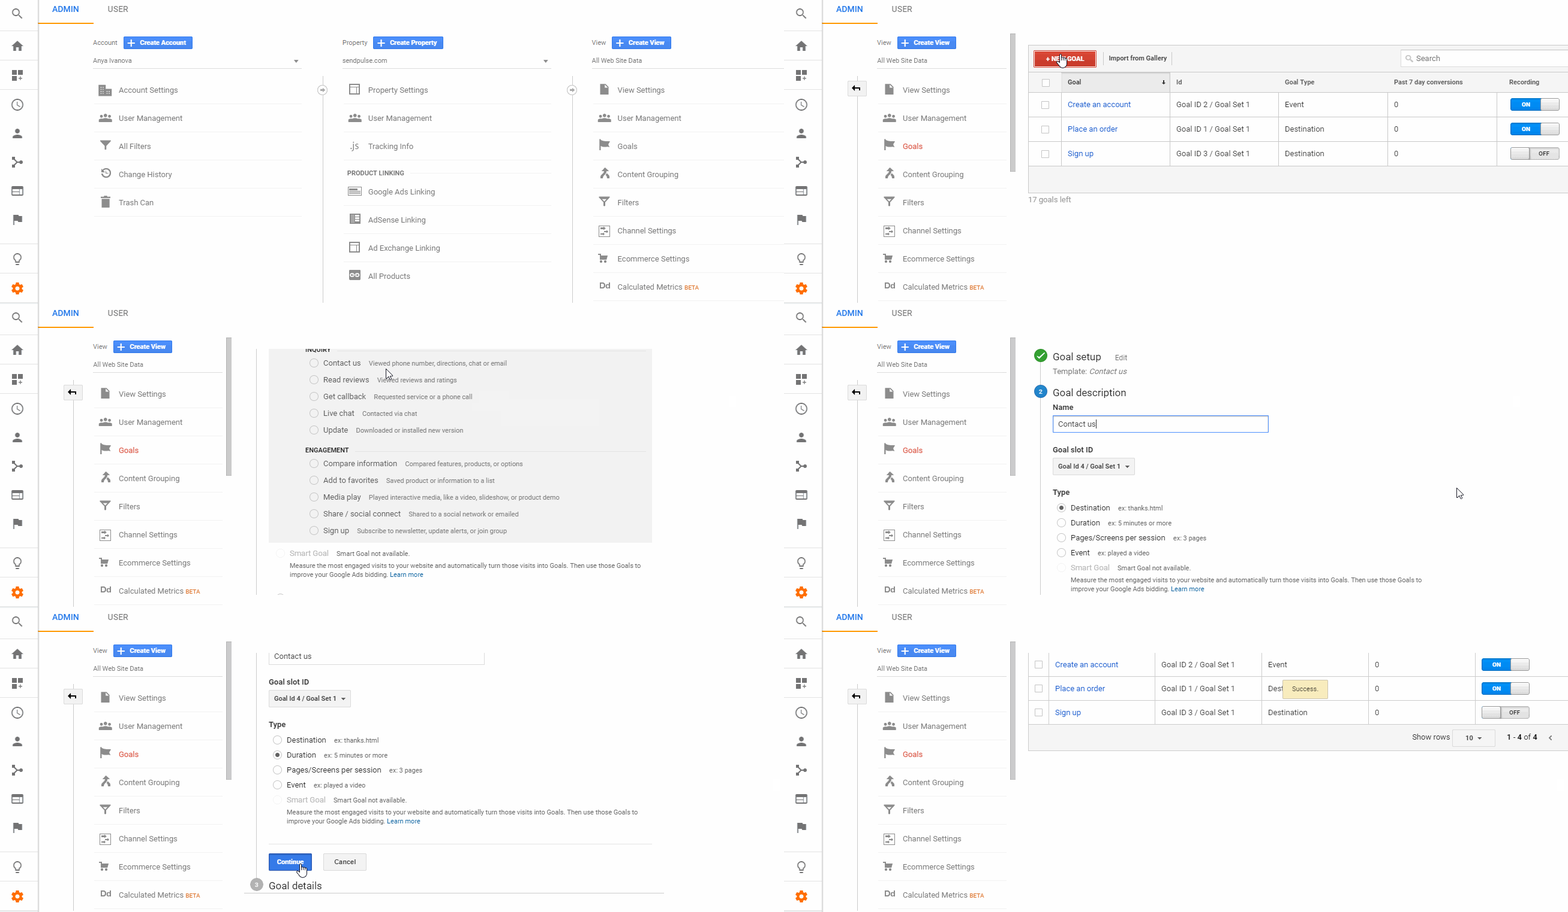 Setting up a goal in Google Analytics
Step 2. Add URLs
Let’s say you’ve posted a new article on your blog. You shared it via email and on Facebook. The next day, you’ve got thousands of visitors to this blog post. But where did all these visitors arrive from? Was it the email or Facebook to bring more traffic?
To identify the source of your traffic, you need to add trackable URLs — links with corresponding UTM (Urchin Tracking Module) parameters or tags at the end of the target website URL.
You can tag your URLs either manually or automatically.
To do it manually, use Google Analytics URL Builder. To generate a URL with the necessary UTM tags, follow these steps:
1. Add the link to the website you’re going to redirect the readers to.
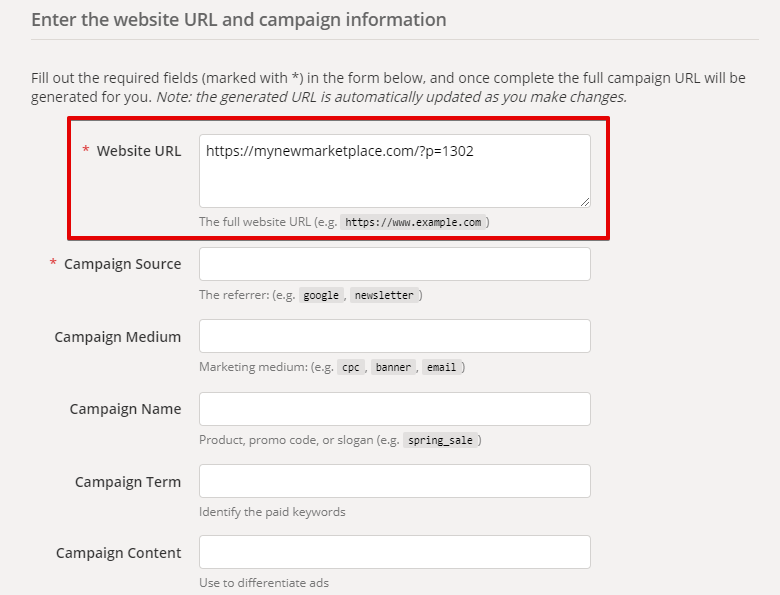 Adding the website link in Google Analytics URL Builder
2. Specify the campaign source (utm_source).
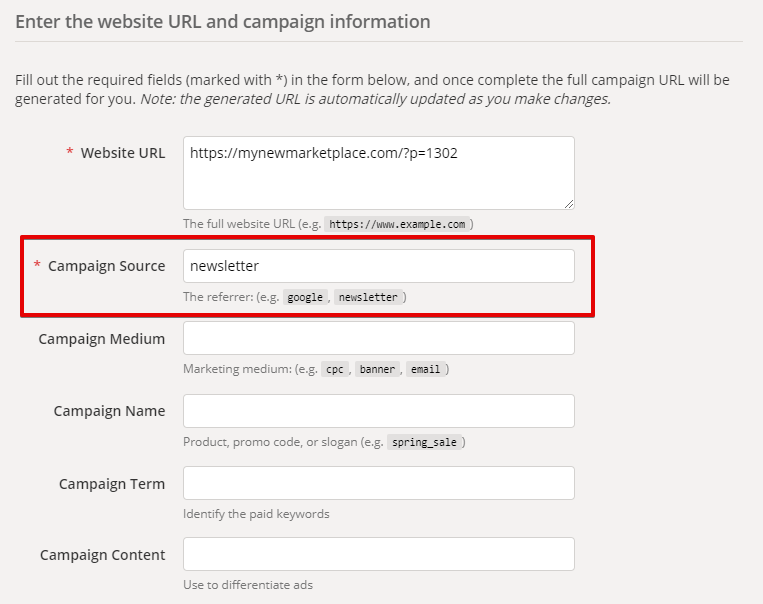 Specifying the traffic source in Google Analytics URL Builder
This tag is mandatory, it indicates where the visits to your website are coming from:
- name of a search engine, e.g., Google;
- referring website, e.g., facebook.com;
- name of your email, e.g., black_friday_newsletter;
- direct traffic, e.g. users who bookmarked your website or typed it right in their browser.
3. Enter the campaign medium (utm_medium).
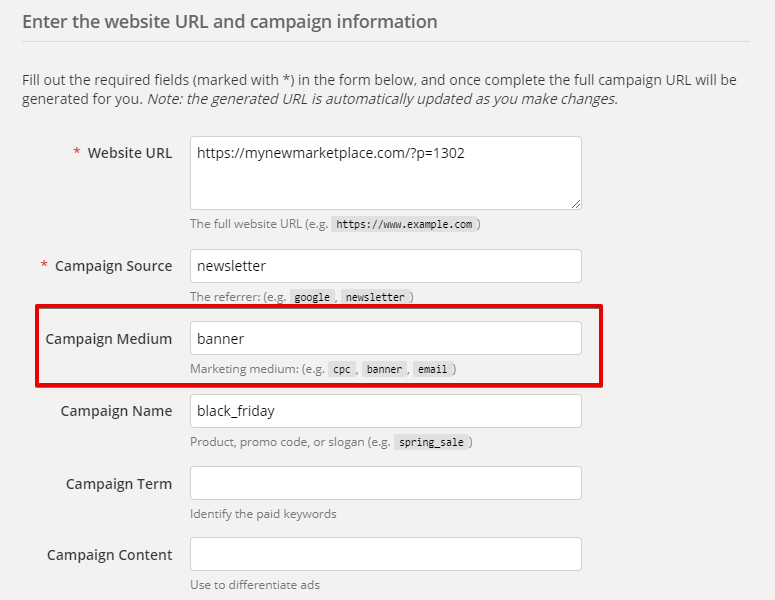 Adding the campaign medium in Google Analytics URL Builder
This tag shows the type of traffic the visitor originated from:
- organic — unpaid search;
- CPC (cost per click) — paid search;
- referral traffic;
- email — traffic from the source you have created;
- none — direct or unknown traffic.
4. Add the name of your campaign (utm_campaign).
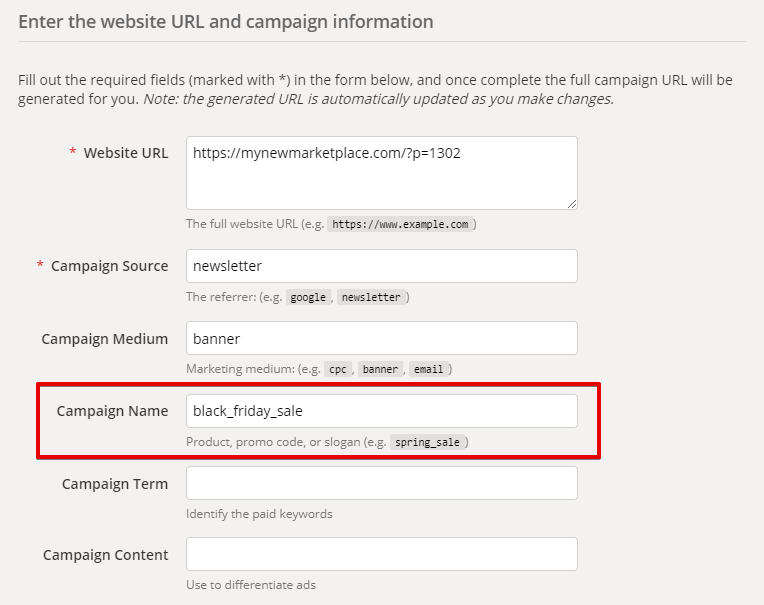 Specifying the campaign name in Google Analytics URL Builder
This tag is used to specify the name of the campaign you’re running. Remember to use the lowercase underscore to separate each word in the name of your campaign.
Google Analytics URL Builder will generate a unique link with all the UTM tags you have specified.
Note: Remember to replace the CTA button link code with the one you received with the URL builder.
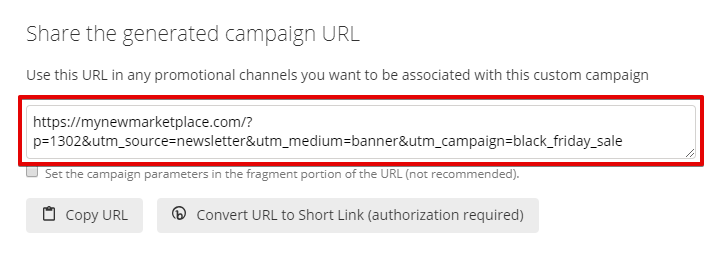 A URL with UTM generated tags in Google Analytics URL Builder
As to the automatic tagging, SendPulse allows you to add the UTM parameters at the final stage of creating your email campaign.
Tick the corresponding box, and SendPulse will create a campaign, source and medium tags which you’ll be able to use for further tracking in your Google Analytics account.
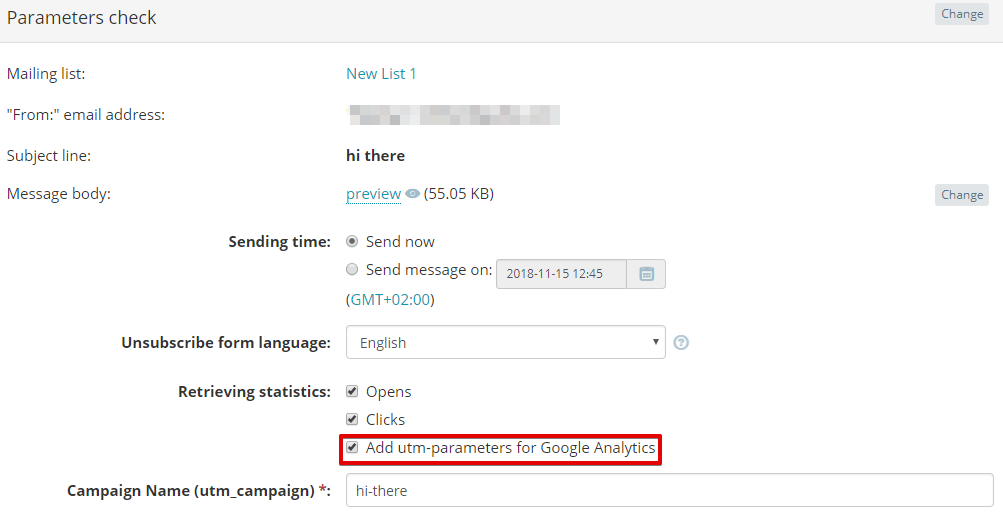 Adding UTM parameters automatically with SendPulse
Step 3. Create an advanced segment
To see how specific visitors behave on your website, create advanced segments for email marketing. Click “Audience” in the sidebar, select the “Add segment” option in Audience Overview, and hit the “New Segment” button.
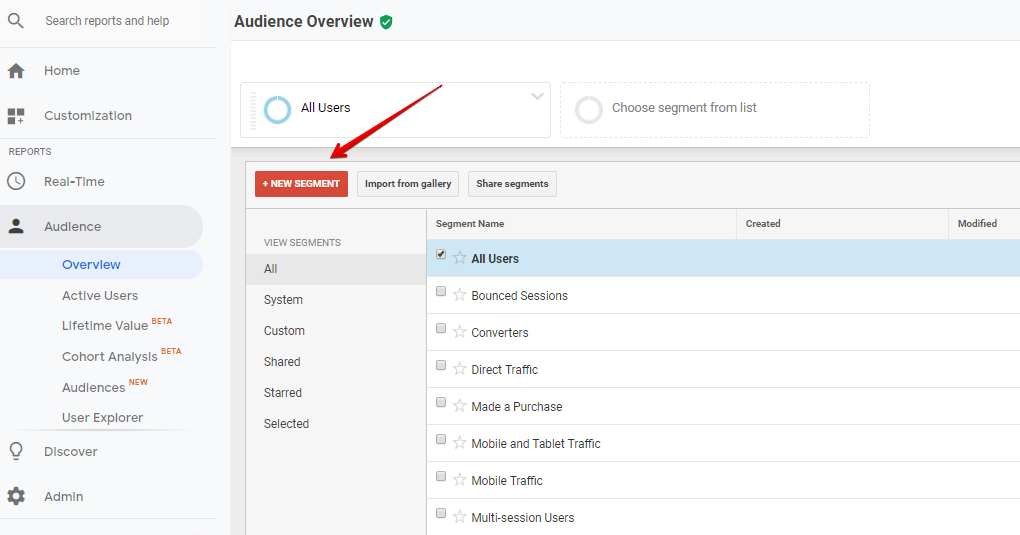 Adding a new segment in Google Analytics
Go to Traffic Sources, choose “Email” in the “Medium” field. Additionally, you can set up to 20 filters in each segment, such as age, location, language, and so on.
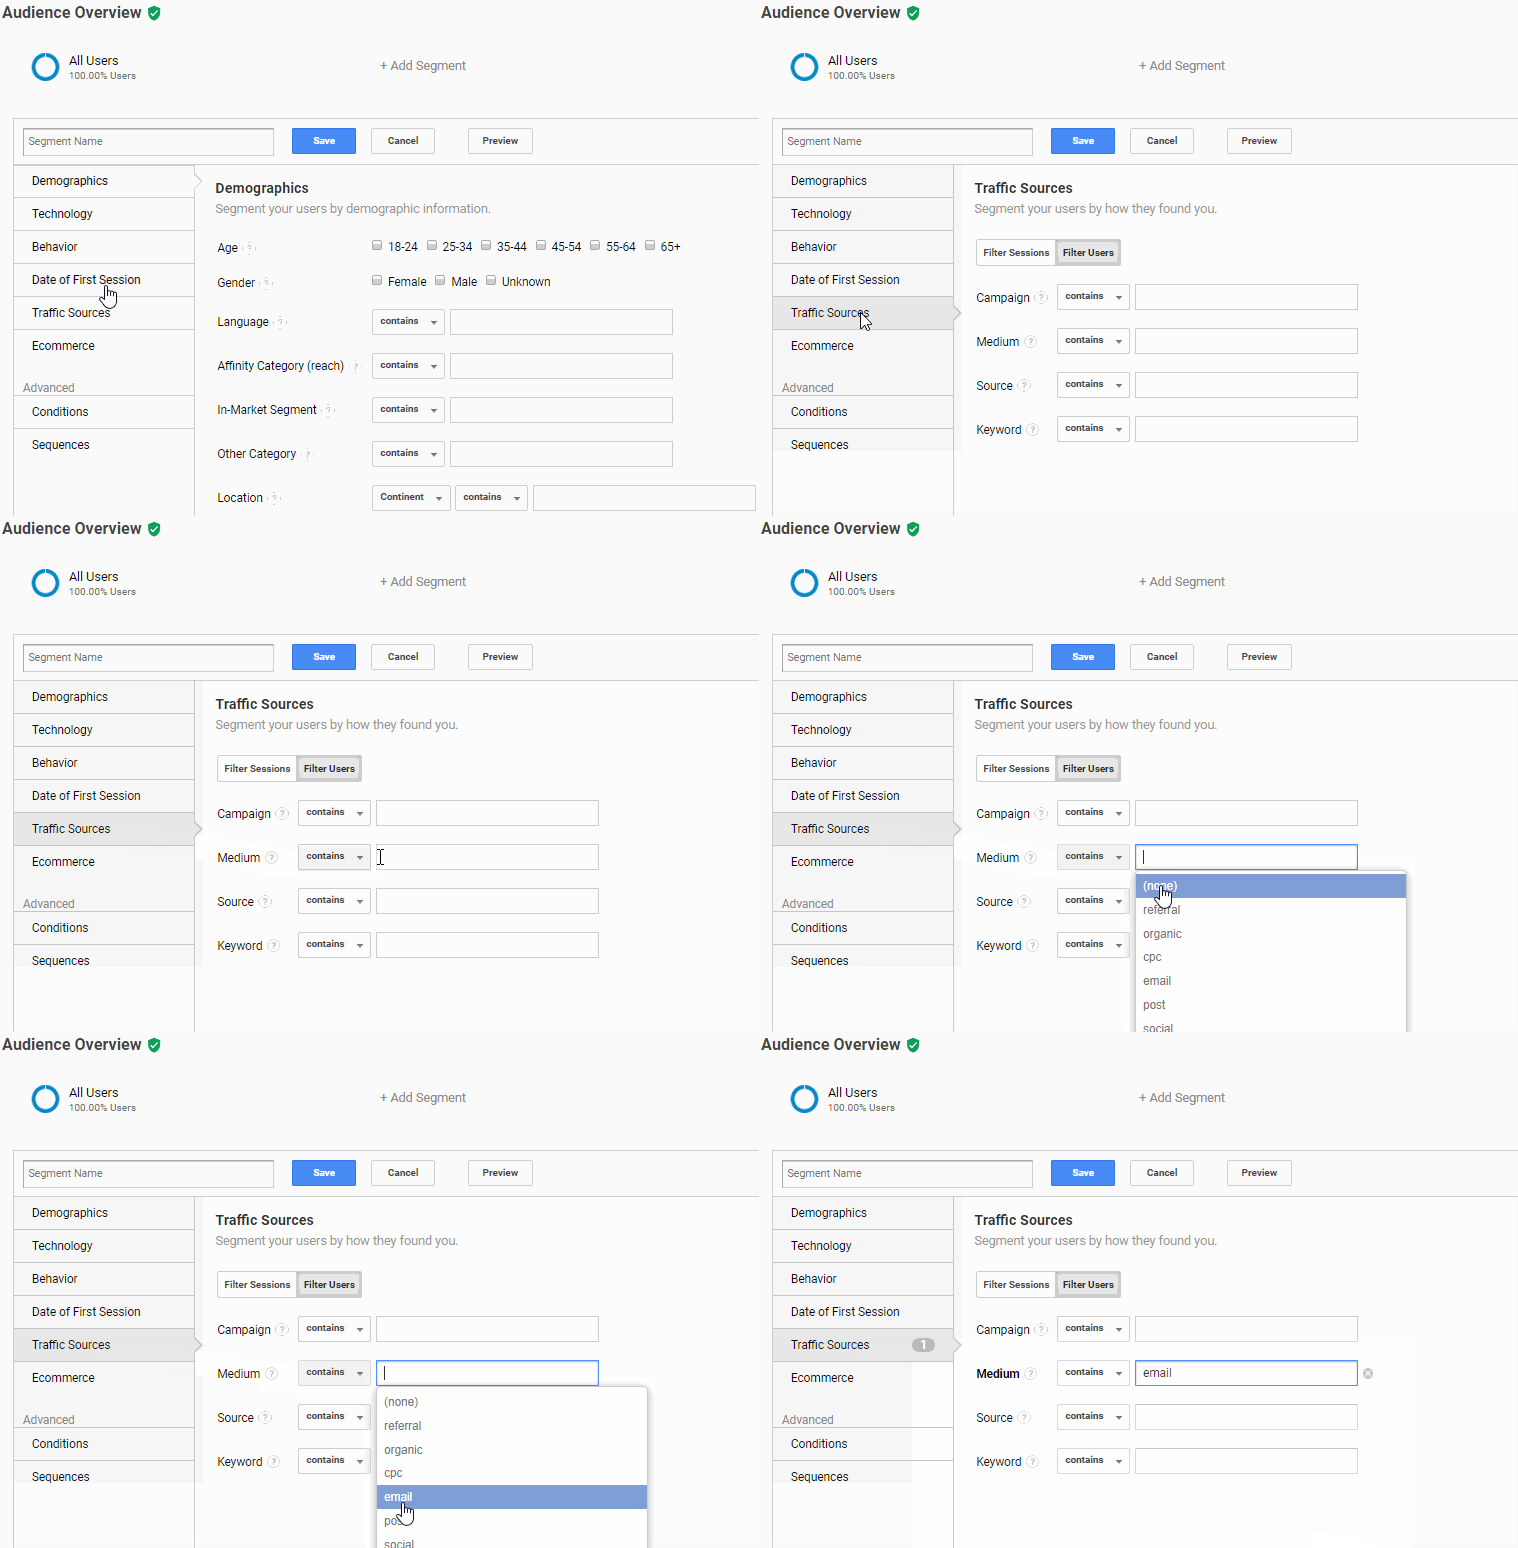 Setting medium for a new segment in Google Analytics
Google Analytics Reports
Google Analytics also provides you with an array of reports that will help you understand the performance of your email marketing campaigns.
Real-time report
This report allows you to check the number of active users who traveled to your website from your email campaign. You can also see their location, which pages they are viewing on your website, and which device they’re using.
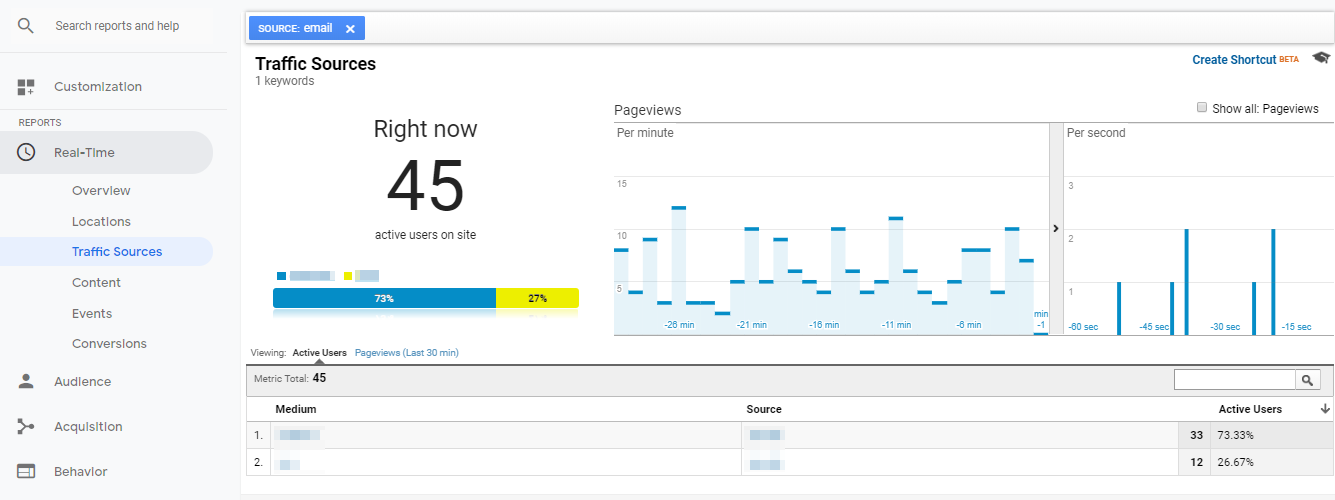 Real-time report in Google Analytics
Campaign report
Turn to this report to see the overall performance of your email campaigns: how many new users you obtained after each campaign, how much time users spent on your website, how many pages they viewed during their visits, and the percentage of conversions that met the goal you’ve set.
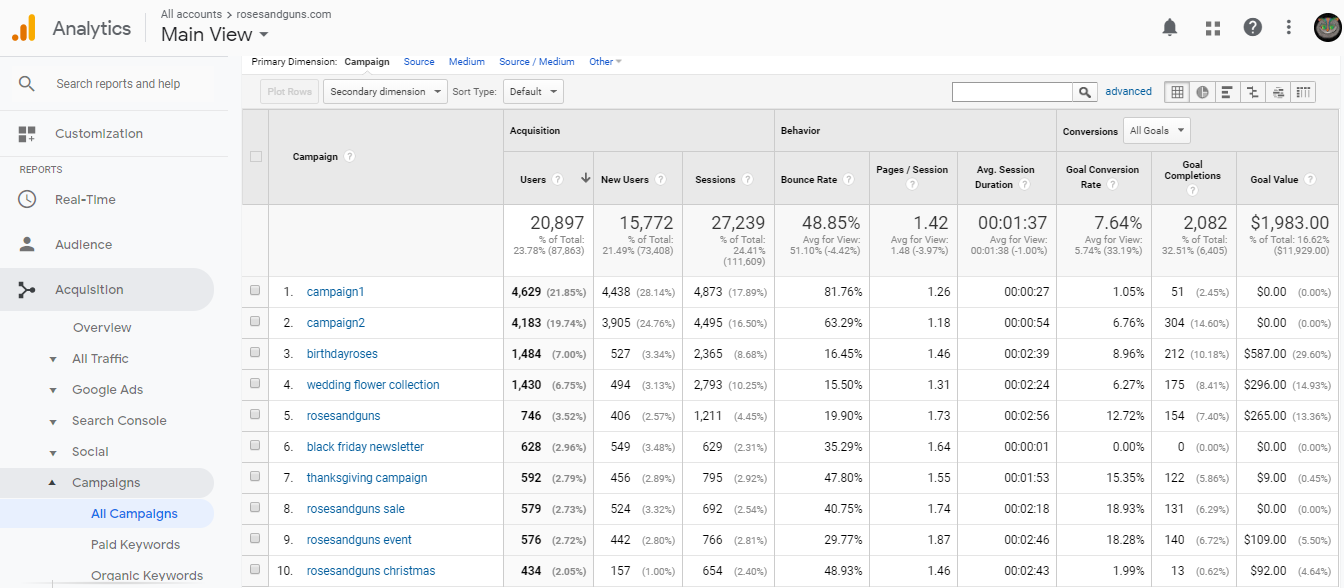 Сampaign report in Google Analytics
Behavior flow report
With the above-listed information on hands, you would probably want to dig deeper and find out the users’ route on your website after a specific email campaign. Google Analytics provides you with such an opportunity offering a behavior flow report which helps you track to which pages users proceed after they arrive at your website.
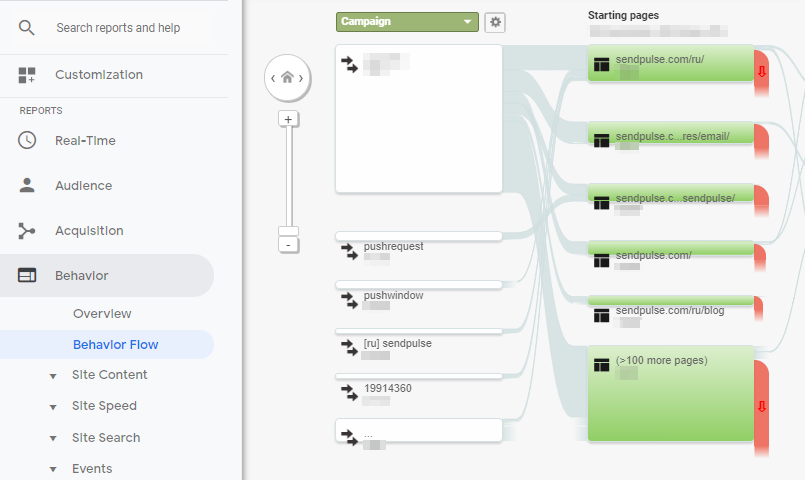 Behavior flow report in Google Analytics
Stick to Google Terms of Service on Privacy
Google Analytics uses cookies to be able to track the usage data and user behavior on a website. According to the new GDPR rules, you’ve got to come up with a Privacy Policy, where you should explain how you collect data. Also, make sure to inform your website visitors that you use cookies and explain the reasons you do this in the corresponding document — Cookie Statement.
Companies typically place these documents in the footer of their website so that the users can easily find them:
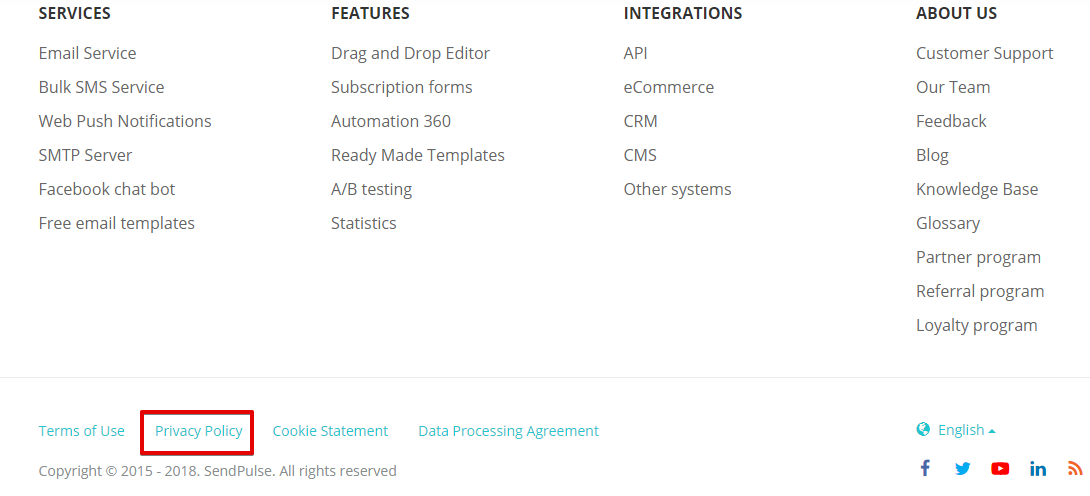 Privacy Policy and Cookie Statement on SendPulse website
Final point
Google Analytics might seem a hard nut to crack, but worth some time spent unwrapping its mechanics. If you’re just starting your email campaign tracking with Google Analytics, here’s what you need to understand about it:
- Setting goals helps you see if your marketing efforts bring the desired results.
- Adding UTM tracking codes to the URLs in your emails helps you find out which links drive traffic to your website.
- Creating segments helps to get a clearer view of how the users from different email campaigns behave and get converted.
- Checking available reports gives you more detailed information about the preferences and on-site engagement of your audience.
Use SendPulse to create your email campaigns, compare their performance using Google Analytics, and use the results to improve your email marketing strategy!