With advanced SendPulse tools, you can create online courses and automatically enroll students in paid or free programs using chatbot flows.
You can share your chatbot link in marketing content or add it to your website to simplify enrollment and payments. Let’s walk through how to enable payments through chatbots and give students instant access to your course content. Let’s dive in!
How to add payment methods
First, add payment methods to your SendPulse account.
To do this, switch to a paid plan and go to your account settings. Under the “Accept payments” tab, select a merchant, like Klarna or PayPal, and connect it following the prompts. If you’re unsure how to do this, don’t worry — detailed tutorials linked in the description will help you.
Once you’ve added a payment method, you can accept payments for your online courses and add payment buttons to chatbot flows and SendPulse-powered websites.
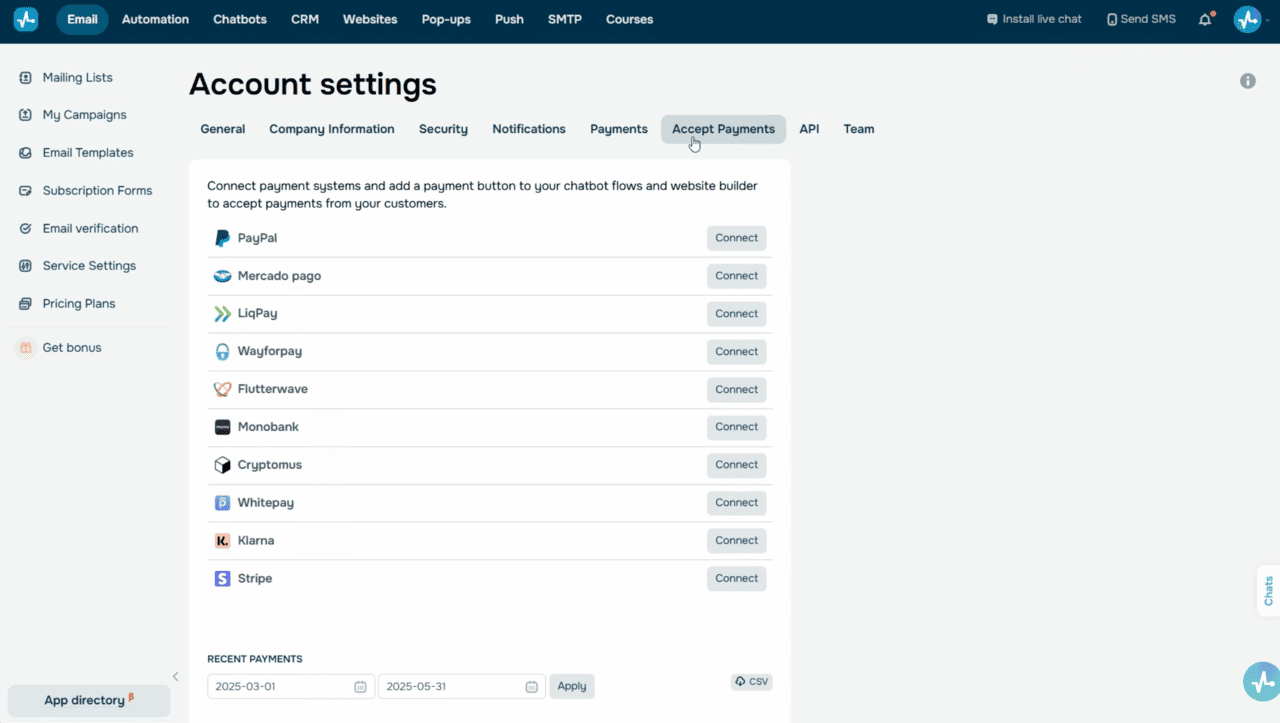 Account settings — Accept payments tab with connected merchants
How to enable and view chatbot payments
Now let’s go over how to enroll a student in your course once they pay for it through your chatbot.
Go to the chatbot builder and add the “Message” element. Type in your text and add a button. Then, set your button type to “Payment” and add a name. Next, select a payment method, set your course price, add a product name, and choose a CRM pipeline to save payment data.
If you want to offer multiple payment options, add more buttons with other payment methods.
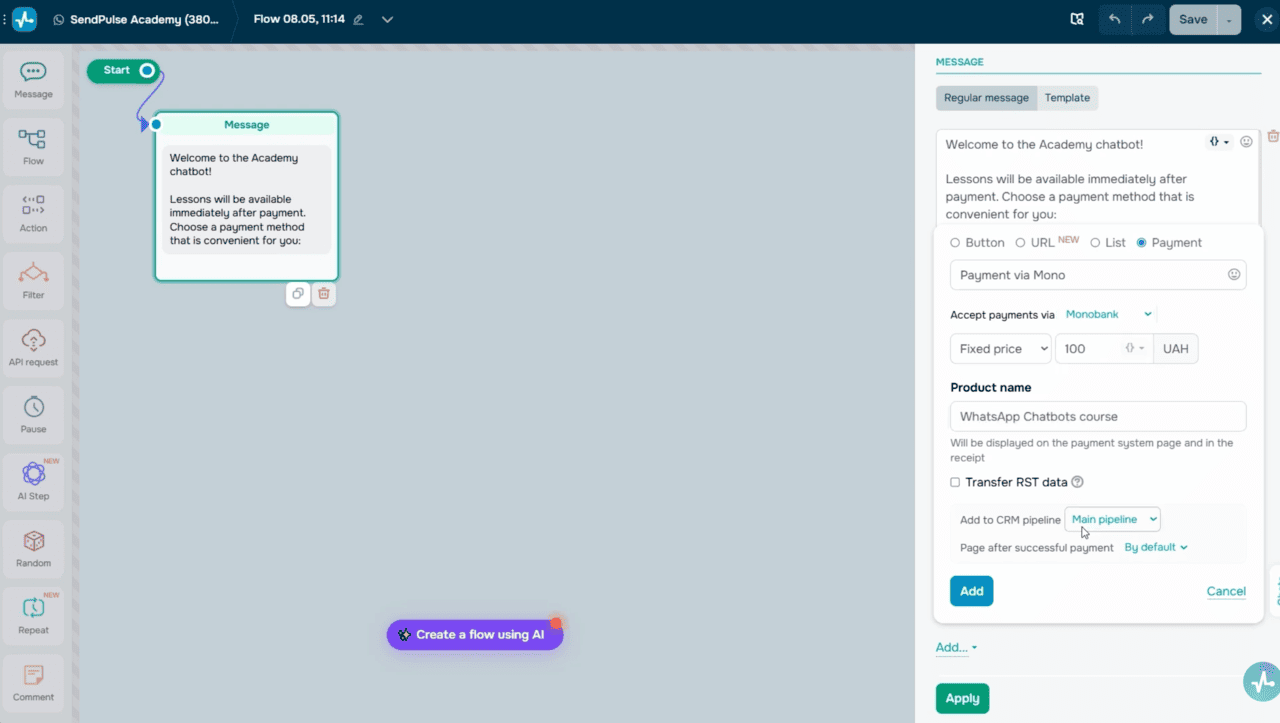 Chatbot flow builder — Message element with Payment button
Next, add the “Filter” element to check payment statuses. Set its condition to “Paid” or “Not paid” and select the product you want to track. For this product to appear in the list, you’ll need to receive your first payment.
To ensure everything works smoothly, you can run test payments for every payment method, sending flows to yourself.
If you’ve added multiple payment methods, set up your filter to trigger if any of the selected conditions are met.
When payment is successful, users move to the next step in your flow. If their payment fails, your chatbot will send a message prompting them to try again.
If you don’t plan to accept payments in your chatbot, you can skip this step and move on to enrollment and payments in student accounts.
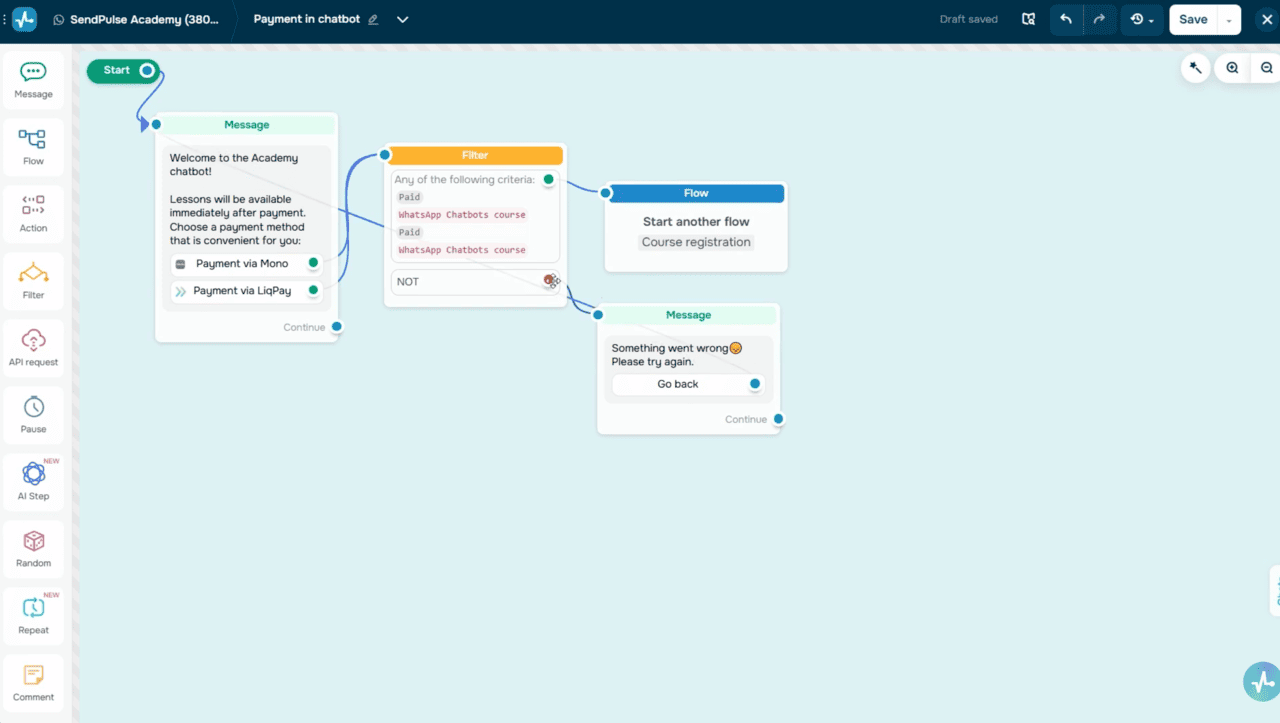 Filter element with Paid/Not paid conditions
How to enroll a student in your course through a chatbot
Add the “Message” element and ask users to share their email addresses so they can sign up for your course. Turn on the “Wait for the subscriber’s response” toggle. Select the “Email” validation type and the “email” variable to save their data.
Next, add the “Action” element, and in the “Courses” section, select the “Enroll in another course” option. Select your course from the list and link the “email” variable, which will act as your student’s login.
If your course is paid, you’ll see the “Mark as paid” checkbox. If your student has paid for your course through your chatbot or a third-party solution, select this checkbox to mark their payment as successful.
Once you do that, the “Paid” status will appear next to your student’s name in the “Courses” section in your account. Your student will automatically receive an email with their account login credentials, allowing them to start taking your course right away.
If you didn’t enable chatbot payments, you can skip this step. In this case, your student will still receive an email with login credentials. However, they will be able to access your course content only after paying for it in their student account. As soon as their payment goes through, they will automatically get access to your course.
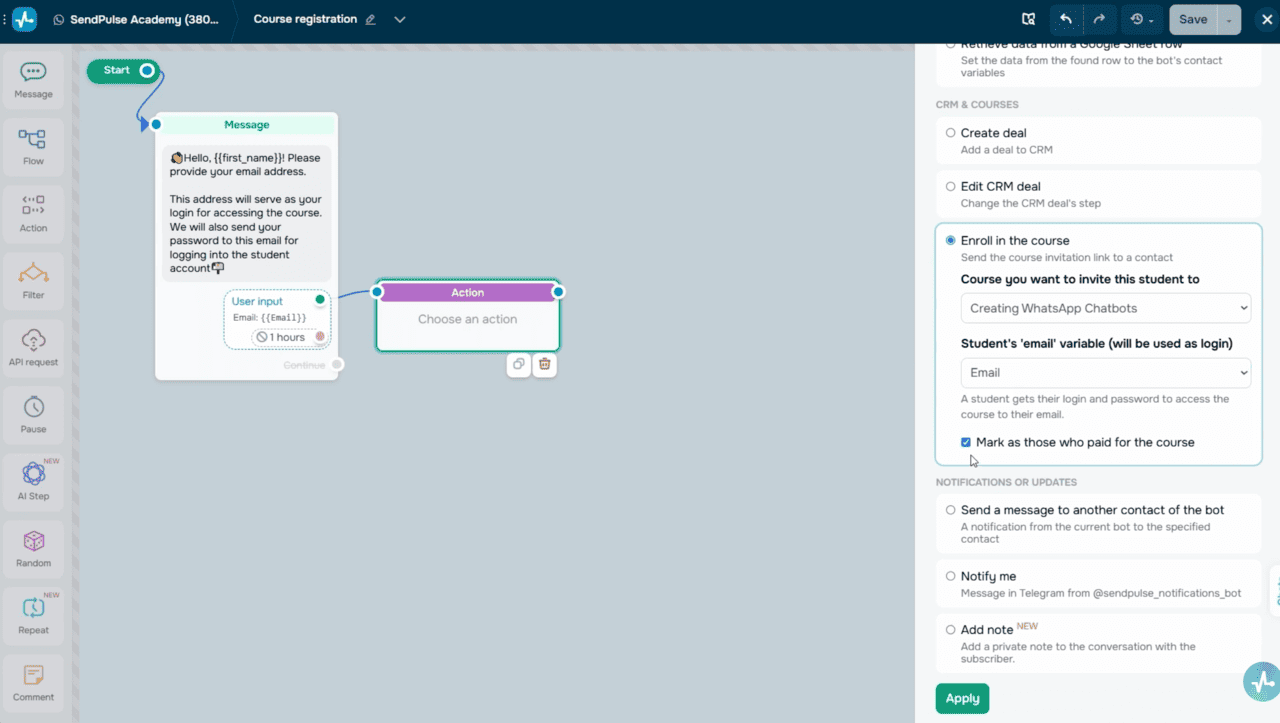 Action element — Enroll in another course option
How to integrate with SendPulse’s CRM system
You can create course-related deals automatically and track student payments right in the CRM system.
Go to the “CRM” section, select your course pipeline, and click “Settings.” Here, you can define which pipeline stage a deal should move to based on its payment status. You can also rename deal stages if you’d like.
If you accept payments through your chatbot, deals and their statuses will automatically appear in the pipeline you’ve selected in the “Payment” button settings.
If you’ve skipped this step earlier but still want to track deals in the CRM system, here’s what you can do. Add the “Action” element, select the “Create deal” option, and then choose a pipeline and deal stage.
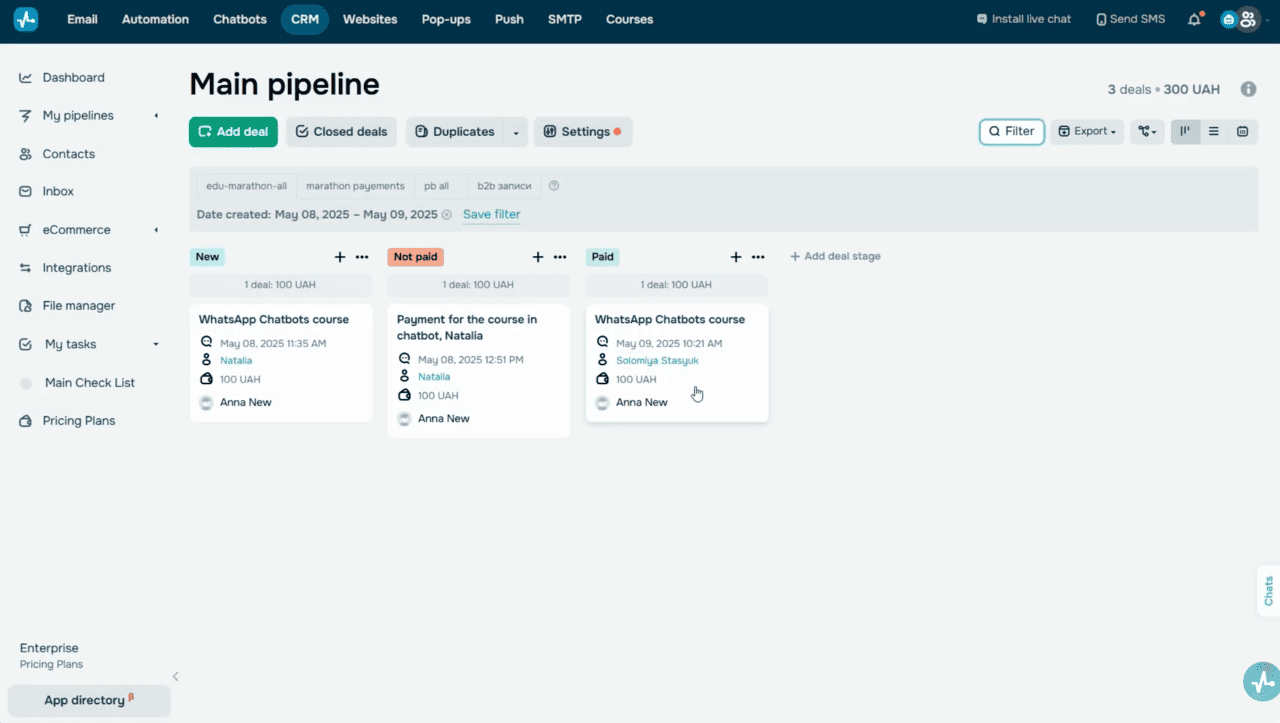 CRM pipeline settings for course deals
Let’s wrap it up
With SendPulse, you can easily create flexible enrollment and payment flows to fit your online course model.
You can accept payments right in your chatbot or through third-party tools, and then automatically enroll students in paid courses, selecting the “Mark as paid” checkbox.
If a student hasn’t paid yet, you can still enroll them through your chatbot. Then, guide them to payment in their student account.
As for free courses, all you need is your student’s email address. Once a user shares it in your chatbot, they will automatically gain access to your course content.
Create comprehensive online courses and watch your brand grow with SendPulse. And if you have any questions along the way, our support team is always here to assist you.