Manage course email notifications
Students can receive email notifications about new lessons, course launches, instructor answers, and other course events. You can customize these emails or not send them at all.
In this article, we will talk about how to view and manage course email notifications.
How to view course email notifications
Students receive these emails from the standard email address or your SMTP service email address.
Read more: How does the sending work.
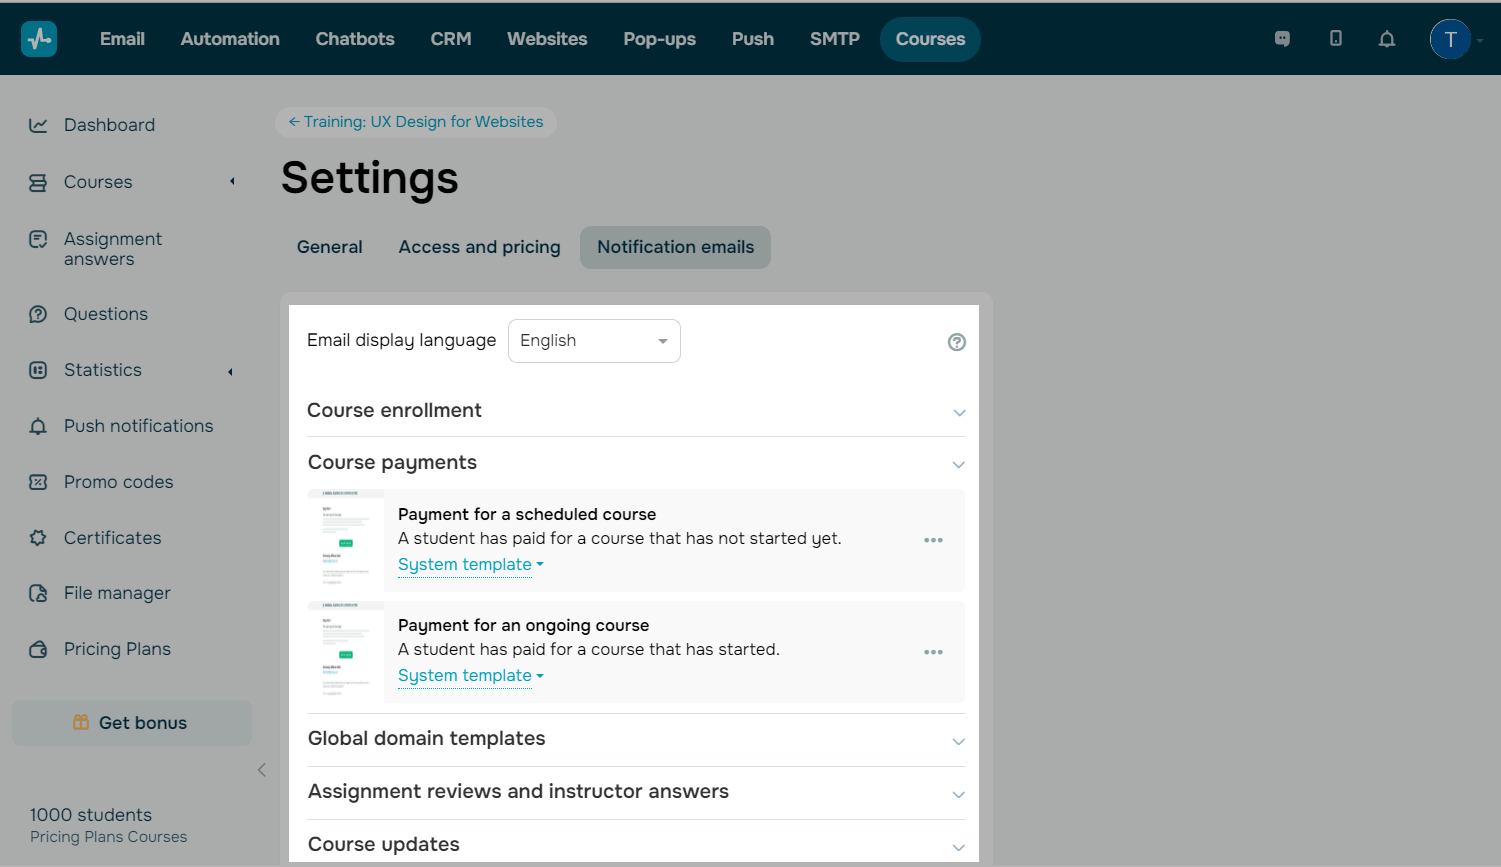
To view the list of course email notifications, go to your course, and click Settings > Notification emails.
To filter these emails by language, click the button in the Email display language section, and select a language from the drop-down list.
Students receive email notifications in the language they set in their account. If you have not translated your emails into the language a student has selected, they will receive your emails in the language specified in your course settings.
All emails in the list are categorized by course events. Click the down arrow to open the list.
Every email name describes its corresponding course event. Under every email, you can learn more about its sending conditions.
How to manage your email notification content
You can add your own template and edit your email subject lines.
Edit your email subject line
You can edit email subject lines only in your own templates.
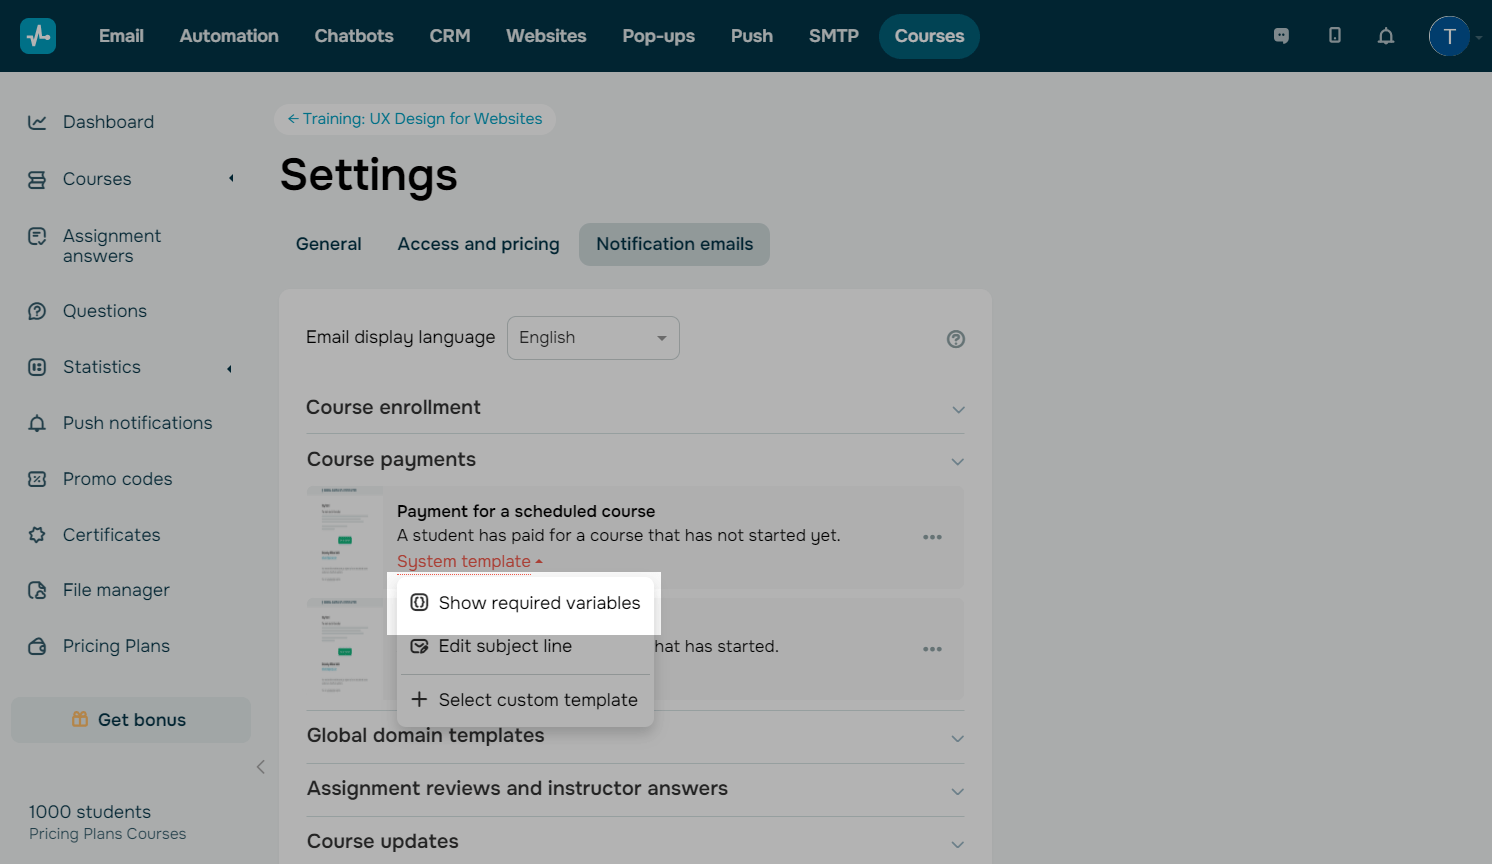
Click System template, and select Edit subject line.
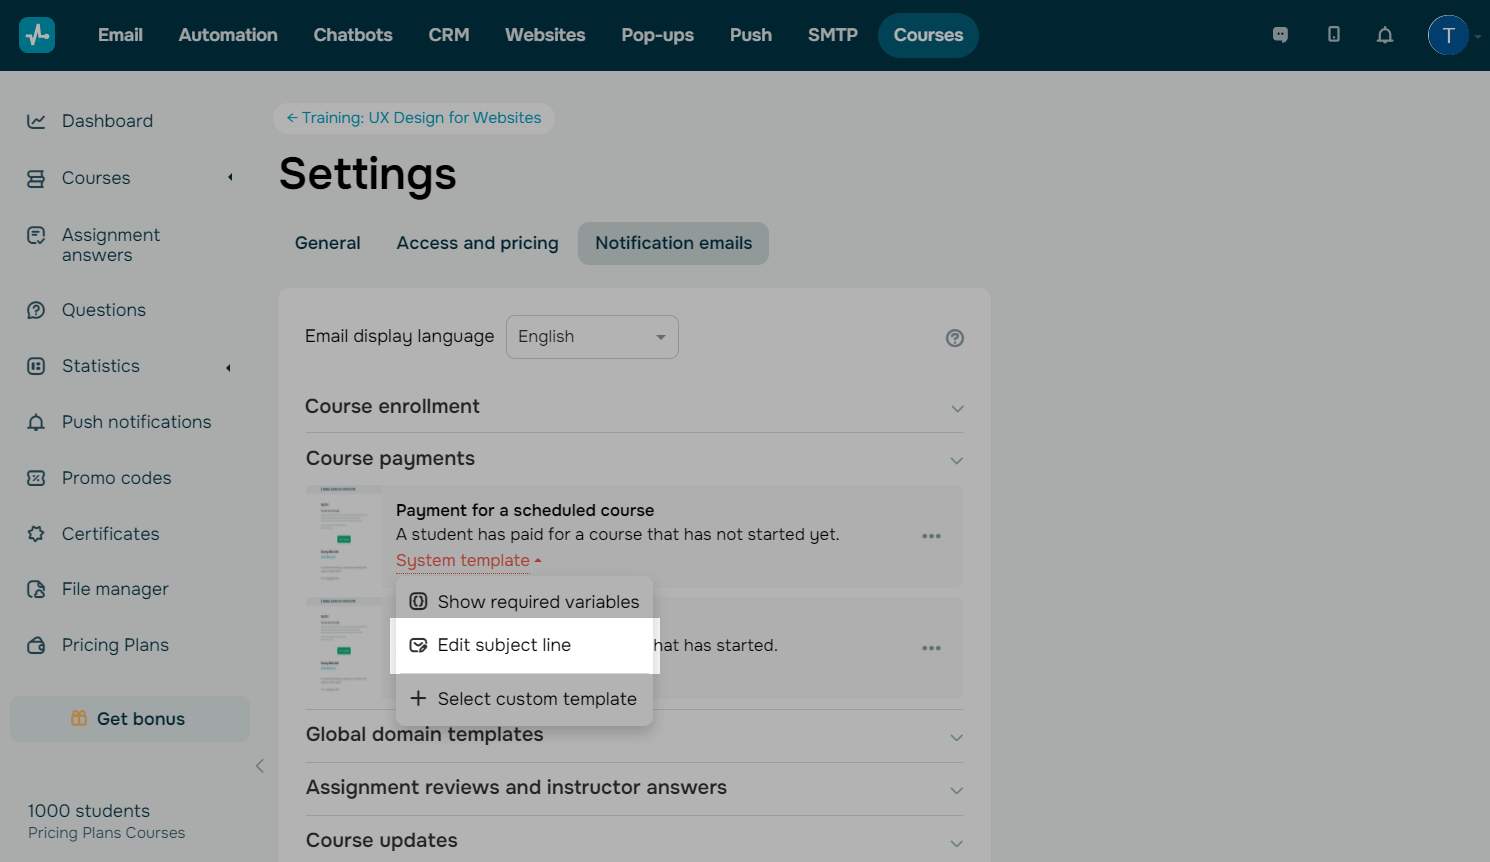
In the opened modal window, add your new subject line to the New email subject line field.
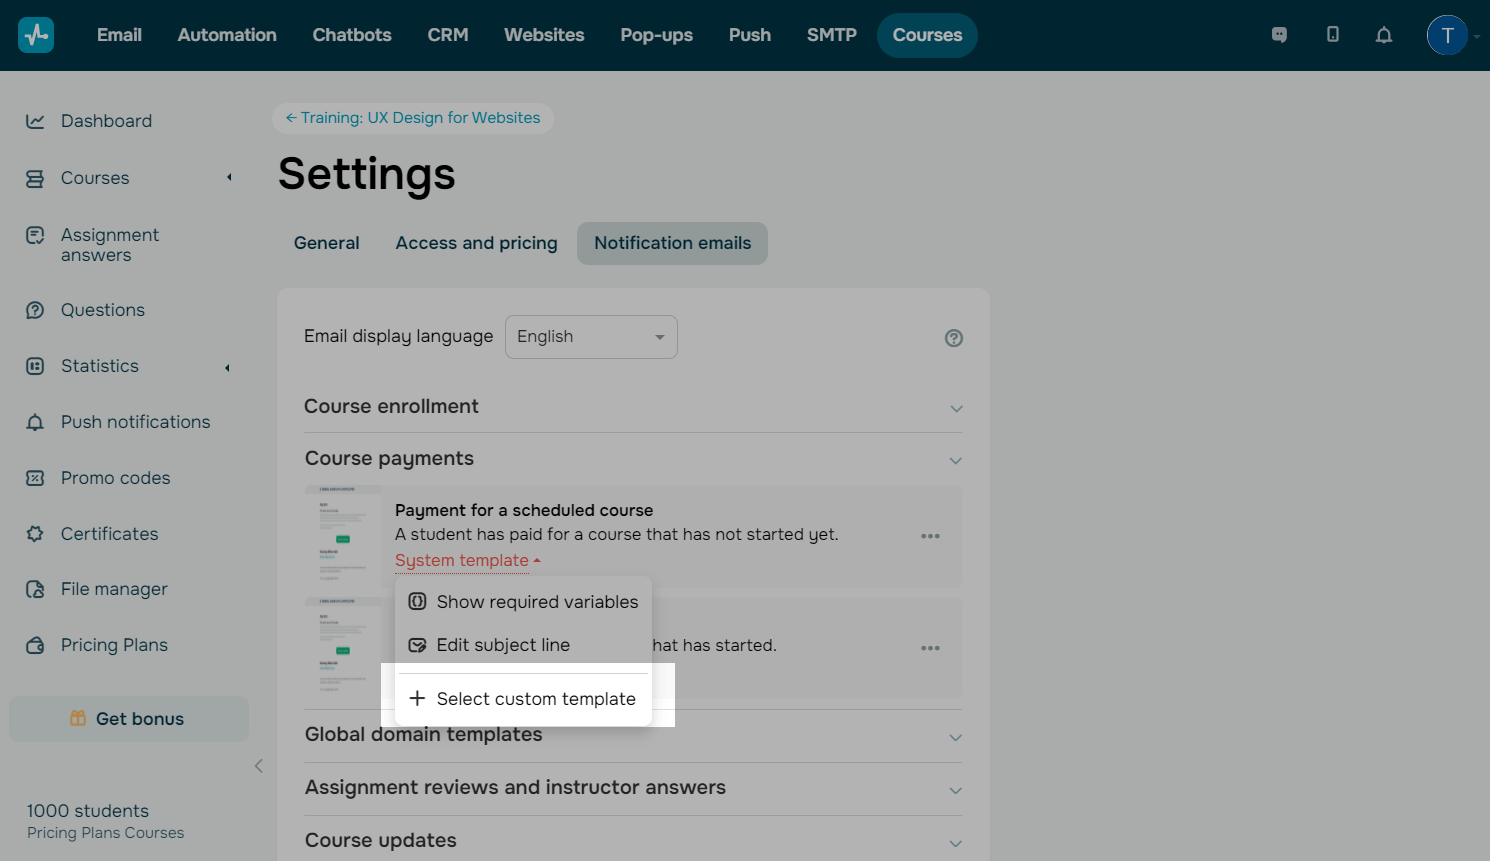
Change an email template
You can select your custom email template created with our email service.
Click System template and then Select custom template.
In the modal window, you can copy variables to use them in your own email template.
Select an email template.
Read also: How to create your custom template.
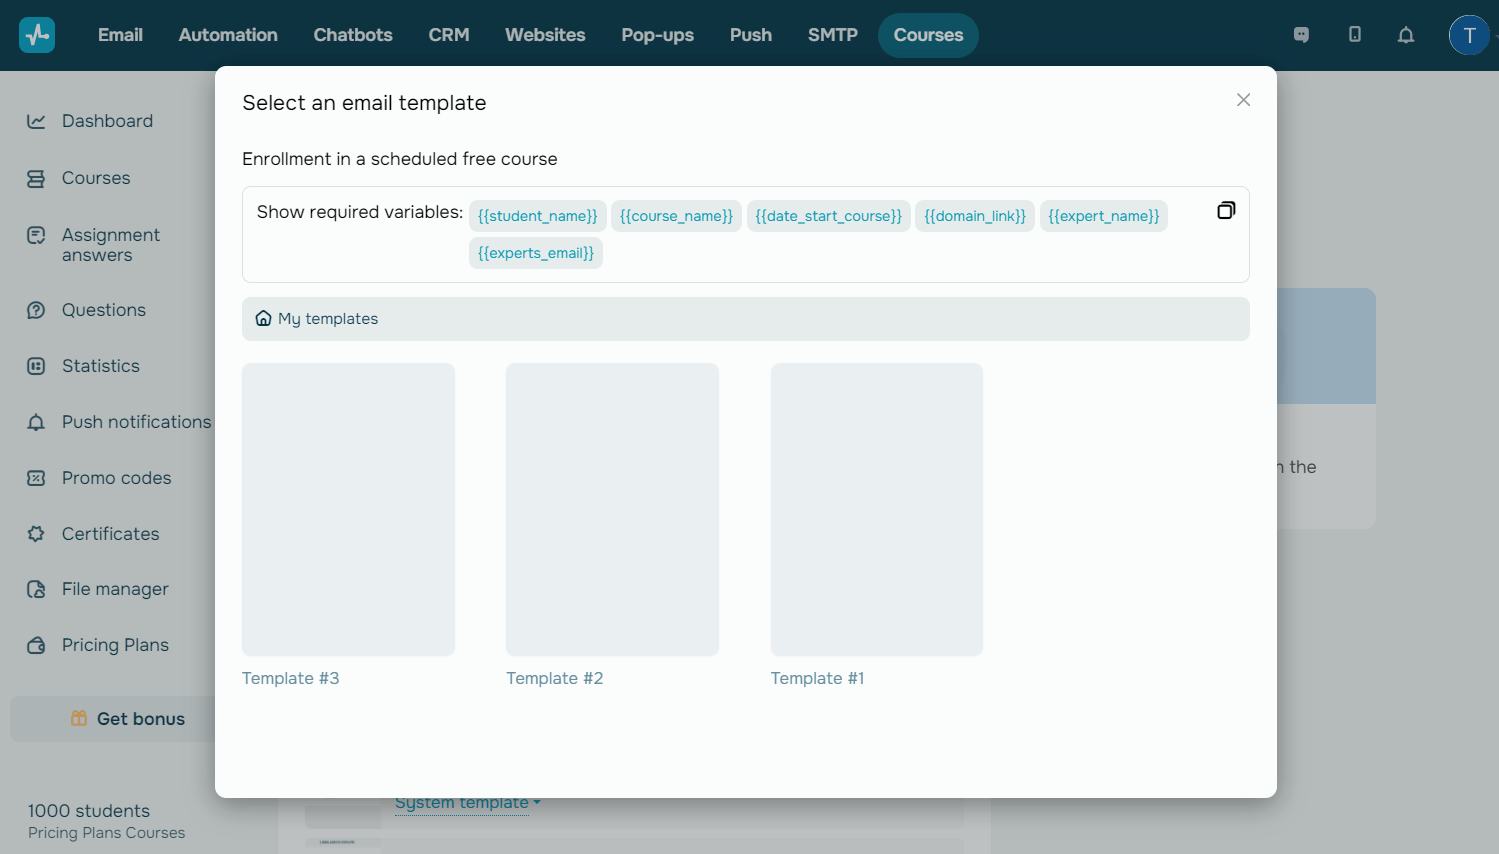
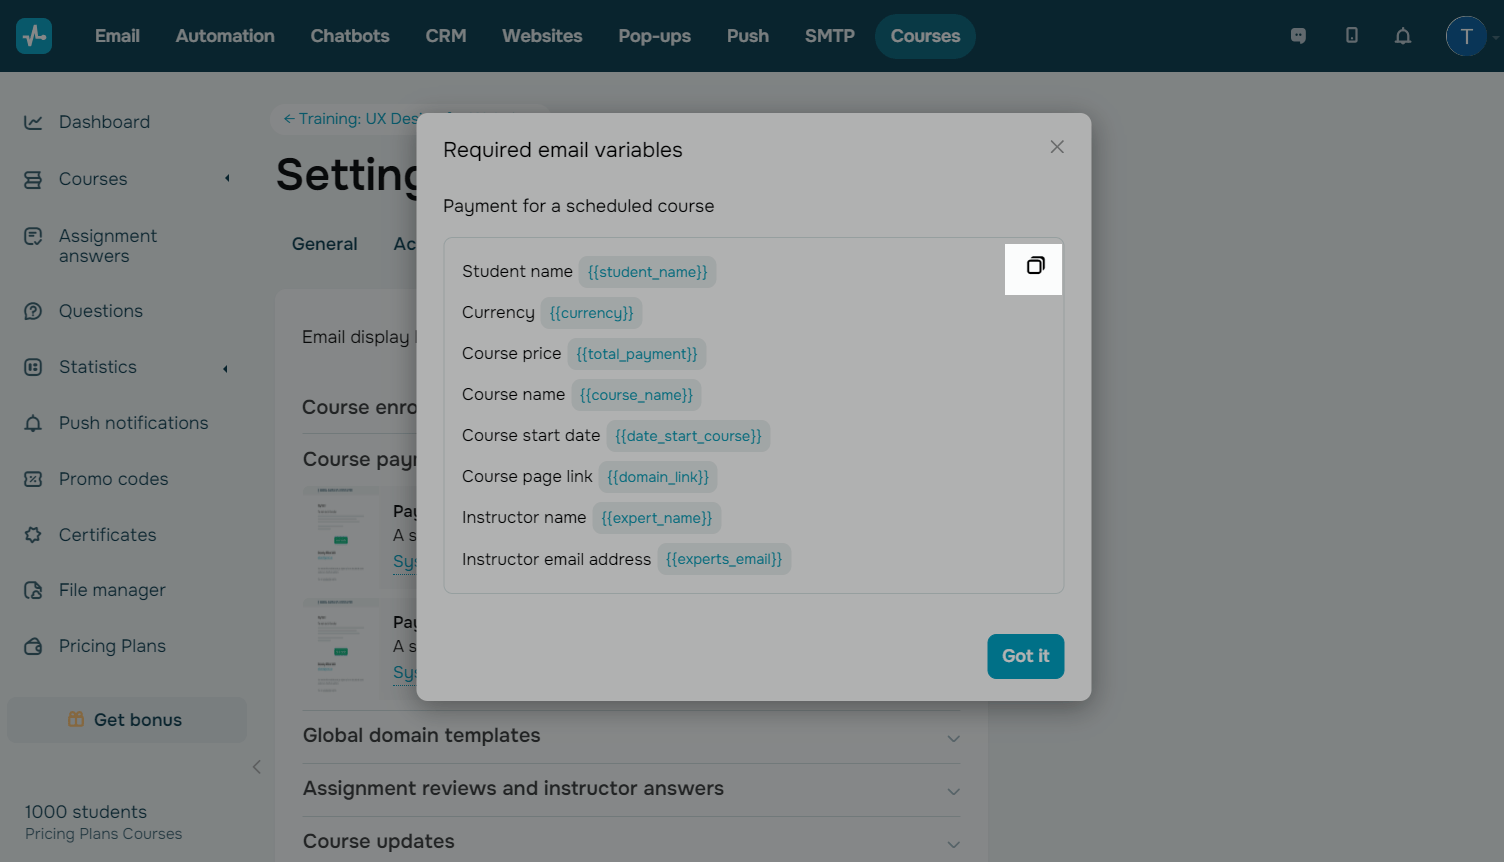
How to view the list of variables
You can view the list of variables in a template to customize your own templates.
Click System template, and select Show required variables.
To copy all variables to the clipboard, click the copy icon in the upper right corner of the modal window.
To copy one variable, hover over it, and click Copy.
How to send a test email
You can send any email notification from the list to your email address.
Click the three dots next to an email name, and select Send test email.
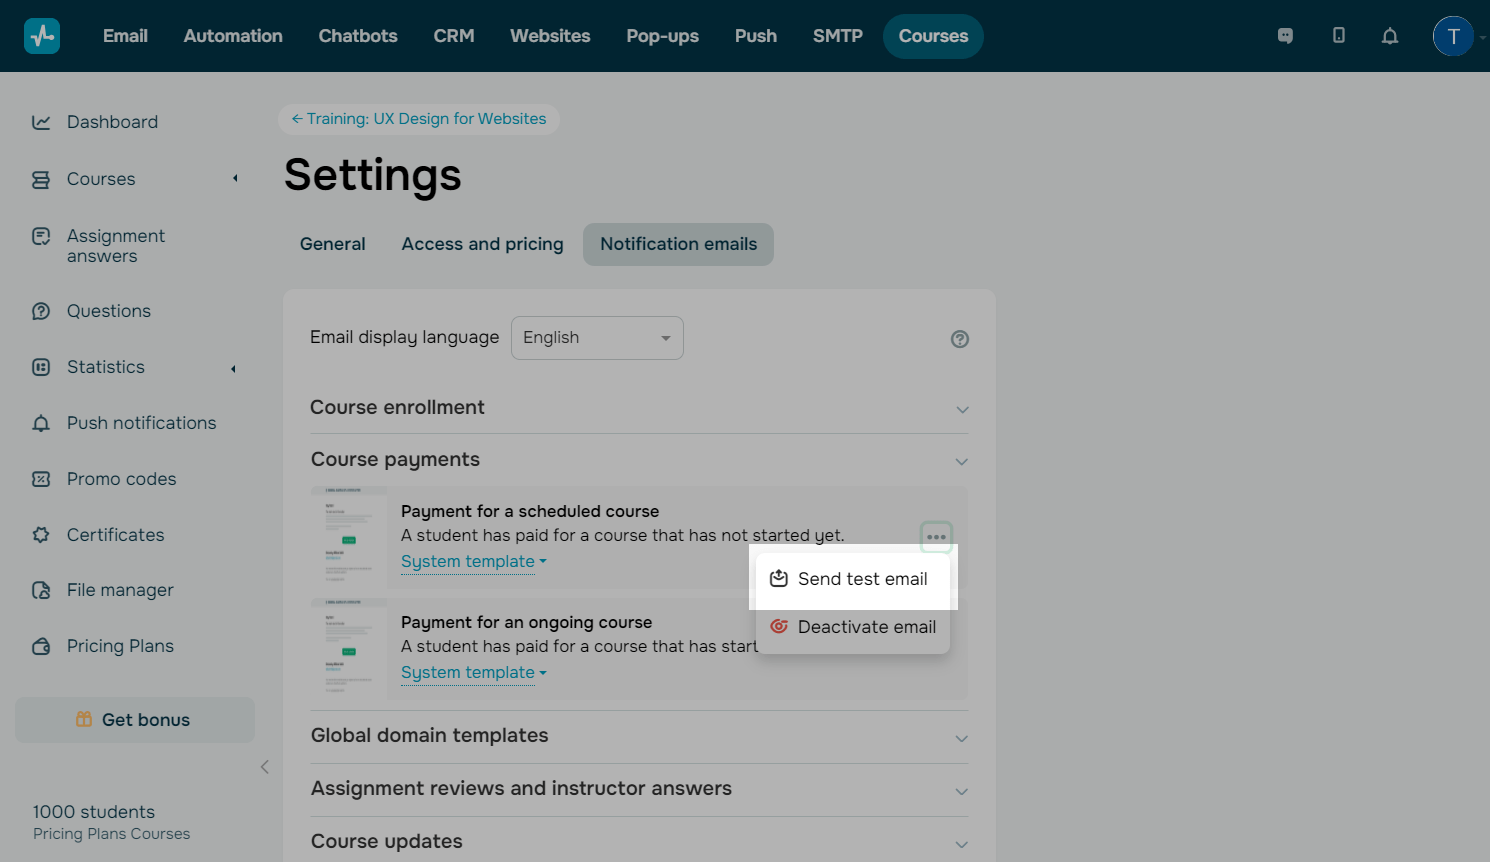
Next, select your email address, and click Send.
You will receive an email template with variables replacing your main course data. For example, course_name includes your course name. Find out more about the list of email variables in the How to view the list of variables section of this article.
Read also: Conditions of sending.
How to deactivate an email
You can deactivate any email from this list. This can be useful if you don't want to send some of them through the SMTP service or want to limit the number of emails in student inboxes.
Click the three dots next to an email name, and select Deactivate email.
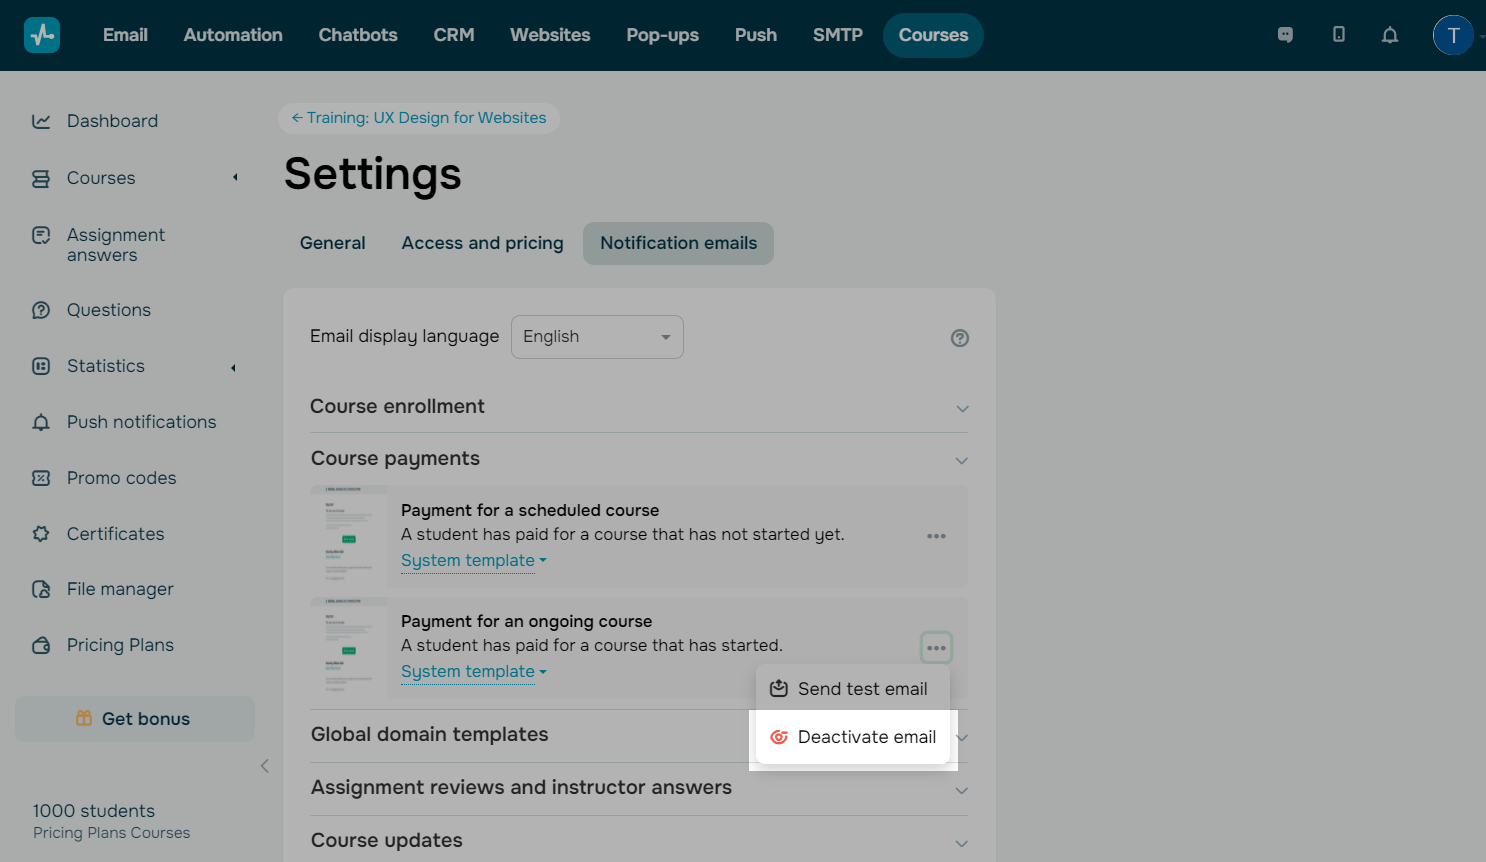
If you want to deactivate an email in all languages, select the corresponding checkbox in the modal window.
Click Deactivate.
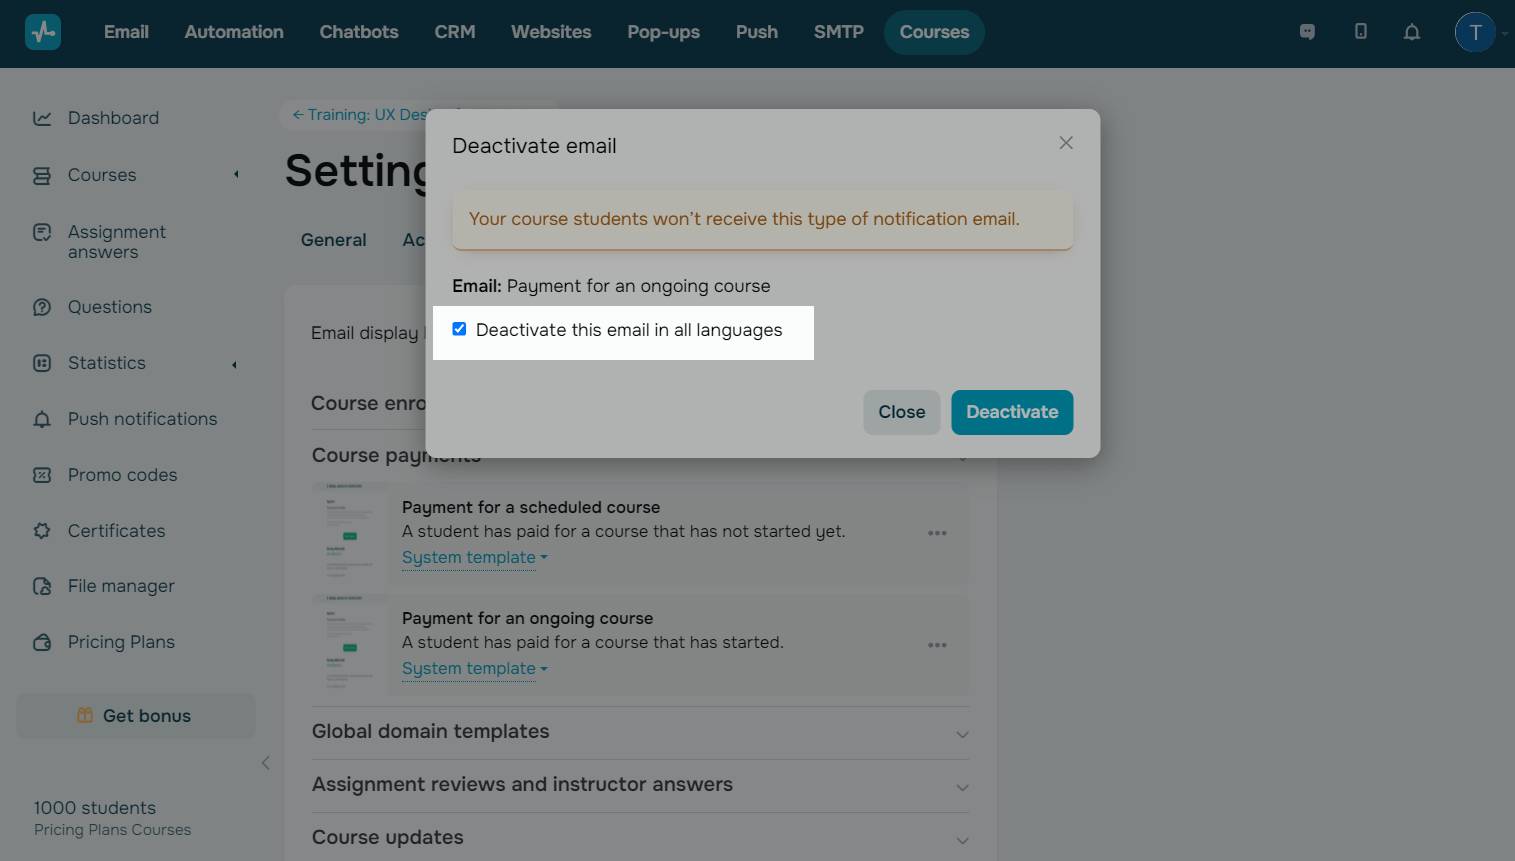
Afterward, course students will no longer receive this email, and you will see the Off status next to its name.
To reactivate an email, click the three dots next to its name, and select Activate email. You also select the checkbox to reactivate it in all languages and click Activate.
Last Updated: 19.04.2024
or