How to Create a Chatbot Flow Using a Template

Chatbot flows help optimize your time, automate communications, and simplify the process of solving customer issues. With SendPulse, you can use chatbot flows in your everyday business routine — from processing customer requests to providing your services with the help of AI.
Let's talk about how to create a chatbot flow using a template and customize it to your needs.
Select a Template
Go to "Chatbots" > "Templates" tab.

View templates by categories, and select the one that suits your needs best.
For example, in the "Booking" category, you will find appointment flows for various industries; in the "eCommerce" category, there are flows with service descriptions and payment options; and in the "Customer support" category, you can find flows that help identify and solve customer issues.

Once you select a flow, click it.
Select a Bot
Select a bot to which you want to copy your flow.
When selecting a flow, pay attention to social media platforms it is available on. Some flows are not available on certain social media platforms.

With some flows, you can also preview how users will see your conversation in a messaging app.

Click Copy flow.
Some flow templates have paid elements. To copy such flows, you need to upgrade your pricing plan.
Edit Your Flow
Go over your flow scenario and all the highlighted elements where additional actions may be required. You can edit all conditions, values, and elements to customize them to your needs.
Read more about setting up flow elements in the How to Use Chatbot Builder Elements article and about messaging platforms’ operation details in the How to Copy a Chatbot Flow from One Messaging Platform to Another article.

For example, in the "Message" element, you will probably need to edit or add the information about your services and products. For buttons with links, you need to add a link to your website. For payment buttons, you need to add a connected payment method. For media elements, you will probably need to upload an image or a file.
Pay particular attention to elements that use or save a variable — you need to choose a variable that exists in your selected chatbot’s audience.
If you do not select an existing variable, users will not receive the required data, or the data received from users will not be saved.
Variables are usually included in the following elements:
- the "Message" element (variables are added to your text field when you personalize a message or save values after receiving responses from users with the "Wait for the subscribers response" option enabled);
- the "Action" element (for the "Set variable,” "Create a deal," "Edit deal," and "Notify me" options);
- the "Filter" element (for the "Variable value" condition);
- the "API Request" element (variables are added to your field to send a URL and request body and to store values after receiving a request response).

In the "Pause" element, you can set your response delay time based on your business hours.
In the "Filter" element, you can view dates by condition and/or filters where you need to select an element. For example, for the "Payment complete" option, you need to select a product, and for the "Telegram Channel or Group Members" option, select an added Telegram group.
In the "Action" element, you need to select a pipeline and stage to which you want to save your CRM deals and select a Telegram group.
In the "Request API" and "Action: Send webhook" elements, you can add a URL request to your service.

Once you customize your flow, send it yourself to test it, and then save it.
| Save and send to yourself | Saves changes to the current flow and sends it to a chatbot owner. |
| Save as a new flow | Saves changes as a new flow. The copy of the old flow remains unchanged. |
| Save and exit | Saves changes to the current flow and closes the chatbot builder. |
| Save template | Saves changes to a template in the "Templates'' section. Next time you select a template, you will copy a flow with all its changes. |

Launch Your Flow
A new flow will be saved to the "Bot Structure" > "Flows" section. To launch a flow for users, you can share a link to it, link it to a subscription widget on your website, or create a keyword trigger, and select a flow.
Learn more: How to Set Up a Chatbot Launch.

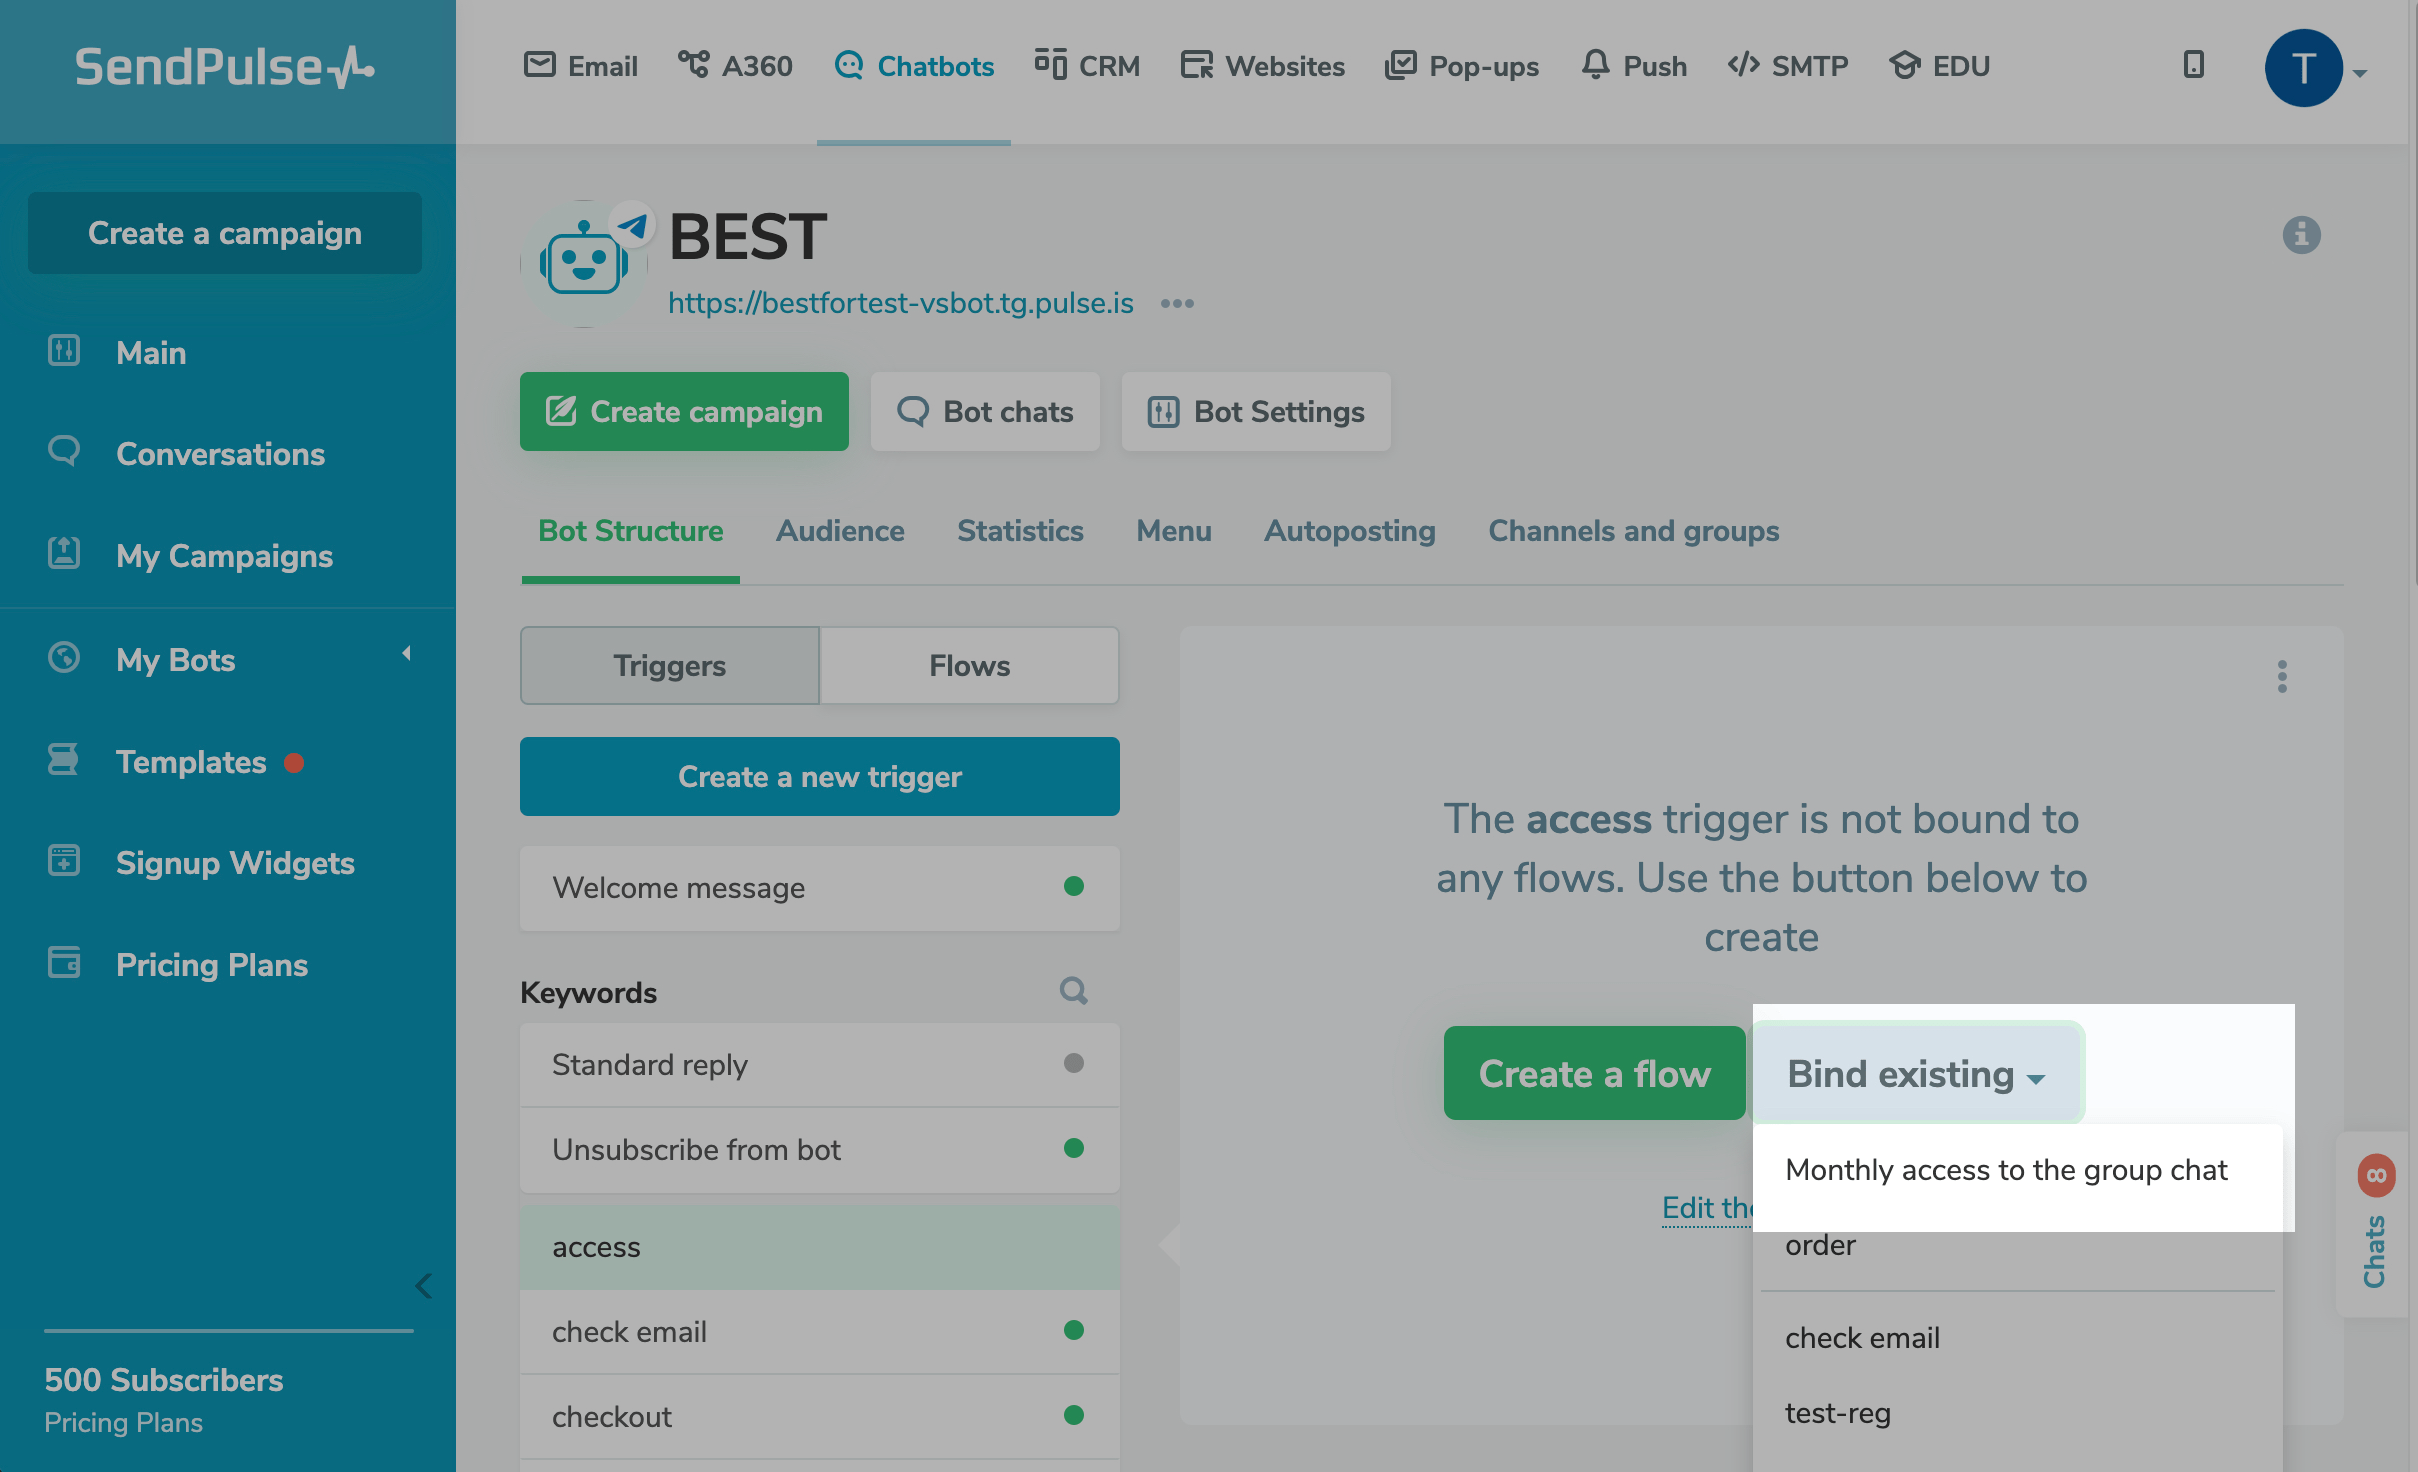
To configure a flow launch by a user-typed keyword or other triggers, go to "Bot Structure" > "Triggers." Click Create a new trigger, enter your trigger word, and configure other settings.
Select the created trigger from the panel, and click Bind existing. Select a flow from the list.
Last Updated: 14.11.2023
or