With SendPulse’s website builder, you can create subscription forms or pop-ups on your SendPulse-powered website or integrate them into third-party websites. This allows users to subscribe to your email newsletters and chatbots at the same time and deliver a seamless multichannel experience in one click.
To give you an idea, you can invite website visitors to sign up for a webinar, get a freebie, or subscribe to company news. After filling out your form, users will automatically subscribe to your chatbot. Their data will be saved to your mailing list so that you can send emails and SMS campaigns later. You can also save their info to SendPulse’s CRM system and your chatbot audience to track user interactions and continue personalized communications within messaging apps.
Let’s talk about how to capture both email and chatbot subscribers using the same pop-up or website form.
If you don’t have a website, you can create one using SendPulse’s website builder. In your account, go to “Websites” and click “Create website.” You can build your site from scratch or select and edit any available template. To learn more about how to build websites, take the free SendPulse Academy course.
Choose a placement and add the “Form” widget to it. The editing panel will appear on the right. If you plan to create deals in the CRM system, type in a deal name and select a pipeline and status. If you only want to save contacts without creating deals, select the “Create only contact” option.
To save contacts to your mailing list, turn on the toggle and select a mailing list from the dropdown menu.

Now, go to your form field settings. “Email” is a required field you cannot remove, but you can edit its name and placeholder text.
Add a new field and click the pencil icon to edit it.
Next, type in a field name. It should match the chatbot variable name you will create later.
Add placeholder text and select a variable from your mailing list and a contact field in the CRM system.
 Form field editing panel
To add required variables, including city, job title, or date of birth, make sure to create them in your mailing list and CRM contact settings in advance. Matching variable names and field names is optional.
You can also make other form fields required. Now, save your changes.
Action after subscription
Click the pencil icon to edit the button text and style.
Scroll down to advanced form settings. In the “Action after subscription” field, select “Go to page” and paste your chatbot flow link.
To get your chatbot flow link, in the “Chatbots” section, click the three dots next to your flow name and select “Link to launch the flow” from the dropdown menu.
Copy this link, add it to your form settings, and save the changes.
Once you finish customizing the form, publish your website.
How to create variables in your chatbot audience
Chatbot subscriber data will be saved to the “Audience” tab. To transfer data from your subscription form to your chatbot audience, create variables and type in names that match your form fields. Read more about how to build effective chatbot flows that collect and use subscriber data.
The “Email” and “Phone” variables automatically appear in your chatbot audience when a user fills out relevant form fields and subscribes to your chatbot.
There’s also the “Name” variable you can’t delete or edit in your chatbot audience. It automatically saves your subscribers’ usernames from messaging apps.
 Chatbot Audience tab with a list of system variables
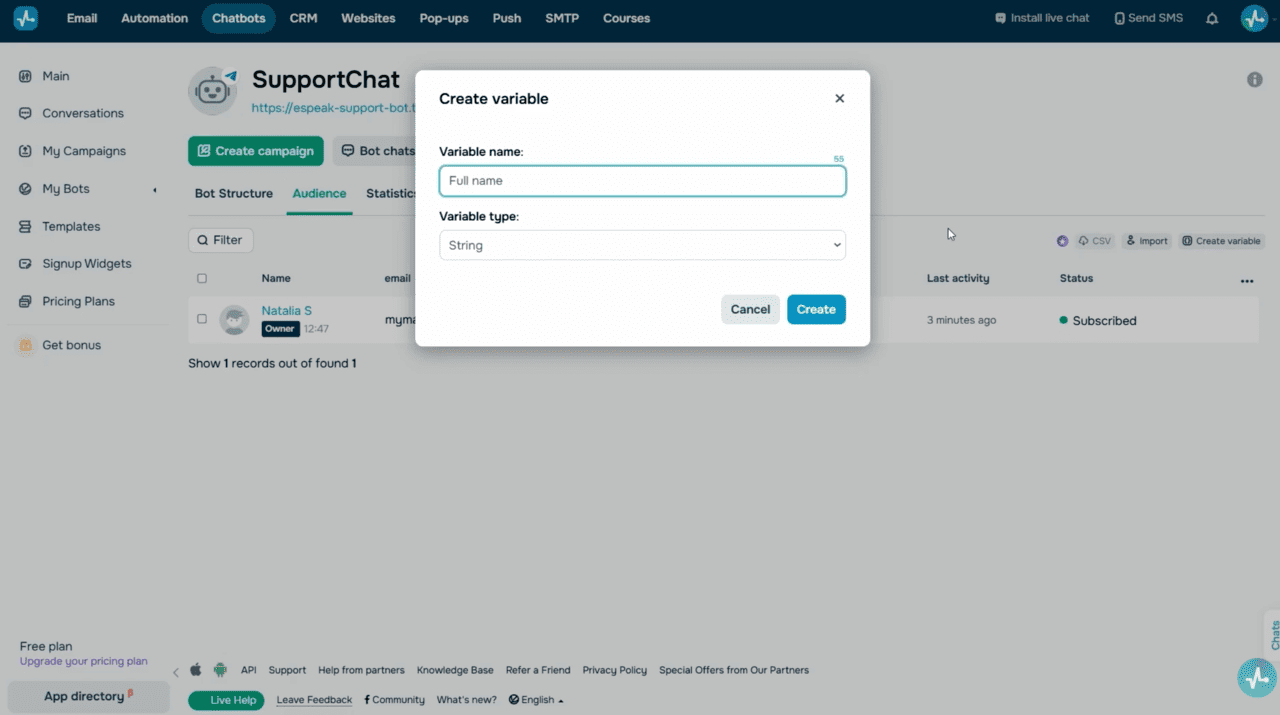
To collect users’ actual names, add a new variable with a different name, like “First name” or “First and last name.” Click “Add variable.” Name it, select a type, and save it.
Keep in mind that your variable name must match your form field name.
If you plan to collect other data, add relevant variables, such as your subscriber’s company name, job title, or city.
When a user fills out your form and moves on to your chatbot, field values will be automatically saved to your chatbot variables in the “Audience” tab.
How to create pop-ups on third-party websites
With SendPulse’s pop-up builder, you can create pop-ups triggered by specific actions, such as when a user views your website for over thirty seconds, scrolls more than fifty percent of your website page, moves a cursor to close a tab, or performs other actions.
You can add pop-ups to SendPulse-powered websites or websites created using other tools.
To learn how to create projects, link your websites, and add pop-ups, check out our tutorial using the link in the description.
Setting up pop-up fields
Select a pop-up template and remove unnecessary fields and buttons. Then, add a new field and select the “Email” variable from the list of system variables to pass users’ email addresses. Once a user fills in this field and subscribes to your chatbot, this variable will automatically appear in your audience. Learn more about building high-converting lead capture forms.
You can also edit placeholder text and make this field required.
To collect users’ phone numbers, add a new field and select the “Phone” system variable. Users will have to enter their phone numbers in the international format. You can also include an infotip or add a dynamic phone number mask with the “plus” sign. Once a user fills in this field and subscribes to your chatbot, the “Phone” variable will appear in the audience automatically.
You can also pass other system variables from the list, like first name, last name, company name, and date of birth, or create custom variables. Let’s talk about how to do this.
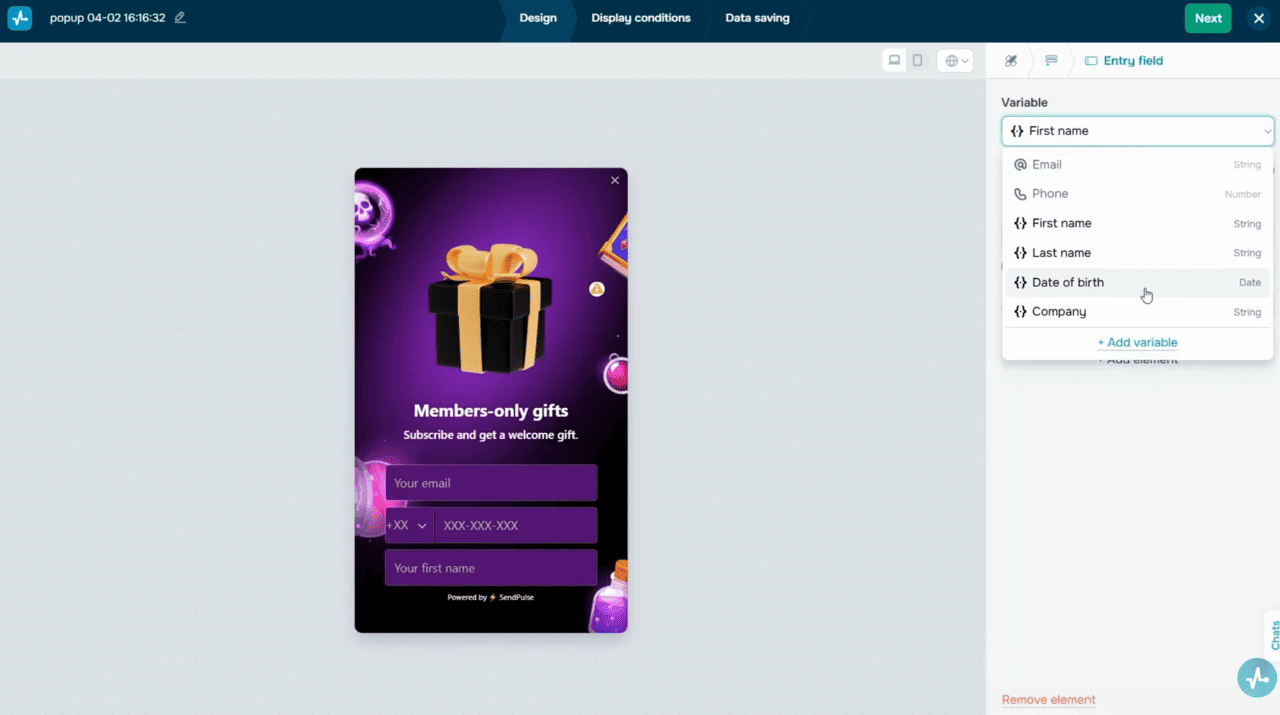 Pop-up field editor with the system variable dropdown
System and custom variables
To pass system variables, go to your chatbot audience and create the following variables:
- The string-type firstName variable
- The string-type lastName variable
- The date-type default_birthdate variable
- The string-type default_company variable
Once you add a field and select one of these default variables, user data will be saved to matching variables in your chatbot audience.
To create custom variables for your pop-ups, click “Create variable,” type in a variable name, and select its type.
Avoid spaces and apostrophes in variable names. If a variable name includes multiple words, separate them with an underscore.
Next, create a variable with the same name and type in your chatbot audience. Keep in mind that custom variable names must match form field names.
Adding the chatbot subscription element
Add the “Messaging app” element to your pop-up to motivate users to subscribe to your chatbot. Edit the button text, then select your chatbot and the flow you want to launch.
Customize your form design and click “Next” to configure its display conditions. Decide if you want to save collected data to your mailing list or create a deal in the CRM system. Then, publish your pop-up.
 Pop-up editor with the Messaging app element added
Once a user fills in the pop-up fields and proceeds to your chatbot, their data will be saved to your chatbot variables. The “Email” and “Phone” system variables and their values will be created automatically.
Wrapping up
Collect subscriber contact data using a single pop-up or form and build omnichannel interactions with them through email and messaging apps. Segment your audience and connect with them using their preferred communication channels.