Thinking about going global with your website? Adding multiple languages to it is one of the easiest ways to grow your reach, make your content more user-friendly, and boost performance across different regions. This approach is especially valuable for businesses expanding into or already operating in global markets.
In this article, we’ll walk you through two quick methods to make your SendPulse-powered website multilingual, so you can connect with visitors worldwide without missing a beat.
Page Copies Within a Single Website
The first method involves hosting all language versions within the same project or domain, with every localization represented as a separate page. Typically, these page links include subdirectories with language codes, like mysite.com/en.
Using subdirectories is ideal for websites with 2–3 language versions that have a standard structure and content. For instance, if you’re translating a travel agency website into three languages, this is the most efficient option. All versions are hosted within a single project, which makes them easy to edit and update. Plus, they often inherit the main domain’s SEO strength, giving your content a solid head start in search rankings.
Add a Header and Language Switcher Menu
Before creating page copies, we recommend you add the “Header” sitewide block to your website and insert the “Menu” widget into it. This menu will later serve as the navigation hub for your language versions, allowing users to switch between them easily. We linked step-by-step guides on how to add a header and menu in the video description.

Copy Your Page and Set the Language
Once you create your language switcher menu, go to the “Websites” section and open the list of pages. Locate the page you want to translate, click the three dots next to it, and select “Copy.” In the pop-up window, type in a new page name and URL, then add a subdirectory for its new language version. Suppose your original website link is mysite.com, then its English version is mysite.com/en. We also recommend naming your new page in the target language right away — this will make navigation easier and help you keep track of every version within your project.
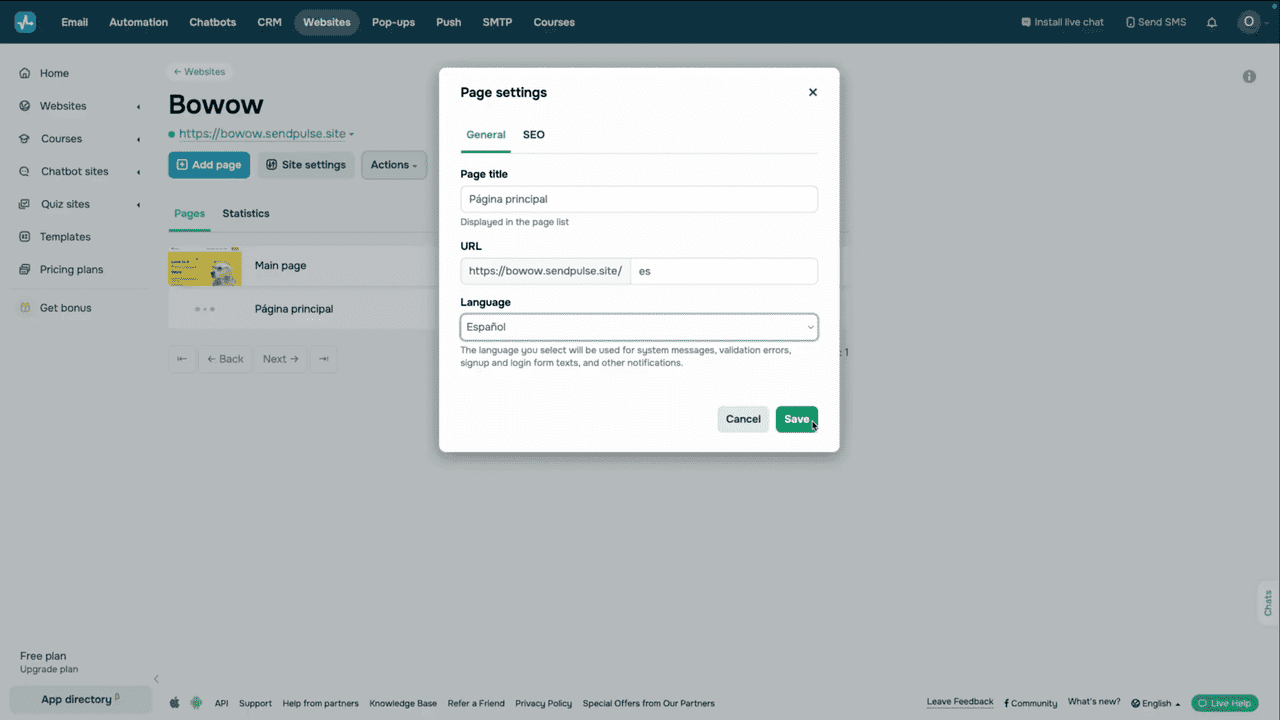
Once you create a page copy, click the three dots next to your page and select “Settings.” In the “Language” field, select your interface language from the list. Now all notifications and technical texts will automatically appear in the selected language.
Translate Page Content Using AI
However, you’ll need to translate your page content yourself. To do this, click the three dots next to your new page, select “Edit,” and open it in the builder. Go over all text elements and translate them into your target language manually or use the built-in AI features.
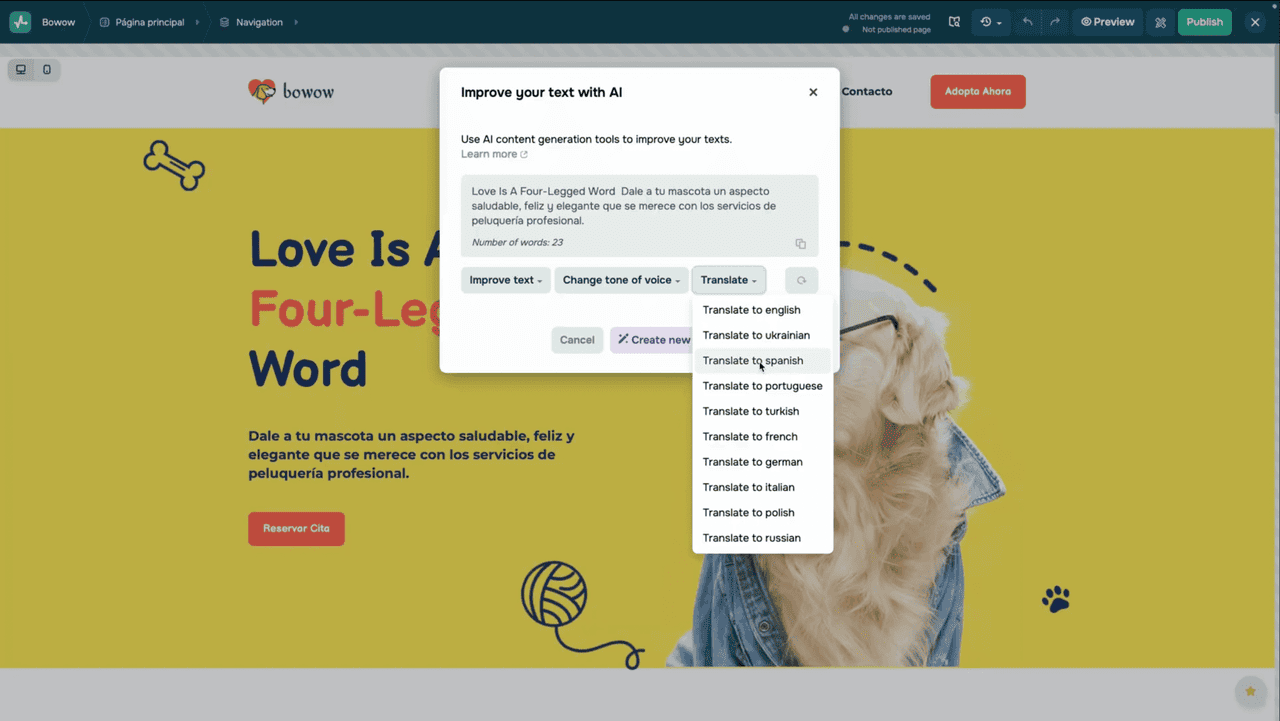
If you go with the second option, open a text element, select “Use AI” on the toolbar, click “Translate,” and select a target language. Once the translation is generated, click “Apply text” to insert it into the text element.
We recommend reviewing and adapting all automated translations manually to ensure natural readability and cultural relevance.
You get 30 free AI requests. After that, you can integrate with OpenAI to keep using the feature. We’ve linked detailed guides on how to use AI features for your website content and set up this integration in the video description.
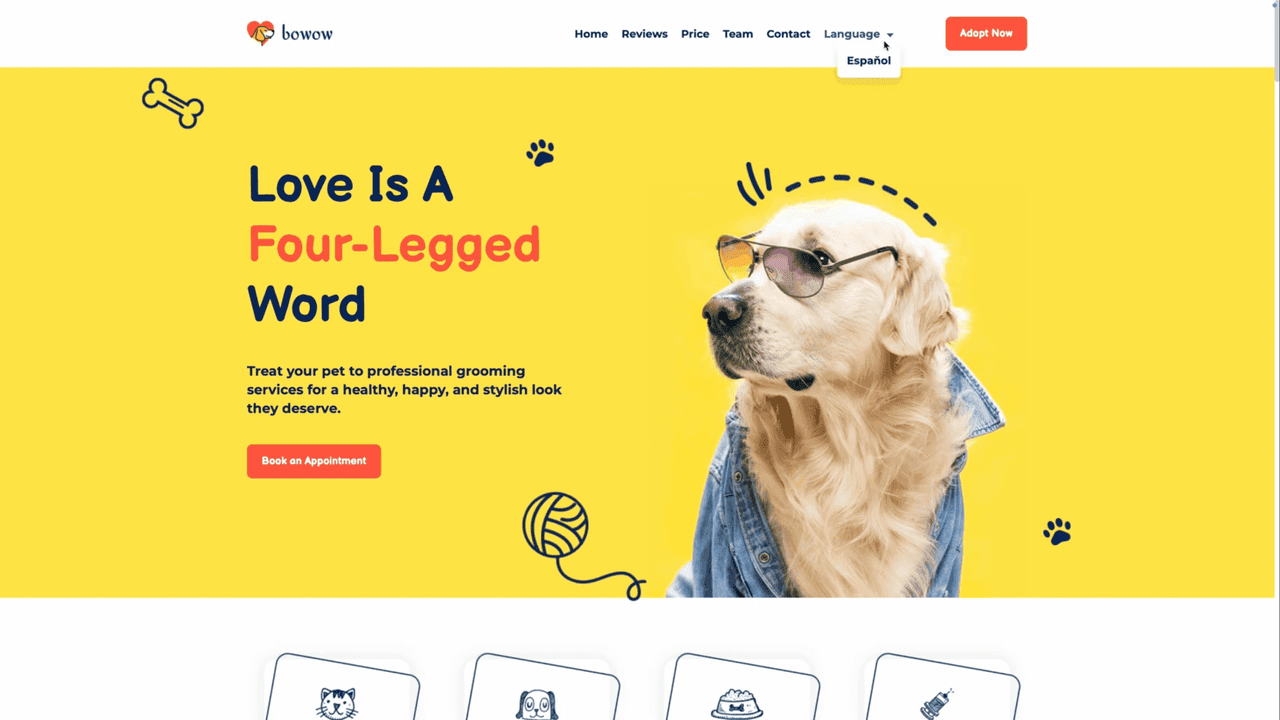
Once all language versions of your page are ready, add them to the language switcher menu you’ve set up earlier. Open your page’s “Menu” element and add a new item named “Language” in your target language. Or use localized terms like “Langue” for French, “Idioma” for Portuguese, and so on. Leave the link field blank and click “Save.”
Next, click the three dots next to your new item and select “Add submenu item.” In the submenu item, type in a language name, for instance, “English” or “Español”, and paste the link to your translated page. If you have multiple translations, repeat this for each localization. This way, you will create a dropdown list of languages and allow visitors to quickly switch between versions.
Adapt the Language List for Every Page
Please keep in mind that you need to adapt your language list for every page. For example, if your website is available in Spanish, Portuguese, and English, then:
- Your website’s English menu must include links to the Spanish and Portuguese versions.
- Your Spanish page must link to English and Portuguese versions.
- Your Portuguese page must link to English and Spanish pages.
This way, you will allow your website visitors to switch to another language no matter what page version they are on.
Dedicated Websites for Every Language
Another way to make your website multilingual is to create individual websites using different subdirectories. In this case, every language version is a standalone project with its own settings, giving you flexibility to localize content for each target market.
This method works best if you want your website to support many languages or significantly adapt its structure to offer country-specific promotions or unique product lines.
Copy Your Website and Select the Language
The process is similar to the first method. Head over to the “Websites” section and ensure your original content is ready for copying. If you need to make adjustments, do so before copying your website.
Next, click “Actions” and select “Copy.” Type in your new website name and its main domain in the pop-up window. All pages will be copied using the same link structure as the original website, but under the new domain.
For example, if your original website link is discoverytale.com, you can set the discoverytale.latam domain or the latam.discoverytale.com subdirectory for its Spanish version. During the setup, you can select a standard SendPulse domain and assign a custom subdirectory in your website settings later. You can learn how to do this if you follow the link in the video description.
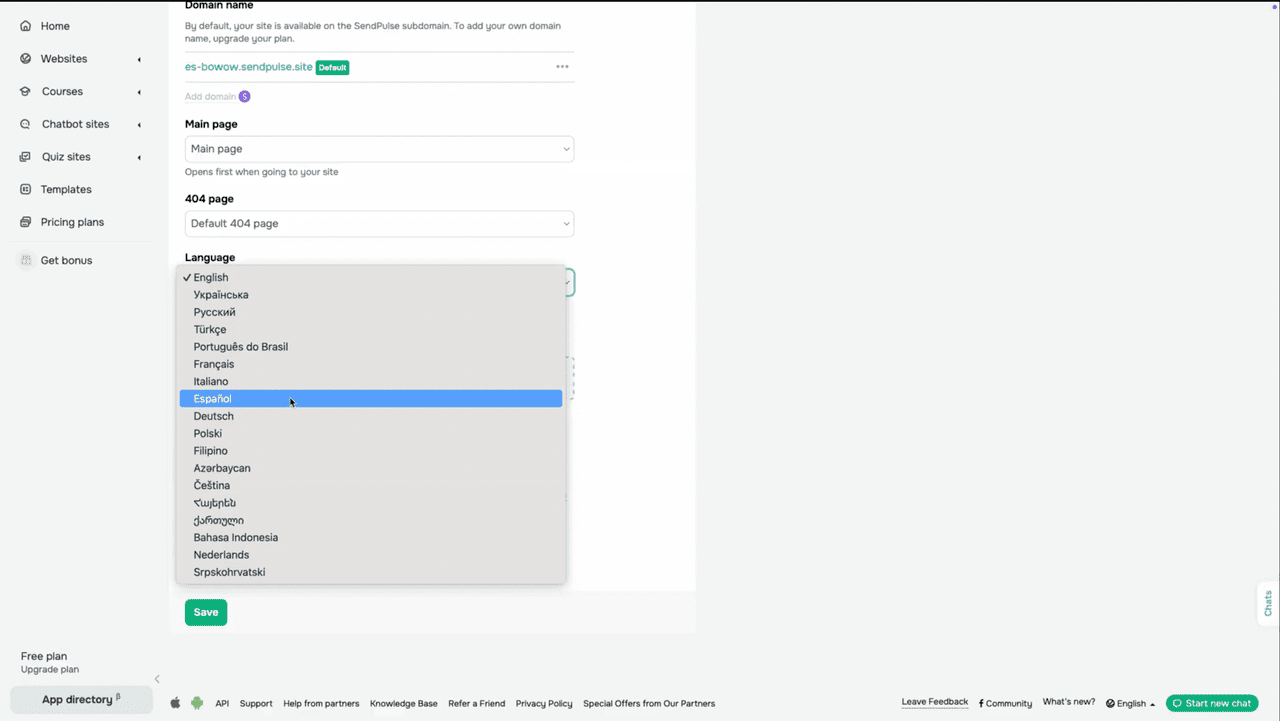
Once you copy your website, go to your new project settings. In the “Language” field, select the appropriate language version from the list. Unlike the first method, this language is applied to the entire website simultaneously, not to individual pages.
Translate Content and Update Internal Links
Then, open the list of your new website pages, click the three dots next to every page, and select “Edit.” Just like before, go through every text element and replace the original text with your translated content. Be sure to update any internal links as well — they should lead to the correct pages within the new language version, not back to your original website. Also, adjust page names in their settings.
The final step is to link all language versions together through the language switcher menu. Make sure this menu is added to every page on each website so that visitors can easily switch languages wherever they are.
Test Your Language Switcher
No matter which method you choose, once you set up all your language versions, test your language switcher menu.
Verify the following:
- Pages and menu items appear correctly in every language.
- Your language switcher operates smoothly.
- Links to language versions are configured properly.
All website elements — forms, buttons, and messages — are translated.
If everything works as it should, congratulations! Your website is now ready to welcome visitors from around the world and help you grow in global markets. Create a multilingual website using SendPulse today — choose the method that works best for you and see how simple and intuitive it can be.