Hosting or participating in an event helps companies establish their brand and create a buzz around their products or services as well as educate the audience. From this entry, you’ll learn what goes into creating a highly-effective event invitation email.
Why use event invitation emails
An event invitation email is a crucial part of event marketing, that consists of promoting products or services through online or in-person communications — conferences, seminars, webinars, workshops, launch parties, or expos.
According to Bizzabo, 31% of marketers agree that such live events are critical in meeting their business objectives and achieving the company’s success.
The most effective marketing channels
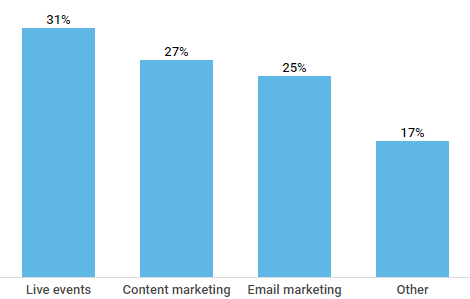 Source: The Event Marketing 2018 Benchmarks and Trends Report
Since email is correctly considered the most effective medium to promote an event, don’t hesitate to start right in the subscribers’ inboxes.
To make the most out of your event invitation email, make sure it includes
- time and place of your special occasion;
- speakers and topics they are going to dwell on;
- sponsors;
- benefits for attendees;
- useful links.
If you’re scratching your head over how to write an email invitation for an event, here are some necessary steps for you to take followed by several good examples from our inbox.
How to write an email invitation for an event
Start with a subject line
A compelling subject line can trigger and motivate recipients to open your email. Since 69% of users report spam based solely on the subject line, you need to make it speak clearly about what a user should expect from your emails.
For instance, you can indicate the name of the main speaker to fuel up the interest to your event, like in an email from DMA Awards:
 Subject line with the name of the speaker
Alternatively, you can invite the actual subscriber by name to glue their attention. This is what the HireVue Team did in their event invitation email:
 Subject line with the name of the user
Why not encourage users to take action by indicating the date of the event or registration deadlines, like MarketingProfs did in their campaign?
 Subject line with the event date
And, of course, remember to add some intrigue to your subject line by asking a question, as DMA Events did:
 Subject line with a question
Introduce the speaker
Just like you attend a concert to see your favorite band, users watch for big names while checking out an event outline. What’s more, a conference, seminar, or a webinar is always a nice opportunity to get insights from new faces the attendee-to-be has never heard of.
So, no matter whether you mentioned a speaker in the subject line, remember to introduce the key person and tell about their professional background in the main body of your email, as Pearson did in one of their campaigns:
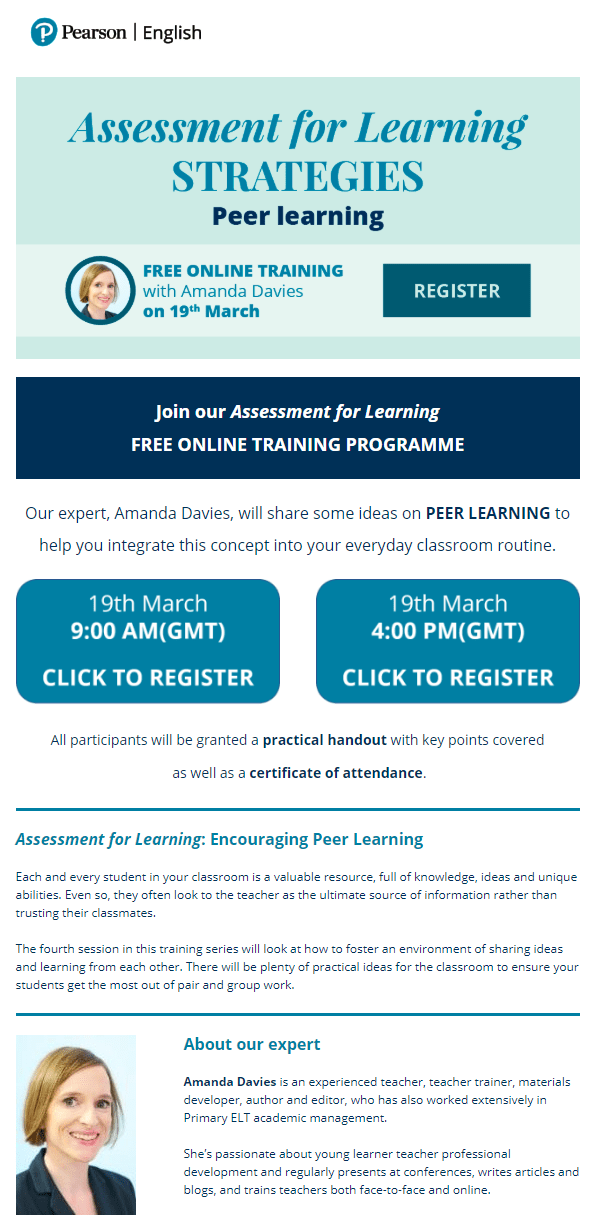 An email with information about the speaker from Pearson
The company sent a webinar invitation featuring the main speaker both in the header and footer of the email, devoting the latter to the expert’s qualifications and personal features.
Add visuals
Make your email more appealing and invite subscribers to your event by adding a video. In case you’re hosting a big opening, place a picture of the building; or if you are planning a webinar, use a snapshot of a service or product.
Segment
If you are promoting an event for a particular profession or location, make sure you are informing the right audience about it. Collect their names, job positions, age, or any other information about your subscribers to segment your mailing list.
Ace Hotel, for example, announced their movie marathon event relevant for anyone located in New Orleans. The company designed the email in the corresponding spooky manner, indicated the date, and provided the link for users to purchase the tickets.
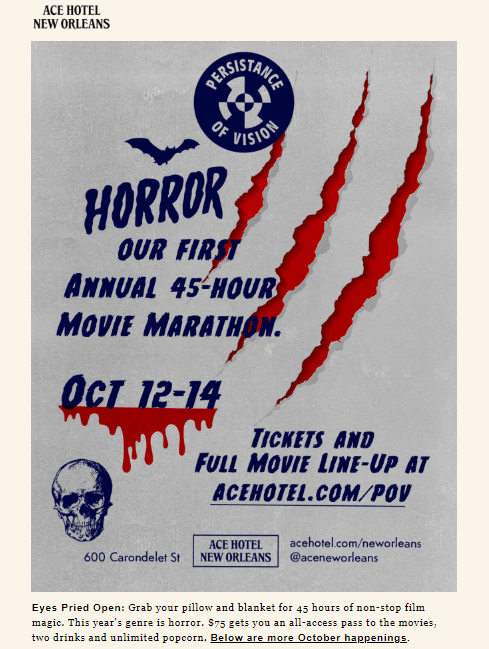 Event invitation email from Ace Hotel to users from New Orleans
Unveil the benefits for the attendee
Inspire users to attend your event by listing what they will learn and how this information is useful for them. Benefits for the attendee may be various: freebies, a sneak peek on your new services or products, or communication with respected speakers in their industry.
ReadWrite Labs followed this rule in their event invitation email. Together with details of the event, like the place, date, and sponsors, the organization included a list of perks awaiting for subscribers upon their participation.
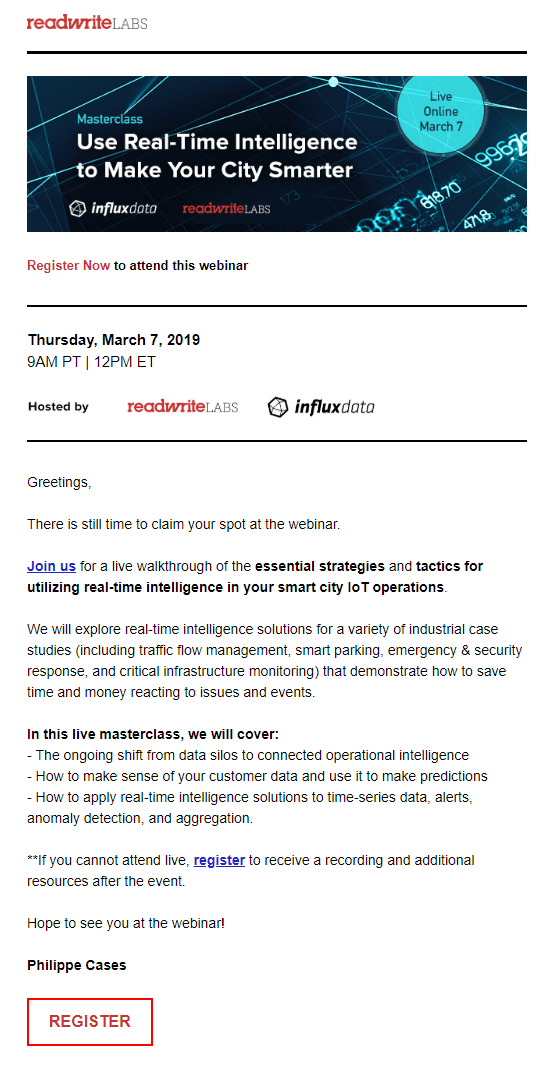 Event invitation email with benefits from ReadWrite Labs
How to send an event invitation email series
Let’s say you’re arranging a webinar and you’ve got a list of subscribers using your service. Now you need to promote your event to them. To do that, you can organize your event invitation into a series of automated emails using Automation 360.
This is how such series can look like:
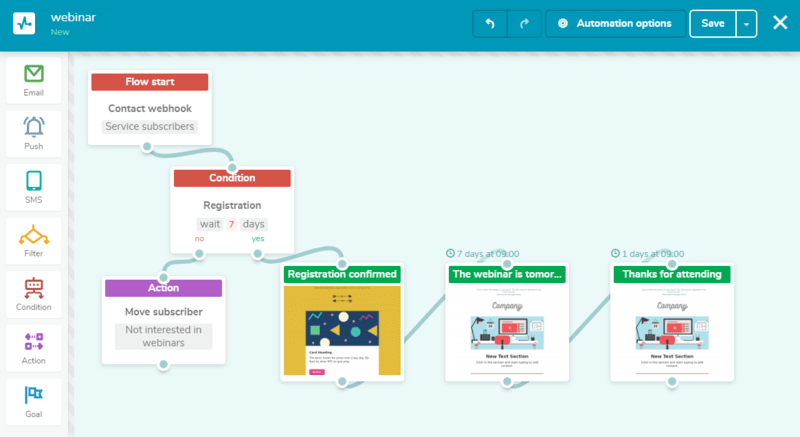 Event invitation email flow created in Automation 360
Now, let’s take a closer look at each step you should take to launch such an automated flow.
Create an automated email flow that starts with a contact webhook. Select a mailing list you need.
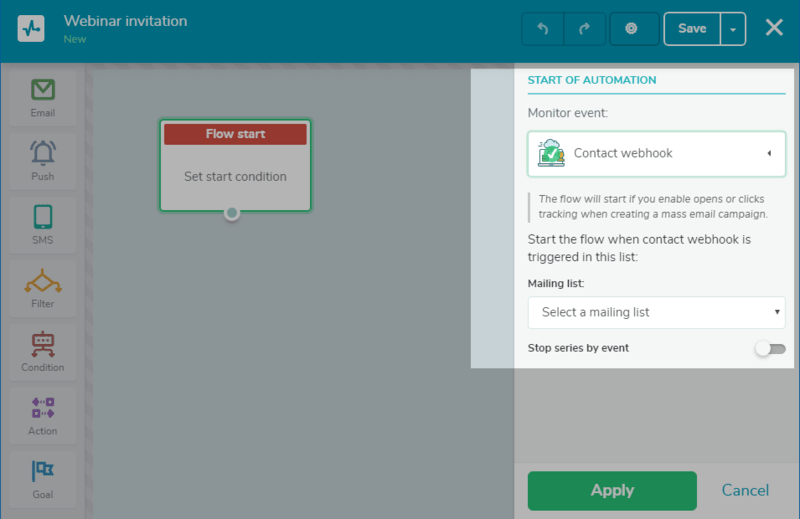 Setting up a contact webhook as a trigger action for the flow start
Save this automation and proceed to a regular email campaign. Create a mass event invitation email and make sure it contains information about the place, the date, the speakers, and reasons why users should participate in your event. Remember to add a clear CTA leading to a page where users can register for the event.
When you’re done with the content, tick the corresponding Automation 360 box in the “Campaign parameters” stage.
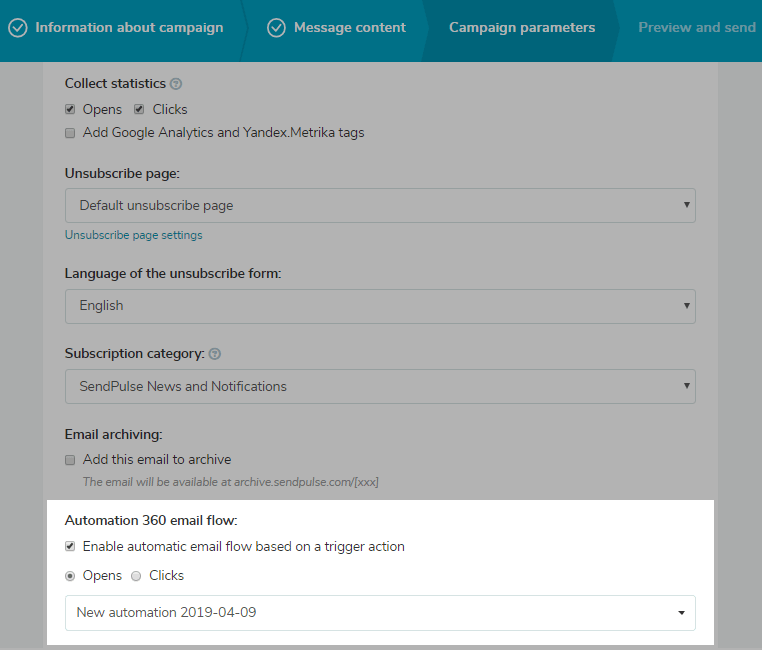 Enabling the automatic email flow option in SendPulse after the mass event invitation email
Provided that your subscribers open this mass email, an automated email flow based on the contact webhook will be launched.
Step 2. Add a condition for sending the next emails in the flow
Use the “Condition” block to set up the condition for triggering the next messages in the automated flow. It can be an open, click, delivery, or any other custom event you set in the “Events manager.”
We used this block to set the waiting time for webinar registration — 7 days.
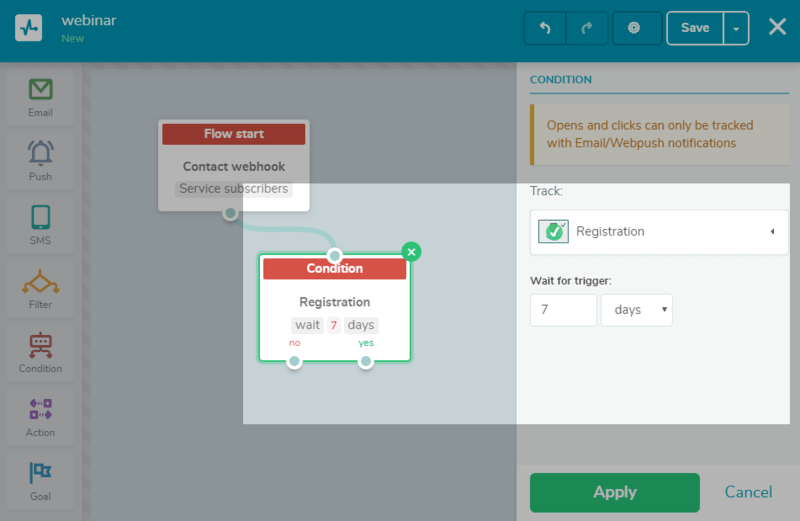 Setting a condition for sending next emails of the flow
If a subscriber registers within this period, they instantly receive the next email — confirmation for the webinar registration. In this email, thank your subscribers for registering, add login or sign-up details or a ticket if it’s a ticketed event. Otherwise, they are moved to a new mailing list via the “Action” block.
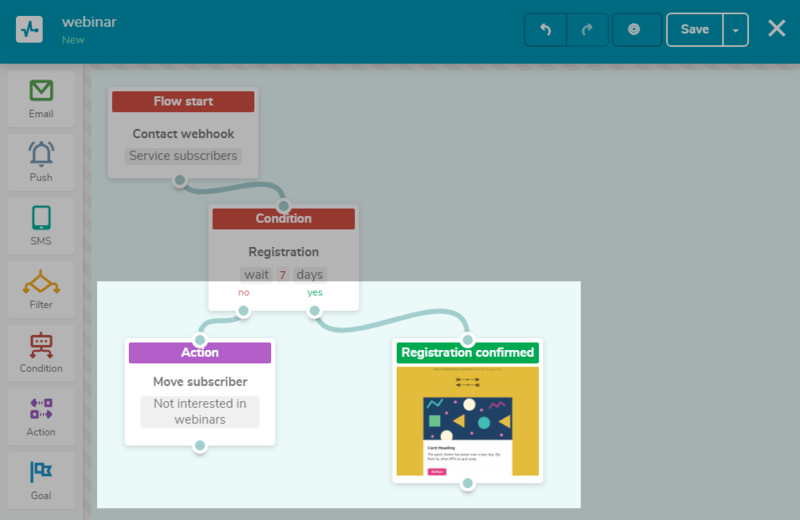 Adding two different blocks depending on users’ actions in the mass event invitation emails
Step 3. Set the reminder email for the event
Schedule your next email 1-2 days prior the big day to remind registered users about your event.
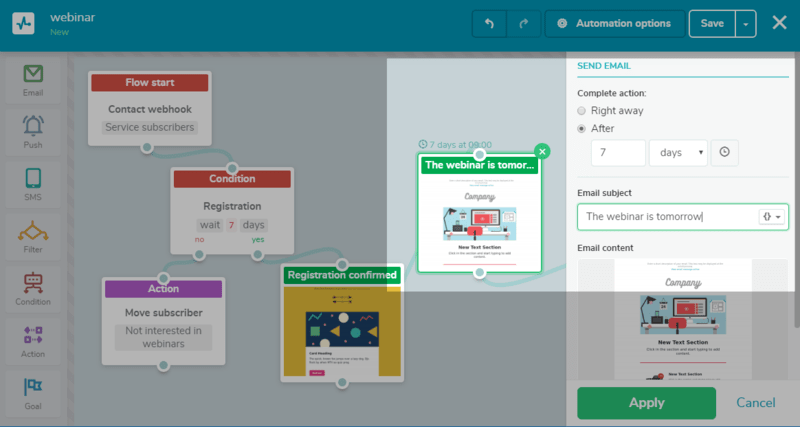 Adding a reminder email for the event
Make sure to include a quick outline: the order of the speakers and subjects that will be discussed. Add a countdown timer to increase user’s interest or unveil some benefits users will receive after attending your event: a free trial of your services or prizes.
Step 4. Set up the final email of the automated flow
After the completed event, send a follow-up email to thank users for participation, present a certificate of attendance, share the presentations speakers used or photos of the event if it was live, send special offers and related products, or announce future events.
Event invitation email basics
So, in case you’re investing in an online or in-person event, your subscribers’ inbox is the right place to promote it. Stick to the following tips to create an event invitation email:
- create compelling subject lines to encourage users to open your emails at the preview stage;
- segment your mailing list to come up with invitations that will correspond to users’ preferences, location, hobbies, or age;
- think through the content of your email;
- set up a series of automated emails to invite users and prepare them for your event.
Use our tips to create event invitation emails, comment on your own ideas below, and spread your content with SendPulse!