How to send emails via SMTP with WordPress plugins
You can send transactional emails to clients via SendPulse’s SMTP service from your WordPress site using various plugins. Then you can then view your mailing history and the list of unsubscribers in your SendPulse account.
In this article, we will talk about where to find authorization data in SendPulse’s SMTP service and how to configure plugins to send emails.
Copy your SMTP login credentials
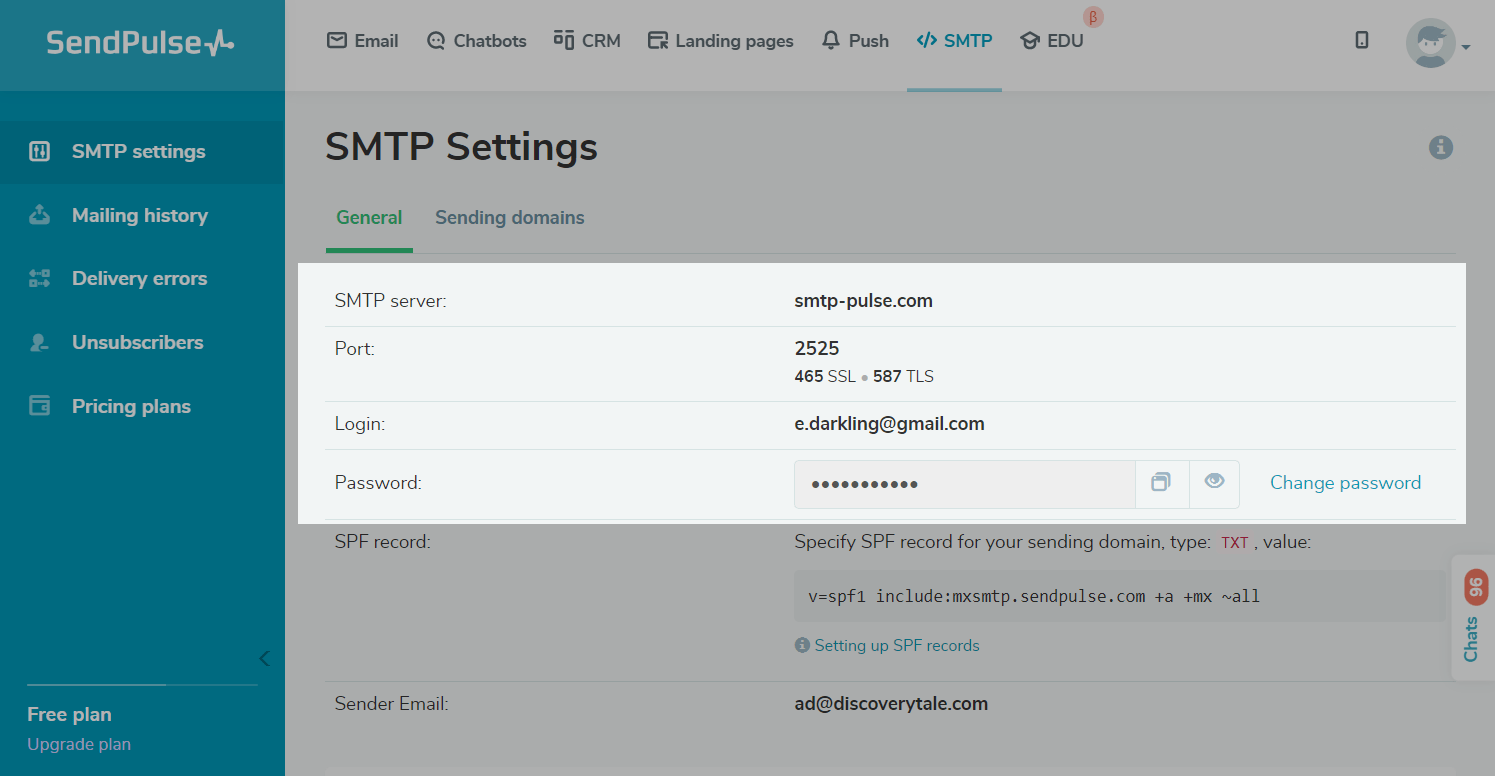
Go to the SMTP Settings > General tab in your SendPulse account. Copy your SMTP authorization values: server address, port, login, and password.
You can access the SMTP settings after your profile gets activated. The “Your profile is being moderated” message will disappear from the page, and you will receive an email notifying you that your account has been approved and activated.
Set Up email sending in MailPoet
Install the application via the Plugins tab. Once you install and activate it, click MailPoet in the left panel, and select Settings.
Read more: MailPoet's Settings.

Go to the Send From tab, select the Others option, and click Configure.

Enter your SMTP server settings.
You can add the sender's address in the plugin settings you can find in the "General" tab. This address must be confirmed in your SMTP account.

You can also send a test email. Scroll down, add the email address you want to send the email to, and click Send Test Email.
If you have configured everything correctly, you will receive a test email. Once you are done editing the settings, click Activate.
Set Up email sending in Contact Form 7
With the help of the WP Mail SMTP plugin, you can set up an SMTP server to send emails using forms created with the Contact Form 7 plugin.
Read more: Other SMTP.
Install the application via the Plugins tab. Once you install and activate it, find WP Mail SMTP in the list of plugins, and click Settings.

In the General tab > the Mailer option, select Other SMTP.

Enter your SMTP server settings.
You can add the sender's address in the From Email option you can find on the page above. This address must be confirmed in your SMTP account.

Click Save changes, and you can start sending emails.
Set Up email sending in Easy WP SMTP
Install the application via the Plugins tab. Once you install and activate it, go to Settings > Easy WP SMTP in the left panel.
Read more: Easy WordPress SMTP.

In the SMTP Setting tab, scroll down, and enter your SMTP settings.
You can add the sender's address in the From Email Address option you can find on the page above. This address must be confirmed in your SMTP account.

Click Save changes, and you can start sending emails.
Last Updated: 03.01.2024
or