Today we’re excited to share a series of new features and improvements for our landing page builder. You can now create multi-page websites, add a navigation menu to your site, and use advanced settings for its pages. Let us tell you more about these updates.
Add multiple pages to your site
Finally, you can compose several subpages into a complex website for any eCommerce business or company that offers multiple services. It can be an online store, eLearning portal, blog, and more.
Using our drag and drop builder, you can add up to 50 pages on our Free plan, up to 500 pages on our Standard and Pro plans, and unlimited pages on the Enterprise plan.
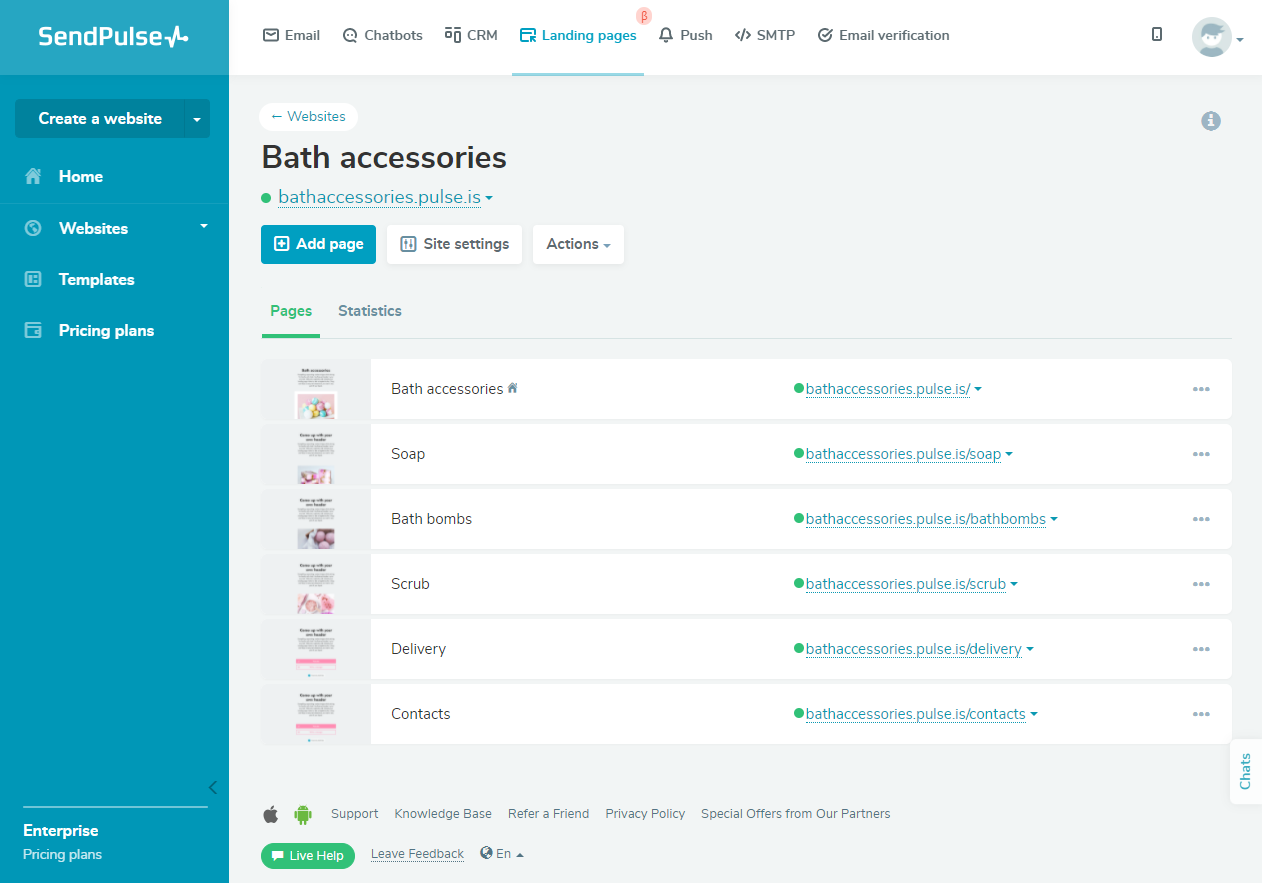 If you offer many products and services, adding several pages to a website can benefit your conversions greatly
You can create your website from scratch or choose a temple that best presents your style and brand — we regularly update our gallery. You just need to personalize your template: change the colors, fonts, and other styles for your site, add a menu, text and media elements, forms, social media links, payment options, etc.
Learn more on creating your site with SendPulse from our Knowledge Base!
Also, you don’t have to worry about the consistent look of your site. When you customize one page — choose corporate colors, suitable fonts, buttons, etc. — your changes automatically apply to your whole site.
Another update from our landing page builder’s team is a navigation menu for your site — it allows you to prioritize the content you want visitors to see and ensure that they can easily find pages they’re looking for.
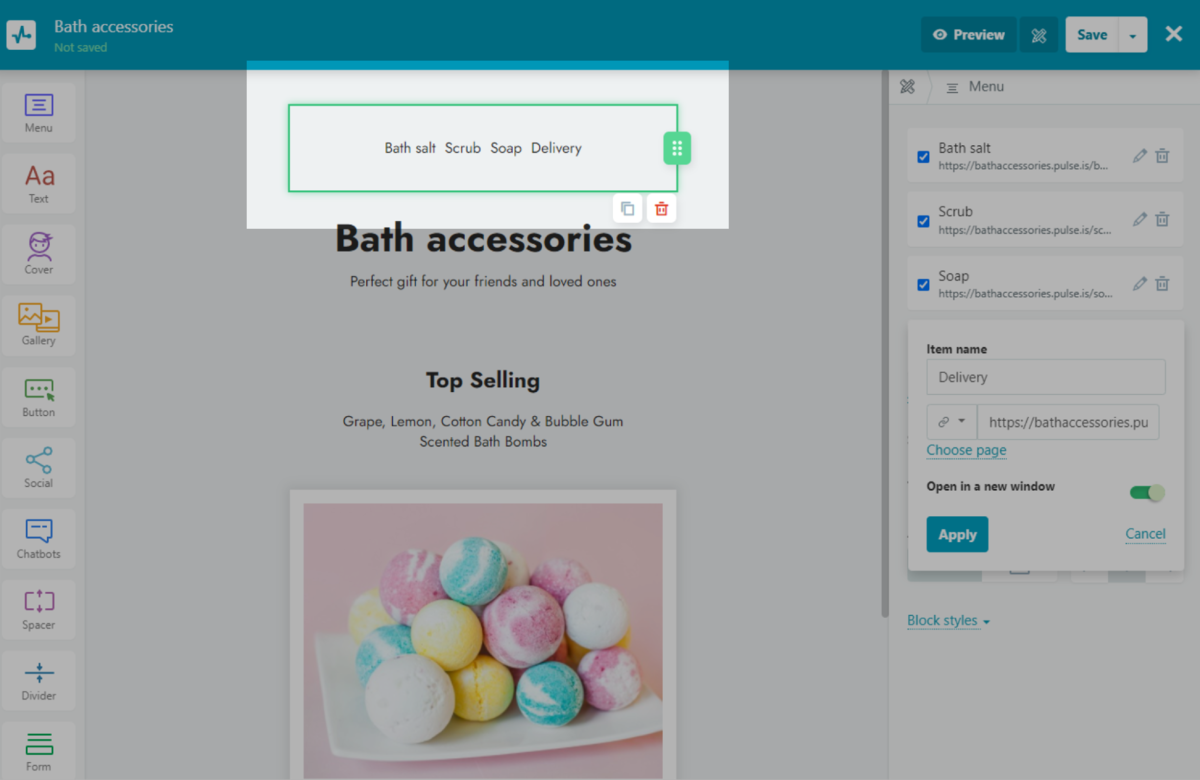 Consider a navigation menu on your site as a roadmap for visitors
To add a new item to your menu, click “Add.” Then, click on the pencil icon, and enter a new name for this item. Choose your site page created with our builder, or specify a link to a third-party resource, email address, or phone number.
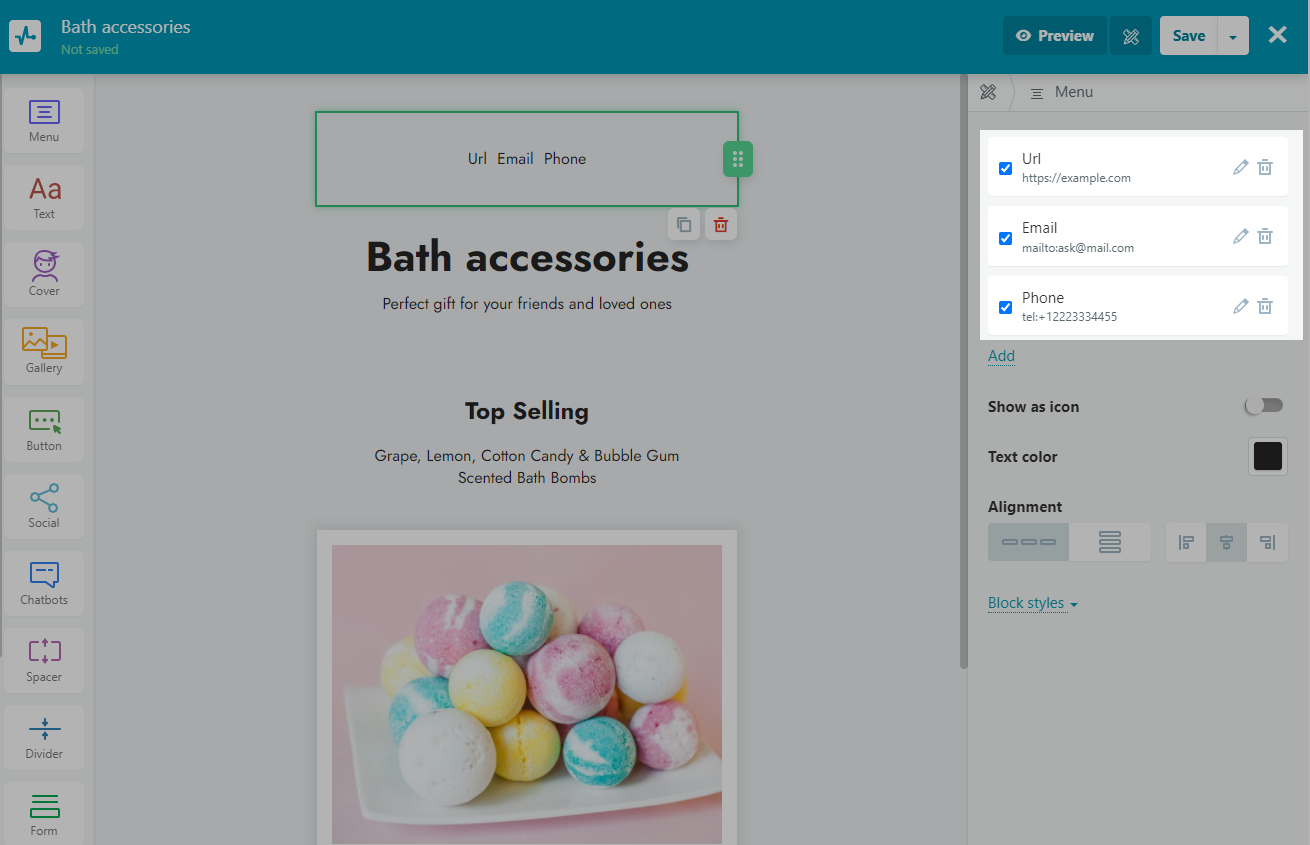 If you are using a template, you will see some examples of what you can add to your site menu — customize it, or delete it and add a new one
To change the display order of menu items, move them from top to bottom. You can also customize the look of your menu: display it as an icon or text, change the color of your text or icon, and choose the alignment.
Check out our Knowledge Base guide on adding a menu to your site.
Another way to add a menu is using the “Text” element — drag it to the top of the page, enter names for your menu items, and add links to them.
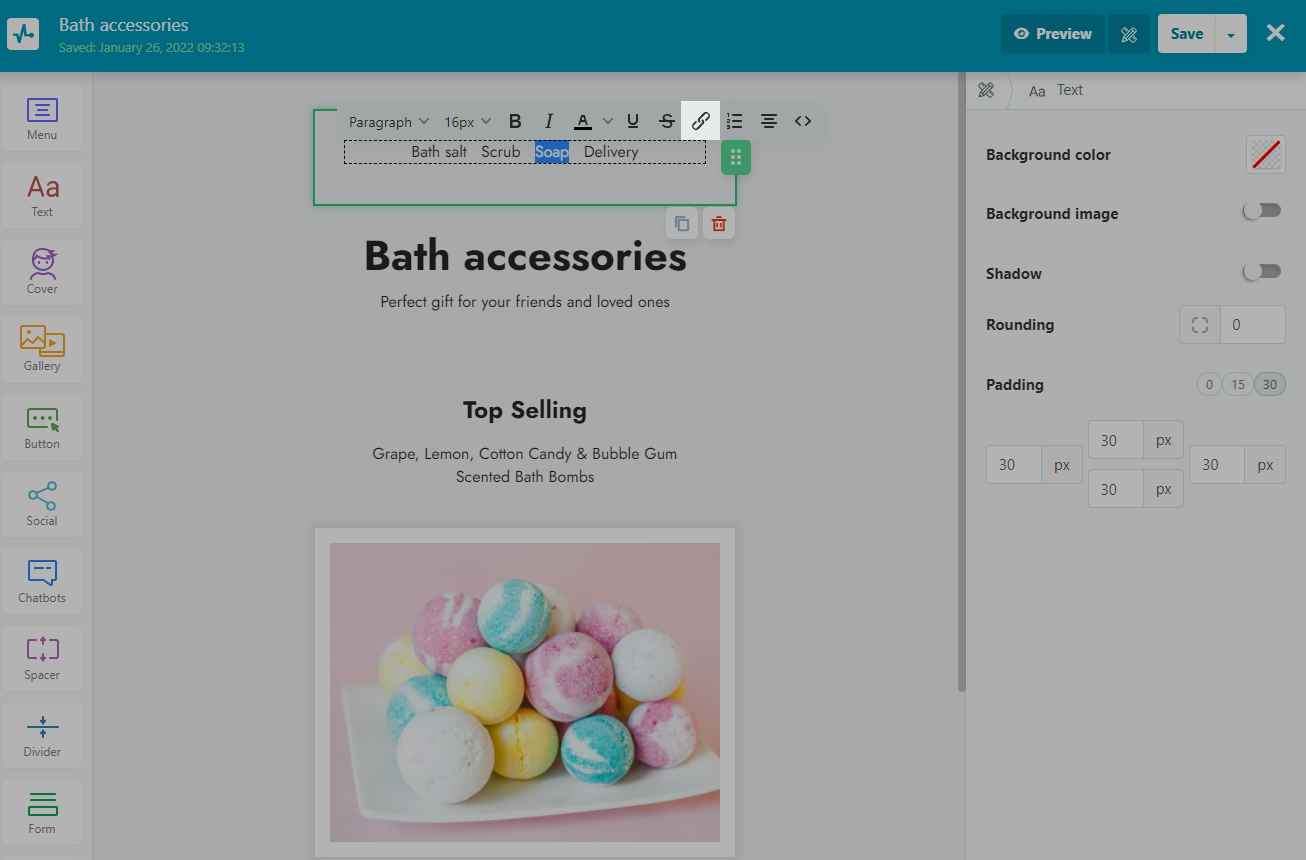 Create a menu for the site with links in your text
Use more setting options for your pages and sites
There are more setting options available for your site — they will make your work with multiple pages faster and easier. You can re-assign your homepage, copy, publish, and unpublish your pages.
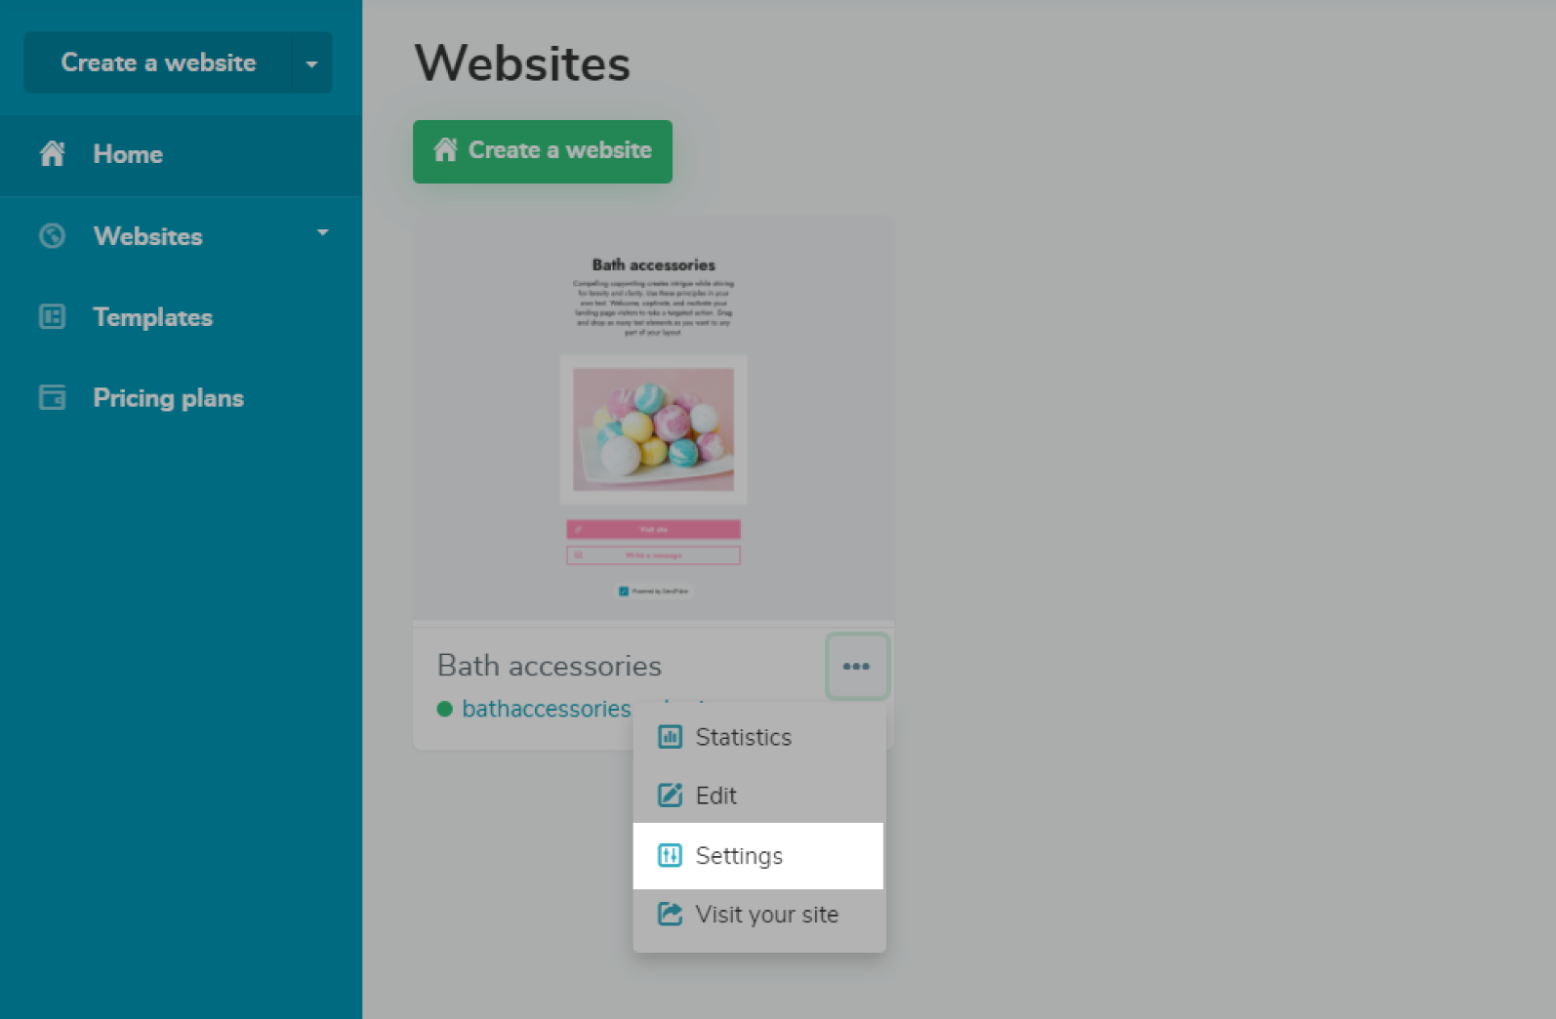 To set up your site, select the site you want to work with and go to “Settings”
There are three tabs in the Site settings:
- “General” to add or change the site name, its favicon, domain, and the main page of your site;
- “Analytics” to connect Google Analytics, Facebook pixel, and other analytics and tracking tools;
- “Custom code” to integrate additional pieces of code to your site’s head and body through HTML, CSS, and JavaScript.
You can also set up your page.
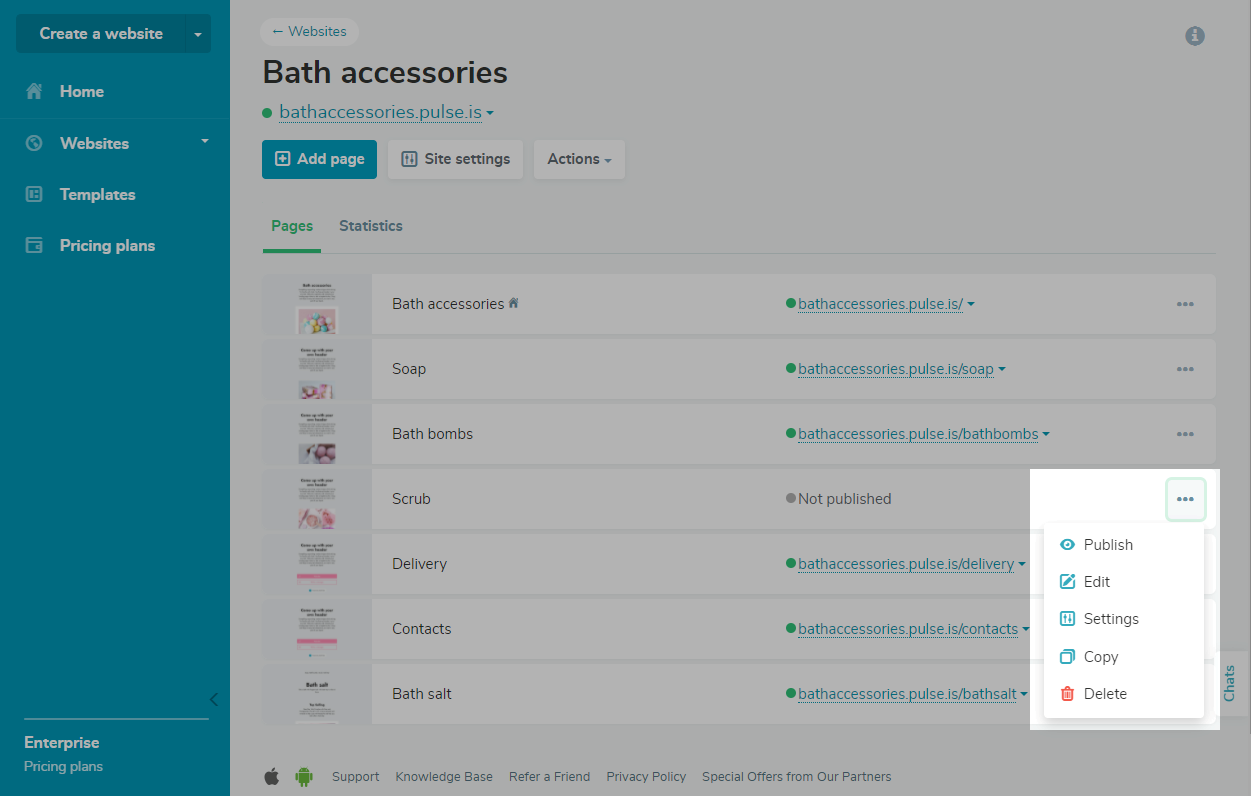 There are several actions applicable to your page
Using the menu settings on the right, you can do the following:
- publish or unpublish a page;
- edit a page;
- make a page copy;
- delete a page.
From the same dropdown menu, you can also open your page’s settings. You’ll see two tabs in the opened window: “General,” where you can enter your new title and URL for the page, and “SEO,” where you can add metadata for your page.
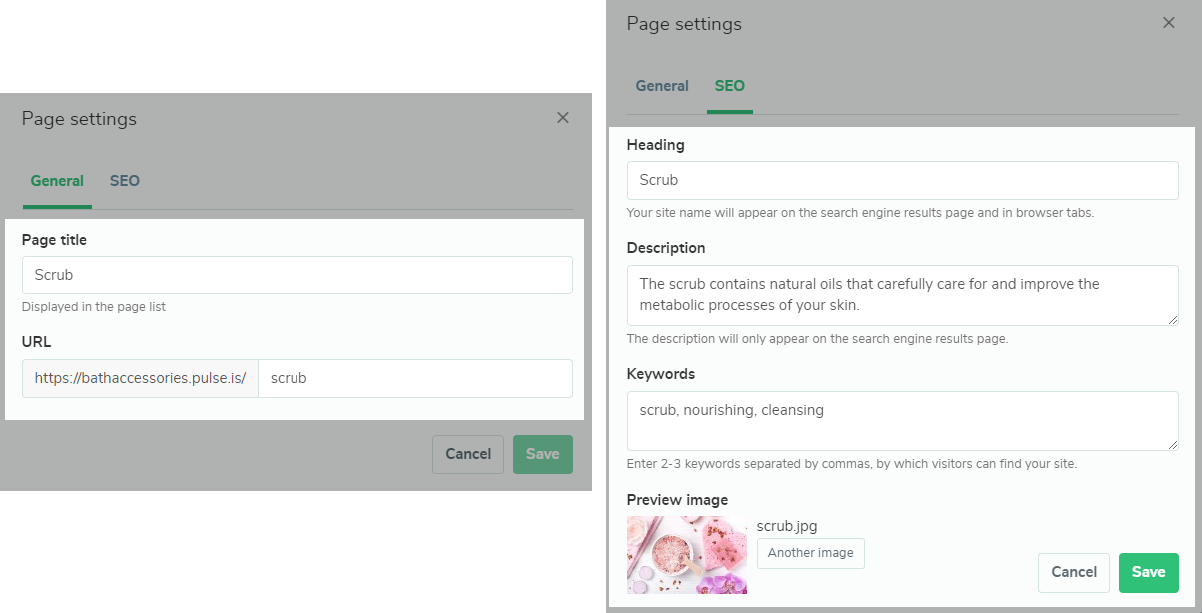 Add a title, set up a URL, and configure some additional SEO information to improve your site page’s indexing
Choose a homepage
In the “Pages” tab, you can view the list of all the pages on your site. The main page of the site will be marked with a home icon.
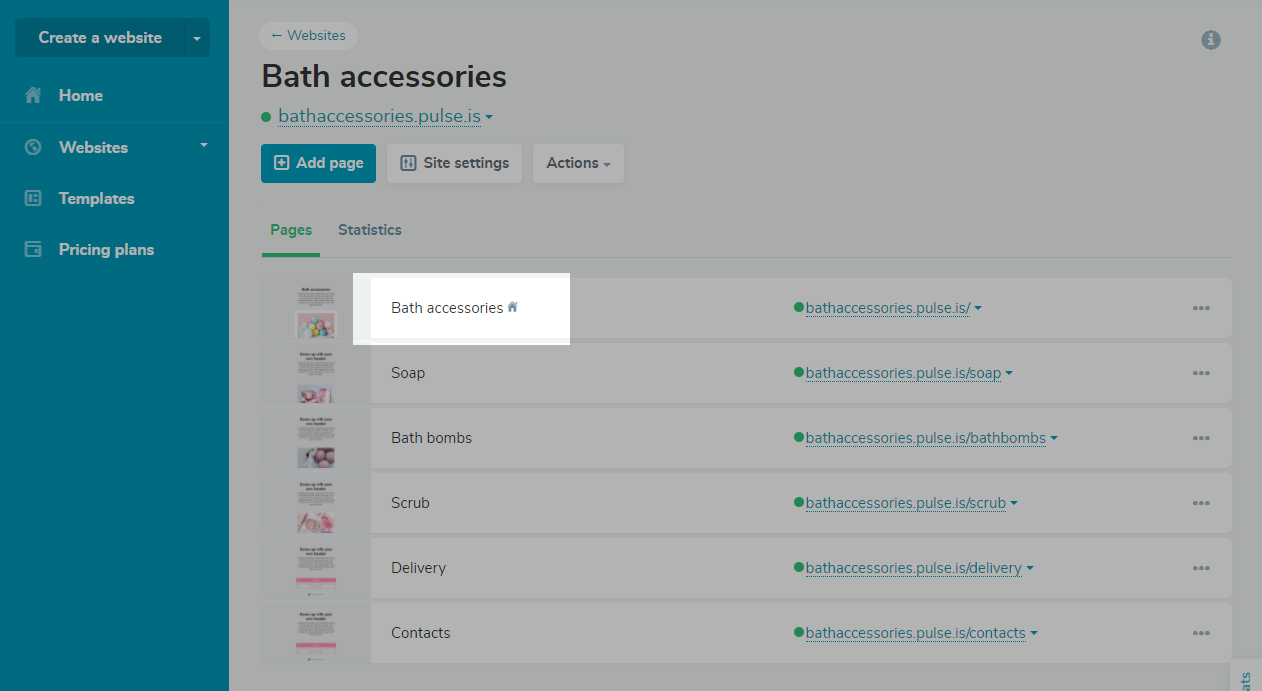 Your current homepage has a home icon next to its title
From multiple published pages, you can choose a homepage for your site. To change the main page, go to “Site settings,” and select it from the dropdown menu.
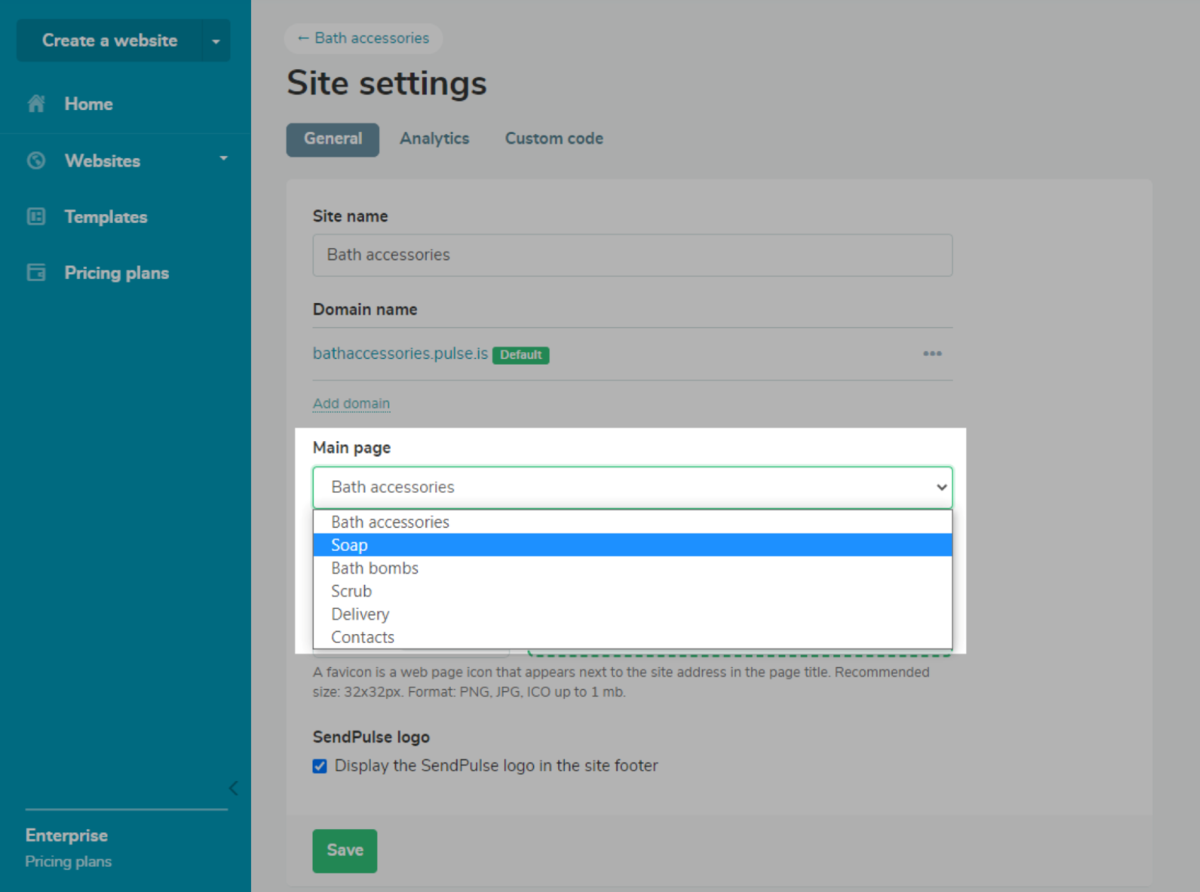 You can set any page as the homepage
When you choose a new homepage for your site, it will be assigned the site’s URL. And your former main page will get a system URL — you can change it in the “General” settings of your page.
View page statistics
In addition to general statistics, you can now analyze the performance of an individual page — views, clicks, subscriptions, and payments. To see detailed statistics for each page, choose the statistics you want to check, and click “Detailed statistics of visits/clicks/subscriptions/payments.”
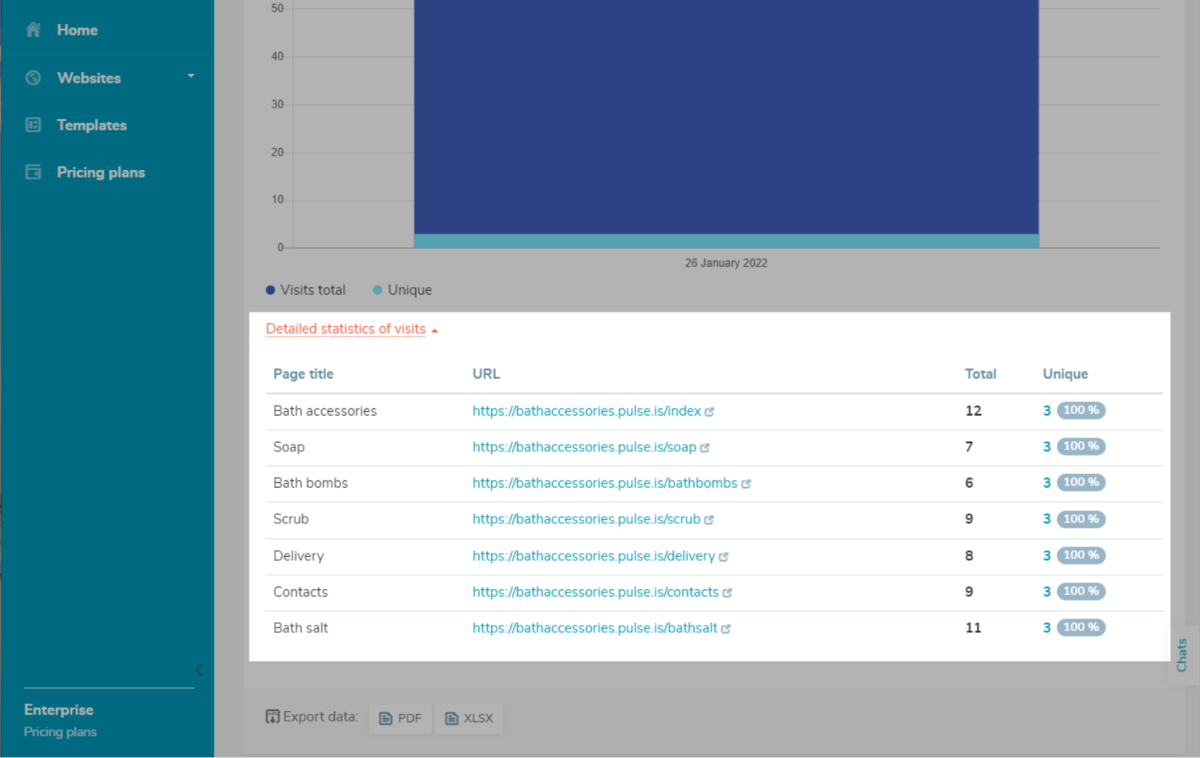 To view statistics for individual pages, click on “Detailed statistics…”
Accept payments
In addition to PayPal, YouMoney, and Fondy, you can now accept online payments from your pages via Stripe. Enabling online payments, you can turn your landing page or website into an online store to grow your business.
To integrate Stripe with SendPulse, create and activate a Stripe account, copy the secret key, and paste it into SendPulse for authorization. Then, set up a payment form in the editor, select the payment method, and indicate the price for your product.
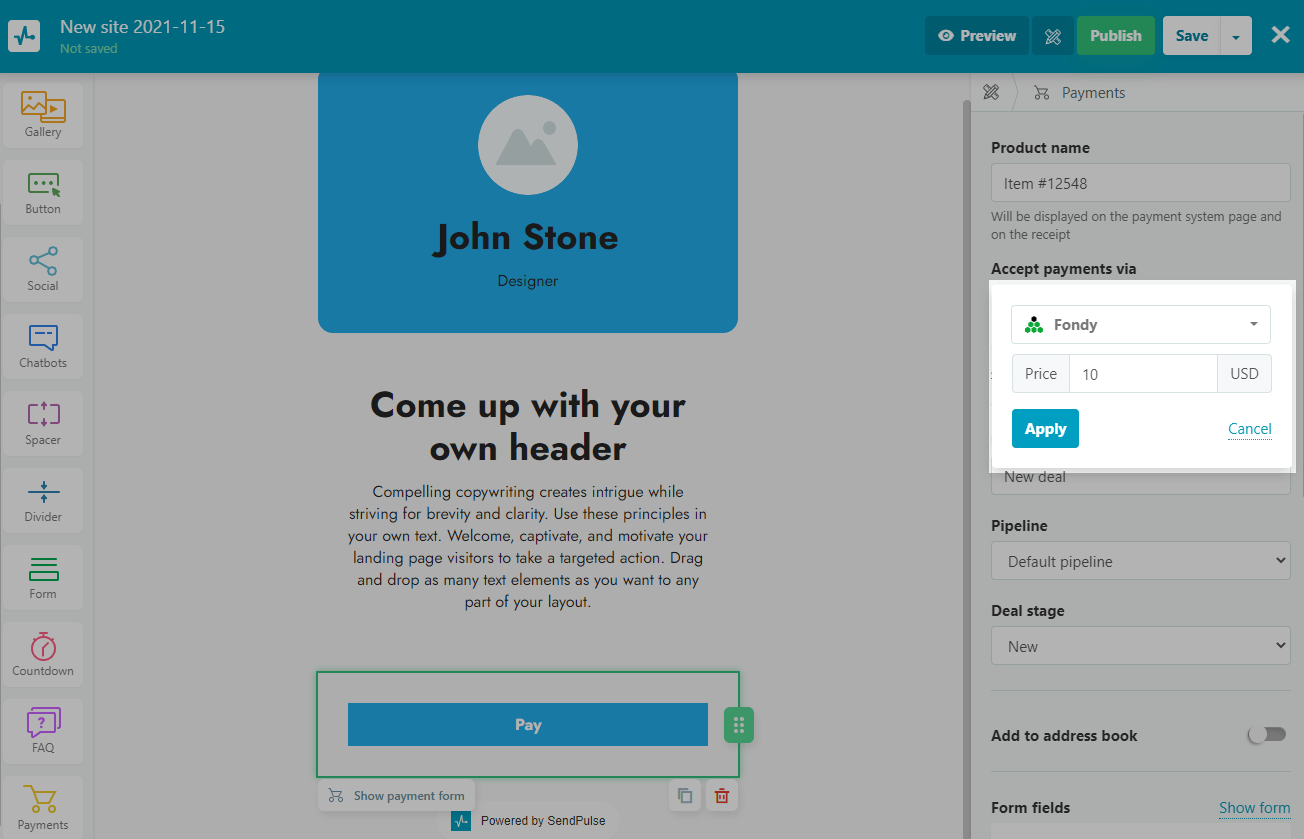 After a user buys your product, you’ll get money to the chosen payment system
Find all the detailed guides to creating and setting up your landing pages and sites with SendPulse in our Knowledge Base.
Already building your pages with SendPulse? Go ahead and test all these updates out! ?
Not yet using SendPulse? Get your free account now! ✨